Survive: Mountains (2016)
THE SURVIVAL KIT
The basics of the survival kit include:
✵ knife
✵ compass
✵ maps
✵ fire-starting tool
✵ fishing and/or hunting gear
✵ shelter
✵ signals
✵ medical supplies or first-aid kit
✵ water treatment
✵ insect protection
✵ emergency blanket
✵ cordage
✵ flashlight or headlamp
If you happen to have any of these with you, you are ahead of the game. You can get by without having any of these items, and that’s what we’ll describe in this section. We’ll assume you are empty-handed as we go through how to get resourceful and create something from nothing.
KNIFE
A sharp object or knife is an integral piece of equipment and often the foundation for completing any of the subsequent necessary steps for survival that we will cover in detail in later chapters. Generally a sharp, jagged, or pointy rock or a sharp broken tree branch can suffice for most things that a knife will do. It won’t cut quite as smoothly as a machine-made knife, but for the basics of cutting willows to make rope or slicing fish skin, you should be fine. Remember throughout your search for a knife that one implement may not be the best to perform all of the tasks, depending on the shape, size, and sharpness. Look near creeks and rivers for exposed rocks and branches, as this is often where you will find the largest selection and variety.
When you find a good shard to use as a knife, you can fairly easily turn it into a useful implement. Find a green piece of wood or a dry piece that is sturdy. Look for something about 6 to 10 inches long. Make sure it is still green so it isn’t brittle. Using the shard, split one side in half about a third of the way down. Insert the shard with the pointed end protruding out. Then wrap some twine, hemp, or whatever cordlike material you have below the rock, then around the back of the rock to hold it in place, then finish and fasten the wrap above the rock. This will create a fairly sturdy hatchet to aid in most of the necessary survival steps you will have to perform. Keep in mind this isn’t bombproof like a manufactured knife would be, but it will work well for skinning and gutting fish, creating kindling, and cutting small pieces of wood.
COMPASS
If you don’t have a compass, don’t fret. There are countless systems that we’ll cover in the “Orienteering, Navigation, and Signaling” chapter to steer you in the right direction. The simplest methods need nothing more than observing the sun or the stars, or a wristwatch or a broken stick. More to come on how to use these methods!
MAPS
Maps are an integral component to know exactly where you are. In most survival situations, however, the person does not have a map. These situations could easily have been remedied with a map; for example, Chris McCandless of Into the Wild fame.
There are complex stargazing tactics to pinpoint your location, but you’ll still need a map. Even with a GPS, you’ll likely still need one. Coordinates will just be a random set of numbers without a map to place them on. Nowadays if you gain a high ridgeline or peak, you may be able to see some sign of human life, whether it’s a building, road, or light. If that fails or you have an idea of your whereabouts, you probably already have an inkling of surrounding communities or roads, although they may be far away. Use this knowledge to your advantage, as stated in the last “L” of the SURVIVAL moniker, and head in that direction—making sure to maintain that bearing and not getting off track even more so.
Ultimately, since this book is catered toward survival in the mountains, after you have surveyed the scene from a high point and assessed your route, it will almost always be better to head lower in elevation. The temperatures will warm drastically (typically 3 to 5 degrees Fahrenheit per 1,000 feet of elevation), the weather will typically improve, flowing water will likely become more frequent, and you have a better chance of coming across other people or villages.
FIRE-STARTING TOOL
The simplest answer to starting a fire lies in carrying matches, a lighter, flint, or fire-starting tool. This is often not the case, or your lighter or matches may have gotten wet. It’s not the end of the world when this happens, but it will definitely take more time and energy to get a fire going. You will simply need to assess what resources you have available and possible tree varieties. We will go into more details later in the “Fire” chapter. You will be looking for soft, non-resinous wood like aspen, cedar, basswood, cottonwood, or dry yucca stalks. Although pine is soft, it is not going to work well due to the sap, which causes cooling. You will need a few good pieces of wood, so grab them for later if you see them.
FISHING AND/OR HUNTING GEAR
Fish are relatively easy to catch and provide good nutrition. They are best cooked shortly after catching them. Usually it is easier to catch fish than to trap a land animal. The advantage of trapping a land animal is that you can make the trap and then let it do its thing while you go do something else. We will discuss technique later in the book, but for both systems you will generally need some cord, twine, string, or dental floss. This can be a shoelace, or you can make the cord from willows or other plants. Then you will need some sort of hook, which can be a sharpened piece of wood, a small thin bone, or a turtle shell. Traps are a little more complicated but will also only need some cord and wood, twigs, or rocks.
Remember, under the Leave No Trace ethics, don’t catch or kill anything that you don’t intend to eat or use for your survival.
SHELTER
Finding or making a shelter is an opportunity to get creative. Often in the mountains there are rock outcroppings or boulders with a cavity underneath. These are perfect spots where you won’t have to expend much energy to improve them, and they will help retain heat from a fire. Other opportunities are using downed trees or branches to make cover. There are all sorts of varieties of shelters depending on the season and the vegetation. We’ll cover these more later, but don’t expect a five-star resort when you build your own shelter from scratch. The goal is warm, safe, and dry. Keep in mind when you are in your shelter that you may not be visible, so make sure to leave signals and clues as to your location.
SIGNALS
Flares are obvious signals, but I don’t know anybody that carries them in the backcountry. More likely and common signals are fires, mirrors, and even rocks or boughs placed strategically in an open area like a meadow. Typically you want your signal to be visible from high above. Size is very important because something that seems big to you on the ground may be hardly visible from thousands of feet above. Tree cover will severely limit the visibility, so meadows, ridgelines, and open hillsides may be your best bet. Build a large X with tree branches and rocks that will stand out. If you can find them, red rocks, or rocks that are a different color than the ground, would be very helpful.
MEDICAL SUPPLIES
A typical first-aid kit contains pain killers and anti-inflammatory medicine, bandages, gauze, antiseptic, tape, soap or gloves for hygiene, needle and thread, prescription medicine if needed, scissors, foot and blister care products, and maybe even Benadryl. These items can be handy, but to be honest, most of these supplies are superfluous and can easily be replaced by ingenuity. Techniques will be discussed in detail in the “Basic First Aid” chapter.
WATER TREATMENT
Generally all backcountry water sources should be treated. Treatments include iodine, UV light, chlorine dioxide, or boiling or filtering the water. Even if treating the water, try to gather it from streams or other moving water. It tastes better and is usually safer.
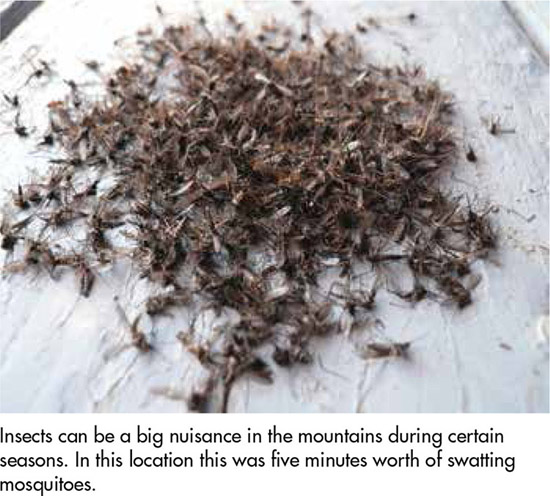
INSECT PROTECTION
In mountainous areas insects can be swarming in the springtime. After the winter thaws and when the temperatures have warmed sufficiently, they can be bloodthirsty. Typically there are not many diseases born from insects in high mountain locales, and they will be more of a nuisance than a threat. That having been said, they can be a severe nuisance. Without any human-made repellants at hand, the best way to avoid insect bites is to either add clothing that they can’t bite through, like nylon wind shells or rain jackets, if you have them, or slather yourself in mud. Cake the mud on and let it dry. Insects shouldn’t be able to penetrate through it. Repeat as necessary. Sometimes in the mountains, if you are lucky, you may be able to find cedars, onions, or mints and use the plant oils as insect repellant.
EMERGENCY BLANKET
A standard lightweight Mylar space blanket is an easy layer to throw on for increased warmth. It does a fantastic job of reflecting your body heat back on you, or casting the heat from fire to where you want it so it isn’t lost. These blankets are pocket-size and usually weigh less than a few ounces.
CORDAGE
Carrying some parachute cord or twine will save you a lot of time if you end up getting into a survival situation. It is possible to make your own from plants or materials that you can find, but the time involved is considerable and the end quality is likely to be marginal at best. As a result it can be beneficial to carry a minimum of a few feet of cordage.
FLASHLIGHT OR HEADLAMP
A flashlight or headlamp is not a must-have but obviously a very helpful piece of equipment to work or continue moving at night. A headlamp is highly recommended over a flashlight since you can work with both hands at the same time and the light beam will follow the movement of your head and thus your field of view. Generally you will also get more efficiency in weight and function from a headlamp rather than a flashlight.
