K-Food: Korean Home Cooking and Street Food - Da-Hae West, Gareth West (2016)
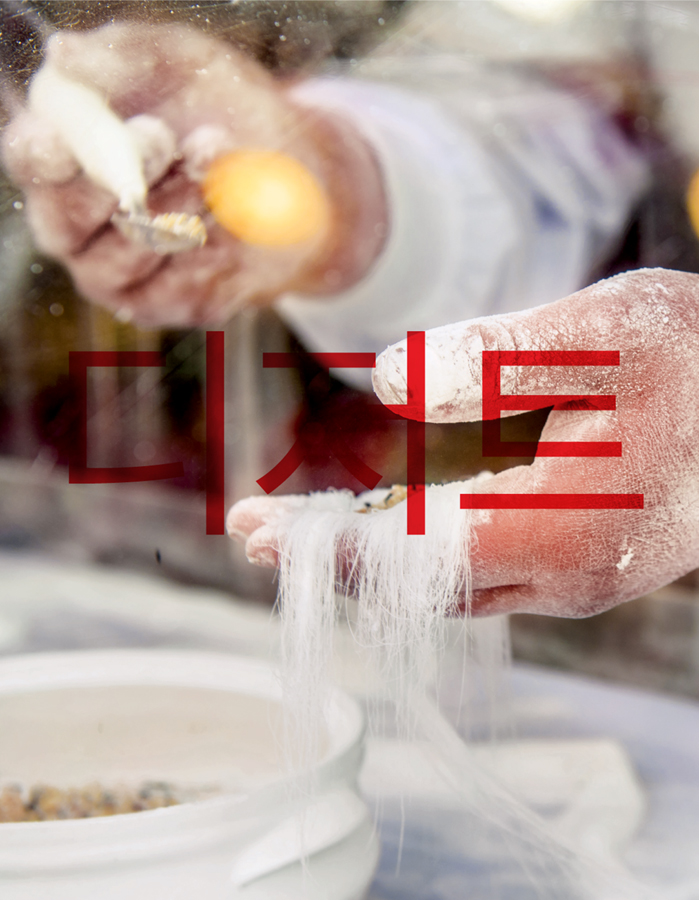
Chapter 10. Sweet Treats
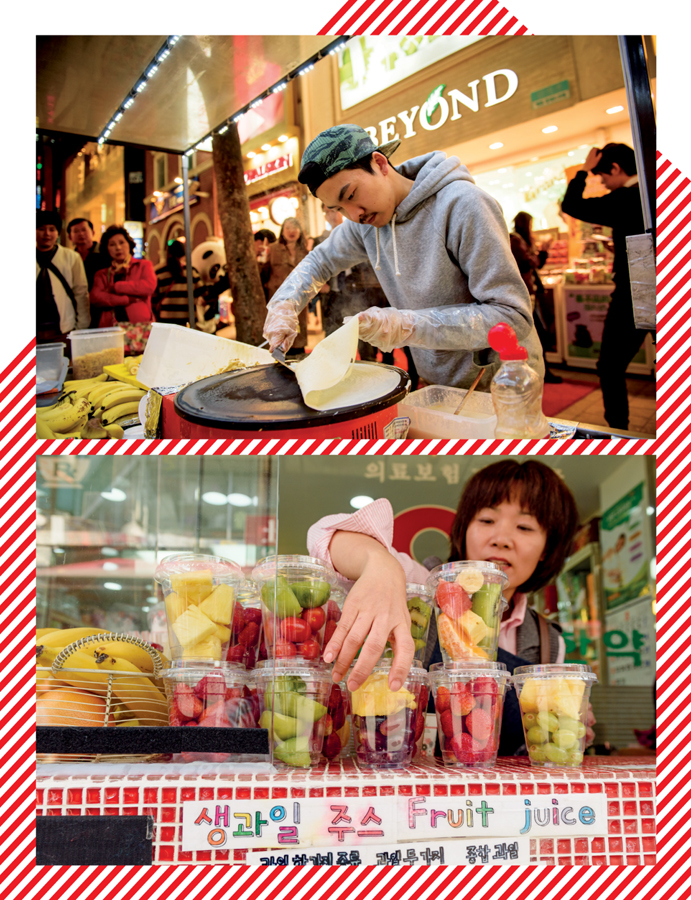
Traditionally, Korea’s never had that much in the way of desserts. As Korean food is served all at the same time rather than as different courses, Korean restaurants rarely have any sort of dessert offering and instead fruit is usually eaten at the end of the meal.
There are a couple of sweet treats that are famous in Korea such as hotteok, the chewy, crispy pancakes filled with caramel, and bingsu, a snowy, shaved ice that’s eaten in the summer, but even these aren’t usually eaten at the end the meal. Hotteok is a popular street food and bingsu is usually sold in cafes, separate from where you’d eat your main meal.
Even for special occasions, when sweet treats do sometimes make an appearance, the treats are usually in the form of biscuits or rice cakes called tteok. Tteok are a chewier, stickier version of the Japanese mochi rice cakes. These are often filled with sweetened red bean paste or sugar and sesame seeds and are usually eaten during Chusok (Korean Thanksgiving).
Rice cakes don’t really feel like a dessert to me though, and because desserts aren’t really a big thing in Korea, we’ve always come up with Western-style desserts that incorporate Korean flavours for our pop-ups and events. These include our Yuja Cheesecake and our Blueberry Mandu, which is a little twist on the sweet Polish pierogi dumpling.
Korea does have a lot of bakeries though - in fact, in the bigger cities such as Seoul and Busan, it’s difficult to walk down a street without passing one. These bakeries are often big chains which all sell similar breads and cakes. Some of the offerings are often a little unusual (think hot-dog doughnuts, or tuna sandwiches on sugary, sweet bread), whereas others are more typically cake-like, such as Soborro, a peanutty crumble bread that we’ve based our cake recipe on here.
I think that a lot of the reasons why people like certain desserts are due to nostalgia - it’s probably why I like Soborro so much, because it’s my go-to whenever I visit a Korean bakery. It’s also the reason that we had to include a recipe for banana milk here. You might say that banana milk isn’t much of a dessert, but our version is thick, creamy and full of ice cream, so it makes a great end to a meal.
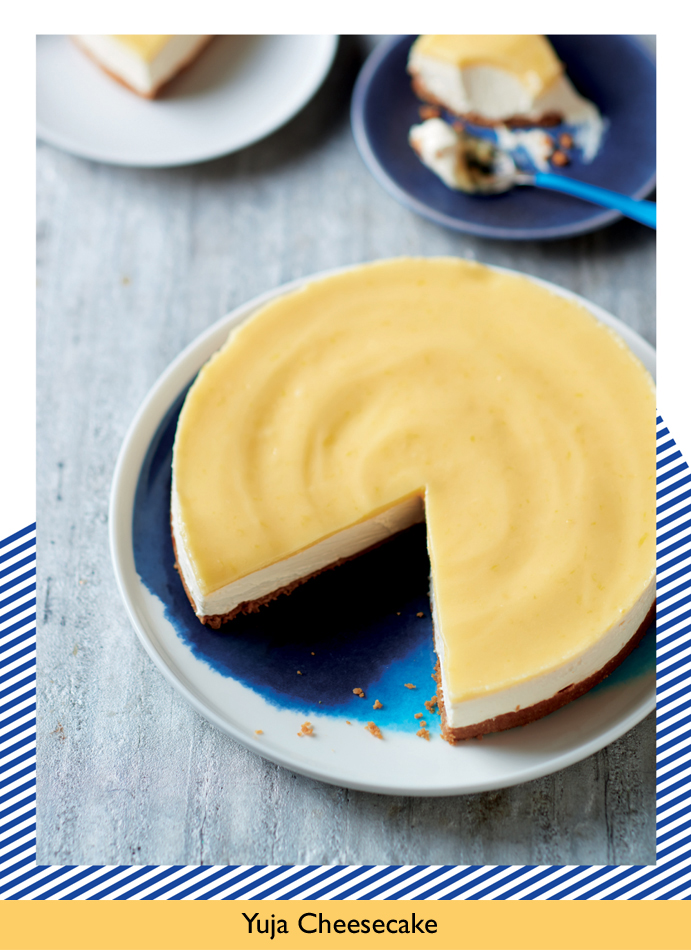
Yuja Cheesecake
For our first pop-up, we had to think really hard about a suitable dessert, as Korea isn’t particularly known for its sweet treats. After playing around with a few ideas, we decided on this yuja cheesecake. Yuja is the Korean word for yuzu, a citrus fruit that has the zesty freshness of a lemon but with a slightly bitter edge. Here it combines perfectly with the rich cream cheese, to create a tangy, sweet dessert.

200ml (7fl oz) double cream
300g (10½oz) cream cheese
100g (3½oz) golden caster sugar
4 tablespoons yuja (yuzu) juice
BASE
90g (3¼oz) gingernut biscuits
60g (2¼oz) digestive biscuits
75g (2½oz) salted butter, melted
JELLY
200g (7oz) Yuja Curd
2 tablespoons yuja (yuzu) juice
½ teaspoon gelatine powder
1_ For the base, break the biscuits into a food processor and blend to a fine powder. Add the melted butter and stir together until the mixture resembles wet sand.
2_ Spread the biscuit mix over the base of a loose-bottomed 20-cm (8-inch) round cake tin, pressing it down with the back of a spoon to create an even layer. Transfer to the freezer for 5 minutes to set.
3_ Meanwhile, pour the double cream into a mixing bowl and whisk to form stiff peaks. Add the cream cheese, sugar and yuja juice and beat everything together.
4_ Remove the tin from the freezer and spread the cream cheese mixture evenly over the biscuit base. Transfer to the refrigerator and leave to chill and set for at least 4 hours.
5_ Once set, make the jelly. Gently heat the yuja curd and juice in a small saucepan over a medium heat, being careful not to let the mixture boil. Once hot, add the gelatine powder and stir continuously over the heat for 10-12 minutes, until all the gelatine has dissolved into the liquid. Remove from the heat and leave to cool to room temperature.
6_ Remove the cheesecake from the refrigerator and pour the jelly mixture evenly over the top. Return to the refrigerator and leave to set overnight before serving the following day.
Yuja Curd
This zesty, tangy, sweet curd has so many uses. Lemon curd has always been one of my favourite toast toppings, but yuja curd feels more like a special treat. Stir it into yogurt for breakfast, use it as a topping on desserts or simply spread it on toast for a simple, delicious and easy snack.

2 eggs, plus 2 extra yolks
100g (3½oz) butter
200g (7oz) caster sugar
6 tablespoons yuja (yuzu) juice
zest of 2 lemons
1_ Lightly whisk the whole eggs and egg yolks together in a bowl.
2_ Melt the butter in a saucepan over a medium heat. Once liquid, add the sugar and mix together with a wooden spoon. Stir in the yuja juice and lemon zest, then add the eggs and continue to cook, stirring, for 8-10 minutes, until the mixture is creamy and thick enough to coat the back of a spoon.
3_ Remove the pan from the heat and leave the curd to cool, then pour into a sterilized jar and seal. Keep in the refrigerator until ready to use. This will keep for up to a month unopened but use within a week once the jar is opened.
Bingsu
SUMMER SNOW
There is nothing better than bingsu in the summer. Made from shaved or crushed frozen milk, it cools you down much faster than eating ice cream and it’s so light and refreshing. Bingsu can be topped with any fruit you like - on our most recent trip to Korea, I got hooked on a ‘mango cheese’ version, which sounds weird, but essentially tasted like a mango cheesecake ice cream. Tinned fruit works well here, as the fruit is always soft enough to break apart with your spoon.

600ml (20fl oz) milk
1 x 425g (15oz) tin mango slices, drained
vanilla ice cream, to serve
‘CHEESECAKE’ MIX
3 tablespoons cream cheese
4 tablespoons double cream
2 tablespoons icing sugar
1_ Pour the milk into ice cube trays and place them in the freezer for 3-4 hours, until just set. (Don’t allow the ice cubes to set too solid, as they will not break down properly in the food processor if you do.)
2_ Meanwhile, mix together all the ‘cheesecake’ ingredients in a small bowl. Set aside.
3_ Once the milky ice cubes have just frozen, tip them into a food processor and pulse briefly together until the icy mixture resembles snow (it shouldn’t become too wet like a slushie).
4_ Pour the ice mixture into a large bowl, then pile over the mango slices. Using a teaspoon, dot little lumps of the ‘cheesecake’ mix all over the bingsu and serve with a generous scoop of vanilla ice cream in the middle.
TIP: Nowadays in Korea, bingsu often comes with a side of condensed milk, which you pour all over the top to make things really creamy and to add a little more sweetness. If you’ve got a sweet tooth, give it a try.
Soborro Cake
In Korea, soborro is actually a non-sweet bread, and one that I only really enjoy for its peanut butter crumble topping - I love to peel off all the crumble bits and eat them like little biscuits. Here we’ve sweetened things up a bit, giving it a peanut butter sponge base and a buttercream filling to go with all those delicious peanut buttery crumble bits. It’s sweet with a slightly salty edge, and goes perfectly with a coffee.

175g (6oz) softened unsalted butter, plus extra for greasing
200g (7oz) caster sugar
3 eggs
4 tablespoons crunchy peanut butter
25g (1oz) roasted, salted peanuts
200g (7oz) self-raising flour
1 teaspoon baking powder
TOPPING
60g (2¼oz) plain flour
40g (1½oz) caster sugar
40g (1½oz) cold butter, cut into cubes
1½ tablespoons crunchy peanut butter
10g (¼oz) roasted, salted peanuts
FILLING
70g (2½oz) unsalted butter, cut into cubes
1½ tablespoons crunchy peanut butter
15g (½oz) icing sugar
pinch of salt
1 tablespoon milk
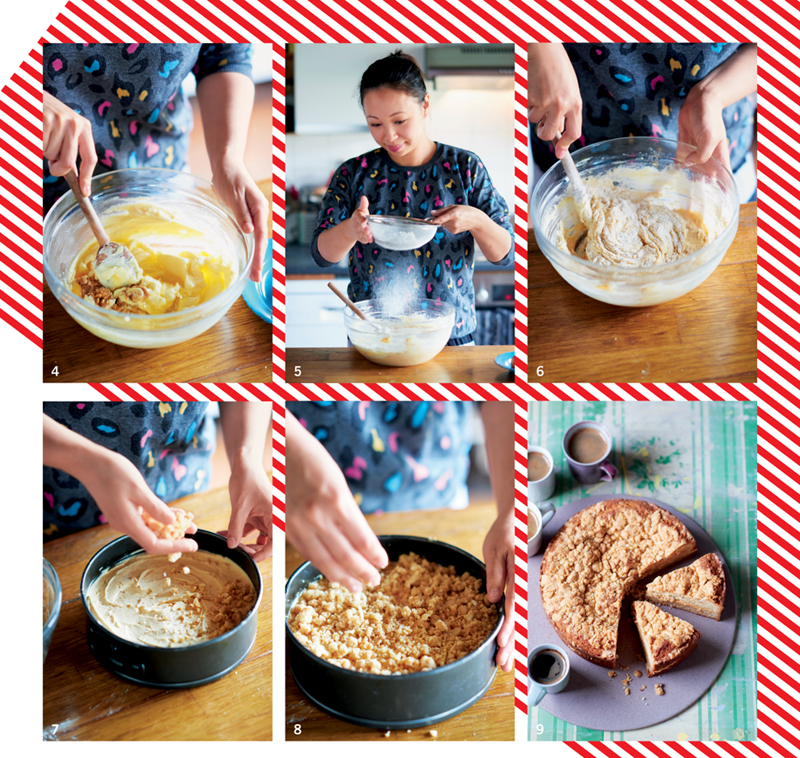
1_ Grease a 20-cm (8-inch) loose-bottomed round cake tin with a little butter and line the base with nonstick baking paper. Preheat the oven to 180ºC (350ºF), Gas Mark 4.
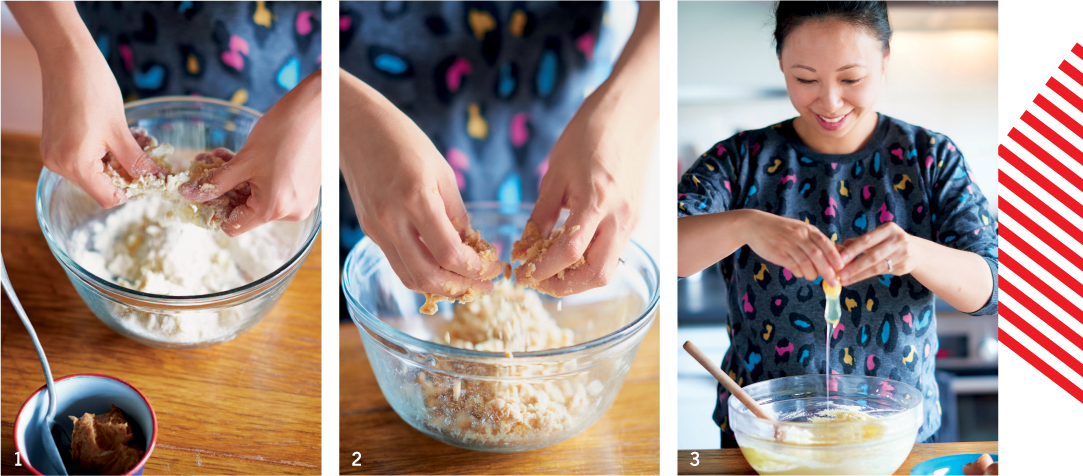
2_ For the topping, put all the ingredients in a large bowl and rub the mixture between your fingertips until it resembles coarse breadcrumbs. Set aside.
3_ In a large bowl, cream together the butter and sugar until pale and fluffy. Stir in the eggs, peanut butter and peanuts and beat together until the peanut butter is no longer in lumps and everything is mixed together well. Slowly add the flour and baking powder to the bowl and stir everything together to form a smooth cake batter.
4_ Spoon the batter into the prepared cake tin, smoothing out the top with the base of a spoon so that it is even. Sprinkle over the crumble topping evenly and bake for 45 minutes, or until a metal skewer inserted into the middle of the cake comes out clean.
5_ Meanwhile, put all the filling ingredients in a large bowl and mix together well until smooth and creamy. Set aside.
6_ Once the cake is cooked, remove from the tin and leave to cool completely on a wire rack. Once cooled, slice the cake in half horizontally. Carefully remove the top half and put to one side, then smear the peanut butter filling generously over the bottom half of the cake. Sandwich the cake halves back together and serve.
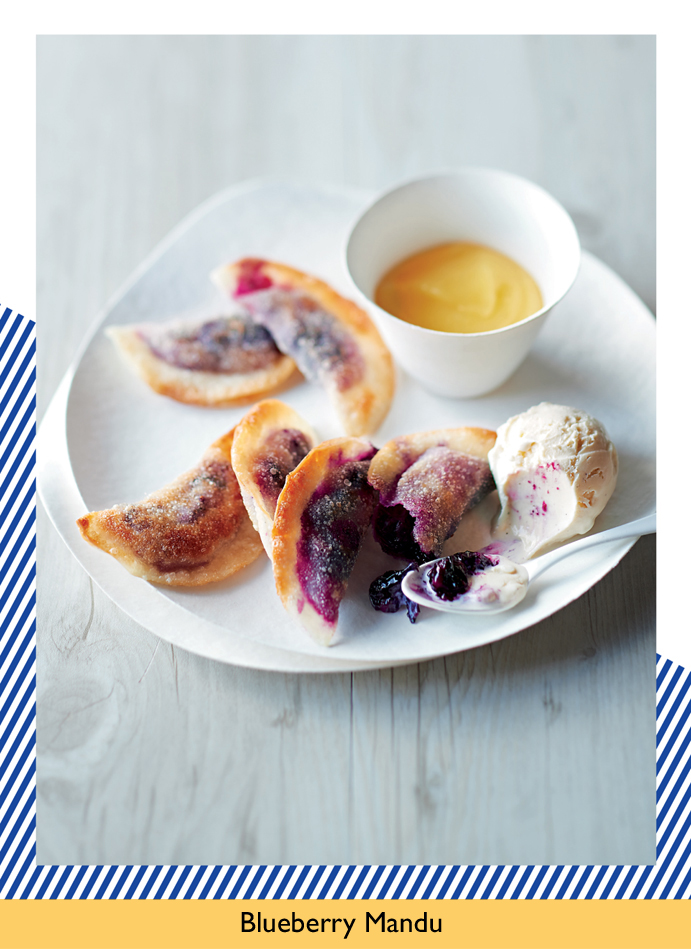
Blueberry Mandu
A cross between Korean mandu and Polish pierogi, these crispy dumplings are filled with sweet blueberries and smell like pancakes as they crisp up in the frying pan. I’d never considered eating mandu as a dessert before - I’ve definitely never seen them in Korea - but my friend Magda introduced me to Polish pierogis and put the idea in my head. With traditional mandu dumplings, we would usually fold the tops to make pretty parcels, which half-fry and half-steam, but with these it’s better to crimp the edges with a fork, so that the dumplings can lay flatter in the frying pan and get really crispy on both sides.

1 tablespoon plain flour
2 tablespoons caster sugar
pinch of salt
120g (4½oz) blueberries
8 large mandu skins, either shop-bought or homemade
2 tablespoons vegetable oil
TO SERVE
Yuja Curd
vanilla ice cream
1_ Combine the flour, sugar and salt in a mixing bowl. Add the blueberries, gently crushing half of them with the back of a fork as you go. Mix everything together thoroughly to form a paste. Set aside.
2_ Fill a small bowl with a little cold water.
3_ Lay a mandu skin flat in the palm of your hand, and spoon 1 teaspoon of the blueberry mix into the centre. Dip the thumb and forefinger of your free hand into the water and use them to fold over one side of the skin to form a semicircular parcel. Seal the mandu together by lightly pressing the edges with the tines of a fork, ensuring there are no gaps. Repeat with the remaining mandu skins and filling.
4_ Heat the oil in a large frying pan over a medium-high heat. Add the mandu and fry for at least 30 seconds on each side, until lightly browned and crisp (homemade dumpling skins will take slightly longer). Drain the mandu on kitchen paper and serve with vanilla ice cream and a tablespoon of yuja curd.
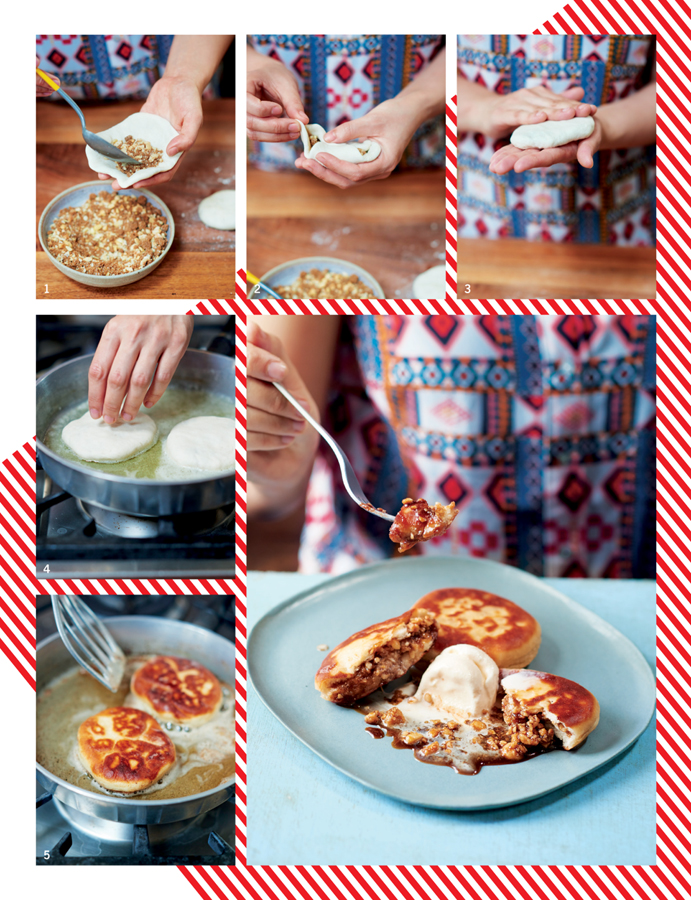
Hotteok
SALTED CARAMEL-FILLED PANCAKES
Hotteok are traditionally sold as street food and can be found all over Korea. They’re a chewy cross between a doughnut and a pancake, filled with a cinnamon sugar that melts to become a caramel as they fry. In Busan (where you can find the best hotteok), they add nuts and seeds too, and that’s my favourite way to eat them. For the sugar filling to be completely melted they have to be served hot, but be careful as the inside can become molten. It’s said that hotteok get their name from the ‘ho’ noise made from blowing on them to cool them down - don’t forget to do this before taking your first bite!

1 teaspoon active dried yeast
1½ tablespoons caster sugar
5 tablespoons warm water
6 tablespoons warm milk, plus extra if needed
200g (7oz) plain flour, plus extra for dusting
50g (1¾oz) sweet rice flour
1 teaspoon vegetable oil, plus extra for frying
generous knob of butter
FILLING
2 tablespoons ground hazelnuts
2 tablespoons pine nuts
150g (5½oz) tablespoons soft dark brown sugar
25g (1oz) roasted, salted peanuts, crushed
pinch of ground cinnamon
pinch of salt
1_ For the filling, mix together the ingredients in a small bowl. Set aside.
2_ In a separate small bowl, mix together the yeast, sugar, water and milk. Set aside for 10 minutes to allow the yeast to activate.
3_ In a large bowl, mix together the flour and sweet rice flour. Slowly add the milky yeast mixture to the bowl, stirring together with a wooden spoon to form a dough.
4_ Tip the dough out onto a lightly floured surface and knead for 10 minutes until smooth and elastic, adding a few extra drops of milk if the dough is still feeling a little dry. Put the dough in a mixing bowl and brush lightly with the vegetable oil. Cover loosely with clingfilm and leave in a warm place for 45 minutes, or until doubled in size.
5_ Gently tip the risen dough out onto a lightly floured surface and knead for a further 2-3 minutes to loosen it up again. Divide the dough into eight equal-sized pieces and form into little balls. For each ball, flatten it out in your hand, to form a round disc, approximately 1cm (½ inch) thick.
6_ Using the heel of your hand create a well in the centre of each dough disc. Spoon 1-1½ tablespoons of the sugar filling evenly over the centre of each disc, then fold the edges into the centre to seal in the filling. Gently flatten the dough again to form a 1-cm (½-inch) thick pancake.
7_ Heat the butter and a splash of oil in a heavy-based frying pan, over a medium heat. Fry the pancakes one at a time for 1-2 minutes on each side, until crispy and golden brown. Drain on kitchen paper and serve immediately.
TIP: Heat any leftover sugar mix with a little water to create a caramel which you can spoon on top of the hotteok and ice cream.
My Mum’s Miracle Cure
For as long as I can remember, this has been my family’s go-to recipe for whenever anyone comes down with a cold. Its fresh, citrussy taste is quite strong - I used to hate it as a kid, though I’ve grown to like it as I’ve gotten older. I swear it’ll get rid of a cold within 24 hours.

2 pears, halved
2 large oranges, quartered
1 lemon, quartered
1 lime, halved
100g (3½oz) fresh root ginger, roughly chopped
1 litre (1¾ pints) water
clear runny honey, to serve
1_ Put all the ingredients in a large saucepan over a high heat. Bring to the boil, reduce to a simmer and leave to cook, uncovered, for 25 minutes until reduced by about half.
2_ Remove from the heat and leave to cool slightly, then ladle the liquid into mugs. Stir in a teaspoon or so of honey to sweeten. Drink up.
TIP: You can adapt this recipe to your own taste - my mum’s recipe is an adaptation of my grandmother’s, and mine is an adaptation of my mum’s. The key ingredients are whole, large oranges for vitamin C and pears to soothe a sore throat; the rest is up to you.
Ba-na-na Oo-You
BANANA MILK
Whenever we visited my grandparents in Busan we’d take them a bag of their favourite treats, which would almost always include little bottles of banana milk. Bananas used to be really expensive in Korea, so when banana milk was introduced into the country it quickly became a big hit with both young and old. While I never really drink it in England, as I’m not a huge fan of its artificial sweetness, I still always pick up a bottle when I’m in Korea as it brings back such childhood memories. This recipe is for the ultimate banana milk - an American-style, thick ice cream shake with lots of banana flavour. Perfectly ice cold, sweet but not sickly, it’s just really, really great.

1 ripe banana
5 ice cubes
1 tablespoon malted drink powder (such as Ovaltine)
½ tablespoon soft brown sugar
2 tablespoons vanilla ice cream
150ml (¼ pint) semi-skimmed milk
1_ Peel and roughly chop the banana. Wrap the banana pieces in clingfilm and freeze for 1-2 hours, or until needed.
2_ Put the frozen banana pieces in a blender with all the other ingredients. Blend together until smooth, then pour into a tall glass. Serve with a thick straw.