K-Food: Korean Home Cooking and Street Food - Da-Hae West, Gareth West (2016)
Chapter 9. Anju & Bar Snacks

In Korea it is very difficult to go for a drink without food. The very fact that Korean has a specific word, anju, to describe the food that you eat when drinking shows how the two are linked and (outside of westernized districts) Korean hofs or pubs will expect you to order something to eat whenever you order any drinks. This is partly because the alcohol is generally very cheap, but also because drinking is a sociable experience best enjoyed in a group with plenty of food to share. Plus, it’s never a bad idea to line your stomach when drinking.
The recipes we’ve included here are the messy kind of fast-food style anju that we love. They’re mostly designed for sharing and are perfect with a few shots of soju or beer.
READING AN ANJU MENU
When you arrive at a hof you are usually given a menu which is split into several categories of anju:
Chicken
Korean fried chicken is the ultimate anju for us. Double-fried, super-crispy, juicy chicken is the perfect accompaniment to an ice-cold beer. It’s usually available plain, with either sweet-and-spicy or soy glazes, or with piles of finely chopped garlic on top. The chicken is usually served with two forks per person - so that you can pull the meat apart without getting your fingers too dirty - and with a side of pickled mooli to help cleanse the palate between bites.
Soups and Stews
Soups and stews eaten as anju are usually quite spicy or salty as that pairs well with most Korean alcohol, which acts as palate cleanser. Examples include bean sprout soup (some people believe that it prevents a hangover if they eat it while they’re drinking), kimchi jjigae and ramyun.
Deep-fried
Deep-fried anju are pretty varied and can include tempuras, chips and even potato smiley faces. Gareth and my dad have ordered ‘assorted fried potato’ from a hof before, thinking that they might receive a plate of chips, but what they were actually given was a mixture of hash browns, French fries, smiley faces and deep-fried balls of mash.
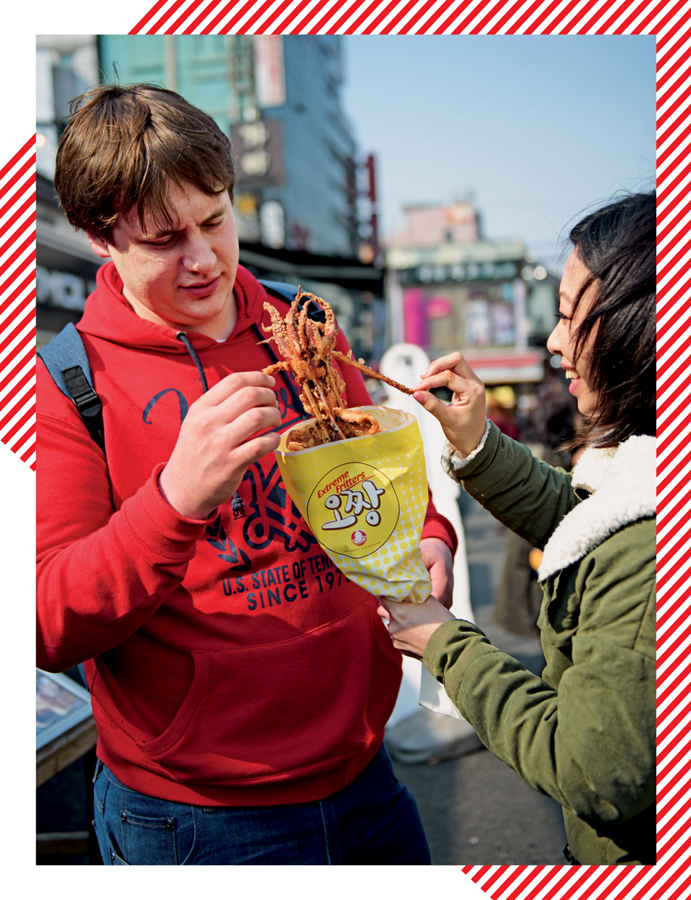
Dried
Dried anju are the ones we’d normally go for on days when we’re feeling really, really full. Dried anju are usually a choice of dried or partially dried squid (accompanied by ketchup and mayo for dipping), dried and sweetened filefish (a type of tropical fish), dried anchovies and/or nuts. These are often served with M&M peanuts.
Fruit
For those wanting a healthier or lighter option, you can always order a platter of fruit, or one of fruit and ham. These platters tend to be quite expensive, usually a similar price to a plate of fried chicken, which is why we never end up ordering them.
Traditional
Other than the soups and stews, traditional anju include dubu kimchi (steamed tofu with kimchi and fried pork), steamed silkworm pupae (not a favourite of ours) and pajeon (spring onion pancakes).
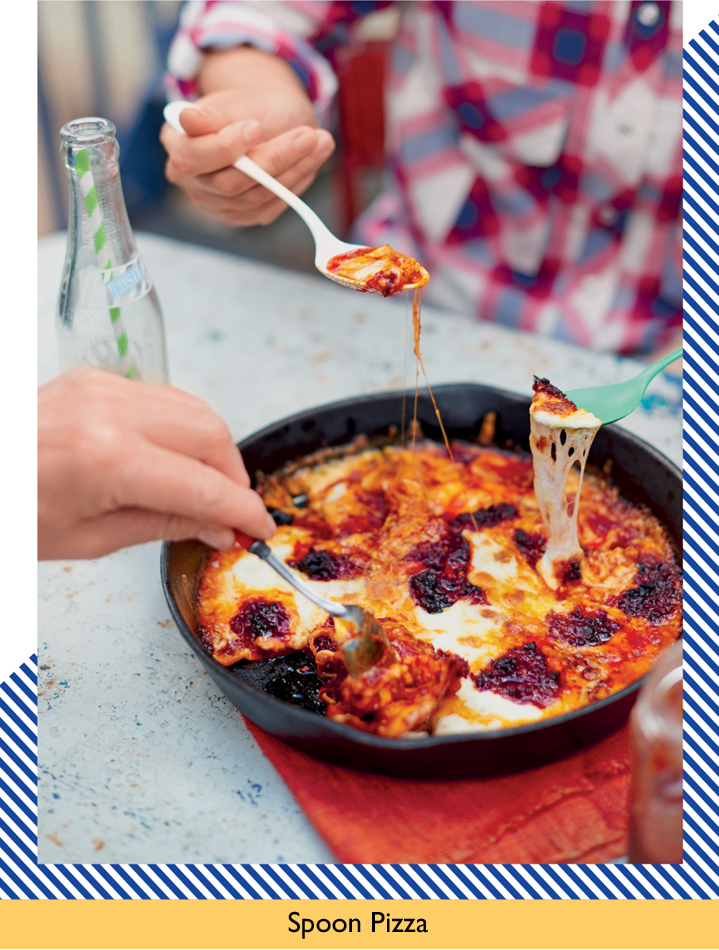
Spoon Pizza
Gareth and I had spoon pizza on our first trip to Korea together. We’d ordered it more out of curiosity than anything else at one of the pubs we visited with my cousin Jisoo. I can’t remember what the toppings were on that first one we got, but the idea of eating pizza with a spoon stuck in our heads. Spoon pizza is about the best bit of the pizza - the cheesy, tomatoey, gooey topping - with the tortilla wrap acting simply as something for your spoon to scrape against as you dig into the pan. I can imagine lots of Italians looking at this recipe and shaking their heads in despair, but it really is the perfect sharing dish to be enjoyed with friends, armed with a few spoons and lots of drinks.

2 flour tortilla wraps, cut into quarters
4 tablespoons Gochujang Ketchup
50g (1¾oz) medium Cheddar cheese, grated
50g (1¾oz) red Leicester cheese, grated
50g (1¾oz) soft mozzarella cheese
50g (1¾oz) nduja (hot Italian sausage paste)
2 tablespoons Really Great Cheese Sauce
1_ Preheat the oven to 200ºC (400ºF), Gas Mark 6.
2_ Lay half the tortilla quarters flat in a cast-iron griddle pan, with the curved edges on the outside to form a circle. Lay the remaining tortilla quarters over the top so that they overlap, ensuring the bottom of the pan is completely covered.
3_ Smear the gochujang ketchup all over the tortillas, making sure they are completely covered, then sprinkle over the grated cheeses. Tear the mozzarella into small pieces and dot over the surface of the pizza along with the nduja, then use a teaspoon to spoon small amounts of the cheese sauce all over.
4_ Put the pan in the oven and cook for 15 minutes, until all the cheese has completely melted and is gooey. Serve immediately - if you have a fondue set, place the pan on the stand over the flame to keep the cheese soft and melted.
TIP: The topping here can really be anything you like - I’m pretty sure we’ve had chicken and pepperoni on spoon pizzas before - so feel free to get creative and add any of your favourite pizza topping ingredients.
Gochu Twiguim
CHEESY SPAM-STUFFED CHILLIES
Whenever I see any kind of stuffed, fried chilli on a menu, I have to have it - and if I ever saw this version on a menu, I’d be ordering it by the bucket-load. In Korea, fried chillies are both a common street food and anju, but they’re usually filled with a mandu-style filling of minced pork. In this one, I’ve combined my love for the light, Korean-style batter, with my loves for cheese and Spam. The result is crispy, spicy chillies filled with oozy, melty cheese with a bit of meaty, salty bite from the Spam. Delicious.

10 long green chillies
75g (2½oz) Spam, finely diced
½ onion, finely diced
½ bird’s eye chilli, trimmed and finely sliced
250g (9oz) soft mozzarella cheese
vegetable oil, for frying
BATTER
150g (5½oz) plain flour
½ teaspoon baking powder
½ teaspoon garlic granules
½ teaspoon freshly ground black pepper
½ teaspoon salt
2 eggs
1_ For the batter, mix together the dry ingredients in a bowl. In a separate bowl, whisk together the eggs. Set aside.
2_ Using a sharp knife, make a cut down the middle of each long green chilli to create an opening, being careful not to go right through the other side. Remove the seeds and membranes.
3_ Heat a splash of vegetable oil in a frying pan over a medium heat, add the Spam, onion and bird’s eye chilli and cook, stirring, for -5 minutes until the onions have softened and the Spam begins to brown and crisp at the edges.
4_ Tip the Spam, onion and chilli into a large bowl, tear over the mozzarella, add the salt and mix everything together with a wooden spoon. Spoon a tablespoon or so of the Spam and mozzarella mixture into each chilli, being careful to fill them completely but not overstuff them. Press the chillies back together to seal the filling in.
5_ Half-fill a large pot or deep-fryer with vegetable oil and heat to 180°C (350°F), or until a cube of bread browns in 30 seconds.
6_ Dip a stuffed chilli into the beaten egg, moving it around with your fingertips to make sure it is fully coated, then dip it into the flour mix. Lightly toss the flour over the chilli to ensure it is fully coated on all sides, then carefully shake off any excess flour. Repeat with the remaining chillies.
7_ Lower the stuffed chillies carefully into the hot oil and fry for 2-3 minutes until golden. Remove from the fryer and shake off the excess oil, then leave to drain and cool for 2 minutes on kitchen paper before serving - be careful as they will be molten hot inside!
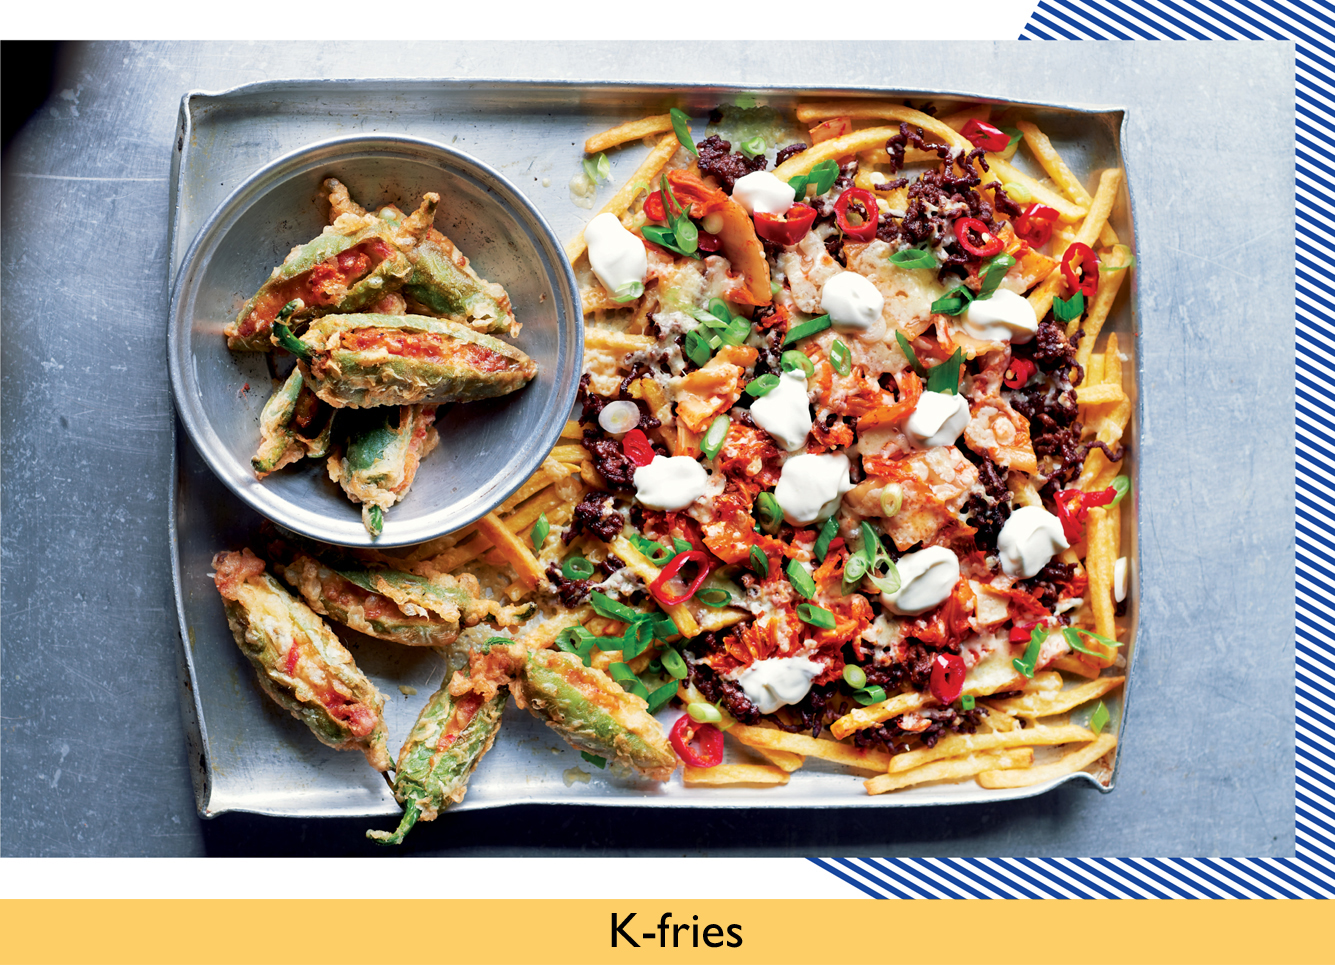
K-fries
Dripping in cheese, sour cream, kimchi and the meaty juices from the beef mince, Korean fries, or K-fries, are unapologetically messy. An American-Korean fusion food, they’ve been really big in the States (particularly L.A.) for quite some time now thanks to the likes of Roy Choi and his hugely popular Kogi taco trucks. They have also started to make their way over to Korea too and we’ve noticed several different variations of them on our last few visits. Just make sure you’ve got plenty of napkins before attempting to eat them!

400g (14oz) oven French fries
vegetable oil, for frying
100g (3½oz) minced beef
50ml (2fl oz) Bulgogi Sauce
75g (2½oz) medium Cheddar cheese, grated
100g (3½oz) Baechu Kimchi, drained and roughly chopped
1 long red pickled chilli, pickled overnight in Simple Pickle Brine and finely chopped
2 spring onions, trimmed and finely sliced, plus extra to garnish
2 tablespoons sour cream
1_ Cook the fries according to the packet instructions.
2_ Heat a splash of vegetable oil in a frying pan over a medium heat, add the minced beef and fry for 3-4 minutes until browned, then add the bulgogi sauce and cook for a further 2 minutes until the sauce has thickened and reduced. Set aside.
3_ Once cooked, remove the fries from the oven and place them in an ovenproof dish. Sprinkle a quarter of the cheese over the fries, then spoon the bulgogi beef mince over the top. Scatter over the kimchi, red chilli, spring onions and the rest of the cheese, then place the fries under a hot grill for 2 minutes, until the cheese is bubbling and melted.
4_ Dollop the sour cream generously over the fries, sprinkle with spring onions and serve immediately.
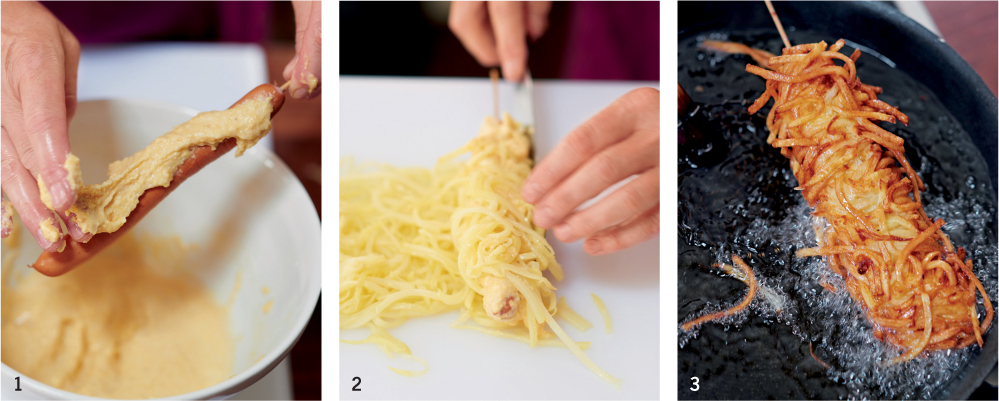
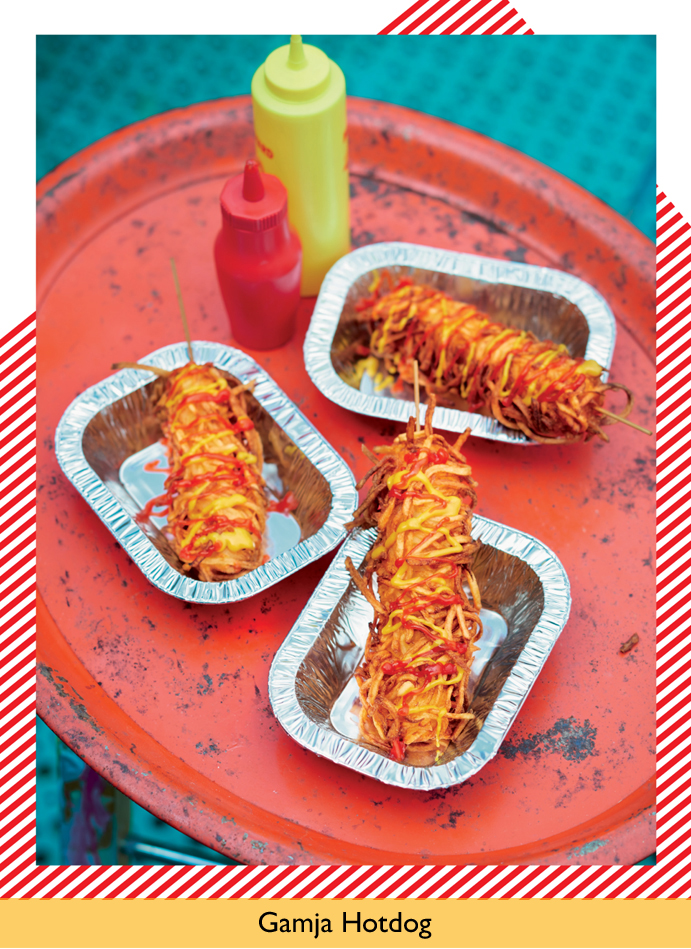
Gamja Hotdog
CHIPS ON A STICK
These seem to be sold at almost every street food stall in Korea. Deep-fried hot-dogs coated in a cornmeal batter with fat chips stuck all over them, they look amazing, but the chips combined with the cornmeal batter often makes them quite stodgy. Still, we really wanted to bring a version back home as we thought that they had the potential to be great. After testing the recipe a few times, we discovered that straw fries were the way forward as they go really crispy in the fryer - giving you a crunchy outside with a soft cornmeal-battered hot-dog in the middle. Squeeze over lots of ketchup and American mustard for a truly authentic experience.

4 baking potatoes, peeled
vegetable oil, for deep-frying
4 large hot-dogs
4 bamboo skewers, soaked in water for at least 10 minutes
BATTER
100g (3½oz) plain flour
100g (3½oz) cornmeal
2 teaspoons baking powder
1 tablespoon caster sugar
pinch of salt
150ml (¼ pint) milk
1 egg
TO SERVE
Gochujang Ketchup
American mustard
1_ Cut the potatoes into thin matchsticks using a sharp knife or a julienne peeler. Put the potato pieces in a colander and rinse under cold running water, then place in a large bowl with enough water to cover. Set aside for 10 minutes to draw out the excess starch.
2_ Meanwhile, put all the batter ingredients in a large bowl and mix together well. Set aside. Half-fill a large pot or deep-fryer with vegetable oil and heat to 180°C (350°F), or until a cube of bread browns in 30 seconds.
3_ Drain the potatoes and pat dry with kitchen paper, then lower them carefully into the hot oil. Fry for 10 seconds, then remove from the oil and drain on a tray lined with kitchen paper. Arrange the fries in an even layer, all roughly pointing in the same direction.
4_ Thread a bamboo skewer through the length of each hot-dog. Dip the hot-dog skewers in the batter one at a time, then spoon over extra batter to make sure they are completely coated. Lay one of the hot-dog skewers over the straw fries and gently roll it until coated all over, patting the fries into the batter. Repeat with the remaining skewers.
5_ Carefully lower the hot-dog skewers into the hot oil and fry for for 2-3 minutes, until the batter is crisp and golden brown. Drain on kitchen paper and serve with gochujang ketchup and American mustard.
Kimchi Mac ‘n’ Cheese
There’s something about kimchi and cheese together that just works - the tangy kimchi lifts the thick cheese sauce and gives it a bit of a chilli kick. Combined with the crunchy, salty breadcrumbs, this dish is pure comfort food. We’ve served this as a side dish at our pop-ups before, alongside our pork belly buns, but this cheesy pasta is also great on its own.

250g (9oz) Really Great Cheese Sauce
320g (11½oz) macaroni
2 tablespoons matured Baechu Kimchi
2 spring onions, trimmed and finely sliced
TOPPING
150g (5½oz) matured Baechu Kimchi, drained and cut into 1-cm (½-inch) pieces
3 smoked streaky bacon rashers
½ tablespoon gochugaru (Korean red chilli powder)
1 small whole garlic clove
75g (2½oz) fresh breadcrumbs
1_ For the topping, lay the kimchi pieces flat on a large baking tray. Put in the oven on its lowest setting and leave for about 6 hours, or until dried out and crispy. Set aside.
2_ Put the bacon in a dry frying pan over a medium heat and fry for 3-4 minutes, until the edges start to go crispy and the bacon is cooked through. Tip into a blender along with the dried kimchi, gochugaru and garlic and pulse until everything is finely chopped. Return the pan to the heat, add the breadcrumbs and toast, stirring, for 4-5 minutes until the breadcrumbs are completely dry. Add to the other topping ingredients and set aside.
3_ Warm the cheese sauce over a moderate heat, stirring ocassionally and adding some extra milk if too thick. Set aside.
4_ Meanwhile, bring a pan of salted water to a boil, add the macaroni and cook according to the packet instructions until al dente. Drain and return to the pan, then mix in the cheese sauce, kimchi and spring onions. Spoon into bowls and scatter over a handful of the crispy topping to finish.
TIP: If you have one, place the kimchi topping pieces in a dehydrator rather than the oven to get them really dried out and crunchy.

Korean Fried Chicken
Double-fried, so the coating goes really crunchy but the meat stays juicy and really tender, Korean fried chicken really is the best kind of fried chicken there is. On a recent trip to Korea with some friends - and despite spending our days sampling all the street food that Korea has to offer, followed by evenings of Korean BBQ - we’d end our nights at a pub with a big plateful of the stuff. Well, you have to order anju in a pub and the chicken was always too hard to resist, no matter how full we were. Nothing goes better with an ice-cold beer.

1kg (2lb 4oz) chicken wings
1 litre (1¾ pints) Kimchi Brine
vegetable oil, for deep-frying
3 eggs
½ quantity Korean Sweet Chilli Sauce, for brushing
COATING
180g (6oz) potato starch
60g (2¼oz) sweet rice flour
80g (3oz) self-raising flour
1 tablespoon baking powder
½ tablespoon salt
1_ Put the chicken wings in a large bowl and pour over the brine. Transfer to the refrigerator and leave to brine for 1 hour.
2_ After 1 hour, drain the chicken wings and rinse them under cold running water to remove the excess salt from the brine, then pat dry with kitchen paper.
3_ Half-fill a large pot or deep-fryer with vegetable oil and heat to 180°C (350°F), or until a cube of bread browns in 30 seconds.
4_ Put the chicken in a large bowl. Crack the eggs over the top and rub in using your hands. In a separate bowl, mix together the coating ingredients. Tip the mix over the chicken and massage with your hands until evenly coated.
5_ Shake the chicken wings gently to remove any excess coating, then carefully lower into the hot oil. Fry for 4-5 minutes until the chicken begins to colour.
6_ Lift the chicken out of the oil for 4-5 minutes (this will allow the oil to get back up to temperature as well as allow the chicken a moment to rest), then carefully lower the chicken back into the oil and fry for a further 3 minutes until golden.
7_ Drain the chicken on kitchen paper, brush with a little chilli sauce and serve immediately with plenty of napkins.

Garlicky Gizzards
I don’t know many people who ate chickens’ gizzards growing up, but I’ve always been a fan. We spent quite a lot of summer holidays in Spain, and my mum would often pick up a pack of chickens’ gizzards from the local supermarket. She’d bring them back to the house and quickly sauté them with fresh chilli, garlic and salt. Cooked quickly like this, the gizzards are quite chewy (which I like), but Gareth has never been too convinced of the texture, so we found that brining the gizzards first and trimming them of any sinew makes them much more tender, while still retaining their flavour. We’ve added a little bit of chickens’ liver here too to balance out the texture.

200g (7oz) chickens’ gizzards, cleaned and trimmed of any sinew
1 litre (1¾pints) Kimchi Brine
1½ tablespoons vegetable oil
50g (1¾oz) chickens’ livers, cleaned, trimmed of any sinew and cut into thin strips
1 teaspoon salted butter
1 long red chilli, trimmed, deseeded and finely sliced
2 garlic cloves, finely sliced
pinch of salt
pinch of pepper
1 tablespoon soju (Korean rice/grain spirit) or sake
½ spring onion, trimmed and finely sliced, to garnish
1_ Put the gizzards in a large bowl and pour over the brine. Transfer to the refrigerator and leave to brine for 1 hour.
2_ After 1 hour, drain the gizzards and rinse them under cold running water to remove the excess salt from the brine, then pat dry with kitchen paper.
3_ Heat 1 tablespoon of the vegetable oil in a large frying pan over a high heat. Add the livers and fry, stirring, for 30 seconds, then add ½ teaspoon of butter to the pan. Once the butter has melted, tip the livers into a bowl and set to one side.
4_ Return the pan to the heat and add the remaining ½ tablespoon of oil. Reduce the heat to medium, add the gizzards, chilli, garlic, salt and pepper and fry for 2-3 minutes until the gizzards are cooked through. Add the soju, livers and remaining butter to the frying pan and fry a further 30 seconds. Transfer to a plate and serve garnished with the spring onion.
TIP: These gizzards also make a great starter. Toast a couple of slices of rye or sourdough bread in the frying pan after cooking to soak up the juices, then spoon over the gizzard mix to finish.
Chorizo and Kimchi Hash
With its winning combination of smoky chorizo, tangy kimchi and runny eggs, this hash is the ultimate brunch food - although it’s just as good shared as an anju to help soak up all that beer.

500g (1lb 2oz) new potatoes
1 tablespoon vegetable oil
1 red onion, finely sliced
50g (1¾oz) dried chorizo sausage, finely chopped
100g Baechu Kimchi, drained
5 cherry tomatoes, halved
1 garlic clove, minced
2 eggs
salt
buttered crusty bread slices, to serve
TO GARNISH
1 spring onion, trimmed and finely chopped
1 teaspoon gochugaru (Korean red chilli powder)
1_ Bring a large saucepan of salted water to the boil, add the potatoes and cook for 15 minutes, until tender. Drain and rinse under cold water and cut into bite-sized chunks.
2_ Heat the oil in a cast-iron griddle pan. Fry the onion and chorizo for 2-3 minutes, until the onion has just softened. Add the kimchi, tomatoes and garlic and fry for a further minute, then add the potatoes and cook, stirring gently, for a further 2 minutes.
3_ Make two wells in the centre of the hash with a spoon and crack an egg into each. Put the pan under a hot grill for 3-4 minutes, until the whites of the eggs are cooked through but the yolks are still runny.
4_ Garnish with spring onion and gochugaru and serve immediately with thick slices of crusty buttered bread.
Lotus Root Nachos
Sweet, salty and moreish, these crispy nachos are a twist on the traditional and make for the perfect party snack. They require minimum effort, while the pretty pattern of the sliced lotus roots looks seriously impressive. Lotus roots are traditionally served as banchan, often braised in soy sauce. Though they look attractive, I never think that they taste that great, and I much prefer eating them like this.

4 lotus roots, about 200g (7oz) each, trimmed
juice of 1 lemon
vegetable oil, for deep-frying
SEASONING
1 teaspoon salt
1 teaspoon sesame oil
1 tablespoon garlic granules
1½ teaspoons caster sugar
1 tablespoon gochugaru (Korean red chilli powder)
1 tablespoon paprika
TO SERVE
Zingy Green Sauce
Kimchi Salsa
1_ Using a sharp knife or a mandoline, cut the lotus root widthways into 3-mm (⅛-inch) slices. Place the lotus root slices in a bowl, covering them with the lemon juice as you go to prevent them from turning brown.
2_ Half-fill a large pot or deep-fryer with vegetable oil and heat to 180°C (350°F), or until a cube of bread browns in 30 seconds. Lower the lotus root slices carefully into the hot oil a few at a time (to prevent them sticking to each other) and fry for 3 minutes, until the slices are crisp and slightly browned. Shake off any excess oil and leave to drain on kitchen paper while repeating with the remaining slices.
3_ Meanwhile, mix together all the seasoning ingredients in a small bowl. Tip the lotus root slices into a large bowl and sprinkle over the seasoning mixture a pinch at a time to prevent the seasoning powder from clumping together. Toss the lotus root slices until they are thoroughly coated, then serve with zingy green sauce and kimchi salsa.