DIY Nut Milks, Nut Butters, and More (2014)

Once you realize how easy nut butters are to make, you’ll probably laugh at yourself for not trying it sooner. You’ll also never buy them from a supermarket again. The preparation doesn’t take long, the butter lasts quite a while if properly stored, and it tastes more flavorful than commercial versions do. If you keep your nut butter in the fridge, it can last for several months, although we usually go through it much more quickly than that in our house. You can make butter from just about any nut, with each variety offering its own unique, finger-licking-good flavor. The following recipes will show you that homemade nut butter soars way beyond the standard peanut butter.
Basic Nut Butter
THE CONCEPT BEHIND making nut butters is pretty simple: just blend the nuts until they reach the creaminess you desire. The process is the same for all nuts.You should make nut butter in small batches to get the best results and to avoid burning out your blender or food processor. If you prefer it a bit chunky, as I do, a food processor works well, or you can use a blender for a finer, smoother consistency. I have made nut butter in a food processor, a Vitamix, and my Blendtec using the Twister Jar (see Notes below).
MAKES ½ CUP (125 G)
1 cup (125 g) nuts (see Notes below)
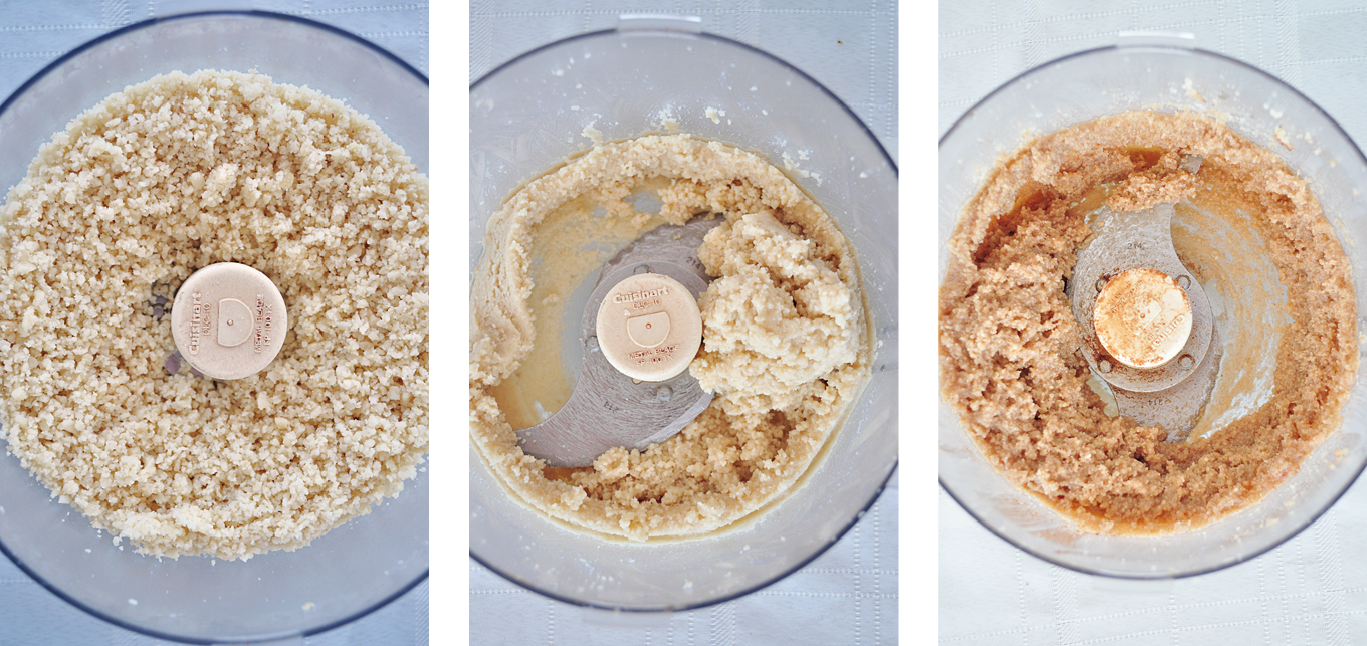
1. Grind the nuts in a food processor or a high-powered blender. The food processor requires a little more time, but you won’t have to scrape down the sides as often, and it’s easier to clean. Both work equally well; you simply need to decide which one is better for you.
2. Blend until the butter is smooth, scraping down the sides of the canister periodically. The time this takes depends on the nuts. Brazil nuts, macadamias, peanuts, pecans, and walnuts all take about 5 minutes. Almonds, hazelnuts, pistachios, and sunflower seeds can take up to 20 minutes. For those that take longer, I suggest pausing the blending process every 5 minutes to give the machine a break and allow the nuts to release some of their oils.
3. Transfer the butter to an airtight container for storage. I store my nut butter on the counter and it will keep for a few weeks, but it’s usually gobbled up before then! If you plan on saving it longer than 2 weeks, I recommend refrigerating it. It can last up to 4 months in the refrigerator, since the cold temperature helps keep the oils from going rancid.
NOTES
· I typically make my nut butters with raw, unsalted nuts. You can use roasted nuts (see Kitchen Tips for directions), but you might need to add at least 1½ teaspoons of a mild-tasting oil to get a smooth, buttery consistency.
· Please make sure the nuts are fresh. If they’re old, they will not create a smooth consistency.
· If you choose to use the Blendtec Twister Jar, I recommend making 1 cup (250 g) of nut butter at a time. Even if you don’t have a powerful food processor or blender, you can make nut butter using a smaller appliance like a Magic Bullet. If you go that route, cut the recipe in half to ½ cup (65 g) of nuts.
VARIATIONS
If you want to add flavorings such as oil, sea salt, or sweetener, do so after you have made the nut butter so that you’ll know what your base consistency and flavor is. Some suggestions are ½ teaspoon of sea salt; 1 teaspoon of sweetener, such as pure maple syrup or raw honey; or ½ to 1 tablespoon of oil (I like to use coconut, grape seed, or olive).
PREP TIME: 5 to 20 minutes, depending on the type of nut you use
Classic Peanut Butter
THIS IS THE classic nut butter recipe, making it a great starting point. You can use any type of peanuts you desire: raw, roasted, salted, or unsalted. They’re all delicious. I prefer using roasted, unsalted peanuts for this butter, because it allows me to control the salt content, and I love that great roasted flavor. If you use roasted peanuts, remember to add a little oil to keep the peanut butter moist throughout the process. This recipe works perfectly for the Peanut Butter Cup Granola or Peanut Butter Chocolate Chip Donuts.
MAKES 1 CUP (250 G)
2 cups (280 g) peanuts, roasted (see Kitchen Tips) or raw
½ teaspoon sea salt
1 to 2 tablespoons mild-tasting oil, if using roasted peanuts
1. Grind the peanuts and sea salt in a food processor or high-powered blender until creamy, 5 to 10 minutes. If you’re using a blender, I recommend starting on a low speed and then working your way up to high. You might need to stop several times to scrape down the sides.
2. Transfer the peanut butter to an airtight container for storage. It should keep at room temperature for up to 2 weeks, or up to 4 months in the refrigerator.
PREP TIME: 5 to 10 minutes
Salted Honey Cashew Butter
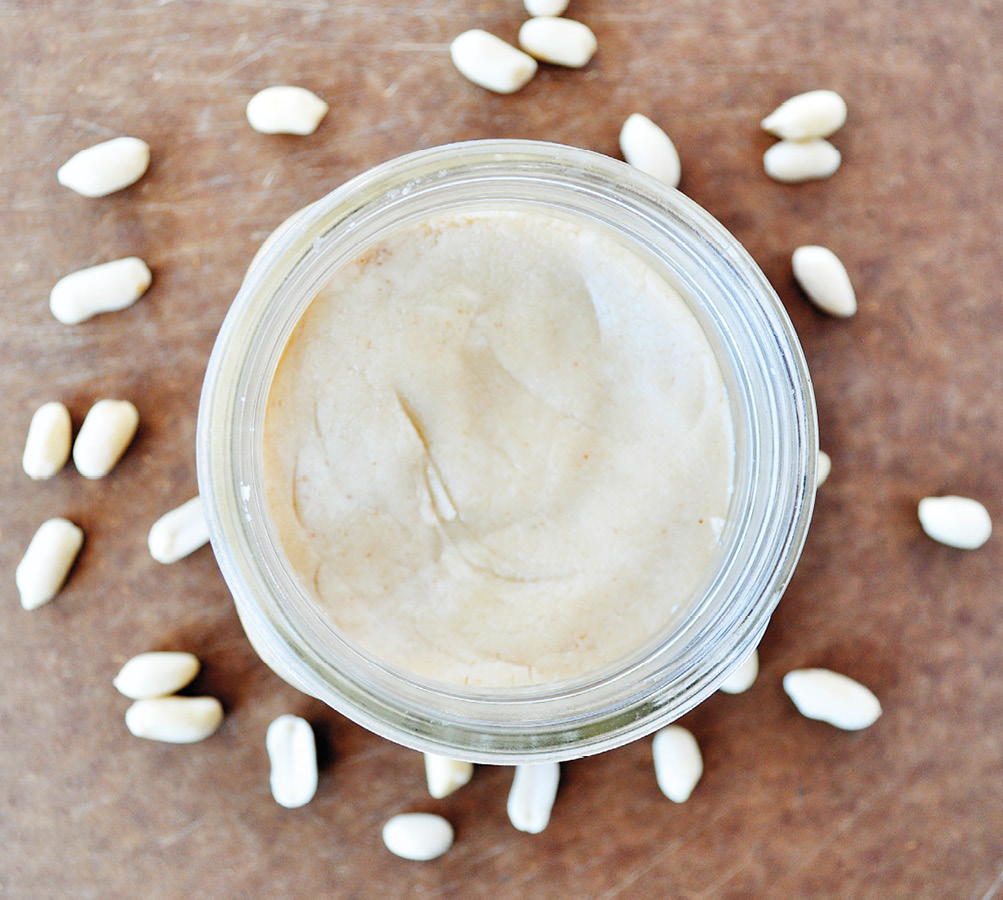
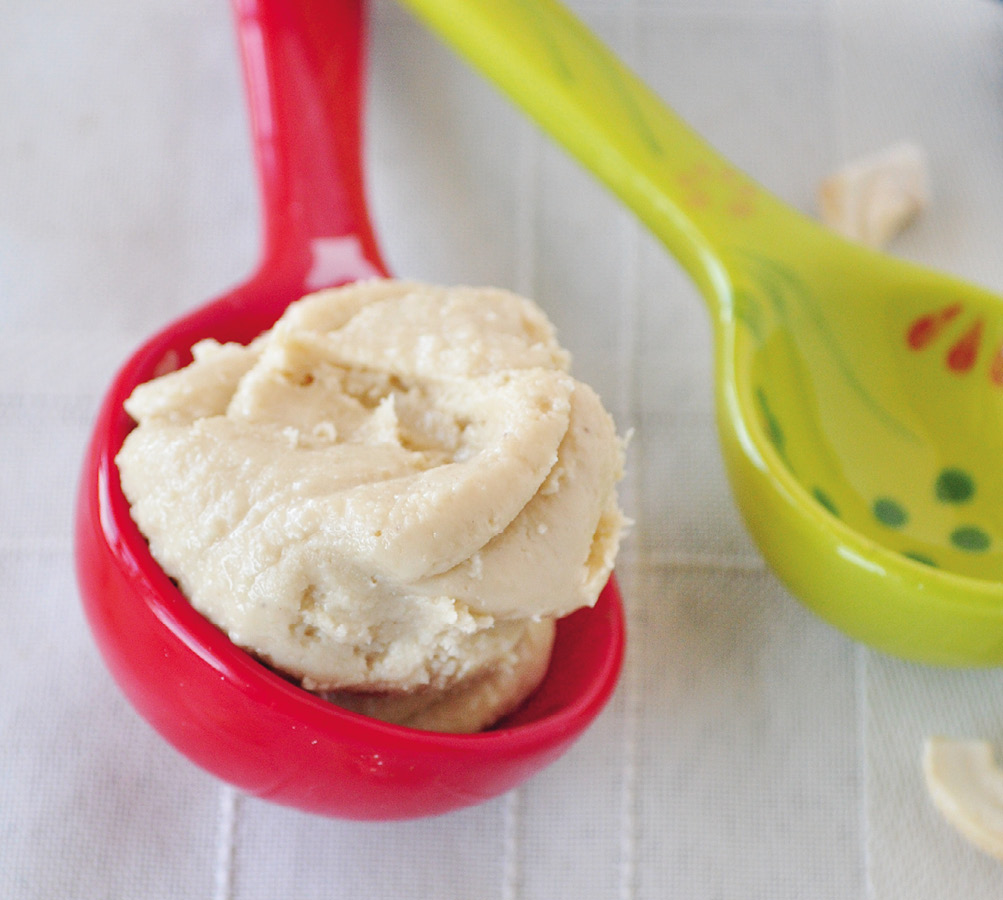
THE RICH, SMOOTH taste of cashew butter makes it one of the most special nut butters, in my opinion. Sweet and salty, always a winning combination, join forces perfectly in this extra-luxurious salted honey cashew butter. You might be tempted to eat it straight from the jar—I find that bread just gets in the way. It’s also a perfect filling for truffles.
MAKES ½ CUP (160 G)
1 cup (130 g) raw cashews
1 tablespoon raw honey or pure maple syrup
½ teaspoon sea salt (see Note below)
1. Grind the cashews in a food processor or high-powered blender for 5 to 10 minutes, stopping often to scrape down the sides. Start at a low speed and slowly work your way up to high.
2. Add the honey and sea salt and continue to blend until smooth. This should require only a few more minutes.
3. Transfer the butter to an airtight glass storage container. It should keep at room temperature for up to 2 weeks, or up to 4 months in the refrigerator.
NOTE
If you buy salted cashews, omit the salt in this recipe.
PREP TIME: 8 to 12 minutes
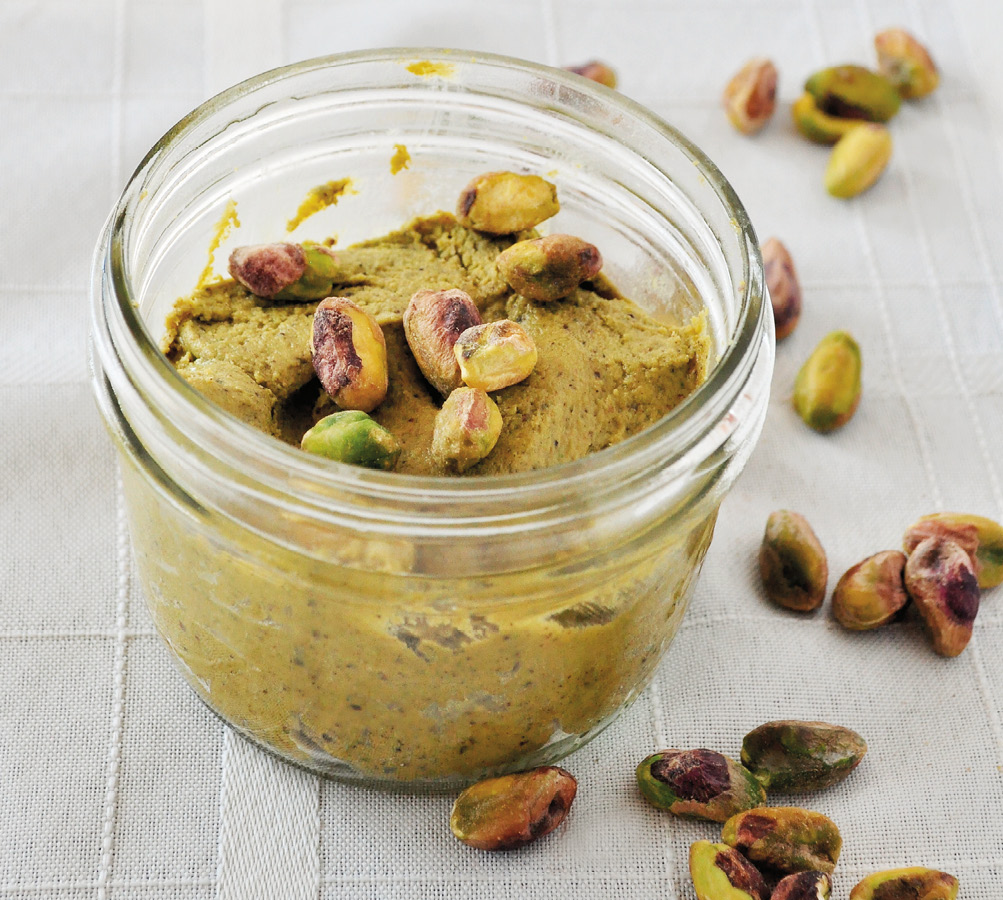
Rich and Creamy Pistachio Butter
I DON’T KNOW about you, but a bag of pistachios never lasts long in my house, even with the hassle of shelling them. There’s just something about their smooth texture that makes them so appealing. Add some salt and you have yourself a handy snack! Throw them in a blender and you get a velvety butter that you can use in cookies, ice cream, truffles, and other treats. I especially love using pistachios in truffles, since their pretty green hue contrasts beautifully against the chocolate, making them ideal for the holidays.
MAKES ½ CUP (140 G)
1 cup (125 g) raw, unsalted pistachios
½ teaspoon sea salt
1 teaspoon pure maple syrup
1. Grind the nuts and the sea salt in a food processor or high-powered blender on high speed for 10 to 15 minutes. You might need to scrape down the sides of the blender or food processor several times.
2. When the mixture is almost smooth, add the maple syrup, and blend for another 2 minutes.
3. Transfer the butter to an airtight glass container for storage. It should keep at room temperature for up to 2 weeks, or up to 4 months in the refrigerator.
NOTE
This pistachio butter is also wonderful in place of the pecan butter in Pecan Caramel Overnight Oats. Delicious!
PREP TIME: 10 to 15 minutes
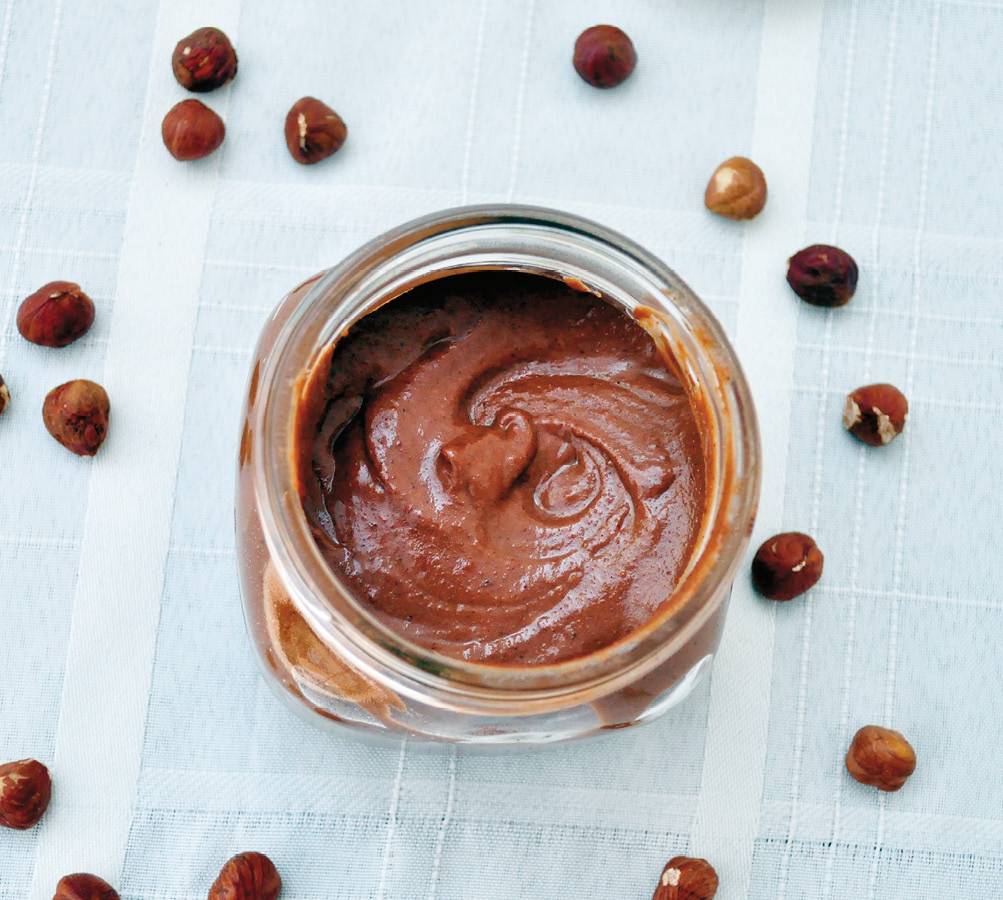
Chocolate Hazelnut Spread
HAZELNUTS ARE ONE of my favorite nuts to use in the kitchen, perhaps because my mother was German. Since many German desserts and candies contain hazelnuts, recipes like this one take me back to my childhood. This spread can be enjoyed in so many different ways. Smear it on toast, waffles, crepes, or pancakes, or add a spoonful to Pecan Caramel Overnight Oats. It’s also wonderful in Banana Muffins with Chocolate Hazelnut Filling. Unlike the popular store-bought chocolate hazelnut spread, this one does not contain processed sugar or soy. Try this easy recipe and you’ll never have the urge to purchase the commercial brand again.
MAKES 1½ CUPS (360 G)
2 cups (240 g) raw, unsalted hazelnuts
1 cup (240 ml) almond milk (see Basic Nut Milk)
⅓ cup (40 g) unsweetened cocoa powder
3 tablespoons pure maple syrup or raw honey
2 teaspoons ground vanilla beans
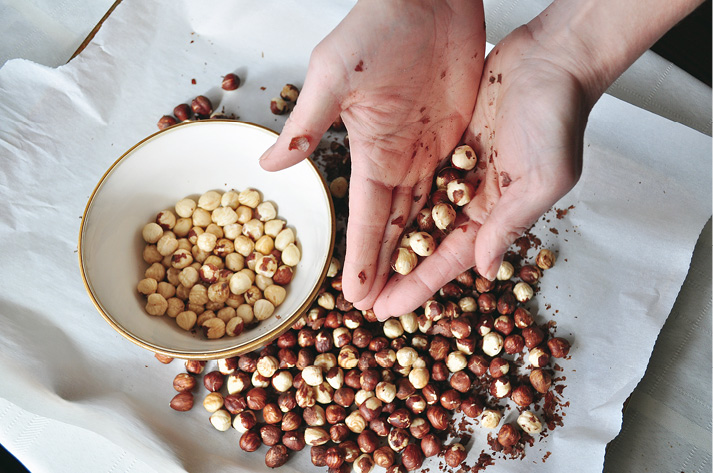
1. You can remove the hazelnut skins or leave them on; I’ve done it both ways. If you decide to remove the skins, you’ll need to roast the nuts first (see Kitchen Tips for directions).
2. Wait until the hazelnuts are completely cooled before attempting to remove the skins; otherwise you’ll burn your hands. It should take about 5 minutes for the hazelnuts to cool down enough to handle. Once cooled, rub them between your palms to remove the skins.
3. Grind the hazelnuts in a blender until they have a coarse consistency, about 1 minute. I highly recommend using a high-powered blender to get a smoother texture. You can use a food processor, but you might need to grind the nuts for about 2 minutes longer and a slight graininess may remain. It will still taste divine; it will just have a different texture. I have tested this recipe with both appliances and find that the hazel-nut spread made in the blender most closely resembles the store-bought variety.
4. Add the almond milk, cocoa powder, maple syrup, and vanilla. Blend until smooth, about 2 minutes.
5. Because this recipe contains almond milk, it needs to be stored in the refrigerator. It should last 7 to 10 days.
NOTE
You can substitute 1 teaspoon of vanilla extract for the ground vanilla beans, but you might be able to slightly taste the alcohol if you do, since this recipe isn’t cooked.
PREP TIME: 5 to 7 minutes (longer if removing the skins first)
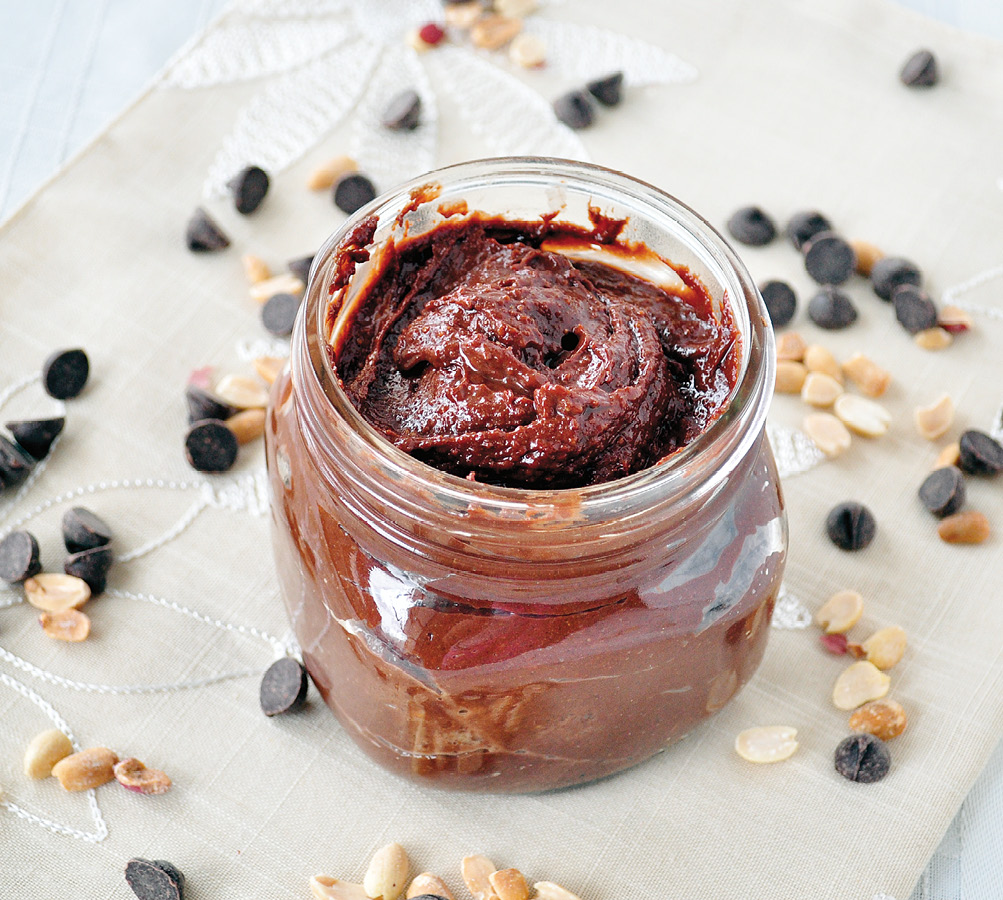
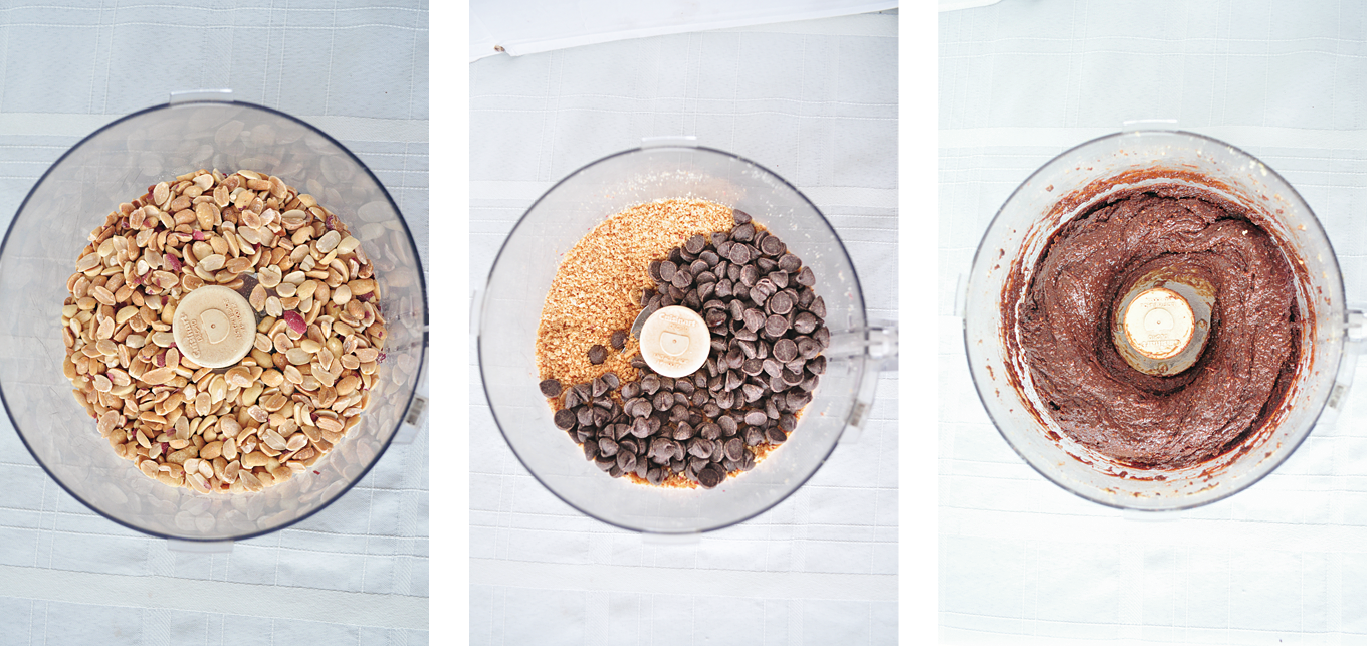
Chocolate Peanut Butter Spread
SINCE THE BEGINNING of their mutual existence, chocolate and peanut butter have been paired together. Some of the most popular desserts in Western culture today are based on this wonderful combination, be it a sumptuous mousse at an expensive restaurant or a common candy bar impulsively purchased at the checkout line in a grocery store. They’re the perfect match, with the saltiness of the peanuts and the melt-in-your-mouth sweetness of the chocolate too good to pass up. I simply had to include this recipe in the book. This spread is great on toast, waffles, or ice cream, or you can just eat it by the spoonful!
MAKES 1 CUP (300 G)
1½ cups (210 g) raw peanuts (see Notes below)
1 cup (160 g) dark chocolate chips
1¾ cups (420 ml) almond milk (see Basic Nut Milk)
2 tablespoons pure maple syrup
1. Grind the peanuts in a food processor or high-powered blender on high speed until they have a coarse consistency, 1 to 2 minutes.
2. Add the chocolate chips and continue to pulse for a few more minutes to mix.
3. Add the almond milk and maple syrup and blend for another 3 minutes, or until the spread reaches the consistency you desire.
4. Transfer the spread to a glass jar for storage. Because this recipe contains almond milk, it needs to be stored in the refrigerator, where it should last for up to 2 weeks.
NOTES
· You can make this with salted or unsalted peanuts; I use unsalted. If you go with unsalted peanuts and would still like a salty element, I suggest adding ½ teaspoon of sea salt. You can mix it in at the same time as the almond milk and maple syrup.
· I keep this spread in 12-ounce (340 ml), wide-mouth glass mason jars, which fit the recipe yield perfectly.
· This spread will firm up after being in the fridge. Before using, let it sit at room temperature for about 30 minutes, or heat it in a microwave at half power for 1 minute.
PREP TIME: 5 to 7 minutes
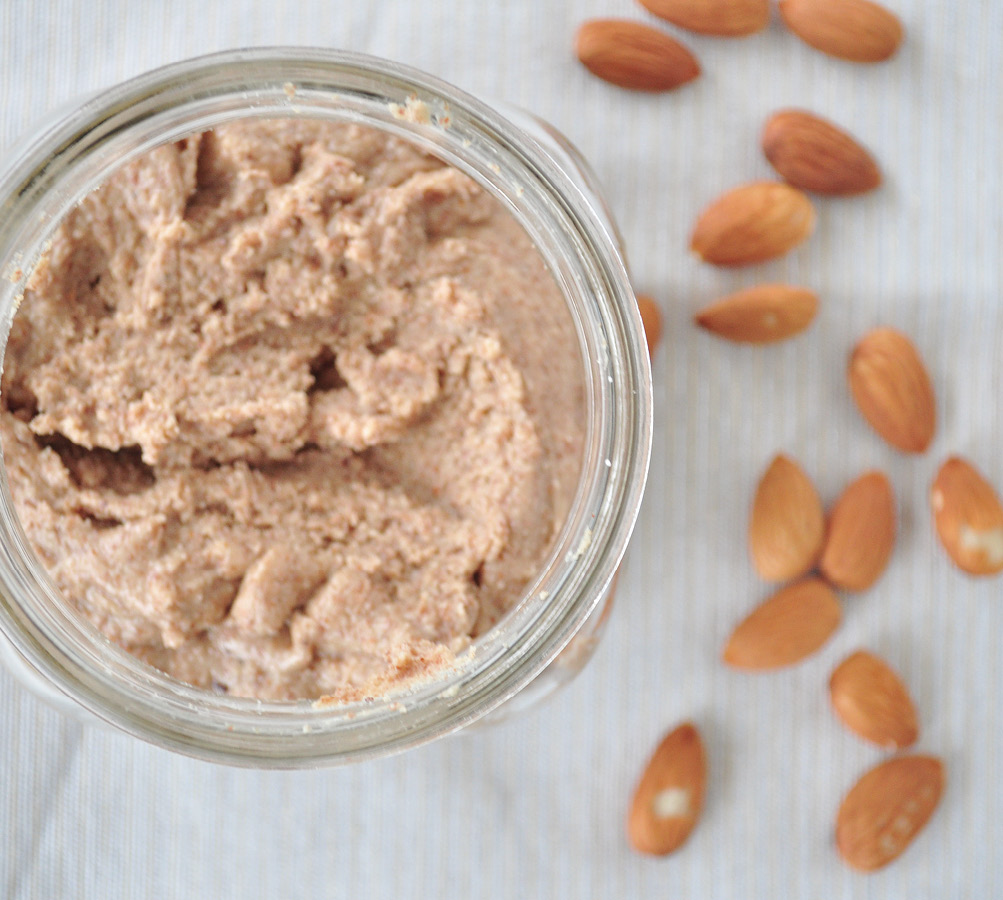
Maple Vanilla Almond Butter
HAVING GROWN UP in the Northeast, I can attest to the magic of anything maple, from maple butter to maple syrup. The natural sweetener makes everything better, and it pairs perfectly with vanilla, which really stands out in this flavorful spread. Adding ground vanilla beans to a dish can make it taste sweeter than it really is, which makes using vanilla a terrific way to cut sugar consumption while still indulging. I promise this classic combination will have you coming back for more.
MAKES ½ CUP (175 G)
1 cup (125 g) raw, unsalted almonds
2 tablespoons pure maple syrup
1 teaspoon ground vanilla beans
½ teaspoon sea salt
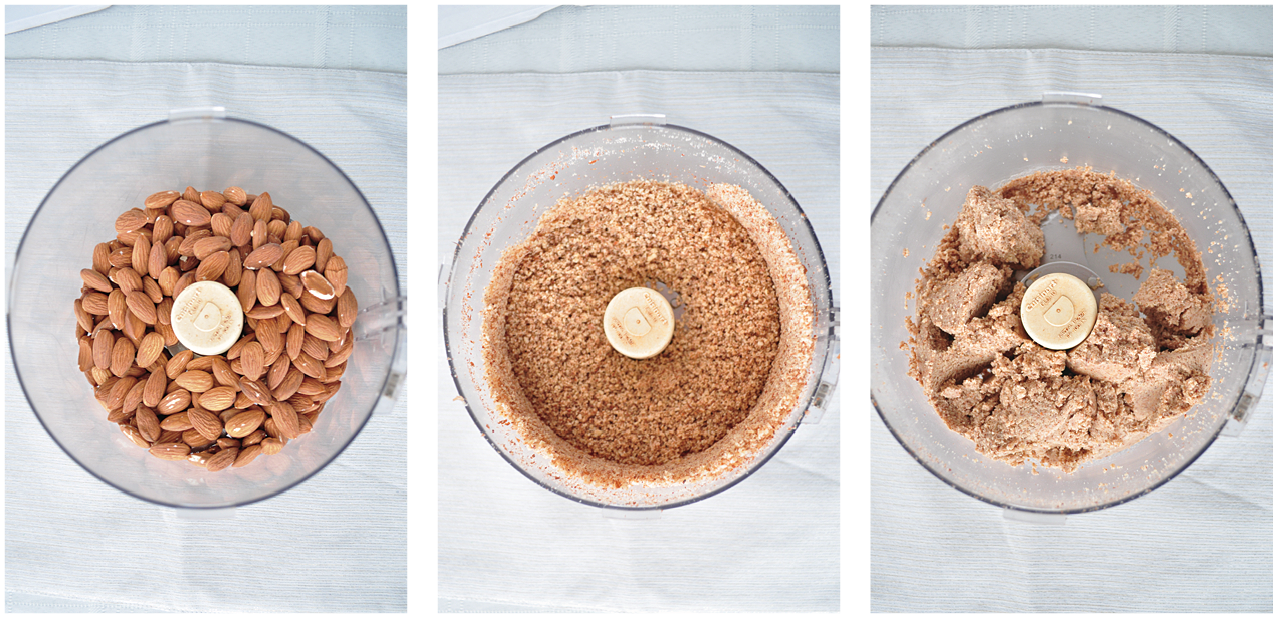
1. Grind the almonds in a food processor or a high-powered blender on high speed (see Notes below). Pause every few minutes to give the almonds time to release their oils.
2. Once the almonds look moist, after 10 to 15 minutes, add the remaining ingredients and blend until smooth.
3. Transfer the butter to an airtight glass container for storage. It should keep at room temperature for up to 2 weeks, or up to 4 months in the refrigerator.
NOTES
· You can substitute vanilla extract for the vanilla beans, cutting the amount down to ½ teaspoon, but you might be able to slightly taste the alcohol if you do, since this recipe isn’t cooked.
· The time it takes to make almond butter varies depending on the type of equipment you use; it typically takes about 15 to 25 minutes. A high-powered blender will be faster than a food processor. Both have their pros and cons. While the food processor might take longer, the cleanup is much easier and the sides don’t need to be scraped as often. A blender is quicker, but it requires more scraping and a more difficult cleanup. Either way, this recipe is worth the time and effort.
PREP TIME: 15 to 25 minutes
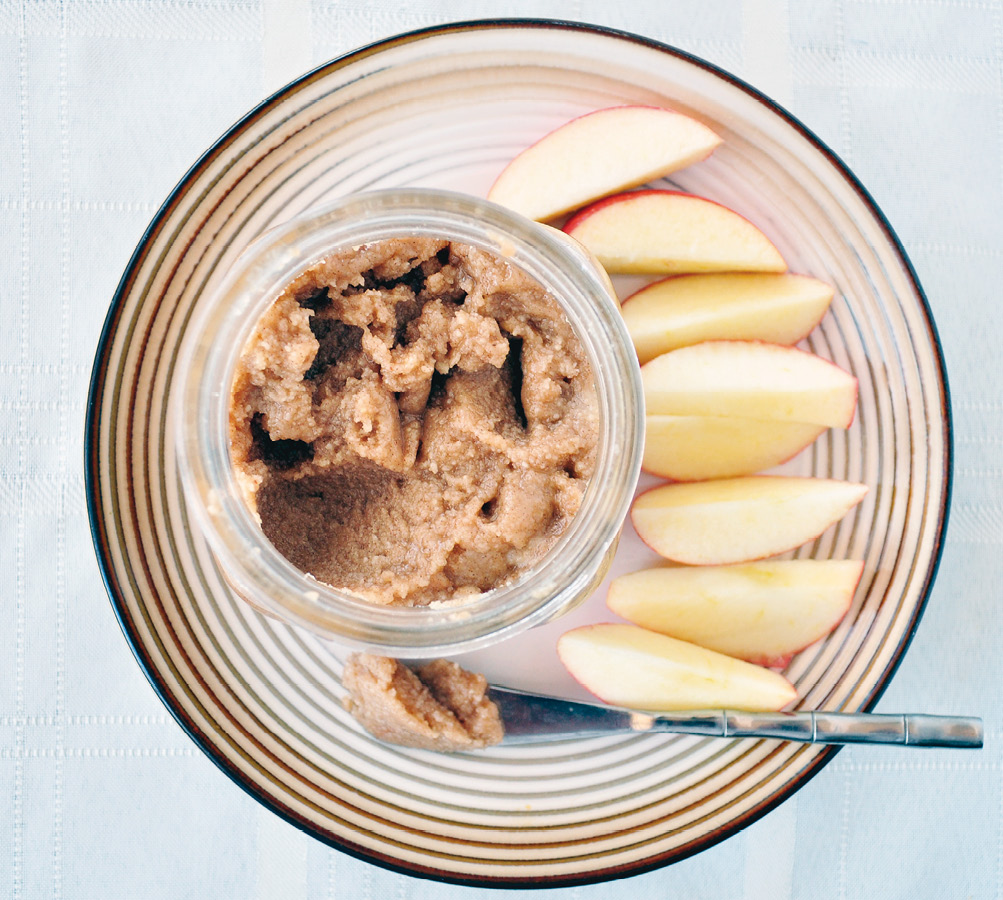
 Apple Donuts and Sandwiches
Here’s a fun serving suggestion for this Maple Vanilla Almond Butter: use it in apple donuts and apple sandwiches. I enjoy making these simple, healthy snacks with my daughters, who love them! If your child is allergic to nuts or attends a nut-free school, you can substitute Sunflower Seed Butter for the almond butter. Here’s how you make them:
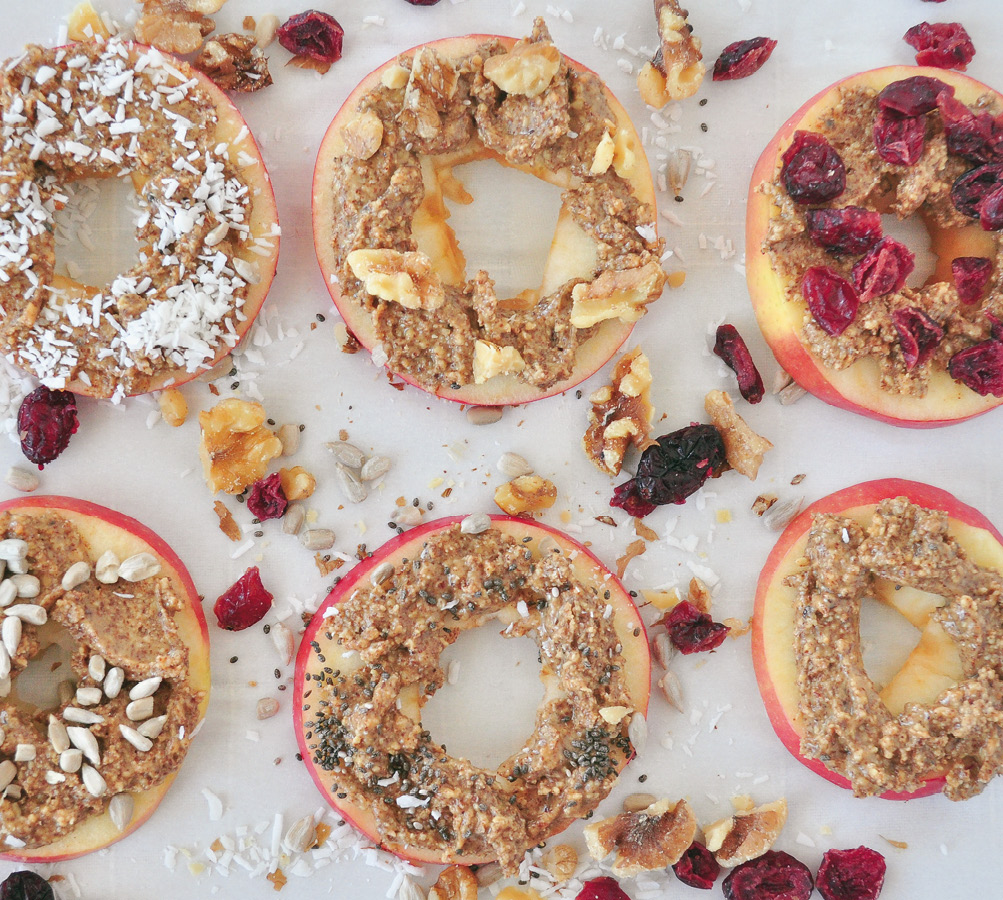
Take an apple of your choice (I like Honeycrisp) and slice it into ¼-inch-thick circles. If you have very young children, you can peel the apple before slicing it. What you end up with are about 6 apple circles with a little core in the middle of each one. Use a small circular cookie cutter or a knife to cut the core out of each apple slice.
To make donuts, simply spread the nut butter on top of each slice, and then give the kids some toppings to add. We like to use shredded, unsweetened coconut, raw sunflower seeds, dried fruit, chopped nuts, or cacao nibs.
If you want apple sandwiches, just stack two slices of apple on top of each other with the nut butter in the middle. Apple sandwiches make excellent snacks for school. If you want to keep your apples from browning in the lunch box, simply squeeze a tiny drop of lemon juice onto each slice.
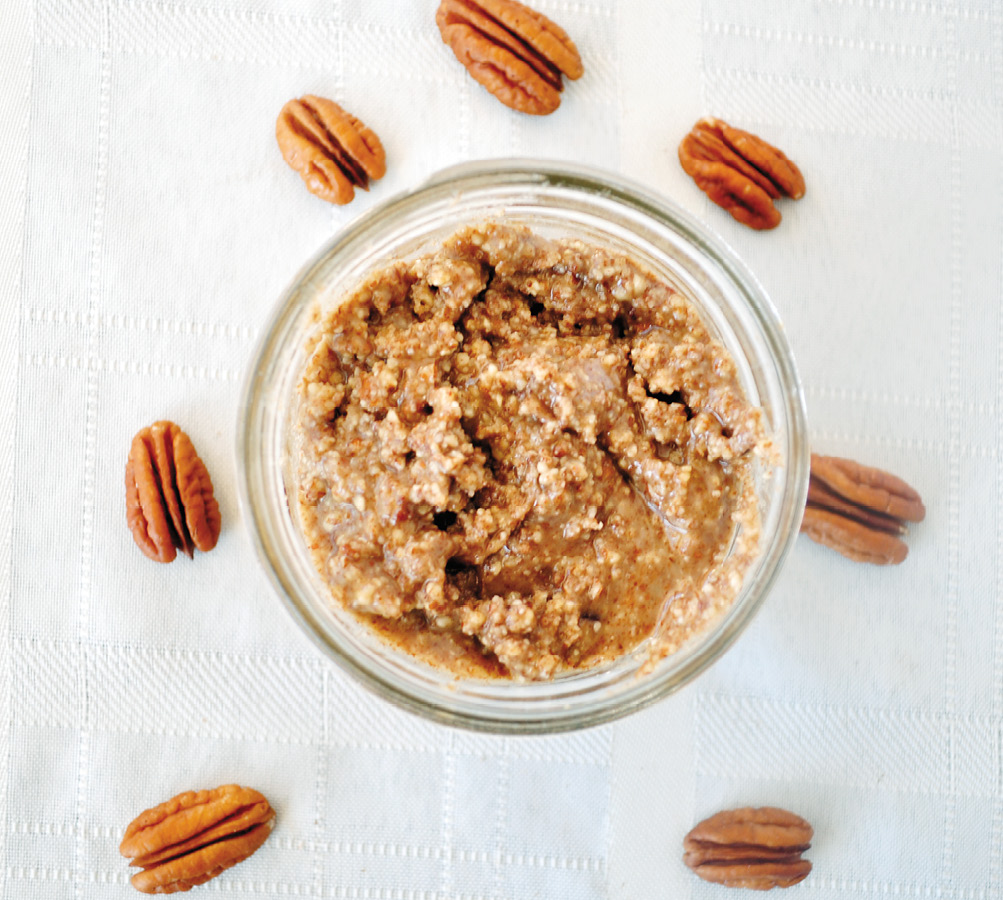
Cinnamon Pecan Butter
PECANS HAVE A natural sweetness that I’m incredibly fond of, and they make an ideal nut butter. I sometimes use pecan butter as the base in my truffles, since it’s so rich in flavor without any extra sugar. When you add cinnamon to the mix, it takes the taste to a whole new level. I’m sure this will become a staple in your house as it has in mine. Try using it in place of the Chocolate Hazelnut Spread in my Banana Muffins.
MAKES ½ CUP (160 G)
1½ cups (150 g) raw, unsalted pecans
1 teaspoon cinnamon
½ teaspoon sea salt
1. Combine all the ingredients in a food processor or high-powered blender. Blend on high speed until the mixture reaches the consistency you desire. If you use a blender, this should take only about 2 minutes; a food processor will need 5 to 7 minutes.
2. Transfer the butter to an airtight glass container for storage. It should keep at room temperature for up to 2 weeks, or up to 4 months in the refrigerator.
NOTE
If you decide to add a sweetener, mix it in when the butter looks almost ready. I recommend using 1 teaspoon of pure maple syrup or 1 teaspoon of raw honey.
PREP TIME: 5 to 10 minutes
Maple Cinnamon Macadamia Spread
THIS SPICE-FILLED NUT butter is sure to comfort you on a cold day. Sweet and buttery, bursting with hints of cinnamon and nutmeg, it makes a wonderful dip for fruit or cookies, or you can give new life to your morning toast by using it instead of butter or jam.
MAKES 1¼ CUP (330 G)
2 cups (280 g) raw, unsalted macadamia nuts
2 tablespoons pure maple syrup
1 teaspoon cinnamon
1 teaspoon sea salt
¼ teaspoon ground nutmeg
1. Grind the nuts in a food processor or high-powered blender on high speed for 1 to 2 minutes.
2. Add the remaining ingredients and continue to blend until the mixture is smooth. This should take less than 5 minutes. Scrape down the sides of the blender as needed.
3. Transfer the butter to an airtight glass container for storage. It should keep at room temperature for up to 2 weeks, or up to 4 months in the refrigerator.
NOTES
· I find that this spread tastes even better warm, so keep that in mind when serving it. I warm the spread by sticking the jar in a bowl of hot water for a few minutes, or you can heat it gently in a microwave on half power for no longer than 20 seconds.
· I’ve discovered that a 4-ounce (120 ml) mason jar fits this recipe perfectly.
VARIATION
Apples and nuts go perfectly together, so if you want to kick things up a notch, add ¼ cup (60 ml) of unsweetened applesauce. This mixture tastes great on toast or even swirled into a cup of plain yogurt.
PREP TIME: 7 to 10 minutes
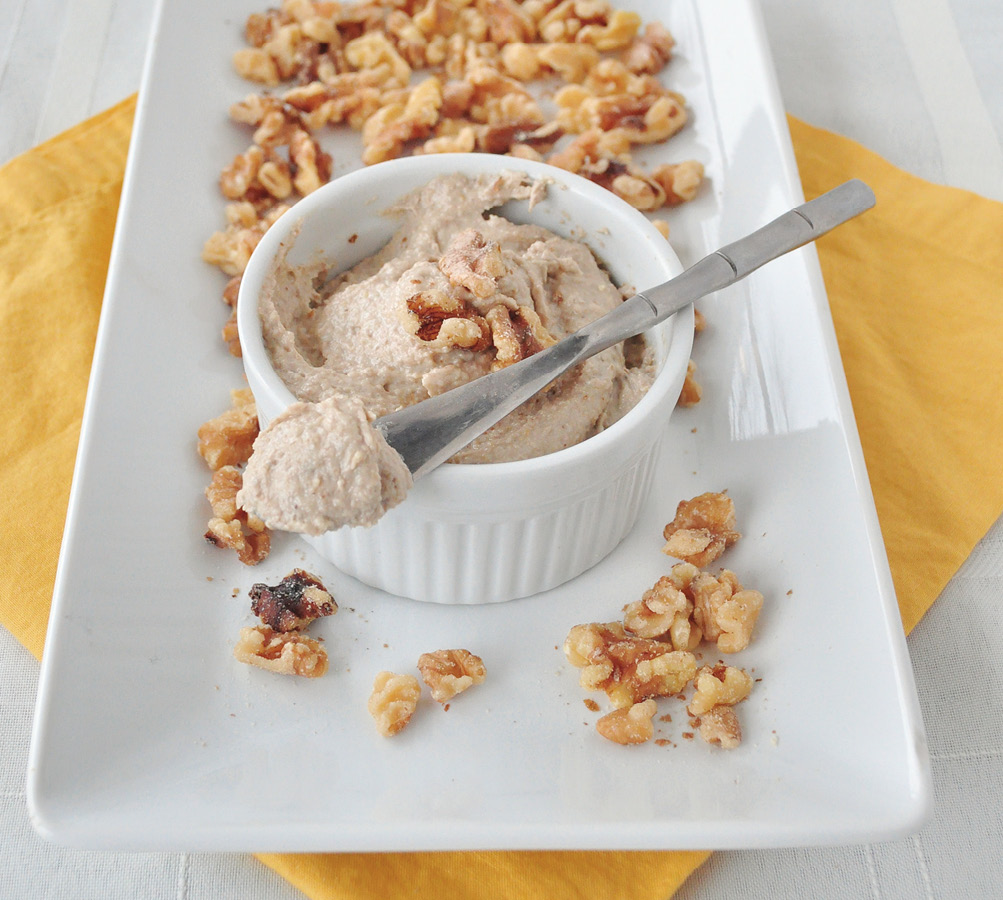
Chunky Banana Walnut Spread
THIS IS NOT your mama’s nut butter—this stuff is over-the-top awesome, with a deep and unending flavor. The richness of the walnut butter mixed with the sweetness of the ripe banana tastes amazing together in this epic spread. I highly suggest spreading some on top of pancakes or waffles; I promise you’ll love it.
MAKES 1 CUP (330 G)
2 cups (200 g) raw, unsalted walnuts, plus an extra handful to mix in for an added crunch
1 large very ripe banana
1 to 1½ teaspoons cinnamon
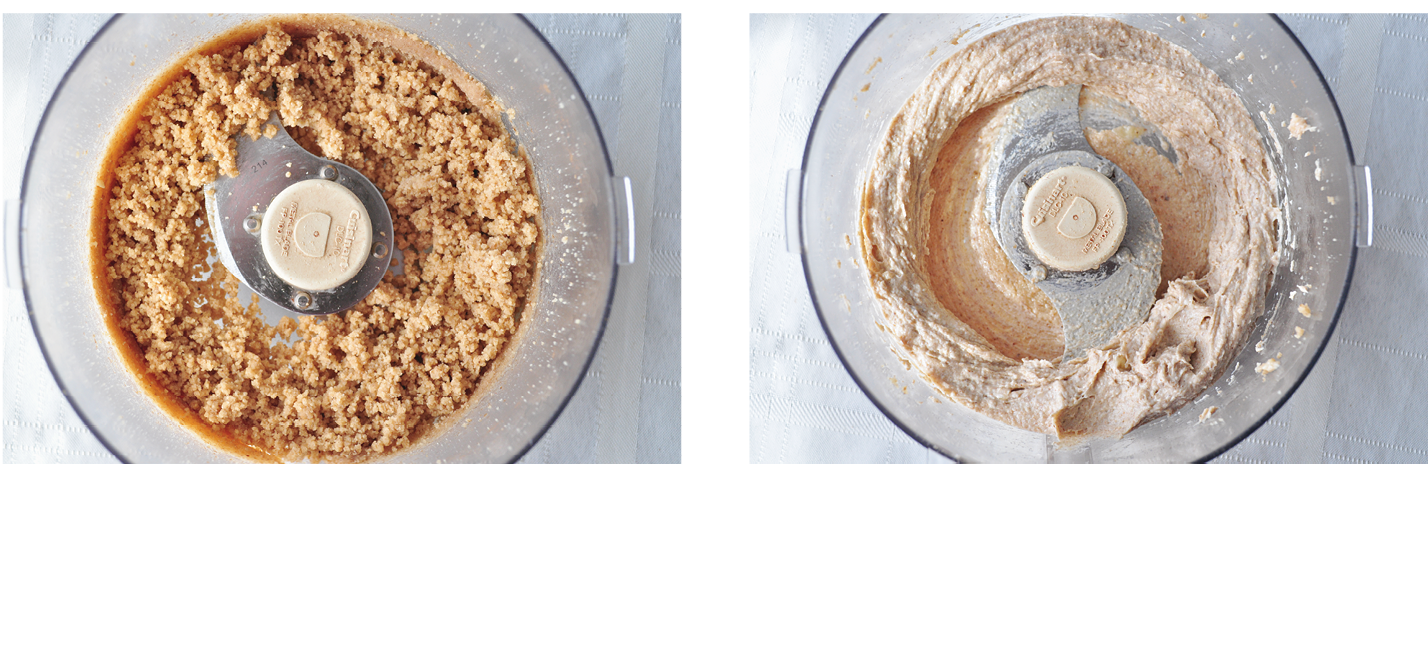
1. Grind the walnuts in a food processor or high-powered blender on high speed for 1 to 2 minutes, until they begin to clump together slightly.
2. Add the banana and cinnamon and blend until smooth, another 2 minutes. Gently fold in the extra walnuts for an additional crunch, or you can omit them and leave it smooth.
3. Transfer the butter to an airtight glass container for storage. It should keep in the refrigerator for up to 1 week.
NOTE
After this spread has been refrigerated for a while it will harden a bit, so you’ll need to pull it out about 30 minutes before using it. You can also set the jar in a bowl of warm water to soften it.
PREP TIME: About 5 minutes
Banana Walnut Freezer Fudge
You can make a heavenly freezer fudge using the basic ingredients in this recipe. Take 2 cups (200 g) of walnuts, 1 mashed banana, and 1 tablespoon of pure maple syrup, and mix them together in a food processor or blender on high speed. Scoop the mixture into the lined cups of a standard muffin pan and place the pan in the freezer. After about 4 hours, you’ll have a decadent fudge with very little added sugar. This recipe makes 10 to 12 pieces of fudge, depending on how large you cut them.
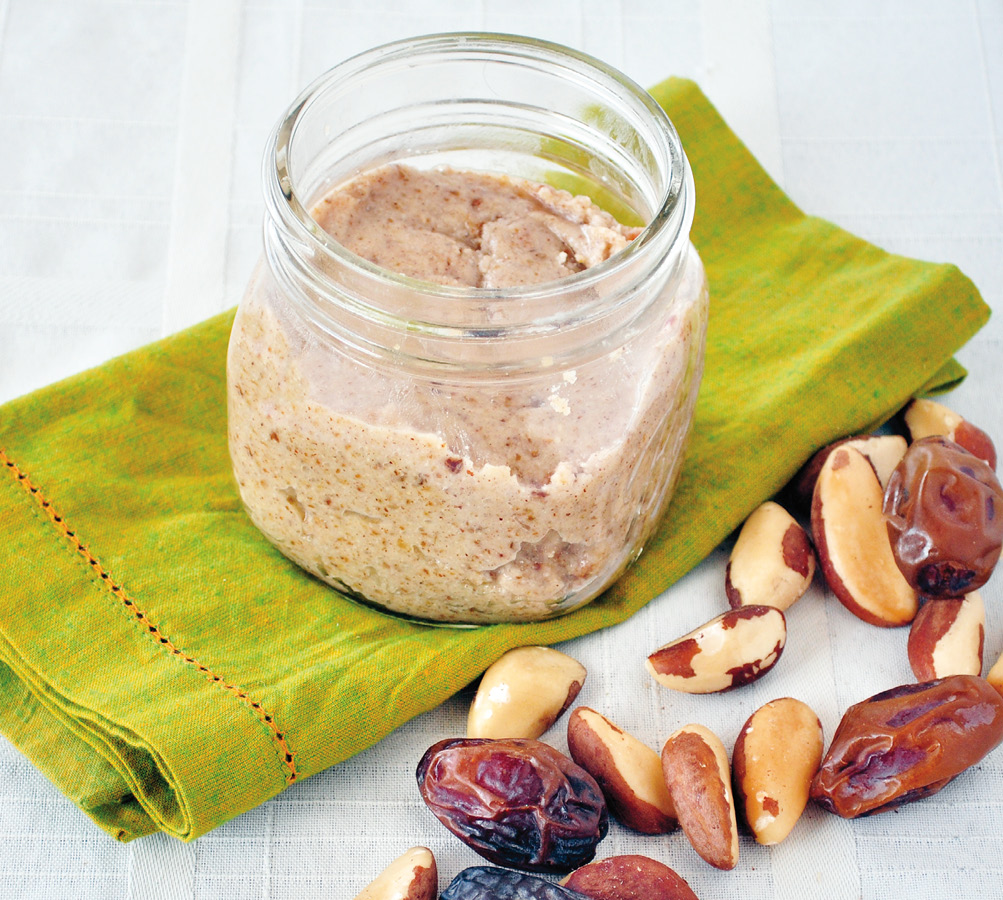
Salted “Caramel” Brazil Nut Butter
BRAZIL NUT BUTTER is one of the quickest nut butters you can make. If you have a high-powered blender, you should be able to do it in about 2 minutes. The sweet and salty combo of this recipe makes it highly addictive. The Medjool dates provide a caramel-like taste and texture in a much healthier way than the actual sugary stuff, and the sea salt enhances all of the flavors. You can spread this nut butter on toast or simply eat it with a spoon. To use it in a fun, creative way, try melting it over some ice cream.
MAKES 1½ CUPS (360 G)
2½ cups (360 g) raw, unsalted Brazil nuts
5 Medjool dates, pits removed
1½ teaspoons sea salt
1. Grind the Brazil nuts in a high-powered blender or food processor on high speed until completely crumbled, 2 to 4 minutes.
2. Add the dates and sea salt, then continue to blend until the mixture is smooth, another 1 to 2 minutes.
3. Transfer the butter to an airtight glass storage container. It should keep at room temperature for up to 1 week, or up to 3 weeks in the refrigerator.
NOTE
If you store this butter in the fridge, it might harden a little. To soften it back up, simply stick the jar in a bowl of very warm water for about 2 minutes. You can also gently heat it in a microwave at half power for 30 seconds, which should loosen it up.
PREP TIME: 5 to 7 minutes
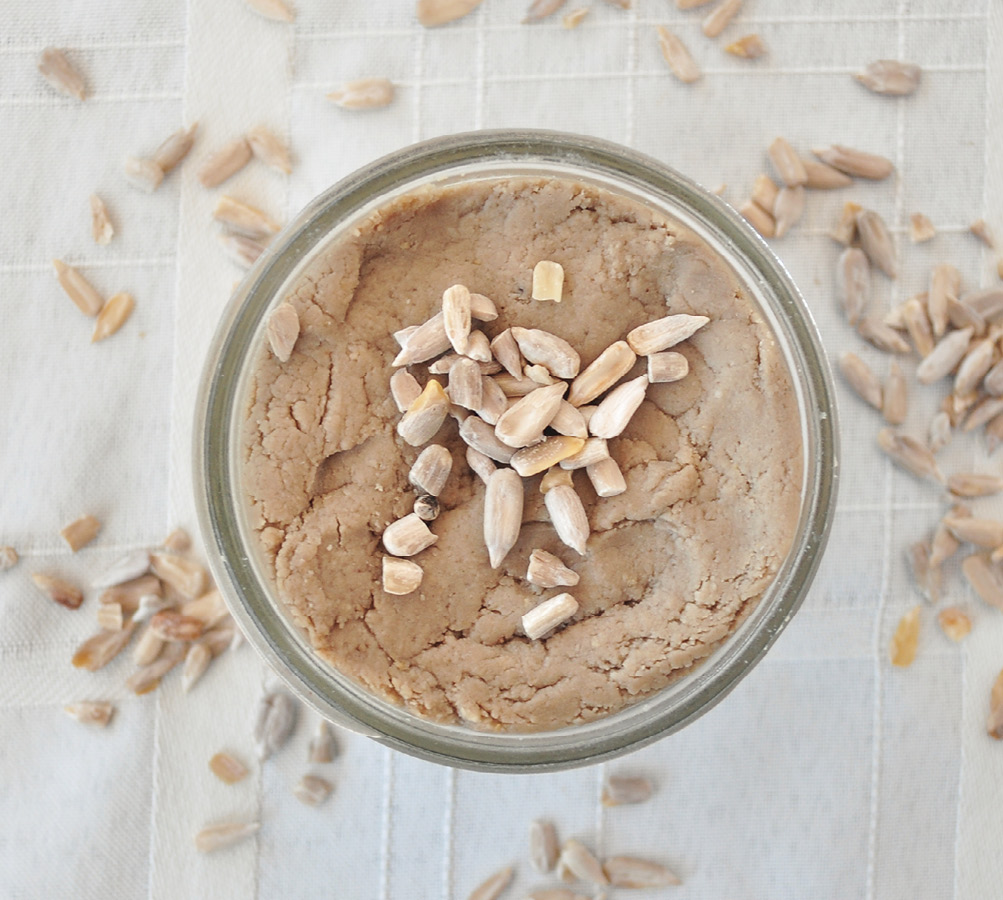
Sunflower Seed Butter
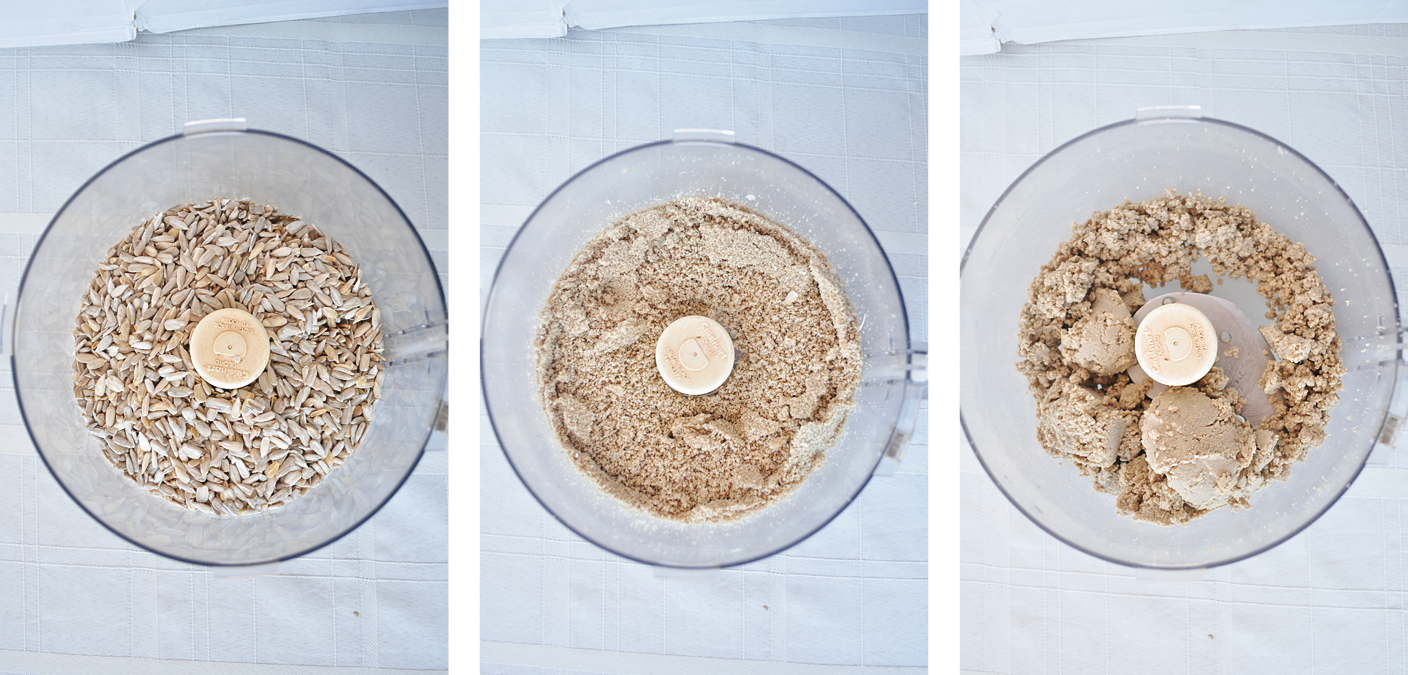
TECHNICALLY SUNFLOWER SEEDS are not nuts. However, I felt the need to include them in this book, since so many people suffer from nut allergies these days, and sunflower seeds can make a tasty spread. If you or someone you know is allergic to nuts, sunflower seeds are a great alternative. This butter is very easy to make, although it does require some patience.
MAKES 1 CUP (300 G)
2 cups (280 g) raw, unsalted sunflower seeds
2 tablespoons olive oil
½ teaspoon sea salt
1. Grind the sunflower seeds in a food processor or a high-powered blender for 2 to 3 minutes on high. Stop and give the seeds a few minutes to release some of their natural oils.
2. Start processing the seeds again, scraping down the sides often. Pause every few minutes to give the blender a rest and to allow the seeds to release more oils.
3. After about 10 minutes, the mixture will start to get moist and clump together. Add the olive oil and sea salt. Continue to process until it forms a spread. Making Sunflower Seed Butter takes much longer than nut butter, usually 20 to 25 minutes.
4. Transfer the butter to an airtight glass container for storage. It should keep at room temperature or in the refrigerator for 2 to 3 weeks.
NOTES
If you have a high-powered blender such as a Vitamix, Ninja, or Blendtec, this process will be much faster, although you’ll probably have to scrape down the sides more often. I used my Blendtec with the Twister Jar attachment, which cuts down on the time a bit.
PREP TIME: About 25 minutes