Mastering Basic Cheesemaking: The Fun and Fundamentals of Making Cheese at Home - Gianaclis Caldwell (2015)
Part 2. THE FUN OF MAKING CHEESE
Chapter 4. QUICK AND SIMPLE CHEESES
WE’RE GOING TO START OUR JOURNEY by making some really fun, tasty, super simple cheeses. The first lessons in cheese and milk chemistry are also the first dose of the magic of making cheese. In all of the lessons in this chapter, we’ll be using heat and added acid to force the solids in the milk — the protein, fat, and minerals — to separate from the watery portion. At the unseen level, milk behaves very differently when it is hot compared to when it is cold. It also reacts radically to having something tangy and acidic added to it — it curdles. The hotter the milk, the less acid is needed to produce this amazing chemical reaction, but — and here’s your first important milk chemistry lesson — the hotter the milk when the acid is added, the more chewy the end product will be thanks to the way that the heat changes and helps capture the proteins.
STEPS FOR MAKING QUICK AND SIMPLE CHEESES WITH HEAT AND ADDED ACID
This quick, super easy method involves just three basic steps. It produces a family of versatile fresh dairy products, including such classics as Italian ricotta and Indian paneer. Most recipes in this chapter will yield 1.5-2 pounds of cheese per gallon of milk (0.7-0.9 kg per 4 L) depending on whether the curd is pressed or not.
Heat Milk
This step involves using high heat ranging from 175oF to 220oF (79oC to 100oC) to form curds in the milk. Heat does several things to milk (including destroying bacteria and enzymes), and the changes it causes depend on both the temperature and how long the milk remains at that temperature. For the purpose of making high-heat and acid cheeses, the heat does two helpful things: First, it makes some of the proteins in milk stick together. This makes these cheese types higher in protein and clumpier in texture. Second, the heat helps the acid to coagulate the curd. The higher the heat, the less acid is needed, helping create a cheese that isn’t overly sour.
Add Acid
When the milk has reached the goal temperature, acid is added to make the curds separate from the whey. Slowly drizzle the acid into the milk while stirring gently. As soon as the acid is added, all of the proteins in the milk will begin to clump and form curds. (The first time you see this, it is truly amazing.) Continue stirring very gently to avoid breaking the curds up into little pieces; then stop and let the curds and whey set for 5-20 minutes.
Drain Curd
Once the curds and whey have separated in the pot, the curds are drained. This process might be as simple as scooping and pouring the steaming curds into a cheesecloth-lined colander, or you might add a step that includes gentle pressing to form a solid cheese. Remember the whey from high-heat cheeses is extremely hot so place the colander over another pot or in the sink to keep from getting splattered.
FAQ: WARMING MILK FOR ALL CHEESES
Q:After milking do I have to chill the milk before I make cheese?
A:No. One of the best things you can do if you have access to milk straight out of the animal is to start the cheesemaking or milk fermentation process right away.
Q:How often should I stir the milk while it is warming?
A:That depends on how quickly you are heating it. If it the pot is sitting directly on the hot burner, the milk should be stirred constantly. But, if it is sitting in a sink filled with hot water, you should stir it every few minutes.
Q:If the milk burns a bit, can I still use it to make cheese?
A:In theory, yes, but the flavor will be tainted. It is better to send it to the compost pile or chicken coop and start again.
Q:If the milk gets too warm, what do I do?
A:If the milk gets a little warmer than the goal temperature, you can set the pot in a sink of cool water and stir it until it cools down to the desired temperature. But, if it gets really hot, say about 170°F (77°C), consider making it into yogurt or ricotta, that is, unless you already are!
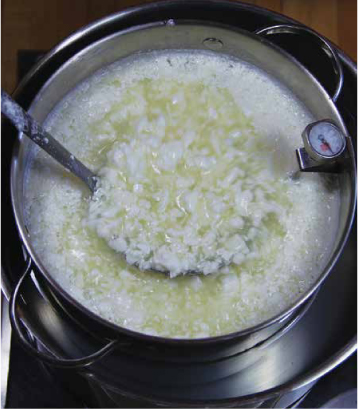
Once acid is added, the milk quickly coagulates into curd, leaving translucent whey.
Store and Use
You can use quick and simple cheeses right away, store in the refrigerator for about a week, or keep in the freezer for many months. Before storing, cover or wrap the cheese tightly in plastic to keep out unwanted flavors and yeasts and molds. These cheeses don’t have a long shelf life and are prone to spoilage because they are so moist.
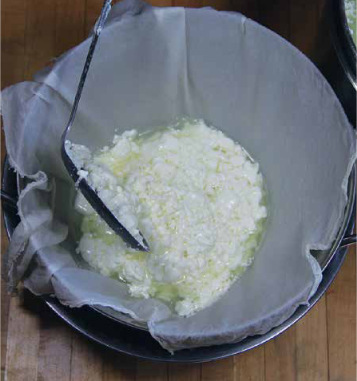
Acid curd being ladled into a cheesecloth-ined colander.
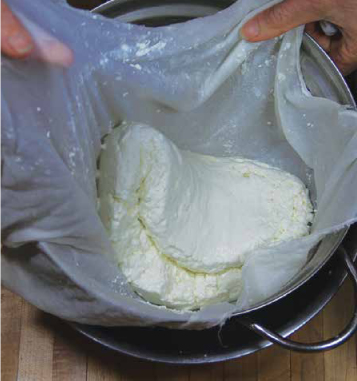
After a few minutes of draining, you can flip the curd in the cloth if you want to speed up the process.
WHAT TO DO WITH THE WHEY FROM QUICK AND SIMPLE CHEESES
The cheeses in this chapter will create whey that contains some milk sugar, acid, a bit of fat, and some protein (but not much). There isn’t much nutrition in it, especially compared to the whey we’ll collect in chapters 7 and 8, so it isn’t good for as many uses. You can use it to water acid-loving plants (such as evergreen trees, azaleas, and most berries), pour it in the compost or down the drain, or feed to the chickens.

After draining, paneer curd can be pressed using simple kitchen supplies.
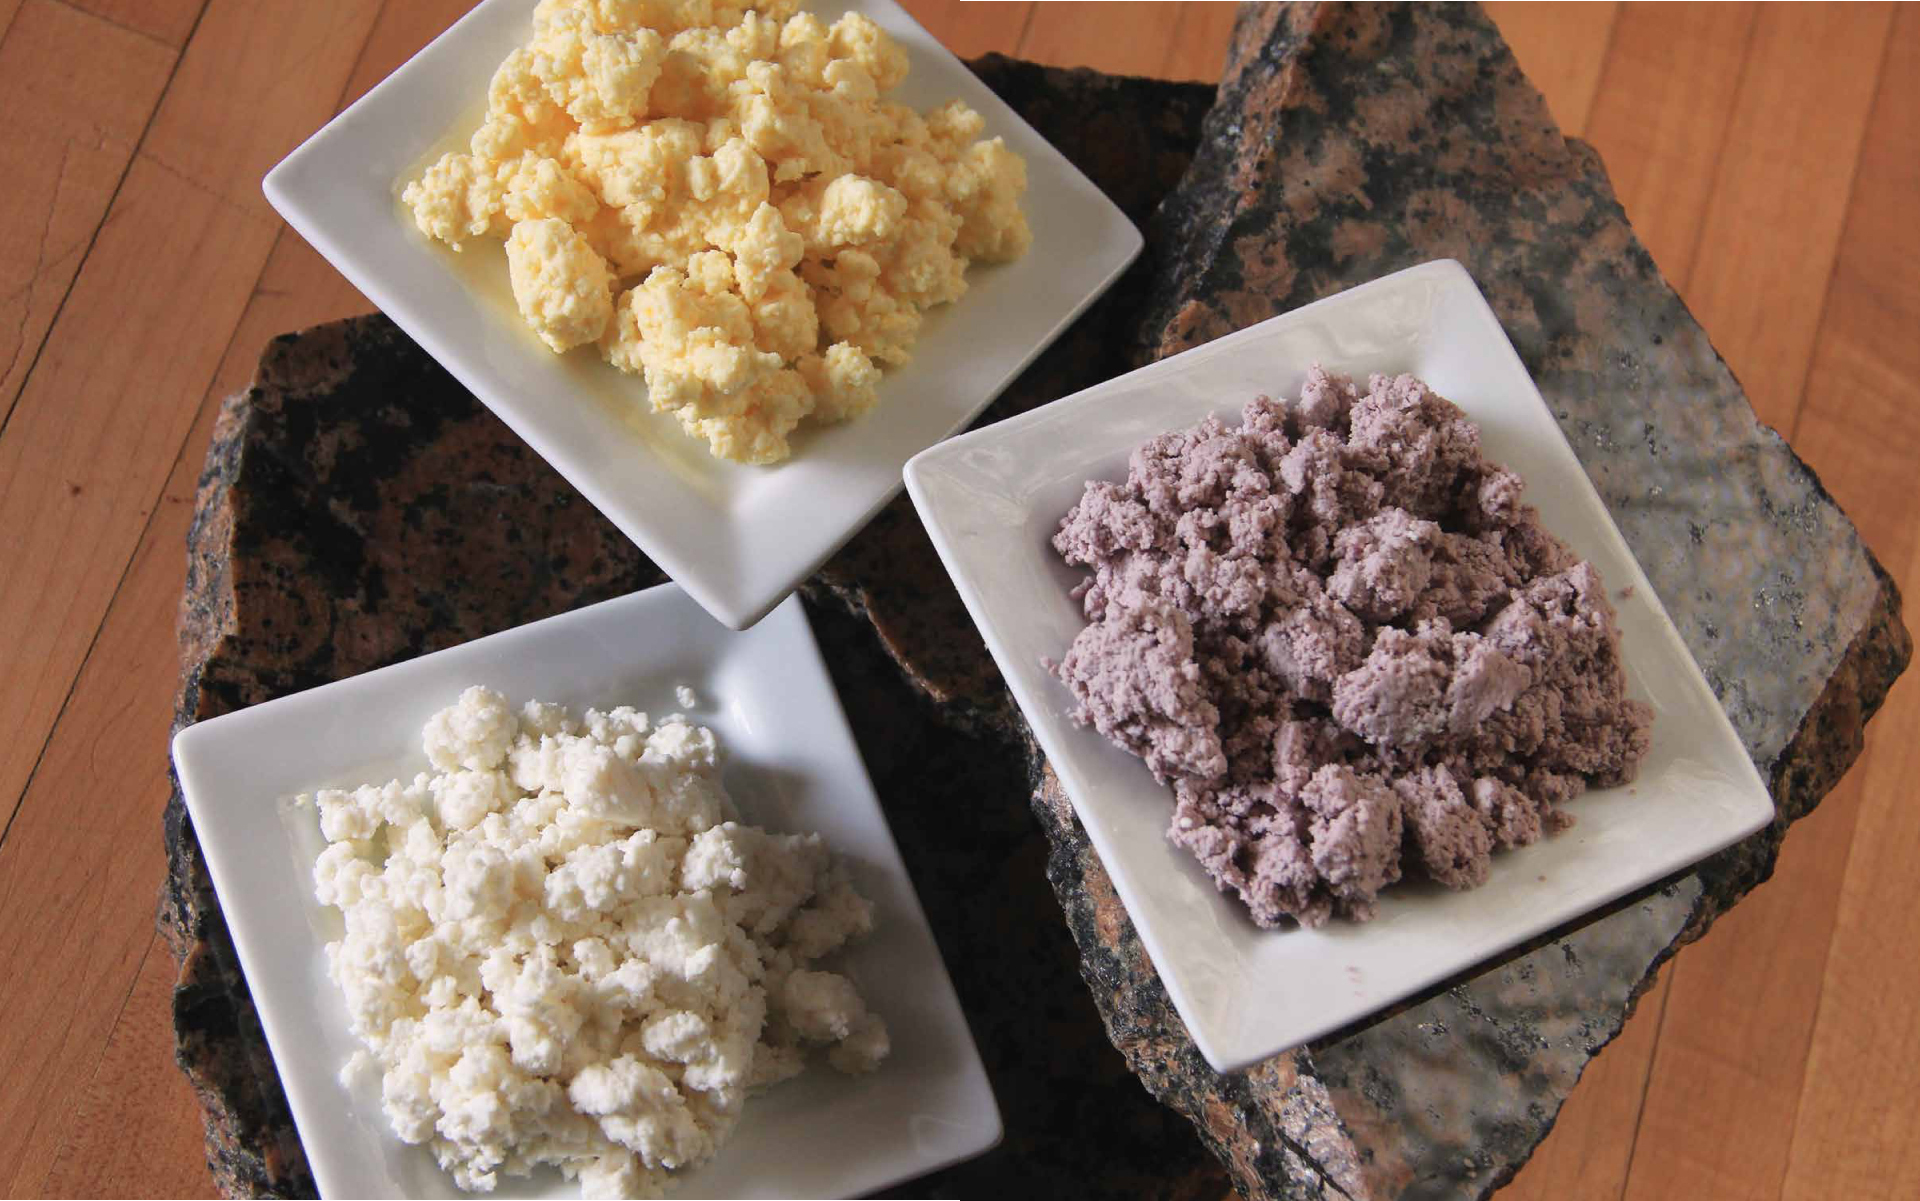
Ricotta three ways, clockwise bottom left: Acidified with cider vinegar, orange juice, and wine.

There is a whole family of fresh cheeses made with milk, whey, or a combination of whey and milk to which acid is added. Of these, North Americans may be most familiar with ricotta, but it comes in many other guises around the world including brocciu (BRO-shu) from Corsica (made from sheep’s whey and milk) and anari from Cyprus (made from goat’s or sheep’s whey and milk). While the fresh versions are better known, the cheeses can be dried and heavily salted to create tangy, pungent grating cheeses. Greek mizithra (made from goat’s or sheep’s whey and milk) and Italian ricotta salata are two well-known examples, but gauze bags of traditional anari can also be seen hanging in the windows of a few Cypriot cheesemakers. This is your first lesson in cheese anthropology; you will learn as we work together that pretty much every cheese has a doppelganger or two out there. So without further ado, let’s make our first cheese!
What You’ll Need
Milk: 1 gal. (4 L) whole milk
Acid: ½-⅔ cup (118-158 ml) cider vinegar, or fresh or bottled lemon juice
Salt: Any type of salt, even table salt with added iodine, to taste (here it is merely a flavoring, not a preservative)
Utensils: Pot, spatula, thermometer, ladle, cheese cloth, colander
Process in a Nutshell
Time: 10 min. active, 25-50 min. inactive
Steps: Heat milk, add acid, set, drain, salt, store and use
Step by Step
Heat Milk: Pour the milk into the pot, and place the pot over medium-high heat. Heat the milk, stirring constantly and scraping the bottom of the pot with the spatula, until the temperature reaches 180-185oF (82-85oC). If the milk starts sticking to the bottom of the pot, lower the heat and continue stirring.
Add Acid: Remove the pot from the heat. Slowly drizzle the vinegar or lemon juice into the milk while stirring gently; the curds will begin to separate immediately. Continue stirring gently until the whey is a translucent yellow, about one minute. Watch closely and stop stirring as soon as the whey turns clear.
Set: Let the curds set in the pot, uncovered, for 10 minutes; this gives them time to collect and cool a bit.
Drain: Position colander over another pot or in the sink. Dampen the cheesecloth and line the colander. Carefully ladle most of the curds into the colander, and then gently pour the rest of the curds and whey into the colander. Let the curds drain until they reach the desired texture, 15-30 minutes. (If you want the curds to be soft and moist, drain them for less time. If you want drier curds that are easy to make into a shape, drain longer.)
Salt: Add salt to taste, if desired. (I usually don’t add salt since the ricotta is most likely going to be used in a dish with added salt, such as lasagna.)
Store and Use: Use the ricotta right away, or tightly cover and store it in the refrigerator for up to 5 days.
Troubleshooting
Curd is too small or doesn’t form: Try stirring more slowly when adding the acid, adding more acid, or increasing the heat.
Cheese is too sour: Try adding less acid the next time and adding it more slowly so that you can see if the curd separates. If it is just too sour to use, try adding a pinch of baking soda to the final product to neutralize the acid.
Recap
Wasn’t that easy? Have you tasted it yet? The ricotta will be simple, a bit tangy, and have a pleasant cooked-milk taste. Milk ricotta (we’ll learn how to make whey ricotta later) can be made from any type of milk — skim from the grocery store, rich, creamy sheep’s milk straight from the pail, even camel milk, should you have one of those lovely beasts around — as long as it’s fresh and of high quality. But, the amount of cream or butterfat in the milk you select will have a huge influence on the texture of the cheese. For ricotta a certain amount of fat will help make it — brace yourself — creamy, but if you try to make it from something like half-and-half or cream, you will create a very different product. Speaking of cream, let’s move on to our next lesson!

Fresh ricotta can be rolled into spheres and used to make these delicious pistachio and nutmeg encrusted balls, drizled with maple syrup and sprinkled with roasted grapes.

In texture and use, creamy, decadent mascarpone (mas-car-PŌ-nay) is more akin to sour cream and crème fraîche than cheese. But, because it is not cultured with bacteria and is partially thickened by draining, it is indeed a member of the cheese family. While the initial thickening process is quick, it takes a day or so of patience to finish the process — but it is well worth it. In the next chapter, we’ll be making sour cream and crème fraîche, which you will be able to compare and contrast with this first, thickened cream recipe. These types of spoonable, dense cream are popular all over the world. In Australia there is even a widely available product called “thickened cream” that is made by adding gelatin to cream.
What You’ll Need
Cream: 1 qt. (1 L) whipping cream (about 30% fat) or heavy cream (about 36% fat)
Acid: ¼-½ tsp. (1-2.5 g) tartaric or citric acid dissolved in ⅛ cup (30 ml) water
Equipment: Pot, spatula, thermometer, cheesecloth or organdy, colander
Process in a Nutshell
Time: 30 min. active, 16-24 min. inactive
Steps: Heat cream, add acid, drain, chill, store and use
Step by Step
Heat Cream: Pour the cream into the pot, and place the pot over medium-high heat. Heat the milk, stirring constantly and scraping the bottom of the pot with the spatula, until the temperature reaches 195oF (90oC).
Add Acid: Slowly drizzle the dissolved acid into the cream while stirring gently. Maintain the temperature of the cream at 195oF (90oC), stirring gently, for 10 minutes. Remove from the heat and cool to 100oF (38oC).
Drain: Position the colander over another pot and line with a double layer of cheesecloth or a single layer of organdy. Carefully pour the thickened mixture into the colander. Let the mixture drain at a cool room temperature of 65oF-70oF (18oC-21oC), stirring occasionally, until about the thickness of yogurt or sour cream, usually about 16-24 hours.
Chill: Cover and refrigerate the mascarpone until cold; it will continue thickening as it chills.
Store and Use: Store in the refrigerator for up to two weeks.
Troubleshooting
Mascarpone is pretty hard to mess up (other than having the cat find it during the night while it is draining!).
Recap
Now you have two cheeses under your belt. While the process steps are similar, you can really see — and taste — the difference that the thick cream makes compared to the milk. The more fat in the milk, the less clumpy the coagulation will be. You can do more experiments by mixing any proportion of milk to cream, heating it up, and then adding vinegar.
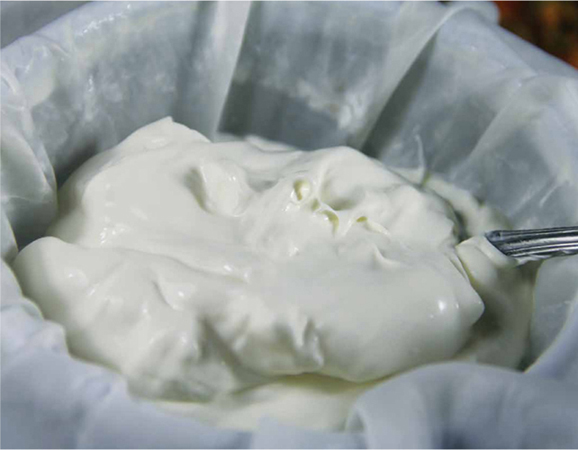
After 16 hours of draining, the mascarpone will be thicker than sour cream. When chilled it will thicken further.
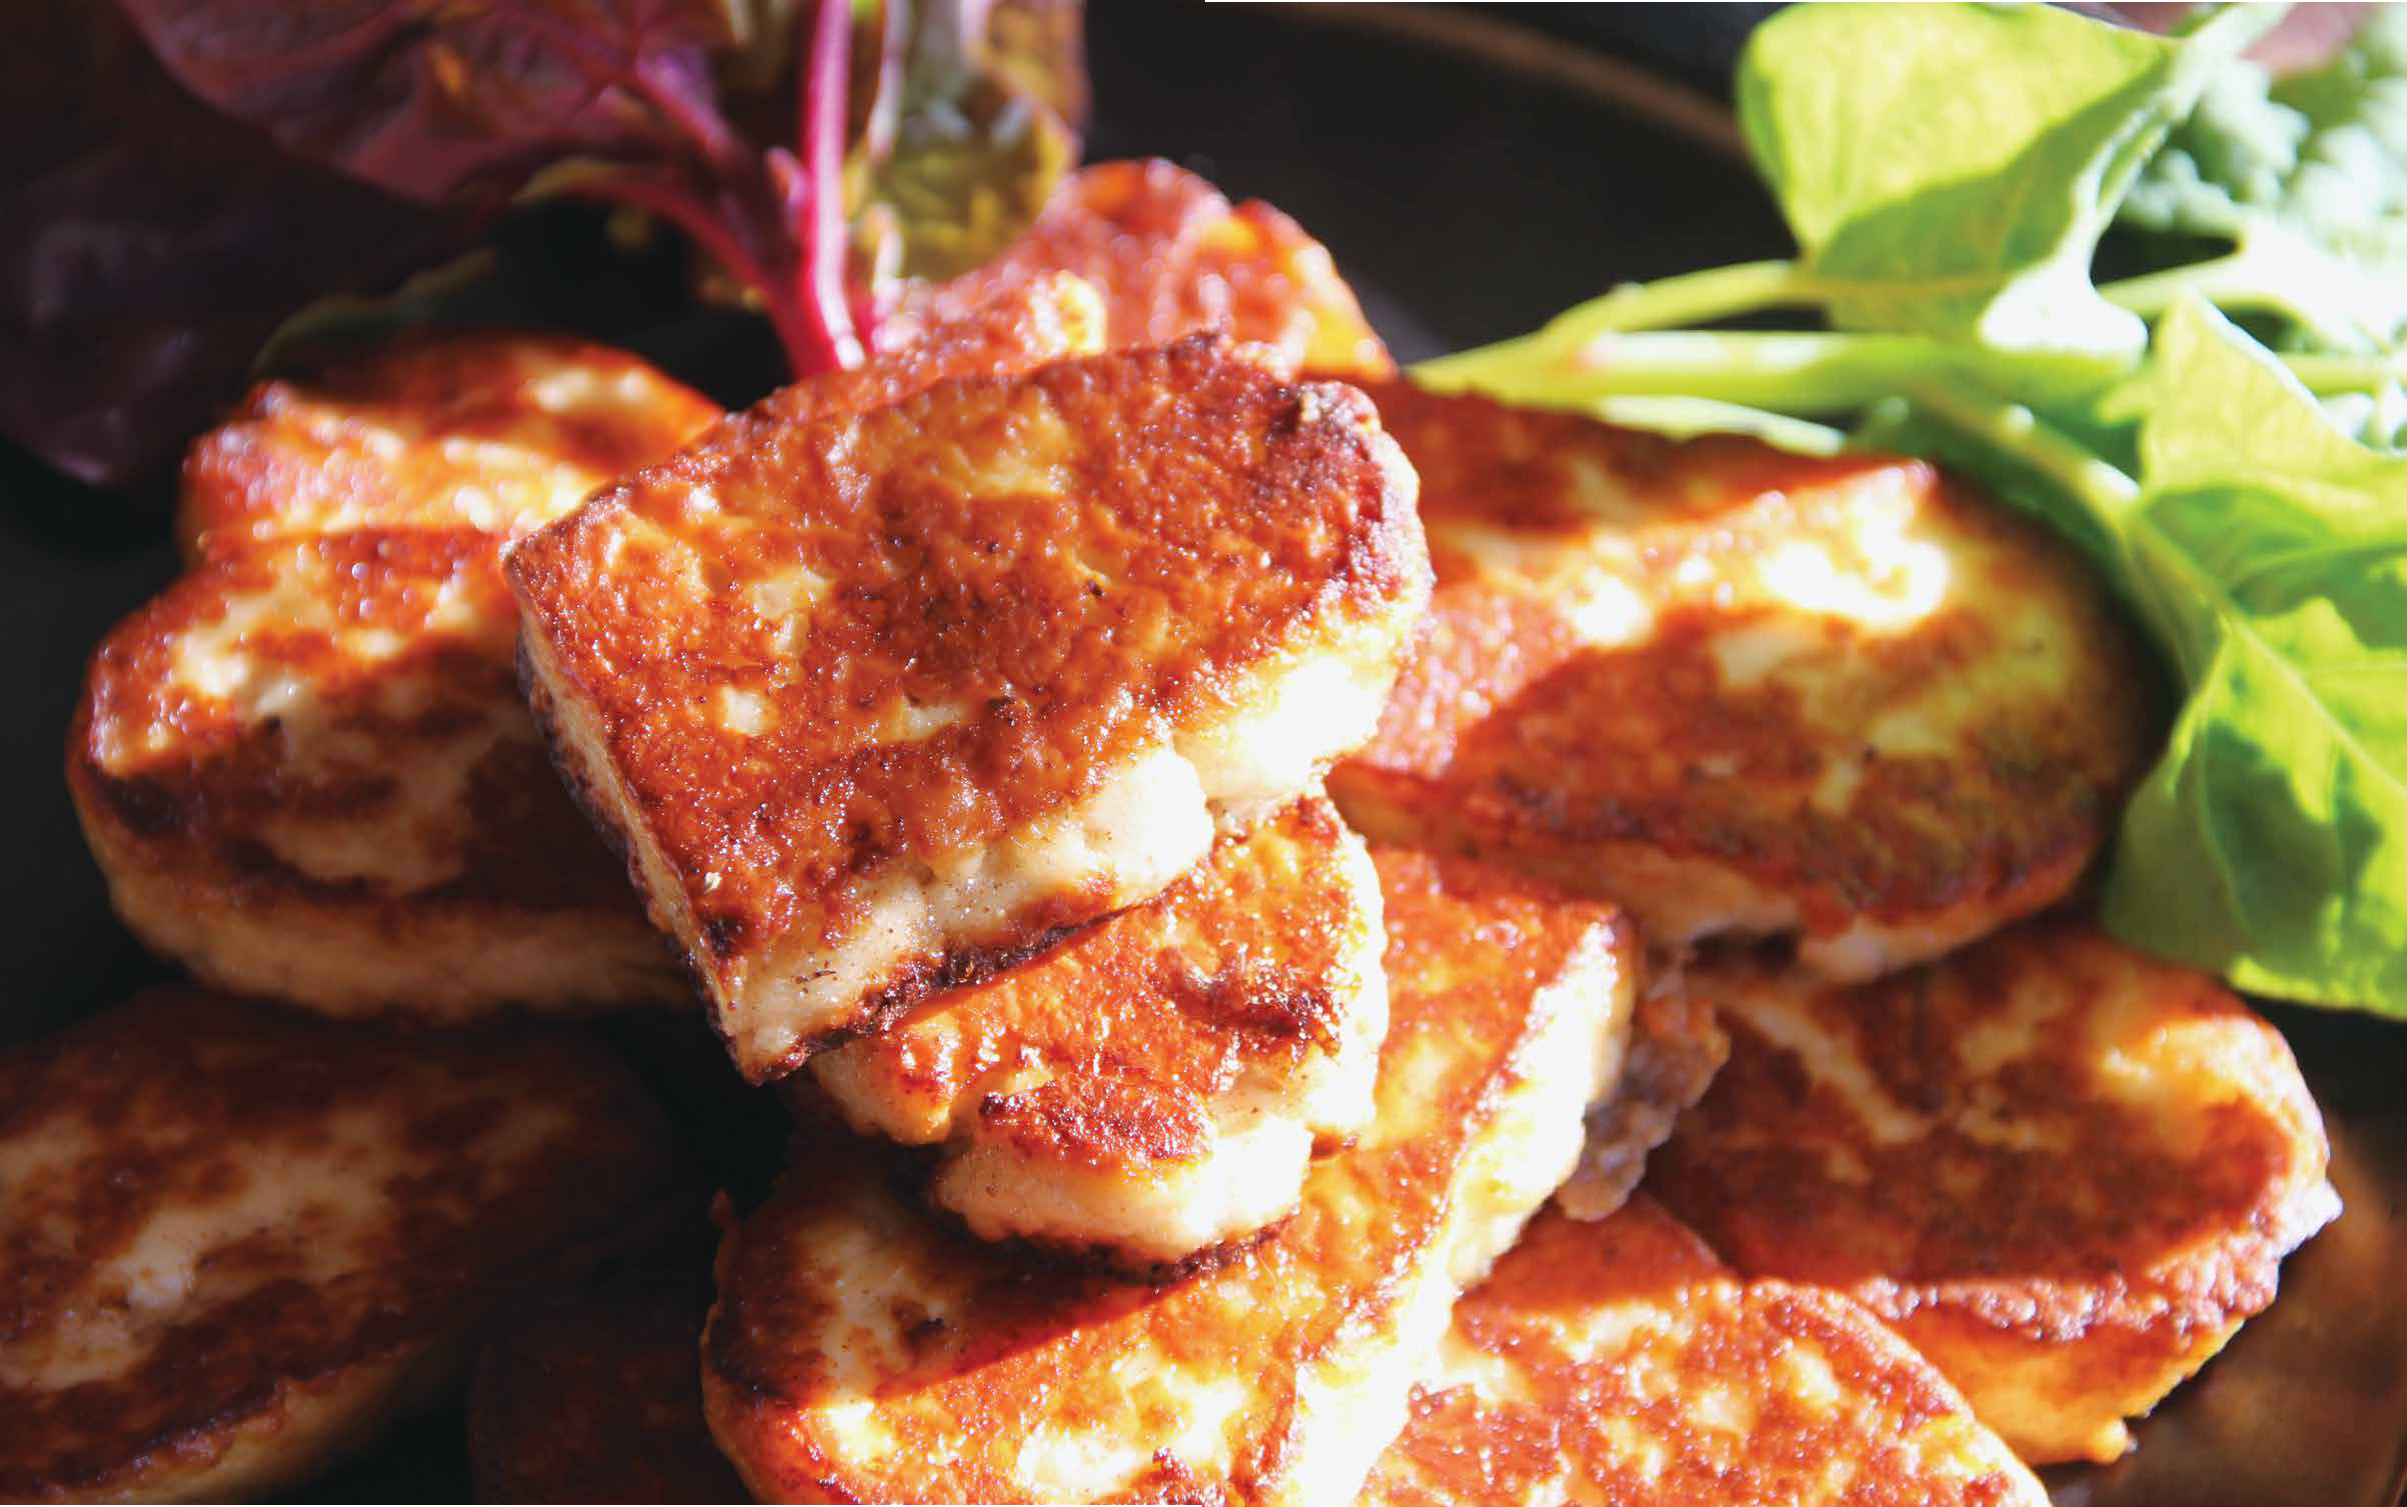
Paneer can be fried and served as a main course or combined with other dishes for protein, flavor, and texture.

If you are at all familiar with Indian food, you might have encountered a firm, non-melting cheese called paneer. A virtual twin to many other cheeses made throughout the world, such as pressed queso blanco and Lithuanian white cheese, paneer is — in my opinion — one of the most perfect cheeses. It can be made quickly, it is versatile (since it won’t melt), it can be frozen, and it is higher in protein than almost any other cheese (since very little protein is left in the whey thanks to the higher heat used to make it). Making paneer will be your first lesson in pressing cheese, so you are on your way to becoming a pro.
What You’ll Need
Milk: 1 gal. (4 L) whole milk
Acid: ½-⅔ cup (118-158 ml) cider or white vinegar, or fresh or bottled lemon juice
Salt: ¼ tsp (1 g) pure salt
Utensils: 1.5-2 gal. (6-8 L) pot, spatula, colander, cheesecloth, 2 plates, heavy skillet
Process in a Nutshell
Time: 20-30 min. active, 1 hr. inactive
Steps: Heat milk, add acid, set, drain, salt and press, store and use
Step by Step
Heat Milk: Pour the milk into the pot, and place the pot over medium-high heat. Heat the milk, stirring constantly with the spatula, until gently boiling, 20-30 minutes.
Add Acid: Remove the pot from the heat. Slowly drizzle the vinegar or lemon juice into the milk while stirring gently; the curds will begin to separate immediately. Continue stirring gently and constantly, until the whey is a translucent yellow, about one minute.
Set: Let the curds set in the pot, uncovered, for 10 minutes; this gives them time to collect and cool.
Drain: Position the colander over another pot or in the sink, dampen the cheesecloth with warm water, and line the colander. Carefully ladle most of the curds into the colander. Gently pour the rest of the curds and whey into the colander. Let the curds drain for 5 minutes.
Salt and Press: Gather the curds up in the cloth and squeeze gently to eliminate any extra whey. Open the cloth and stir in the salt. Gather three corners of the cloth tightly together and as close to the curd ball as possible. Hold the three corners in one hand, and with the other hand take the fourth corner and wrap it snuggly around the other three, as close to the curd as possible. Each wrap of the fourth corner should be below the previous wrap.(See photo) This will create a self-tightening knot called a “stilton knot.”
Place the curd bundle onto an inverted plate set inside of a large bowl or in the sink. Place another inverted plate on top of the bundle and set a heavy skillet or other weight on top of the plate; the combined weight should be 3-5 pounds. Press for 1 hour.
Remove the bundle from the press, unwrap the cloth, and — voilà! — your first pressed cheese.
Store and Use: You can use the paneer right away, but if you let it chill overnight, it will be easier to slice. Wrap tightly in plastic wrap or a zipper-lock bag and store in the refrigerator for up to 1 week or in the freezer for several months.
Troubleshooting
Cheese has lots of openings in it and isn’t smooth in texture: Use more weight the next time and tie the knot more snugly against the ball of curd.
Recap
Compare the texture of the paneer with that of the ricotta. Even just after draining and before pressing, the paneer’s texture should be much chewier and chunkier. The difference in the milk temperature and the time it took to heat to this temperature account for the disparity. The longer milk is held at a high temperature, the more proteins are captured in the curd. Like ricotta, paneer can be made with very high-fat milk, but not with heavy cream. Can you conclude why? Heavy cream has a lot of fat but not much protein. Without a significant amount of protein, you can’t make a cheese that you can press and slice.
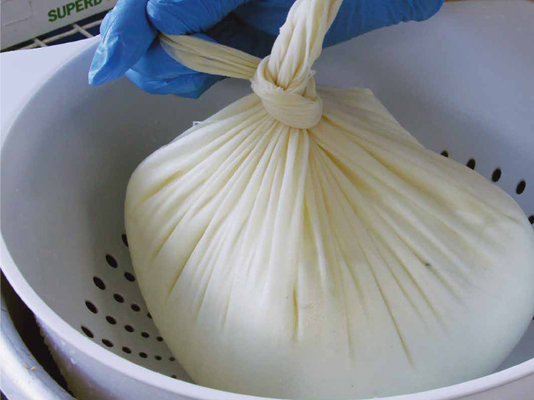
Paneer, as well as other cheeses (such as those pictured on page 3) can be pressed inside a cheesecloth bag made by tying a special knot. See instructions on page 54 (under Salt and Press).