Citizen's Guide to Armed Defense (2015)
CHAPTER SIX: TRAINING
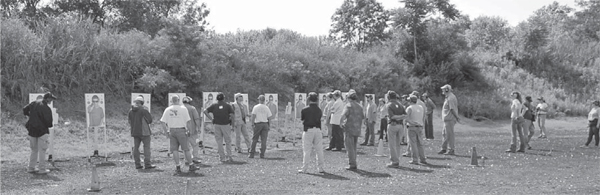
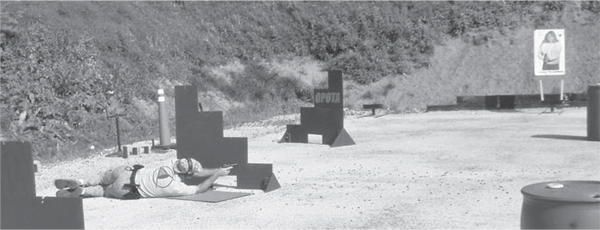
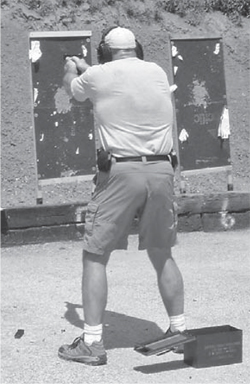
Firearms instruction and training can start on a static line but it must progress to be relevant.
Quite simply, training is the engine for winning a violent encounter. Whether we go home, to the E.R. or to the morgue, or instead send our assailant seeking medical care or a body bag, is dependent on the “sweat equity” we have paid in training. Yes the mental issues of our survival and the tactics we use are vital to 1) Avoiding a confrontation in the first place, 2) Observing the precursors and pre-attack indicators and warnings of an imminent threat, and 3) Effectively responding when faced with a deadly threat - whether with communication to the authorities leading to a law enforcement response; with non-deadly force such as pepper spray, a Taser or other less-lethal device; or with deadly force. Training is the key.
We will not “rise to the occasion” but rather “default to our level of training.”
CASE STUDY
“Dan” was a uniformed police officer responding to a domestic disturbance call. The incident involved a grown son and his parents. The son was a convicted felon who was assaulting his parents with his prosthetic arms/hooks. The reason he wore these prosthesis was that he had accidentally blown off both hands with a homemade hand grenade in a confrontation with state police in another state. After serving eight years in prison, he was released and moved into his parent’s home. After the parents called in to police announcing the domestic assault, the son had armed himself with a .308 bolt action deer rifle which he had taught himself to operate with his prosthesis. He took up an ambush position prior to the officer’s arrival on scene. As Dan emerged from his patrol car, the suspect shot him through the abdomen above his duty belt. The .308 round expanded and blew a fist-sized hole out Dan’s back, severing his duty belt.
Dan never stopped and never dropped. Though his belt was hanging down, only held on by “keepers” attached to his trouser belt, he successfully drew his duty pistol and he and his partner returned fire, killing the assailant.
I received a call from another officer who wanted me to know that Dan heard my voice in his brain yelling, “Stay in the fight! Get to cover! Get your gun out and rounds on target!”
It was a humbling experience in my training career. It wasn’t the first and sadly won’t be the last time some man or woman I’ve trained put their training and themselves to the test in a life or death encounter. Fortunately it won’t be the last time that the law of realistic training saving a life will be proven.
Make no mistake, I stand on the shoulders of giants, but more importantly those lessons passed on to me that have saved my bacon more than a few times, that I have passed on to countless officers I’ve trained, are now being passed on to you.
TRAINING MODEL
I’ve used a model originally given to me by noted trainer Bruce Siddle, which I modified and expanded over the years, in training firearms instructors as well as basic cadets and new officers. The model illustrates the training flow we employ to properly train men and women to work the street.
The proper training flow takes a student who is motivated to learn, and gives them:
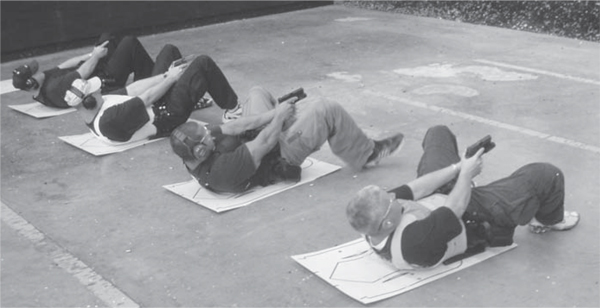
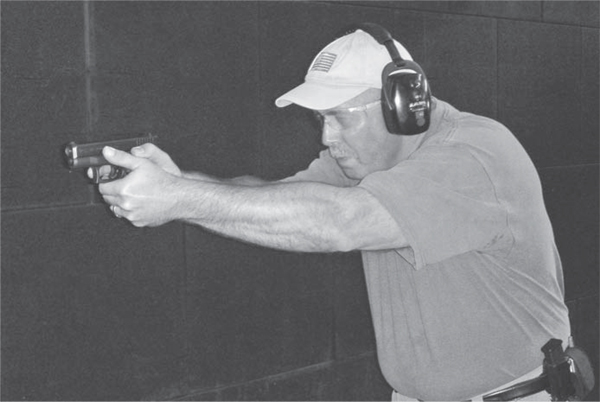
You must be able to fight regardless of your position. It is the trainer’s job to prepare you.
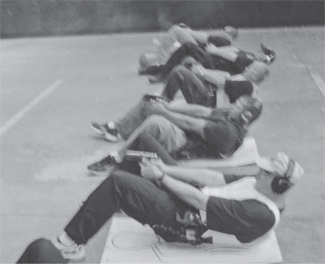
Training gives you the skills you need to win, regardless of what level you’re shooting from.
Proper firearms training content - Content that gives them proper firearm skills they can actually do in a stressful situation. Skills that actually have been proven to work or be worthwhile on the street or in actual violent encounters during an SNS response. Motor skills are broken down into classifications. The majority of our skills should be gross motor skills. Gross motor skills require large muscle masses to accomplish, versus fine motor skills. Fine motor skills require eye/hand coordination, such as precision shooting, and deteriorate in a SNS response. Complex motor skills, also known as serial motor skills, require the upper and lower body to work in concert. Driving, for instance, is a complex motor skill. Gross motor skills actually improve with stress, and since fine motor movements go out the window under stress, we want to revolve our self-defense and armed response strategies around gross skills as much as possible. I have actually seen more than a few shooters stumble and fumble actions such as reloads in just the stress of an agency qualification event. Shooting in defense of your life on the “two way range” of the street only magnifies this lack of coordination and inability to perform fine motor skills.
Proper motor skill development - We want to follow a sound methodology of skill development based on motor learning science. As we begin training in a new skill, static training in a closed environment is required. In static training and blocked practice, we isolate a specific motor skill to practice, the draw-stroke or presentation of the pistol from the holster, for instance. We may segment the skill into three parts, i.e. the beginning, middle and end. This segmentation is called chunking. The closed environment pertains to the fact that we are not reacting to changes in our environment or simulated threats. We are isolating and practicing a specific skill. As we begin to flow movements together we have entered the fluid training stage. The instructor may begin using stimulus/response training at this point. He may match a simulated threat, e.g. when a threat target turns, to a response, i.e. draw and fire two rounds. In the fluid stage of training it is seldom necessary to go full speed and power but rather to work on technique and smoothness. As my late Filipino Martial Arts Instructor, Suro Mike Inay used to say, “Let’s work on technique, speed and power will be out on the street.” The next level of training is to venture into open environment training wherein the student must react to simulated threats versus “On the whistle, draw and fire two rounds.” The student shoots when he perceives a threat, i.e. a picture threat target, and keeps shooting until it is no longer a threat, such as when the target turns or falls. Random training is often ignored by many programs. In random training, rather than do what the instructor calls out or instructs, the student downloads or retrieves the necessary skills to solve the problem or save the day. The student is forced to download the skills from short-term memory and this is a vital part of learning. Dynamic training need only compose a small part of training but is vitally important. We will deal with dynamic training later. A good way to illustrate proper skill development is using the British model of training which was taught to me by my friend and fellow trainer Hertfordshire Constable James Dowle: Explain, Demonstrate, Imitate, and Practice. The instructor should follow this flow throughout firearms training.
High repetitions - “Repetition is the mother of all skill” is a quote I’ll attribute to the late Filipino Master Edgar Sulite. Put simply, if you want to get good at anything from badminton to bowling, you’ve got to practice. We used to think that it took thousands of repetitions to get what laymen call “muscle memory,” what is now referred to as a Motor Program by Richard Schmidt, PhD the author of the seminal book Motor Performance and Learning (1991; Human Kinetics Books). What modern science has shown us is that these motor programs, think of a pistol draw-stroke as an example, even for the most complex motor skills, only require about 250 repetitions for smooth, fluid movements. It should be noted as Malcolm Gladwell has pointed out in his book Outliers: The Story of Success (2011, Back Bay Books) that mastery takes far longer and the best performers in any field of endeavor practice hard to get there and practice hard to stay there. We have to be careful that we don’t fatigue in our live-fire firearms training by training too long. This can lead to unintentional discharges and other safety issues.
“Do it again, and again, and yet again!” If you want to be good, you’ve got to practice.
Skill competence - Means that with proper and regular training, you get good at performing the skills whether it is the aforementioned draw-stroke, reload, use of cover, etc. Shooters whether new or old want easily obtained and attained skill levels. It is simply not that easy. Although, introductory skill levels of the fundamentals of shooting can certainly save your life. Indeed the difference between basic and advanced training are the speed, power and intensity of the output. They are the same skills. You want to achieve and maintain skill competence then put in the time and reps. In the beginning stages of motor skill development we must actively think about how to do something. With training we can progress to the point that once we get the “go” signal or stimulus we just respond with a successful motor program.
Cover is a lifesaver but in order to feel confident in its use, you must gain competence in training.
Skill confidence - The more you do something and the better you do it, the more confident you become and this confidence leads to control of the SNS. We know, for instance, that with our shooting and tactics training we begin to feel more competent which reduces our anxiety and helps control our fear. Essentially our brain feels like “this ain’t heaven, but I can operate here…” Meaning that we can focus less on our response and pay more attention to threat assessment, our tactics and controlling the threat. The first time a police cadet clears a house in training he feels totally out of control and out of his depth. With time and training however, he begins to learn the skill and begins to feel confident. In short order after doing the skill repeatedly he cannot become overconfident, but should feel in control.
Confrontation simulation - The last part of our training flow chart is confrontation simulation or simulated encounters. When I began my police career we used role-players armed with cotton ball rounds or balls of cotton stuffed into plastic casings with large pistol primers inserted and loaded into revolvers. Eye protection was mandatory in these scenarios. If and when the suspect or officer fired, the cotton ball would fly out and impact the target, within ten feet or so. Nowadays these types of events are known as force on force and are an integral part of most basic training programs.
The training flow circle leads back to a motivated student since, in order to stay good, you have to practice and follow the never ending circle of training.
CASE STUDY
A police captain once commented on in-service training and the requirement that officers continue to train throughout the calendar year and throughout their career. “When will they ever be trained enough?” He lamented that his officers were being pulled off his shift for firearms and assorted training programs…

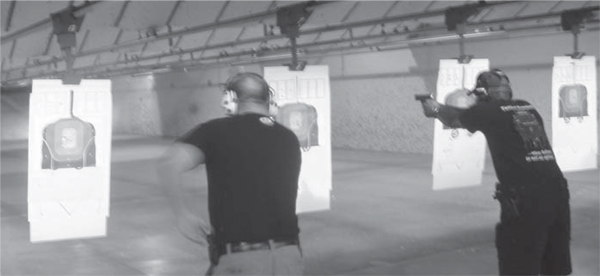
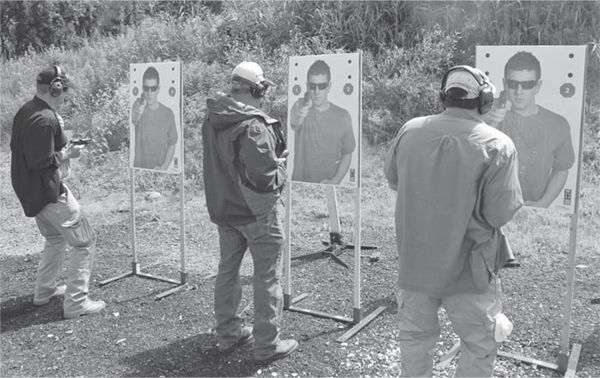
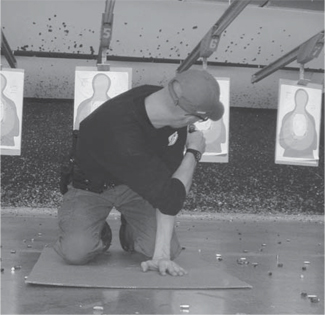
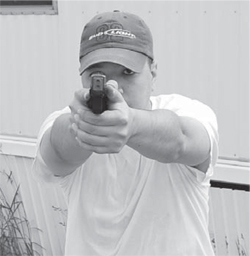
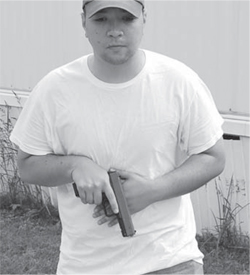
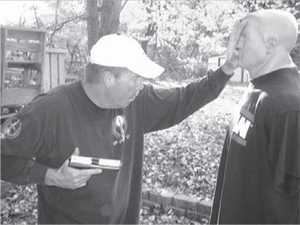
Here a student engages in force on force using airsoft. It is not enough to engage in static line work, you must apply the skills in confrontation simulation.
The answer to this question is that training never stops. It must be ongoing and must be a dedicated part of your decision to be armed.
STALE BEER
The concept of skill degradation over time is known as the stale beer concept. The truth is that the further you get from a training program the more you lose. As police trainers we now acknowledge that you are better off giving officers eight different one hour training programs during a calendar year than one eight-hour program. The “one time in time” training program leads to too much loss of abilities and skill. Can you imagine a Navy SEAL or Delta Force operator who only shoots once a year for a few hours? I was once told by a member of SEAL Team 4 that when these Naval special operators shoot, the military ships their ammunition on pallets and for eight hours a day during that training block or cycle all they do is shoot.
CASE STUDY
Over my police career I’ve seen countless officers who come to the range, for shotgun training specifically, who have lost most of their abilities or skills. Simple tasks such as loading, unloading, clearing, firing and cycling the 12 gauge pump shotgun have been lost since they last touched the gun.
The counteraction or preventative for skill degradation is practice. Simple practice on a regular basis keeps the skills sharp. Short of live fire there are many ways to train on a regular basis which we’ll cover shortly.
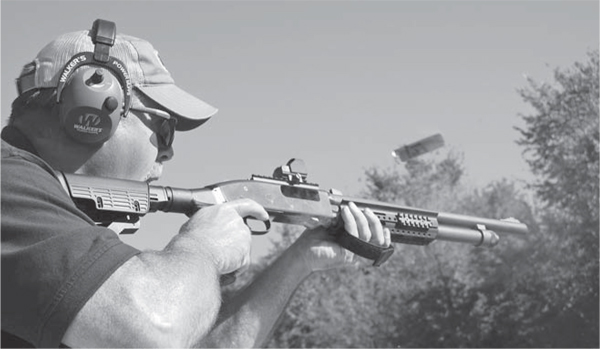
The 12 gauge pump is an awesome firearm but only through training can skills stay sharp.
THE THREE R’S OF TRAINING
Relevant - Training must be relevant to the task. The notion that you can engage in non-relevant firearms training and still be properly prepared for a violent encounter does not hold water. As an analogy, let’s examine boxing. You do not walk off the street and into the ring facing your first skilled opponent in a match. You would start with the basics of stance, movement and punches first practiced in shadow boxing. You would then progress to power development on the heavy bag and speed development on the speed bag. A coach would work with you using focus mitts while you learn slipping, bobbing and weaving as well as combinations. Interspersed throughout would be fitness work to develop stamina, wind and strength. Only then would you step into a ring for sparring work with protective head and body gear. This training would commence over time to get the required skills and then improve upon them. Boxing is, after all, the sweet science.
Unfortunately the training that most CCW permit holders go through is better described as an introduction rather than serious worthwhile training. Training preparation for the armed citizen need not be as intensive as a Olympic athlete or Navy SEAL, but good fundamentals practiced on a regular basis will certain improve your chances.
Realistic - In order to win the day in an armed encounter, your training program must be realistic, meaning the skills learned must be translate to the street or environment you’re in. There is a tendency nowadays for armed citizens to seek out “high-speed low drag” folks or alleged former operators for firearms training. Is it really necessary to train under one of these guys to achieve the level of ability to save your life? Not really. Sometimes we have to ask ourselves, does their job experience and the training they give translate to the armed citizen on the streets of America?
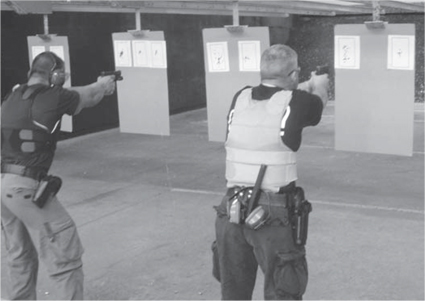
That said, standing in a booth at an indoor range or on a line at an outdoor range and loading only when the instructor tells you, slow fire shooting, not moving off the line of attack, etcetera is not conducive to winning on the street as well. There is a lot of realistic training that can be conducted without playing urban commando.
Repetitive - Sufficient repetitions to achieve “myelination.” As reported by Bobbi DePorter in her Quantum Learning book (DePorter, Hernacki; 1992; Dell), our brains have millions of nerve cells called neurons. Connecting these neurons are branches called dendrites. Myelin sheaths cover each of the dendrites. As you practice your armed response motor programs, this myelin sheath increases improving performance.
Encounters take place at “bad breath distance.” Training must include those realities.
Professional shooters shoot a lot and practice a lot. I’ve been told that one early three-gun master class and champion shooter went to the range with a five-gallon bucket of ammunition every day! Certainly we don’t want and cannot commit that amount of time and ammunition to our pursuit of effective armed response in our homes, at work or in public, but we can and should practice sufficiently to improve our tactics and shooting. How much time, energy and ammunition are up to you? Officers who have survived a life-threatening encounter tend to take their training more seriously than those who haven’t because they realize the importance of relevant and realistic training repeated on a regular basis.
THE FUNDAMENTALS OF MARKSMANSHIP
“Some people try to find things in this game that don’t exist, but football is only two things - blocking and tackling.”
~Vince Lombardi
Many people and some trainers will try to circumvent the fundamentals by attempting to use shortcuts. They will say, “In a real confrontation, you won’t see your sights so you don’t need to learn to use them,” or “In an actual shooting you’ll get a convulsive grip on the pistol and slam the trigger so, you don’t need to learn trigger manipulation or a correct grip.”
I have a saying I’ve used for years, “We strive for perfection but we’ll settle for excellence.” We understand that there will be skill degradation based on an SNS response but we need to learn how to do things correctly. Just like football in the Lombardi quote, we understand that shooting and tactics fundamentals will allow us to dominate and win an armed confrontation.
Platform or stance
The fundamentals must be developed in a repetitive way. Without solid fundamentals, success is a wish away.
Years ago I began using the term platform versus stance because stance in my mind equates to a fixed non-fluid position. In truth we strive to have the most balanced position or platform available but we don’t want to “grow roots” to the ground or floor during an armed confrontation. We need to get the best base possible since like buildings, everything starts from a “firm foundation.” By and large our shooting platform is with feet shoulder width or slightly wider with the support side foot slightly forward. Our knees are slightly flexed to act as “shock absorbers,” in general our toes, knees, hips and shoulders are oriented toward the threat. Shooting instructor Ken Hackathorn refers to this as our “natural fighting stance.” The platform we use to shoot a pistol can with slight changes be used to defend ourselves with empty hands, a shotgun, carbine or submachine gun. The late-great close quarters fighting instructor Colonel Rex Applegate noted that when threatened, man had an inclination to square off to the threat.
Toes, knees, hips and shoulders squared to the threat with weight on the balls of the feet.
The key to controlling footwork is a simple weight transfer to the balls of our feet. My friend and fellow instructor Chris Cerino, from Top Shot® Season One and Top Shot All Stars equates this weight shift to attempting to pin a piece of paper to the floor. Imagine a note was passed to you in school and a teacher was coming toward you. You shift your weight slightly to pin the note to the deck. This subtle little movement permits recoil to flow up your arms, down your body and into the ground, versus having your weight on your heels and even slight recoil pushing you around. Proper weight distribution keeps the pistol down in recoil, allowing quicker follow-up shots. You don’t want to lean too far forward so that you are off balance.
When stationary, moving or behind cover we strive to achieve the best base or platform possible but like most things in combat there is some compromise at times.
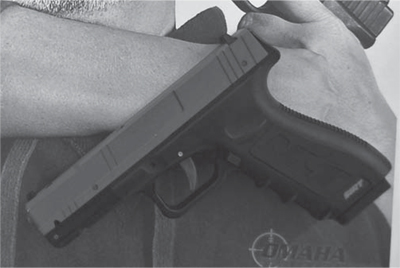
Grip
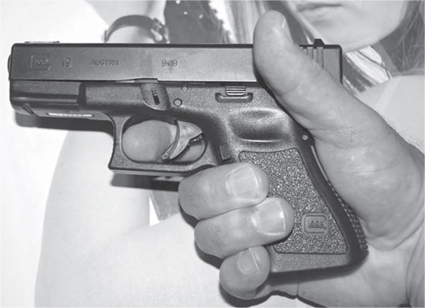
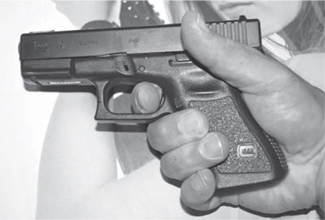
The 360-degree thumbs high and forward grip helps control the recoil and keeps the pistol on target.
Most modern competent instructors prefer a thumbs high forward grip on the semi-auto pistol but many don’t know how to explain or demonstrate how to correctly grip the handgun. World-class champion shooter and instructor Ron Avery states that in order to control the pistol you need both leverage and friction. Leverage is obtained by being high on the back-strap of the handgun so that the impetus of recoil while shooting transfers into the forearms versus causing muzzle flip, the higher the shooting hand is on the back-strip the more recoil control and less flip. The pistol or revolver is controlled with a “pincer type” grip of the two middle fingers of the shooting hand, curling and pressing rearward on the front of the grip. Although you grip with the pinky finger, very little pressure can actually be developed and most of our grip is with the middle and ring fingers. Grip energy is directed back into the “drumstick” of the thumb, so that pressure is front to back. The thumb is up or pointed toward the target in line with the barrel.
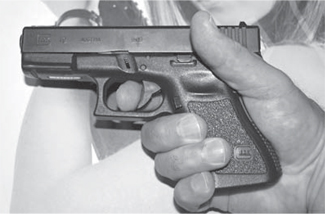
The trigger finger is indexed alongside the frame/slide area of the pistol, above the trigger guard. It does not enter the trigger guard until you are committed to taking a shot. Dr. Bill Lewinski and Force Science have done research on trigger finger placement using training pistols mounted with sensors. Although we instruct students to not place their fingers inside the trigger guard or make contact with the trigger, the reality is that in stressful situations we do. As Mas Ayoob once told me, “When stress goes up, the finger migrates to the trigger,” that said, this is a good reason to not have a “hair trigger” or light trigger in a defensive pistol.
As Ron Avery points out, we “set” the shooting hand wrist, we don’t lock it. By curling the shooting hand thumb downward and locking the wrist we actually lose trigger finger manipulation and dexterity.
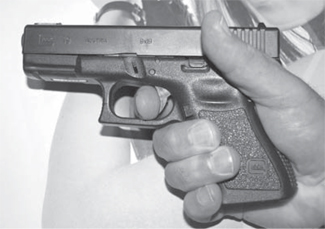
The support hand is the majority controlling hand during two-handed shooting. Whether it is 50% of the grip, 60% or as high as 80% as instructors such as Kyle Lamb suggest, the support hand grip is vital to control the handgun (and it’s hard to determine what percentage the support hand versus gun-hand offers since pistols don’t come with meters). Friction in shooting the handgun is obtained by a 360-degree grip around the pistol. With the shooting hand thumb positioned high and not curled downward an opening for the support hand is made on the grip. This is filled with the support hand. The wrist of the support hand is canted so that the thumb is in line with the barrel. If you were to point downward toward the deck with the index finger of this hand, the finger would point to the ground at a 45-degree angle.
The fingers of the support hand press into the fingers of the gun hand. Pressure is side to side.
Friction and leverage help control recoil and improve shooting.
A firm handshake type of grip is exerted on the pistol. Too little and you’ll be readjusting your grip after every shot. Too much and you’ll exhibit shaking of the hands and reduced ability to manipulate the trigger.
Note - The handgun should properly fit the shooter. I’ve seen male and female officers have problems with handguns which were too large for their smaller hands. They would have to move their gun hand around the gun in order to press the trigger. This is most pronounced in higher capacity double stack pistols with double-action triggers.
Trigger management
The manipulation of the trigger is the most vital piece of shooting. We can have a poor stance or platform, bad grip, fail to breathe or follow-through and ignore the other fundamentals - we may still hit. But if we slap the trigger we will deviate the muzzle to such a degree that we can completely miss the target. Even at close range.
I prefer the term trigger press. We are attempting to press the trigger straight back. The term “trigger squeeze” seems to connote a squeezing motion of the whole hand. This is not conducive to accuracy.
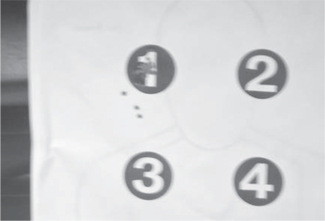
Groups happen based on the application of the fundamentals. Here the author works on bar target.
Years ago, I, like many other shooters and police cadets was directed by my instructors at the time to place only the tip or the pad of my trigger finger on the trigger. The problem with this is that, for me, it led to muzzle deviation by way of angular pressure on the side of the trigger. I have long ago changed to placing more trigger finger on the trigger, up to the first distal joint of the index finger. For me this positions the finger better on the trigger and offers better biomechanics. Where should you place the index finger on the trigger? Wherever it feels comfortable and natural and where you can best manipulate the trigger without angular pressure.
Results based on application of the fundamentals.
Parts of trigger manipulation
Many shooters, even many cops who’ve been on the job for years, don’t touch the trigger until they fire the shot. To fire a shot they go from outside the trigger-guard to making contact with the trigger face, through the trigger take-up or slack and then firing the shot, all in one movement. This oftentimes results in trigger slap. If we are committed to a shot, i.e. a deadly threat is presented by a suspect, or an instructor gives a fire command, then the trigger finger makes contact with the face of the trigger.
Finger completely off the trigger.
With an empty handgun, which you have double and triple checked, and no ammunition in the room, pointing at a safe backstop, you can try the following.
Take-up or slack
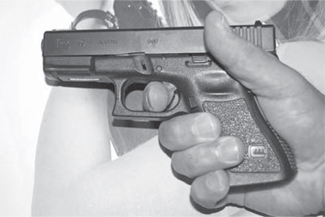
Trigger finger at first touch.
Each handgun trigger has an amount of movement prior to the striker activating, hammer falling or firing pin being released. This is called take-up or slack. Some pistols such as double-action/single-action pistols such as the Sig Sauer P226, Beretta 92, S&W 5906, etc. have a heavier weight and further distance until the shot breaks. Even the Glock series of pistols have as much as 3⁄8" of travel before the striker fires. My G19 pistol with its eight-pound New York trigger still has some take-up before the break of the shot. Single action pistols like the excellent DoubleStar 1911 have less movement or slack in the trigger and a lighter trigger weight but still have some.
Pressure wall
Trigger finger at “pressure wall.”
Trigger breaks and shot is fired.
As you “bump” up against the point where the sear breaks the shot, you are “up against the pressure wall.” Which means further pressure or movement will fire the shot. With an unloaded pistol and pointing at a safe backstop, i.e. a Safe Direction® wall pad or concrete block wall, you can learn where this pressure wall is on your pistol.
Trigger reset
Trigger has been reset and is ready for follow-up shot.
In dry fire mode with an empty pistol, after you have pressed the shot, while holding the trigger to the rear, manually rack the slide. If you then slowly release the trigger you will hear an audible “click” when the trigger “resets.” This means that another shot can be fired from this point with another press of the trigger. There are a couple of bad habits here. Many neophyte shooters remove their trigger fingers completely from the face of the trigger between shots. Once again this is trigger slap and is to be avoided since it adversely affects accuracy.
Shooting to reset
This is a term that many instructors improperly use. Two techniques some instructors teach can become training scars and are to be avoided: 1) Holding the trigger to the rear after each shot. The notion here is to follow-through on the trigger prior to releasing for better accuracy. 2) They then suggest after pausing and holding the trigger to the rear, you only then release/reset the trigger and press the second or subsequent shots off in this manner. This poor technique can often result in a student under SNS not firing more than one shot because they don’t release the trigger or poor accuracy because of so much movement of the pistol to fire one shot.
We all shoot to reset since we have to move our trigger finger enough for reset to occur. When shooting, I would recommend resetting the trigger on recoil and bumping up against the pressure wall to be ready for follow-up shots. Shooting great Todd Jarrett says that most tops shooters are trigger “slappers” and let their fingers fly off the face of the triggers between shots. I respect Todd’s abilities but don’t know if I would recommend slapping the trigger to new shooters. That said I do let my trigger finger fly and then take the trigger back to the pressure wall. If no further shooting is necessary, the finger is removed from inside the trigger guard and indexed at the slide/frame point.
Out of all the fundamentals as we have indicated, trigger manipulation or management is the most important. We can literally hold the gun upside down with one hand, stand on one foot, but if we smoothly press the trigger, we will hit our target.
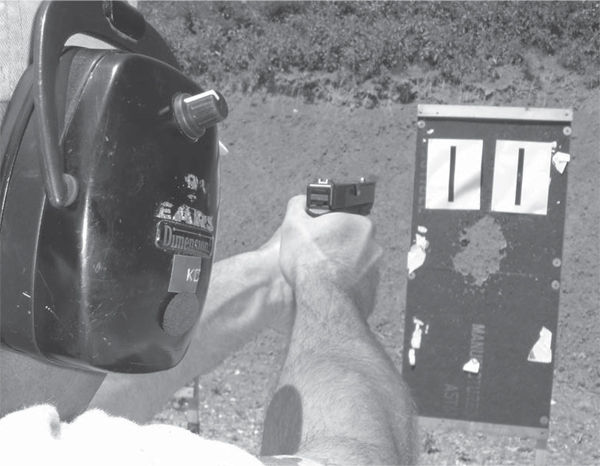
Sight alignment
Sight alignment is placing the front sight within the rear sight notch so that it is even at the top with equal light on both sides. Some sights, such as the Smith and Wesson M&P pistols have a smaller front sight so that there is more room on either side within the rear sight notch. Some pistols such as the Glocks have blockier front and rear sights so that there is little room on either side. As I have gotten older, I’ve been looking for better sights than are offered by most factories. I’ve had Lasik surgery with my dominate right eye corrected to 20/20 and my left eye at 20/40 to read with, this is called “mono-vision.” (Note - This was a mistake in my opinion and I should have had my left eye corrected to 20/20 because my sights are always blurry now. So if you are contemplating Lasik, and it is a great thing, and are a shooter, talk to your eye surgeon about this.)
Because of vision issues, I currently use a factory Glock rear sight but a green fiber optic front sight from Hi Viz® Shooting Systems. This allows my front sight to “pop” a little easier on target. I have also begun using an S&W M&P340 as a back-up gun. This five shot scandium frame revolver is outfitted with XS Sights 24/7 Express Sights. The big front sight featuring a Tritium insert is so much easier to see than my old Chief Special sights.
As part of Jeff Cooper’s Modern Technique of the Pistol we find the term “flash front sight picture,” meaning that at most combat distances one only has to flash or lightly focus on the front sight on target to achieve solid hits. Cooper wrote in his excellent book, To Ride Shoot Straight and Speak the Truth (1998; Paladin Press) that “the body aims and the eyes verify” which means that once natural point of aim is found and additional training obtained (a successful motor program is achieved) then the pistol is presented to the target and the eyes verify this alignment prior to shooting.
Cooper’s statement falls in line with modern research on what the eyes can focus on during SNS. My friend Randall Murphy from Meggitt Training Systems (the makers of the FATS® - Firearms Training Systems) has conducted state-of-the-art research using headsets which can track what a test subject’s eye focuses on during a stressful simulated armed confrontation. Murphy’s research clearly demonstrates that the eyes tend to focus on the threat but as Randy points out, that doesn’t mean we ignore the sights in training. As he has said to me, the sights are the training wheels with which the shooter learns alignment. We train using the sights to achieve a successful motor program so that in an actual armed encounter we raise the pistol to the same spot.
CASE STUDY
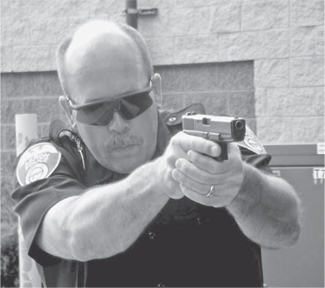
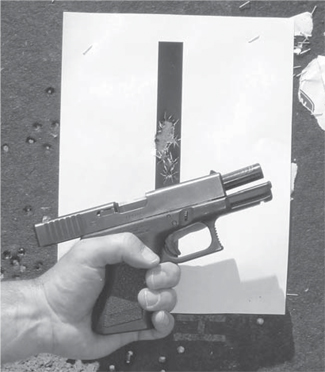
Over the years I’ve dealt with “point shooting” and point shooters ad nauseum. My experience and those of my fellow trainers is that point shooting at below eye level leads to misses even at close range. In countless confrontation simulation scenarios we have noted time and time again students missing at distances as close as five feet when their pistol is held at chin or chest level or lower. However once the student brings the pistol up to eye-level where you have the eyes, pistol and target in a straight line, hits are achieved.
I am a fan of red-dot, i.e. holographic or collimator sights. These sighting devices have been around since the Vietnam era with Bull Simons’ Son Tay raiders using them in their attempt to rescue American POWs held in North Vietnam. The raiders were troubled by their ability to hit targets in low or subdued lighting. They found the answer in a shooting supply catalog with the Armson O.E.G. - Occluded Eye Gunsight. The OEG superimposed a red aiming dot on target. Although the raiders did not rescue any POWs, who were moved prior, they did engage North Vietnamese and Cuban military personnel in a gunfight and were very successful with their red-dot sights.
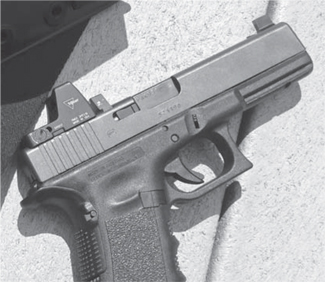
Trijicon RMR red dot sight mounted on Glock 17.
It took a long time for the military to widely adopt red-dots but in today’s military every service uses some type of holographic or collimator sight. They have been so successful that the technology has shrunk and is now being applied to pistols with Trijicon’s RMR - Ruggedized Miniature Reflex sight being used among others.
The nice thing about reflex or holographic sights is that one only has to “float the dot and take the shot.” Just superimpose the red-dot aiming point, chevron or reticle onto the target and press the trigger. There is no need to align the front and rear sight. As the United States Marine Corps found out years ago when testing these sights, there is no accuracy fall-out but there is an distinct improvement in speed on target.
A couple of truisms here: 1) Everyone’s sights move. Even the top shooters in the world cannot hold their pistol completely still. That said many shooters will attempt to rush or slap a shot when “everything is perfectly lined up.” This leads to trigger slapping or jerking and poor accuracy. 2) In order to hit, perfect alignment is not necessary. You can, at most handgun shooting distances, hit within an eight-inch circle if the front sight is bumped up against the left side of the rear sight, the right side, is barely visible above the bottom of the rear sight notch or is completely above the top of the rear sight.
A good saying in terms of sight alignment is, “See what you need to see to make the shot.” Meaning that at relatively close range shooting aggressively once the pistol breaks the line of sight will result in center mass hits on target. My corollary to this rule is, “The further the distance, the smaller the target, the more you have to pay attention to your trigger and sights.”
Sight picture
Taking sight alignment and placing it on what you want to hit is sight picture. As we have already stated, a strict focus on the sights or even front sight although desirous is not required at most handgun ranges. We bring the pistol to eye-level and can, using the entire rear frame of the pistol as a sighting system, achieve decent accuracy.
CASE STUDY
Howard Wasdin, Navy SEAL Team Six member and author of “SEAL Team Six: Memoirs of an Elite SEAL Sniper” (2011; St. Martin’s Press), once told me and a class of SWAT operators during a hostage rescue training class that when he was involved in the infamous Mogadishu, Somalia, combat operation that the hardest thing to do in combat when rounds are coming at you like a hornet’s nest is to pay attention to your sights to get rounds on target.
We can use the entire pistol as an aiming sight out to decent distances. Noted firearms trainer Bill Burroughs (Talon International) has commented that the entire pistol can be used as an aiming aid or sight until it no longer fits within the target area. Once the pistol is seen as larger than the target area, the sights must be referenced. Remember though, “The farther the distance, the smaller the target, the more you have to pay attention to sights and trigger,” headshots or small target areas at close range, require sight alignment/sight picture.
Breathing
Every warrior class from the Spartans to the Samurai and Miyamoto Musashi, including our modern warriors in military and police uniform, have come to find that breathing specifically what trainers now call autogenic or tactical breathing has direct impact on performing well under stress.
CASE STUDY
As a veteran of hundreds of SWAT narcotics search warrants, I would take the research that as few as three to four deep breaths can reduce your stress (take control of your SNS response) to the point that you can perform complex motor skills, and recommend it to our team. While riding in the SWAT raid van prior to enforcing a search warrant I would say, “Breathe to reduce your stress and focus on your task.”
Autogenic breathing simply means breathing in through your nose for a four count, hold for a count of four, breathe out through your mouth for a four count and hold for a count of four, then repeat. Anytime I’m aware of an increase heart rate during stressful times (I usually feel this in my neck) then I start using tactical breathing.
Over the years when I’ve faced dangerous of stressful situations or conditions, I’ll take a few deep breaths and immediately feel the stress and symptoms of an SNS response such as - tunnel vision, auditory exclusion, hands trembling, lack of cerebral cortex processing, all reduce or come under my control again.
Follow-through
This means staying on the sights and trigger through the break of the shot. Most times I’ve missed at small targets or during multiple targets events are because of I’ve failed to follow-through. Tactically there is a danger to relaxing too soon or coming off the gun and giving attention to persons, areas or things other than the threat. Once you come off the threat or attend to other things, the threat may attack or move.
It is generally suggested that you continue to shoot until the suspect is no longer a threat. This has been summarized by the statement, “Shoot them to the ground.” There can be a danger with putting a large number of shots on one suspect when dealing with multiple adversaries, in that it gives time for the other suspects to recover and attack. We do not want to fire only one shot at each suspect based on the realities of low hit probabilities in actual shootings (in police shootings hit rates average 20 to 40%). However, we do not want to give our other assailants the time needed to react and respond. Two to four rounds may be a decent number per assailant. The notion that under an SNS response you can: shoot one on bad guy #1, one round on bad guy #2, two rounds on #3, then come back and shoot #1 & #2 again some more, is not realistic and may not be even possible.
Accuracy wise in that brief period you are no longer paying attention to the sights, the pistol may be moving. On the range I’ve seen many students toss shots two and three on a first target when shooting two or more targets due to lack of follow-through.
To hit you’ve got to apply the fundamentals including follow-through. Coming off target too early leads to misses.
It has become “tactically cool” to come off the sights, trigger and target after firing. Instructors who advocate this technique do so with a “snap” back to a ready position. Looks cool but in real life, don’t you want to stay on target to make sure he’s down and out before coming off target? Of course, in my life and career I’ve never been described as “cool.”
CASE STUDY
Law enforcement has gone from a fire two and assess mode, i.e. firing a double-tap (one sight picture, two shots fired) because countless officers have done this only to find that the suspects shot were unimpressed and when the officer stopped their string of fire to take a peek, were shot in the process. There are a multitude of stories where suspects were shot and did not become instantly incapacitated. Stay on your sights, stay on the trigger until all the bad guys are no longer a deadly threat.
Recovery
Firearms instructor Chris Cerino and I began adding the recovery phase to the fundamentals years ago. We noted that far too many law enforcement officers were rushing to re-holster after encounters. The truth is that no one ever won a gunfight by being the first one to put the pistol or revolver back in the holster. I began using the phrase, “Reluctantly re-holster,” to describe this process after all, you’ve had this gun out of the holster or in a ready position for a reason, you need to be sure that the threat is down and out and no other threat exists before you relax. Even then, it is entirely possible that the suspect is just feigning incapacitation and playing “opossum.”
No one ever won a gunfight by being the first back into the holster. Reluctantly reholster and break that tunnel vision.
This recovery phase has several parts. The first is to counteract against the effects of the SNS and tunnel vision. We do that by lowering the pistol slightly and starting to expand our vision. We compensate for tunnel vision by turning our head.
We move to change our position to make a harder target and if cover is within steps, we move behind it. If a tactical retreat is advisable and possible we safely move away from the threat.
If the threat is down and out or under control we may hold on the suspect’s hips or a position if the suspect is prone, which allows us to see his hands.
If shots have been fired, we glance at the pistol to see the condition. Many times in high stress shootings or scenarios students will not give conscious thought to the condition of the pistol, i.e. they shoot to slide lock back and are standing, post incident, with an empty pistol in hand.
We can also conduct a “tactical reload” also known as a “reload with retention” to ensure that our pistol is topped off with ammo and ready to go.
Regardless of whether we’ve have fired or not, we want to look around for other citizens or police personnel, witnesses and possible other threats. The eminent firearms instructor John Farnam states, “Life is a live-fire, 360-degree environment.”
If and then we determine that it is safe to do so, we reluctantly re-holster.
GIVE AND TAKE
A number of years ago firearms instructor Andrew Blubaugh, former Recon Marine, police trainer, and director of Apex Shooting and Tactics, applied the concept of “index and trade” to the fundamentals of marksmanship. The concept was name changed by Chris Cerino to “give and take,” and subsequently incorporated into firearms programs we taught for the state LE academy.
Give and take. If some of the fundamentals are not available, like platform, focus on the others.
Give and take means that if one or more of the other fundamentals of marksmanship are not as strong, then a shooter must focus on the others to achieve accuracy. For example, if a shooting platform or position is not what it should be because of terrain or movement, then the shooter should focus on the other fundamentals. Remember my example of shooting a pistol upside down on one foot, with one hand? When I do this in basic programs or with new shooters, the emphasis has to be on the trigger and sights to make the hits.
THE BASICS
The basics of shooting are the fundamentals of marksmanship (FOM) and they need to be trained and competently attained and attended to with regular practice. Students always want “advanced” or “high-speed low drag” training. The problem with this notion is that they have frequently not competently attained the basics. In truth, “Advanced techniques are the basics mastered,” and like focus on the basics in football, focusing on the fundamentals of marksmanship wins gunfights and armed encounters. You will often hear a coach tell his team after a disappointing loss, “Monday, we’ll be focusing on the fundamentals.” You never hear a coach say, “We need to get more complicated and intricate.”
How then can we attain competency in the basics? Proper training, time, repetition and practice are the methods we use.
DRY FIRE
All shooters, regardless of competency levels, benefit from dry firing their handgun as well as engaging in dry (unloaded) weapon manipulation drills of the firearm. Few of us can afford to live-fire on a regular basis to maintain proficiency with our skills. Dry-fire is an important way to develop the myelination I talked about earlier and successful firearm motor programs.
Use a Safe Direction Composite Armor Board from my buddy Steve Camp at Ravelin Group, or an ammo can filled with sand, or a safe backstop such as a cinder block wall. Double, then triple check to make sure your handgun is unloaded and no live ammunition is in the same room.
CASE STUDY
The Federal Air Marshal’s management gave instructions for their personnel not to engage in “dry fire” in hotels while on assignment because they had to pay for too many big screen TVs and plumbing repairs in the walls of hotel rooms where some of the marshals had stayed.
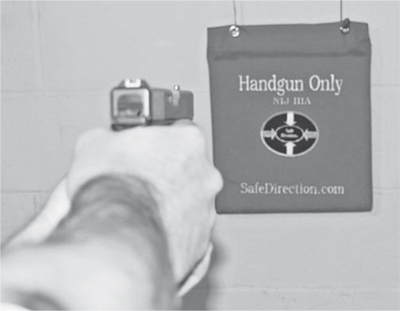
Safe Direction makes an excellent dry fire product to lessen the chance of an unintended discharge injuring someone.
Engage in dry-fire sessions working on the FOM including trigger and sights. Striker-fired pistols will have to be manually racked after each trigger press. Some instructors have called this action a “training scar” since the typical response to a “click” and not a “bang” is to engage in malfunction clearance drills. However, in all the incidents where I have responded to a threat on the street and range work, I’ve never seen this become a problem. In training we are isolating a skill such as trigger press and we can do that without adverse impact on our defensive pistol work. This is one of the ways that shooters have improved their FOM since man has been carrying firearms.
We can practice various aspects of our combat handgun skills - the presentation of the pistol from the holster, reload with retention, reload without retention, use of cover, movement, etc. To improve our performance the purchase of dummy training rounds is recommended. I prefer the metal case and orange plastic simulated bullet. The metal case will stand up to the rigors of repeated use and the orange plastic faux projectile is easily seen and hard to confuse. That said, inspect each dummy cartridge prior to loading in a magazine. These dummy rounds allow the slide to go into battery when conducting reloading drills.
As a way to improve your training, use a simulated target such as an actual Shoot-N-C target or even a photocopy of a threat target.
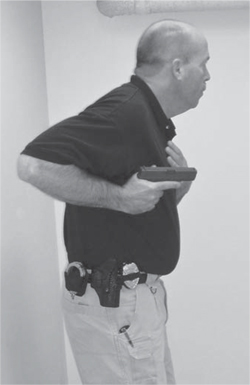
Let’s examine a dry-fire presentation of the pistol from the holster with a four-count draw-stroke.
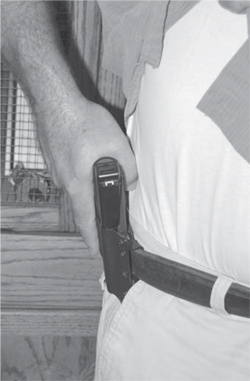
Count 1: Achieve a solid three-finger grip of the pistol in the holster.
Count One: Obtain a solid three finger grip of the pistol in the holster, while deactivating any safety mechanisms such as thumb breaks or other retention devices, the off-hand is placed center palm on center chest to facilitate a block, parry, or strike.
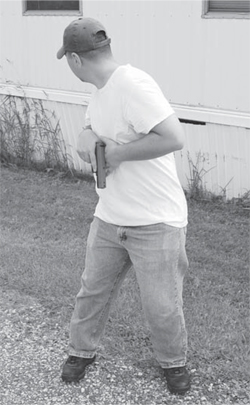
Count 2: Rock the pistol out of the holster and lock the wrist, indexing the thumb of the shooting hand at the outside of the pectoral.
Count Two: Rock & Lock - As soon as the muzzle clears the top of the holster, rotate or rock the muzzle forward and toward the threat while locking the wrist. Properly done, the thumb of the shooting hand is indexed on the outside of the pectoral area with the pistol slightly canted outboard so that in live-fire the slide can properly reciprocate. Some trainers advocate a muzzle canted downward position but this can lead to misses at distances as close as five or six feet and even hits may be in soft tissue in the belly. As Dr. James Williams states in his Tactical Anatomy class, “Between the naval and nads there’s nothing good to shoot.”
Count 3: The hands meet at center chest, pistol pointing toward threat.
Count Three: The support-hand and gun-hand meet at center chest at what is high-ready position with muzzle oriented toward the threat. From here the pistol is lifted up to eye-level, pressed outward toward the threat, while the trigger finger begins applying pressure to the trigger.
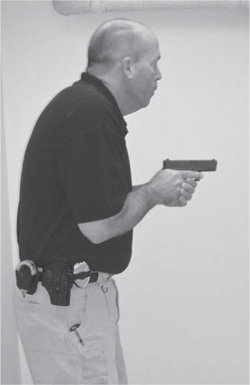
Count 4: Handgun is lifted up and pushed out toward the threat. Shot can be fired, if necessary, as handgun breaks the line of sight.
Count Four: The arms are at full extension, the pistol is held at eye-level with soft or hard focus on the front sight and all slack is taken out of the trigger to fire a shot.
Handgun is returned to placement at Count 3, then Position Sul is used as 360 scan is commenced.
Note - If a shot is not necessary, the trigger finger does not enter the trigger guard. It is fully anticipated that the armed citizen will have a greater possibility to draw and point the handgun at a suspect to stop a developing threat, than actually drawing and firing.
Note - As master shooter and instructor Bill Rogers of the famous Rogers Shooting School states, the time difference between placing the trigger finger on the trigger and keeping it outside the guard in a shooting scenario is substantial. I would recommend without hesitation Roger’s book Be Fast, Be Accurate, Be the Best (2010; Rogers Shooting School Publications) and his Panteao Productions training DVD Reactive Pistol Shooting.
RECOVERY TO THE HOLSTER
To recover to the holster we recommend the following procedure. Lower the handgun to the subject’s hips and begin to scan the area by turning your head, return to Count 3 of the draw-stroke with the forearms resting on the floating ribs. Transition to Position Sul and move your feet to check the areas to your right, left and behind you. Re-holster with the support-hand indexed on the chest to protect yourself.
To add realism via a time constraint, you can use your smart phone as a shot timer. Surefire has a free app that you can download to engage in worthwhile structure practice. Remember be smooth in your movements.
Hundreds of these presentations and recovery to the holster can be practiced in the safe confines of your home if the safety protocols are followed! By clearing the pistol and engaging in safe practice you won’t shoot your plasma TV or your wife’s Pekinese.
TRAINING GEAR
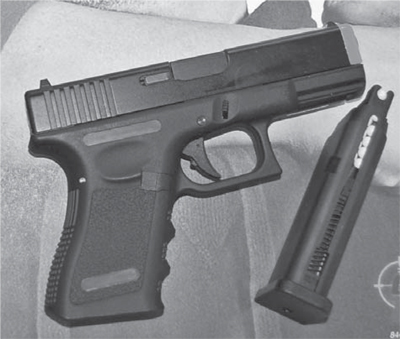
S.I.R.T. training pistol
The Shot Indicating Resetting Trigger Training Pistol from Next Level Training (NLT) is a training device that I’ve come to appreciate more and more. Originally introduced to me at the annual conference of ILEETA, the SIRT pistol allows realistic training via the use of a laser training “pistol.” Replicating a Glock 17 sufficiently that it will fit in my Blackhawk SERPA duty holster, the SIRT PRO model which I have been working with is a completely non-firing training device with all the controls where my G19 are located. With a removal and weighted simulated “magazine,” I can practice reloads as well (although the slide does not move at all). The weight is right at 28.9 ounces for the SIRT and 30.7 ounces for my loaded G19 with a 15 round magazine.
The excellent S.I.R.T. training pistol. Simply nothing else like it.
The SIRT PRO model features dual lasers. When your finger begins to apply pressure on the trigger a red laser beam is projected from the lower laser (where the guide rod would normally be located). This red laser is adjusted by NLT to impact lower than the sight line. This would allow an instructor monitoring a student’s use of the device in training to track if the student has his/her finger on the trigger, where the SIRT pistol is pointing and movement pre and post trigger break.
A green laser is sighted in dead-on with the sights and “fires” when the trigger is fully pressed. If the trigger is held to the rear and not reset, the green laser stays on.
These green and red lasers can be reversed by an internal switch, so that the green turns on first, then the red.
Training opportunities are endless because, unlike air soft or marking cartridges, there is no danger to the environment. No safety equipment is necessary and targets can be simply copied from the internet and printed, standard paper or cardboard targets, martial arts striking bags like a boxing heavy bag or a Body Opponent Bag (which simulates a real man), or even an innovative target of a plastic sealed bowl filled with water (I’ve done this with a one gallon jug of spring water from the store). In this way you can train by yourself with a resetting trigger pistol (unlike dry firing with an unloaded pistol which needs to be reset after every shot). I’ve used all of the above as targets. In combination with a SHOT timer such as my Competition Electronics Pocket Pro, I can work on my draw-stroke, multiple targets, use of cover, on and on. Just last year while convalescing from knee surgery, I set up some training using a SIRT pistol and other laser training technologies in my den. Gave me something to do, opportunities for practice from concealment and more, as well as beating the heck out of watching TV on a cold fall day when trips to the range were not recommended.
Body Opponent Bag can be used with SIRT pistol to incorporate empty hand striking as part of drawstroke.
Just yesterday I consulted with three trainers from the state police academy who were interested in improving their firearms and officer survival training for their students. What I recommended was the purchase of SIRT pistols and then progression through air soft drills conducted with an instructor, before they introduced confrontation simulation. Does this sound like the boxer analogy we used earlier? You bet.
Another option for SIRT work is the training pistol used in conjunction with a free smart phone or iPad app called Ubersense which is a “video analysis & sports coaching app.” If you have a beginning student or student experiencing problems and would like to diagnose their movements, just video their FOMs and review it. Many shooters don’t understand how a trigger jerk or slap can throw them off target or how they are failing to follow through while shooting multiple targets, etc. You can even draw lines or other shapes to focus their attention and ship the video to an email address for further review. Pretty cool technology that can be used out in the field for shooter training.
LaserLyte
LaserLyte makes some neat and fairly low cost training devices as well. In my officer at work I have a LaserLyte plastic trainer pistol (Model LT-TT), a LT-PRO red laser that works in pistols and revolvers from .38 special (minimum two inch barrel) to .45 semi-auto pistols. The device is sized by tightening or loosening the adapter and “fires” a laser dot on target when it “hears” the hammer drop. The LaserLyte training pistol has a trigger that resets after each shot. Although this pistol has more of a “toy” feel to it, the sights are good and the ergonomics well designed to recreate a modern striker fired semi-auto pistol. I simply install the laser LT-PRO in the barrel of the pistol and am good to go with training.
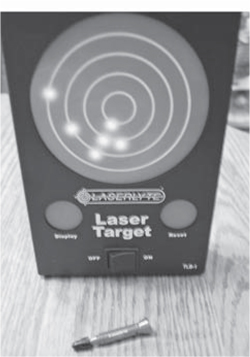
LaserLyte Laser Target and LT-PRO laser for use with standard handgun.
LaserLyte has several laser training targets that are pretty cool. The TLB-1 is powered by three AA batteries and has a circular five-inch red target area. Simply turn the target on, and “fire” the training pistol at it. To see your hits, fire a shot at the one-inch “Display” target and LED lights will illuminate where you hit. For subsequent strings, just hit “Reset” and you can do it all over again.
New training targets from LaserLyte include the Reaction Tyme targets that will flash and beep a target light in random three to seven second intervals and then beep twice if struck. The laser Plinking Cans are a lot of fun with three can shaped targets. Simply turn them on and set them down on a flat surface. Strike the one and half inch oval target area and a little piston topples the plinking can over. The last new target is the new countdown target which has a larger target screen, and gives audible beeps to start time and another beep to stop at either three or seven seconds, whichever you select.
I’ve got the Trainer Target and Plinking cans set up in the armorer’s room across the hall from me. From my office I can easily hit the target and cans with the trainer pistol, which allows me to work on my sight picture and trigger press as well as the other fundamentals of marksmanship.
Airsoft
Airsoft pistol powered by “green gas.”
Several years ago I became aware of a new “toy” called airsoft that looked to have some interesting applications for training. The original manual cocked airsoft pistols were strictly toys, as were the original electric pistols. But soon “green gas” airsoft pistols hit the market and I purchased a couple to play with. Green gas is actually propane, and the interesting thing about the new air soft pistols is the accuracy potential. The .20-gram plastic “BBs” fly down the barrel at a decent velocity and a “bump” in the barrel imparts a backspin on the projectile. The result is some exceptional accuracy from pistols that closely resemble the actual handguns out there. I happened upon a DVD by an innovative trainer named Rich Daniel out of Oregon (Fist, Feet, Knife, Gun and The Place to Shoot indoor firearms range). Rich was taking air soft to new levels by using them in conjunction with live-fire firearms training. You can do training drills with airsoft indoors using cardboard targets that you simply cannot safely do life-fire, as well as teaching shooter new material in a safe way prior to live-fire. As long as eye protection is worn, the possibilities are endless.
I had the opportunity to meet and train with Rich Daniel when members of the Seattle Police Department who had trained with him, instructed at an international police training conference I attended. Seattle was rotating all of their personnel at the time through a firearms training program which used air soft as the training modality.
Since then I have used air soft in basic training programs with police cadets as well as advanced officer survival programs with veteran officers. We’ve used airsoft against cardboard targets, boxing focus mitts to work on the transition for empty-hand to handgun, other students, and role-players in confrontation simulation scenarios. For work against cardboard targets, as long as eye protection is worn (the BBs tend to bounce around) students and instructors are fine. In scenario-based exercises, throat protection and a heavy garment and gloves as well as eye pro should be worn. Rich Daniel uses street hockey helmets modified with mesh to protect the face and eyes. The helmet is to protect the student from impacts with objects, walls and other students.
The only negative aspect of airsoft training is the reduced sturdiness of the pistols and magazines. The magazines cost about $30.00 each and will invariably break if dropped on a concrete floor.
For more information and some really cool training check out Rich Daniel’s DVD Legitimate Training with Airsoft.
CONFRONTATION SIMULATION TRAINING
A lot of proper preparation for armed confrontation can be accomplished at home conducting dry fire or by using any of the modalities mentioned above. There is still a missing element, in my opinion, which is confrontation simulation training, also known as force-on-force, adrenal based training, shoot or don’t shoot, stress inoculation or scenario based training. The notion here is to take the student out of the classroom or off the live-fire range and put them into scenarios in which they have to interact with role-players and make correct tactical and force decisions using inert, airsoft or marking cartridges. As I previously mentioned, early versions of this type of training used cotton-ball projectiles that were only used in revolvers LE carried almost exclusively at that time. The next step for me was using Code Eagle paint or marking cartridge rounds then Simunitions, which were developed in Canada, and with conversion kits could be used in the S&W 5906 semi-auto pistols my agency carried at the time. These new marking cartridges had a thin skin plastic projectile that was filled with inert marking compound and powered by large pistol primers. Make no mistake, these projectiles can hurt you traveling at 400fps or thereabouts.
CASE STUDY
I can remember getting some Code Eagle in and asking my then training Sergeant Dave Van Pelt to “shoot me in the back.” The good sergeant had some understandable trepidation about doing this but relented. Yes, it stung and left a red mark but wasn’t debilitating. When I called Simunitions about safety equipment a short time later and asked, “What safety equipment do you recommend?” He said, “Well, it depends on how tough you are. The Norwegian Jaegers (their special operations troops) wear shorts, sandals and eye protection.” I freely admit after years of Sim use, I’m not that tough…
Simunition marking cartridges can be used in pistols with conversion barrels attached or for the Glock pistol, a dedicated training pistol. Sim makes protective suits for scenario based training which protect against injury to eyes, face and body. The only detriment is that Simunitions are not available for civilian use and cost about 50 cents per round.
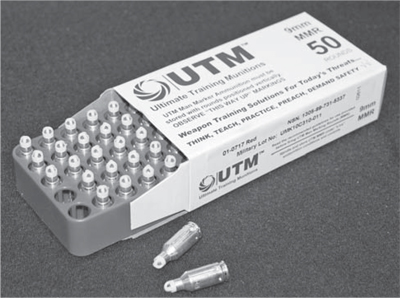
UTM marking cartridges fire paint rounds.
UTM and Speer’s Force-on-Force are other brands of marking cartridges but are restricted to the military and law enforcement only. That said, airsoft has been successfully used in armed citizen confrontation simulation training for a while now. Once again, if other students or role-players are to be targeted then appropriate eye, face, neck, hand and body protection is mandatory.
STRESS INOCULATION
The idea of this type of training is to introduce the student to the stressor, cause a sympathetic nervous system response, and teach them how to deal with and overcome the brain and body’s response to fear. The inoculation concept simply means that by exposing yourself to the stressors or fears in training, and all the physiological, physical and psychological responses involved, you’ll be able to operate better when it happens for real.
After years of running these types of drills I’ve found them extremely valuable and worthwhile. That said there are some important rules and safeguards that need to be in play.
1. The training must be designed to empower and lift the student up, not trash them.
2. The scenarios must be “winnable,” no ninjas rappelling out the ceiling.
3. Sufficient safety equipment must be worn. Damaging a student’s eye or chipping their teeth or physically injuring them is not acceptable.
4. A safety officer must be present who can halt the proceedings to protect both student and role-player.
5. It is recommended that the scenario be videotaped for debriefing.
6. Debriefings should be positive in nature and not trash the student’s performance.
7. The student should always win, even if promptings must be given by the instructor on how to win or what to do. I have literally had to position a LE student and a role-player and then give prompts such as “Forearm strikes, knee strikes! Front takedown!” it is vitally important that the student become empowered in training even if they are scared, timid, or lack self-confidence. If the student leaves training doubting their ability to win an encounter, then it has been a failure. There have been several basic academy students who decided that law enforcement was not for them after this training.
8. Multiple scenarios should be given. In this way a student has sufficient number of reps to become inoculated to the stress.
Everyone gets nervous when running a confrontation scenario. The training value is learning to operate while stressed. As Colonel Dave Grossman, author of On Combat (Grossman, Christensen; 2004; Warrior Science Publications) points out in his lectures it’s not that military special operations personnel don’t feel fear or aren’t stressed, it is that they based on their training, have expanded their comfort zones so that they can operate at a higher level, under worse conditions and longer than the average person. Though you and I will never operate at the level of a Delta Force member or Navy SEAL, we can expand our own comfort zones and increase our ability to deal with our own SNS response through scenario-based training.
I came across the Hooded-Box Drill® while watching a documentary about training that Department of State Security agents go through. Trainer Duane Dieter trains Naval Special Warfare operators as well as DSS agents. He developed the Hooded-Box Drill and I have used a modified version ever since. The idea is that the student comes into a specially prepared room where role-players are already located behind a wall. We usually lower the lighting level and play loud music in the background. A hood is lowered over their head with instructions to react and appropriately respond to whatever threat they are confronted with. Could be a drunk in a park, a domestic disturbance, a fight in the parking lot of a bar, etc., when the hood is lifted they must control the threat.
We have just talking drills where verbal direction is the only requirement, man with a knife, man with a gun, hostage incident, a physical fight between two role-players, on and on. Once the student controls the situation we call, “Break!” and position the hood back over their head. In this way, we can give one student five or six scenarios in the space of two minutes or less. The idea is to introduce max stress but enable the student to win the day. Our LE students are armed with a marking cartridge or airsoft pistol, Hydro-Shot which is an inert water spray which simulates pepper spray, and a Blue Baton which is a training baton simulating an expandable metal baton.
Borrowing and modifying Mr. Dieter’s training has increased the reality-based training we offer our law enforcement officers. I have run similar programs for armed citizens training with similar positive results.
CASE STUDY
The first course I ever used the Hood Drill on was a Female Officer Survival program. One of the most rewarding programs of my career, the ladies really “opened up a can of whoop ass!” as the saying goes and were very aggressive. Part of this was because they stated they didn’t have to “Compete with the testosterone in the room,” like normal in-service but rather felt they could get suitably aggressive without being judged. In consideration, maybe we as a society should ponder this… I’ll cover more on this topic in Chapter Nine - Ladies, Guns and Armed Defense.
For more information on this type of training, I would recommend Ken Murray’s book Training at the Speed of Life (2004; Armiger Publications). Although geared for the military and law enforcement, there is a treasure trove of information on this type of reality-based training.
TRAINING SUMMATION
I’ve lost track of the number of officers who have stated that training saved their life. Even at this stage in my long law enforcement career, I spend thousands each year on books, DVDs, training courses and training equipment. I learned early on how important the training I received was as well as the practice I give myself to learn new skills as well as maintain those I already have.
It doesn’t take hours per day or even hours per week but it does take some time and due diligence to learn those skills and tactics which will save your life, train to perfect them and continue to work to maintain them.
Armed confrontations or even potentially violent confrontations can make you weak-kneed, shaky and gasping for air - that’s even after you’ve won. Give yourself and your loved ones the best chance possible - train like your life depends on it, because it does…
WHAT IT TAKES TO HIT
Kevin R. Davis
Originally published in SWAT magazine, October 2008
What will it take for you to hit and stop your assailant in a deadly force encounter? Will the assailant be under the influence of extreme rage or drugs and hard to stop? Will one shot drop the suspect or will it take an entire magazine or more? What will that encounter look like? Will it be at close range or at 50 feet or more? Will you have a front, back or side shot? Will he be moving toward you or laterally or standing still? Furthermore, will you be moving “off the X” as you shoot? All of these intangibles and many more such as adverse lighting, innocent civilians in the background must be prepared for in your training.
If we can’t say what your encounter will look like, then we cannot say what skills you will need to win the day. This is the case with the use of the sights on your pistol as well. For someone to say that you won’t use your sights because of fight or flight or that you shouldn’t need to see your sights to hit at close range belies the fact that you don’t know what you will need to do to “make the shot.” Since misses do nothing to aid in the fight for your life (indeed misses compound your problems) and we can only count on decisive hits to stop an assailant, it is imperative that our rounds be on target. Further, on the square range our targets don’t move and innocent bystanders don’t get in the way. Sadly when it comes to those “bumpy things on the top of the slide” (sights) we are subject to dogma from so-called “experts” who tell us what we will need to win the day, that misses are not a factor or that “any” hit will do. We must instead look at what it takes to hit and how we can correctly develop the motor skills conducive to winning a violent encounter.
Automatic motor programs
According to movement expert Dr. Bill Lewinski of Force Science Research Center, a skill such as the presentation of the pistol from the holster, also called a motor program, must be practiced until it becomes automatic. Given a stimulus such as a suspect armed with a pistol or a knife, you must be able to draw your handgun without conscious thought to the process. Your grip and stance must be also practiced to the point that it is automatic. “Running the gun” must be second nature. Only by training to such a level can you expect to be effective. This includes sight alignment and sight picture. The sighting process - bringing the pistol to eye level and aligning the front sight within the rear sight notch and centering that on the target - must be developed as a part of the draw stroke. The presentation presents the pistol to the target so that the sights are aligned. As Col. Jeff Cooper said, “The body aims, the eyes verify.” Oftentimes we have shooters who report that they “didn’t see their sights” in combat however Dr. Lewinski submits that if the act was an automatic motor program, in most cases you wouldn’t remember seeing the sights, you would do as you’ve trained to do.
Are there advantages to not bringing the pistol to eye level? The late Col. Rex Applegate, who himself advocated eye level shooting, suggested a continuum of shooting from one handed “hip” shooting to two handed eye level shooting with sights aligned. Col. Applegate believed that man had an internal clock and would shoot based on his perception of time needed to bring the pistol to eye level. Applegate was not a fan of hip shooting commenting that it was too inaccurate outside five feet based on the inconsistent wrist and elbow bend.
If we accept that eye level shooting and sighted fire is the ultimate in terms of accuracy potential, anything less is what Applegate called “a compromise.”
Those bumpy things on the slide
I grow tired of the whole point shooting issue. I’ve had to spend too much time fixing shooters who were told, “At this distance inward you don’t need to see your sights,” or “Just shove the pistol out and fire” (some instructors even taping over the sights because students were referencing them while shooting?) neither is conducive to good accurate fire and I’ve seen both fail in training scenarios and force on force. Recently I had a range officer (I will not use the term instructor because…he isn’t) tell a shooter I tried to correct “We don’t teach flash front sight picture.” When I informed him that the majority of the instructors do, he said “We don’t teach that, we teach point shooting.” Question: If you don’t refer to the sights, how do you improve accuracy? Another co-worker said that these people believe it’s like the movie Star Wars, “Luke…trust the force.” I’ve heard point shooting instructors say, “From thirty feet inward you don’t need your sights.” Thirty feet? Well that might work on the square range at a wide target that isn’t moving but when these same students try it on force on force, they fail. But then again many PS Koolaid® drinkers never let reality get in the way. Realistically, when should you use the sights? Whenever you perceive you have enough time. When should you use a “rougher” alignment i.e. Applegate’s admonition to “shoot through the weapon system”? Whenever you perceive you don’t have enough time to do otherwise. When should you shoot at a hip, chest tuck or CQB position? When you believe you don’t have enough distance to extend or time to bring the pistol up higher.
The object of the endeavor
The object of your gunfire in a deadly encounter is to score decisive hits on target. Decisive hits that cause your assailant to stop or impair his attack on you. The most decisive hits in this context are, according to Dr. James Williams of Tactical Anatomy Systems™, the Mediastinum (upper center mass in the body targeting the heart and major blood vessels above the heart), the Lateral Pelvis and the Brain Stem. These are specific targets not just anywhere from topknot to toenail. Hits on these targets are more effective than shots elsewhere on the body and are aided by accurate fire. Accurate fire is aided by sight alignment / sight picture and trigger press. Alignment and sight picture are aided by an automatic (well developed) stance, grip and presentation of the pistol from the holster. Start by developing the basics and work from there. If the suspect is close and you don’t perceive enough time, well trained compromise positions can be effective. Let’s stop telling out students based on our biases what they will need and instead develop shooters who can hit.
WHAT APPLEGATE SAID
Originally published in The Firearms Instructor, the magazine for IALEFI -International Association of Law Enforcement Firearms Instructors, Issue 4
Rex Applegate. The name conjures up images of some OSS operative cloaked in secrecy being trained for some classified mission behind enemy lines in WWII. The name connotes a lifetime of study in armed and unarmed combatives. The name also is associated in the field of firearms training with point shooting, something that Applegate believed and instructed in until his death. Since Applegate’s passing the direct line to his beliefs and teachings has been lost. But fortunately we have a body of work that articulates what the good Colonel believed and instructed. It is to this material that we will quote and to his “disciples” that carry on his work to this day.
The development of point shooting
Applegate was tasked by “Wild Bill” Donovan commander of the OSS to learn all he could about close-quarters combat. When it came to use of the pistol which clandestine operators relied upon as the primary weapon in many cases, he and other instructors at Section VIII, Camp Ritchie, Maryland began with a system of combat shooting developed by British commando trainers W.E. Fairbairn and E.A. Sykes. This is not to say that this program was a static one. Applegate states that, “we added our own real-world experience and continued to validate and refine point shooting technique even more. The result was a method of combat shooting which allowed the effective delivery of fire at close range in virtually any light conditions with the use of sights this method was ultimately taught to thousands of U.S. and allied operatives and successfully applied in combat countless times during the war”. These techniques were taught in range sessions with static target but were built upon in realistic sessions using bobbing and moving targets and the infamous “house of horrors.”
Martial scientist
Col. Applegate looked at the effects of a deadly threat on performance. He said, “Statistics have consistently shown that the typical gunfight occurs at close range, in low light, and under conditions of extreme stress. The closer and more imminent the threat, the more immediate your need to fire. In these circumstances, the body’s instinctive reactions to stress take over and only natural movements can be performed reliably.” He outlined these reactions to a deadly threat as follows:
· crouching to present a smaller target
· squaring your body with the threat
· focusing your vision intently on the threat
· convulsive muscle contractions
It is interesting to note that these reactions have been backed up by state-of-the-art research. In 1998 Bill Burroughs completed a study of reactions of officers in Simuntions® dynamic training events. His study involved 157 officers participating in 188 life-threatening scenarios. Burroughs found that participants reacted in the following ways:
|
Squaring the body to the threat |
59% |
|
Focused vision on the threat |
93% |
|
Used binocular vision |
88% |
Oftentimes armed and unarmed tactics are developed in the comfort of the training hall. Applegate was not interested in what worked in competition or under controlled conditions. He was interested in what worked in mortal combat. If a student could not replicate his training in combat or if the techniques didn’t work, they were thrown out. When talking about techniques developed primarily in competition he had this to say, “The problem with these interpretations of combat shooting is that none of them bother to consider what actually happens to a shooter when the target is shooting back. There is a tremendous difference between shooting methods that work well when you’re simply trying to put holes in the target and those that work well when the target is trying to put holes in you.” These responses are instinctive gross motor movements that will almost always override your ability to perform finely coordinated actions.
The Applegate Method
The “Applegate” method differs from the original Fairbairn technique. Essentially Applegate took Fairbairn and Sykes’s techniques and modified them. In the Fairbairn/Sykes method the gun is raised to chest level and held directly in front of the centerline of the body with the wrist canted. Said Applegate, “One variation of pointing shooting is the original method developed by Fairbairn and Sykes. This technique involved bringing the pistol up to chest level and pointing from the center of the body. This is more difficult to master and inherently less accurate than bringing the gun to eye level, therefore it is not recommended.” The mechanics of instinctive pointing (Applegate method) are very simple: the eyes focus on the target, then the arm is raised until the hand breaks the line of sight…keeping the elbow and wrist locked and raising the arm like a pump handle, a very accurate and consistent alignment of the pointing hand and the line of sight can be achieved. Contrary to popular belief, Applegate did not believe that shooting was as easy as pointing your finger. He believed that the eyes, pistol and target must be in line. “The mechanics of instinctive pointing are very simple: the eyes focus on the target, then the arm is raised until the hand breaks the line of sight.” Applegate said of the original Fairbairn technique, “Since this technique does not take full advantage of the body’s instinctive eye-hand coordination, it is inherently less accurate than bringing the hand to eye level. The point shooting method you have just learned is an improvement upon the original Fairbairn/Sykes method that was found to be even more effective in actual shooting incidents. It is also easier to learn and master and is therefore preferred to the original technique.” Applegate student and survival skills pre-eminent instructor Bruce Siddle, who studied extensively with the Colonel states Applegate advocated to “always” bring the weapon to eye level and use the whole weapon system as the front sight. He would state to “keep your eyes on the target and shoot through the weapon system” to illustrate his point. Furthermore, Applegate believed the key to accuracy was based on simple principal of alignment; the officer’s eyes, the weapon system and center mass of the threat should align in a straight line. While he did believe in keeping your eyes focused on the target, he did not believe in looking over the weapon, but through the weapon.
Hip shooting
The Applegate method is not hip shooting. “Although the method of shooting by instinctive pointing has been called hip shooting, it is not. A pure definition of the term hip shooting is: “the type of shooting done when either the wrist or the elbow is pressed or held tightly against the side or center of the body at hip level at the time of firing.” Applegate covered all contingencies from touching distance wherein the officer or soldier could not physically raise the pistol to techniques where more time and distance allowed bringing the pistol up to eye level, using two hands and using the sights, “Realistic combat shooting technique therefore becomes a continuum that ranges from contact distance (so-called “hip shooting”) to two-handed, sighted fire. Where you fire along this continuum is based on your distance to the target, the perceived threat, and your ability to control the instinctive physical response to stress.” Yes Col. Applegate taught the “body point” his version of hip shooting. But he described these techniques as compromise positions often necessary when it was not possible to raise the gun to eye level. However, the good Colonel believed that the pistol should be brought to eye level if at all possible. “Shooting with the gun-arm elbow resting against the side, or hip, is a poor alternative to the instinctive pointing, straight arm shoulder-pivot method. If the officer and criminal are almost in body contact, or if it is impossible to raise the weapon to eye level to fire, this type of firing may be the only expedient. However, it does not take much practice to jam the muzzle into the criminal’s body during a struggle.” The Colonel commented on the limitations of hip shooting in his book Killed or Get Killed, “It is difficult to master this method of shooting, where the elbow is bent as much as shown above, or when it is resting on the hip. It is hard to achieve, through practice, the ability always to bend the elbow at the same angle under combat conditions. There are many who can shoot accurately at targets on a horizontal level from the hip position, but it is not a method by which the ordinary individual can achieve proficiency without a prohibitive amount of practice.” Furthermore, Applegate wrote and stated that the body point (hip shooting) method was limited in its effectiveness to 5 feet, (according to Steve Barron, Applegate said 10 feet with practice). Bruce Siddle studied with Colonel Applegate for several years prior to Applegate’s passing. As a matter of fact, Siddle and Applegate were working on an article together during the Colonel’s final days. Siddle states, “he (Applegate) believed man had an internal clock that estimated the amount of time needed to raise a weapon to eye level. If the threat was close and imminent, he felt the weapon would start to be discharged the second it cleared leather and would continue to discharge to shoulder or eye level if time allowed.”
One-handed shooting versus two-handed shooting
Col. Applegate was primarily a one handed shooter. He clearly described his opinions on the matter:
“The single-handed carry in the instinctive method is superior at close quarters for a number of valid reasons. The gun-free hand is useful to hold a flashlight, open a door, fend off an attacker, maintain balance, feel along walls or up stairs, help conduct silent movement, and to maintain contact with other officers in dark conditions. It is also much easier to shoot objects above eye level and around obstacles with less body exposure.” He did state, “Everybody knows that you can shoot a handgun better with two hands-if you can use the sights and have time to aim-than you can by using one hand.
Applegate does comment on the validity of the two handed isosceles stance, “However, World War II combat experience and recent police reports indicate that the two-handed Isosceles stance, with both arms fully extended, is usually instinctively resorted to by the officer/soldier when the target is shooting back.” Modern research has validated the effectiveness of the isosceles stance. In 1989 Harland Westmoreland published Isosceles vs. Weaver Shooting Stances: The Selection of a Shooting Stance Under Stress (1989; PPCT Research Publications). Westmoreland surmised that, “when suddenly attacked especially in close quarters, is to face our opponent squarely with our hands and arms extended out in front of us.” Furthermore, Westmoreland noted that oftentimes a one handed stance is utilized as well. The Burroughs study noted that in dynamic events wherein officers responded spontaneously that the Isosceles stance was used by the majority of participants (59% Isosceles, 19% Weaver and 7% Natural).
Applegate knew this commenting, “In its basic form, the isosceles stance is nothing more than point shooting with a slightly more stable platform.”
Applying Applegate’s lessons today
Yes, we have come far in terms of technology and training for today’s modern warriors. Developments in armament, equipment and training methodology have improved over the years (change for the sake of change is not an improvement, however…). The nature of pistol encounters has pretty much stayed the same. The pistol is a close range defensive arm, after all, if you know you’re going to be in a gunfight get a long gun. Within these close range violent encounters Col. Rex Applegate’s methods still make sense. Col. Applegate understood that the nature of pistol engagements is really about two different scenarios with distance and time being the deciding factor. In other words if the officer perceives they have time and distance they will bring the pistol to eye level and utilize the sights. This internal clock as Bruce Siddle is quoted earlier referring to is based on a sympathetic nervous system reaction to a violent encounter. What Applegate and his students referred to based on actual shootings has been quantified and qualified using modern research methods. We now have reasons why based on physiological effects of stress that officers may not be able to see their sights. Although all agree, including Applegate, that an officer is far better off bringing the pistol to eye level using two hands and verifying the sight alignment prior to shooting, we understand the limitations of the human animal in times of peril. It then becomes a question of improving performance under stress. Applegate attempted to do that with his “house of horrors” and modern firearms instructors attempt to do that with Simunitions®. By doing all we can to properly develop firearms motor skills, to teach threat cue recognition and inoculate our students to the effects of stress we can hopefully prepare our people for winning an armed encounter regardless of the conditions. That is what Col. Rex Applegate wanted and attempted to do in his time and what we must endeavor to carry on today.
The author wishes to thank the following for their contributions to this article: Bruce Siddle, Mike Janich, Lou Chiodo, and Steve Barron.