Citizen's Guide to Armed Defense (2015)
CHAPTER FIVE: TACTICS
1. To be a fair stand-up boxing match in a 24-foot ring, or as near that size as practicable.
2. No wrestling or hugging allowed.
3. The rounds to be of three minutes’ duration, and one minute’s time between rounds.
4. If either man falls through weakness or otherwise, he must get up unassisted, 10 seconds to be allowed him to do so, the other man meanwhile to return to his corner, and when the fallen man is on his legs the round is to be resumed and continued until the three minutes have expired. If one man fails to come to the scratch in the 10 seconds allowed, it shall be in the power of the referee to give his award in favour of the other man.
5. A man hanging on the ropes in a helpless state, with his toes off the ground, shall be considered down.
6. No seconds or any other person to be allowed in the ring during the rounds.
7. Should the contest be stopped by any unavoidable interference, the referee to name the time and place as soon as possible for finishing the contest; so that the match must be won and lost, unless the backers of both men agree to draw the stakes.
8. The gloves to be fair-sized boxing gloves of the best quality and new.
9. Should a glove burst, or come off, it must be replaced to the referee’s satisfaction.
10. A man on one knee is considered down and if struck is entitled to the stakes.
11. That no shoes or boots with spikes or sprigs be allowed.
12. The contest in all other respects to be governed by revised London Prize Ring Rules.
~“the Queensbury rules for the sport of boxing”
~John Graham Chambers (1865)
~*Later to be known as the Marquess of Queensbury Rules
Sportsmanship and fair play are worthy goals in sport, whether in the “sweet science” of boxing, the Ultimate Fighting Championship® or your child’s soccer match.
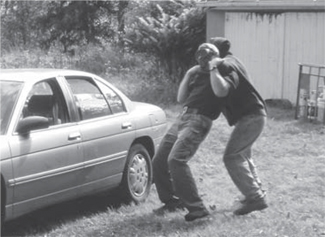
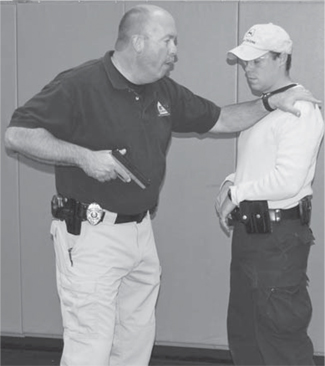
There are no rules in a street fight. As Karlos proved to John, a standing fair “fist-fight” is an anathema. What may start as an empty-hand mano-a-mano “straighten-up,” as the Brits refer to them, can change in an instant to a savage mass attack by multiple individuals, a knife assault or a felonious assault against you with a gun. Get the concept out of your head - there is no such thing as a fair fight.
CASE STUDY
While working security at an outdoor concert facility in the Midwest we responded to a fight call. The “fight” between two combatants had quickly turned into an assault when one grabbed a broken beer bottle and slashed the throat of the other. The victim was extremely lucky that day since the assailant just missed severing the victim’s carotid arteries and the jugular veins in his neck. You could literally see these exposed blood vessels through the slashed open flesh.
We want to avoid the altercation if at all possible. We can help accomplish this by practicing awareness and preparedness.
THE RIGHT MIND
“All things are ready, if our minds be so.”
~William Shakespeare; Henry V, Act 4, Scene 3
Awareness is the early warning radar of self-defense and the armed citizen. As we’ve already stated, being caught off guard or the victim of a surprise attack, necessitates us trying to play catch-up in the action/reaction (response) game. Oftentimes, surprised citizens or law enforcement officers are victimized before they can even formulate, let alone field, some type of response.
As related to the science of body language and victimization discussed earlier in this manual, criminals frequently seek out the seemingly least aware and prepared among us. Walking through a mall, parking lot or on a sidewalk, do not be distracted by the bane of the modern citizen, the smart phone. Talking or texting, even having ear buds in as you walk along, denies you the ability to see, attend to, acknowledge or respond to situations, attacks, encounters or pending threats to you or your companions.
You want to walk with your head up and scanning your environment. No, it does not require that you hop around in a paranoid state like John Belushi did as the character Bluto in the movie Animal House. It does mean that you are looking at, paying attention to and preparing responses to developments in your environment.
It is probably true that most victims are not aware that they are in the process of being victimized since they have missed the developing indicators. For instance, the subject has selected you based on his observation or surveillance. As trainer Payton Quinn said, you are being “interviewed” as a potential victim at this time and this is an interview you want to fail.
THE NATURE OF MOST ATTACKS: AMBUSH
Over the last couple of years we have seen ambush as the leading cause of death for law enforcement officers due to gunfire.
CASE STUDY
Four officers from the Lakewood, Washington, Police Department are inside a coffee shop at the beginning of their tour of duty. The opportunity to get some caffeine, work on some reports on their laptops and ease into the day is a routine that is repeated by law enforcement officers throughout this country (and probably throughout the world). As the officers are either sitting at a table or ordering their coffee, suspect Maurice Clemmons enters with two guns on his person and murder in his heart. As Officer Tina Griswold is sitting at the table with her back to Clemmons, he walks up behind her and shoots her in the back of the head, killing her. He then turns the semi-auto on Sgt. Mark Renninger and shoots and kills him, then his pistol jams. Officer Ronald Owens charges the suspect, who draws a back-up revolver and shoots and kills Officer Owens. Officer Gregory Richards attacks Clemmons; he draws his Glock .40 and is able to fire a shot, which strikes the cop killer in the abdomen. An intense close range gun battle commences and, despite being wounded, Clemmons is able to disarm the fourth officer and kills him with a shot to the head. Clemmons then runs away. Clemmons’ cop killing will be stopped 42 hours later when he is shot and killed by a Seattle police officer.
This tragedy reminds law enforcement officers that there is never a time when you can lower your guard and you must always be ready. But I believe that most attacks against citizens are ambushes as well. There is no such thing as a fair fight, and most attacks - robberies, rapes and other criminal assaults - are some version of ambush.
That said, I ask my law enforcement students the following and I’ll ask the same of you: How would you do it?
Say, for instance, you are a police officer assigned to go after a dangerous suspect. Rather than attempt the arrest in the environment where he is most dangerous, has superior knowledge of the terrain and has possible access to his weapons, you elect to “set him up” or ambush him elsewhere. Items to consider in your plan:
· Gather as much info as you can. Know your target.
· Learn his routine. Use it against him.
· Isolate him. Get him by himself and away from his stronghold and vehicle if possible.
· Take the offensive, don’t be reactive.
· Attack at a chokepoint where his options are limited to surrender or become the recipient of overwhelming force.
· Maneuver him into your “kill zone” (for lack of a better term).
· Have the high ground advantage.
· Use cover.
· Use distraction.
· Use coordinated overwhelming force.
· Knock him on his heels (stun or disorient him).
How would tactical officers ambush this hostage taker as he was moving his hostage to a vehicle for getaway? With overwhelming force based on solid training and planning.
That said, we can see that criminals are using these same tactics against armed citizens and police officers. They are watching us and, based on their perceptions of our perceived awareness and ability to defend ourselves, they make a decision to assault or attack. How then can we reduce the likelihood of an ambush?
COUNTER-AMBUSH TACTICS
Knowing how you would “ambush” a violent suspect, counter-ambush tactics need to limit a criminal’s use of these same methods against you. Avoid routine i.e. parking your car in the same place, the same time every day, locking up your business the same time and in the same way, etc. Limit “choke-points” - locations where you are isolated and have little room to move or maneuver. Deny opportunity by being a hard target. Scan your environment and what comes into it as to the potential threat it presents, and listen to your “gut instincts” about the potential for violence. All are solid counter-ambush tactics.
Once the trap is initiated, assaulting into the ambush is a standard military doctrine. To be effective in your response requires that your skills be second nature, i.e. stimulus (perception of the attack) leads to response (movement while drawing your pistol and getting accurate fire on target). Have you trained the presentation of your pistol (draw) from its holster to the point you can do it without conscious thought? An effective response to ambush requires it.
CASE STUDY
A female citizen has entered the vestibule of her apartment when she is attacked by a man who threatens to kill her if she does not comply. The female victim is forced out of the foyer and into her car where she drives the assailant to an ATM to withdraw money. The man then forces the victim to call a friend and bring more money before she is finally released.
To say this could have ended tragically is an understatement. To say that this lady was put through a terrible ordeal, one in which she feared for her life for several hours, is also an understatement.
Many victims do not understand when they are being lined up or interviewed by a potential attacker.
Have you learned how to respond with deadly force while in a vehicle? An ambush may push your training to the limits for you to survive.
Whether the assailant has ambushed based on more extensive planning and surveillance or a hasty ambush based on target isolation and opportunity is irrelevant. The chances of becoming a victim of either can be reduced by proper awareness and scanning your environment for threats. You must understand the locations and environments when you are more isolated and more easily attacked. Passive security measures, such as closed circuit video cameras at an apartment building, businesses or other locations, may help identify an attack after the event, but they do little to prevent the assault or crime.
Many victims do not understand when they are being lined up or interviewed by a potential attacker.
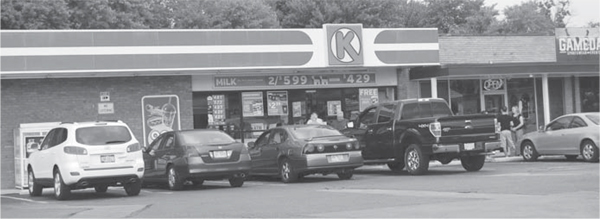
CASE STUDY
A female clerk who is pregnant is working at a convenience store/gas station when a male enters, engages in mindless chatter about the weather, then closes the gap and punches her in the face from across the counter. He then rounds the counter area and forces the woman to open the cash register. Fortunately she is not seriously hurt.
Oftentimes this chit-chat is an “interview” by the criminal and you may not even know it. During this time he is ascertaining your awareness level, his ability to close the distance to get within close proximity to you and your ability to defend yourself. Many times we subconsciously perceive this interview and dismiss it as paranoia.
CASE STUDY
In Gavin DeBecker’s excellent book The Gift of Fear (Dell; 1999), the author tells the story of an airline pilot who was troubled by an incident. The pilot had stopped off at a local convenience store to purchase a few magazines. The pilot got out of his car, opened the front door and something in his gut told him not to go inside. The pilot would later here of the armed robber inside who shot and killed a uniformed police officer as the officer walked into the store. The pilot was at a loss as to why he was spared and the officer lost his life. The pilot was able to recall seeing a vehicle in the lot with two subjects inside and the engine running, he remembers seeing the unease in the eye of the clerk as he began to open the door and seeing the suspect, who did not look at him and had an overly long/warm coat for the weather. DeBecker makes the point that the police officer possibly saw these same things when he walked into the store but ignored them. These “gut feelings” or survival signals are possibly subconscious perceptions we have not mentally processed and we ignore them at our peril. Survival signals are as much a part of our survival as any tactic or conscious thought. In law enforcement we call these “sixth sense” or “street sense.” Unfortunately, since violent incidents don’t happen that much, this police officer’s experience may have led him to ignore these same signals.
Like the pilot in Gavin DeBecker’s book, how many times do you go to this type of quick mart? Are you “tuned in” and listening to your “survival signals” when you do?
BEHIND THE WHEEL
When in your car on the way to work, home or any destination, look ahead in traffic scanning for hazards or developing risks ahead. You don’t want to drive 65 mph only looking at the bumper of the vehicle directly ahead with only one car’s length between your car and theirs. You want to check your rearview mirror for traffic behind or the side mirror when changing lanes. You limit distractions while driving, understanding that cell phone conversations expose you and whoever is in the car with you to risk. You don’t text and drive because doing so reduces your response time worse than operating a vehicle under the influence of alcohol. If you don’t practice these types of “tactics” while driving the result could be disastrous. If you are distracted or unaware, and wait until the car in front slams on their brakes before you brake, it means that you’ve not given enough distance (time) to respond and stop your forward momentum.
Even Mario Andretti could have caused an accident if he drove in the city without paying attention.
And yet, despite training and experience, many people violate these driving rules every day, causing accidents and injuries. Familiarity breeds contempt, as they say. But it also breeds inattentiveness and unawareness because - usually nothing much happens, does it?
CASE STUDY
Birmingham, Alabama - Just this weekend a five-year veteran of Birmingham PD was killed off-duty as he was behind the wheel of his personal vehicle in the parking area of a carry-out. Apparently as the officer exited the store the rider of a motorcycle accused him of hitting his motorcycle with his car door. Information is sketchy at this point, but the officer stated he had not hit the motorcycle, then entered his car whereupon he was shot and killed. The officer, a father of three, had just celebrated the birth of his first son two weeks prior.
MANIFESTED AWARENESS
You want to manifest your awareness of your environment and who comes into it. You don’t necessarily want to appear challenging to subjects with your scrutiny, which may result in an aggressive, “What are you looking at?” But you do want to acknowledge their presence. This non-hostile type of manifested awareness has prevented an untold number of violent encounters for citizens and law enforcement alike. Simply stated, it is a non-verbal “I see you” and “You’re not going to surprise me or victimize me.”
Awareness is comprised of several different factors or elements:
· Acknowledgement of the threat - The first step towards self-protection and self-defense is an acknowledgement and acceptance that the threat actually exists.
· Refusal to be a victim ¬- The next step is that you make the decision to not be a victim and that if you attend to your environment the threat can be reduced, stopped outright or mitigated.
· Target hardening - You then set about making yourself, your family or significant others, your car and your home a hard target.
· Opportunity denial - Awareness denies easy opportunities for the individual to ambush, surprise attack or otherwise target you.
· Resolute - Being resolved means constantly attentive to your environment and determined to keep yourself and your loved ones safe.
· Determination - Determination manifests itself in the way you constantly scan and observe your environment, non-verbal communication in how you stand, move and carry yourself, as well as how you respond to negative changes to your environment.
· Vigilance - Thomas Jefferson said, “Eternal vigilance is the price of liberty.” The modern self-defense equivalent is, “The cost of safety is eternal vigilance.” You simply must be forever vigilant in attending to the safety of your environment.
· Habituation - Maintaining your awareness and preparing to defend yourself and your family/friends is a habit. We have good habits and bad ones. What you chose to develop is up to you.
· Observation - In order to react to a pending or active threat against you, you must first have observed it. This is not a casual glance but an educated view anticipating a threat. It is not paranoia, but mental preparation.
· Threat perception - Based on your observation you now perceive a threat. The circumstances have gone from a casual attention or observation to a specific person or set of circumstances.
· Threat identification - Observant to your environment and what is moving within it you are able to I.D. a specific person, vehicle or circumstances that pose danger or are threatening.
· Threat pattern analysis - The pattern or totality of the circumstances is quickly analyzed and assessed as to severity and threat level.
CASE STUDY
A young lady from the capitol city of my home state was recently on the news. One night she was stabbed by a robber in the parking area of the gym where she works out. After she recovered from her injuries, she and friends from the gym set about hardening their self-defense armor much as they had strengthening their muscles and fitness levels. They attended training programs in the Israeli martial art of Krav Maga and then went to a local firearms range where they went through a CCW course.
They are only part of the way to their goal, however. So much of self-defense and being effective as an armed citizen involves mental awareness and preparation. It’s one thing to have the skills, it’s quite another to be “dialed in” as military and police “operators” refer to the mental aspects of preparation.
CASE STUDY
You see a police officer whose equipment is in a sorry state and who is seemingly oblivious to the goings-on around him. Within seconds, you’ve made a mental assessment of the man and his ability to perform his job. On the street, suspects survey this officer based on a quick glance and come to the conclusion that he is no real threat to them. He is “tried and tested” on the street more than other officers because of his apparent lack of mental and physical preparation.
PROJECTED PREPAREDNESS
Along with awareness, the armed citizen can project a state of readiness or preparedness. This is not just the aura of a man or woman who is armed, but one who can take control of his environment and put forth an effective response to any type of attack.
· Competence - Competence is based on the ability to perform a task or function. When it comes to self-defense, competence radiates like an aura around you. Criminals, at least sober or non-impaired, mentally sound criminals, will pick up on a citizen who appears to be competently prepared. Quite simply, competence means that criminals attacking you are in more danger from you than you are from them.
· Confidence - Competence leads to confidence, a confident but not cocky air that you have the abilities to prevent or stop violence against you and yours. Confidence helps control the Sympathetic Nervous System, allowing you to operate more effectively.
· Composure - The ability to maintain your composure in emergencies can be developed through training and is an indicator of the prepared armed citizen.
· Readiness - An important part of readiness pertaining to the preparation of the armed citizen is the physical act of being armed. You are not “ready” to defend yourself by way of deadly force in a lethal assault against you if you are not armed or within one to two motions of arming. A Maserati in the driveway is no good if the gas tank is empty.
· Decisiveness - You must know self-defense law first and foremost and you must have preplanned, practiced and trained response. Knowledge, competence and confidence lead to decisiveness and the prevention of the tendency to dither in a confrontation or crisis.
· Intention - Inclination is fine; intention puts meaning and energy into your actions. A committed and intent man is a dangerous man and hard to stop.
· Dangerousness - Loosely defined as the ability to be violent or use violence. We desire and strive to be peaceful, but we are prepared to do violence against those who would hurt or kill us.
· Capacity - Indicates the ability to perform. In the armed citizen, capacity relates to physical ability and readiness but also to the mental capacity to perform acts of lawful violence in defense of oneself or others.
· Capability - As it relates to the armed citizen, means that you are capable and able.
Certainly there are overlaps in these elements, qualities and attributes, and this list is certainly not exhaustive.
What is most important is that all of the foregoing elements and qualities of awareness and projected preparedness can be developed. The primary method to learn, perfect and develop these attributes is through research, study and training. Not one class or course, but a lifetime of study. Such is the price of personal safety.

The price of safety is training, preparedness and awareness.
CASE STUDY
A female police officer in the Midwest is confronting a hyper-violent individual in an armed encounter. Rather than shoot the suspect, she voluntarily disarms herself to show him she means him no harm. He shoots and seriously wounds her. She was lucky to have survived, but is forced to retire from the police agency based on her injuries.
CASE STUDY
From 1989 to 1992, a watch dealer in Los Angeles arms himself with a .38 revolver after several merchants in the area are robbed. Soon after, two armed robbers enter his store. “In an instant, I decided not to be a victim.” He shoots and wounds one of the robbers with a shot to the face. “I was scared to death!” Lance Thomas went to the range and began improving his odds by practicing at the pistol range as well as working out at the gym. Lance obtained several more handguns and strategically placed them in his shop and also worked out tactics in his head as to what he would do if he was robbed again. Less than four months later he was robbed again. Two armed robbers come through the door with guns out. Thomas came out firing, and in the ensuing gun battle killed the robbers while he got on the phone and called 911 for help. Lance Thomas was wounded in the gunfight but stated, “I’m faced with an armed intruder. Now, I have to make a mental decision to be a victim of his mercy or exercise the right of self-defense and fight back. In fighting back, part of that is the willingness to die and to kill. Hard choice!” In two years after this shooting, Lance improved the security in his store, hired a part-time security guard, trained at the range and increased his weaponry. Then his store was robbed again by a pistol wielding robber. Lance Thomas grabbed a pistol and fired killing the robber. Thomas was again wounded and survived. When asked by a reporter “Why do anything? If you hadn’t reached for your gun, maybe you wouldn’t have gotten shot?” Lance Thomas responded, “Would have been up to him wouldn’t it? He had his finger on the trigger, and he intended to negotiate. There’s no negotiation. My life is too precious for that.”
Lance Thomas then installed a double security door in his shop. Robbers came in anyway. Two robbers affiliated with one of L.A.’s most violent street gangs came into the store. While in the store acting as customers they went to leave then pivoted, raised their weapons, said, “You’re dead!” and open fired. Lance Thomas was quicker though and shot and killed both robbers.
A police investigator assigned to the shootings stated that every robber had an extensive violent criminal history and that Thomas was completely justified in everything he did.
Lance Thomas survived four different shootings at his watch shop until he closed up and moved to a private on-call style of doing business.
~Justice Files TV Show; Don Kladstrup, reporting
Two different and distinct mind-sets and mental preparations - one, a law enforcement officer employed, armed and charged by society to protect and serve, as she enforces the law, the other a citizen forced by increasing crime and violent criminals to arm to protect himself and conduct his lawful business.
The officer was empowered by her city as a law enforcer, yet unwilling and/or unable to employ deadly force to stop a threat against her, the other an armed citizen who refused to be a victim.
The similarity here is that both were armed or had firearms readily available and had trained in their use. The analogy stops there however. The differences are so stark, obvious and so tragic that they exemplify the proper mental preparation versus submission and subsequent victimization.
The late firearms trainer, Jeff Cooper (known as the Father of the Modern Technique), compared men who owned guns with musicians, stating, “Owning a handgun doesn’t make you armed any more than owning a guitar makes you a musician.”
As Colonel Jeff Cooper stated, “owning” a firearm doesn’t mean you’re prepared. That takes diligent study, practice and intent.
The good thing is that you don’t have to be a “steely-eyed-killer” to be an armed citizen and effectively defend your life or the life of your family or friends. You can develop these mental attributes, which have proven to work over the years for law enforcement officers, military personnel, security professionals and armed citizens at home, on the street or at work.
In September 2012, the F.B.I. published Killed in the Line of Duty: A Study of Selected Felonious Killings of Law Enforcement Officers (1992: Uniform Crime Reports Section; Federal Bureau of Investigation: United States Department of Justice). From that report:
Offenders’ perspectives
The offenders were asked what, in their opinion, the victim officers could have done, if anything, to prevent their deaths. Because of lack of eyewitness or surviving officers, the exact facts surrounding the initial confrontation between the offenders and the officers are quite difficult to verify independently. 8% of the offenders felt that if the officers had been more “professional,” these officers may not have lost their lives.
Some offenders responded to this phase of the study by indicating that they felt that they had the tactical edge on the officers even before the officers were aware of the imminent threat. In these cases, the killers did not shift the blame to the officers by stating that the officers could have taken an alternate course of action to prevent their deaths.
Here we see the failure of a combination of different elements in officer survival.
First is that officers who win armed or violent confrontations have a different mental approach, they believe that, A) “It” does in fact happen, B) That “it” can indeed happen to them, C) That they must train and prepare, and D) That their tactics and training will save their life.
They believe in the following concepts:
· Acceptance of the existence of dangerous men and women
· That a winning mindset is vital - that despite what they are confronted with, they can win the day
· Winning is dependent on training and preparation
· Regularly conducted skill building and skill maintenance practice is necessary
· That they must have a conscious awareness of their environment and subjects within their environment
· That they must have mental and physical options trained to a competent level and thought out
· That they will experience fear, but can control the Sympathetic Nervous System with their training and autogenic breathing
Many times armed self-defense can turn into a hardware conversation or a focus on guns and gear when it should be mostly about “software” or the mental aspects of winning. Hundreds, no, thousands of people have saved their lives with .22 caliber firearms or what some would consider antiquated pistols, shotguns and rifles. Indeed, the old quote; “Beware the man with one gun, because he probably knows how to use it…” comes to mind. An intent man or woman focused on stopping a threat against them, their children or family member can be a hard thing to stop.
It’s not about hardware, it’s about software - will, drive, intent, among other mental attributes.
CASE STUDY
Several years ago my wife took time off from work to help take care of her elderly mother who was in home hospice care. My mother-in-law was mostly confined to a hospital bed in the home of another daughter. On the day in question, I was actually teaching new law enforcement firearms instructors for the state academy. My subject before an hourly break had been the Sympathetic Nervous System and fear control. My wife called on the break. She had been sitting in the front living room of the house when she heard a noise and looked up to see a strange man standing inside the side door of the house. Challenging him with a “What are you doing here?” He responded with a weird comment of, “Well…what are you doing?” She immediately ran to a bedroom and grabbed her sister’s .38 special revolver. Coming back to the living room she got into a two handed isosceles stance, pointed the handgun at the subject and ordered him to “Get out!” in a loud voice. The subject stammered but went out the door.
After the subject departed, her knees started knocking and the inevitable “parasympathetic backlash” occurred, which is your body regulating itself after a stressful incident. During the backlash, your hands may shake, you may become exhausted, feel light-headed or even become nauseous as your body deals with the residual stress chemicals such as adrenalin and noradrenalin.
My wife received a call from a family member who reported that the man was a friend who had been hired to perform repairs at the house and to whom my wife’s sister had given a house key.
All of this could have been avoided with communication and advisement from the sister that the man was coming. Further, he should have knocked on the door rather than just entering the home. Additionally he should have said, “Excuse me…” and alerted my wife to his presence and his reason for being there. Because my wife had been trained to understand the body and mind’s response to stress as well as shooting and tactics, it ended well. Without that training and just possessing a gun, it could have been a catastrophe.
Put simply, in addition to having the equipment, you must know how to competently use your deadly and non-deadly force options, observe pending danger, strategically avoid if possible, be prepared to repel or stop the threat efficiently while handling the stress of the encounter - to shoot (if necessary), move and communicate.
WHEN/THEN THINKING
“Victims focus on their vulnerabilities, survivors focus on their ability to respond.” ~Ultimate Survivors video, Calibre Press, 1991
When I first started in law enforcement, the concept of “If/Then” thinking was introduced. The notion was that by visualizing a “Plan A” if things went south when dealing with a violent subject, you would lower your response time and be more efficient in your reaction.
Law enforcement trainer and retired lawman (Coach) Bob Lindsey (ILEETA law enforcement trainer of the year, 2013) rephrased the concept to “When/Then” thinking. It is not the idea that “if” it happens but rather “when” it does. This mental paradigm shift more fully prepares you for a response to violence. By constantly asking yourself, “When this happens…then I will respond by doing this…” you have preloaded your response. All you await is the stimulus of an attack or threat.
When/then thinking is all about developing tactical options.
CASE STUDY
At the graduation banquet of a police academy class held at a local hotel banquet room, a young officer who was a former Marine and combat veteran of Fallujah came up to my wife and me as we were leaving. “Officer Davis,” he said as he shook my hand, “There are five entrances and exits to this room.” What the cadet was referring to is my intonation during his training that you should be aware of the physical layout of the room you are in and scout for escape routes, cover opportunities and where threats might emerge. Further, that you should always scan as people enter/exit the room and approach your position. While we talked, I had my right hand in my pocket. In that pocket I had an Uncle Mike’s nylon pocket holster holding a Glock 26, 9mm semi-auto pistol. There is preparation and then there is “real preparation.”
This same When/Then thinking has been played out for me for years and years and served me well. When I walked my eldest daughter down the aisle, looking quite dapper in my tuxedo, I had that same Glock 26 in an Uncle Mike’s ankle holster (tuxedo trousers look good but usually lack belt loops which allow you to carry a belt holster, and the jackets oftentimes prevent quick access to the belt carried handgun as well).
When/then thinking is based on tactical options.
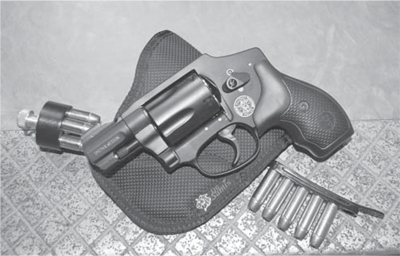
Pocket holster similar to the one the author carried on that day and his current second gun method of carry.
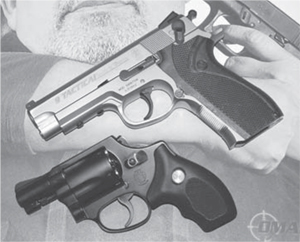
Many of the detectives at that time carried S&W Chief’s Special revolvers but placed them in their desks or in the glove boxes of their DB cars versus carrying the issue S&W 5906. Thankfully things have changed.
THE TACTICAL OPTIONS CONTINUUM
“If all you have is a hammer, everything looks like a nail.”
~Bernard Baruch
The armed citizen has as his final option deadly force, but that is not the only option.
Years ago I was assigned to research and report on the equipment, training and tactical response capability of my agency’s detective personnel. What I found was shocking. Many detectives at the time (mid to late 90s) did not even carry firearms on duty. They would lock their handguns in the glove boxes of their plain clothes cars parked in the basement or would take off their sidearm and place it in their desk drawers. Most did not carry handcuffs during their duty day either.
Those who carried a handgun would frequently carry a five shot revolver in .38 special with no reloads on their person. Now, keep in mind that this was a time when our agency had recently shifted to carrying a 15-shot 9mm pistol as a duty sidearm and allowed a smaller capacity semi-auto to be carried in plainclothes or off-duty. Yet, these detectives chose, based on the faulty assumption that their risk was minimal, to carry a handgun with only five rounds available. If they were involved in a shooting, and exhausted those five rounds, they had a very poor club to use.
Further, the detectives force options were limited to empty hand control (punching or striking a suspect) and shooting them. These are the only options they had available, but not the most effective or lawful. Just because you don’t have any non-deadly force options available, does not mean you can shoot someone who poses a non-deadly threat.
The Tactical Options Continuum includes:
· escape or avoidance
· police assistance and intervention
· verbal de-escalation techniques
· empty hand control
· non-deadly force options (pepper spray, taser, etc.)
· deadly force
This is not to say that you must exhaust other options prior to using deadly force if you are attacked by a man armed with a knife or gun. It simply means that, to be truly ready and prepared for defense of self, family, friends and home, you must have equipped and trained in other options. These options can also be used in your defense after a shooting incident as well.
Let’s examine a hypothetical interview with a police detective after you’ve shot and killed an armed robber *with the presence of your attorney during the interview:
Detective: Mr. Smith couldn’t you have just run away?
You: Detective the man had a gun and I was in fear of my life. If I had tried to run away I might have gotten shot in the back.
Detective: Did you see him approach? Couldn’t you have avoided contact?
You: I attempted to move away from the man when I first saw him but he continued do move toward me. I warned him to stay away but he kept coming toward me and boxed me in. I didn’t see his gun in his hand until he was too close. I had my pepper spray out as I was walking but it was not an option.
Detective: Why was pepper spray not an option?
You: If he had no gun and just threatened me or was going to attempt to rob me by force, I could have tried to pepper spray him, but he showed me his gun and I had no choice.
Let’s say the individual never presented a deadly threat and just menaced you instead. In this case, avoidance and verbal warnings may have worked but when it did not, you had the option to use pepper spray. With more options available, you give yourself the ability to control a non-deadly threat with other means rather than resorting to deadly force. The reason law enforcement officers use pepper spray and electronic control weapons, like the Taser, is that they are remote controls that can be applied from a distance (there are always risks in close range or hand to hand confrontations), are effective, are less injurious to the officer and cause less injuries to the suspect. These factors can all benefit the armed citizen as well.
TACTICAL BASICS: FIREARM SELECTION
There have been books and thousands of articles written on firearm selection for self-defense. Indeed, I’ve written my fair share. I’ll refer the reader to these books for more detailed coverage, especially the works of Massad Ayoob, such as The Gun Digest Book of Concealed Carry and The Gun Digest Book of Combat Handgunnery, among Mas’s many other titles.
I’ll just break the subject matter down into the basics: the firearm must be well made and reliable, be accurate, have decent sights and trigger, with sufficient power to stop an assailant, contain enough bullets or shells, and be relatively easy to shoot under stress.
That said, thousands if not tens of thousands of citizens have defended themselves over the millennia with single barrel shotguns, rifles and all manner of handgun - from the rusty old six-shooter to two-shot derringers.
What we strive for and are most aided by is an efficient and reliable tool (firearm) to help us accomplish our task, which is to save our life or that of a family or loved one.
This is best accomplished by a modern, reliable firearm. It need not be the most expensive handgun or long-gun on the market or some custom design (indeed these can be finicky and not the most reliable). It just has to effectively do its job.
In the cop world, law enforcement officers in the late 80s early 90s began switching to modern semi-auto pistol designs. Smith & Wesson, Glock, Sig Sauer pistols began showing up in the holsters of modern lawmen. Indeed, all of the aforementioned makers, as well as Colt, Remington, Taurus, Ruger, Beretta and many others, make quality and reliable firearms in calibers of sufficient size (9mm, .45 and .40) to stop criminal suspects.
In most cases five or six shot revolvers and smaller caliber (.38 special and .380) handguns have been relegated to off-duty or back-up role in law enforcement. As well, higher capacity handguns now dominate law enforcement with the average uniform officer carrying more than 46 rounds of ammo on his person - with three magazines of at least 15 rounds of 9mm (which is the most popular caliber) and one round in the chamber of the holstered pistol.
This is not to say that you are not served by carrying a single-stack .45 or .40 Glock with less than 15 rounds onboard.

Excellent concealed holster the Phantom by Raven Concealment Systems and a dual spare magazine carrier by BladeTech.
Over the years we have found that semi-auto pistols are easier to shoot and normally contain more rounds than a revolver. The ease of shooting has to do with the trigger manipulation, which can be substantially easier than a revolver (15 pounds over a longer trigger arc of movement in a revolver fired in double action, versus a five pound press of a standard Glock or S&W M&P pistol). That higher capacity handgun doesn’t mean that you have to shoot 15 rounds or more at an assailant, it just means you are capable of firing 16 rounds before a reload is necessary.
Unfortunately, a few states - New York and Colorado as example - have passed laws that limit magazine capacity and rounds that can be carried onboard. The New York state S.A.F.E. Act which accomplished the exact opposite, limits handguns carried in that state to magazines which can hold ten or less but can only be loaded with seven rounds. Even as a traveling lawman, unless on official business such as a prisoner extradition or investigation, I have to carry my Glock 26 (ten-round magazines) loaded with only seven rounds in each. What is amazing in New York is that I can carry 20 magazines on my person but they are limited to seven rounds in each. In Colorado, Governor Hickenlooper signed into law a bill passed by the state legislature that limits magazines purchased after the date signed to 15 rounds. Even lawmen that carried Glock 17s or S&W M&P pistols while on-duty, when they retire, cannot purchase new magazines that can hold more than 15 rounds.

S.A.F.E. Act compliant carry for New York state. DoubleStar 1911 with Wilson magazines loaded with seven rounds of Liberty Ammunition .45 ammo. Unfortunately the Wilson mags must be downloaded from eight to seven to be within the law.
Note - This is not to say that retired lawmen should be exempt. Indeed some police unions and groups such as the International Association of Chiefs of Police are short-sighted in this regard, advocate for gun control and against citizen concealed carry. They don’t understand that, once retired, law enforcement officers are bound by these draconian gun laws as well. Of course, the IACP are made up of increasingly political chiefs of police, oftentimes more interested in staying in office. It should be noted that a survey completed by PoliceOne.com of 15,000 law enforcement officers was pro Second Amendment and pro concealed carry for citizens.
*At this time it is unclear if the magazine limit is in effect. The NYSAFE website still indicates that magazines must be limited to ten round capacity with only seven rounds loaded. CCW permit holders must know the law. If you are traveling and have reciprocity in that state, you must comply with state law.
Your ammunition must be a reliable performer and expander. Here Remington representatives conduct ballistic testing on their excellent handgun ammunition.
More rounds on board mean that you can deal with a worst case scenario - multiple bad guys, longer gun fight - than you can with a semi-auto holding eight rounds or a revolver stuffed with six shots.
CALIBER AND AMMUNITION
We want adequate penetration without over-penetration. Remington Golden Saber Bonded fills the bill.
We carry handguns concealed because of their ease of carry and the ability to hide them from view, not because it is the best choice in defending our lives. If and when we have time, long guns - shotguns, carbines and rifles - are ballistically more effective. Handguns in the calibers of 9mm, .38 special, .357 magnum, .40 S&W, .45 GAP and .45 ACP are all capable of stopping an assailant, with the right ammunition. If we were talking about full-metal jacketed rounds, the largest bullet, .45 ACP at an average of 230 grains, makes the most sense. Bigger bullet, bigger hole with non-expanding bullets, this is why many special operations units that are restricted by the Hague Convention from carrying expanding ammo carry Government Model 1911 semi-auto-pistols such as the excellent Colt Close Quarters Battle Pistol for Marine MARSOC - Marine Corps Forces Special Operations Command operators.
By and large I would not recommend calibers smaller than .380 or .38 special for self-defense. Yes, .22s and .25s can and have been used successfully by armed citizens to stop deadly threats, but they do not have a high probability for doing so. If they did, LEOs and the military would carry them. If physical limitations such as arthritis or other limitation makes it impossible for you to shoot or fire a larger caliber, then these sub-calibers can be used. Seek out the best ammunition available in .22 or .25 to improve your performance, and practice to achieve the best accuracy possible.
When we talk about law enforcement and private citizens’ ammunition however, we see that the 9mm is the most widely issued caliber carried by domestic law enforcement officers. Many large agencies carried .40 caliber pistols but even the Federal Bureau of Investigation is reported to be changing to the 9mm based on improved hit performance on target and reduced recoil. My own experience is that, despite being a larger officer, I do not enjoy the “snappy” recoil of the .40. My agency has had several shootings with our 9mm pistols and they have fared well. As an instructor, I have seen ladies who have been forced to shoot .40 caliber pistols because their husbands were enamored with the caliber, only to develop a flinch and fail or struggle with qualification courses.
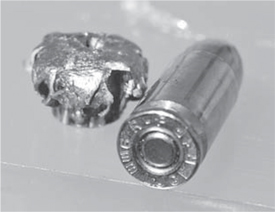
Here a Remington Golden Saber Bonded 124 grain bullet is removed from ballistic gelatin.
Fellow Ohio lawman, trainer and blogger Greg Ellifritz at ActiveResponseTraining.net has completed and published a caliber study based on actual shootings. His articles An Alternate Look at Handgun Stopping Power and Handgun Stopping Power: Science vs. 40 years of Experience are interesting reading. Ellifritz reports, after studying 1,800 shootings, that the average number of rounds to stop a person is:
· .45 = 2.08
· .40 = 2.36
· 9mm = 2.45
Ellifritz covers stopping power with every caliber from .25ACP to .44 Magnums, shotguns and rifles, and his articles are worth your time.
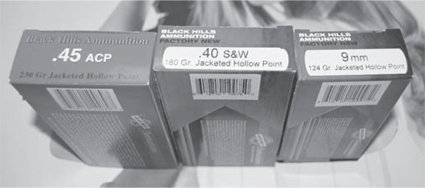
According to studies by Greg Ellifritz there is little difference in performance between 9mm, .40 and .45 such as these excellent Black Hills rounds.
CASE STUDY
As a law enforcement officer my own perspective is that shot placement is the key. You must accurately deliver fire into a suspect’s mediastinum (upper chest area - where the heart and major blood vessels lie), the brainstem or the lateral pelvis. I once rolled onto a homicide in which the deceased, a bad-guy, was deader than a doornail from one shot from a .25ACP pistol. The .25 FMJ round had penetrated his heart and stopped him immediately with death only a few steps away. Other than headshots on victims I’ve responded to on the street, this is one of the few “one shot stops” I’ve witnessed.
Hit placement is the key. For more in this regard, I would recommend our friend Dr. James Williams’ Tactical Anatomy book and course. Dr. Williams is an E.R. doc, shooter, hunter and police trainer who lectures law enforcement and qualified citizens on the subject. Try Dr. Williams site at TacticalAnatomy.com for his training schedule and book.
THE MYTH OF THE ONE-SHOT STOP
The purpose of modern expanding ammunition is to improve performance on target while not over-penetrating. According to ballistic and forensic experts, we want a decent amount of penetration while not passing completely through the human body, which often happens when using full-metal jacket or round nose bullets.
CASE STUDY
In 1986, members of the FBI in Florida were hunting for serial armed robbers who had hit several banks and an armored car in the Miami area leaving two guards wounded. It was later found that the two robbers - Michael Platt and William Matix had previously killed a citizen and stolen his car. They would shoot and wound another citizen and steal his car as well. An FBI task force encountered the suspects in the stolen car and, fearing more lives lost if they did not act, rammed the car. In the ensuing gun battle, Platt, armed with a .223 carbine, killed two FBI agents and wounded five others before being shot to death by FBI Agent Edmundo Mireles. Amazingly, Platt was able to shoot and kill two agents and wound others after sustaining a 9mm gunshot wound to the lung. No drugs would be found in either of the suspect’s systems.
The FBI began looking into the stopping power of handgun rounds in an attempt to improve agents effectiveness in shootings. In 1989, Special Agent Urey Patrick wrote Handgun Wounding Factors and Effectiveness.
From S.A. Patrick’s report we read, “Realistic and regular law enforcement training must counterbalance and mentally and emotionally override the fallacy of the one-shot drop still promoted by some media. Short of disrupting the brain or severing the upper spinal column, immediate incapacitation does not occur.”
“Physiologically, a determined adversary can be stopped reliably and immediately only by a shot that disrupts the brain or upper spinal cord. Failing to hit the center nervous system, massive bleeding from holes in the heart, or major blood vessels of the torso causing circulatory collapse is the only way to force incapacitation upon an adversary, and this takes time. For example, there is sufficient oxygen within the brain to support full, voluntary action for 10 to 15 seconds after the heart has been destroyed.”
“A review of law enforcement shootings clearly suggests that regardless of the number of rounds fired in a shooting, most of the time only one or two solid torso hits on the adversary can be expected.”
This FBI panel led to the Bureau adopting the 10mm as its caliber. This transition was never successful, however, with agents complaining of recoil and other factors. The FBI then adopted the .40 S&W as its caliber and used that for many years. It has already been noted that, at this point, information I have received is that the agency is moving back to 9mm as its caliber of choice.
There has been the myth of the one-shot stop over the years with witty sayings such as, “They all fall to hardball!” implying that the 230 grain .45 round is the most reliable stopper.
CASE STUDY
I met a former law enforcement officer who now works for a major firearms manufacturer. He related a shooting he was involved in where, undercover posing as a stolen goods “fence,” he was encountered by a large man armed with a knife attempting to rob him as he sat behind his desk in his “office.” The detective shot the man in center torso with one round of .45ACP, 230 grain hardball. The round traveled through the suspect and skittered along the ground as the suspect stayed upright and in the fight. The lawman prevailed, but he related that it was not because of the infamous 230 grain FMJ he fired into the suspect and it was certainly not a “one-shot stop.”
Don’t get me wrong, I have a couple of .45 semi-auto pistols that I am very fond of. I trust my life in my DoubleStar 1911. However, all my .45s use expanding hollow-point ammunition.
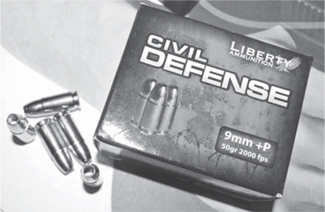
Liberty Ammunition’s Civil Defense loads use a solid copper projectile, which is devastating in soft tissue but penetrates sufficiently as well.
Once again, many books and article have been written on ammunition. Trainers like Mas Ayoob have attended autopsies and examined hundreds if not thousands of shooting reports. I would refer the reader to Mas’s writings and to work done by eminent ballistician Dr. Martin Fackler, M.D. for more.
There is a lot of great ammunition available to the armed citizen. Remember that the goal is to have adequate penetration to hit the “good stuff” within a target’s body and not over-penetrate. Understand that the one-shot stop is a myth and that, even when individuals are hit with devastating rounds in the mediastinum, they can have enough oxygenated blood in their system to stay upright and dangerous for quite some time.
As medical professionals who study deaths in military combat have stated, most battlefield deaths are due to exsanguination or blood loss. This takes time. While this is good for you, meaning that if you are wounded, most injuries are survivable, it also means that you should continue shooting until the threat is stopped and this may take multiple rounds. This is another reason why higher capacity pistols are recommended.
Master competition shooter and instructor Ron Avery puts stopping power this way, “Air in, blood out.” The more rounds you put effectively on target, the better chance the individual will stop.
READY POSITIONS
Based on perception of the threat, there are a variety of different positions that allow you to confront threats, search, move around people and to fire more effectively.
Hand on the holstered pistol
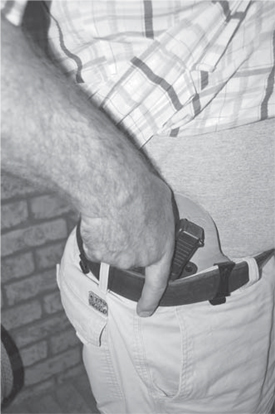
Getting your hand on your pistol, if the situation dictates, is faster than a standard draw.
Placing your hand on a holstered pistol is certainly the first step in a successful draw stroke or presentation of the pistol from the holster. It is not a panacea however. Too many officers are shot and killed when confronting a threat by just placing their hand on the pistol instead of drawing it. Placing your hand on a gun is not a serious deterrent to a street criminal. Further, it does not raise a “force field” around you to protect you from incoming bullets. In many street thugs’ world, even pointing a gun at them poses little threat. I’ve pointed all manner of firearms at suspects. It was the tactically sound thing to do at the time, and more than a few simply turned and fled.
Placing your hand on your pistol can be used when there is not a defined threat but only the possibility of a threat, e.g. a suspicious individual who approaches you late at night while you’ve pumping gas and does not heed your warnings to, “Stay back!” It could be just an aggressive panhandler or a robber, the idea is that without perceiving a deadly threat you want to add emphasis to your verbal warnings. It should be noted that this is a preparatory tactic when you feel real fear based on the totality of the circumstances.
In most states, your Concealed Carry Permit is in jeopardy for reckless display or unreasonable threatening with the gun.
There is an old and stupid saying that, “The only time my handgun comes out of its holster is when it’s smoking.” Consider that having a gun in hand speeds response time. Even the fastest draw stroke cannot beat an already drawn pistol. With that said, we must understand that we should not draw a pistol without provocation. In most states, your Concealed Carry Permit is in jeopardy for reckless display or unreasonable threatening with the gun. Depending on the circumstances, this may even equate to criminal charges against you for menacing or assault. So, drawing a gun must be a conscious act in response to a threat that you can articulate based on the totality of the circumstances.
The question then is, what ready position do you assume? The answer is that all of the following, as well as having your firearm in hand, are options.
Hidden or low profile ready
Some may argue with this, but street cops have long drawn their handguns and held them behind their legs, hidden from view, in traffic stops and other suspicious person encounters. Held behind the same side leg, the handgun can be elevated onto target in short order to stop a deadly threat. If you live in a high-crime area and there is a loud knock on your front door at night and the sound of a drunken individual, it might behoove you to draw your pistol or get it from your quick access safe and hold it in your hand behind the evening paper. Taking a look through your door’s peephole, you can warn the person away. If you must open the door to speak with the subject, hopefully you have a well-installed security chain that prevents the door from opening all the way and can withstand a kick from the potential intruder.
The problem with having gun in hand is that you cannot shoot simply because you have your firearm out, so reholstering is necessary if you are wrong in your assessment of danger or that non-deadly force is necessary.
Low ready
Standard low ready is at approximately a 45 degree outward angle.
Standard low ready is with the muzzle depressed at about a 45-degree angle downward. Many systems only teach this ready position, but consider that if you were to rotate around a 360-degree circle with your handgun or long-gun at low ready you would inevitably sweep the muzzle across others from their hips to their feet depending on the distance they are from you. This sweeping could include innocents, family members or whoever is within distance.
Further, low ready may mean that you are not pointing the handgun at a specific threat and are completely off target with your muzzle. If you are challenging a threat at gunpoint or are holding a man until the police arrive, and he suddenly goes for a gun, your muzzle is not on target. Low ready then is useful when you have no specific threat and when you want the muzzle pointed downward.
High ready
If you have a potential threat and are holding them at gunpoint or have not been threatened with death and cannot yet fire, then holding on the hips of the individual accomplishes a couple of good things. First, if the person suddenly presents a threat such as attempting to draw his own gun, then you can fire immediately. Second, by lowering your muzzle to a point on his hips you can more easily see his hands and what is in them. Additionally, holding at low ready or high ready on the hips is less fatiguing than holding at point shoulder position.
Chest ready or air marshal ready

Chest or FAM ready has the pistol within arm’s reach of the chin with the forearms resting on the ribs.
Pulling the pistol into the chest, which would be position three of a four-count draw stroke, the top and back of the slide is held about one hand spread from the chin. Your forearms are held against the ribs with the muzzle pointed toward the threat. In this ready position the handgun is pulled closer to your center and not at arm’s reach so that you have more control over the handgun and your profile is reduced. Chest ready is appropriate when entering a small room to search, such as a bathroom or within a doorway or tight confines where a more extended position is not possible. This ready position is taught to Federal Air Marshals to use in the close confines of the passenger compartment of an aircraft.
There is a variation in which the muzzle is canted downward. The thought is to have the support of the forearms on the ribs while having the muzzle pointed at the deck. I’m partial to the muzzle being parallel with the floor.
CASE STUDY
I once responded to a burglary call with other officers. I encountered the suspect coming out a second story window. I held the suspect at gunpoint as I had him hang halfway out the open bedroom window, with my flashlight held in what is known as the Chapman Flashlight Technique, until the key holder arrived and other officers entered the home and took him. This took some time, around 15 minutes, and holding close in at high ready, I did not fatigue while covering him with my 9mm pistol.
Chest tuck or CQB position
This would be count two of our four-count drawstroke. The pistol is held in one hand at the side pectoral area. As an index, the shooting thumb is held against the side of the pec. The pistol should be canted slightly outboard to allow the slide to reciprocate in firing. The shooting elbow is pointed to the rear.
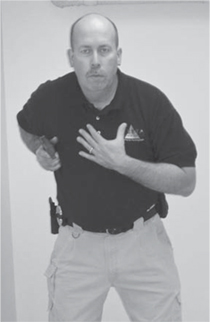
Position 2 of the 4 count draw-stroke is the pistol indexed at the outside of the pectoral area and canted slightly outboard.
Here the author demonstrates shooting extreme close quarters using the chest tuck technique.
This ready position offers more control and is even tighter to the body than chest ready. If you are moving forward to open a door or need your support hand to do something, then you can pull the handgun back into this tuck position to maintain control, prevent an attempted gun takeaway and shoot if necessary. Since accuracy in shooting from chest tuck is affected by the angle of the wrist, this position is not accurate past five feet or so.
Position Sul
Position Sul is a transition position versus a ready position and not to be used when confronted by a threat.
Firearms trainer and former Marine Max Joseph is credited with developing Position Sul. Sul is Portuguese for South and was developed when Joseph was training forces in Brazil. It should be noted that Position Sul is not a “ready position,” but a transition position when other more affective positions cannot be assumed and should never be used if a deadly threat is encountered. In Sul, the handgun is held against the chest with muzzle pointed downward between the feet. Position Sul can be used when you are in close confines to others and can have the handgun protected by the off-hand. Sul can also be used to transition from one position to the next. Imagine you are facing forward with your handgun at low ready and want to turn around to encounter a perceived threat. Rather than turn with muzzle at a 45-degree angle and “flag” or “laser” others with your muzzle, you pull back to your center chest, point the muzzle at the floor and pivot, then extend the handgun at low ready or point shoulder position.
Critics of position Sul state that it is a weak wrist angle to hold a handgun, and that is certainly true; but when used for its intended purpose it averts the muzzle from covering friendlies.
Indoor ready
Indoor ready is for a long-gun when moving inside a structure or within close confines. Here author works from indoor ready with 12 gauge pump shotgun.
Indoor ready position is used for long-guns and allows a tighter profile than low ready. In the Indoor Ready position, the muzzle is pointed down and outboard toward the floor. Exercise care to not point the muzzle at the support side foot. Imagine you are in the center of a Hula Hoop®. The muzzle would be inside this hoop or what some call your “safety circle.”
If a door needs to be opened or a threshold crossed while using a long-gun, indoor ready allows this to be done.
One-handed ready positions
All of the foregoing ready positions can be accomplished with one hand and indeed may have to be. Remember it is a handgun, not a handsgun. Our off-hand may need to be freed up to open doors, push back offenders, hold flashlights, maneuver our loved ones out of the way, etc.

Remember it is a “handgun” not a “handsgun” and oftentimes you may have to use your off-hand for something else, such as holding or fending.
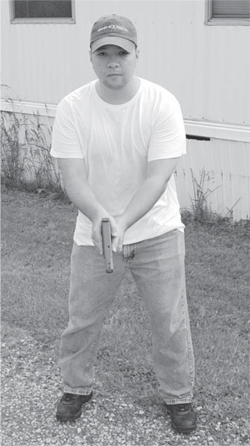
Point shoulder or up on target
If there is a defined threat at more than muzzle extension distance, then the handgun and long-gun should be up at eye level. The target area on the threat, which usually equates to “center of mass” on the individual, the front sight and the rear sight are all in a line. This is true whether we are focusing on the sights or not. This is the default position we aspire to - both hands on the handgun held at extension, sights in view. We always shoot better from this position, which is count four of the four-count draw stroke.
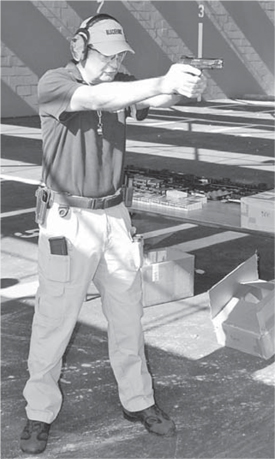
Shooting great Todd Jarrett demonstrates the two-hand point shoulder position using a modern isosceles stance.
ALL positions should be assumed with finger off the trigger and outside the trigger guard unless you are taking a shot at a threat. Scientific studies have indicated the presence of what has been called a sympathetic press or interlimb effect (Involuntary Muscle Contractions and Unintentional Discharge of a Firearm; Roger M. Enoka, PhD; 2003). Dr. Enoka’s study has been supported by further research reported by Force Science (Dr. Bill Lewinski; Force Science Institute; Force Science News #3; Can You Really Prevent Unintentional Discharges) with data conducted from research my German PhD candidate Christopher Heim:
“A large number of different groups of muscles in different parts of the body work together.” These “involuntary muscle actions” can play a role in unintentional discharges by affecting the grip and trigger finger. Besides a sudden loss of balance and the use of other limbs (during a rapid tactical building entry or a struggle with an attacker, as examples), Heim believes that a “startle reaction” can also stimulate a dangerous involuntary muscle reaction.”
CASE STUDY
On one narcotics search warrant I was point man on the entry and was using a ballistic body bunker (large portable ballistic shield). As I moved quickly through the front room with the shield in my left hand and my S&W 9mm in my right, I tripped on an ottoman that was blocked from my view by the bunker, and fell forward into a wall with the shield. Because my finger was outside the trigger guard, I did not have an unintentional discharge. These types of trips and falls can happen even in the SWAT world.
Let’s examine how these ready and shooting positions work in a scenario: You are awakened late at night by a loud crash downstairs from your living room area. You roll out of bed and obtain your handgun with its integral white light from its quick access safe mounted near the bed. With finger off the trigger and outside the trigger-guard, you move toward the hallway door at low ready. As you near the doorway you pull the handgun back to chest ready, then to cqb tuck as you step into the doorway. Using the frame of the doorway as cover you roll out and extend the pistol up to point shoulder as your off-hand touches the white light switch illuminating the hallway. Seeing nothing you move at low ready position toward the steps downstairs to the first floor. Retracting the pistol to chest ready, you grab the stairway rail with your off-hand to support yourself and you step down the stairs. As you near the bottom of the stairs you roll out from cover and extend your pistol on target, touching the momentary switch on your weapon light, pistol up at point shoulder. Moving down the first floor hallway to the living room at low ready, you pull back the pistol to chest ready, as you approach the corner of the wall, and then to cqb tuck with your off-hand up to fend off any attacker. As you “slice the pie” or angle out from the corner of the wall, the pistol moves from low ready up to point shoulder, low ready up to point shoulder until the room is cleared.
These ready and transition positions allow you to flow, more safely and efficiently moving with a gun in hand.
USE OF COVER
Cover is a lifesaver. Cover, as defined here, is something that will slow or stop bullet penetration. Of course, cover is relative to the firearm and ammunition being shot in your direction. What suffices for cover against an assailant armed with a .22 may not work against someone armed with an AK-47 stoked with steel core ammo.

Proper use of cover minimizes the shooter’s exposure.
Cover is different than concealment. Concealment may be offered by darkness, foliage or common household walls made of sheetrock. Can you have cover and not concealment? Yes, the common bullet resistant polymer Lexan comes to mind. A note here on structures that have “bulletproof glass.” The proper terminology is bullet resistant and, once again, its ability to withstand penetration is based on design, rating and the firearm/ammunition being shot against it.
Ideally you want both, cover and concealment, when bullets are coming in your direction. Regardless, getting your derriere behind something, time permitting, before bullets start to fly, is an excellent idea.
Examine the cover opportunities available throughout your living or work space. They may be comprised of sheetrock, wooden studs, brick, rock, block, steel, aluminum, insulation, plywood and/or various combinations of these materials.
Survey your world and identify the cover available should shooting erupt. Here, concrete cover is available.
A standard sheetrock wall offers more resistance to bullet penetration at the corners than at flat section of wall due to the wooden studs or aluminum framing. The problem with using corners of structures for cover is that they do not provide a lot of room to maneuver. This issue may be compounded if furniture is up against the wall at the doorway or corner where you are taking cover. A bedroom chest of drawers against a wall next to the doorway may not allow you an angle to cover the hallway where an intruder will move through to attack you. This may necessitate that you withdraw into the room further, hopefully behind another point of cover, and focus attention on the doorway as you await police response.
Points of cover within a room may actually offer more bullet resistance than the walls. Hardwood furniture, refrigerators or other major appliances, sofas, chairs, entertainment centers, washers & dryers, full bookshelves, even a gun safe - all offer more resistance than a standard sheetrock wall.
The physical lay-out of your home, business or whatever structure, outside area or parking lot in which you find yourself offers varying degrees of cover and concealment.
It is best to stay away from cover and not “hug” it if at all possible. When bullets strike a hard surface, such as cinder block, asphalt or concrete, they tend to parallel the surface, i.e. they skim the surface at about eight inches off. Therefore if rounds are fired onto the hard cover surface in front of a target, they may “skip” off and into the target if it is close by. Rounds fired into hard cover like concrete block may create secondary missiles that can cause injury. By “hugging” cover or being up too close you expose yourself to impact from the bouncing projective as well as secondary missiles or fragments. You should stay off the cover at least one arm’s length if possible.
Standing use of cover
“Roll out” from cover to minimize exposure. You want to have your handgun, carbine or shotgun up and already on the sights, and roll out from the waist up. When you step out from cover, you first expose your lower leg betraying your position. So too, by using a standard rifleman’s technique of strong-side elbow up, you expose about one foot of forearm before your carbine or shotgun sights clear the side of cover.
“Rolling out” from cover means that the firearm is up and ready to shoot and you roll out from the hips, thereby minimizing exposure.
Rolling out can be accomplished by placing whatever foot is to the outside of the cover forward and bending that knee. In this way, you roll or bend forward and out from the waist and not step out. I’ve found this knee bend technique to be the fastest and most secure technique when shooting from a standing position. Shooting in this way you expose only your firearm and less than half of your head.
CASE STUDY
Several years ago my agency was conducting a tactical use of cover training exercise that I developed. The officer/trainee was in a warehouse area with multiple pieces of cover available - large wooded pillars, washing machine, and other simulated cover positions - armed with a training pistol capable of firing Simunitions® marking cartridges. I was the “bad guy” role-player who was at the far end of the warehouse behind covered positions as well as panels of Plexiglas. I was armed with a paintball rifle. The trainee’s job was to roll out, find my position and fire accurate rounds on target. I would fire into their covered position but if they rolled out correctly, minimizing their exposure, and shot accurately (using their sights), they controlled the encounter. They could then move to another position forward and we would repeat the exercise until an “End Ex!” (end exercise) was called by me. Having paint balls thwack into a piece of plywood or into the washing machine you were hiding behind was a unnerving experience for many. On one particular training day, “Bob” a burglary detective was the trainee. Bob stepped out from cover much like the fictional TV character “Sabrina” from Charlie’s Angels. He gave me half of his body as target. I started shooting at his feet and despite the warnings of my training-instructor partner yelling at Bob to get behind cover, he continued to step out exposing himself. I began raising my point of aim with my paintball rifle until finally I hit him in the chest. Even with body armor on, Bob said “Ow!” My partner said, “Well get your ass behind cover!”
It is interesting to note that in this same training drill, which I learned at the Federal Law Enforcement Training Center, several more “timid” officers and detectives would hug their cover, extend the pistol over the top or side and fire blindly. Many of these marking cartridge rounds would impact into the ceiling above, which was around 20 feet high.
It is more advantageous to shoot around cover than over it. The reason is that if the cover position allows you to shoot around the side, you expose less of yourself than you do when shooting over. Because our eyes are about 1⁄3 of the way down from the top of our head, we expose our brain bucket when shooting over cover. If your cover is a low wall or vehicle, however, you must be able to use it effectively without endangering yourself by unnecessary exposure.
When shooting around the weak-side of cover, the left side if you are a right handed shooter, you expose less of yourself if you switch hands going from gun-hand to support-hand. The problem with this is that we tend to not shoot as well with our support hands and it is virtually unheard of in an actual gun battle. You can switch to your support-side with long-guns as well but this may be somewhat cumbersome depending on what sling, if any, you have.
In order to shoot effectively from the support-side of cover, you should roll the support elbow under. Even then, you are exposing more of your head until the strong-side eye and sights are on target.
As my friend and fellow LE trainer Andrew Blubaugh (Apex Shooting and Tactics) states, using cover correctly is much like the game “whack-a-mole” played at county fairs. In the game you stand with a padded “hammer,” when the fictional “moles” pop-up from their holes, you are supposed to whack them with the hammer. If the mole keeps popping up from the same hole it’s easy to target. When using cover and rolling out or popping up from the same position again and again, you set a pattern and it is easy to “whack” you.
Based on reaction and response time of the opponent, your thought should be, “I’m up, he sees me, I’m shooting, or I’m back down” as a timing exercise. You have to be able to get rounds on target before your assailant sees you and can fire upon you. Constantly changing position or elevation behind cover helps you accomplish this. You effectively fire on target while minimizing your exposure and you don’t set a discernable pattern.
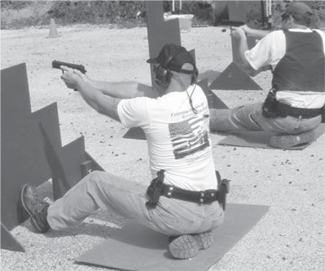
Kneeling use of cover
There are a variety of kneeling positions: kneeling supported; kneeling unsupported; double kneeling; Surefire or Strategos modified prone.

Firearms trainer Andrew Blubaugh set up this cover exercise. Don’t be the mole in the “whack-a-mole” game, “I’m up, he sees me, I’m either shooting or I’m down,” constantly changing your position.
The standard supported kneeling position is when the gun-side knee is down, the support side knee is up and the support elbow is braced on the support knee or thigh. The rule here for increasing accuracy and decreasing wobble is to place the support elbow on the thigh muscles or the support triceps on the kneecap. Never place bone to bone, i.e. elbow to kneecap. This is a braced position that can be gotten into and out of fairly quickly. Used in the open to lessen your exposure profile or to take a more braced and accurate position to fire at distance, the supported kneeling is good as it is when varying your position from standing behind a wall or tall covered position. The problem is that the position cannot be used to shoot over most cars for instance, because it does not elevate your pistol high enough to accomplish this.

Shooting from behind low cover while rolling out to take the shot.
Unsupported kneeling is actually faster to get into, offers the advantages of being able to change your elevation behind cover quickly and it allows you to shoot over vehicles and similar height pieces of cover such as low walls. Firing unsupported, you can achieve decent accuracy with a handgun out to medium distance using this technique.
Double kneeling is a little slower to assume and to get out of but allows you to roll-out from both sides of short cover (think mailbox or maybe a washing machine) as well as sit back on your heels and get a little lower. If you have a piece of cover with an intermediate height, in between the hood of a vehicle and underneath the car, double kneeling gives you an option.
Shooters shoot over low cover with braced or supported kneeling position.
Once again, when using any kneeling position, stay back from cover, have the pistol or long-gun up, and “roll-out” versus exposing your position to gunfire.
Urban prone allows a shooter to shoot under a vehicle.
Modified prone where shooter can dip down behind cover or roll up to engage.
Modified prone is a position I first saw demonstrated by former Navy SEAL Ken Good who once instructed at the Surefire Academy, who now has his own company Strategos International. This kneeling position can be used behind a vehicle or other low cover. The shooter is away from his cover, kneeling on the strong-side knee with the support-leg outstretched toward cover. By bending forward at the waist, you can conceal your upper body behind cover. The eyes are on the sights of the handgun or long-gun. In order to fire, you pivot as you bend back up, find your target and fire or bend back down again. Even with bad knees, I’m able to use this technique.
Squatting and using cover
The squat or “rice paddy prone” is a technique used to quickly drop behind cover and be able to fire. The squat means exactly that, you drop your butt to the deck while both feet are flat on the ground. More flexible shooters may be able to brace the triceps on the kneecaps for added stability and accuracy.
Seated using cover
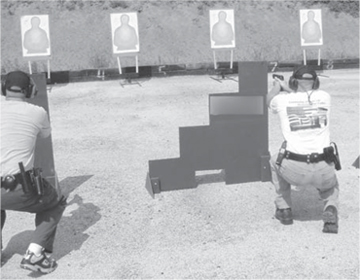
Squatting allows a quick use of low cover use as when shooting over the hood of a car.
A seated position can be very effective shooting over low cover or at an assailant a distance away. To assume the position, sit down on your butt. Flexible people can cross their ankles and sit without removing their support hand from their firearm. Most people have to go to a kneeling position, place their support hand back and then sit. You can cross your ankle and place the elbows on the inner thighs for more support or keep the legs opened depending on preference and flexibility. The seated position is slower to get into than prone in many cases and is slow to get out of as well.
Remember to keep the muzzle pointed toward the threat when assuming and getting out of the seated position.
Prone using cover
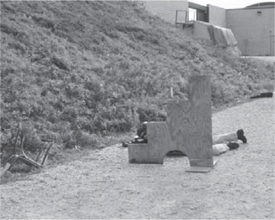
Here author uses modified prone to shoot around the edge of cover without exposing his body.
To effectively use cover from a prone position you must modify your technique to a “roll-over prone” position wherein you can shoot from around the side of cover without exposing your body. If you were to use traditional sniper prone position your body would be directly behind the rifle in an upside down “Y” configuration. This would allow an adversary to see, and fire, at half of your body. By using the roll-over prone, your body is angled back toward the cover position. To assume roll-over prone, angle your feet slightly outward from your cover position, drop down to a kneeling position, then extend the pistol outward toward the threat. You lie on your strong side with shooting arm or carbine extended, by bending the support-side knee upward to relieve pressure off the diaphragm making a more comfortable position.
You can roll into and out of roll-over prone by using the legs as counter-weights and rolling. You can roll out to shoot then roll back behind cover.
Supine shooting using cover
If you have a low piece of cover, i.e. a curb, you can effectively shoot over it, minimizing your exposure to gunfire, by shooting from a face up position or supine.
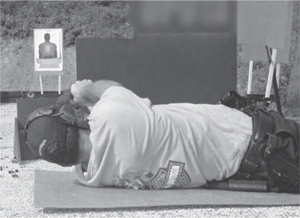
Supine can be used to shoot over low cover, like over a street curb.
In order to get into the supine position a right-handed shooter should be facing the right with muzzle pointed toward the threat. Using the support hand to steady yourself, sit down and then lay back with pistol or long-gun across your chest toward the threat. You use the leg to drive or roll over onto the support-side, take the shot(s) and then roll back flat.
Urban prone using cover
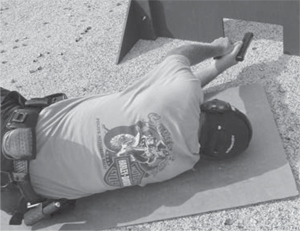
Urban prone allows a shooter to shoot under a vehicle.
Urban prone allows the shooter to shoot under very low cover such as a vehicle. Urban prone can be assumed by a right or left handed shooter by facing to the strong side. Assume a kneeling position then laying down on the strong side with the shooter’s elbow tucked under. The handgun or long-gun is held sideways. The handgun can be held outstretched in both hands. With the long-gun such as a carbine, the stock is still indexed in the pectoral area but the support hand lies underneath the forearm supporting it. Shooting under a car using this method, only a very small amount of elevation is possible and only ten inches of the target can be fired upon (depending on the height of the vehicle).
In order to make effective use of the tire, wheel and axle area of a car and to minimize your exposure, you can place your feet against the wheel and shoot from the side of the tire.
If size or flexibility prevents you from getting down on the ground low enough to use the urban prone, a version known by the pop-culture reference of “Brokeback Mountain” prone can be assumed. In this version you are kneeling with your head down and rump in the air. It can still be done effectively and is the position of choice by SWAT team members whose helmets prevent them from getting on their sides to see their sights.
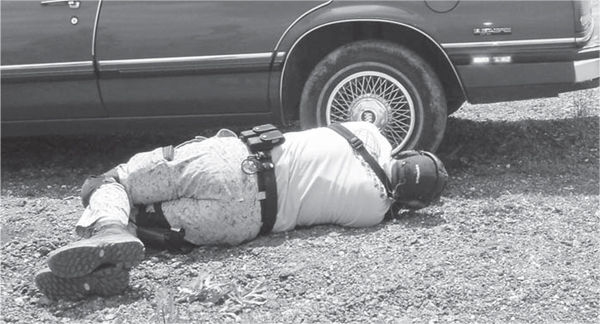
In this case the officer can use the tire, wheel, axle as cover while engaging the targets from under the vehicle.
A note here on mechanical offset with carbines, the barrel of an M-4 or M-16 lies about two to two and a half inches below the line of sight. Quite simply you can see over a piece of cover but unless the muzzle clears it, you’ll shoot into it. This can be an embarrassment to the shooter at the range, but can cause injury on the street in an actual shooting. More than a few police officers have shot into pieces of cover when not taking mechanical offset into consideration.
CASE STUDY
In a famous bank robbery, hostage taking incident in the western part of our country, a SWAT sniper took up a position away from a chest high wall to his front as he shot using a tree as support. Through his scope he could clearly see the hostage taker holding a handgun to a female hostage’s head. His first shot impacted into the wall causing the bad guy to look around. The second shot went into the same wall at which point the sniper realized his mistake, elevated the muzzle and ended the hostage incident by placing a round squarely into the suspect’s head.
Even solid marksmen can make this error. If using a long-gun, make sure you visually clear the cover with the muzzle.
COVER CONSIDERATIONS
Understand that what may constitute cover on the same height, for instance ground level, may be a completely exposed position if a threat is on the second or third floor. So, too, cover like a vehicle that exposes your feet and legs to fire can be detrimental.
Remember that you should not expose any portion of your body from behind cover. A foot, elbow, knee or the top of your head can be shot without you knowing it is exposed. While attending the Federal Law Enforcement Training Center - Multiple Weapons Instructor Course years ago, I was put through a use of cover exercise. Because I had my head down, I thought I was concealed behind my cover. Turns out that the top of my head was exposed and the role-playing instructor shot my head with a paintball. The protective helmet that I wore saved me from a more serious reminder of my tactical faux pas but I have remembered the lesson since and have passed it on to my students. This is just one of the values of force-on-force training.
All of this knowledge of cover can be used by you against an assailant as well. More than one suspect has been stopped by officers who shot under a vehicle or skipped rounds off a wall and into the suspect’s head or torso.
CASE STUDY
During the infamous North Hollywood bank shootout between heavily armed robbers Larry Phillips and Emil Matasareanu in 1997,members of the L.A.P.D. S.W.A.T. engaged Matasareanu on the street after he attempted to carjack a pick-up truck. Retreating behind his getaway car, the suspect and the SWAT officers exchanged heavy gunfire. The SWAT team members shot under the vehicles, impacting Matasareanu in the legs after which he surrendered. Matasareanu would die from his wounds.
Taking cover is dependent on time available. Mediocre cover one step away that can be taken now is better than cover yards away. Certainly getting the best cover position you can as fast as you can is important. If the threat is not imminent, move to the best covered position available.
Using an “L” maneuver one can place cover more quickly between you and the threat. In other words, a lateral movement may place cover in front of you while still several feet away. Imagine a large tree thirty feet in front of you but one you can place in the shooter’s line of fire with a quick movement. You are not safely behind the cover but you are still protected by the tree. To improve your covered position you may then move closer to the object.
BE COVER CONSCIOUS
While parking decks and lots can be dangerous, isolated locations, they offer great cover opportunities.
As you go about your daily routine, be cover conscious. Outside, walking your dog or working on your car in the driveway of your home, cover opportunities may be provided by trees, wooden utility poles, parked vehicles, brick walls or other objects or structures.
In a parking deck, concrete walls may be available that provide solid cover. Vehicles, including your own, offer some protection from small arms fire.
In my working environment I have concrete block walls and steel door frames in most of the building. Recent modifications are sheetrock and aluminum that offer less protection but are certainly better than nothing and may offer opportunities to evade detection from view (concealment opportunities).
Going to a mall (less likely for me by choice) or a store such as a book or hardware store, cover opportunities exist such as display racks, counters, kiosks in the open areas, or corners of brick and marble.
In the downtown area where my office was situation up until last year, there were concrete trash bin holders and vehicle barricades as well as brick building corners, mailboxes and vehicles.
Standard glass windows offer points of observation but are easily shot through and present secondary missile dangers from glass spalling (shards or fragments).
PROS AND CONS OF VARIOUS POINTS OF COVER
Trees and wooden utility poles
Medium to large diameter trees are bullet sponges; treated wooden utility poles actually offer more resistance to bullets than trees of similar diameter. Even smaller diameter trees may offer protection for your center of mass. Negative issues are that many housing allotments nowadays have very few trees or at least trees of a size suitable as cover. Because of their lack of depth, cover such as a utility pole can be easily flanked by a moving antagonist. There is also the tendency to “hunker down” behind a solid piece of cover and “hide” versus moving and putting more distance between you and an attacker, even when movement may be a better tactic.
CASE STUDY
Several years ago in Van Nuys, California an incident occurred captured by Court TV. A suspect armed with a revolver attacked an attorney outside a courthouse. The attorney took cover behind a medium size tree and with the suspect shooting at him from within arm’s reach moved side to side placing the tree in between the suspect’s gun and himself. Though wounded, the attorney lived through the close range attack.
Cinder block or brick walls

Poured concrete and concrete block can offer great cover.
Concrete block is fairly resistant to gunfire from side arms. If there is an angle involved rather than 90 degrees perpendicular, there may be less penetration and more deflection. In an excellent video you can watch on YouTube, “military shooting test 1⁄3, 2⁄3, 3⁄3" researchers from the Naval Surface Warfare Center under direction from the Marine Corps Warfighting Lab conducted penetration tests on many of the military’s standard small arms on standard 1⁄2-inch sheetrock and 2X4 constructed interior rooms with 1⁄2-inch exterior plywood walls as well as a section of cinder block and brick outside wall.
Rounds were fired from about 19 meters (60 feet) at angles of 90 and 45 degrees. *Note - the distance used (60 feet) is reported as the average distance for “military” urban fighting. Mannequin targets placed inside the rooms were situated behind standard commercial grade office furniture (desks and file cabinets).
Small Arms Tested Included:
· Beretta M9 9mm Pistol (Military Ball Ammo)
· 12 Gauge Shotgun
· AK-47 (Military Ball Ammo)
· M-16 (Military Ball Ammo)
Sheetrock-only walls were easily penetrated by all rounds but notice the protection offered by block or brick to even the 5.56mm round fired from a full-size M-16A2 with 16 inch barrel.
AK-47 Rifle
|
Target |
Firing Angle 0° / 45° |
|
Sheet Rock |
Yes / Yes |
|
Plywood |
Yes / Yes |
|
Block |
Yes / Yes |
|
Brick |
Yes / Yes |
M-16 Rifle
|
Target |
Firing Angle 0° / 45° |
|
Sheet Rock |
Yes / Yes |
|
Plywood |
Yes / Yes |
|
Block |
No / No |
|
Brick |
Yes / No |
*Remember the issues of secondary missiles such as fragments coming off the wall toward you as well as the issue of bouncing or skipping rounds or buckshot.
Interior walls in homes and businesses
The Bureau of Alcohol Tobacco and Firearms (ATF) conducted a ballistics and penetration test of 9mm carbines, shotguns with slugs and 5.56 carbines (Data Analysis of .223 Caliber Ammunition). The ATF presentation relied on data gleaned from: FBI’s “Weapons Selection Test,” San Diego County Sheriff’s Department’s, “Structural Penetration Testing,” and the DEA’s “Construction Material Test”:
From the ATF presentation:
How far will a projectile travel before it falls to the Earth? Based on the weapon system firing 60 inches above ground level:
|
✵ 870 Shotgun - 12 Gauge Slug |
200 Yards |
|
✵ H&K MP5 Subgun - 9mm |
200 Yards |
|
✵ M4 Carbine - 5.56mm |
500 Yards |
The ATF study also refers to a “San Diego Penetration Test” with four walls approximately five yards apart. The walls were constructed of: 1⁄2" Wood Siding; Stucco material; Insulation; 1⁄2-inch Gypsum; Cinder Block.
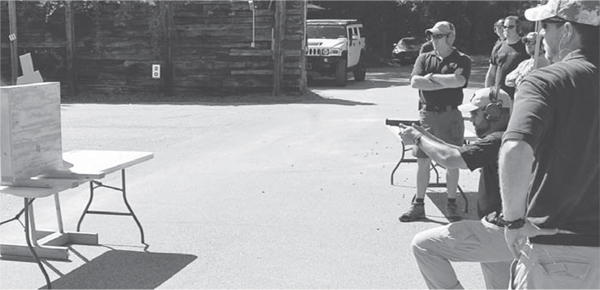
Here Liberty Ammunition tests their 9mm rounds against standard wall board.
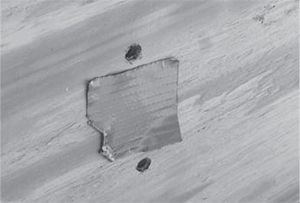
Penetration on 1⁄4 inch plywood.
And sufficient penetration through interior sheetrock.
The average penetration listed:
|
✵ 9mm 147 grain Hydra Shock |
3 Walls |
|
✵ .40 cal. 165 grain Hydra Shock |
3.6 Walls |
|
✵ .223 55 grain Federal Tactical |
3 Walls |
CASE STUDY
Several years ago, as reported to me by a federal agent, members of his agency had been involved in a shooting inside a mobile home. Both .40 caliber standard issue handguns were fired as well as 5.56mm rounds from M-4s. Rounds from inside the trailer penetrated the exterior wall of the suspect’s prefab home, through both walls of another mobile home, through an exterior wall of a third trailer, before being stopped. Fortunately, only the suspect was wounded. When the Special Agent in Charge questioned the shooting, he suspected it was the 5.56 rounds that had over-penetrated. Turns out that the .40 pistol rounds were the culprits.
We want sufficient penetration without over-penetration.
Drug Enforcement Agency Wall Penetration Test also referred to by the ATF:
DEA Wall Penetration Test #1:
Wall #1 constructed of:
· 1 sheet of 1⁄16" plastic sheeting
· 2 sheets of 7⁄16" plywood
· 1 sheet of 9⁄16" hard insulation
· 2" of soft insulation
· 1 sheet of 1⁄2" drywall
Walls #2 & #3 were constructed of:
· 2 sheets of 7⁄16" plywood
· 2 sheets of 1⁄2" drywall
· 2" of soft insulation
The average penetration listed:
|
9mm 147 grain Hydra Shock |
3 Walls |
|
.40 cal. 165 grain Hydra Shock |
2.5 Walls |
|
.223 55 grain Federal Tactical |
1.5 Walls |
Here we see the myth destroyed in two studies that handguns penetrate less than carbines. We can also say that penetration depends on bullet design and velocity but it is certainly true that rounds that expand the most penetrate the least through cover. This is a reason many tactical teams run a couple different loads through their 5.56mm M-4 rifles. They may have magazines stuffed with Hornady 223 Remington TAP® for entry work inside structures and Federal Tactical or Remington Core-Lokt for perimeter work where more penetration is required. *Note - Ballistic studies have been done which show that both the Federal Tactical and Remington Core-Lokt ammo have excellent penetration abilities, expand in ballistic gelatin well and don’t over-penetrate. Both loadings in .223 are worthy of consideration. There is handgun ammunition which can accomplish the same thing, A) Penetrate through glass, sheet rock and sheet metal, etc., B) Expand in humans, and C) Not over-penetrate.
DEA Wall Penetration Test #2:
Consisted of firing rounds through 9 walls approximately 4 yards apart.
Walls #1 - #8 were constructed of 2 sheets of 1⁄2" drywall
Wall #9 - was constructed of:
· 1 sheet of 1⁄2" drywall
· 1 sheet of 7⁄16" plywood
· 3" soft insulation
· 9⁄16" hard insulation
· 1⁄16" plastic siding
*This simulates the construction of an exterior wall of a residence
The average penetration listed:
|
9mm 147 grain Hydra Shock |
9 Walls |
|
.40 cal. 165 grain Hydra Shock |
9 Walls |
|
M-16 55 grain |
8 Walls |
|
M-4 55 grain |
8 Walls |
Vehicles
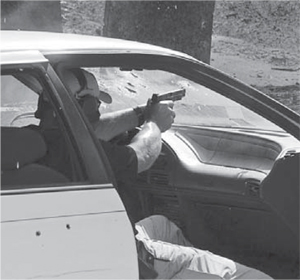
Shooting through laminated safety glass causes deflection. In this case a Liberty round is fired through the windshield but deflects upward following the perpendicular plane of the glass.
Laminated vehicle safety glass provides more of a deflection than resistance. When shooting out of or into a vehicle through the front windshield or back window, the tendency is for the rounds that hit the glass to follow the perpendicular angle of the glass. Rounds fired out through the front window will impact high on a target (the farther the distance, the higher the deflection). Rounds fired through the front windshield and into the car will deflect low. *Note - The deflection only affects rounds passing through the laminated glass not subsequent rounds fired through a hole you created.
CASE STUDY
A violent domestic dispute subject was attempting to flee the scene in his vehicle. One officer in the street on the passenger side of the vehicle was knocked to the ground as the suspect backed into and rammed the car behind him. The officer in the front of the suspect’s car, fearing that his partner would be run over, fired through the front window at the suspect. The rounds deflected downward into the top of the dashboard and did not strike the suspect.
Remington tests their Golden Saber Bonded rounds against sheet metal.
In a DEA training video members of that agency take a four-door sedan and fire through the vehicle with the handguns, subguns, shotguns, and carbines carried by that agency. From the side they shoot the tires, the car body, through the doors and windows. They then move to the front of the car and shoot through the grill, hood and passenger compartment. Yet, when all those rounds were fired by multiple agents at one time into the car, the vehicle still fires up and can be driven away (even with flat tire). More importantly, two cardboard targets that were placed in the front seat area under the dash and in the rear seat area, both simulating suspects taking cover, are checked, neither has been hit.
The round still had adequate penetration against ballistic gelatin after shooting through the metal.
This test indicates several points for you, the armed citizen. They are: A) Vehicles, despite their light metallic or plastic construction, can shield you somewhat from incoming fire. Remember my bank robber story earlier? B) That assailants inside an auto coming toward you are very hard to stop. Better to avoid the car if possible rather than trying to shoot the car to stop the assailant. And, C) Because of the kinetic energy impact of a car and the difficulty in hitting the driver, someone coming at you with homicidal intent is a serious threat and can be fired upon. This is the tough part of assailants in vehicles attempting to run you over. A car driven by someone attempting to hit you or run you over is a deadly threat, and stopping them is not an easy proposition - avoid/escape if possible, shoot when you must to stop the threat.
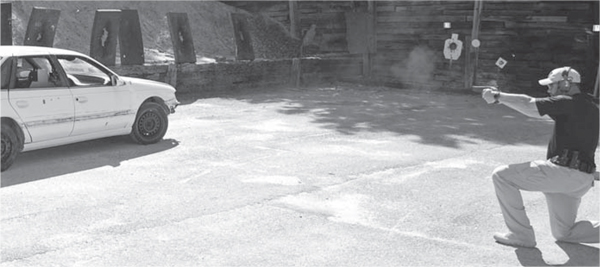
Here Liberty Ammunition is fired through a vehicle door.
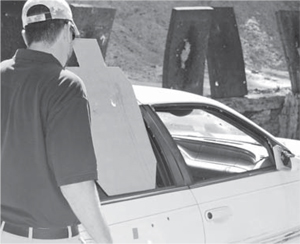
The round penetrated the door with the inner core projectile able to hit the target beyond.
Body armor
Modern body armor using Kevlar was first patented by Richard Davis, formerly of Second Chance®. Mr. Davis’s own history included being shot and wounded in Detroit by three armed robbers while delivering pizzas. Davis shot and wounded two of the robbery suspects. During his convalescence Davis began formulating the idea of concealable body armor and came upon a new synthetic material called Kevlar. Richard Davis was the first person to use multiple layers of Kevlar in a vest design to stop bullets. Marketing his vests to police officers, Davis would demo the vest by shooting himself with a handgun then turn and shoot several bowling pins off a table (to demonstrate that he could continue to fire to save his life after being shot).
The International Association of Chiefs of Police® DuPont Kevlar Survivor’s Club® now numbers over 3,100 officers who have been saved from death or serious bodily injury. Two of my former coworkers are members of that club. Both were saved by body armor. Further, two other coworkers were saved by body armor: one by a Second Chance vest before the Survivor’s Club was started and one from another type of ballistic fiber.
Author’s Second Chance vest purchased in the 1980s.
Vests are available to the armed citizen. Several companies manufacture body armor for citizens including designs for kids incorporated into backpacks. I have two body armor designs from U.S. P.A.L.M. (Primary Armament Logistical Manufacturing) that I keep handy. In my office I have a Defender AR15 vest that incorporates two 11" X 13.5" NIJ Level IIIA ballistic panels in a quick don design. Should an active killer attack my building, which is secure but susceptible, I can toss the Defender AR15 over my head and then grab my DoubleStar Star15 carbine placed underneath the vest. This gives me four 30-round mags to respond with. At home, I have a Defender Handgun vest from U.S. PALM that has one .45 Wilson spare magazine and a Surefire 6PX 320 lumen handheld light. Grab the DoubleStar 1911 .45 that has a Surefire X200 weapon-light attached, from my quick access Sentry safe and I can respond to “bumps in the night” or a violent home intruder, a little better protected.
Guard Dog Security’s ballistic backpacks feature Kevlar inserts for a student’s back.
Available in pink for the girls as well.
In my car I have a Blackhawk S.T.R.I.K.E. Level IIIA tactical vest with rifle rated plates fore and aft. As a full-time LEO it is my duty and sworn obligation to respond to active shooter calls or other violent incidents and armor helps me and other LEOs safely complete this task.
US PALM Defender AR15 is hung in the author’s office.
US PALM Defender Handgun ballistic vest set up for home response to unlawful incursions into the house.
Considering that taxi drivers and clerks at 24-hour mini-marts and gas stations are at a considerable risk, I would not want to do those jobs without wearing armor. The National Crime Victimization Survey clearly indicates the rate of assault in retail work as dangerously high. According to the U.S. Justice Report, Workplace Violence, 1993-2009:
Highlights
· From 2002 to 2009, the rate of nonfatal workplace violence has declined by 35%, following a 62% decline in the rate from 1993 to 2002.
· The average annual rate of workplace violence between 2005 and 2009 (5 violent crimes per 1,000 employed persons age 16 or older) was about one-third the rate of nonworkplace violence (16 violent crimes per 1,000 employed persons age 16 or older) and violence against persons not employed (17 violent crimes per 1,000 persons age 16 or older).
· Between 2005 and 2009, law enforcement officers, security guards, and bartenders had the highest rates of nonfatal workplace violence.
· Strangers committed the greatest proportion of nonfatal workplace violence against males (53%) and females (41%) between 2005 and 2009.
· Among workplace homicides that occurred between 2005 and 2009, about 28% involved victims in sales and related occupations and about 17% involved victims in protective service occupations.
· About 70% of workplace homicides were committed by robbers and other assailants while about 21% were committed by work associates between 2005 and 2009.
· Between 2005 and 2009, while firearms were used in 5% of nonfatal workplace violence, shootings accounted for 80% of workplace homicides.
~U.S. Justice Report, Workplace Violence, 1993-2009
It is clear after examining the workplace violence numbers that professions other than law enforcement are susceptible to armed and unarmed attack. Body armor is the last line of cover available to law enforcement and citizens and should be considered depending on vocation.
Cover is a life saver, period. Effective use of cover minimizes your exposure to your assailants fire while you are able to place accurate fire on him. Don’t emulate the detective mentioned in the case study above and do a Sabrina from behind cover exposing yourself unnecessarily. Stay back away from cover, get the pistol or long-gun ready, roll out and solve the problem by putting rounds into the bad guy.
CASE STUDY
January 23, 2011, Detroit: Suspect Lamar Moore, wanted for kidnapping and rape of a 13-year-old girl, carrying a shotgun entered the Sixth Precinct of the DPD and opened fire. Captured on surveillance video, officers working the desk area took cover and returned fire. Very much like the “whack-a-mole” mentioned earlier, two officers popped up and fired. Four police officers were injured by the suspect who, at one point, dove over the counter to assault the officers’ positions. At least one patrolman was unarmed having secured their pistol in a gun locker in a back room and had to hide under the front desk. The suspect though shot and mortally wounded by a plainclothes commander stayed on his feet and maneuvered on the police officer who used a counter area as cover. The suspect fired with this shotgun at the officer’s outstretch hand/pistol, blowing off two of the officer’s fingers and causing the commander to drop his pistol. Only after the commander scrambled from behind the desk did the suspect collapse. All police officers wounded recovered.
This video is available for your viewing at YouTube.com and is a very violent reminder of what cover is all about and how effective use of cover can save your life.
MOVEMENT
Taking root or not moving when bullets are coming in your direction is not a sound tactic in a gunfight. Imagine a train coming toward you and you’re standing in the middle of the tracks. You don’t want to move straight toward the train. If you attempt to backpedal, you’ll soon lose your balance and fall. Turn and run on the tracks? You’ll never be able to move fast enough to outrun the locomotive. So the answer is, get off the tracks as quickly and smoothly as you can without losing your balance.
We can begin moving off the “X” or the “train tracks” by incorporating a simple side step during our draw stroke or presentation of the pistol on target. Some have scoffed at the simple side step but realistically based on where you are right now while reading this, how much unimpeded room is available to your right or left - twenty feet? I seriously doubt it. How about ten feet of uninterrupted space with no chairs, tables of other obstacles in your way? As I write this, I could move only to my right and possibly just two adult steps before I hit a wall. Envision a gunfight in your living room, bedroom or rec room. Realistically, how much room is available? Why then do we practice techniques which only work on the flat wide open section of a pistol range?
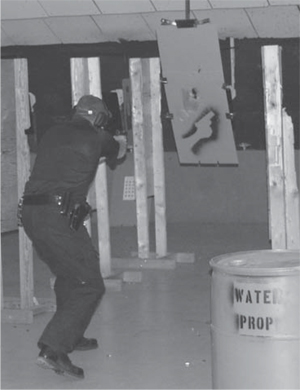
Here student at Sig Academy evades rushing target while moving to the rear and laterally while firing.
Any controlled movement is better than no movement at all or standing stock still, but unrealistic movement can be dangerous as well. One tactic taught to police officers was to duck, touch the floor on the side you were moving to as you ran off the X. This technique would not work in a parking lot with vehicles let alone the interior of a residence. Developed and taught in an open gymnasium the tactic was totally unrealistic. Sure, a turn and aggressive movement off the X for a couple steps will work but anything more than that and we are getting into tactics which work on the range, not realistic techniques which will work on the streets, or help an Armed Citizen win an armed encounter.
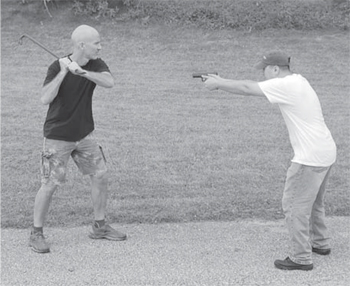
Backing up will only cause you to trip and fall. Here lateral movement off the “X” gets the citizen off the line of attack.
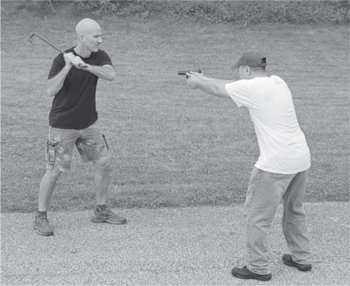
Movement must be controlled of you can run into obstacles.
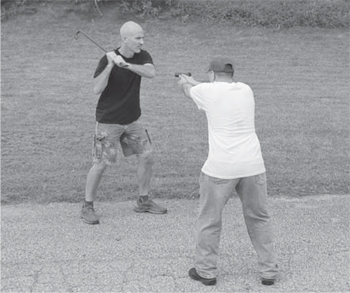
Step and drag movements can suffice in tight confines.
Another technique that has been advocated for private citizens is to aggressively move straight into a threat as you fire. The notion is that your aggressive movement and fire will somehow cause the threat to stop. As we noted in the previous case study about the Detroit substation shooting, the assailant was mortally wounded and for several seconds able to continue shooting and moving. Why on Earth would we want to make it easier for an attacker to be able to hit us with his gunfire by moving closer? Yes, police tactical teams teach to shoot while moving forward and to the rear but this is during narcotics search warrants or hostage rescue scenarios. Noted firearms and tactics trainer, and former U.S. Army Spec Ops operator, Paul Howe has stated that in combat operations he has been involved in such as Operation Just Cause, (the invasion of Panama), or the Battle of the Black Sea (Mogadishu Somalia combat operations reported in Mark Bowden’s book and depicted in the movie of the same name, Black Hawk Down, he has never fired while moving. He has moved, then posted in position and fired, but never fired while on the move. That said, we still train for the ability to shoot on the move.
How much movement and what kind is the question. As we stated in the previous section on use of cover, if something solid is relatively close by and the threat is imminent, move to cover while or before shooting. If you have time, then get to the best covered position available. This may also mean that you cover the retreat of your friends or family as they move to cover or vacate the area. Teaching your family members how to move to cover safely, as well as moving from one covered position to another, is a wise tactical suggestion as well.
A lateral step/drag or two may suffice to get behind cover if it is close by. Turning and quickly moving allows quicker more aggressive movement off the attack line and maintains better balance.
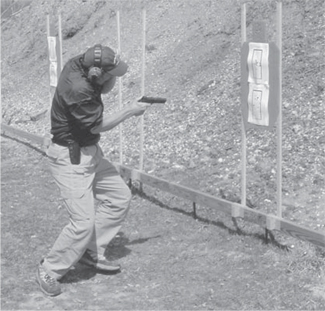
Here shooting great and master instructor Ron Avery demonstrates his moving and shooting technique at close range.
We are designed to move best in a forward direction. Having toes, hips, shoulders and head pointed in one direction achieves better efficiency and reduces bouncing which is deleterious to shooting on the move. Moving forward we advocate the “Groucho Walk” named after the famous late comic who crouched and glided as he moved forward. The heel/toe glide of the Groucho Walk is dependent on the toe/knee/hips and shoulders being aligned. Having the toes pointed outward instead of forward as described, causes the hips to splay, resulting in a back and forth rocking motion that adversely effects accuracy.
When moving, the gun is at low, indoor or chest ready unless a specific threat area or person is being covered.
CASE STUDY
“C” is a governmental paramilitary operator with extensive experience in the world’s hotspots in the Global War on Terror. He related a story where a member of his team was killed by a terrorist during a building clearing. The operator was moving down a hallway with his carbine held up at point shoulder position. An Islamic terrorist was lying on the floor in a doorway ahead and shot the American in the head, killing him. “C’s” point was that if you move with a gun up at eye level you can miss threats at a lower level. Let us learn from this tragic lesson.
Try to use available cover when moving inside a structure or outside. When moving down a hallway in your home, why move straight up the center, when you can move to a doorway of another room or place some other type of cover such as a corner, appliance or piece of furniture between you and the possible threat.
When moving through a parking lot or other outside venue, you should place an obstacle or piece of cover between you and potential or real threats. As mentioned when we discussed use of cover, you don’t have to be right on top of cover to protect yourself.
Lateral movement
Can be of two or three types. Side stepping we move one foot sideways then the other while facing forward, this is also known as a shuffle step or step/drag. We strive to have the best base or platform possible. We want to side step versus crossing the feet to reduce the likelihood of falling or stumbling. This type of movement can be used when a threat is encountered and you are out in the open but want to move laterally to a position behind a piece of cover.
If you want to move a distance and don’t have a defined threat, just walk in that direction. A right-handed person can cover, and shoot if need arises, to the left using a two handed stance by swiveling at the waist. If a right-handed person is moving to the left, then it is easier to use a one handed position holding the handgun in the right hand and walking with toes pointed in the direction you’re headed.
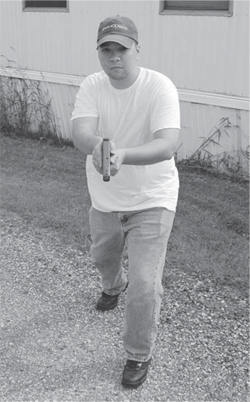
Step forward with your support side foot and then drag your strong-side foot

Then repeat the stepping. This allows for more control during forward or rearward movement.
Step/drag is a more stable way to move forward or to the rear as well. When moving forward, the support side foot takes a step, then the strong-side steps. Once again, care is taken to have a stable platform when moving versus a narrow base. Flexing the knees aids in stability and reduces bounce. Stepping rearward when backing away from an assailant or threatening situation or area when using the step/drag technique, the strong-side footsteps back, then the support side foot drags.
Of course, if no imminent threat is presented, turning and moving quickly even running is a viable tactic. Do not run toward problems however. The rule as taught to me my members of LAPD-SWAT is that in tactical movement do not move any quicker than you can shoot accurately. This is frequently a problem when I’ve trained SWAT teams as a natural reaction, based on an SNS response is to run.
CASE STUDY
I was hired to train a county SWAT team. During narcotics search warrants they had been trained by their instructors to run into structures. A light snow had fallen and the team had wet boots once they hit the house and ran into the kitchen through the side door. Once the first two operators ran onto the linoleum they both slid and fell. In training this can result in injury. In a real encounter, this could result in death or serious injury and certainly does not equate to accurate fire if the need arises.
The reason we avoid rushing or running into a problem area is because we cannot visually see or mentally perceive and process any threats we encounter.
STATIC DEFENSE AND POSITIONING: BUNKERING OR ENSCONCING
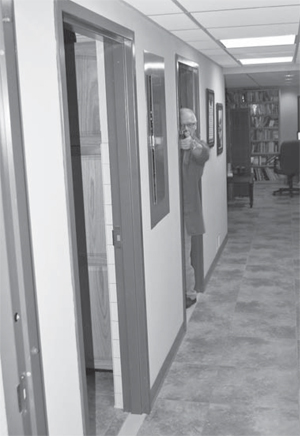
“Bunkering” or ensconcing is a safer way to defend a structure if you don’t have to rescue or move toward other family members.
If there is no reason, i.e. a family member that is downstairs or in a separate area of the house from you, there is a compelling argument for taking up a bunkered position and setting up what is essentially a hasty ambush or ensconcing behind cover and waiting for the threat to appear or the police to respond.
Searching through any structure, even if it is your own, is a dangerous tactic. In SWAT work, when teams do entries on narcotics or felony arrest warrants looking for dangerous subjects, the danger is extreme because you are entering into the “lair” of the suspect. They know the noises, creaks, light switches and layout of the rooms, hallways and stairs of their house. Despite using the tactics of speed, surprise and violence of action, a suspect only needs a few seconds to arm himself and respond.
CASE STUDY
My police tactical team made entry into a small house in search of a narcotics trafficker who was a violent three-time loser. The risk, as assessed during the research prior to the raid, was high. The team breached the front door, tossed in a flash-bang, which emits a blinding light and loud bang, and entered the house. Mike was point man and was moving down a hallway when he encountered a closed bedroom door. Mike opened the door and the suspect, who was lying on a bed against the wall to the left of the door, open fired with a revolver. One round struck the metal door frame next to Mike’s head. The other two rounds hit him in his ballistic “raid vest” which saved his life. Mike pivoted and shot four two round bursts from his Heckler and Koch MP-5 9mm submachine gun striking the suspect with seven out of eight shots, killing him.
Searching has its risks but may be necessary based on the physical layout of your home, i.e. where other bedrooms for your children or possibly an elderly parent are located. It’s kind of hard to bunker or ensconce in your bedroom when the intruder is between you and your children.
Further, ensconcing may not be possible if an attack occurs during the day when family is scattered about the house or property. This also creates a problem when your handguns or long-guns are not within arm’s reach. Imagine sitting in the living room watching television, when an intruder begins kicking in your front door. Where are your guns? If the firearms are stowed in a safe downstairs in the den, or upstairs in a gun safe, how long will it take you to get to them? It is for this reason that many armed citizens elect to carry their handguns on their person within the home or strategically place quick access safes mounted on the walls in several rooms.
In the old television show Candid Camera the theme song stated, “When you least expect it, you’re elected…” Violent crime happens everywhere at every time not just in the bad parts of town when you’re armed to the teeth.
CASE STUDY
St. Louis, Missouri: Approximately 11pm on a Monday night a 17-year-old girl walks out to her car parked on the street in front of her mother’s modest home. Two armed and masked gunmen seize the girl and use her as a human shield holding a gun to her head while attempting a home invasion. The girl’s father is visiting however and draws his own gun shooting and killing one suspect and shooting and seriously wounding the other. The 17-year-old daughter was uninjured. The dead suspect had previously served time for robbery, the wounded suspect was once accused of murder but charges were dropped when witnesses to his crime would not cooperate.
Monday night at home, with a gunfight with two hyper-violent criminal suspects erupting, fortunately the father was prepared and accurate in his fire!
ACTIVE SEARCHING AND RESPONSE
Conducting what police call a slow and methodical search takes time and is certainly not to be conducted in haste. There are several different methods to search or clear your home or a structure.
Slicing the pie or quartering
Imagine you are approaching a room down a hallway. As you would normally walk down the hall toward the room, you can begin to see into the room. As you close in and pass in front of the threshold, you can see into the room except for possibly the corners but anyone in the room can see you. Further if the room is dark and the hallway lit up, they can see you but you cannot see them. This is not how you want to search a room or structure because anyone who can see you can shoot you if they are armed and so inclined. By slowing down, using available cover (such as a doorway) you can more safely search or clear a room. We do this by searching small sections or “slices of the pie” of the room.
As you move the pistol should move from a ready position such as low, indoor or chest ready up to point shoulder as unknown risks are approached. You must be prepared to fire if/when a deadly threat presents itself.
As in using cover, we want to stand back away from the doorway of the room we want to search. In most homes, this may not be very far.
As you “slice the pie” you “roll out” as previously described in the cover section. Only your eye and your handgun should be visible. We roll out from the waist, clear the visible section, then step slightly and roll out more, until the majority of the room is cleared in this fashion. Even after you have cleared the majority of the room from outside the threshold, the corners and areas behind furniture must be cleared. Once again, this is a game of angles and inches.
CASE STUDY
My team once searched an entire seven story apartment building room by room looking for a murder suspect who had run into the building. Using a body bunker we had to search each apartment that took hours and was exhausting considering the full SWAT kit (helmet, raid vest, duty belt) we had to wear and carrying the bunker that weighed in excess of 35 pounds. The stress level searching the last few rooms was certainly intense! We did not find the suspect that day but we certainly earned our pay.
Care must be taken to not lead with a foot, your shoulder of other parts of your body. For example, don’t expose a foot by stepping out too far, to a subject in the room. By leading with a body part rather than rolling out ready to shoot, you expose your position. All an assailant has to do is aim at the doorway and wait until you come into view, or shoot through the wall for that matter.
When you search, don’t anticipate seeing an entire person if the person is hiding. You will see a tennis shoe sticking out or part of a shoulder or top of their head. You may not see their entire body.
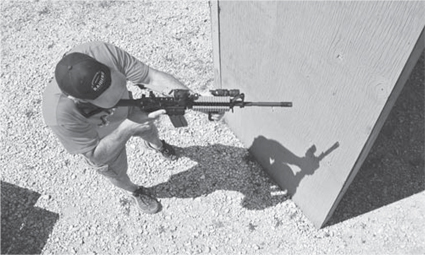
“Slicing the pie” refers to quartering or segmenting the room into pieces of the pie.
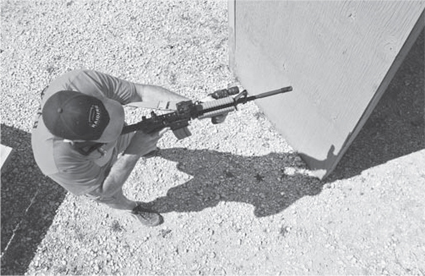
A small step is made, then you roll out to clear, then another step and so forth.
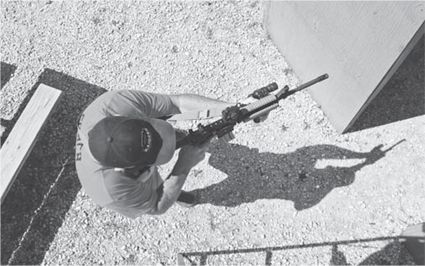
Using this technique the bulk of a room can be cleared without making entry.
If you are responding to calls for help from a family member, this quartering or slicing the pie tactic can be employed more quickly to safely clear your way. The same stepping and rolling out is down, just in a quicker fashion. In this way, you are not blindly moving into gunfire in your haste.
Remember to breathe a few deep breaths before you start searching and during your search. That will help control the inevitable SNS response and improve your performance.
CHALLENGING AN INTRUDER
If during your search you encounter an intruder who does not pose a deadly threat, then you must give them verbal commands. Do not approach them to put hands on. If they don’t have their own gun or other weapon, by closing the gap and getting within arm’s reach, you are giving them the opportunity to attempt to take your gun.
Your job is to protect your family’s life and your life - not apprehend suspects.
Also don’t be shocked if the assailant does not follow your commands to get on the ground even when you are pointing a firearm at them. As stated, I’ve pointed guns at hundreds of people on the street and in confrontations indoors. Many were so unimpressed with my shiny pistol, steely-eyed countenance and loud repetitive verbal commands that they turned and fled. In an armed citizen confrontation, this is a good thing. He runs away and you just wait for responding police to search for him. A tactic might be to order the intruder to “Get out of my house!” Your job is to protect your family’s life and your life - not apprehend suspects. That choice of holding them at gunpoint or telling them to beat feet and get out is up to you.
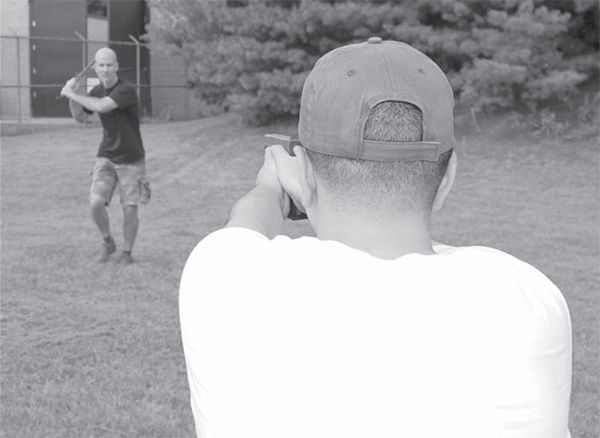
When challenging a threat, give them short, repetitive verbal commands such as “Drop the crowbar! Drop it now! Get down on the ground!”
CASE STUDY
An off-duty police lieutenant comes home and after entering the house realizes that there is a burglary in progress. The lieutenant draws his pistol and begins searching, encountering the burglar who, is pointing his own gun at the off-duty cop in plainclothes. This armed stalemate could have ended in a terminal way for both citizen and criminal. Finally the lieutenant says, “This could end bad for both of us. Why don’t you just take off?” At which point the suspect runs from the house. Some would argue the police officer should have shot but they weren’t in his shoes at that moment facing death. On that day, the lieutenant survived and that is the number one mission.
The best way to reduce the threat to you is to order the assailant, “Get down on the floor! Arms out to the side, palms up! Spread your legs! Don’t look at me! The police are on their way! Don’t make me shoot you!”
Do all this from a position of cover such as from a corner, behind an appliance or doorway minimizing your exposure. As in preparing for the police response after a shooting, which we will cover later, if possible prepare for the officers arrival. Unfortunately there are “blue on blue” shootings each year where off-duty or plainclothes cops are shot by responding officers in the chaos of an armed encounter. Reduce that likelihood by lowering or re-holstering your firearm prior to contact with them. Be advised that if you or a family member cannot open the door for them then they will probably kick the door in.
RETREATING
Just because you start clearing and searching doesn’t mean you have to continue. If at any time you feel the risk is too great, retreat (back up) to a position of cover and “hunker down.” In this way, you can set up that hasty ambush we talked about for any intruder who elects to continue forward toward you. This is exactly what that Detroit female homeowner did, mentioned in an earlier case study when three intruders kicked in her back door. She bunkered and shot at them as they came toward her. All three retreated, then one intruder drew his own pistol and attempted to enter again only to be met by more of her gunfire, after which he quickly gave up anymore thoughts of invading the home, and then all three ran off into the night.
COMMUNICATIONS
Police officers will make all possible haste toward a “burglary in progress armed homeowner” call, a robbery or shooting. But when you are the one involved and forced to wait, it can seem like hours. You want to call or have someone else call prior to contact, if at all possible and when it is safe to do so. If the threat is imminent, then take care of business, control the threat, and then call the police.
You getting shot while talking to police dispatch instead of taking care of business and possibly shooting the intruder is not a viable approach. The dispatcher will probably warn whoever calls to “put the gun down.” The dispatcher is trying to protect the responding officers but not you. Don’t listen to this advice if it puts you and your family at risk. Have your family member, or you if you’re calling, stay on the line with police dispatch until such time as police arrive and begin communicating directly with you. This open line is recorded by dispatch and can serve as evidence if your verbal orders are not followed and the intruder begins to attack. Remember to keep your language powerful and direct but not threatening, i.e. “Don’t move or I’ll blow your head off!” or other threats. A declaration such as, “Don’t make me shoot you!” can be used in your defense.
ATTACK SCENARIOS
As you go about your daily routine, envision attacks that come from different directions or in different environments you might travel. Constantly play the when/then game to think about what you will do when “it” happens.
Criminals have forced entry to commit burglaries, rapes, home invasions and all manner of criminal activity in a vast number of ways. Potential armed confrontations or attacks may happen:
· outside (front)
· outside (rear)
· front door
· back door
· other door(s)
· garage
· other outbuilding
· windows
· sliding glass door(s)
· in your auto
· parking area
· business location
· public location
· even at a public park or other non-developed area
The number of locations or the environments where you might have to engage in a fight for your life are limited only by the places you go or travel. Each one has different physical layouts, structures, available cover and areas of concern to deal with. Some of which you and your companions or family may be isolated in dealing with the attacker(s). Others, such as malls, football stadiums or other public areas, may have a large number of other citizens. You have to safely traverse or work within whatever structure or environment you’re in and win the day.
Smart and common sense tactics can make that winning possible.
TIME
Many tactics are dependent or reliant on the amount of time available. A spontaneous assault right now may give you only time to respond. Hopefully this response will be based on your training and preplanned, pre-thought out responses.
Other scenarios or confrontations may have some time to allow you to better prepare or operate. If time permits, of course, await the police and let them handle the situation or avoid the confrontation altogether by possibly retreating to cover or getting out of the area. Quite possibly drawing your handgun, covering the threat, ordering the assailant(s) to “Stay back!” and then getting the heck out of Dodge!
DISTANCE
Maintaining your distance from a threat is a sound tactic. We have already shown that an assailant armed with a contact weapon - knife or bludgeon, at 30 feet or so - can close the gap between you and he in less than a couple of seconds. Staying back and covering them with your firearm from a distance is sound strategy. Be advised that while in an SNS response, closeness is equated with control. Armed citizens and law enforcement officers oftentimes rush into or close distance with a threat because they believe that going hands on or being close means they are dominating the encounter.
Even in “felony car stops” where LEOs are chasing felons in a vehicle pursuit and officers announce on the radio, “If the car stops, let’s use felony stop tactics!” one officer or more will run up to the car, recklessly endangering themselves. The result is that other officers who were in more control and behind cover, have to run up to protect their brother.
We shoot better at a distance, so why “storm the beaches”?
CASE STUDY
On SWAT when dealing with violent felon searches in homes, we would establish an outer perimeter that was manned by patrol. In one memorable incident we had pushed “Al” a seasoned SWAT operator up into an attic crawl space to search for a suspect. Much like the work of the “tunnel rats” of Vietnam, searching a crawl space is very dangerous. After Al located the suspect and we broadcast an apprehension, we turned around and all the officers from the outer perimeter were now standing in the house. The outer perimeter had collapsed.
Closeness does not equal control. When possible maintain your distance.
WEAPON ACCESS
GunVault Speed Vault mounted in closet. Press the combination and the door drops down offering quick access.
Storing and securing a weapon and access during an emergency situation is about finding a balance. The more secure a firearm is to prevent theft and to keep it out of the hands of non-authorized persons such as children, the less accessible it is. Big heavy safes are a great way to protect firearms from burglars and damage or loss due to fire, but are often slow to open and are often placed in rooms such as basements or dens with solid floor versus upstairs bedrooms or living rooms.
The answer and a good balance between speed of access and security is one of the modern safes from Sentry or Gun Vault. I have used the Home Defense Center from Sentry Safe for a couple of primary long-guns and a pistol for armed response in my home. It is a decent sized safe that fits in a corner. It cannot secure all of my firearms but it takes up very little space and keeps the guns out of the hands of my growing grandchildren.
For handguns I use a Sentry Digital Safe and a GunVault Speed Vault. Both feature access combinations that are a quick series of button pushes you select from the four combo buttons. Both either open on a compression gas strut (Sentry Safe) or drops down from gravity (Gun Vault).
My recommendation if you have a firearms collection is to secure most of your guns in a large safe and one or more secured in quick access safes.
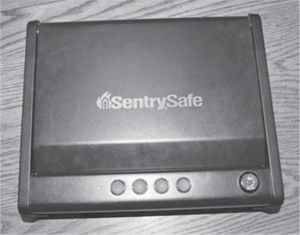
Sentry Safe Digital allows quick access with pneumatic door.
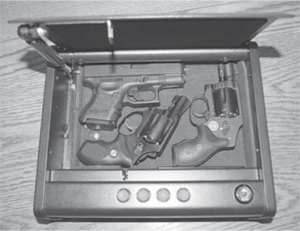
Press in your code and the door pops up and open.
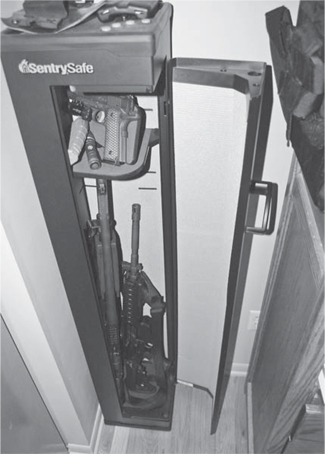
Sentry Safe Home Defense Center secures two long-guns, pistol with weaponlight and spare Surefire handheld light as well.
My travel safe used when flying is a NanoVault 300. To comply with federal law, you must declare a firearm when flying which can only be transported in checked luggage. To find out more, visit the TSA website at http://www.tsa.gov/traveler-information/firearms-and-ammunition there you can find out more about how to transport firearms and ammunition while flying. The NanoVault 300 has a push button combination so it can still be accessed if you lose or misplace your keys. It also features a cable that can be run through the hardware of my suitcase to prevent easy theft by pulling it out of my luggage.
Prevent two types of tragedy:
1) Prevent an accidental shooting by securing your firearms, and
2) Prevent a tragedy of being unable to access a gun during an armed encounter or intrusion into your property.
For these reasons many armed citizens are electing to carry a handgun on their person, while at home. It’s easy enough to do with so many quality holsters. I’ve heard of a “game” played by friends who carry concealed. They have a standing bet of $5.00 if they can catch their friend without a firearm on their person. To some, it may seem over the top. I was once accused by an acquaintance, actually a friend of a friend on Facebook, of being a “Jack Bauer wannabe.” There are two points I want to relate here: 1) I pointed out that I was not paranoid, I was experienced. I have spent the time from age 18 until now, some 34+ years dealing with violent people and seeing the results of their acts, and 2) That this same anti-gun “let’s all hold hands and sing” person almost lost an eye when criminal suspects attacked him and he was stabbed in the side of the head.
The wise man learns from others mistakes and experiences - the ignorant man fails to learn from his own.
LOW OR ADVERSE LIGHTING AND TACTICAL OPTIONS
Criminals seldom, if ever, look for a fair fight. They avoid confrontation and the armed citizen like the plague. They therefore ply their trade under cover of darkness, low or subdued lighting that can conceal them and their actions until they attack or complete their criminal acts.
CASE STUDY
My father passed away several years ago. His obituary ran in the local paper with the announcement detailing calling hours as well as the funeral date, time and location. I was asleep the night before the calling hours when I received a call from my police department’s dispatch center stating that an alarm drop had occurred at my father’s house. Officers were on scene, it was an apparent false alarm and I should respond to secure the house since the front door had apparently been left unlocked.
When I arrived on scene, still rubbing the sleep from my eyes, the officers said that they had checked the house and apparently my brother or I had left the front door unlocked and the wind must have blown open the door causing the alarm. I thanked them as they departed.
I then looked around the house since both my brother and I are very careful about locking up. In a back bedroom I found a window leading out to a screened in porch pushed up and a small statue knocked over on the floor under the window. I then walked out to the porch and examined the screen. A suspect had slit the bottom of the screen with a razor blade, had entered the porch and then pushed open the window to the house. Once he exited the back bedroom he had initiated the motion sensor in the hallway causing the alarm to go off.
It was then that the burglar unlocked the front door and left the house.
I had to call the officers back to the scene to make a burglary report and show them the evidence. They had stopped at the easiest conclusion - homeowner error - and had not looked beyond that. In the cover of darkness a serial burglar had picked an easy target based on reading the obituaries. My father’s home could have been ransacked, family heirlooms lost or damaged. The only thing that stopped the burglar was as an alarm, which a loving son and police officer had paid for years ago as a Christmas present.
At night, all the monsters come out to play…
According to the FBI’s Law Enforcement Officers Killed and Assaulted for 2012, examining the years 2003-2012, 55% or 295 officers out of the total of 535 which were feloniously killed in the line of duty were killed at night. 55%.
The FBI has stated, “historically most line-of-duty deaths and serious injuries take place during the hours of darkness.” And yet, very little if any police firearms training takes place in low or subdued lighting. For instance, in my state for years basic police academies were allowed to train recruits for “low light” by having them wear welding goggles. The state qualification course for pistol and shotgun for in-service officers allowed the same welding goggles to be worn. Since welding goggles only impair vision there was no training in the use of flashlights or weapon mounted lights.
Many agencies nationwide still do not conduct meaningful low light training for their officers and many officers have little to no knowledge of how to work and operate safely, in low light conditions.
THE EYES
When I started working security in 1980 while attending University, most of my work was conducted at night in low or subdued lighting and I was ill-equipped to deal with these conditions. I can remember working a small community theatre that is unfortunately situated in a deteriorating section of town. The first night I worked in the parking lot, I had no flashlight and my employer did not provide one. The second night I took an old Radio Shack® plastic flashlight the store chain used to give away for free. It was a six cell D battery light but it was worth little more than what they gave it away for. Sometimes it would light up and sometimes it would not.
It was then that I decided that I would have a decent working flashlight and how most of my police equipment purchases were subsequently made - out of necessity. I bought handcuffs because I figured I couldn’t sit on a bad guy until the police arrived, a raincoat because I got soaked one night working outside and a decent flashlight because I wanted to be able to see and operate in the dark.
CASE STUDY
As a Field Training Officer I once trained a rookie who arrived on my shift after working 12 weeks on afternoon shift. He didn’t have a flashlight and I asked, “Where’s your flashlight?” He said that he had left his Streamlight® SL-20 light in a patrol car and someone had taken it (yes, we have thieves in law enforcement. Why do you think we have locks on our lockers?). I asked him what he was planning to do if we had to search a darkened factory or house. He said he would stay with me… I asked if he still had the flashlight - three cell D battery light which the department had issued him. He said, yes but that it wasn’t too bright. I pointed out that any light is better than being in the dark… And believe me, he was in the dark. He didn’t make it through probation…
Over the years I’ve worked on nightshifts extensively, spent hundreds, no thousands, of dollars on flashlights, weapon mounted lights and have had some of the best training in low-light operations as well as training hundreds of LEOs, SWAT operators and private armed citizens in low-light operations, tactics and shooting.
Much of this research comes from a friend of mine, Marshall Schmidt. I met Marshall, a law enforcement trainer, years ago at a police conference in Dallas, Texas. Marshall was a trainer for the Kansas Bureau of Investigation and specialized at that time in low or subdued lighting training for officers. Marshall now works as a trainer for Glock USA.
The retinas of the eyes are made up of rods and cones. The rods are more photosensitive and number at around 120 million. The cones number at around six to seven million and are used for daylight or photopic lighting conditions. Mesopic vision is in intermediate light and a combination of rods and cones are used for vision. Scotopic vision is at low or subdued light levels.
Author lectures law enforcement students on how the eyes are affected by low light.
It is wrong, however, to think of low, subdued or adverse lighting as only occurring outside and at night. Even during the height of the afternoon sun, low or subdued lighting can be found indoors. Black-holes, as Ken Good refers to darkened areas or spaces such as closets, interior rooms without lighting, or under desks or anywhere in a room where light does not penetrate, may even be found in an otherwise well lit room.
CASE STUDY
I’ve conducted hundreds of narcotics search warrants as a team leader or team member on SWAT. Most of these were conducted in the height of the “crack wars” of the 1990s. Each team member carried a H&K MP5 submachine gun with a Surefire® white light integral forearm. In addition team members carried at least one handheld flashlight with many carrying weapon-mounted white lights on their pistols. We used to joke that in a dope house the only light bulb that worked was in the kitchen and frequently we conducted raids on houses where the only illumination was the flicker of light from the TV set, which always seemed to have cable. But I digress… It paid to have at least one quality light if not multiples to look for possibly armed dope dealers.
LOW LIGHT ADAPTATION
When you move from the sun lit exterior of your home (photopic vision) to a darkened area (scotopic vision) you cannot normally see well and it takes a period of time until you can safely navigate inside.
In an SNS response vision is affected as well with more loss of night vision and the ability to distinguish shapes and colors further impaired - the cones of photopic vision are what the eyes use to see colors.
✵ If you have normal vision of 20/20 when you enter into a low light environment, your vision deteriorates to a level of around 20/800 or about 5% of your normal visual acuity. Consider that legal blindness equates to a visual acuity level of about 20/200. This means that your vision is four times worse than that of legal blindness.
✵ At 15 minutes your eyes adapt to a point your vision will be about 20/300.
✵ At about 32 minutes your vision improves to about 20/180 and is the best that it will get.
Put simply, your night or scotopic vision right off the bat can leave you vulnerable and, in most situations, who has time to wait 32 minutes for their vision to improve?
HERE COMES THE LIGHT
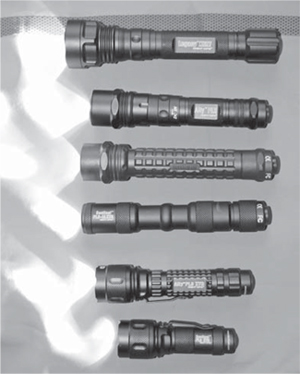
Blackhawk’s excellent handheld flashlights.
I progressed in my equipment upgrades to what, at the time, was high-tech lighting, Kel-Tec Flashlights, then Maglites. I saw that in the hands of officers, they improved police night operations substantially. These lights offered better/brighter bulbs and reflectors as well as durable aluminum bodies that could double as impact weapons for law enforcement officers.
The problem with these flashlights is that they used disposable batteries that could cost you a few bucks and had the tendency to die when you needed them most.
For this reason, most of us used to carry small AA battery Streamlight® or Maglite penlights. Although these lights offered little illumination in comparison with their larger brothers, they were better than being in the dark.
Streamlight solved the problem with the introduction of their line of rechargeable flashlights. It was at this point in time while carrying an SL-20 with 20,000 candlepower, while working security at an outdoor concert facility that light could be used to distract or disorient subjects as well. Frequently we were required to move large groups of concert-goers who were under the influence of alcohol or drugs. Shining my flashlight at them when they would not cooperate was a way to prompt them to move away from the blinding light towards areas they were permitted.
Since those days more and smaller rechargeable flashlights have come on the scene as well as the use of LED - Light Emitting Diode bulbs. The benefit of LED’s in flashlights is the thousands of hours of burn time possible versus standard incandescent bulbs and they are more rugged as well. The first LED flashlights emitted a light that was kind of bluish in color but today’s high quality LED’s are great lights very white and extremely bright. Another nice feature of LED bulbs is that you have more run time as the batteries die versus little warning with incandescent bulbs.
Surefire came on the scene with their 6P two cell CR123 battery lights which introduced the term lumen. The original 6P was 65 lumens. Lumens, according to Surefire, are a better indicator of overall light beam brightness than candlepower.
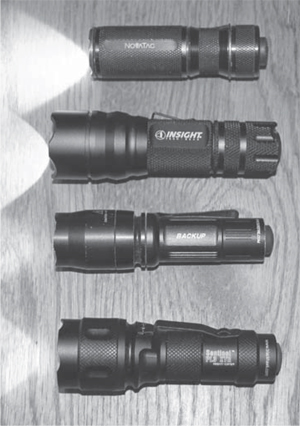
Lineup of micro lights from NovaTac, InSight, Surefire and Blackhawk. Any of these are suitable for everyday carry for the armed citizen.
Today’s small, single CR123 battery and double battery CREE LED lights from Surefire, Streamlight, Blackhawk®, Brite-Strike®, Insight®, NovaTac® and many more quality manufacturers, allow the armed citizen to always have a light with them - in a pocket, purse or carried on the belt. Further, modern mini-lights such as the Executive Precision Lighting Instrument light from Brite-Strike uses two AAA batteries but produces 160 lumens of light and only weighs next to nothing.
Today in uniform I carry two rechargeable lights from Streamlight, a Dual Switch LED Stinger® flashlight as a primary and a smaller Strion® flashlight as back-up, following the old Navy SEAL motto - “Two equals one, and one equals none.” Redundancy in safety equipment is always nice.
Off-duty in a jacket or vest pocket and available at the house for self-defense, I carry lithium battery lights from Surefire, Blackhawk, Brite-Strike and NovaTac.
Factors to be considered when purchasing a flashlight are:
· Throw - The distance the beam can travel and illuminate a target.
· Corona - The wider area of a beam that encompasses the entire lit portion.
· Hot Spot - This is the intense circle of light within the corona where the beam is at its brightest.
· Side Spill or Side Splash - Is the unfocused light that is emitted from the bulb or LED and lights up areas around the circumference of the lens.
For defensive purposes, you want a flashlight, and all of the aforementioned lights are capable, which can punch through the darkness to intensely illuminate a target area or intruder from head to toe, at a distance with minimal side splash. A beam which is so intently focused that the hot-spot does not allow you to see the threat’s hands, or what’s in them, is of little value, so too, a flashlight which cannot penetrate the darkness with white light to be able to identify a threat should be avoided.
Activation switch
For most defensive purposes, a tail-cap switch is preferable. In this style of switch, a rubber button switch is on the end-cap. To activate the light, the user must press the light inward.
· “Click” switch - When the user presses inward the switch “clicks” on and stays on until you press the switch again.
· Click switch for different light levels - Another type of flashlight click switch is a click on for high lumen level, click again for low level and then click off. I am not fond of lights with this style of click switch for self-defense.
· Momentary switch - When you press the button, the light illuminates. You release pressure, the light goes out.
· Rotary switch - Many flashlights feature a momentary on button switch that can be left on for extended time by rotating the switch clockwise.
· Multi-Purpose switch - In these flashlights there is a momentary on button at the beginning of the press. Pressing further clicks the light on. Double or triple pressing the button can elicit a strobe feature or even a Morse code blink for S-O-S.
· Rotary selection switch - Some flashlights have a rotary switch that selects function but does not turn the light on and off. The Blackhawk Gladius® for instance, has a rotary switch which features: constant on, momentary on, strobe, and lock-out. With the Gladius you select the feature and then press the momentary tail-cap button to actuate. I usually leave mine in momentary on mode.
For general purpose, I prefer a flashlight that has only a momentary button switch or a combination switch that has momentary button that presses farther to click and stay on.
Strobe capability is nice and can be very distracting on the subject. Having run hundreds of personnel through low and subdued light level shooting programs, most people do not have the skill level with light to double or triple click the light to actuate the strobe. A rotary switch such as on the Gladius takes more practice as well. Unless my light was previously set to strobe function, I’ve found that I don’t normally use this on the street or in training.
Lumen level
For most general purpose flashlights, I believe a lumen level above 100 is necessary. Fortunately most lights exceed this level. The rule is that the higher the lumen level, the lower the runtime or time until the LED begins to fade. Many lights have two light levels, one at their highest and one substantially reduced.
The excellent Surefire 6PX Tactical is a great light featuring 320 lumens. At this light level, the beam can disorient or temporarily distract a threat. The 6PX Tactical is selling for around $63.00 right now from Amazon.
High intensity white lights allow you to work behind a “wall of light.” When I’ve acted as a bad guy role-player in use of cover drills in low light I can attest to the blinding nature of these modern high lumen level lights. When an intense white light hits you, it is virtually impossible to ascertain where the student is located, the lower the overall ambient light level, the more intense this effect. The longer the light is left on, the more an antagonist can adjust but the concept of the “wall of light” is tactically effective.
Surefire’s excellent 320 lumen 6PX Tactical handheld LED flashlight.
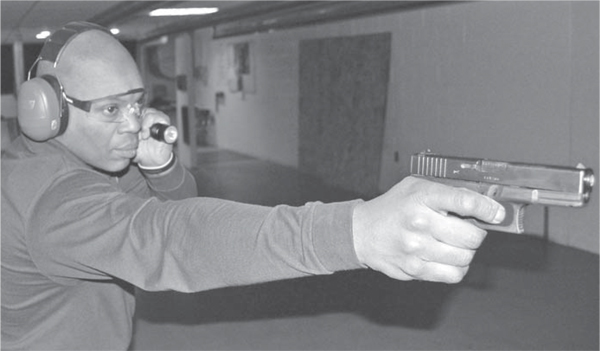
Author’s partner Jeff Tyler uses the neck index shooting position.
Fortunately there are some great products out there, many available at great prices and most are available at the company’s website or Amazon.com. Checking Amazon you can read the products reviews so you’re not getting an inferior or cheap product. Remember the admonition, “Buy cheap, pay twice!” when buying self-defense equipment.
FLASHLIGHT USE
There were law enforcement myths surrounding the use of flashlights, such as officers shouldn’t use flashlights because it would attract gunfire. Truth is, as law enforcement trainer and researcher Tom Aveni has pointed out, that this is a LE myth but more importantly, “Low light shootings account for at least 60% of police applications of deadly force. They seem to diminish police hit ratios by as much as 30%. Low light also accounts for as many as 75% of all mistake-of-fact shootings.”
Yet, as previously mentioned few agencies train extensively in low-light operations, adverse light shooting or the coordinated use of handheld light and handgun.
You use a flashlight to:
· Navigate - Flashlights are used to find your way and avoid physical hazards such as obstacles, drop-offs or holes.
· Locate - Lights can be used to locate both friend and foe. Searching through your house in the middle of the night, a handheld light can help you locate the sound of the noise you heard.
· Identify - Once you find your way and locate the person(s) you’re searching for, a light can help you identify them and ascertain if they present a deadly threat.
· Engage the threat - And we mean that not all “engagement” is deadly in nature. If the subject poses no threat to you and you are not in fear of your life, then engagement may be verbal as in, “Get out of my house,” or “Stand back!” It may also mean non-deadly force engagement, i.e. spraying a subject with pepper spray or using your C2 Taser®. When it comes to deadly force, as Tom Aveni has pointed out, police accuracy in low-light situations deteriorates by as much as 30%. Flashlights, when used correctly and with training, can improve this hit percentage substantially.
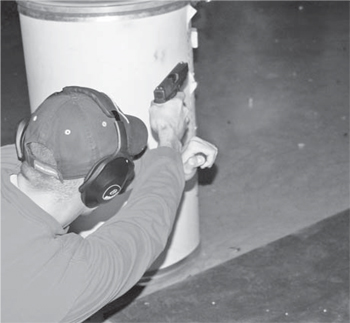
Here student uses Harries technique behind low cover.
CASE STUDY
A Colorado man shot and killed his own 14-year-old daughter who was sneaking back into the house through a basement window in the early morning. The father thought it was a burglar breaking in.
FLASHLIGHT TACTICS
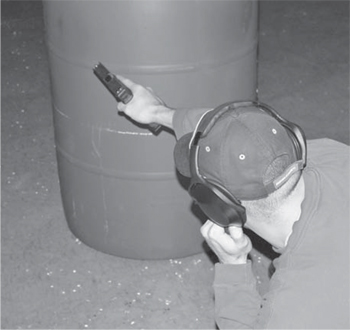
Neck index is used to roll out from weak side of cover.
Operational understanding and tactical training using handheld white lights has improved tremendously over the past few years. Sadly if you watch many (most?) law enforcement officers operate with flashlights it is pretty dangerous. During a building search, for instance, many LEOs will simply walk around with their lights illuminated the entire time. As they walk and raise/lower the light while searching, each time the light comes back to point at the ground by their feet, they illuminate/expose themselves to any potentia assailant hiding in the darkness. Regardless of lumen level, this has always been a problem. It is especially true with modern high-capacity lights that can reflect off the surface of the floor, completely illuminating the officer and any other officer standing in the area. This “tracking back” can and should be avoided by only using the temporary or momentary activation button on the light.
Another issue in this regard is “side splash” from the light. In some flashlights this is more pronounced but side spill can throw enough light to the side to illuminate you.
Concepts I’ve learned over the years when using white lights are:
· Use a flashlight grip which coordinates the light beam and handgun when you can.
· Use a two-handed stance whenever possible.
· Use the momentary button when searching or operating with the light.
· Keep the flashlight placement ahead of your body to minimize side splash.
· Try to use cover as you normally would. More on cover tactics with the light later.
· “Paint” the area with light. Light on, sweep the area with the light’s beam. Light off.
· Move after illuminating an area to make a harder target.
· If you locate a subject who does not present a deadly threat, keep your light on. If you turn the light off, he can run or move which may require you to search again.
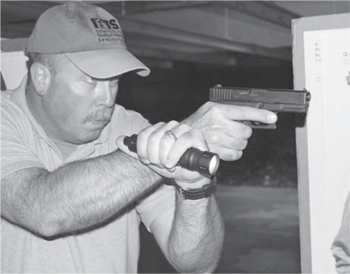
Author demonstrates the strongest flashlight technique, the Harries method.
When I first started in law enforcement the most advocated tactic was the FBI flashlight hold. In the FBI hold, the flashlight is extended out to the side at arm’s length. The theory here is that attackers may shoot for the light and if it is held out to the side the agent/officer will be safe. Once again, Tom Aveni’s research has put this myth to bed.
We want to have a few different skill sets in our repertoire and different light techniques as well.
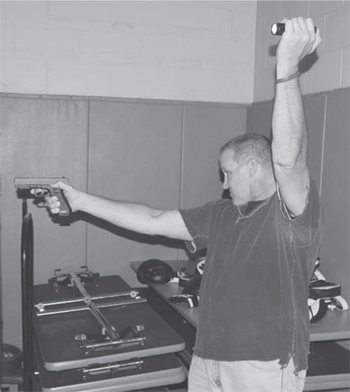
Don Sampsel demonstrates the FBI technique by holding the flashlight up and away from his body to minimize exposure.
FBI technique - The FBI technique can still be used and is a viable technique if searching for an armed attacker from behind short cover such as over a low wall or vehicle or with narrow cover such as a tree less than arm’s reach wide or a utility pole. The flashlight is held up and away from you with the support hand while the pistol is covering the threat area with the gun hand. Remember that the gun should be up and within line of sight. You aim the handgun. You search with the light.
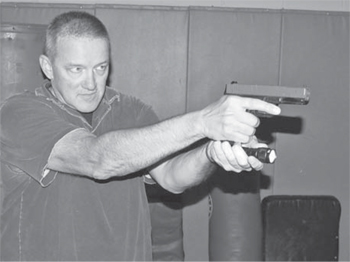
A simple way to use a flashlight while working with a handgun is to “stack” the mag baseplate on the flashlight tube. Simple but it offers little recoil control.
Negative aspects of this technique are a lack of coordination between handgun and flashlight. With modern high lumen lights, however, you usually will get enough light downrange to be able to see a wide area. Shooting accuracy is adversely impacted based on the use of only one hand. Side splash and reflection off ceilings and floors usually illuminates you regardless of the side placement of the light.
New York or Stack technique - Is assumed by simply holding the flashlight in your support hand and stacking the baseplate of the magazine of the pistol held in your gun hand on top of the flashlight tube. For close in work with the pistol, decent accuracy can be achieved if the pistol is brought up to the line of sight.
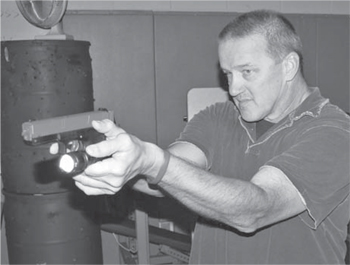
The Chapman technique coordinates the light and handgun and is good for large flashlights with side switches.
Negative aspects are a lack of recoil control during firing as the baseplate/flashlight tube match-up is not conducive to control movement or bounce. Further, there is the tendency to point shoot with this technique rather than bring the pistol up to eye level and aim. This technique is better to employ with an activation switch that is located on the side of the tube.
Chapman technique - The late great International Practical Shooting Confederation Grand Master and World Champion demonstrated this technique when I attended an Advanced Officer Survival course that was taught by Mas Ayoob and Chapman years ago. This technique works best with larger tube flashlights such as D cell Maglites or the Streamlight SL20 with switches located on the side of the tube (works with smaller flashlights as well). In the Chapman technique the flashlight is held with the thumb or index finger on the button. The knuckles of the shooting fingers are indexed on the tube and the support hand fingers wrap around to complete a solid two-hand hold. This is a very solid technique and the hands can be pulled back to chest ready with the forearms resting on the ribs for extended periods.
Negative aspects are the more complex nature of the hold and that the pistol is held in the center of the body which necessitates more roll-out from cover. Because the grip is different than the following two techniques, you cannot easily transition to other techniques. Still the Chapman technique is a solid two-hand technique worthy of consideration.
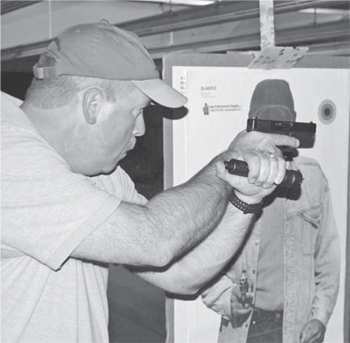
The Harries method is the preferred method when shooting with two hands and working from the strong-side of cover.
Harries technique - The Harries technique is the premier two-handed flashlight technique. Isometric pressure is used to control the pistol by pressing the back of the hands together at the wrist. In this posture the Harries Technique very much resembles the Weaver shooting stance. The flashlight is held in a “reverse grip” i.e. - lens or bulb end at the pinky. The technique is assumed by extending the shooting hand/arm out, wrapping the support hand under the extended gun arm and mating the two. To achieve isometric pressure, roll the support elbow under.
Negative aspects are a more complex platform that takes more training and skill maintenance to maintain proficiency. You must be careful to extend the gun arm first and then wrap the support hand under, otherwise you “flag” or “laser” your own forearm. The Harries technique should not be used when rolling out from the “weak” or support side of cover because you expose more than one half of your body before the pistol clears cover.
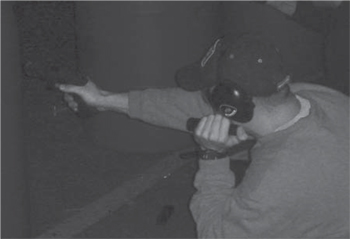
Neck index places the flashlight on your weak side so it exposes less when shooting around cover to that side.
Neck-Index technique - This technique was designed by Ken Good of Strategos International and is the best one handed flashlight shooting technique. The pistol is extended up to eye level but the flashlight is indexed at the neck or under the ear at the jaw. The light is held in the reverse grip as well. This is the best way for a shooter to roll out from the weak or support side of cover.
Negative aspects are the tendency for shooters to place the tube of a larger light on the shoulder. Doing so tends to aim the light toward the floor and not on a co-axis with the barrel. Another error is the tendency to bring the light toward the chin, which illuminates the rear/top of the slide. This oftentimes prevents the shooter from seeing the assailant/target. Finally, the light is placed close to the head/body. If the light is left on, then the assailant may shoot toward the light.
There are other techniques such as the Ayoob technique, the Roger’s or Syringe technique and more. These techniques are worthwhile and mastery depends on how much time you have to train and develop them as skills. In my experience, the two basic techniques I would recommend are the Harries and the Neck Index.
RELOADING WITH LIGHT IN HAND
There have been a lot of overly complicated notions and ideas put forth as to what to do with your handheld light while reloading: place the light in your gun side arm pit, push it through your belt, clamp it between your knees, kneel and place it on your foot, use an aftermarket lanyard or ring on your finger or wrist, and more. My experience on this matter is that the more complicated a skill set you use or releasing your grip on the light - the more chance you’ll fumble the reload or drop the flashlight.
Years ago I remember firearms trainer Chuck Taylor recommending that you just keep the flashlight in your hand and reload. Since I have been practicing and teaching this technique, I’ve not had any students fumble or drop flashlights or magazines. While it certainly works easier if you have a smaller flashlight like an N sized 3-volt lithium, it works with C size flashlights like the Safariland Stinger as well as D sized flashlights.
Simply keep the flashlight in hand, reach to your spare magazine carrier, grab the new mag and then reload. Have doubts? Double and triple check you have an unloaded pistol then try this technique. I think you’ll be surprised.
Shooting from cover with a flashlight
As in our previous recommendations on cover, when using a light stay back from cover so that you can extend the pistol and have the sights at eye level prior to rolling out as well as having the flashlight in position to instantly illuminate the area.
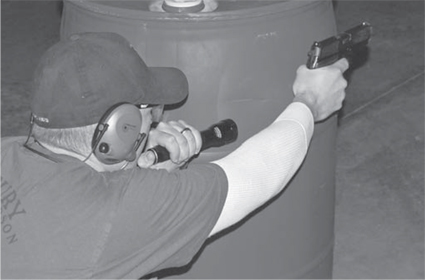
This is why training is so important. Here student is too close to cover and his flashlight is held improperly. When he illuminates the light he will not be able to see past his own gun hand.
The correct procedure is to roll out then illuminate. If you activate the light prior to rolling out, you will blind yourself from the backsplash reflected off the surface of your cover, as well as illuminating yourself to the assailant. Additionally, don’t track the light back to your position. Roll out, light on, search by “painting the area” with sweeping motions of light, then light out and roll back behind cover. Think about the “whack-a-mole” game mentioned and possibly change your position or elevation. If you locate, identify and then neutralize a threat by shooting until they are down, then you can keep the light on. Some will tell you to turn the light off and move in the dark after shooting. This is a task requiring high order control. My personal opinion is that it is a lot to ask someone to turn a light off when a threat is found and shot. Movement is good, but if you turn the light out and move, the subject may move and then you have to re-search to locate him.
As mentioned the Harries is best assumed from the gun or strong side of cover, the Neck Index on the support or weak side, e.g. a right-handed shooter uses Harries shooting around the right side of cover, and the Neck Index around his left side of cover.
If short or low cover is used, i.e. a vehicle or low wall, then the FBI technique of extending the flashlight out away from cover is a viable tactic.
WEAPON-MOUNTED LIGHTS
CASE STUDY
August, 2014 (LoudounTimes.com): An off-duty sheriff’s sergeant shot and wounded his 16-year-old daughter when he mistook her for an intruder in the home. The daughter had apparently snuck out earlier in the night and was sneaking back into the home at 3:30 a.m. when the sheriff’s deputy responded to the burglar alarm going off in the garage area. The deputy shot and wounded his daughter in the darkened garage when he believed an intruder was coming at him.
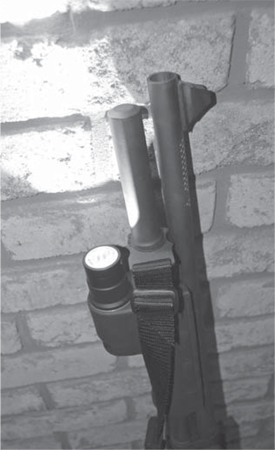
Surefire’s excellent DSF Series Shotgun forearm with over 600 lumens of white light. Mounted on Vang Comp tuned Remington 870 it is a formidable shotgun set-up.
Do I like them? In a word, yes. Operationally over the years running a submachine gun with a Surefire forearm, a Colt M4 with a white light attached and working SWAT and patrol carrying a Blackhawk Xiphos pistol light as well as having run Low Light Pistol courses and training SWAT operators in low light ops over the years, there is a distinct advantage to weapon mounted white lights. Executing search warrants on countless dope houses in the middle of the crack cocaine wars and slow/methodical home searches for murder suspects, I can attest to the value of being able to have two hands on a weapon system pointing at a threat while illuminating them with a high intensity white light. Furthermore, when mounted on a handgun, a weapon-mounted light allows the user to point a firearm and illuminate a target area or suspect with one hand. Consider the offhand being used to stabilize or balance yourself while ascending or descending stairs, opening a door or positioned to fend off an unseen or seen attacker. In law enforcement, K9 officers who frequently hold a dog leash in their offhand, can effectively search and cover with a weapon mounted white light. On police uniform patrol and SWAT my Glock 19 was outfitted with a Blackhawk Xiphos light (180 lumens) and carried in a SERPA Level 3 holster.
Running low light pistol “scramblers” which require students to move through a field of cover with or without partners against a role-playing suspect using air soft pistols, paintball or marking cartridges, I can attest to the effectiveness of weapon mounted light with so equipped students oftentimes dominating the force-on-force encounters.

Glock white light mounted on author’s G19, perfect for home defense.
This is not to say that you should only have a weapon mounted light and not a handheld. You can never use the light on the firearm as a flashlight only because…it’s attached to a firearm and everywhere you point it, you are pointing a live handgun or long-gun. While using weapon-mounted lights for SWAT, I would have a white light around a lanyard on my wrist. Yes, I had a white light on my MP5 or M4 and a Xiphos on my Glock 19 in my holster, but I also had a Blackhawk Gladius on my wrist. In this way I could search or illuminate an area without pointing a firearm.
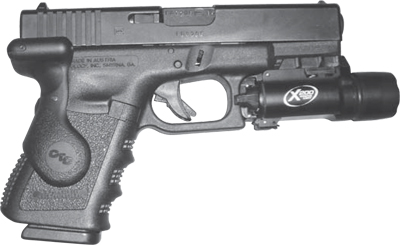
This set-up is excellent for low or subdued lighting. Crimson Trace Lasergrips and Surefire X200 white light. Best of both worlds.
For home defense, I have a Sentry® quick access Home Defense Center® in my bedroom. Inside I have a DoubleStar 1911 .45 pistol with a Surefire X300 weapon light (500 lumens) attached, a Remington 870 shotgun custom crafted by shotgun master gunsmith Hans Vang from VangComp sporting a Surefire 600 lumen forearm light, and a Colt 5.56 M4 carbine with a Viridian Green® X5L-RS white light/green laser combo light (190 lumen white light). I also have a U.S. Palm® Defender body armor carrier which features front/back IIIA ballistic panels, a spare Wilson® eight round magazine for the pistol and another Surefire 6PX Defender white light. You can see I value quality lights on both handgun and long-gun.
Fortunately many concealed carry holster manufacturers such as Blade-Tech® and Raven Concealment Systems® and others make holster manufacturers have begun making scabbards for pistols with weapon mounted lights. These rigs include inside the belt holsters as well as belt mounted concealment scabbards.
CASE STUDY
We were chasing robbery suspects in the city’s eastside where I patrolled on a sunny afternoon. They bailed out of their vehicle and we began a search on foot of the backyards and potential hiding areas. I was by myself searching a garage using a flashlight with my handgun, a Smith and Wesson 5906 9mm pistol in my gun hand. Despite the garage door being up, I had to use my Streamlight SL20 light to penetrate the shadows and adverse lighting under the car. There he was! I could only see the bottoms of his tennis shoes since he lie away from me with his head under the engine. “Hands, show me your hands!” I yelled at the suspect. I had him crawl forward out from under the front of the car with his hands outstretched overhead. I was ordering him to walk toward me when another officer, under the adverse influence of a Sympathetic Nervous System response and “John Wayne’ing it”, ran in front of my muzzle and grabbed the suspect forcing him to the ground.
Sunny day outside but under and in front of that car in that garage, I needed a flashlight to safely perform my job.
Life has taught me many hard lessons, having at least one quality flashlight, day or night, is one of those lessons. Increase your odds, purchase a high lumen, quality hand-held flashlight and then train. Put some range time in on a regular basis while working with these flashlight techniques. Even if your local range does not permit working in low or subdued lighting, you can still practice the techniques.
Dry fire (with a safely unloaded and double-checked pistol or long-gun - even though it’s still “unloaded” don’t point the firearm at another person, flat-screen TV or your wife’s Pekinese…) in your own home will certainly improve your performance.
Better yet, seek out quality instruction from a vetted instructor.
LASERS
CASE STUDY
Early in my SWAT career, weapon mounted lasers were introduced into law enforcement and my commander at the time became enamored with them (quite honestly I think it was because he wanted to improve his shooting without practicing…). He ordered lasers that were about the size of a pack of cigarettes and had our armorer install them on our MP5 subguns. Norm, our armorer and a friend of 24 years, complained that the units were fragile, hard to zero and easily knocked off zero. Never the less, this commander had his lasers despite the fact that there were no white lights on the submachine guns. Oh, you could see these little red dots dancing around but not the suspect in the darkness. I could tell you that this same commander would get in some trouble for “playing” with his laser on an op but I won’t…
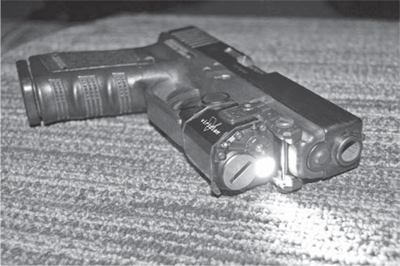
Viridian Green white light and green laser combo. Definitely an improvement over earlier designs.
Suffice to say, that I was not enamored with lasers for some time. But my old buddy Marshall Schmidt began working for Laser Max and persuaded me to try one of his company’s lasers in a low light pistol class. Oh, the design and practical use started to make more sense. Then Crimson Trace sent me one of their designs, which attach to the grip of my Glock 19. Okay, you now had my interest especially when Crimson Trace sent a training DVD on how to work with lasers. It seems to always be the way that once you educate yourself and train with the gear or tactic, all of sudden truth is injected into the equation, either supporting the equipment or proving it worthless.
Just last year I ran a Law Enforcement Carbine Instructor course in the fall. I had a Viridian Green white light / green laser combo, the excellent X5L-RS mentioned earlier. On the evening of the third day of training, I run a low-light training portion. Shooting the Colt carbine with the Viridian Green long-gun system, I was actually giggling while shooting on the move. I could clearly locate and identify my target with the white light but I was also making head shots because of the strobing green laser dot - all while shooting on the move!
Some will say that lasers offer a deterrent effect with the assailant freezing or submitting to the red or green dot placed on his chest. To this I say - don’t count on it. If pointing a firearm in general does not result in surrender or submission, a laser dot won’t make them curl into a fetal position. Cops point Tasers with laser red dots at bad-guys every day without instant success, don’t expect laser-mounted firearms to do any better.
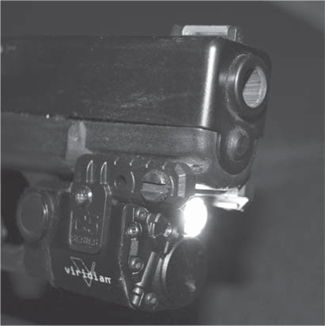
“It’s almost like cheating!” Certainly a top performer in low light.
Do you absolutely need a laser? No, but lasers can improve shooting in certain conditions and for shooters who have trouble seeing the sights due to deteriorating eyesight, a laser may help. Other shooters with good eyesight may benefit as well. If you are contemplating purchasing a laser product, go to YouTube and check out The Art of Survival video series or the Viridian Green video series featuring my buddy Rich Nance at viridiangreenlaser.com.
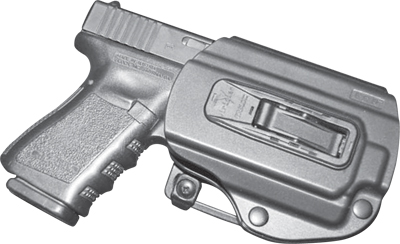
This holster from Viridian Green turns on the white light or laser as you draw. Innovative and quality product.
Lasers, or any device or piece of equipment, will not make you a better shooter, period. They can be used to improve your performance, but no piece of kit can replace time in training.
LONG-GUN TACTICS
Since the old West, Greener 10 gauge and scatterguns of 12 and 20 gauge, lever-action rifles, even single-shot bolt action rifles have been used in personal defense by armed citizens. Clint Smith of Thunder Ranch fame has a saying, “We carry a handgun to fight our way to our rifle!” And indeed Clint, the father of the modern urban rifle concept, should know. Yes, handguns are convenient to carry but compared to shotguns of 20 gauge or larger, or rifles of .223 or above, have significantly less ballistic impact on target.
That said there are instructors who steer citizens away from using long-guns in personal and home defense. Many of the critics of long-guns in armed defense have little experience with them. We hear these complaints about long-guns:
· Are not necessary for armed defense
· Are too long and hard to manipulate in close quarters
· Over-penetrate through common interior walls
· Take time to access
· Require two hands to manipulate
Funny, most of my teammates and I carried long-guns on hundreds of tactical operations I was involved in. Further, when we knew we were going up against a serious bad actor, we almost always gravitated toward a shotgun, subgun or carbine. Yes, we carried a sidearm in a holster and would transition to the handgun when entering small areas or when one-handed manipulation was dictated by the environment, but we all carried long-guns. And it seems to me that members of our military when conducting house or building clearing operations in far off hostile locations carry carbines or shotguns.
Let’s address some of these issues.
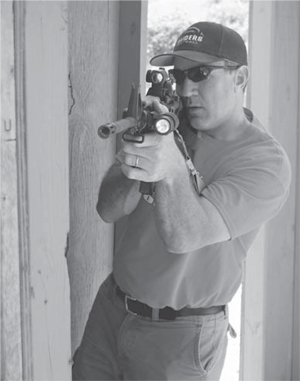
Long guns improve performance in armed encounters based on many different factors.
Carbines or shotguns are simply not necessary - This comes from the land of “this is all you need.” Indeed states like Colorado and New York have implemented completely ignorant and illogical magazine capacity laws based on “this is all you need.” Ten-round magazines with seven bullets in them or 15-round magazines in pistols designed to hold 17 rounds, you pick the law which is more devoid of common sense. The facts are that I cannot tell you how many rounds you will need, nor what your armed encounter will look like. Just this week armed citizens, including off-duty police officers have gotten into armed confrontations nationwide.
CASE STUDY
In Pennsylvania, an off-duty officer was being beaten by five occupants of a vehicle involved in a road rage incident when he fired a shot, wounding one of his attackers and causing the others to scatter.
CASE STUDY
East Peoria, Illinois: An off-duty F.B.I. Agent shot and killed a gunman who had walked into a sports bar and shot both his ex-wife and her current boyfriend to death.
Yes, both of these incidents involved lawmen but both incidents had nothing to do with their law enforcement vocations and they are first and foremost citizens of this country, lawfully carrying concealed.
I can’t tell you where, when, how many assailants or how long the incident will take. I can only tell you that you want the most effective weapon available and that long-guns have more ballistic impact than pistols and revolvers of even the same caliber.
The mere fact you’re in an armed confrontation is an anomaly. After we get over that reality we should develop plans and contingences to solve the problem in the most efficient and expeditious way possible.
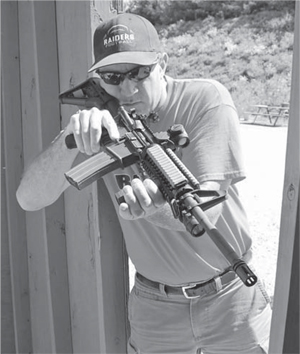
With proper techniques long guns can be used in home defense.
Too long or cumbersome for close quarters - Is simply not true. If you were to stand with arms outstretched holding a pistol and stand with a 16-inch carbine both in a combat platform or stance, you would find the overall profile very similar. Further, if approaching a door or smaller room, you don’t have to have the carbine or shotgun at point shoulder position. You can transition to a tuck position wherein the butt-stock is clamped under your arm, in your armpit or use indoor ready wherein the muzzle is canted down and outboard to the weak side, inside your “safety circle.”
Working with a carbine or shotgun conducting searching, room entry and clearing is a question of training and experience because it is certainly true that they are valuable tools in those kinds of armed scenarios.
Long-guns over-penetrate - As mentioned in the ballistics and caliber section of this chapter, when a DEA operation resulted in gunfire in a trailer park, it was the .40 which over-penetrated not the 5.56 carbine rounds.
Having responded to countless shootings, I cannot remember a case where a shotgun over-penetrated and wounded innocents. There have been cases where rounds fired from bad guys with AKs have sent rounds into other structures but these were gangsters spraying the area.
Will OO buck penetrate through a sheetrock wall and possibly injure others? Yes but so will pistol rounds when we look at the tests we cited earlier.
Do I want to fire a 12 gauge Brenneke® slug designed for hunting in my home in a self-defense scenario? No, but Federal Reduced Recoil 12 gauge fodder, absolutely.
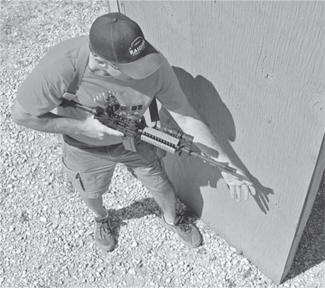
Pistol grip on M4 allows armed citizen to use support hand to open doors. Slings allow both hands to be used.
Take time to access - Well, unless you walk around with an M4 or 870 on-sling, this is a quote from Captain Obvious. But if we go back to the fact that we cannot predetermine what your encounter may look like, we cannot say how much time you’ll have to access a more efficient weapons system. I previously mentioned one incident I experienced at my home when a shotgun was multiple times and pellets whizzed through the trees above our house. My response was to grab an M4 and call the police.
Certainly if your only home defense long-gun is stored in a large, slow to access safe, then this point may have more import. But even then, if you have a minute in an event that is building in intensity and you’re waiting for a police response, why not up-armor?
Requires two hands to operate - Once again, we say, “It depends.” Can you fire a shotgun or carbine one-handed from an armpit tuck position? Yes you can. Can you go to indoor ready to free the off or support hand for things like opening doors? You bet. Can you even run the gun including reloads with one hand? With training, it can be done.
Equipment wise, we always suggest two or three point slings for long-guns. A sling to a long-gun is like a holster for a handgun. The sling enables the user to go hands free or “on sling” if both hands are needed.
Certainly we shoot better with two hands on the long-gun but we shoot better with both mitts on the handgun as well. Training and practice improves performance generally and it is certainly true with long-guns.
ACCESSORIES FOR LONG-GUNS
Red-dot sights - My M4 carbines all field red-dot or holographic sights like the excellent Aimpoint T-1, H-1, PRO - Patrol Rifle Optic, EOTech sights, InSight MRDS or Redfield Counterstrike, because they improve my performance with the carbines.
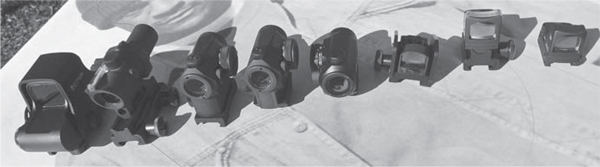
Left to right: EOTech, Trijicon ACOG, Aimpoint T-1 and H-1, Sig Sauer Red Dot, InSight MRDS, Trijicon RMRs
Years ago the United States Marine Corps conducted a test with red-dot sights to see their value and impact on accuracy as well as time on target. When running qual courses they found that the collimator sights were just as accurate but faster on target. Because the red-dot or holographic sights only require one visual index, the red-dot or reticle on target versus aligning the front sight post within the rear sight aperture. The USMC has found their RCO - Rifle Combat Optic, Trijicon’s ACOG - Advanced Combat Optical Gunsight, so battle proven that when a friend’s son recently went through Marine Corps boot-camp, he did not even train with iron sights.
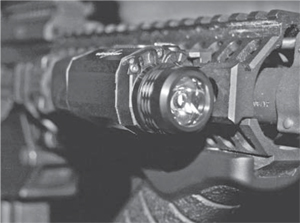
Viridian Green makes an excellent white light, green laser combo for a carbine.
White lights - For the same reasons I’ve already mentioned, white lights allow you to navigate, locate, identify and engage armed criminal assailants.
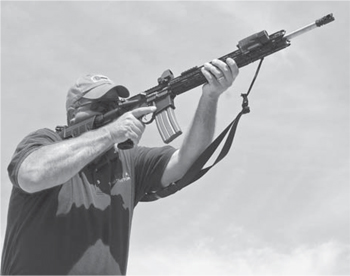
Here author works out with Rock River carbine, InSight MRDS-mini red dot sight and their white light, and Blackhawk two point sling.
Slings - No, they don’t get in the way. Modern two point slings like the excellent Vicker’s Sling® from Blue Force Gear improve performance and allow the armed citizen to operate better with a carbine.
THE CAR GUN
Since we’ve put many of the myths on long-guns in armed defense to rest, let’s introduce a very valid concept, the car gun or truck gun. I have retired Detroit PD Sergeant Evan Marshall and the fine folks at the Stopping Power forum online StoppingPower.net for solidifying this concept for me.
The idea is to have a carbine or other long-gun in your vehicle that is more effective than a handgun. As I remember, Evan was doing some contract work for a U.S. Government entity and was asked by an old LE friend if he had a long-gun in his vehicle. He stated he did not and was reminded about the road he was traveling “Ev, some of the nastiest people in the world live off I-40 between Fort Smith and Oke City. Don’t ever come over here again without a rifle.” After that, he got a carbine that he carried in his vehicle.
As a LEO carrying off-duty in my state or out of state under LEOSA - Law Enforcement Officers Safety Act, I carry a Level IIIA raid vest with rifle plates installed in case of response to an active killer scenario on or off-duty. In addition, I have a carbine accessible. For my own Car Guns I’ve outfitted two different carbines, which I’ve carried locked in my vehicle.
The first is an Auto-Ordnance M1 .30 carbine with a folding stock. I’ve attached a picatinny rail on the top of the barrel and mounted an InSight MRDS - Mini Red Dot Sight. On the off-side I mounted a single cell CR123 battery NovaTac flashlight. A bungee sling rounds out the package with 15 round magazines stuffed with excellent .30 100 grain DPX ammunition from Cor-Bon. I’ve worked with this carbine and it is fun to shoot, exceedingly accurate and with the Cor-Bon a solid performer on target. I’m able to make head shots with the MRDS from 50 yards standing with no problem. I have a small chest spare mag carrier from Blue Force Gear where I carry my spare mags. When in the passenger compartment of my vehicle, I carry the M1 in a nondescript double tennis racket bag I picked up from Play It Again Sports®.
The second carbine I’ve set up for the car is the one I’m currently using. It is a Rock River 5.56 lower on which I’ve mounted a Del-Ton® full upper, adjustable stock and parts kit. The Del-Ton/Rock carbine features an Aimpoint H-1 red-dot sight, Magpul - short vertical foregrip, and a Blackhawk white light mounted using a Command Arms Accessories light mount. Like all my carbines, the Del-Ton/Rock River carbine has a two-point sling attached. This carbine rides in an excellent product the Trojan Horse Gun Case® from Comp-Tac®. This case looks like a tennis racket bag but can transport a 16-inch barrel M4 with magazine inserted.

The current car gun is this DelTon upper and parts package on a Rock River lower. Aimpoint H-1 red dot and white light complete the package carried in this discreet Trojan Horse Gun Case by Comp-Tac.
Care must be taken to secure your car gun carbine or shotgun from theft or unauthorized access. In this regard several new products address this such as the AR-Solo Vault® from ShotLock®.
TACTICS WRAP-UP
There is no such thing as “cheating” in a gunfight. Just like the Marquess of Queensbury Rules don’t apply on the street to “fisticuffs,” an armed encounter has no “rules.” Yes, you must obey the laws on the use of deadly and non-deadly force but when it comes to the two-way range and shots being fired there is no requirement that you be fair. As we say in law enforcement, “Fair is where you ride the rides, eat cotton candy and walk in Monkey sh*t” it does not apply to violent encounters.
When carrying concealed, you must always weigh the “risk” of getting involved with the “need” to do so. Most times you want to be the best witness you can be and avoid involvement. But as we say in LE, “on-duty you go to the calls, off-duty the calls come to you…” Some times when rounds are going off and innocents are endangered good men must stand up and put themselves in danger. We try to do this without recklessly endangering ourselves and we never give the bad guy a fight chance when they are actively trying to kill us and others. As one trainer put it, “They are one who put their arm in the lion’s cage. They are the one who started it.” Dominate the encounter and win. Later chapters will deal with the aftermath but for now understand that the mental aspects of winning are so more important than the gear.
CASE STUDY
Just recently two Las Vegas Metropolitan Police Department officers - Officer Alyn Beck and Officer Igor Soldo were shot and killed in ambush as they were eating their lunch at a pizzeria. After the male and female suspects killed the officers, they took their sidearms and went to a WalMart in the same plaza, where they fired a shot. Armed citizen Joseph Robert Wilcox confronted them. While challenging the male suspect, Wilcox was shot and killed by the unseen female suspect. Police responded to the store, engaged and wounded the male suspect, who was then shot and killed by the female after which she committed suicide.
This chapter is dedicated to Officer Beck, Officer Soldo and to Joseph Robert Wilcox who stepped up to the plate when it counted and was killed.
How do you deal and stop hyper-violent assailants like these two? You mentally prepare and physically train for it. Let’s now look at the training aspects of being an armed citizen.