Sabbats Almanac: Samhain to Mabon - Kristoffer Hughes 2018
Crafty Crafts by Natalie Zaman
Samhain
CONFESSION: I’M A CRAFT-SUPPLY hoarder, particularly when it comes to glitter. Powders, discs, mirrors, sequins, silver, gold, every color of the rainbow—I probably have it. This was a truth I had to face when we decided to move and the inevitable purge began. There’s nothing like a good clear-out to reveal just how much stuff you’ve accumulated, especially after being in the same house for two decades. It didn’t, however, negate my desire to create. I want to keep making stuff, but not add to the pile. What’s a witch to do? I found a very satisfying (not to mention sparkling) answer in consumable crafts.
Even before my massive and still ongoing dump-o-rama I’d embraced the idea of consumables, especially with gift giving. The downside: a consumable gift isn’t a permanent reminder of kindness. The upside: consumable gifts give over and over and over again. Consumable gifts and crafts are interactive. From start to finish they give pleasure, in their making, giving, and using—after which, your recipient is free of any obligations to keep, display, or otherwise curate a thing. And—important, this—you’re free to make more.
All of this year’s Crafty Crafts are consumable in some way, shape, or form. Burn them, mix them, melt them, scrub them, deck yourself out in them, use them up until they’re gone. They’re tailored to specific sabbats and were designed with magic and ritual in mind (hence the presence of efficacious and symbolic herbs, stones, essential oils and the ever-important intention). With a few adjustments, any of them can be made for a variety of occasions—or they can just be made, no esoteric agenda necessary.
Some things to note before we crack open the glitter cannisters:
I tend to work with plants that I can wild harvest or grow in my garden, so I use lots of rosemary, lavender, lemon balm, honeysuckle and blackberry leaves and berries when I make things. If a project calls for the use of plants, it’s likely that one or more of these will appear in the list of items to procure. All of them are suggestions and can be swapped out for other herbs and flowers.
About aesthetics … while I would dearly love my finished products to be Pinterest-perfect, most of the time they look homemade rather than handmade. Still, I love the creative process and the idea that I’ve created something useful—which brings me to another reason to love consumable crafts: I’m not afraid to destroy them because of their beauty.
Chances are you’ll probably find many of the other necessary supplies for these projects in your pantry or, if you’re like me, your craft stash. Most are inexpensive and can be easily acquired at your local market, craft, or thrift shop. I like using things up (many a project has evolved around the phrase, “what can I do with the rest of this…”) and using free things—save glitter. On THAT I will splurge.
And speaking of glitter…the aforementioned substance somehow finds its way into almost everything I make. It’s a personal taste, so feel free to omit it if it’s not your thing. Before you do however, consider this: besides being fabulously blingy, the shiny stuff is, literally magical. Glitter attracts light and also reflects it—which means it draws positivity to your work, and then reflects it outward. Shine on!
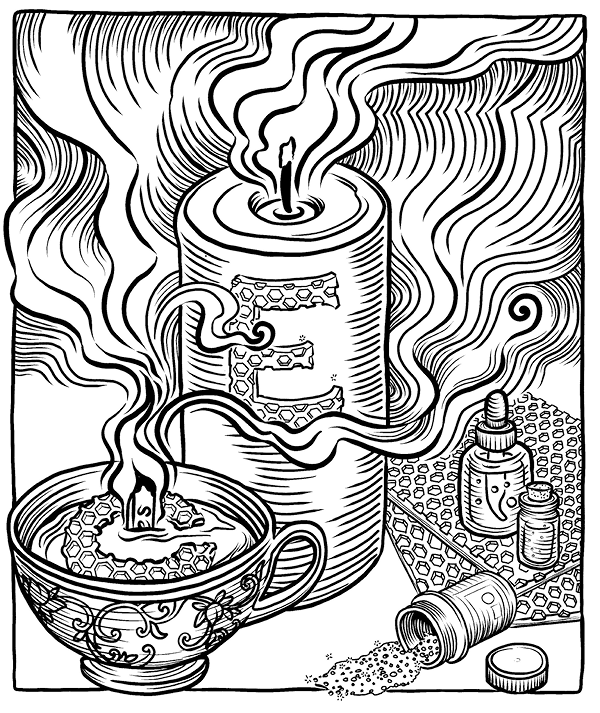
Sparkling Monogram Memory Lights
The addition of initials to anything—a handkerchief, a doormat, a cake—conveys instant pride in one’s identity. Monograms are personal sigils and date back to the ancient world where coins were marked with the initials of rulers to claim what was theirs—that whole “render unto Caesar” thing. Craft some candles with your ancestors’ initials as an elegant means of honoring them at Samhain (or any time!).
Time Lavished: Making a monogram memory light will take up about an hour of your time, maybe two, depending on how much you want to devote to cutting out beeswax letters (or in my case, re-cutting them).
Coinage Required: The supplies to make 4—6 monogram memory lights will set you back about $30—$40. You can save some money and do some upcycling at the same time by repurposing crayons as well as leftover wax from candles that didn’t burn down all the way. Remember to save any wax scraps when you cut your monograms. These can be melted down to make other candles or added to the wax you’re using for this project.
Supplies
Old tea cups. (You can also use mugs or small bowls—chips add character!) By using a cup with a history, you’re keeping the past alive. What is remembered, lives—that is, after all, the purpose of this craft. Bonus points for using a cup that belonged to an ancestor. (Unless, of course, it’s fragile. In that case—keep out of reach of crafty hands!)
Wooden candle wicks and tabs to hold them in place. You can use traditional candle wicking, but I find it fussy, plus, you can write messages on wooden wicks.
Heat-proof receptacle to melt candle wax. (Never melt wax in a microwave or over direct heat—it’s a fire hazard!)
Candle wax. You can buy candle wax, but since its Samhain and the new year, it’s a good time to clear up and clean out. Repurpose wax from candles that didn’t burn all the way, as well as broken crayons. (Peel any paper off your crayons before melting them.) Smudge any upcycled material you’re using with sage, lavender, or your favorite cleansing herbs before you melt it to clear it of any past workings or connotations that may be attached to it. You can also place the wax in a salt water bath before you melt it.
Cypress or myrrh essential oil. Both of these oils are good for spirit connection work, however, if you associate a specific scent with your ancestor(s), use those or any others that hold personal meaning for you.
Glitter. Black is seasonal and protective while white, silver and purple are colors for working with the spirit realm. Again, use your intuition as well as traditional knowledge to determine what colors to use (for this, or any Craft!).
Beeswax sheets. Most beeswax sheets come in standard square (8" × 8") or rectangular (8" × 17") sizes. You’ll be cutting the initials from this material, so any size will work, and any left-over remnants can be melted down to make other candles later. If you have a choice of colors, black, as stated above, is seasonal and protective, but you can use any color. In fact, the whole point of a monogram is personalization. Think of your ancestors’ favorite colors.
Small scissors and/or a craft knife.
A store-bought pillar candle. Don’t have tea cups or lots of time? No problem—there’s a quick way to make a monogram memory light—read on!
Crystal chips. Quartz will magnify your intention while stones like lepidolite, celestite, petrified wood, selenite, and amethyst are good for spirit communication.
Begin by turning your cup upside down and placing it on top of a sheet of beeswax. Trace the outline of the cup opening, then cut it out. Using a stencil or your own mad skills, carefully cut your ancestor’s initial(s) from the beeswax disc you just made. You don’t have to make the letters circular in shape (or the shape of the cup opening), but this will ensure that your monogram will fit. (You’ll be placing it on top of the candle.)
Next, clean and dry your cup. Before inserting the wick into the tab, write your ancestor’s name on it, and if space allows, a simple message. Center the wick tab in the bottom of the cup, then secure it in place with a few drops of melted wax. Once you’ve poured your candle and the wax has hardened, you may need to trim the wick depending on the size of the cup.
Melt the wax, then take it off the heat and let it cool and thicken slightly before mixing in the essential oils. The wax should still be liquid when you do this. Adding essential oil to too-hot wax lessens the potency of its scent.
Pour the wax into the cup, leaving a little space at the top—you’ll need some room for your monogram. As the wax starts to set, sprinkle glitter on the top of the candle.
Let the wax harden and set completely (mine took about an hour) before adding your monogram, which will sit on top of the candle. First, trim the wick if needed; you should see about an inch of it above the wax. Center the monogram around the wick. Depending on the letter, you may need to make a slice or slit in the wax with your scissors or craft knife to accommodate the wick. Don’t worry if you cut the letter; simply place it on top of the candle in pieces. Trim any excess so that it fits in your cup, and gently press it into place. Press a few crystal chips into the cells of the beeswax. Place them randomly or in a pattern, outline the letters, or fill them in completely. These are just suggestions—do what feels and looks right to you.
In a hurry? You can skip the candle making process and purchase a pillar candle. Cut your letters from the beeswax sheet (the size of the letters will depend on the size of your candle). Use a hair dryer or heat gun to soften one side of the candle and the back side of the monogram. Gently press the monogram into the candle. If the letter fails to stick, use a bit of craft glue to hold it in place.
Dress the candle with the oils and gently spread glitter on the sides and top of the candle. Press the crystal chips into the cells of the beeswax. Place the stones around the edge of the letters to outline them, or incorporate them into the letters randomly or in a pattern. Again, do what looks and feels right to you.
Monogram candles can be used for many other special occasions—weddings, birthdays or any time that you want to acknowledge the uniqueness of a certain special someone—including yourself. Go forth shining!