Greenhouse Vegetable Gardening (2015)
GREEN OR BROWN THUMB GARDENER?Growing plants is an endeavor that is both simple and complex. There's nothing easier than pushing a seed into the soil, which then grows into a plant. If everything goes as planned, that's all it takes. There is, however, more to cultivating plants that are grown specifically for their blooms. |
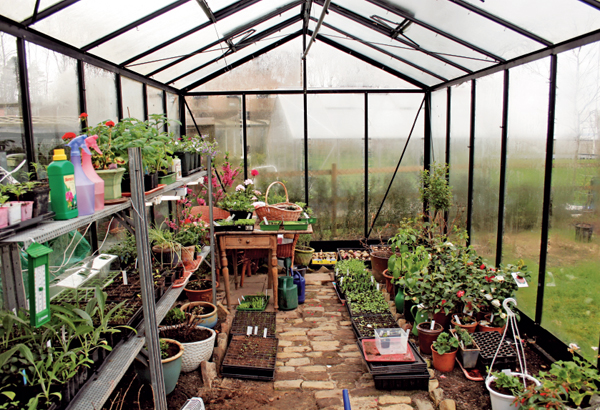
Early spring in the greenhouse. Seedlings to transplant—both flowers and vegetables. Trays of plants to be grown in the greenhouse. Over-wintered nectarines and geraniums in full bloom. Artichokes that were planted in January and sprouting-seed potatoes. All need light, water, nutrients, and good soil.
While all plants need light, water, nutrients and warmth to grow, they don’t all require the same amount of all of these elements. Our most common weeds germinate quickly and manage well on their own. A tomato germinates easily, while a cucumber needs more warmth to grow. When a gardener ensures that the plants get what they need to thrive, their cultivation becomes simpler, requires less work and yields better harvests, whether they’re flowers or fruit. And it’s easier to treat them right if we understand how plants grow.
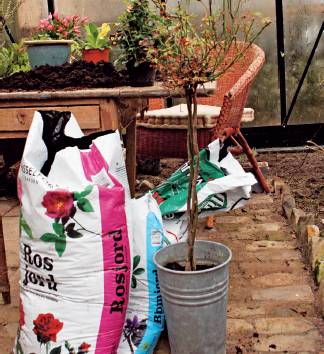
A seed needs moisture to germinate. It’s like a packet of dried food, in that it needs water to become rehydrated—the seed needs to be enveloped by humid soil so it can swell and grow. The soil also has to be free of weeds and disease, and needs to be devoid of nutrients. This kind of soil is called potting soil; it’s widely available and can be purchased in bags. It’s important to use potting soil here, as neither planting, compost nor topsoil work very well. Common planting soil contains too many nutrients, and topsoil harbors weed seeds that will compete with the sown seeds.
Soil
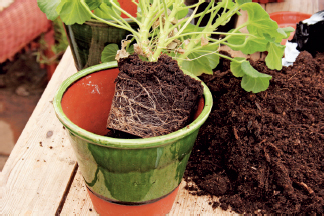
When the seed has germinated, it’s then placed in its own pot with nutrient-rich soil. Please note that even store-bought plants need to be potted up into bigger receptacles with nutrient-rich soil. When selecting your soil (sometimes sold as plant soil, flower soil, or garden soil), do not opt for the cheapest brand available, as its price usually reflects the quality and quantity of nutrients in the soil. If you buy the cheap soil, you will end up having to buy supplemental nutrients to amend it. And you need to ensure that the soil you buy is weed- and disease-free.
It’s fine to use compost or garden soil when you pot up your plant—simply mix equal amounts of compost and garden soil for optimum results. This soil is not free of weeds, however, and you will have to pull them as they appear. If you have many big pots you’ll need a lot of soil, so adding garden soil to your store-bought soil will make it go further. Commercial soil contains mostly peat which, when mixed with a half-and-half mix of garden soil and compost, will become slightly sturdier and won’t dry into a hard lump.
Compost
Most plants grow well in regular planting soil. When you sow your seeds, use the same soil for all the seeds. Do not use compost for seeds, or for any plants that require acidity. Even compost from decayed oak leaves will not produce acidic compost, as nature tends to interfere. Compost that is amended with chicken manure for extra nitrogen, however, is excellent for larger plants and for general soil nutrient balance. Compost is also ideal because it contains naturally occurring beneficial bacteria and insects that do not come in commercial soil.
Compost’s high content of microbial populations, worms and insects makes it naturally pest-resistant, and even helps plants absorb nutrients. All fungi and bacteria in compost and well-balanced soil work in symbiosis with the plants’ root systems, so using soil amended with compost is a shortcut to a healthy and easy-to-care-for garden.
Nutrient storehouse
Plants can be grown in many ways. They can be raised in pots, either large or small, depending on the final size of the plant. They can also be planted in the ground soil of the greenhouse. It’s even possible to set them directly into the purchased bags of soil, or grow them out of sand and grass clippings. While all these different methods have their pros and cons, the common factor is that they will at some point run out of nutrients during the growing season, so the soil will need to be enriched regularly.
Someone to lean on
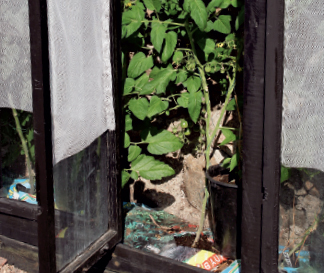
The soil isn’t just a storehouse for nutrients and water—the plants also need it for support. The roots anchor the plants in the soil so they don’t topple over in a strong wind or buckle under their own weight. That’s why the soil needs to go deep. A 10 cm (4”) layer of soil per square meter area is not the same as growing something at a depth of 30 cm (12”) in the same patch of earth, so it’s preferable that the plant be placed in a pot or in a hole that’s at least 30 cm (12”) deep. The deeper you set it, the more stable the plant, and the more even the distribution of nutrients and water. You won’t have to water and fertilize as frequently, and the earth does not get as warm. (You want the soil to be warm in springtime, but in summer it can often heat up to the point of being detrimental to growth.) Ground soil does not heat up as much as potting soil in a container.
Airy and loose
For plant roots to be able to draw up water and nutrients from their environment, the soil needs to be loose. First, roots need air to breathe, or else they will slowly but steadily suffocate. Second, soil has to be loose in order to allow the roots to grow and thrive. The roots push through the soil while growing, and are unable to do so if the soil is too compacted, thus preventing them from reaching further to get additional water and nutrients.
The roots also have to spread unrestricted in the soil; a stone, cement paver or a patch of hard compacted earth will stop them. Driving a heavy wheelbarrow or repeatedly walking on the soil will tamp down and compact the earth, so it’s advisable to never walk or kneel directly in the beds, cold frames or raised beds. This way you also avoid the added workload of re-digging and changing out the compacted earth.
Growing directly in the ground
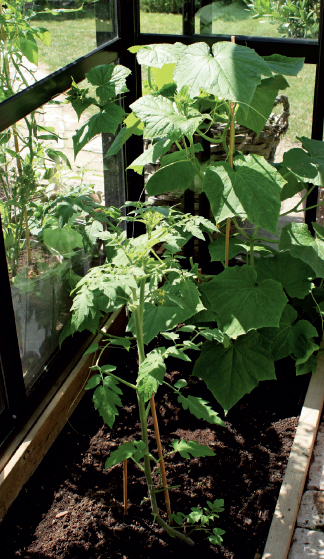
Growing plants directly in the ground is both simple and traditional. The soil is a storehouse of water and nutrients where the roots have plenty of room to thrive, and can reach and reap the benefits of deeper sources of water and nutrients. Consequently, careful watering of the roots and plants is not essential, and it’s also easier to train plants to grow vertically (see chapter 7, page 62).
Avoid raising the same plants in the same soil year after year, as doing so can attract pests that feed on and destroy the plants early in the spring. The disadvantage to this method is that you have to add new soil or amend the existing ground soil each spring. One way to avoid this drudgery is to mix plenty of compost into the beds before starting to plant, as compost helps keep soil healthy and full of nutrients. Another option is to rotate the placement of plants, with cucumbers on one side and tomatoes on the other one year, and switching them around the following year, for example.
The in-ground bed soil and compost is amended and covered with store-bought planting soil—an effective way to prevent weeds.
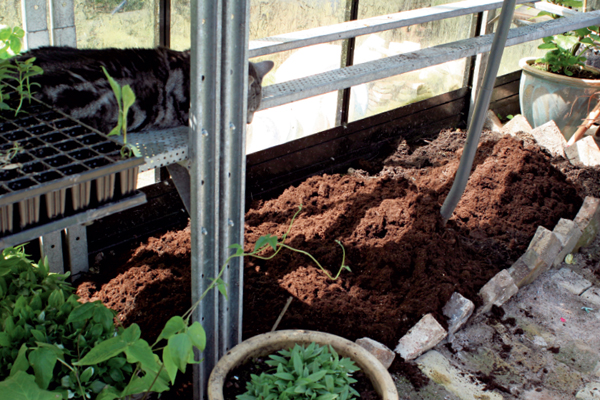
When you work the ground in the greenhouse for the first time, it should be dug to a depth of 25 to 30 cm (10 to 12 inches) in order to loosen the earth and make it crumbly. It’s OK to use a garden fork for this task. A 20 cm (8-inch-high) layer of compost is then laid on top and methodically worked into the ground. This leaves the soil piled quite high above the rest of the ground, so you can add edging made out of wood planks or stones to limit or prevent soil erosion. The soil level will sink and become level with the surrounding ground as the plants gradually absorb nutrients.
Each batch of spent soil should be removed and replaced with store-bought planting soil or compost. If you don’t want to change all of the soil each spring, you will have to amend it with plenty of compost to keep it healthy. Old soil can be used in many other ways in the garden.
Growing in containers
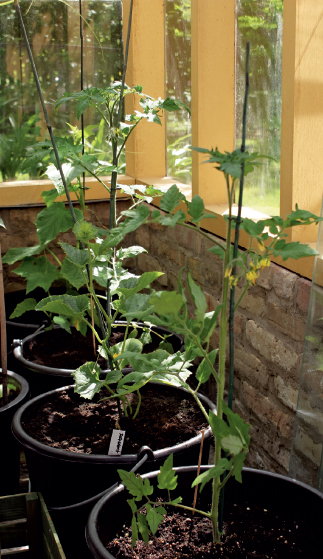
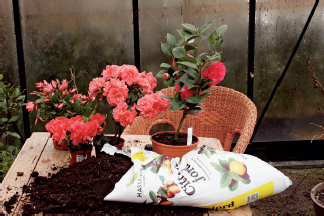
A more flexible option than growing plants in the ground is to grow them in containers. Big pots are filled with soil and plants—the soil can be store-bought planting soil that is mixed with compost, as well as topsoil, if you so wish. It’s easy to switch growing mediums every year to give plants a healthy and disease-free environment. And if a pest or disease happens to strike one container, it’s unlikely to spread to the others. It’s also a foolproof way to accommodate plants that need special soils or require an especially large amount of nutrients, since it’s possible to have different soils in the different pots.
The drawback to this is that a container’s soil tends to warm up and dry out more quickly than on the ground, so you’ll have to keep a watchful eye and provide extra water, and boost nutrition as needed. Generally, larger containers grow healthier plants—a 10-liter (2 1/2 gallon) bucket is almost too small for a tomato or cucumber plant. Also, stay away from dark colored containers and pots, as they tend to absorb heat, and this in turn may overwhelm and burn your plants, especially in summer. Pots may be moved around the greenhouse, but training large plants in this way can become cumbersome.
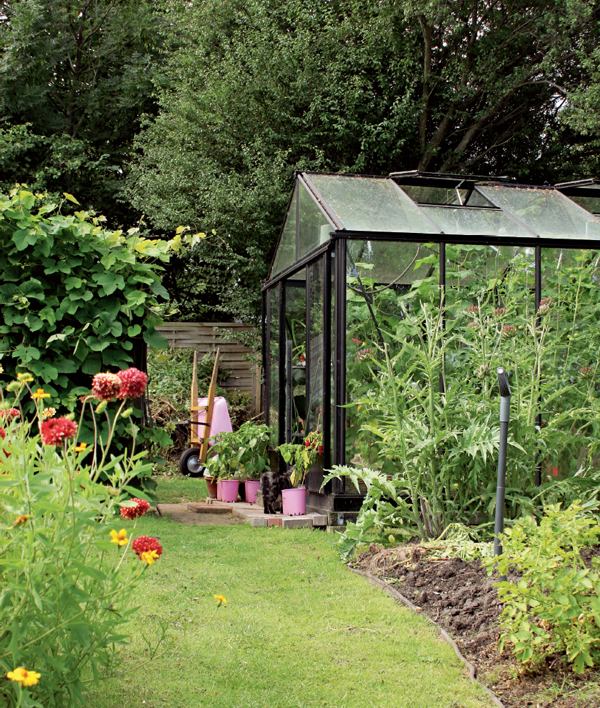
Plants in the ground and in big containers. The plants in pots need more frequent watering than the plants in the ground bed.
Grow directly in bags of planting soil.
Boxed beds are a variation of growing plants in pots. Boxes built with untreated lumber can be easily set up to suit the greenhouse’s plan. As with containers, the soil in a planting box should be changed each year. If the box has no foundation, the plant roots can grow into the ground soil. Raised beds are a great option if lower back issues are a concern; they also make gardening accessible to those who use a wheelchair, as it’s easier to reach and care for the plants.
Growing plants in a bag
A growing method wedged somewhere between using containers and the ground is to grow plants directly in a bag. A 55- to 65-quart sack filled with good plant soil is laid flat on the ground (the ground underneath the bag should be porous, so avoid setting it on cement or asphalt).
Cut a few X’s on the underside of the bag—the side that rests on the ground—this is where the excess water will drain. In time, the plant roots will grow through the bag and into the ground, which allows them to benefit from the water and nutrients found in the ground below the bag. Cut one or two holes on the surface of the bag and insert one plant into each hole. You can place rows of bags in the greenhouse. In the fall, simply remove the bags and empty their contents into your vegetable garden, the compost heap or flower beds; buy new bags of soil in the spring.
The inconvenience with this method is that the soil’s temperature rises quickly (like for potted plants) so it’s necessary to be extra vigilant about watering. The layer of soil is shallow and doesn’t provide much stability for the plant, so it has a tendency to become lanky. And if there’s a paved or cemented area underneath the bags, the plants will be especially prone to drying out, as the roots will be unable to reach into the cooler ground below.
Growing in sand and grass clippings
Growing plants in sand with grass clippings is a method that has piqued the interest of many. Sand contains no nutrients, but keeps its shape and is easily watered. The nourishment for the plant is supplied by fresh grass clippings, which are deposited onto the sand’s surface. The nutrients in the clippings are quickly broken down (as in surface composting) and dissolve in the sand’s water, and in this manner become accessible to the plants. While this method is highly successful, the harvest is neither better nor worse than in-ground planting.
The inconvenience here is that grass clippings must be added in a thin layer once a week. It also takes a while for the clippings’ decomposition process to begin, so it’s necessary to add manure initially. You also have to collect sand for the plant, and sand is heavy. Grass clippings are always useful somewhere in the garden.
Fresh grass clippings can be used to mulch around roses, vegetables and summer flowering plants. Just layer the clippings 0.5 to 1 cm (¼ to ½ inches) thick several times over the first half of the summer. If you choose to leave finely chopped clippings on the lawn they will soon break down into nourishment for the lawn itself. If you add the clippings to the compost pile they will decompose quickly, so make sure the clippings are properly mixed into the composting material; if not, they will form into a dry, foul-smelling layer on top of the pile.
Nutrients
All plants need regularly added nutrients, but greenhouse plants that grow more abundant and faster than in-ground garden plants require an especially large amount of fertilizer. You can amend the soil, as well as purchase soil that is extra rich in nutrients. However, this food lasts only about three to five weeks, after which it becomes necessary to add more supplements. You can also water plants with liquid fertilizer—add it to the soil or install an automatic irrigation system complete with liquid nutrients.
A garden’s goldmine is its compost pile. With its contents you can fill all the big garden pots and planters; in the spring it helps amend the beds in the greenhouse with nutrient-rich top dressing.
Organic and manufactured fertilizers
Fertilizers are available in either manufactured or organic formulations. In Sweden, some manufactured, also called commercial, fertilizers go by the names of EnPeKå, Blåkorn and TGVäx Upp. Organic fertilizer can be cow manure, chicken manure, or a mixture of several natural by-products such as blood meal and bone meal. There is even organic fertilizer that has been amended with manufactured fertilizer. Whichever fertilizer you decide to use can be found in both solid and liquid forms. Solid fertilizers are worked into the soil, whereas liquid versions are diluted and then watered in. For fertilizer to be ready to use by the plants, it has to be incorporated into the soil’s moisture. Roots draw up the water containing small concentrations of nutrients from the manure and soil, making it important to water after the addition of manure to the soil.
The inherent convenience of commercial fertilizer is that it dissolves in water and is available to the plants right away. Its downside is that any amount of fertilizer that is not taken up by the plants runs into the ground and subsoil, along with the irrigation water; too much fertilizer leached into the ground water increases the nitrogen content of our lakes and waterways, which in turn causes a proliferation of algae that is detrimental to the environment.
Organic fertilizer, on the other hand, needs to break down in the soil before the plants can make use of it. This takes a bit more time and can delay the availability of nutrients to the plant, which might be a problem. The flip side is that the breakdown of this type of fertilizer is sustained as long as the soil temperature remains at or above 5°C (41°F), which means that there will always be some nutrients available to the plants, which is healthy. Organic fertilizer is also beneficial to the soil fauna that’s involved in breaking down the nutrients in the soil, and that also keeps the soil loose, airy, and porous. Earthworms, as well as useful bacteria and fungi that work in symbiosis with plant roots, much prefer soil nourished with organic fertilizer to one boosted by commercial fertilizer.
All-day snacking
Plants grow best when they’re given an even, steady supply of nutrients; a small but constant release means that they’ll always have food when they need it. Plants don’t absorb more nutrients than they need at any given time, even when there is a surplus (there are some notable exceptions, one of them being nitrogen). By contrast, administering large amounts of fertilizer in fewer doses is seldom beneficial to plants—it’s not a good idea to fertilize them heavily and then leave them over long spells between feedings. Once nutrients are dissolved, plants absorb whatever they need immediately, and the excess nutrients will seep into the ground—and groundwater—and be lost to the plant. Since plants only ever eat what they need at any given moment, they will lack nutrients until the next time you feed them. Fertilizing plants in this manner will result in sparse growth, lack of blooms and skimpy harvests, while creating more harmful chemical run-offs in our waterways.
Food every time
Among the many liquid fertilizers available on the market, some feature attachments that plug directly into a garden-hose spray nozzle for easy and convenient fertilizing. This is not a method that I recommend, however, since spray nozzles are not at all suitable for watering plants. A far better and practical feeding option is to mix liquid fertilizer and water in a drip irrigation system, type Hydromat, so that plants receive a continuous, slow release of nutrients.
Another way is to add slow-release fertilizer pellets to the soil. They look like tiny dots and are often found in good quality, store-bought fertilizers. The fertilizer itself is enclosed in the pellets, and is gradually released as the pellets’ outer shells disintegrate over time. The amount of nutrients released from the pellets depends on the warmth and humidity of the growing medium—the warmer and more humid the soil is, the more nutrients are released within it. Plants tend to grow more quickly when the environment is warm and humid, and the quicker plants grow, the more food they require to avoid becoming undernourished.
Yet another efficient fertilizing method is to use a watering can to water the plants with water mixed with soluble fertilizer. Swedish trials have shown that most plants thrive and grow vigorously when given the Swedish plant food equivalent to Miracle-Gro, ‘Blomstra’, in amounts of 1 ml per liter (1 quart) of water, per watering. Big plants need more water and more food compared to smaller plants; plants grown in warmer environments will grow faster and therefore also require more water and fertilizer.
All small pots with seedlings for transplanting, as well as hanging baskets, summer bulbs, corms, rhizomes, and other plants cultivated in the greenhouse should be irrigated with liquid fertilizer, since the potting soil contains hardly any nutrients at all. Peat pellets with vegetable seedlings also thrive when fed regularly, once the seed has sprouted and the first couple of leaves appear. Summer flowers in planters, window box arrangements, and potted houseplants also flourish when administered a mix of water and Blomstra. (It’s the perfect blend to use on bushes, flower beds and vegetable patches, too, but those garden spaces require a much larger amount of the mix). To an average-sized three-gallon watering can, add two teaspoons of Blomstra—this would be about 10 ml of liquid fertilizer per can of water.
A watering can containing a weak fertilizer solution is a good option for watering plants. Fill the can and let its contents rise to the ambient temperature of the greenhouse.
The right plant food
Plants require nutrients in order to grow and flower; if you are stingy with food they will not thrive. Pour on too much fertilizer, however, and you may also end up with undesirable results. Nitrogen (chemical symbol N) is a nutrient that plants readily gobble up, and when they absorb more than they need they grow huge, resulting in tall, foliage-heavy plants that give little fruit or blooms. Potatoes end up large, watery and flat tasting; tomatoes are tasteless, and hot peppers lack heat. So instead of making a hit and miss mixture of one’s own, it’s better to buy a ready-made blend that contains perfectly balanced nutrients - the Swedish Blomstra and Chrysan are good examples of such products. If you opt for other brands, be sure the nitrogen (N) content does not exceed 5% to 10%. The mix should also contain micronutrients. The fertilizer feeds containing all the nutrients that plants need are usually referred to as complete fertilizers. A good fertilizer is not expensive, but a really cheap product is definitely a false economy, as it will lack important nutrients—and plants need around twenty different nutrients such as iron, manganese, and calcium in order to grow. Those nutrients must also be in a form that plants can easily absorb. If the label only says NPK (Nitrogen Phosphorus Potassium) with no further detail in the fine print, the product will most likely be missing the rest of the necessary nutrients.
Special needs
Different soils contain different nutrients. Nearly all commercially available bagged soil is made from peat moss. Peat moss is harvested in peat bogs and is acidic, weed free, loose, and contains no nutrients. Starting off with this base makes it easier to mix it to the desired final composition, as all plants don’t need the same amounts and types of nutrients—some want more of this and others prefer more of that; some plants even require special fertilizer and special soil. Nevertheless, most plants will thrive in limed, alkaline, and fertilized soil.
Plants that don’t do well in alkaline soil need acidic soil instead, also called rhododendron soil. For example, rhododendron, camellia and labruscana grapes (concord and niagara) need acidic soil and fertilizer. These plants have great difficulty absorbing nutrients like iron if they are planted in the wrong soil—their growth is stunted and their leaves turn yellow. Citrus soil is good for citrus plants, as it contains quite a bit of clay and is slightly heavier than normal alkaline planting soil while being also slightly acidic (citrus plants are often plagued by yellowing leaves if they’re planted in regular planting soil). It’s good to provide roses with their own special soil, but it’s not necessary. The special soil contains a fair bit of clay, which roses seem to thrive in.
Geranium soil is extra rich in nutrients.
Rose soil contains clay.
Citrus soil is slightly acidic.
Geranium soil contains an extra large amount of fertilizer, both in slow-release and in readily available forms, which makes nutrients available to plants over a long period of time. This steady source of nutrients is necessary because geraniums need a lot of food to flower profusely. Potted clematis also like geranium soil, as large-bloom clematis require lots of food to blossom abundantly.
Planting soil is necessary for sowing in pots and flower beds. In Sweden, a good choice would be 50-liter (13 1/2 gallon) sacks of Hasselfors S-soil (lightly fertilized, loose, porous soil containing perlite). Leftover soil can always be used to start growing potatoes from seed.
Potted summer flowers and hanging baskets demand a special U-soil (containing both slow and quick release nutrition) or some other good quality soil containing slow-release fertilizer. Geranium soil is suitable here, too.
Economy-priced soil can be used to amend flower beds and vegetable patches. If it’s mixed half and half with garden soil and some added manure, it can be used for planting perennials in the ground; it cannot be used in pots, containers, hanging baskets, or window boxes, since these vessels require more nutrient-rich growth media due to their smaller size. Even the best of soil, however, does not hold enough nutrition to last a geranium or tomato plant through the summer (were that the case, it would be so potent as to become poisonous to the plant). This is why it’s necessary to irrigate the plant with fertilized water after one month or in late summer, depending on plant type and weather conditions.
In addition to special soils and fertilizers, there are also special products aimed at intensifying or lowering the acidity of soils. An example of one such product available in Sweden is ‘Färga mig blå’ (‘Color me blue’) which is used to acidify soil in order to force blue blooms on hydrangeas instead of the more common pink blooms, which are typical of flowers planted in a regular alkaline soil.