Growing Beautiful Food: A Gardener's Guide to Cultivating Extraordinary Vegetables and Fruit (2015)
GROW
Berries, Brambles & Tree Fruit
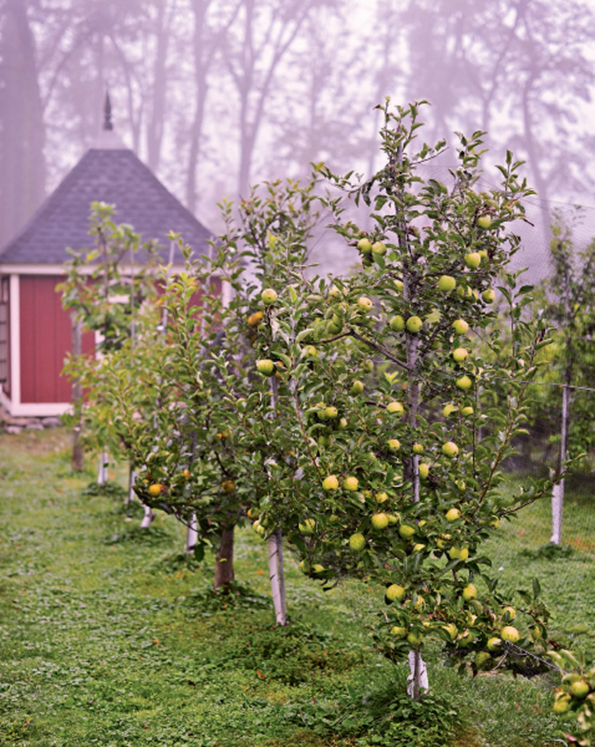
WHEN THE ORCHARD FIRST CLOUDS ITSELF in puffs of fragrant bloom, stirring the nectar lust of thousands of bees, you know that spring has arrived. By midsummer, when the branches of fruit trees and the deeply nodding canes of brambles are burdened with sweetness and pearls of red and white currants dangle in delicate strands, all of the labor and love that go into raising fruit is rewarded.
If a small, organic farm has a provocation worth taking on, it’s growing fruit. Loved by us, but also by countless insects, critters, and fungi, the organic orchard makes considerable demands on the grower. But properly managed, organic heirloom apples and pears, plums, sweet and sour cherries, gooseberries, black and red currants, blackberries, raspberries, and blueberries are worth the trouble; one delicious pie or crumble, or a fresh berry smoothie or fruit-scattered salad, will attest to that.
Planting dwarf fruit trees means they will bear sooner, yield abundantly, and take up a fraction of the space of standard varieties. And the small orchard can indulge in rare or unusual fruit that’s often not available in the market. Historic apples, for example, with names like ‘Keswick Codlin’, ‘Kerry Pippin’, and ‘Devonshire Quarrenden’, seem to come from another time and place, with complex flavors and forms that evoke a time a century ago when more than 700 known varieties of apples were cultivated in the United States. Beauty alone is reason enough to cultivate orchard fruit, but throw in exquisite flavor, health, and history, and growing them is worth every fussy, coddling minute.
BERRIES
If pome and stone fruit are the showy tree ornaments in the orchard, then berries are the smaller, seductive swags of color and melt-in-your-mouth flavor that fill the lower canopy. Berries come in a range of forms, flavors, and colors, and at Stonegate, we’ve dedicated our orchard rows to a few tart favorites: black and red currant, gooseberry, and aronia berry. One reason is that these are hard to find in the market, and the other is that the sharp, dark flavors these berries have is an antidote to the ubiquity of oversweetened everything.
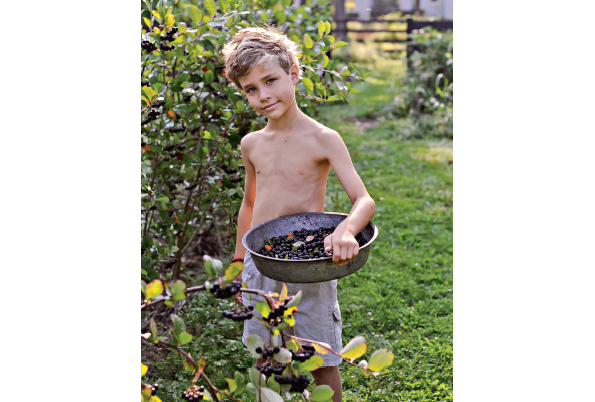
Aronia
Aronia melanocarpa
We grow a 75-foot row of aronia berry at Stonegate as a kind of hedge against mortality. It’s so full of free-radical-fighting antioxidants and phytonutrients that we put up with its lip-puckering sourness and chalky finish just for the incredible health benefits. By freezing it and adding it to smoothies, or making preserves with a sweet complementary fruit, aronia will last well beyond the growing season.
Pretty enough to be used as a landscape plant, it’s hardy in USDA Zones 3 to 8 and demands little care once established. A few named varieties are available; these have generally been selected for improved fruit flavor and size. The fruits of the unimproved species can be quite tart, earning the chokeberry name, but don’t confuse aronia with chokecherry, a wild species of Prunus.
Site and Soil
Plant aronia in understory conditions: full sun to partial shade, with rich, moist, well-drained, acidic soil. Aronia tolerates wet soil but dislikes droughty sites.
Planting
Plant in fall or early spring in soil amended with compost. Mulch after planting to protect developing roots and to keep the root zone moist.
Growing
Water during dry periods to maintain evenly moist soil conditions. Use a 2-inch layer of organic mulch to keep things cool and moist around the roots. Aronia forms a large multistemmed shrub, 6 to 8 feet tall, and can be grown as a fruit-bearing hedgerow that needs little tending other than occasional thinning to remove old or crowded stems.
Harvesting
Pick clusters of fully colored berries in late August to September. Like the tart varieties of currants, aronia berries are used primarily for juice that is turned into jelly or syrup, made into wine, or blended with other juices for drinking.
Pests and Diseases
Pests and diseases seem to leave this hardy native alone.
Extraordinary Varieties
‘Autumn Magic’, ‘Nero’, ‘Viking’
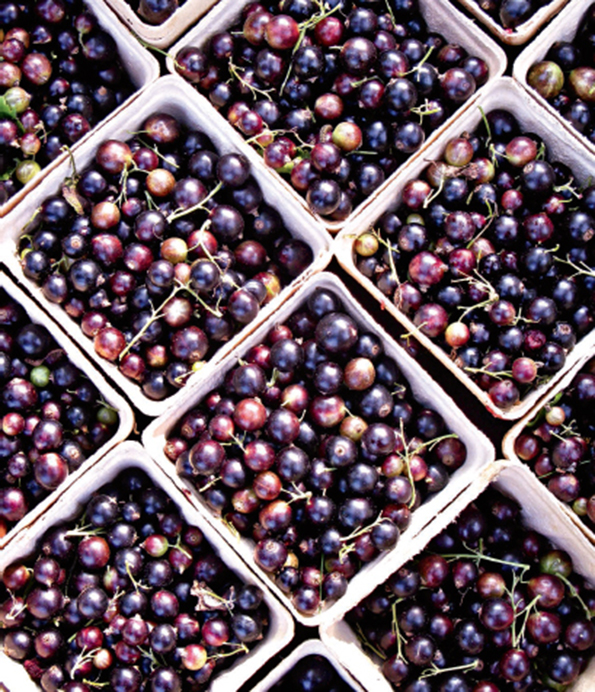
Black Currant
Ribes nigrum, R. americanum, and R. odoratum varieties
One of my favorite berries to grow (and we grow a lot of them at Stonegate), black currants grow on upright, multistemmed shrubs and bear profuse amounts of purple black fruit in dense, dangling clusters. The fruit has a complex, dark sweetness, reminiscent of an aged port—in fact, it’s mixed with wine to make cassis. Black currants are also fairly easy to grow and will bear abundantly.
Both currants and gooseberries and—all members of the genus Ribes—have had to run from the law in the past. Because Ribes is a necessary host in the life cycle of white pine blister rust, a federal ban on planting currants and gooseberries was in place for a good part of the 20th century. Of little consequence to currants and gooseberries, the rust is devastating to white pines, and the ban on Ribes was meant to protect what was then an important source of timber. While federal prohibition on growing Ribes was lifted in the 1960s, restrictions still exist in some states. (New York, our home state, only lifted its ban in 2003.) Check with the Cooperative Extension office in your county before planting currants or gooseberries.
Site and Soil
Grow currants in full sun to partial shade (particularly in the southern part of their range) in evenly moist, well-drained soil amended with plenty of compost. They will grow well in most soil types except soggy situations. Currants bloom early; avoid low-lying frost pockets where their flowers may be damaged by cold. Choose a site with good air movement to reduce problems with powdery mildew.
Planting
Dig a broad, deep planting hole in prepared soil for black currants. Plant bare root bushes in late fall or early spring, setting them in the soil 3 to 4 inches deeper than they grew in the nursery. Water thoroughly after planting to finish settling the soil in the hole, then apply a thick mulch to protect the developing roots.
Growing
Maintain 2 to 3 inches of organic mulch beneath currants to keep the soil moist and block weed growth. Promptly hand-pull any weeds that pop up to avoid the need to cultivate around currants’ shallow roots.
Feed currants with a high-nitrogen organic fertilizer such as composted manure or alfalfa meal, spreading it over the root zone in fall before refreshing the mulch beneath the branches.
Black currants bear most of their crop on 1- and 2-year-old wood. During dormancy, prune out up to five of the oldest stems, cutting them back to the ground, and prune old lateral branches back to young side shoots. Remove crowded or crossing branches and any that are lying on the ground.
Harvesting
Harvest entire clusters of currants when the fruits are ripe and still firm and use them soon after picking. Convert black currants to juice or freeze them for longer storage.
Pests and Diseases
Currant borers are the larvae of a clear-winged moth. The caterpillars hatch from eggs laid in June on stems of currants and gooseberries. The first sign of borers’ presence may be wilting stem tips in summer. Look for entrance holes and prune off infested stems below the point of entry; destroy the prunings to get rid of the pests.
Extraordinary Varieties
‘Ben Sarek’, ‘Consort’, ‘Crusader’, ‘Titania’
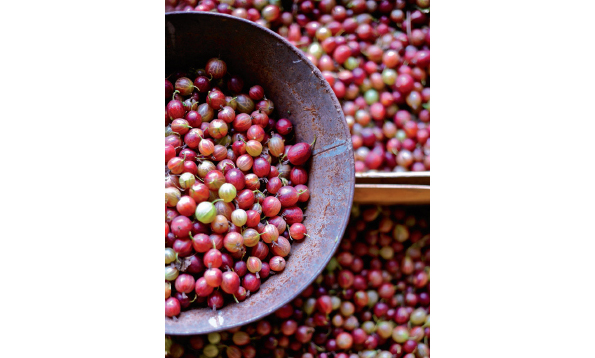
Gooseberry
Ribes hirtellum and R. uva-crispa varieties and hybrids
Gooseberries are a lovely fruit: pale, translucent skin, pleated with ribs, with flavors that are alive and sharp with sun-formed complexity. The flesh is moist but firm and reminiscent of currants, only mellower.
This fruit is borne on large, spiny, vase-shaped shrubs that are hardy in USDA Zones 3 to 6 and grow best in areas with cool summers. A few gooseberries have been developed with enough heat tolerance to grow well in Zones 7 and 8, but southern climes may not satisfy their significant chilling requirements. Gooseberries are self-fruitful, so you only need one bush to enjoy an abundance of tart, succulent fruit.
Site and Soil
Gooseberries are less particular about their situation than many fruits, as long as their roots are moist and cool during the growing season. Full sun to partial shade suits them, in soil that is evenly moist (but not soggy) and slightly acidic. Keep gooseberries out of low spots where frosts may settle and cause damage to their early-opening blossoms.
Planting
Plant bareroot gooseberries in fall or early spring in soil amended with compost. Dig a broad hole that’s deep enough to accommodate the roots and leave a cone of undisturbed soil in the middle. Arrange the roots over the cone of soil so that the uppermost root is about an inch below the soil surface and the bush sits slightly lower than it was in the nursery. Replace the soil removed from the hole, filling in around the roots and compacting it gently to eliminate air pockets. Water thoroughly after planting to finish settling the soil in the hole, then apply a thick mulch to protect the developing roots.
Growing
Maintain 2 to 3 inches of organic mulch beneath gooseberries to keep the soil moist and block weed growth. Promptly hand-pull any weeds that pop up to avoid the need to cultivate around gooseberry’s shallow roots.
Fertilize gooseberries in late fall to late winter by spreading balanced organic fertilizer over the root zone before replenishing the mulch. Gooseberries are most in need of supplemental potassium and magnesium, while their nitrogen needs are modest.
Prune during dormancy, removing wood older than 3 years and thinning new growth to leave 6 to 12 new shoots. Remove crossing or crowded lateral branches. In July, prune the current season’s lateral branches back to retain three to five leaves.
Harvesting
Pick gooseberries destined for pies and other cooked dishes before they are fully ripe. Let varieties meant for fresh eating ripen completely on the bush. Store the harvest in cold, humid conditions for 2 to 4 weeks.
Pests and Diseases
Early in spring, adult female black sawflies lay eggs on the undersides of gooseberry leaves, setting the stage for the appearance of imported currantworms, hungry sawfly larvae that typically begin feeding on a bush’s lower leaves. Be on the lookout for spotted green worms munching on gooseberry foliage and wash them off plants with a strong spray of water or clip out heavily infested branches. Spray with insecticidal soap, if necessary, to put a stop to currantworms before they completely strip a bush of its leaves.
Powdery mildew appears on gooseberries as powdery white patches on foliage and progresses to infect fruits. European gooseberry varieties tend to be more susceptible to mildew, but breeding programs have produced many resistant varieties. Sidestep mildew problems by choosing resistant varieties, avoiding excessive nitrogen fertilization that increases susceptibility, and pruning appropriately to improve air circulation around plants’ leaves.
Because all members of the genus Ribes have been linked to white pine blister rust, some states may have planting restrictions. Check with the Cooperative Extension office in your county before planting gooseberries.
Extraordinary Varieties
‘Invicta’, ‘Pixwell’, ‘Poorman’, ‘Tixia’

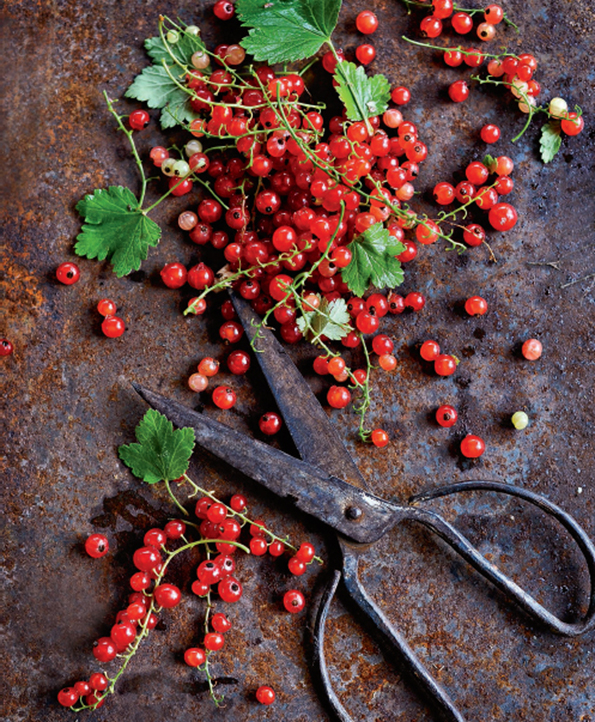
Red Currant
Ribes rubrum, R. sativum, and R. petraeum varieties
Red currants, hanging in loose, glossy strands from upright branches, are as delicious to the eyes as they are to the mouth, and when seen against the sun, the pearl-like berries are almost translucent. These vigorous, prolific, and easy-growing shrubs are hardy in USDA Zones 3 to 5. Most varieties are self-fertile, but some will be more productive in the company of another variety for cross-pollination.
Site and Soil
Red currants prefer cool, moist growing conditions and appreciate a bit of shade at the southern boundaries of their range. A sunny location on a north-facing slope will suit them, too. Soil of average fertility is fine for currants, as long as it is cool and evenly moist but well drained. Keep currants out of lowlying sites where settling frosts might damage their early blossoms.
Planting
Dig a broad, deep planting hole in prepared soil for red currants. Plant bareroot bushes in late fall or early spring, setting them in the soil so the uppermost root is about 1 inch below the soil surface. Water thoroughly after planting to finish settling the soil in the hole, then apply a thick mulch to protect the developing roots.
Growing
Maintain 2 to 3 inches of organic mulch beneath currants to keep the soil moist and block weed growth. Promptly hand-pull any weeds that pop up to avoid the need to cultivate around currants’ shallow roots. Water as needed to maintain evenly moist conditions; currants fare poorly in hot, dry situations.
Feed currants with a high-nitrogen organic fertilizer such as composted manure or alfalfa meal, spreading it over the root zone in fall before refreshing the mulch beneath the branches.
Red currants may be grown as cup-shaped, multistemmed bushes with open centers or trained to stakes or against a wall as cordons, allowing for more currants in limited space. Prune in winter to remove crowded or crossing branches and stems that are more than 3 years old; 2- and 3-year-old wood is most productive.
Harvesting
Pick entire clusters—known as strigs—of currants for cooking as soon as they are fully colored. Red currants meant for fresh eating may be left on the bush to ripen for several days after they’ve turned red. Once they’re harvested, be quick to convert currants to pies, jellies, sauces, and other tangy delights; the fresh berries do not keep for long after picking.
Pests and Diseases
Red currants are susceptible to the same problems as gooseberries and black currants, but they—and all Ribes—are reasonably trouble free. Lush, soft summer growth prompted by excess nitrogen fertilization can increase currants’ odds of developing a couple problems. Aphids may cluster on the undersides of leaves and cause curling and reddening of affected foliage, but their damage is rarely consequential. If their numbers seem unusually large or if the damage appears to be more than cosmetic, wash the pests from plants with a strong stream of water. Otherwise, healthy plants in a diverse garden with lots of beneficial insects often will withstand a few aphids without intervention.
Extraordinary Varieties
‘Cascade’, ‘Red Lake’, ‘Rovada’, ‘Wilder’
BRAMBLES
Clawing, thorny canes aside, brambles are among the easiest fruits to grow. Prohibitively expensive at the market, fragile, flavorful raspberries and plump, succulent blackberries can be yours to pick at their sun-ripened best in exchange for a truly modest amount of care. Everbearing varieties are the easiest, allowing you to cut them to the ground in late winter for a bang-up crop in season.
Although we call them berries, the bramble fruits are aggregates, clusters of drupelets that form around a central receptacle. When ripe, raspberries come free from their central core, while blackberries cling to the core, which comes free from the plant at harvest.
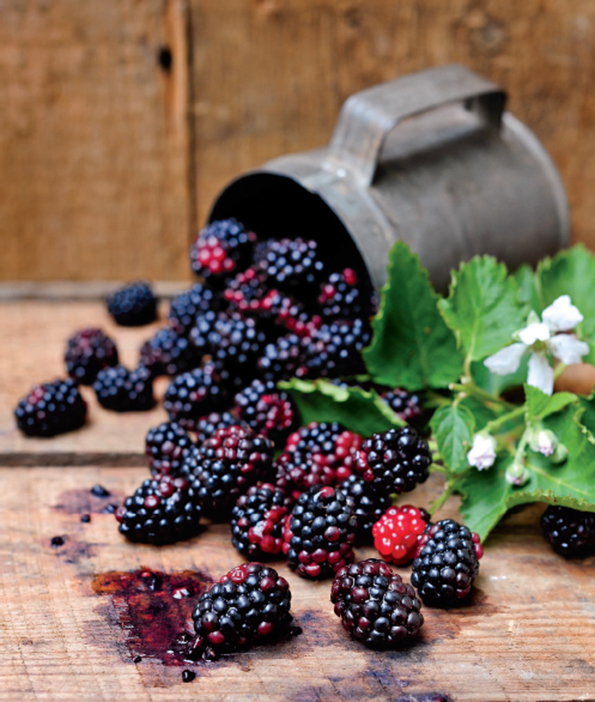

Blackberry
Rubus varieties
Lustrous blackberries the size of your thumb and blistered with juice are a late-season treat. We grow ever-bearing varieties at Stonegate, which fruit twice a year, in summer and fall, but we prune them back for one big bang of a harvest in fall.
Typically bigger and more vigorous than their raspberry relatives, blackberries thrive where summers are hot and humid and winters are mild (or where they are protected from intense cold). Most varieties are hardy in USDA Zones 5 to 9; thornless and trailing types tend to be less cold-hardy than thorny, upright varieties.
Site and Soil
Plant blackberries in full sun to partial shade in rich, loose, moist but well-drained, acidic soil. Good air movement around brambles helps keep them healthy. Avoid low-lying sites where cold air may settle.
Planting
Plant certified disease-free, bareroot plants in early spring, setting them 1 to 2 inches lower in the soil than they grew in the nursery. Keep the roots moist while planting and dig holes large enough to let the roots spread out naturally. Cut topgrowth back to about 6 inches after planting, and mulch to maintain soil moisture while the plants are getting established. Space black berries 5 to 6 feet apart, leaving 7 feet between rows.
Growing
Care for blackberries in much the same way as raspberries, keeping them well watered during the growing season and feeding with compost in early spring, after dormant pruning is completed.
In early spring, prune out all but six to nine sturdy canes per plant and shorten the remaining canes to 6 to 7 feet. Cut off weak side shoots and shorten remaining side branches to about 1 foot long. Blackberries produce fruit on 2-year-old canes. Cut fruiting canes back to the ground after they are finished bearing in summer.
Harvesting
Pick blackberries when they are fully ripe, preferably early in the day but after the morning dew has dried. Ripe berries will come off the stems fairly easily. Place berries gently in shallow containers no more than a few layers deep. Store, if necessary, in refrigeration, for no more than a couple days. Wash or rinse right before use.
Pests and Diseases
Although blackberries are susceptible to most of the same problems as raspberries, they generally are trouble free and suffer few pests or diseases. Starting with healthy, virus-free plants, pruning appropriately, and maintaining good vigor usually keep problems from cropping up in the blackberry patch.
Extraordinary Varieties
‘Darrow’, ‘Prime-Jan’, ‘Prime-Jim’
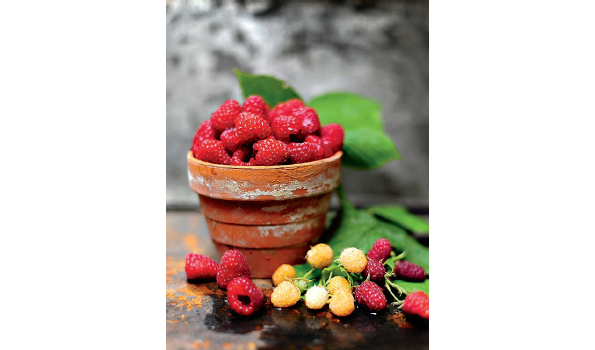
Raspberry
Rubus varieties and hybrids
Fresh raspberries are one of those seasonal delights people look forward to all year.
Bearing luscious fruit in shades of red, gold, and purple, arching raspberry canes range from fiercely thorny to barely prickly. Red varieties are the most cold-hardy and prefer cooler summer conditions. Black raspberries give up a bit in cold-hardiness but are more tolerant of summer heat.
Site and Soil
Grow raspberries in full sun in rich, loose, moist but well-drained, slightly acidic soil. In partial shade, raspberries will still be reasonably productive, but the plants tend to be more prone to problems. Good air movement around brambles helps keep them healthy.
Planting
Plant certified disease-free, bareroot plants in early spring, setting them 1 to 2 inches lower in the soil than they grew in the nursery. Keep the roots moist while planting and dig holes large enough to let the roots spread out naturally. Cut topgrowth back to about 6 inches after planting and mulch to maintain soil moisture while the plants are getting established. Space red and yellow varieties 1 to 2 feet apart and black raspberries 2½ to 3 feet apart, leaving 5 feet between rows.
Growing
Keep raspberries well watered throughout the growing season, particularly as fruits are developing. Drip irrigation makes this easy and reduces the risk of problems resulting from wetting the foliage while watering.
Use organic mulch around raspberries to reduce competition from weeds. Hand-pull weeds if necessary; avoid cultivating around brambles’ shallow roots.
Fertilize by spreading compost over the root zone in late winter to early spring, around the same time as dormant pruning for summer-bearing red raspberries and black raspberries. Cut fall-bearing red raspberries to the ground after leaf drop in fall and spread compost over the top of the bed.
In very early spring, cut out any remaining fruiting canes of summer-bearing red raspberries and thin remaining canes to two to four strong canes per foot of row. Cut these canes back to 4 to 5 feet long.
Dormant-prune black raspberries by thinning canes to leave six to nine strong canes per plant and pruning side strong side branches back to 8 to 12 inches. In summer, prune off the tips of black raspberry canes when they reach 2½ to 4 feet tall to stimulate growth of sturdy side shoots for fruit production.
While raspberries are generally upright and self-supporting, training them to a simple wire trellis makes all aspects of care much easier.
Harvesting
Pick raspberries when they are fully ripe, preferably early in the day but after the morning dew has dried. Ripe berries will slip easily from their central receptacles. Place berries gently in shallow containers no more than a few layers deep. Store, if necessary, in refrigeration, for no more than a couple days. Wash or rinse right before use. If an abundant harvest leaves you with more raspberries than you can use immediately, spread clean berries on cookie sheets and freeze, then put the frozen berries into freezer bags.
Pests and Diseases
Good cultural practices—pruning and removing the clippings, for example, and keeping plants thinned and trellised—go a long way toward avoiding many problems that can affect raspberries.
Japanese beetles are highly visible pests of raspberries and can skeletonize leaves and damage ripe berries with their feeding. Handpick beetles into soapy water or put traps at a distance from raspberries to lure them away.
Less visible but potentially more harmful are aphids and leafhoppers that feed on stems and foliage and spread viral diseases. Wash aphids from plants with a strong stream of water.
Viral diseases are the bane of brambles, infecting entire plantings and causing a gradual but inevitable decline. Start with virus-free plants, control aphid infestations, and remove wild brambles growing near your raspberry patch to limit the spread of virus woes. Remove and destroy wilted canes; those with distorted, discolored, or stunted foliage; canes with sunken purple spots or swollen galls; and any that display blackening upward from the soil.
Extraordinary Varieties
‘Anne’, ‘Autumn Bliss’, ‘Double Delight’, ‘Fall Gold’, ‘Heritage’, ‘Redwing’
NOTES FROM THE WONDERGROUND
Nirvana
“Out of such chaos comes the dancing star,” said my favorite dystopian curmudgeon Nietzsche, who may have come from farming blood for all I know. His obsessions with hardship and trial as paths to enlightenment, just like Homeric and Eastern mythology, are very much in the spirit of agriculture.
And if agriculture has a Grail—an odyssey of tribulation and effort—it’s organic fruit.
Fruit is the most difficult thing we grow. When cultivating organic fruit, from pome (apple, pear, quince) and stone (plum, cherry) to thorny brambles, it’s us against insects, fungi, birds, squirrels, chipmunks, and the rest of ravenous creation. Even the chickens went on a bender this week when a few cherries dropped to the orchard floor while we were harvesting.
Fruit is desire; it’s forbidden biblical temptation. (We might still be living in sinless oblivion had Eve handed Adam a fistful of kale.) And while most fruit is sweet, tempting our evolutionary lust for sugar, I’m in love with sour: the sharp, lip-puckering sour of ripe currants or gooseberries, or the tang of tart cherries, bloodred and swollen, with stone-hard pits that must be spat. Maybe they just seem edgier, and a less obvious choice, given the physiology of taste.
Humans can sense five tastes: sour, salty, bitter, sweet, and umami (soy sauce-like fermentedness). Sweet has been something we’ve done way too well for too long and are paying the price in an epidemic of obesity and diabetes. We’ve been sugar bombed and beaten into a neophobic lull by agribusiness for decades. It’s time for sour to have its moment.
Look at the growing popularity of the sour and bitter taste spectrum, from kombucha and hoppy beer to pickling just about everything, and it seems sour is making strides. Our bodies will thank us: Acids from sour fruit are crucial, since humans must get ascorbic acid from their diet (unlike most mammals, who can make their own), and if we don’t eat it, we’ll die of scurvy.
So what is it about tartness? Is it just that it’s an antivenom to the corn-sweetened everything of our culture? “Sour foods are growing because of what they aren’t: sweet,” says Mark Garrison in the online magazine Slate. “With public health officials in open warfare with soda and corn syrup, the opposite of their flavor profile sounds an awful lot safer to many consumers.”
Stonegate has been going sour since its inception, with black and red currants, sour cherries, gooseberries, and chokeberries (as in “choking on insane bitterness”). Cultivating fruit is what drew me to farming in the first place, plus an affinity for the work of 19th-century cultural stylist Andrew Jackson Downing and his ideas on both fruit cultivation and rural architecture. An orchard heavy with organic fruit seemed as close to the vault of agricultural nirvana as I could get.
I think Downing would have liked it here, even the way I first found it. The wonderful Gothicness of the place—clambered over by bindweed, wild grape, and lilac, with the lovely bones barely poking through a skin of neglect: Stonegate in the raw, abandoned to time and indifference.
Downing would have seen the potential, particularly now, with the orchard in its fullness, radiant and heavy with the sweet and sour glimmer of fruit, like Nietzsche’s dancing stars, lighting up the farm.

Hothouse grapes, currants, gooseberries, and plums add their decadent gleam to the growing season. Pearls of luminous red currants and lip-puckering gooseberries are harvested in late June.
POME FRUIT
An organic orchard, branch-heavy with beautiful, rare, and historic varieties of fruit, was one of the images swirling in my head long before I began to farm. I’d painstakingly espaliered a few pears and apples in my first kitchen garden and got a taste for the delights of homegrown fruit. There were gooseberries, too, and figs, and a few scraggly currants that the birds always got to before me. But as soon as I’d put a fence around a thousand square feet of open land on my property, I knew what was to come: fruit, and lots of it.
Of course, with 19th-century pomologist Andrew Jackson Downing’s long and deep shadow looming over my every move at Stonegate (he was born in Newburgh and is buried just up the road from me), I felt I needed to get this right. With Downing’s 1845 The Fruits and Fruit Trees of America in hand, I spent a few weeks researching 19th-century varieties of apple and pear that Downing wrote about and admired. Then—miraculously—I found a rare fruit nursery in Michigan that had a few dozen varieties of these historic fruit in its nursery stock. The Downing orchard was beginning to take shape.
To connect more deeply with the history of my property, and to cultivate an edible landscape that had as strong a narrative with the past as my architecture, I was determined to plant fruit varieties from the period and earlier without hybridized resistance to common pests and only organic cultivation. I ordered 1-year-old branched apple trees with evocative names and an interesting life story, like ‘Esopus Spitzenburg’ (Thomas Jefferson’s favorite apple), ‘Ashmead’s Kernel’ (an early 18th-century English variety known for its “honeyed nuttiness”), ‘Swaar’ (grown by early Dutch settlers to New York who gave it its name, which means “heavy” in Dutch, and one of Downing’s favorites), ‘Celestia’ (an apple Downing described as “crisp, tender, juicy”), ‘Newton Pippin’ (which George Washington grew at Mount Vernon), ‘Hidden Rose’, ‘Roxbury Russet’ (one of the oldest American apples), ‘Maiden Blush’, ‘Surprise’ (an early 19th-century hybrid with pink flesh), and ‘Caville Blanc d’Hiver’ (served at the table of King Louis the XIII of France in the mid-17th century). These apples have come into their own now in the orchard, bearing remarkable, complex fruit that would impress Downing.
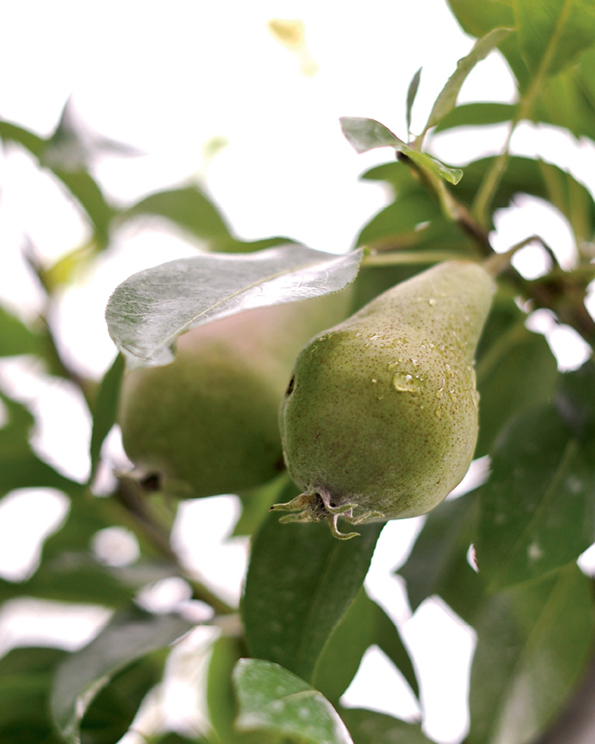
Antique pears, like ‘Vicar of Winkfield’, ‘Abbé Fétel’, ‘Beurré Gris’, ‘Fondante d’Automne’, ‘Sucrée de Montluçon’, ‘Seckel’, and ‘Winter Nelis’, with a cataloged history dating back to the medieval gardens of France and England, form another row in the orchard, as do quinces. These long bands of antique fruit trees, particularly when they’re in full and fragrant blossom or fruit, are something to savor and fix me more deeply to the history of this place.
Downing wrote—thoroughly and eloquently—about all of these, and my planting them not only promised an orchard sweetly burdened with rare fruit but also an interesting dialogue with Downing, a man who had been here and done this.
Apple
Malus varieties
The legend of John Chapman, or Johnny Appleseed, makes apple growing sound so easy: Just wander about strewing seeds far and wide, and apple trees are sure to follow. The truth is, successfully harvesting a crop of apples from your own trees takes more work, but they’ll doubtless be the best apples you’ve ever tasted.
Do your homework before deciding which apple varieties to grow. Sample fruits at local orchards and farm markets to find your favorites. We grow historic fruit because that’s part of our profile and mission at Stonegate, but choosing modern, disease-resistant varieties can reduce seasonal maintenance tasks. Most apples require cross-pollination by another variety to produce fruit, and some varieties don’t make much pollen. Depending on which varieties you select, you may need two or three trees to provide adequate cross-pollination. Focus on varieties—both scion and rootstock—that are suited to your climate and growing conditions to avoid trees that struggle and grow poorly. Dwarf and semidwarf apples that are grafted onto a hearty quince rootstock have done well for us, producing bountifully. Their smaller size will mean you can plant more trees and have more varietal choice, and all the pruning, spraying, netting, and harvesting tasks are more accessible with trees their size.
Site and Soil
Because apple trees are a long-term investment, site selection is particularly important. Plant in full sun in well-drained, fertile, neutral to slightly acidic soil well amended with organic matter. Try to avoid low spots where the soil may be soggy and where frosts may settle. If you’re worried about too much moisture, you can hill up and plant higher than grade to help with drainage.
Planting
Plant dormant 1-year grafted trees in early spring as soon as the soil can be worked. Dig a broad hole at least twice the width of the tree’s root mass, leaving a raised cone of undisturbed soil a few inches high in the middle. Use a digging fork to loosen the bottom and sides of the hole. Spread the roots over the central cone of soil, checking to see that the graft union will be 2 inches above the soil level when the hole is filled. Make sure the trunk is vertical, then fill in around the roots with unamended soil removed from the hole. Gently press the soil down around the roots to ensure there are no air pockets that can let roots dry out. A firm press with the heel usually does the job. Water thoroughly and mulch over the top of the soil, keeping soil and mulch away from the graft union. We ran drip irrigation through our orchard to help the young trees establish themselves with consistent moisture.
Growing
Pay close attention to watering during the months after planting. Evenly moist soil—neither soggy nor dry—helps trees develop strong, healthy roots that will serve them well for years to come. Established trees benefit from supplemental watering in dry conditions during the growing season, particularly while they are blooming and as fruits begin to ripen.
Apply mulch around the base of each apple tree to conserve soil moisture and to prevent weeds and grass from competing for water and nutrients. In early spring, mulching each tree with compost, spread beneath the tree from 1 foot away from the trunk out to the branch tips, provides a gentle nutrient boost as well.
Sprays of liquid seaweed or fish emulsion in spring around the time of petal drop and fruit formation are also beneficial. Apply any fertilizers primarily in spring; feeding at other times of the year can stimulate soft growth that is inviting to pests and diseases and susceptible to injury from cold temperatures.
Dwarf apple trees require regular pruning and training to keep them productive and to maintain their desired size. Most apples are trained in a “central leader” configuration—a single upright central stem surrounded by four or five “scaffold” branches spaced evenly around the central leader. In subsequent years, additional scaffold branches are chosen above the original set, so the branches spiral around the main stem, allowing light to penetrate. Branches will compete for apical dominance, so be sure to always choose a leader and stick with it.
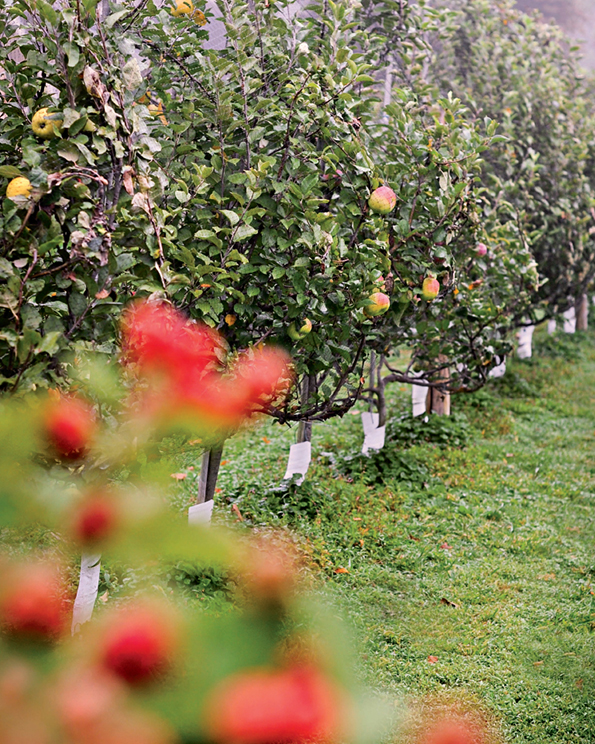
At Stonegate, we’ve planted our orchard of dwarf trees in rows of 15 varieties 6 feet apart. These rows are supported by a two-strand trellis of 12-gauge galvanized wire strung between cedar posts. Young trees often need support, and the post-and-wire setup handles that, but more important, it allows you to train your young trees with more precision, tying branches to wire where needed and creating a more open form. This is close planting and trellising and will require careful training, but the reward is more fruit.
In addition to pruning to shape the tree, cut off any shoots that arise low on the trunk or at its base. Prune out crossing or rubbing branches and those that cast shade on lower ones, as well as dead or diseased branches.
Be prepared to take action if you notice pest activity or disease symptoms that seem likely to threaten fruit production or the tree’s overall health. Ideally, a regular program of preventive care will keep problems from reaching levels that require additional management.
In late fall, refresh the mulch around trees, adding a 6-inch layer to protect the roots over winter but keeping it well away from the trunk to prevent rodents from nesting and feeding on the bark. In our orchard, we’ve used white plastic sleeves around the trunks that expand as the tree grows. Alternately, you can paint the trunk from the lowest branches to ground level with diluted white latex paint to prevent sunscald, as well as encase the base of the trunk with a 2-foot cylinder of wire mesh to further block rodent activity.
Harvesting
Apples ripen from late summer to late fall, depending on the variety. Know the approximate harvest window for the varieties in your home orchard and monitor fruit daily as that time approaches. Watch for changes in the fruits’ underlying skin color—typically from bright green to yellowish—and for fruit that separates easily from the twig when gently twisted. Sample the first apples harvested to determine if they’re fully ripe. Starchy, sour flavor indicates fruit that’s not ripe.
Gather apples when they meet the variety’s (and your) standards for ripeness, handling them carefully to avoid bruising. Store unblemished fruits in a refrigerator. Early-ripening varieties tend to have shorter lives in storage than those that mature later in fall. Use fruits that are bruised or otherwise damaged as soon as possible, since they won’t keep well.
Pests and Diseases
The list of chewing, nibbling, scratching, tunneling, and generally infuriating pests and of troublesome infectious fungal organisms that may afflict apples is long. That’s not to say that reasonably unblemished and worm-free apples are impossible using organic methods, only that producing a healthy, unbitten crop requires monitoring trees, good cultural practices, and following a regimen of organic controls. Your organic, imperfect apples will have all the flavor and character lost on most store-bought varieties.
In general, plan to apply a dormant oil spray in late winter to thwart overwintering pests. In spring and into summer, traps may be useful to monitor and control pests such as codling moth, tarnished plant bug, plum curculio, and apple maggot. Depending on variety, preventive sprays for other diseases or pests may be necessary. At Stonegate, besides dormant oil, we also spray with wettable sulfur for fungal diseases during the bloom cycle (at green tip and after petal drop). We also apply a very fine particulate clay (known as kaolin clay and marketed as Surround), which we dilute in water and spray on fruit immediately after petal drop and throughout the season. This organic clay coating, applied with a 5-gallon backpack sprayer, covers the emerging fruit with a fine, white film that discourages egg-laying insects from damaging the fruit; the clay is an irritant (imagine having sand in your joints) and will keep damage under control. It will need to be monitored and reapplied regularly throughout the season, as a heavy rain will wash it off.
We let our chickens roam the orchard, pecking at any fallen fruit and adding to their diverse diet. (It all ends up in the health and flavor of the eggs.) But chickens will also scratch and dig with their three-toed dinosaur feet, so we’ve run chicken wire over the roots of our trees to protect them. We also net our dwarf trees with 14-foot wide, 1-inch plastic netting to keep birds, squirrels, and chipmunks from stealing our precious fruit. We roll out the netting over the trees with a custom-built jig, then drape it around each side of the trees, tying it at the bottom with 14-gauge wire. It can be difficult to work with but will protect your fruit all season long. We remove it in the late fall for pruning. It’s either prevention or be pillaged at Stonegate.
If deer are active in your area, be prepared to protect apple trees from their browsing during winter. Experiment with repellents such as bags of human or pet hair and bars of deodorant soap to see what is most effective. Success often varies depending on how hungry deer are and what other foods are available to them.
Throughout the season, remove sprouts that arise at the base of the tree and both dead and diseased branches. Pick up fallen fruits to disrupt the life cycles of pests that occupy them. Clean up leaves in fall to keep diseases from overwintering in them and infecting next year’s foliage. In winter, remove any lingering fruits and prune out diseased or damaged branches.
Extraordinary Varieties
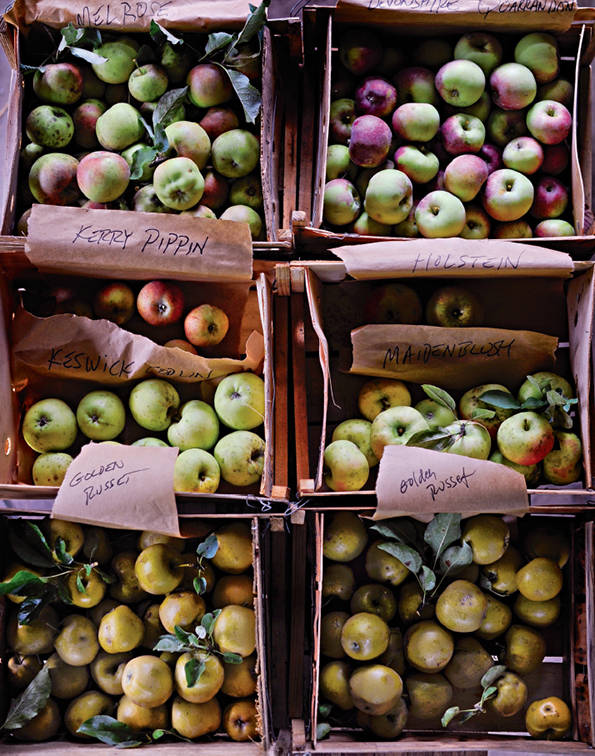
Antique: ‘Ashmead’s Kernel’, ‘Caville Blanc d’Hiver’, ‘Celestia’, ‘Cox’s Orange Pippin’, ‘Esopus Spitzenburg’, ‘Hidden Rose’, ‘Keswick Codlin’, ‘Maiden Blush’, ‘Swaar’, ‘Winter Nelis’, ‘Surprise’, ‘Duchess of Oldenburg’
Modern: ‘Empire’, ‘Holstein’, ‘Honeycrisp’, ‘Liberty’, ‘Macoun’, ‘Melrose’

Pear
Pyrus varieties
Biting into the forgiving flesh of a perfectly ripe pear, as its thick, delectable syrup drips down the chin, is truly one of life’s enduring pleasures, and growing your own pears will free you from the dearth of options in the supermarket—rock-hard proxy pears picked so early they will never ripen, no matter how long they sit among bananas on the counter, or mushy or mealy fruit that has been stored too long. Pears from the home orchard can be picked at just the right time, and there’s no comparison.
Like apples, pears need cross-pollination to produce fruit. Plan to grow at least two varieties and make sure they are capable of cross-pollinating one another; not all pears have viable pollen. Pears are often grafted onto rootstocks that control their size or impart other desired characteristics, such as resistance to fire blight, a disease that can devastate pear trees.
Site and Soil
Plant pears in rich, moist, well-drained soil in full sun. Pears are more tolerant of damp, heavy soil conditions than many tree fruits but shouldn’t be planted in a very soggy site. Pears bloom early, often putting their blossoms at risk from spring frosts; avoid low-lying sites where cold air may settle in spring.
Planting
Plant dormant bareroot pear trees in early spring as soon as the soil can be worked. Dig a broad hole at least twice the width of the tree’s root mass, leaving a raised cone of undisturbed soil a few inches high in the middle. Use a digging fork to loosen the bottom and sides of the hole. Spread the roots over the central cone of soil, checking to see that the graft union will be 2 inches above the soil level when the hole is filled. Make sure the trunk is vertical, then fill in around the roots with unamended soil removed from the hole. Gently press the soil down around the roots to ensure there are no air pockets that can let roots dry out. Water thoroughly and mulch over the top of the soil, keeping soil and mulch away from the graft union.
Growing
Care for pear trees is much the same as described for apples, including training to a central leader. However, in warm, humid spring and summer areas where fire blight is a particular problem, keep pear pruning to a minimum to avoid creating wounds where the disease can enter trees. Do any pruning that’s needed to shape and train in early spring, before trees break dormancy.
To increase their yields of fruit and to create stronger trees that are less prone to breaking, it’s helpful to train pear trees’ branches to overcome their strongly upright habit. By using spreaders between scaffold branches and the central leader or by hanging weights from the scaffold branches, the narrow angles of the branches can be opened to develop a less-crowded crown with sturdier branch angles. As we do with our apples, we train our branches onto orchard wire strung between posts, which is the simplest way to create an open habit. Pears are even more likely than apples to produce more fruits than a tree can support. Thin fruits to one or two per cluster about a month after trees finish blooming.
Harvesting
Pick pears before they are fully ripe, when their color changes from deep to light green and the fruits separate easily from the twigs with a slight twist. Cut a pear in half to be sure—ripe fruits have dark seeds. Sugary-sweet ‘Seckel’ pears are an exception; let them ripen on the tree before harvesting. Store pears in the refrigerator; ripen them at room temperature for a day or two before eating.
Pests and Diseases
Pear psyllas are tiny insects that are barely visible, but they can do substantial damage to pear trees by sucking juices from leaves and stems and by introducing viruses as they feed. Infested trees may turn black from the sticky honeydew the insects exude and the sooty mold that grows on it. If uncontrolled, feeding by psyllas can cause trees to gradually decline and die. Prevent these pests by spraying pear trees with kaolin clay in spring after the trees have finished blooming; repeat sprays as needed to protect the trees all season.
Blackened shoots that often are bent into a crook shape at the tips are signs of fire blight, a bacterial disease that affects pears, apples, and quinces. Resistant varieties and good cultural practices are the best defenses against fire blight. Keep pruning to a minimum to avoid creating wounds where bacteria can enter, and prune only during dormancy. Fertilize pears minimally and only in spring to limit lush, soft growth that also is a target for fire blight and pests.
Extraordinary Varieties
Antique: ‘Abbé Fétel’, ‘Beurré Bosc’, ‘Beurré Gris’, ‘Fondante d’Automne’, ‘Seckel’, ‘Sucrée de Montluçon’, ‘Vicar of Winkfield’, ‘Winter Nelis’
Modern: ‘Ayers’, ‘Blake’s Pride’, ‘Maxine’, ‘Pineapple’, ‘Potomac’, ‘Warren’
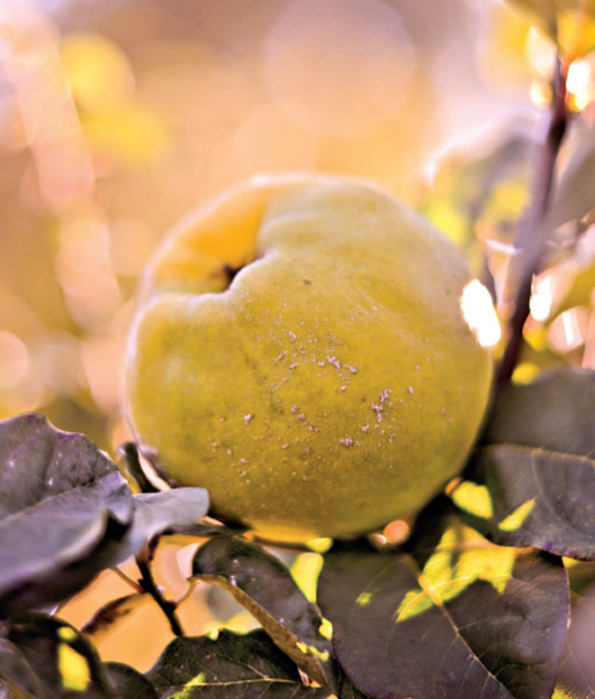
Quince
Cydonia varieties
Quince is often hard to find in the market, making it all the more valuable to the home orchard. Like a cross between a pear and an apple, quince’s oblong, golden, aromatic flesh is delicious when turned into jams, pastes, or preserves or even poached for dessert. And a quince tree in bloom is a beautiful sight: Its blossoms unfold like pale pink roses. Unlike its more popular pome cousins, quince is a fruit used almost exclusively for cooking or preserving. The dense, astringent flesh of all but a couple varieties makes them nearly impossible to eat fresh. And don’t confuse true quince—a small, sometimes multistemmed tree—with flowering quince (Chaenomeles japonica), an ornamental shrub, even though the latter also produces edible fruit.
Site and Soil
Give quince a sunny site in fertile, well-drained soil.
Planting
You can plant two or more varieties of quince to increase fruit production, but quinces are self-fertile and do not require cross-pollination to produce a crop.
Quince varieties usually are grafted onto dwarfing rootstocks that provide moderate size control. Plant in early spring while dormant as described for apples and pears, preparing a broad hole with a cone of soil in the middle and spreading the quince’s roots over the soil cone.
Growing
After planting, water and care for quince as you would any newly planted tree or shrub. Quinces tend to grow broader and stockier than apples or pears and may be trained in an open-center arrangement—lacking the central leader described for apples—or as multistemmed shrubs. Prune young plants during dormancy in late winter to early spring to control size, if necessary, to remove dead or diseased branches, and to alleviate crowding in the crown of the plant. Quinces begin bearing 3 to 5 years after planting, producing flowers and fruits on the tips of the previous season’s growth.
Harvesting
Quinces turn from green to yellow, shedding their fuzzy coating as they ripen. Leave fruits on the tree as long as possible, without exposing them to frost, to let them develop the best flavor. Cut fruits from the branches rather than twisting to avoid damage at the stem end that will reduce storage life. Handle carefully to avoid bruising; store in a cool, dry location away from other fruits, most of which will readily absorb the flavor and fragrance of the quinces.
Pests and Diseases
Quinces are prone to many of the same pests and diseases that trouble apples and pears. In fact, a quince tree may be useful as a trap for drawing pests away from other fruit trees, as long as you don’t mind losing a few quinces.
Sprays to control codling moths, Oriental fruit moths, and scale insects should be factored into quince care plans, starting with a dormant oil application in late winter to early spring. Kaolin clay applications will also discourage egg-laying pests.
Fire blight is as threatening to quinces as it is to pears. Limit pruning to winter dormancy and avoid making any cuts or wounds during the growing season to avoid giving the bacteria an opening.
Extraordinary Varieties
‘Champion’, ‘Fuller’s’, ‘Missouri Mammoth’, ‘Smyrna’, ‘Vranja’
STONE FRUIT
Nothing speaks more evocatively of summer in the orchard than stone fruit: Plums, cherries, peaches, and Pluots all ripen around the same time in midseason and are the first tree fruits to bear. Given the right conditions (and members of the genus Prunus are demanding about their growing conditions), these soft fruits will relinquish impossible amounts of sweetness and in such profusion that all of the challenges of growing them will be quickly forgotten.
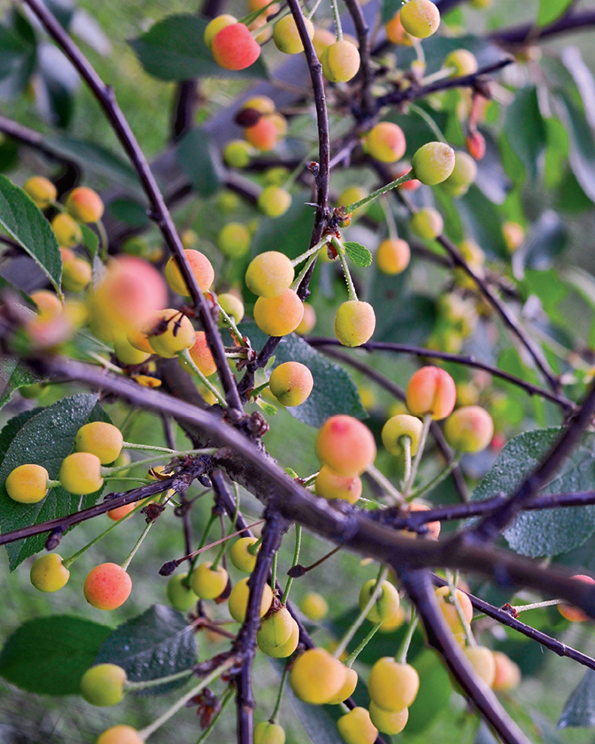
Cherry
Prunus avium and P. cerasus varieties
Cherries are the first trees to flower in my orchard, and they flower so abundantly that they seem almost covered in snow. Those flowers transform themselves into dense sprays of sweet and sour flavor by early summer.
The two types of cherries—sour (or tart) and sweet—have different growth habits and require different growing conditions. Sweet cherries can grow to be large trees that are hardy in USDA Zones 6 to 8, while sour cherries are small and spreading trees that favor cooler conditions in Zones 4 to 6.
Although a few are self-fertile, most sweet cherries need cross-pollination from a different variety that blooms in the same time frame. Sour cherry varieties are self-fertile; you can enjoy a harvest with just one tree.
Site and Soil
Choose a place in the sun with fertile, moist, well-drained soil and good air movement. Avoid low-lying sites where cold air may settle, particularly for sweet cherries whose earlier blossoms are at risk from late-spring frosts. Sour cherries are moderately tolerant of heavy soils but will grow better where the drainage is good.
Planting
Plant 1- or 2-year-old grafted trees in spring, preparing a broad planting hole that’s twice the diameter of the rootball and deep enough to accommodate the roots while ensuring the tree’s graft union will be at least 2 inches above the soil surface. Leave a cone of undisturbed soil in the middle of the hole and position the roots over it. Make sure the trunk is vertical and gradually replace the soil from the hole around the roots. In moist or heavy soil, cherries may be planted in raised beds or mounds to prevent problems related to poor drainage. Gently compact the soil over the roots to ensure good contact between roots and earth and to eliminate air pockets that can let roots dry out. Water thoroughly to further settle the soil in the planting hole.
Growing
Mulch after planting to maintain soil moisture and prevent weeds from competing with young trees. Water as needed throughout the growing season to keep the soil moist but not soggy.
Train young dwarf sweet cherries in a “central leader” arrangement—a single upright central stem surrounded by four or five scaffold branches spaced evenly around the central leader. Sour cherries more naturally assume an open-center shape. Use spreaders and/or weights on side branches to direct them outward rather than upward, controlling height and stimulating earlier fruit production. Once trees begin bearing, prune to let light and air into the center of the crown. Prune sour cherries annually in late winter; sweet cherries need pruning every few years.
Be prepared to follow a regular schedule of pruning, monitoring, and spraying to prevent and control disease and pest problems, starting with winter removal of diseased branches and late-winter sprays of dormant oil to control overwintering pests. Visit and monitor cherry trees regularly to ensure their ongoing health and to spot any developing problems before they get out of hand.
Harvesting
Cherries don’t ripen after they’re picked, so wait to harvest until the fruits signal ripeness by starting to drop. Sample a few to be sure, then pick carefully, pulling off clusters of cherries with the stems intact for better keeping. Don’t pull off the twigs (spurs) that hold the stems—these will produce next year’s cherries. Sour cherries will mellow and sweeten a bit if left on the tree to ripen for an extra day or two. But harvest promptly in warm, humid weather when the fruits can go quickly from ripe to rotten. Rainfall while cherries are ripening can cause fruits to crack.
Pests and Diseases
Cherries are both easy to grow and prone to a long list of pest and disease problems that can make them seem endlessly in need of care. Providing good growing conditions that keep young trees healthy and vigorous goes a long way toward preventing many problems. And maintaining a diverse garden around those trees invites the helpful presence of beneficial insects and microorganisms.
While there are many smaller pests that may want to take a bite of cherries as they grow, birds are often the biggest threat to ripening fruits. In short order, birds can strip a tree of its entire crop, leaving nothing for the gardener who has lovingly tended the tree for years to bring it to fruition. Birds are perhaps the best argument for dwarf cherry trees, since completely covering a dwarf tree with netting is easier—although still challenging—than getting a net over larger trees. Where netting is not possible, try a diverse and changing array of deterrents such as fake snakes and owls and shiny objects hanging from branches. Move these scare devices around frequently to keep birds from becoming accustomed to their presence. A mulberry tree, planted nearby but not too near, may draw birds away from cherries with its preferred fruits.
Extraordinary Varieties Sweet: ‘Bing’, ‘Black Tartarian’, ‘Emperor Francis’, ‘Lapins’, ‘Stella’ Sour: ‘Balaton’, ‘Montmorency’, ‘North Star’
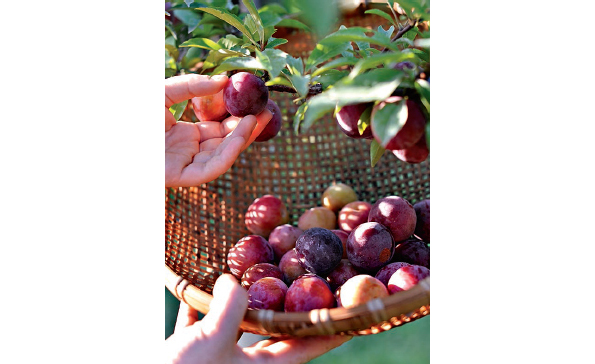
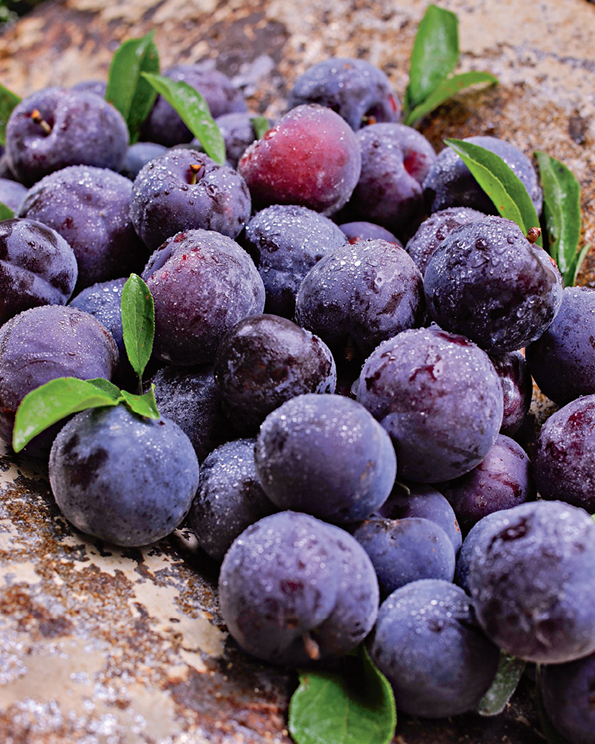
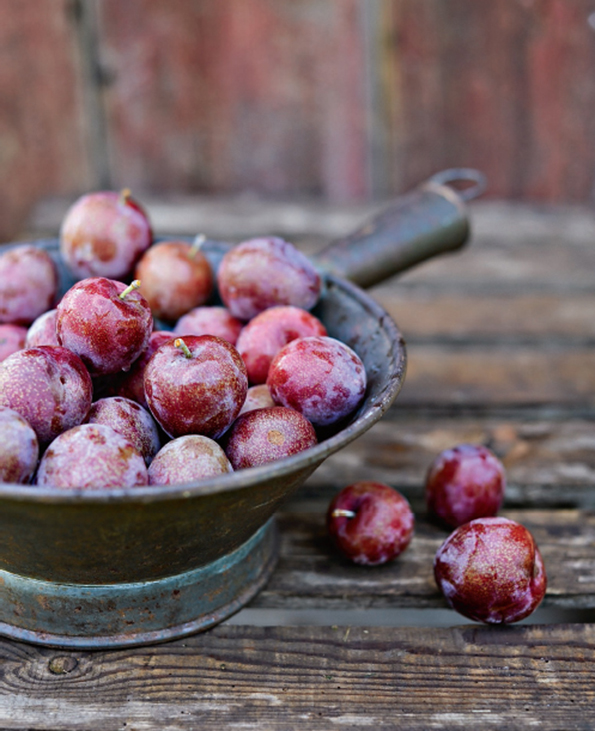
Plum
Prunus varieties
Compared to their fuzzy and opaque peach cousins, plums are smooth and glossy with jewel-toned, translucent flesh. There’s nothing like a sun-warmed plum in the hand, just freed from the branch and about to explode with flavor in the mouth.
Plums represent species and hybrids of oblong European plums (Prunus domestica), damsons (P. insititia), round heart-shaped Asian plums (P. salicina), and bite-size native American plums (P. americana, P. maritime, and others). Fruit colors range from deep purple to rosy pink to gold, and flavors vary from sugary sweet to tart and tangy.
The various plum species and hybrids have somewhat differing needs. European plums and damsons are hardy in USDA Zones 4 to 9 and are at least partly self-fertile. Asian plums require compatible varieties for cross-pollination and are less hardy than European plums but more heat tolerant (Zones 6 to 10). Native American species tend to be quite hardy but also require another plum for pollination.
Site and Soil
Site plum trees in a sunny location where their early blossoms are unlikely to be injured by late-spring frosts—avoid low-lying areas and southern exposures that may tempt them to bloom even earlier. Like other Prunus, they’ll do best in loose, rich, well-drained soil, but plums—especially European varieties—are generally more tolerant of heavy soils than cherries.
Planting
Except in mild-winter areas, plant dormant bareroot 1- or 2-year-old plums in early spring. Prepare a broad planting hole that’s twice the diameter of the rootball and deep enough to accommodate the roots while ensuring that the tree’s graft union will be at least 2 inches above the soil surface. Leave a cone of undisturbed soil in the middle of the hole and position the roots over it. Make sure the trunk is vertical, then gradually replace the soil from the hole around the roots, gently tamping it down to ensure good contact between roots and earth. Water thoroughly.
Growing
Water regularly during the first growing season to help plums establish. Mulch the area around new trees to keep the soil moist and to eliminate competition from weeds, but keep the mulch at least 6 inches from trunks.
In early spring, spread an inch of compost over the soil beneath plums 6 inches from the trunk out to the branch tips. Foliar feed with liquid seaweed or fish emulsion after petal drop and throughout the growing season to enhance plant health.
Upright European plum varieties usually are trained to a central leader configuration, as described for sweet cherries. Asian plums tend to have a spreading form that lends itself to open-center training, like for peaches. American plums may grow more like large bushes than small trees, depending on their parentage and any rootstock in use. Few native species are available commercially.
Prune to shape and train in late winter. Remove unwanted sprouts and crowded branches around the time the buds begin to open in spring. When plums begin bearing, take time to thin out overcrowded fruits.
Harvesting
Typical of stone fruits, plums do not ripen after harvest. Pick fully colored fruits that are slightly soft to the touch. Keep stems intact for longer storage; store plums in moist, cold conditions. Not surprisingly, prune plums (certain European varieties) are particularly good for drying.
Pests and Diseases
In various degrees, the problems of cherries may also afflict plums. Follow the guidance of your county Cooperative Extension office and the reputable fruit nursery you buy plums from regarding potential pest and disease problems in your area and strategies for prevention and control.
Black knot is a fungal disease that affects plums and, to a lesser extent, cherries, peaches, and apricots. Infected branches develop knobby, black, swollen galls. Infection occurs in spring when windblown spores land on fresh, new growth. Monitor plums for signs of black knot galls, and prune out diseased branches in late winter.
Extraordinary Varieties
Beach plum, damson, ‘Methley’, ‘Redheart’, ‘Shiro’

Pluot
Prunus hybrids
Pluots seem an invention of convenience: If you want all the flavor of a plum, without the drippy, plummy mess, look no further than Pluots. Plum flavors dominate (Pluots are about 60 percent plum), but the mouthfeel is that of an apricot, so drier and firmer. Pluots are also much sweeter than their plum and apricot parents.
Pluots are hybrids of plums (Prunus salicina and P. cerasifera) and apricots (P. armeniaca). On the spectrum of crosses between these species, the trees called Pluots (a trademarked name) are genetically closer to plums than hybrids named plumcots (originally a 50-50 cross), Apriums, or apriplums. Typically hardy in USDA Zones 6 to 9, the nature of these fruits tends to vary depending upon their parentage, as do their pollination requirements. Most Pluot trees need another Pluot or a Japanese plum for pollination, although some varieties are self-fruitful.
Site and Soil
Prepare a sunny site for Pluots in rich, evenly moist but well-drained soil that’s been well amended with compost prior to planting. Pluots are somewhat tolerant of dry growing conditions but are unlikely to grow well in heavy, wet soil. Like their parent species, Pluots tend to bloom early, putting their blossoms in harm’s way of late-spring frosts. Avoid planting in low spots where cold air settles.
Planting
Except in mild-winter areas, plant dormant bareroot trees in early spring. Prepare a broad planting hole that’s twice the diameter of the rootball and deep enough to accommodate the roots while ensuring the tree’s graft union will be at least 2 inches above the soil surface. Leave a cone of undisturbed soil in the middle of the hole and position the roots over it. Make sure the trunk is vertical, then gradually replace the soil from the hole around the roots, gently tamping it down to ensure good contact between roots and earth. Water thoroughly to further settle the soil in the planting hole.
Growing
In general, grow Pluots like you would Asian plums. Follow any specific care and training instructions provided by the nursery.
Harvesting
Pick Pluots when they are fully colored and slightly soft to the touch. Sample a fruit or two to be sure they are completely ripe. Store ripe fruit in humid, cold conditions.
Pests and Diseases
Pluots are prone to the usual array of pests and diseases of Prunus varieties. Be aware of the potential problems that are common in your area and when to take preventive actions against them. Plant in a favorable location, space trees appropriately for their mature size, prune to improve air circulation, and water and fertilize as needed to maintain healthy trees that will be less susceptible to problems of all sorts.
Bacterial leaf spot is a common disease of plums, apricots, and peaches in the eastern United States. Note that both of Pluots’ parents are affected by this disease. Small dark spots appear on leaves; the centers of these spots dry and fall out, creating a characteristic shot-hole appearance. Fruits on infected trees develop small, sunken dark spots or cracks. Some Pluot varieties have resistance to leaf spot; otherwise, vigorous growth and appropriate pruning are the best defenses against infection.
Extraordinary Varieties
‘Dapple Dandy’, ‘Dinosaur Egg’, ‘Flavor King’, ‘Flavor Supreme’
NOTES FROM THE WONDERGROUND
iPick
My own apple genius bar was set pretty high when I presumed that cultivating an organic orchard at Stonegate was even remotely doable.
The Cooperative Extension folks shook their Carhartt-capped heads at my callow ambitions; nurseries tried to sell me the same old dreary disease-resistant cultivars; and local farmers insisted that the Hudson Valley, with its centuries of apple production, had created its own Darwinian microcosm of ever-adaptive pestilence that would do me in.
It seemed without the regular puffing out of vast clouds of synthetic pesticides, I was doomed to harvesting bushels of rotting, inedible muck. Organic apples were truly forbidden fruit; a tired old trope for original sin.
So, of course—always one to succumb to a little biblical temptation—I planted them: historic apples with seductive, suggestive names like ‘Hidden Rose’, ‘Maiden Blush’, and ‘Pink Sparkle’; those that sounded decent and honorable like ‘Ashmead’s Kernel’ and ‘Esopus Spitzenburg’; and a few that reeked of high-born patrician plant naming, like ‘Duchess of Oldenburg’, ‘Devonshire Quarrenden’, and ‘Calville Blanc d’Hiver’.
The choosing of varieties (and there are 16 dwarf, spindle-trained apple trees in my orchard) was not entirely up to me. I have the ghost of Andrew Jackson Downing and his 19th-century tome The Fruits and Fruit Trees of America to thank for much of the fussy decision making.
Downing, who was the foremost pomologist of his time and had his nursery in Newburgh, just a few miles from my farm, is something of a legend in these parts. More than just a plant nerd, he was a prominent horticulturalist, landscape designer, and architect who cast a long and dazzling spell during his short life. (He died at 37, drowned rescuing others during a steamship fire on the Hudson.) When it came down to planting an orchard at Stonegate, I wanted Downing’s help.
I spent weeks online, obsessed, looking for rare and historic apple and pear varieties that Downing knew and grew more than 150 years ago, and I stumbled across a quirky, cranky rare-fruit nursery on the southwestern tip of Michigan called Southmeadow Fruit Gardens—they even quoted Downing on the cover of their catalog! After cross-referencing varieties they were growing with ones Downing had written about and praised, I put in my order.
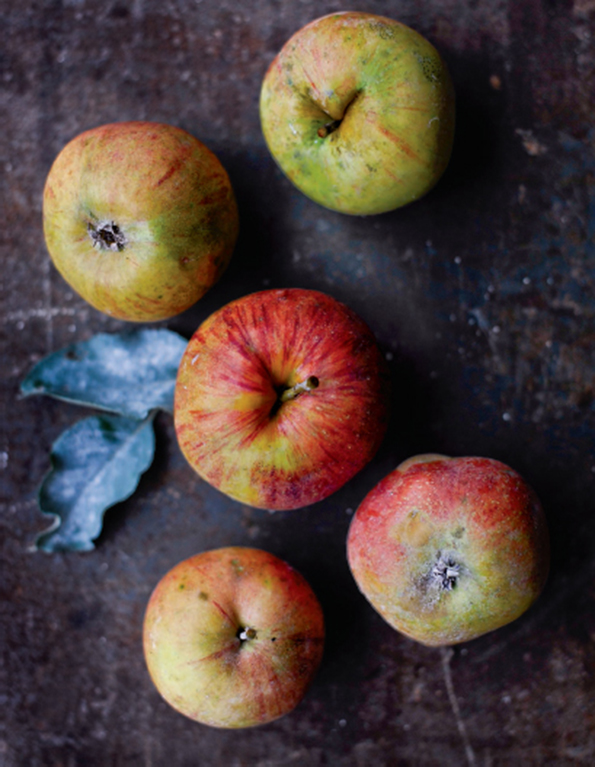
With minimally invasive organic pest management, the orchard at Stonegate has matured over the past 5 years, and the apples this season are the payout: Flecked and pocked and full of a kind of organic indignation for what passes for fruit these days, these are apples to be reckoned with.
We’ve just tasted some of the first remarkable fruit of that planting, with a bushel or more of ‘Golden Russet’, with its fine-grained flesh and bronze cheeks; ‘Maiden Blush’, flaring red over tender, yellow skin; ‘Kerry Pippin’, with its spicy, aromatic tang; and ‘Hidden Rose’, its flesh faintly streaked with pink—the apple of my i.
They may not be the prettiest pommes out there, but they’ve got plenty of organic personality. And unlike the dull, synthetic supermodels at the box stores, these apples have so much to say.

The ghost of 19th-century pomologist Andrew Jackson Downing haunts much of the apple growing at Stonegate Farm, influencing not only which historic varieties are cultivated but how they’re grown.