Damn Delicious: 100 Super Easy, Super Fast Recipes - Rhee Chung-Ah (2016)
3. (BETTER THAN) TAKEOUT EXPRESS
No more waiting for the delivery guy. In just 20 to 30 minutes you can make your own copycats of favorite restaurant dishes at a fraction of restaurant prices. Plus, the homemade versions always taste a million times better.

BBQ CHICKEN FRENCH BREAD PIZZA
All the flavors of a traditional BBQ chicken pizza without any of the fuss. There’s absolutely no kneading, no rolling, no tricky anything involved here. Simply add everything on top of a crusty French bread loaf and you are done!
SERVES 8
PREP TIME: 10 MINUTES
TOTAL TIME: 24 MINUTES ![]()

1 tablespoon olive oil
1 pound boneless, skinless chicken breasts, diced
¼ teaspoon kosher salt
⅛ teaspoon freshly ground black pepper
¾ cup barbecue sauce, divided
1 (1-pound) French bread loaf, cut in half horizontally
1 cup thinly sliced red onion
1 cup shredded Cheddar cheese
1 cup shredded mozzarella cheese
2 tablespoons chopped fresh cilantro leaves, for garnish, optional
1. Preheat the oven to 400°F. Line a baking sheet with parchment paper.
2. Heat the oil in a large skillet or Dutch oven over medium-high heat.
3. Season the chicken with salt and pepper. Add the chicken to the skillet, and cook, stirring occasionally, until lightly browned and cooked through, 3 to 4 minutes. Stir in ¼ cup barbecue sauce, and set aside.
4. Place the bread, cut-sides up, onto the prepared baking sheet. Spread the remaining barbecue sauce evenly over the bread slices; top with the chicken, red onion, and cheeses.
5. Bake for 10 minutes, or until the cheese has melted.
6. Serve immediately, garnished with additional barbecue sauce and cilantro, if desired.
PER SERVING: CALORIES 382 FAT 11.8g PROTEIN 26g CARB 42g FIBER 2g CHOL 55mg IRON 3mg SODIUM 889mg
TIP
When you make pizza at home, you can control the salt levels and load up on healthier ingredients like veggies and chicken!
AVOCADO EGG ROLLS
These egg rolls are inspired by the ones from The Cheesecake Factory. I dedicate them to all you avocado lovers out there. And if you’re not a keen avocado fan, these will still blow your mind. Seriously.
MAKES 8 EGG ROLLS
PREP TIME: 15 MINUTES
TOTAL TIME: 20 MINUTES ![]()

FOR THE CILANTRO DIPPING SAUCE
¾ cup loosely packed fresh cilantro leaves
⅓ cup sour cream
2 tablespoons mayonnaise
1 jalapeño chile, seeded and deveined, optional
1 clove garlic
Juice of 1 lime
Kosher salt and freshly ground black pepper, to taste
3 ripe avocados, pitted and peeled
1 Roma tomato, diced
¼ cup diced red onion
2 tablespoons chopped fresh cilantro leaves
Juice of 1 lime
Kosher salt and freshly ground black pepper, to taste
1 cup vegetable oil
8 egg roll wrappers
1. Make the cilantro dipping sauce: Combine the cilantro, sour cream, mayonnaise, jalapeño, garlic, and lime juice in the bowl of a food processor, and pulse until all the ingredients are evenly incorporated; season with salt and pepper to taste. Set aside.
2. In a medium bowl, gently mash the avocados using a potato masher. Add the tomato, red onion, cilantro, and lime juice, and gently stir to combine. Season with salt and pepper to taste.
3. Heat the oil in a large skillet or Dutch oven over medium-high heat, until it registers 350°F using a deep-fry thermometer.
4. Working with one wrapper at a time, place about ¼ cup avocado mixture in the center of the wrapper. Bring the bottom edge of the wrapper tightly over the filling, and then fold in the sides. Continue to roll up the wrapper, enclosing the filling, until the top of the wrapper is reached. Using your finger, rub the top edge of the wrapper with a dab of water, pressing to seal. Repeat with the remaining wrappers and avocado mixture.
5. Working in batches, add the egg rolls to the hot oil, and fry until golden brown and crispy, 2 to 3 minutes per side. Using tongs, transfer the egg rolls to a paper towel-lined plate to drain.
6. Serve immediately with the cilantro dipping sauce.
PER SERVING: CALORIES 317 FAT 22.5g PROTEIN 4g CARB 26g FIBER 5g CHOL 11mg IRON 2mg SODIUM 330mg
COPYCAT TAKEOUT EGG ROLLS
This recipe gives you egg rolls that are restaurant quality without that heavy grease, and you can throw in any veggies you happen to have on hand. Mushrooms, broccoli, snap peas, and bean sprouts would all make great additions. To keep these meatless, just switch out the the ground chicken for crumbled tofu.
MAKES 8 EGG ROLLS
PREP TIME: 20 MINUTES
TOTAL TIME: 30 MINUTES ![]()

1 pound cooked ground chicken
2 cups shredded cabbage
1 carrot, grated
1 stalk celery, diced
2 cloves garlic, minced
2 green onions, thinly sliced
1 tablespoon reduced-sodium soy sauce
1 tablespoon sesame oil
1 tablespoon hoisin sauce
1 tablespoon freshly grated ginger
1 teaspoon Sriracha sauce, optional
1 cup vegetable oil
8 egg roll wrappers
1. In a medium bowl, combine the chicken, cabbage, carrot, celery, garlic, green onions, soy sauce, sesame oil, hoisin, ginger, and Sriracha, if desired, and stir to evenly distribute the ingredients.
2. Heat the oil in a large skillet or Dutch oven over medium-high heat, until it registers 350°F using a deep-fry thermometer.
3. Working with one wrapper at a time, place about ¼ cup chicken mixture in the center of the wrapper. Bring the bottom edge of the wrapper tightly over the filling, and then fold in the sides. Continue to roll up the wrapper, enclosing the filling, until the top of the wrapper is reached. Using your finger, rub the top edge of the wrapper with a dab of water, pressing to seal. Repeat with the remaining wrappers and chicken mixture.
4. Working in batches, add the egg rolls to the hot oil, and fry until evenly golden brown and crispy, 2 to 3 minutes. Transfer to a paper towel-lined plate to drain.
5. Serve immediately.
PER SERVING: CALORIES 300 FAT 17.1g PROTEIN 15g CARB 22g FIBER 1g CHOL 56mg IRON 2mg SODIUM 334mg
TIP
Serve these with a dipping sauce such as plum sauce or sweet and sour.
EXPRESS CHOW MEIN
When I had my first job as a 16-year-old working at Cold Stone Creamery, I remember ordering the kid’s meal at Panda Express next door. This wasn’t because I didn’t eat much, but more to save a few bucks. If only I knew I could make their chow mein for less than half the price, I would’ve had a full-sized portion for breakfast, lunch, and dinner.
SERVES 4
PREP TIME: 10 MINUTES
TOTAL TIME: 20 MINUTES ![]()

½ cup reduced-sodium soy sauce
6 cloves garlic, minced
2 tablespoons packed brown sugar
4 teaspoons freshly grated ginger
½ teaspoon ground white pepper
2 (5.6-ounce) packages refrigerated yakisoba noodles, seasoning sauce packets discarded (see Note)
2 tablespoons olive oil
1 onion, diced
3 stalks celery, sliced on a diagonal
2 cups shredded cabbage
1. In a small bowl, whisk together the soy sauce, garlic, brown sugar, ginger, and white pepper; set aside.
2. In a large pot of boiling water, cook the yakisoba noodles (they’ll start off in a clump) until loosened, 1 to 2 minutes; drain well.
3. Heat the olive oil in a large skillet over medium-high heat. Add the onion and celery, and cook, stirring often, until tender, about 4 minutes. Stir in the cabbage until heated through, about 1 minute.
4. Add the noodles and the soy sauce mixture, and toss until the ingredients are evenly distributed, about 2 minutes. Serve immediately.
Note: Yakisoba noodles can be found in the refrigerated aisle of most grocery stores.
PER SERVING: CALORIES 265 FAT 8.3g PROTEIN 9g CARB 48g FIBER 4g CHOL 2mg IRON 1mg SODIUM 1254mg
FAUX SHRIMP PAD THAI
The only “faux” part of this cheater pad thai recipe is the use of Italian-style linguine noodles instead of traditional rice noodles. The latter can be difficult to find and will result in gluey, clumpy noodles if overcooked or prepared incorrectly. Use linguine and you’ll get to enjoy all of the wonderful pad thai flavors without dealing with anything tricky.
SERVES 4
PREP TIME: 10 MINUTES
TOTAL TIME: 20 MINUTES

FOR THE SAUCE
3 tablespoons reduced-sodium soy sauce
2 tablespoons packed brown sugar
1 tablespoon fish sauce
1 teaspoon sambal oelek (ground fresh chile paste), plus more to taste
Juice of 1 lime
8 ounces dried linguine
1 cup bean sprouts
1 tablespoon vegetable oil
2 cloves garlic, minced
8 ounces medium shrimp, peeled and deveined
¼ teaspoon freshly ground black pepper
2 large eggs, lightly beaten
1 carrot, grated
2 green onions, thinly sliced
¼ cup peanuts, chopped
¼ cup fresh cilantro leaves
1 lime, cut into wedges, for garnish
1. Make the sauce: In a small bowl, whisk together the soy sauce, brown sugar, fish sauce, sambal oelek, lime juice, and 1 tablespoon water; set aside.
2. In a large pot of boiling salted water, cook the pasta according to package instructions. Just 2 minutes before the pasta is cooked, add the bean sprouts; drain well.
3. Meanwhile, heat the oil in a large skillet over medium-high heat. Add garlic, and cook, stirring frequently, until fragrant, about 1 minute. Add the shrimp and black pepper, and cook, stirring occasionally, until the shrimp are pink, 2 to 3 minutes.
4. Add the pasta and sauce to the skillet, and gently toss to combine. Make a well in the center of the skillet, and pour in the beaten eggs. Stir in the eggs until cooked through and well combined, about 2 minutes (see Note).
5. Serve immediately, topped with the carrot, green onions, peanuts, and cilantro, and garnished with the lime wedges, if desired.
Note: If you want bigger chunks of eggs, scramble them separately, chop, and toss them back into the skillet near the end of cooking.
PER SERVING: CALORIES 435 FAT 11.8g PROTEIN 25g CARB 58g FIBER 4g CHOL 173mg IRON 3mg SODIUM 904mg
ASIAN GARLIC NOODLES
This easy stir-fry uses ingredients you may already have on hand. Just use standard spaghetti noodles, fettuccine, or even angel hair pasta and skip the last-minute grocery run. You’re welcome.
SERVES 4
PREP TIME: 10 MINUTES
TOTAL TIME: 20 MINUTES

FOR THE GARLIC SAUCE
⅓ cup reduced-sodium soy sauce
2 tablespoons packed brown sugar
1 tablespoon sambal oelek (ground fresh chile paste; see Note), plus more to taste
1 tablespoon oyster sauce
1 tablespoon freshly grated ginger
1 teaspoon sesame oil
3 cloves garlic, minced
8 ounces dried spaghetti
1 tablespoon olive oil
12 ounces medium shrimp, peeled and deveined
8 ounces cremini mushrooms, sliced
1 red bell pepper, diced
2 zucchini, trimmed and diced
1 carrot, grated
2 tablespoons chopped fresh cilantro leaves, for garnish, optional
1. Make the garlic sauce: In a small bowl, whisk together the soy sauce, brown sugar, sambal oelek, oyster sauce, ginger, sesame oil, and garlic. Set aside.
2. In a large pot of boiling salted water, cook the pasta according to package instructions; drain well.
3. Meanwhile, heat the olive oil in a large skillet over medium-high heat. Add the shrimp and 2 tablespoons of the garlic sauce, and cook, stirring occasionally, until the shrimp are pink, 2 to 3 minutes. Set aside.
4. Stir the mushrooms, bell pepper, zucchini, and carrot into the skillet. Cook, stirring frequently, until vegetables are tender, 3 to 4 minutes. Add the spaghetti, shrimp, and remaining garlic sauce mixture to the pan, and toss until the ingredients are heated through and evenly distributed, 2 to 3 minutes.
5. Serve immediately, garnished with the cilantro, if desired.
Note: Sriracha sauce can be substituted for the sambal oelek, if desired.
PER SERVING: CALORIES 414 FAT 6g PROTEIN 27g CARB 62g FIBER 4g CHOL 119mg IRON 3mg SODIUM 1053mg
KIMCHI FRIED RICE
Kimchi fried rice is one of my go-to comfort dishes. I like my fried rice lighter and healthier than your standard takeout version, so this recipe uses brown rice—instead of the typical white rice—and tons of veggies. You can skip the beaten egg, if you like, and top with a fried egg with an oozing yolk instead!
SERVES 6
PREP TIME: 10 MINUTES
TOTAL TIME: 25 MINUTES ![]()

¼ cup kimchi juice
1 tablespoon reduced-sodium soy sauce
1 tablespoon freshly grated ginger
1 teaspoon sesame oil
1 tablespoon gochujang (hot pepper paste), optional
2 tablespoons olive oil
2 large eggs, lightly beaten
2 cloves garlic, minced
1 onion, diced
1 cup chopped kimchi (see Note)
2 carrots, peeled and diced
½ cup frozen, canned, or roasted corn kernels
½ cup frozen or canned peas
3 cups cooked leftover brown rice (see Note)
2 green onions, sliced
1 teaspoon sesame seeds, for garnish, optional
1. In a small bowl, whisk together the kimchi juice, soy sauce, ginger, sesame oil, and gochujang, if desired. Set aside.
2. Heat 1 tablespoon of the olive oil in a medium skillet over low heat. Pour in the beaten eggs to cover the bottom of the pan, and let them cook like an omelet, 2 to 3 minutes per side, flipping only once. Let cool before dicing the eggs into small pieces.
3. Heat the remaining 1 tablespoon olive oil in a large skillet or wok over medium-high heat. Add the garlic, onion, and kimchi to the skillet, and cook, stirring often, until the onions have become translucent and the kimchi is starting to brown, 3 to 4 minutes.
4. Stir in the carrots, corn, and peas, and cook, stirring constantly, until the vegetables are tender, 3 to 4 minutes.
5. Stir in the rice, green onions, eggs, and kimchi juice mixture. Cook, stirring constantly, until heated through, about 2 minutes. Serve immediately, garnished with the sesame seeds, if desired.
Note: Kimchi is now available in the produce aisle of many grocery stores. For best results, use cold leftover rice.
PER SERVING: CALORIES 233 FAT 8g PROTEIN 7g CARB 34g FIBER 4g CHOL 62mg IRON 1mg SODIUM 428mg
CHICKEN LETTUCE WRAPS
This copycat recipe from PF Chang’s is not only budget friendly, it comes together super fast. It’s versatile, too: Swap out the ground chicken for ground turkey, beef, or even cubes of tofu. And go ahead, toss in more veggies like carrots, zucchini, or mushrooms. I’m not going to lie—this is my favorite recipe. Period.
SERVES 4
PREP TIME: 10 MINUTES
TOTAL TIME: 20 MINUTES ![]()

1 tablespoon olive oil
1 pound ground chicken (see Note)
2 cloves garlic, minced
1 onion, diced
¼ cup plus 1 tablespoon hoisin sauce
2 tablespoons reduced-sodium soy sauce
1 tablespoon rice wine vinegar
1 tablespoon freshly grated ginger
1 teaspoon Sriracha sauce, plus more to taste
1 (8-ounce) can whole water chestnuts, drained and diced
2 green onions, thinly sliced
Freshly ground black pepper, to taste
2 heads butter lettuce, cores removed to separate the leaves
1. Heat the olive oil in a large skillet over medium-high heat. Add the ground chicken, and cook until browned, about 6 minutes, making sure to crumble the chicken as it cooks; drain off excess fat, if any.
2. Stir the garlic, onion, hoisin sauce, soy sauce, vinegar, ginger, and Sriracha into the chicken; cook over medium-high heat until the onions have become translucent, 1 to 2 minutes. Stir in the water chestnuts and green onions, and cook until tender, 1 to 2 minutes; season with pepper to taste.
3. To serve, spoon several tablespoons of the chicken mixture into the center of each lettuce leaf, taco style.
Note: Try a mix of light and dark chicken meat.
PER SERVING: CALORIES 271 FAT 11.9g PROTEIN 23g CARB 20g FIBER 4g CHOL 92mg IRON 2mg SODIUM 691mg
BANG-BANG CHICKEN
Another restaurant favorite that can easily be made in your own kitchen, this is one of my most popular recipes. It makes the most amazingly crisp chicken bites and a sweet chili mayo sauce that’s so good, you may be tempted to eat it with a spoon.
SERVES 4
PREP TIME: 15 MINUTES
TOTAL TIME: 30 MINUTES ![]()

FOR THE SWEET CHILI MAYO SAUCE
¼ cup mayonnaise
2 tablespoons sweet chili sauce
1 tablespoon honey
2 teaspoons hot sauce (such as Frank’s RedHot Sauce)
1 cup vegetable oil, plus more as needed
1 cup buttermilk
¾ cup all-purpose flour
½ cup cornstarch
1 large egg
1 tablespoon hot sauce
½ teaspoon kosher salt
¼ teaspoon freshly ground black pepper
2 boneless, skinless chicken breasts (about 1 ¼ pounds), cut into 1-inch chunks
2 cups panko (see Note)
1. Make the sweet chili mayo sauce: Whisk together the mayonnaise, sweet chili sauce, honey, and hot sauce in a small bowl; set aside.
2. Heat the oil in a large skillet over medium-high heat.
3. In a large bowl, whisk together the buttermilk, flour, cornstarch, egg, hot sauce, salt, and pepper. Add the chicken pieces, and toss to coat.
4. Working with one piece at a time, dredge the chicken in the panko, pressing to make sure each piece is evenly coated. Set aside.
5. Working in batches, fry the chicken in the skillet until evenly golden and crispy on all sides, 2 to 3 minutes total. Transfer to a paper towel-lined plate to drain.
6. Serve immediately, drizzled with the sweet chili mayo sauce.
Note: Panko is a Japanese-style of bread crumbs that can be found in the Asian section of your local grocery store.
PER SERVING: CALORIES 636 FAT 27.9g PROTEIN 38.5g CARB 59g FIBER 2g CHOL 134mg IRON 2mg SODIUM 601mg
BUTTERMILK RANCH DRUMSTICKS
It doesn’t get much easier than this. Drop your drumsticks into the marinade before leaving for work (I promise, it’ll only take 5 minutes!). When you get home, coat the chicken in the cornflakes and pop it into the oven. These drumsticks are so crisp, no one will ever guess they’re baked from start to finish.
SERVES 4
PREP TIME: 10 MINUTES
TOTAL TIME: 55 MINUTES PLUS MARINATING ![]()

1 cup buttermilk
2 teaspoons dried parsley
2 teaspoons garlic powder
2 teaspoons onion powder
2 teaspoons dried dill
2 teaspoons dried mustard
1 teaspoon kosher salt
½ teaspoon freshly ground black pepper
8 skinless chicken drumsticks
½ cup all-purpose flour
2 large eggs, beaten
6 cups cornflakes, coarsely crushed (see Note)
Vegetable oil or nonstick cooking spray
1 tablespoon chopped fresh parsley leaves, for garnish, optional
1. To a gallon-sized zip-top bag or large bowl, add the buttermilk, parsley, garlic powder, onion powder, dill, mustard, salt, and pepper. Shake or stir to combine, and then add the drumsticks. Marinate for a minimum of 6 hours or overnight, turning the bag or rotating the drumsticks occasionally. Drain the chicken.
2. Preheat the oven to 400°F. Place an oven-safe rack on a baking sheet, and lightly oil the rack or coat it with nonstick spray.
3. Working in batches, dredge the chicken in the flour, eggs, and then the crushed cornflakes, pressing to make sure each drumstick is evenly coated with the crumbs. Arrange on the prepared rack in a single layer, and coat each piece with vegetable oil.
4. Bake until the drumsticks are golden brown and completely cooked through, 40 to 45 minutes. (A meat thermometer inserted into the thickest part of a drumstick should reach an internal temperature of 165°F.)
5. Serve immediately, garnished with parsley, if desired.
Note: Crush the cornflakes by putting them in a zip-top bag and then pressing down with the heel of your hand or the bottom of a cup.
PER SERVING: CALORIES 554 FAT 13.2g PROTEIN 56.5g CARB 50g FIBER 2g CHOL 312mg IRON 16mg SODIUM 759mg
EASY BURRITO BOWLS
The most time-consuming part of this recipe is waiting for the rice to cook. But if you have leftover rice from the night before, these bowls will come together in just 10 minutes! For added protein, the rice can easily be swapped out for quinoa. After you try this, you won’t need to step into Chipotle again.
SERVES 6
PREP TIME: 10 MINUTES
TOTAL TIME: 25 MINUTES ![]()

FOR THE CHIPOTLE CREAM SAUCE
1 cup sour cream
1 tablespoon chipotle paste (see Note)
1 clove garlic, crushed in a garlic press
Juice of 1 lime
¼ teaspoon salt, plus more to taste
1 cup uncooked white rice
1 cup salsa
3 cups chopped romaine lettuce (about 8 ounces)
1 (15 ¼-ounce) can whole-kernel corn, drained
1 (15-ounce) can black beans, drained and rinsed
2 Roma tomatoes, diced
1 ripe avocado, pitted, peeled, and diced
2 tablespoons chopped fresh cilantro leaves
1. Make the chipotle cream sauce: In a small bowl, whisk together the sour cream, chipotle paste, garlic, lime juice, and salt; set aside.
2. In a large saucepan, combine the rice and 1 ½ cups of water, and cook according to package instructions; let cool, and then stir in the salsa; set aside.
3. Assemble the bowls: Divide the rice mixture among serving bowls; top each evenly with the lettuce, corn, black beans, tomatoes, avocado, and cilantro.
4. Serve immediately, drizzled with the chipotle cream sauce.
Note: Chipotle paste can be found in most large supermarkets or anywhere Mexican foods are sold. Or substitute 2 tablespoons chipotle peppers in adobo sauce.
PER SERVING: CALORIES 360 FAT 12.1g PROTEIN 10g CARB 53g FIBER 10g CHOL 28mg IRON 2mg SODIUM 743mg
BEEF AND BROCCOLI BOWLS
Here’s a fun take on everyone’s favorite beef and broccoli takeout dish, except you can use the ground beef you’ve been storing in your freezer. This cooks up quickly, and you can swap out the ground beef for ground turkey or chicken, or switch the rice for quinoa. Whichever variations you choose, dinner will be on the table before you can even find your stash of takeout menus.
SERVES 4
PREP TIME: 10 MINUTES
TOTAL TIME: 20 MINUTES ![]()

½ cup reduced-sodium soy sauce
2 tablespoons packed brown sugar
2 cloves garlic, minced
1 tablespoon rice wine vinegar
1 tablespoon sesame oil
1 tablespoon freshly grated ginger
1 tablespoon Sriracha sauce, optional
1 tablespoon vegetable oil
1 pound ground beef
12 ounces broccoli florets (2 to 3 cups)
2 green onions, thinly sliced
2 cups leftover white or brown rice
1 teaspoon sesame seeds, for garnish, optional
1. In a small bowl, whisk together the soy sauce, brown sugar, garlic, vinegar, sesame oil, ginger, and Sriracha, if desired. Set aside.
2. Heat the vegetable oil in a large skillet over medium-high heat. Add the ground beef, and cook until browned, 3 to 5 minutes, making sure to crumble the beef as it cooks; drain off excess fat.
3. Stir in the broccoli, green onions, and soy sauce mixture until evenly incorporated; cover the skillet, and allow to simmer until the beef is cooked through and the broccoli is tender, 3 to 4 minutes. Stir in the rice until warmed.
4. Divide the beef and broccoli mixture among bowls, and serve immediately, garnished with the sesame seeds, if desired.
PER SERVING: CALORIES 415 FAT 14g PROTEIN 31g CARB 39g FIBER 3g CHOL 76mg IRON 4mg SODIUM 1204mg
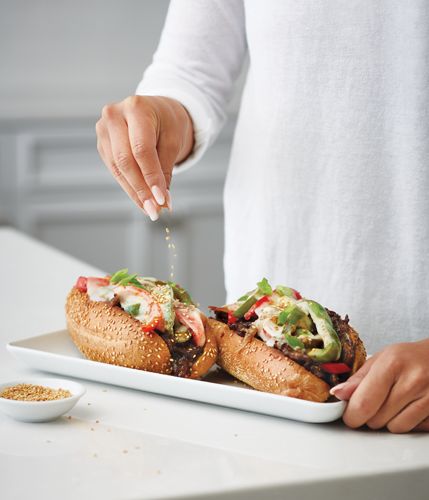
BULGOGI PHILLY CHEESESTEAK
If possible, marinate the bulgogi for several hours to get the most flavorful result; once that is done, this riff on a Philly cheesesteak can be assembled quickly. I don't think I can have a cheesesteak any other way. You can also try making your cheesesteak using the Slow-Cooker Korean Beef.
SERVES 4
PREP TIME: 15 MINUTES
TOTAL TIME: 35 MINUTES, PLUS MARINATING
2 cloves garlic, minced
1 inch ginger root, grated
1 small onion, grated
1 Korean pear, grated
1 Fuji apple, grated
½ cup reduced-sodium soy sauce
1 tablespoon sesame oil
1 tablespoon sugar
2 green onions, chopped
¼ teaspoon freshly ground black pepper
1 pound rib-eye beef, thinly sliced (see Note)
1 tablespoon olive oil
1 onion, sliced
1 green bell pepper, cut into thin strips
1 red bell pepper, cut into thin strips
4 soft hoagie rolls, split ¾ open
4 teaspoons sesame seeds, toasted
4 slices provolone
Chopped fresh parsley leaves, for garnish, optional
1. In a medium bowl, combine the garlic, ginger, onion, pear, apple, soy sauce, sesame oil, sugar, green onions, and black pepper. Place the meat in a shallow bowl, and pour the marinade over the meat. Cover and refrigerate for at least 1 hour or overnight.
2. Heat a medium skillet over medium-high heat. Add the beef (discarding the marinade), and cook to desired doneness; set aside.
3. Preheat the oven to 400°F. Line a baking sheet with foil or a silicone baking mat; set aside.
4. Heat the oil in a saucepan over medium heat. Add the onion, and sauté until tender and caramelized, about 10 minutes. Add the bell peppers, and cook until just tender, 5 to 7 minutes.
5. Place the rolls on the prepared baking sheet. Add the bulgogi, and top with the onion and pepper mixture. Top with sesame seeds and cheese. Bake until cheese is melted, 3 to 5 minutes.
6. Serve immediately, garnished with parsley, if desired.
Note: Unmarinated bulgogi beef can be found in Korean and Asian markets. You can ask your local butcher to slice the rib-eye beef or do it youself by freezing it about 20 minutes before slicing very thinly against the grain.
PER SERVING: CALORIES 562 FAT 22.8g PROTEIN 39g CARB 53g FIBER 5g CHOL 87mg IRON 6mg SODIUM 984mg
TUNA AND AVOCADO POKÉ BOWLS
A staple in the Hawaiian Islands, poké traditionally refers to chunks of raw tuna marinated in soy sauce and sesame oil. Incorporate it into the one-bowl food trend for a more affordable sushi bowl that requires minimal effort. The Sriracha mayo puts it over the top—you’ll want to drizzle it on everything. I’ve even used it on turkey sandwiches for lunch! Make extra because it will come in handy at the strangest times.
SERVES 4
PREP TIME: 15 MINUTES
TOTAL TIME: 30 MINUTES

FOR THE SRIRACHA MAYO
¼ cup mayonnaise
1 tablespoon Sriracha sauce
1 teaspoon honey
1 teaspoon fresh lemon juice
1 cup uncooked white rice
2 tablespoons reduced-sodium soy sauce
2 teaspoons sesame oil
2 cloves garlic, minced
1 tablespoon freshly grated ginger
1 teaspoon sugar, optional
1 pound sushi-grade ahi tuna, diced
2 ripe avocados, pitted, peeled, and diced
2 green onions, thinly sliced, for garnish, optional
1 teaspoon sesame seeds, for garnish, optional
1. Make the Sriracha mayo: In a small bowl, whisk together the mayonnaise, Sriracha, honey, and lemon juice; set aside.
2. In a large saucepan, cook the rice and 1 ½ cups water according to package instructions; remove from heat, and let sit, covered, for 5 minutes.
3. Meanwhile, in a small bowl, whisk together the soy sauce, sesame oil, garlic, ginger, and sugar, if desired. Stir in the tuna; let marinate for 5 to 10 minutes. Stir in the avocado, and gently toss to combine.
4. Divide the rice among serving bowls. Serve the tuna and avocado mixture immediately over the rice. Garnish with the green onions and the sesame seeds, if desired, and drizzle with the Sriracha mayo.
PER SERVING: CALORIES 554 FAT 24.8g PROTEIN 32g CARB 49g FIBER 6g CHOL 50mg IRON 2mg SODIUM 478mg
CALIFORNIA ROLL BOWLS
Enjoy everyone’s favorite sushi roll in a bowl, without any rolling or fuss. And yes, you can easily use leftover rice or quinoa for even quicker prep! Try it with Sriracha Cream Sauce.
SERVES 4
PREP TIME: 15 MINUTES
TOTAL TIME: 15 MINUTES

2 cups leftover room temperature white or brown rice
2 tablespoons reduced-sodium soy sauce
1 tablespoon unseasoned rice vinegar
2 teapoons sugar
2 teaspoons sesame oil
¼ teaspoon salt
8 ounces lump crabmeat, chopped
1 ripe avocado, pitted, peeled, and diced
1 cucumber, julienned
1 carrot, julienned
¼ cup roasted shredded seaweed
1 tablespoon sushi-grade orange fish roe, for garnish, optional
1 teaspoon black sesame seeds, for garnish, optional
1. In a large bowl, mix together the rice, soy sauce, vinegar, sugar, sesame oil, and salt.
2. Divide the rice among serving bowls. Top each bowl with the crabmeat, avocado, cucumber, and carrot.
3. Serve immediately, garnished with the seaweed, roe, and sesame seeds, if desired.
PER SERVING: CALORIES 286 FAT 8.7g PROTEIN 14g CARB 34g FIBER 4g CHOL 55mg IRON 3mg SODIUM 711mg
TIP
With omega-3s in the crabmeat and monounsaturated fats in the avocado, this meal is brimming with heart-healthy fats!
CAJUN SHRIMP AND GRITS
Cheesy grits and Cajun shrimp are as classic as burgers and fries. It’s a match made in heaven—in 30 minutes. And it’s simple enough for a weeknight meal but fancy enough to impress dinner guests. Try throwing in Andouille sausage for extra flavor.
SERVES 4
PREP TIME: 15 MINUTES
TOTAL TIME: 30 MINUTES

3 cups chicken broth
1 cup uncooked quick-cooking grits
½ cup shredded Cheddar cheese
¼ cup freshly grated Parmesan cheese
2 tablespoons unsalted butter
Kosher salt and freshly ground black pepper, to taste
1 pound medium shrimp, peeled and deveined
2 teaspoons Cajun seasoning
Kosher salt and freshly ground black pepper, to taste
4 slices bacon, diced
2 tablespoons chopped fresh chives, for garnish, optional
1. Bring the chicken broth to a boil in a medium saucepan over medium-high heat; stir in the grits. Cook, stirring occasionally, until thickened, about 5 minutes. Stir in both cheeses and the butter.
2. Remove the pan from the heat; season the grits with salt and pepper to taste. Set aside but keep warm.
3. Season the shrimp with the Cajun seasoning and salt and pepper to taste; set aside.
4. Heat a large skillet over medium-high heat. Add the bacon, and cook until brown and crispy, 6 to 8 minutes. Set the bacon aside on a plate, reserving 1 tablespoon of the excess fat in the skillet.
5. Add the seasoned shrimp to the skillet, and cook, stirring occasionally, until pink, 2 to 3 minutes. Remove from the heat.
6. Divide the grits among serving bowls. Serve immediately, topped with the shrimp and bacon, and garnished with the chives, if desired.
PER SERVING: CALORIES 421 FAT 19.5g PROTEIN 32g CARB 31g FIBER 2g CHOL 209mg IRON 2mg SODIUM 1567mg