Christmas Recipes & Crafts (2015)
![]()
Yuletide Baking
![]()
Christmas Tree Wreath Cake
Dark Chocolate Yule Log
Festive Cupcakes
Holly Cupcakes
Apple & Cinnamon Bran Muffins
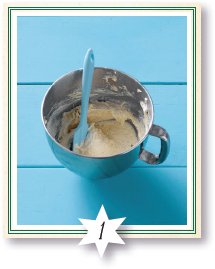
Christmas Macaroons
Christmas Cranberry & Orange Pies
Christmas Tree Biscuits
Rudolph Cookies
Mini Gingerbread House Cookies
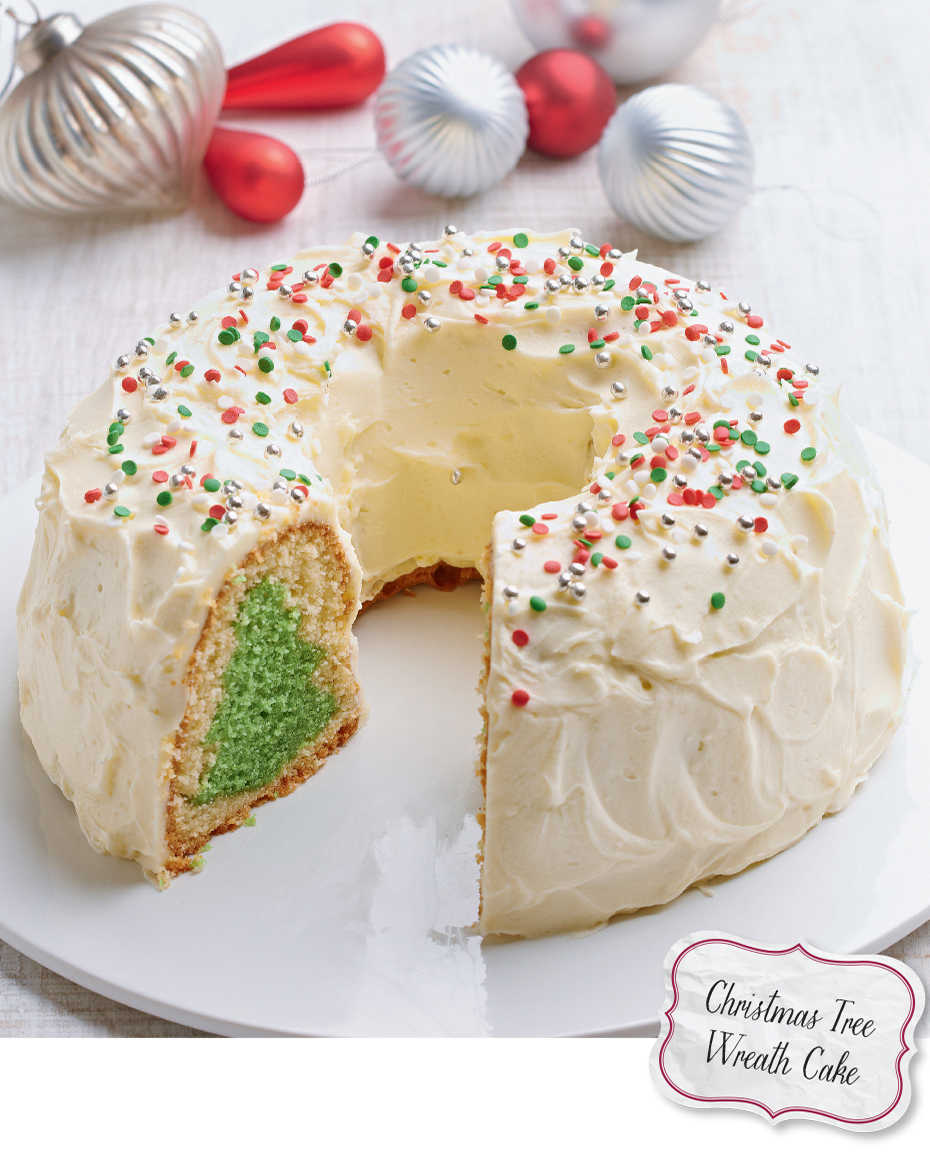
Christmas Tree Wreath Cake
Celebrate the festive season with this delightful themed cake - with the added surprise of Christmas tree sponge running through the middle.
SERVES 16 PREP 60 MINS, PLUS CHILLING COOK 1 HR, 55 MINS, PLUS COOLING
green sponge
10 g/¼ oz butter, for greasing
10 g/¼ oz flour, for dusting
225 g/8 oz self-raising flour
¼ tsp baking powder
225 g/8 oz butter, softened
225 g/8 oz caster sugar
4 large eggs
green food colouring paste
vanilla sponge
250 g/9 oz self-raising flour
225 g/8 oz butter, softened
225 g/8 oz caster sugar
4 large eggs
1 tsp vanilla extract
to decorate
525 g/1 lb 3 oz ready-made vanilla buttercream
2 tsp mixed red, white and green confetti sugar sprinkles
1 tsp silver dragées
1.Preheat the oven to 160°C/325°F/Gas Mark 3. Thoroughly grease a 2-litre/3½-pint ring cake tin, then lightly dust with flour.
2.To make the green sponge, place the self-raising flour, baking powder, butter, sugar and eggs in a large bowl and beat with a hand-held electric mixer for 1-2 minutes until smooth and creamy. Beat in enough food colouring to give the mixture a Christmas tree-green colour.
3.Spoon the mixture into the prepared tin and level the surface. Bake in the preheated oven for 45-50 minutes, or until risen, firm to the touch and a skewer inserted into the middle of the cake comes out clean. Leave to cool in the tin for 10 minutes, then turn out carefully onto a wire rack and leave to cool completely. Switch off the oven.
4.Place the cold cake on a board and use a sharp knife to cut it into 16 wedge-shaped slices. Slightly separate the slices (still maintaining the ring shape), then chill in the freezer for 30 minutes.
5.Use a Christmas tree-shaped cookie cutter to stamp out 16 Christmas tree shapes from the chilled sponge wedges. Re-form the trees into the ring shape again and return to the freezer for a further 30-40 minutes, or until very firm.
6.Meanwhile, preheat the oven to 160°C/325°F/Gas Mark 3. Clean the tin, then grease it and lightly dust with flour.
7.To make the vanilla sponge, place all the ingredients in a large bowl and beat with a hand-held electric mixer for 1-2 minutes until smooth and creamy. Spoon the mixture into a piping bag fitted with a plain nozzle.
8.Pipe three lines of mixture into the base of the prepared tin, then continue piping the mixture up the side of the tin and smooth with a palette knife.
9.Take two Christmas tree sponge cake shapes together and gently place in the vanilla mixture, pointed side down and leaning in to the centre of the tin. Repeat with the remaining slices, keeping them as close together as possible, to re-form the ring shape (upside down) inside the tin.
10.Pipe the remaining vanilla mixture around the other sides of the trees and over the tops to cover them completely. Gently level the surface.
11.Bake in the preheated oven for 45 minutes, then loosely cover the top of the cake with foil. Bake for a further 15-20 minutes, or until a skewer inserted into the cake comes out clean (make sure to place the skewer right into the cake in an area where there is more vanilla sponge). Leave to cool in the tin for 15 minutes. Run a small angled palette knife around the side of the cake, carefully turn out onto a wire rack and leave to cool completely.
12.To decorate, spread some of the buttercream in a thin layer all over the cake. Chill the cake in the refrigerator for 30 minutes. Spread the remaining buttercream all over the cake, swirling it with a palette knife. Decorate with confetti sprinkles and silver dragées.
![]()
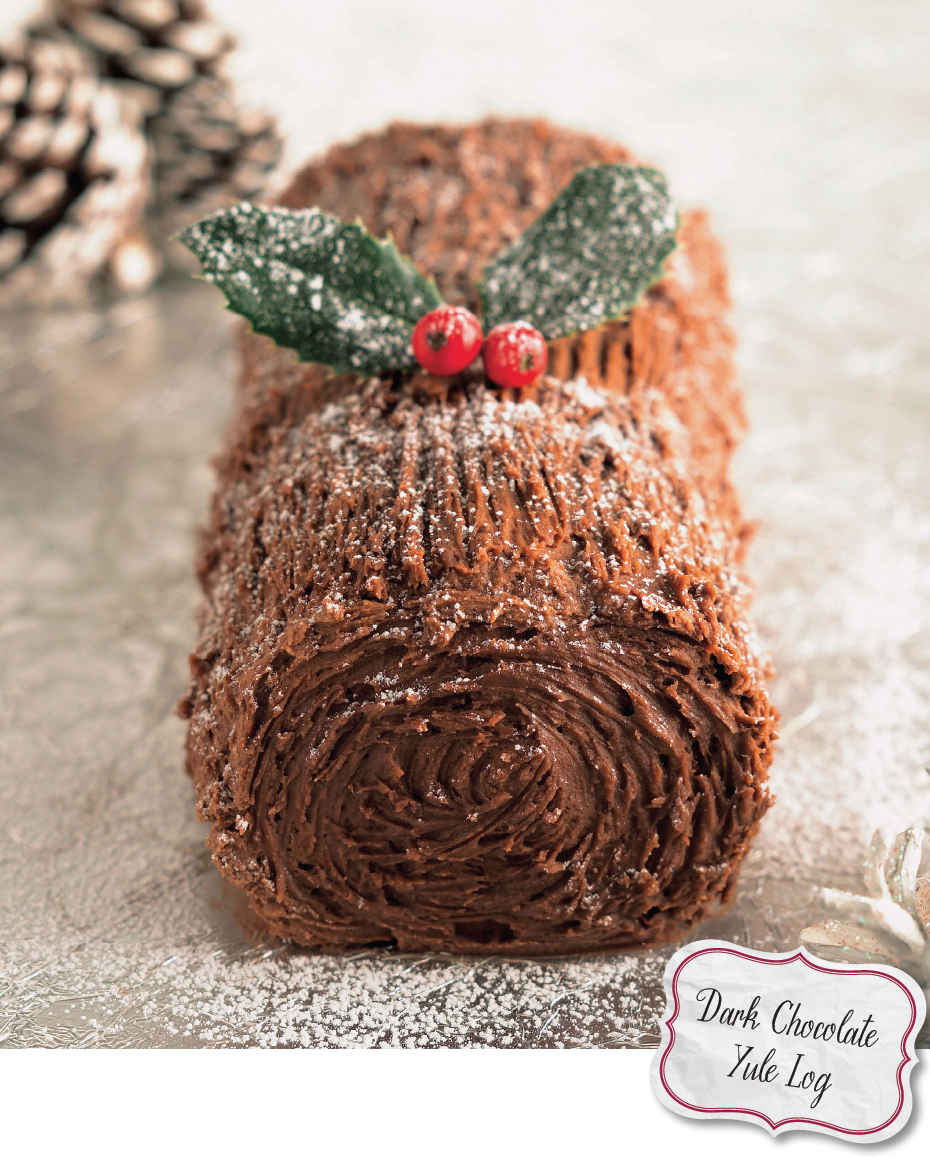
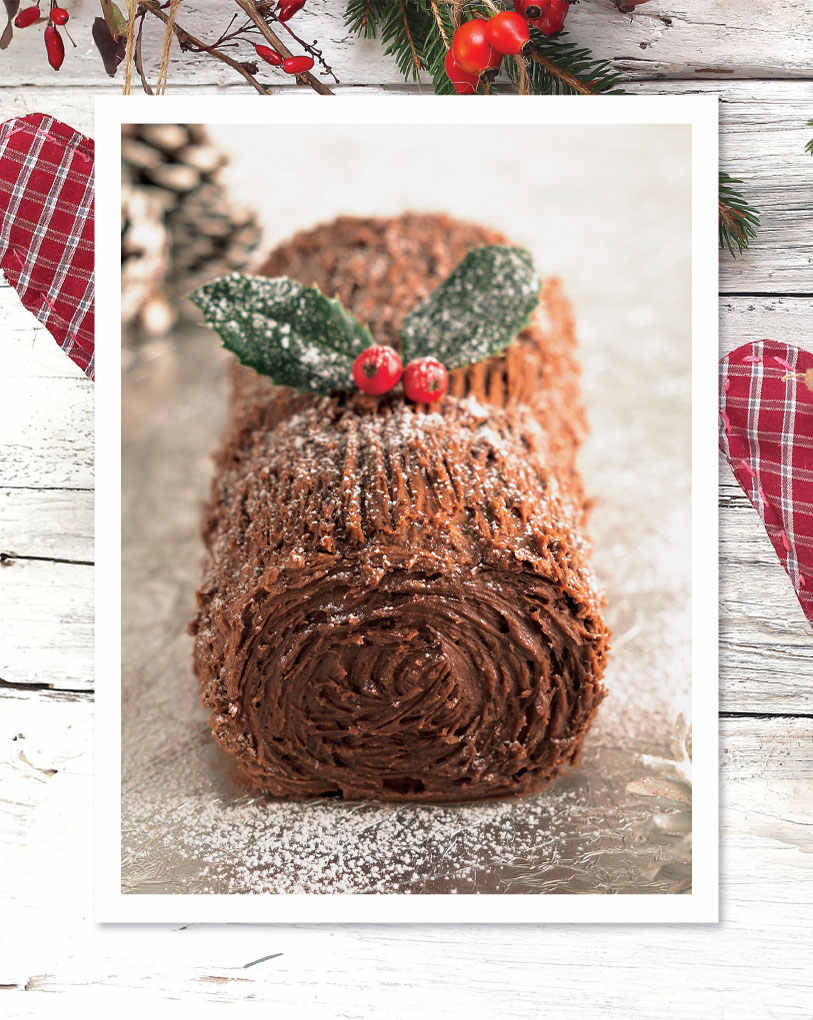
Dark Chocolate Yule Log
This chocolate delight is the traditional French and Belgian Christmas cake - when you’ve sampled it, you’ll see why it’s so popular.
SERVES 8 PREP 45 MINS, PLUS COOLING COOK 20 MINS
10 g/¼ oz butter, for greasing
10 g/¼ oz flour, for dusting
10 g/¼ oz caster sugar, for sprinkling
150 g/5½ oz caster sugar
4 eggs, separated
1 tsp almond extract
115 g/4 oz self-raising flour
280 g/10 oz plain chocolate, broken into squares
225 ml/8 fl oz double cream
2 tbsp rum
holly sprig, to decorate
10 g/¼ oz icing sugar, for dusting
1.Preheat the oven to 190°C/375°F/Gas Mark 5. Grease a 40 x 28-cm/16 x 11-inch Swiss roll tin, line with baking paper, then dust with flour. Sprinkle a sheet of greaseproof paper with caster sugar.
2.Reserving 2 tablespoons, put the caster sugar into a bowl with the egg yolks and whisk until thick and pale. Stir in the almond extract. Whisk the egg whites in a separate bowl until they hold soft peaks. Gradually whisk in the reserved sugar until the mixture is stiff and glossy.
3.Sift half the flour into the egg yolk mixture and fold in, then fold in one quarter of the egg white. Sift and fold in the remaining flour, followed by the remaining egg whites. Spoon the mixture into the prepared tin, spreading it evenly with a palette knife. Bake in the preheated oven for 15 minutes, until lightly golden. Turn out onto the prepared paper, then roll up and leave to cool.
4.Place the chocolate in a heatproof bowl. Bring the cream to boiling point in a small saucepan, then pour it over the smooth and thick. Reserve about one third of the chocolate mixture and stir the rum into the remainder. Unroll the cake and spread with the chocolate and rum mixture. Re-roll and place on a large plate or silver board. Evenly spread the reserved chocolate mixture over the top and side of the cake. Mark with a fork so that the surface resembles tree bark. Just before serving, decorate with a holly sprig and sprinkle with icing sugar to resemble snow.
![]()
Festive Cupcakes
These delicately decorated, mixed fruit and orange cupcakes will take pride of place on your table.
MAKES 14 PREP 20 MINS, PLUS COOLING
COOK 15-20 MINS
115 g/4 oz mixed dried fruit
1 tsp finely grated orange rind
2 tbsp brandy or orange juice
85 g/3 oz butter, softened
85 g/3 oz light soft brown sugar
1 large egg, lightly beaten
115 g/4 oz self-raising flour
1 tsp mixed spice
1 tbsp silver dragées (cake decoration balls), to decorate
icing
85 g/3 oz icing sugar
2 tbsp orange juice
1.Put the mixed fruit, orange rind and brandy in a small bowl. Cover and leave to soak for 1 hour.
2.Preheat the oven to 190°C/375°F/Gas Mark 5. Put 14 paper baking cases in 2 bun trays or put 14 double-layer paper cases on a baking tray.
3.Put the butter and sugar in a mixing bowl and beat together until light and fluffy. Gradually beat in the egg. Sift in the flour and mixed spice and, using a metal spoon, fold them into the mixture followed by the soaked fruit. Spoon the mixture into paper cases.
4.Bake the cupcakes in the preheated oven for 15-20 minutes or until golden brown and firm to the touch. Transfer to a cooling rack and leave to cool.
5.To make the icing, sift the icing sugar into a bowl and gradually mix in enough orange juice until the mixture is smooth and thick enough to coat the back of a wooden spoon. Using a teaspoon, drizzle the icing in a zig-zag pattern over the cupcakes. Decorate with the silver dragées. Leave to set.
![]()
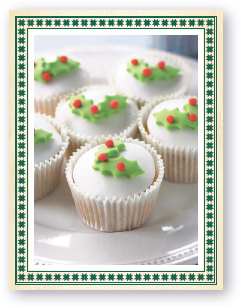
Holly Cupcakes
These picture-perfect iced cupcakes are quick to make and easy to decorate and will certainly impress your guests.
MAKES 16 PREP 45 MINS, PLUS COOLING
COOK 20 MINS
125 g/4½ oz butter, softened
200 g/7 oz caster sugar
4 eggs, lightly beaten
a few drops of almond extract
150 g/5½ oz self-raising flour
175 g/6 oz ground almonds
450 g/1 lb white ready-to-roll fondant icing
10 g/¼ oz icing sugar, for dusting
55 g/2 oz green ready-to-roll fondant icing
25 g/1 oz red ready-to-roll fondant icing
1.Preheat the oven to 180°C/350°F/Gas Mark 4. Line two 8-hole muffin tins with paper cases.
2.Place the butter and caster sugar in a large bowl and beat together until light and fluffy. Gradually beat in the eggs and almond extract. Sift in the flour and, using a metal spoon, fold into the mixture with the ground almonds.
3.Spoon the mixture into the paper cases. Bake in the preheated oven for 20 minutes, or until the cupcakes are risen, golden and firm to the touch. Transfer to a wire rack and leave to cool completely.
4.Roll out the white fondant icing to a thickness of 5 mm/¼ inch on a surface lightly dusted with icing sugar. Using a 7-cm/2¾-inch plain cutter, stamp out 16 rounds, re-rolling the icing as necessary. Place a round on top of each cupcake.
5.Roll out the green fondant icing to the same thickness. Using a holly cutter, cut out 32 leaves, re-rolling the icing as necessary. Brush each leaf with a little water and place two leaves on top of each cupcake. Roll the red fondant icing to make 48 small berries and place on the leaves.
![]()
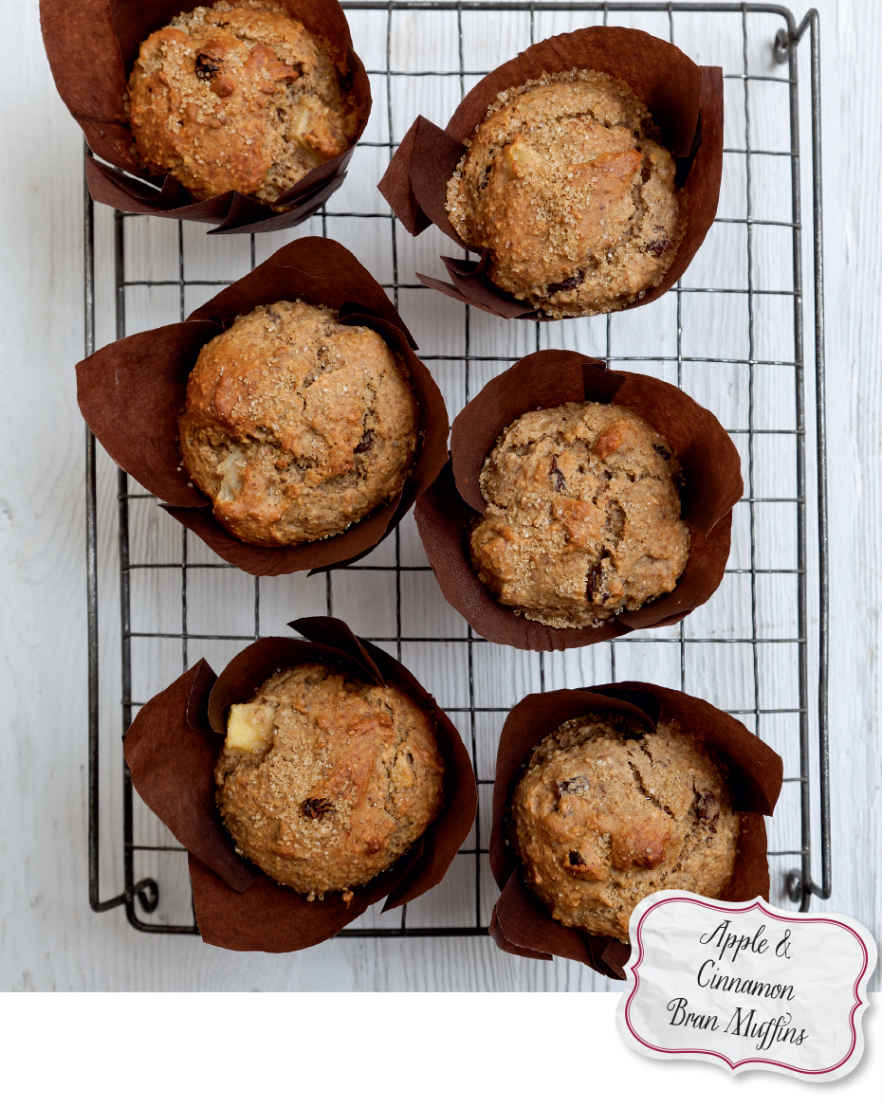
Apple & Cinnamon Bran Muffins
These delicious, gluten-free muffins are so delicious that you will want to make them all year round!
MAKES 12 PREP 15 MINS COOK 20-25 MINS
4 tbsp vegetable oil
1 tbsp glycerine
175 g/6 oz apple purée
2 eggs
½ tsp vanilla extract
55 g/2 oz clear honey
75 ml/2½ fl oz milk
300 g/10½ oz gluten-free, wheat-free plain flour
120 g/4¼ oz gluten-free, wheat-free oat bran
70 g/2½ oz ground linseeds
1 tsp gluten-free baking powder
½ tsp gluten-free bicarbonate of soda
½ tsp xanthan gum
1 tsp cinnamon
¼ tsp mixed spice
175 g/6 oz soft light brown sugar
60 g/2¼ oz raisins
60 g/2¼ oz sultanas
1.Preheat the oven to 180°C/350°F/Gas Mark 4. Line a 12-hole muffin tin with paper cases.
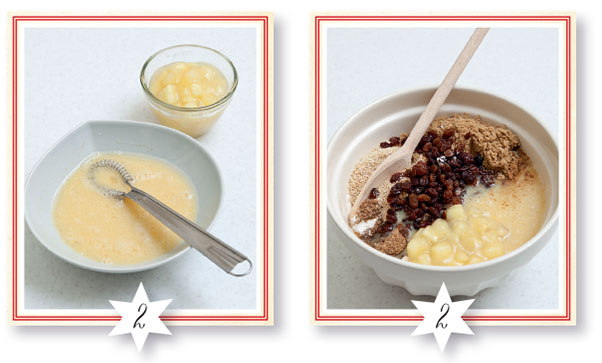
2.In a large bowl, whisk together the oil, glycerine, apple purée, eggs, vanilla extract, honey and milk. In a separate liquid mixture and stir well.
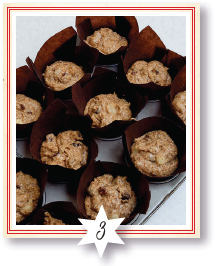
3.Divide the mixture between the paper cases. Bake the muffins in the preheated oven for 20-25 minutes, or until a skewer inserted into the centre of a muffin comes out clean. Remove from the oven and leave to cool on a wire rack.
Tip
If you like, you could add some chopped almonds, hazelnuts, walnuts, pecan nuts or macadamia nuts to the dry ingredients to give the muffins a little crunch and extra flavour.
![]()

Christmas Macaroons
With their Christmas-flavoured filling and sparkling gold decoration, these delicious mouthfuls will certainly enhance the festivities.
MAKES 16 PREP 10 MINS, PLUS STANDING COOK 10-15 MINS
75 g/2¾ oz ground almonds
115 g/4 oz icing sugar
1 tsp ground mixed spice
2 large egg whites
50 g/1¾ oz golden caster sugar
½ tsp freshly grated nutmeg
1 tsp gold dragées
filling
55 g/2 oz unsalted butter, softened
juice and finely grated rind of ½ orange
1 tsp ground mixed spice
115 g/4 oz icing sugar, sifted
25 g/1 oz glacé cherries, finely chopped
1.Place the ground almonds, icing sugar and mixed spice in the bowl of a food processor and process for 15 seconds. Sift the mixture into a bowl. Line two baking sheets with greaseproof paper.
2.Place the egg whites in a large bowl and whisk until they hold soft peaks. Gradually whisk in the caster sugar to make a firm, glossy meringue. Using a spatula, fold the almond mixture into the meringue one third at a time. When all the dry ingredients are thoroughly incorporated, continue to cut and fold the mixture until it forms a shiny batter with a thick, ribbon-like consistency.
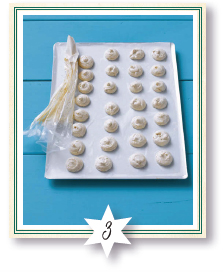
3.Pour the mixture into a piping bag fitted with a 1-cm/½-inch plain nozzle. Pipe 32 small rounds onto the prepared baking sheets. Tap the baking sheets firmly on a work surface to remove air bubbles. Sprinkle half the macaroons with the grated nutmeg and gold dragées. Leave at room temperature for 30 minutes. Meanwhile, preheat the oven to 160°C/325°F/Gas Mark 3.
4.Bake the macaroons in the preheated oven for 10-15 minutes. Leave to cool for 10 minutes, then carefully peel the macaroons off the paper. Transfer to a wire rack and leave to cool completely.
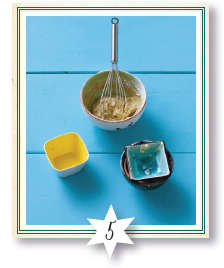
5.To make the filling, beat the butter in a bowl with the orange juice and rind until fluffy. Gradually beat in the mixed spice and icing sugar until smooth and creamy. Fold in the glacé cherries and use the mixture to sandwich pairs of macaroons together.
![]()
;
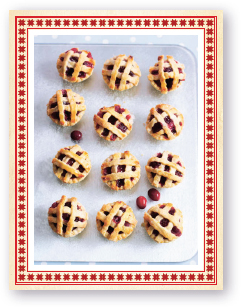
Christmas Cranberry & Orange Pies
If you’re a lover of cranberry sauce, you’ll be delighted with these delicious little fruit pies, filled with the taste of Christmas.
MAKES 12 PREP 15 MINS, PLUS COOLING
COOK 30 MINS
10 g/¼ oz butter, for greasing
175 g/6 oz frozen cranberries
1 tbsp cornflour
3 tbsp freshly squeezed orange juice
2 star anise
55 g/2 oz caster sugar
225 g/8 oz ready-made sweet shortcrust pastry, chilled
10 g/¼ oz plain flour, for dusting
1 tbsp milk, for brushing
10 g/¼ oz caster sugar, for sprinkling
1.Preheat the oven to 180°C/350°F/Gas Mark 4. Lightly grease a 12-hole mini muffin tin. Put the cranberries in a saucepan with the cornflour and orange juice. Add the star anise and cook over a low heat, stirring occasionally, for 5 minutes, or until the cranberries are soft. Add the sugar and cook for a further 5 minutes, then remove from the heat and leave to cool.
2.Thinly roll out the pastry on a lightly floured surface. Using a fluted cookie cutter, stamp out 12 x 6-cm/2½-inch rounds and gently press into the prepared tin, reserving the trimmings. Brush the top edges of the pie cases with a little milk. Remove and discard the star anise, then spoon in the filling.
3.Thinly roll out the pastry trimmings. Using a fluted pastry wheel, cut out thin strips of pastry. Arrange these over each pie in a lattice pattern, brush with milk and sprinkle with sugar. Bake in the preheated oven for 20 minutes. Leave to cool in the tin for 10 minutes, then transfer to a wire rack. Serve warm or cold.
![]()
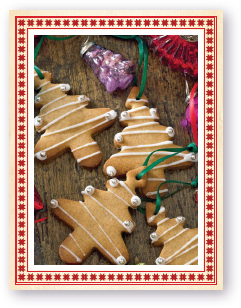
Christmas Tree Biscuits
If you like to make your own Christmas decorations, you’ll love these, but don’t be surprised if they mysteriously disappear from the tree!
MAKES 12 PREP 20 MINS, PLUS CHILLING AND COOLING COOK 10-12 MINS
150 g/5½ oz plain flour
1 tsp ground cinnamon
½ tsp freshly grated nutmeg
½ tsp ground ginger
70 g/2½ oz unsalted butter, diced
3 tbsp honey
10 g/¼ oz butter, for greasing
10 g/¼ oz plain flour, for dusting
white icing and silver dragées (optional) and narrow ribbon, to decorate
1.Sift the flour and spices into a bowl and rub in the butter until the mixture resembles breadcrumbs. Add the honey and mix well together to form a soft dough. Halve the dough, shape into balls, wrap in clingfilm and chill in the refrigerator for 30 minutes.
2.Preheat the oven to 180°C/350°F/Gas Mark 4 and lightly grease two baking sheets. Roll out one piece of dough on a floured work surface to thickness of 5 mm/¼ inch. Cut out tree shapes using a cutter. Repeat with the remaining dough. Put the biscuits on the prepared baking sheets and, using
3.a cocktail stick, make a hole through the top of each biscuit large enough to thread the ribbon through. Chill in the refrigerator for 15 minutes.
4.Bake in the preheated oven for 10-12 minutes until golden. Leave to cool on the baking sheets for 5 minutes, then transfer to a wire rack to cool completely. Decorate the trees with icing and silver dragées, or leave them plain. Thread the ribbon through the biscuits and hang them on the Christmas tree.
![]()
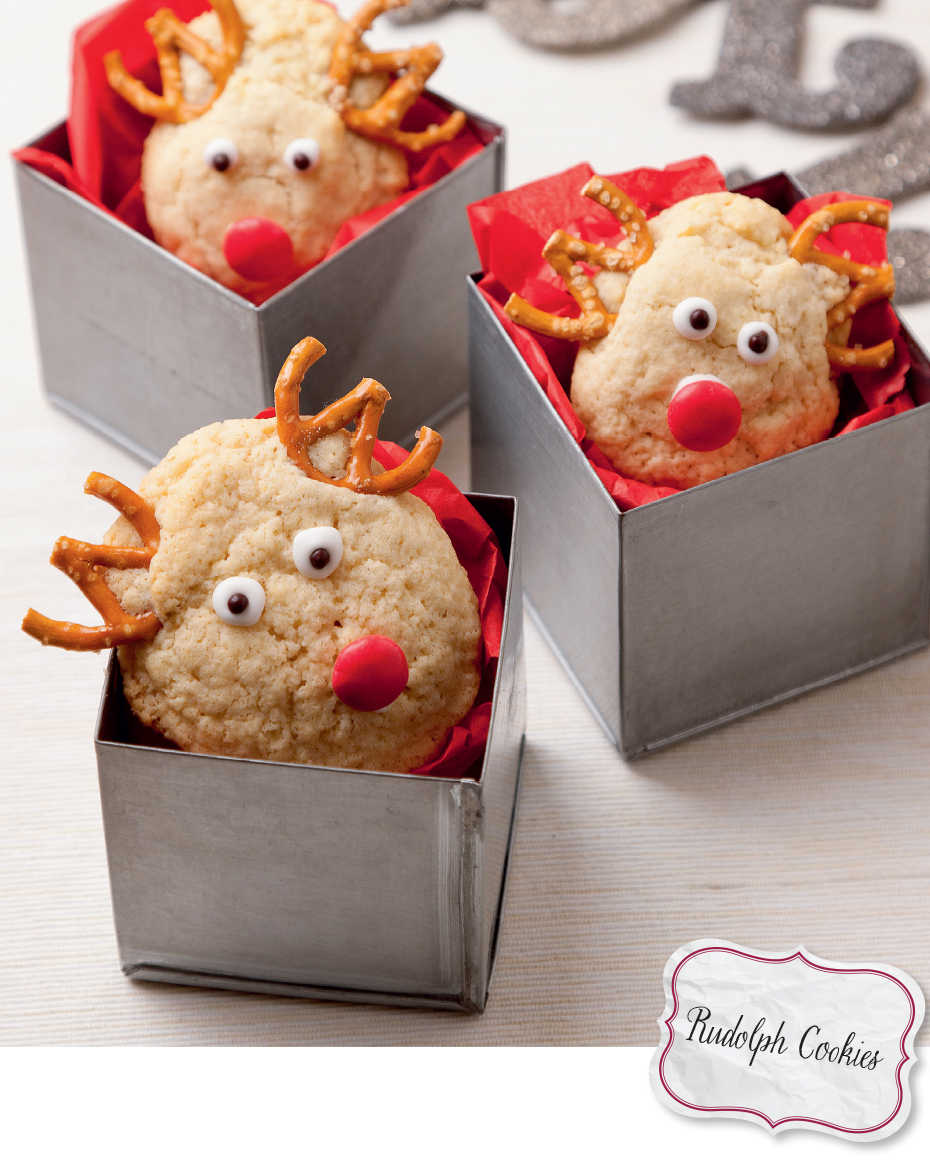
Rudolph Cookies
Everyone loves a Christmas-themed cookie and these reindeer ones are sure to go down well with children and adults alike!
MAKES 16 PREP 30 MINS, PLUS CHILLING AND COOLING COOK 15-18 MINS
100 g/3½ oz unsalted butter, softened
100 g/3½ oz caster sugar
1 small egg
175 g/6 oz self-raising flour
icing
100 g/3½ oz icing sugar
2-3 tsp cold water
to decorate
small pretzels
red sweets
chocolate sprinkles
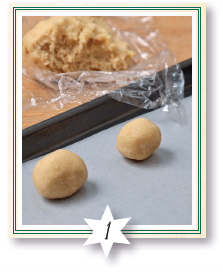
1.Place the butter in a large bowl and beat with a hand-held electric mixer until soft. Add the caster sugar, egg and flour and beat well to make a smooth dough. Wrap in clingfilm and chill in the refrigerator for 10 minutes. Line two baking sheets with baking paper.
2.Unwrap the dough and divide into 16 pieces, rolling with your hands into slightly oval balls. Place on the prepared baking sheets, spaced well apart to allow for spreading.
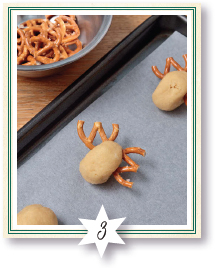
3.Carefully slice off the top of each pretzel with a serrated knife. Press two pretzels into the top of each cookie for antlers. Chill in the refrigerator for 10 minutes. Meanwhile, preheat the oven to 180°C/350°F/Gas Mark 4.
4.Bake in the preheated oven for 15-18 minutes until just golden. Leave to cool on the baking sheets for a few minutes, then transfer to wire racks to cool completely.
5.To make the icing, sift the icing sugar into a bowl and gradually add the water, stirring to a thick, toothpaste-like consistency. Spoon into a squeezy icing bottle.

6.Pipe a dab of icing in the centre of each cookie and press on a red sweet for the nose. Pipe two small dabs of icing for eyes and top each with a chocolate sprinkle. Leave to dry.
![]()
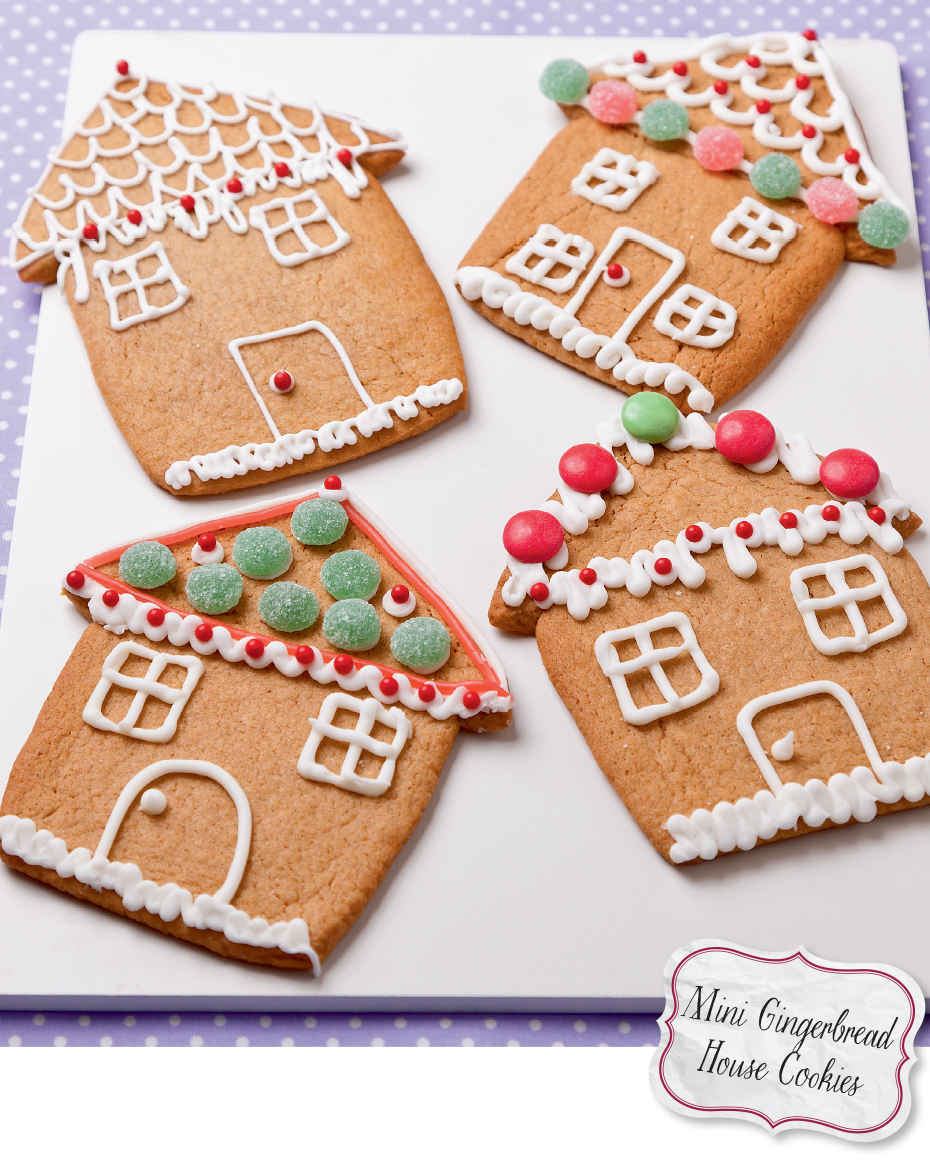
Mini Gingerbread House Cookies
Have fun decorating each of these mini gingerbread houses differently. Colour the royal icing with food colouring and use different sweets.
MAKES 16 PREP 30 MINS, PLUS CHILLING COOK 15-20 MINS
125 g/4½ oz butter
2 tbsp golden syrup
175 g/6 oz light muscovado sugar
300 g/10½ oz self-raising flour
2 tsp ground ginger
1 large egg, beaten
royal icing
150 g/5½ oz icing sugar
2 tsp egg white powder
2 tbsp cold water
to decorate
red and green sweets
1.Place the butter and golden syrup in a saucepan and heat gently, stirring, until melted. Remove the pan from the heat and stir in the sugar, until dissolved.
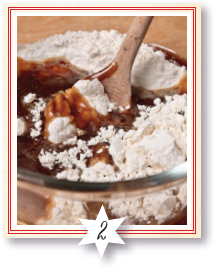
2.Sift the flour and ginger into a large bowl and make a well in the centre with a wooden spoon. Pour in the warm ingredients and the beaten egg and stir until a smooth dough forms. Wrap the dough in clingfilm and chill in the refrigerator for about 20 minutes or until just firm. Line two baking sheets with baking paper.
3.Unwrap the dough and place between two large sheets of baking paper. Roll out to an even thickness of 5 mm/¼ inch. Use a knife to cut the dough into 24 x 7-cm/2¾-inch squares. Cut eight of the squares in half diagonally to make 16 triangles.

4.Carefully transfer the squares to the prepared baking sheets. Place a triangle next to each square, with the long side touching one side of the square to make a roof for the house. Chill in the refrigerator for 10 minutes. Meanwhile, preheat the oven to 160°C/325°F/Gas Mark 3.
5.Bake the cookies in the preheated oven for 12-15 minutes until firm and lightly browned. Leave to cool on the baking sheets for a few minutes, then transfer to wire racks to cool completely.
6.To make the royal icing, sift the icing sugar into a large bowl and add the egg white powder and water. Stir with a spoon until smooth, then use an electric hand-held mixer to beat the icing for 3-4 minutes until it is thick, like toothpaste.
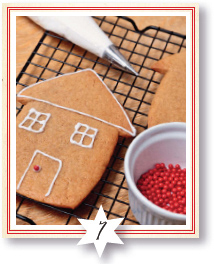
7.Spoon the royal icing into a piping bag fitted with a No.2 nozzle. Pipe a line of icing around the roof of each cookie and pipe roof tiles, if wished. Add a front door and windows. Pipe jagged lines under the roofs and on the ground for icicles and snow. Decorate with red and green sweets. Leave the icing to set.