The Complete Chess Course From Beginning To Winning Chess! (2016)
Book Eight
How to Play the d-pawn Openings
Nimzo-Indian Defense
In the “Indian” defenses Black answers 1.d4 with 1…Nf6. Momentarily, then, Black is trying to control the center by the knight move (rather than the orthodox 1…d5). Later on, Black may intensify this policy of controlling the center by using his pieces. On the other hand, he may resort to pawn moves.
All this sounds inconsistent, but it really isn’t. It puts a considerable burden on White, who must be prepared to contend with either policy on Black’s part. Thus, in a psychological sense it may be said that 1…Nf6 is a subtle attempt on Black’s part to dictate the course of the game.
As in the Queen’s Gambit, the opening struggle in the Indian defenses revolves about control of the center and freedom of the pieces. Whoever achieves the advantage in these respects will have the better game.
Now let us see how these theoretical concepts apply to the specific problems of the Nimzo-Indian Defense. Here are the opening moves:
1.d4 Nf6 2.c4 e6 3.Nc3
Now White is on the point of playing e2-e4, with a pawn center that would crush Black. Here is a crucial situation typical of the problems in this defense.
Of course, Black can solve the difficulty readily enough by playing 3…d5, getting his fair share of the center by transposing into the …e6 defense of the Queen’s Gambit Declined. But Black is intent on playing the Nimzo-Indian Defense. Therefore:
3…Bb4 (D)
Position after 3…Bb4
By pinning White’s knight, Black makes it impossible for White to advance 4.e4. Meanwhile, Black conceals his intentions: he may play …d5 or …d6 later on - or perhaps not move the d-pawn altogether!
White has a great variety of replies at his disposal. Before we consider them, we will have to reflect on the possible forms that the struggle for the center may take.
For example, Black may play …d5 later in order to stop White’s extreme expansion in the center with e2-e4.
Or Black may allow White to play e2-e4 and proceed to build up a “counter-center” with …d6 and …e5.
Another possibility is that Black may try …c5 by way of a flank thrust at White’s center.
But there are also other aspects to be considered. Black’s 3…Bb4 leads most of the time to the exchange of this bishop for White’s knight. In that case White has two bishops against bishop and knight. This is a decided point in White’s favor if he also has a strong development.
On the other hand, if Black develops rapidly and favorably (as generally happens in this defense), he can neutralize the theoretical advantage of the two bishops.
This must be appraised in the light of still another problem. It often happens that when Black plays …Bxc3, White retakes with his b-pawn. This supports his d-pawn and is likely to give him the makings of a powerful pawn center.
On the other hand, Black reasons that the doubled c-pawns are a weakness, and he may elect to train his guns at the c4-square.
Who is right? It all depends on how the game continues. What we have here is a struggle of extreme tension, in which each player attempts to cash in his own potential advantages and nullity those of his opponent. In the detailed analysis that follows, you will repeatedly observe the clash between the rival conceptions.
These comments explain the widespread popularity of the Nimzo-Indian Defense. It offers great rewards to an enterprising and inventive player.
(a) 4.Qc2 Variation with 4…d5
Nimzo-Indian Defense
White - Black
1.d4 Nf6 2.c4 e6 3.Nc3 Bb4 4.Qc2
Renewing the struggle for the center. White is on the point of playing e2-e4.
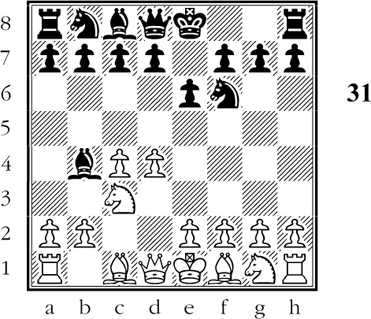
4…d5 (D)
Position after 4…d5
By advancing his d-pawn to d5 Black has adopted the simplest way to maintain a foothold in the center.
Now 5.a3 looks obvious, in order to get rid of the pin, but after 5…Bxc3+ 6.Qxc3 Ne4 7.Qc2, extremely wild play may result: 7…c5 8.dxc5 Nc6 9.Nf3 Qa5+ 10.Nd2 Nd4 11.Qd3 e5!? 12.b4 Qa4 13.Ra2!.
Or 7…Nc6 8.e3 e5!? 9.cxd5 Qxd5 10.Bc4 Qa5+ 11.b4 Nxb4 12.Qxe4 Nc2+ 13.Ke2 Qe1+ 14.Kf3 Nxa1 15.Bb2.
In either case we have wild complications which the average player does well to steer clear of.
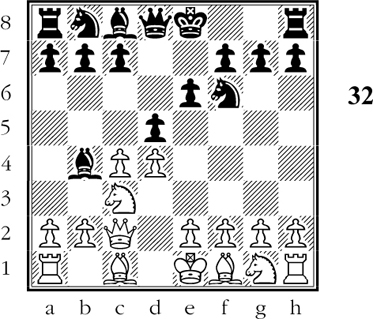
5.cxd5 (D)

Position after 5.cxd5
Again Black must make a choice; to command the center with pieces (5…Qxd5) or the d-pawn (5…exd5).
The simplest method of recapture is 5…exd5. If then 6.Bg5 h6 7.Bxf6 Qxf6 8.a3 Bxc3+ 9.Qxc3 c6 10.e3 0-0 11.Nf3 Bf5 and Black stands well.
Note that 7.Bh4 allows Black to counterattack vigorously with 7…c5! for example 8.dxc5 Nc6 9.0-0-0 g5! 10.Bg3 Qa5 etc.
5…Qxd5 6.Nf3 c5
Operating against White’s pawn center.
7.Bd2 Bxc3
In order to maintain the centralized position of his queen.
8.Bxc3 cxd4 9.Nxd4 e5
A valuable freeing move. If now 10.Nf5 Bxf5 11.Qxf5 Nc6 12.e3 0-0 13.Be2 Qe4! with equality.
10.Nf3 Nc6 11.e3 0-0 12.Be2 Bg4 13.h3
Equal game. White has the two bishops, but Black has freedom of action, for example 13…Bh5 14.0-0 Rfd8 15.a3 Bg6 16.Qc1 Ne4 etc.
(b) 4.Qc2 Variation with 4…Nc6 (Milner-Barry Variation)
Nimzo-Indian Defense
White - Black
1.d4 Nf6 2.c4 e6 3.Nc3 Bb4 4.Qc2 Nc6
Gaining time by attacking White’s d-pawn and preparing to build up a center with …d6 and …e5.
5.Nf3 d6 (D)
Position after 5…d6
Black is prepared to concede the two bishops to White, as the forthcoming …e5 will maintain the balance of power in the center.
If now 6.a3 Bxc3+ 7.Qxc3 White has the two bishops and Black must play carefully to avoid a constricted position. 7…a5! prevents too much White expansion (by 8.b4). Then, after 8.b3 0-0 9.Bb2 Black plays for …e5 with 9…Re8! 10.Rd1 Qe7! etc.
6.Bd2 e5 7.a3 Bxc3 8.Bxc3 Qe7 9.dxe5
Loosening up the position so his dark-square bishop will have more scope.
9…dxe5 10.e3 a5!
Again preventing White from expanding unduly with b2-b4 (threatening b4-b5).
11.h3!
Preventing the development of Black’s light-square bishop via …Bg4. But Black has a resourceful continuation.
11…0-0 12.Be2 g6!
Black maintains equality by preparing …Bf5. After 13.b3 Bf5 14.Qb2 Rfe8 15.0-0 Ne4 the position is approximately even.
(c) 4.Qc2 Variation with 4…c5
Nimzo-Indian Defense
White - Black
1.d4 Nf6 2.c4 e6 3.Nc3 Bb4 4.Qc2 c5
This flank thrust is intended to demolish White’s center by removing White’s d-pawn. White generally gets pressure on the open d-file and on the open long diagonal extending from a1 to h8. However, Black can equalize by getting good play for his pieces in the center.
5.dxc5 (D)
Position after 5.dxc5
Black can hold his own with 5…Bxc5 6.Nf3 Nc6 7.Bg5 Be7 followed by …d6. But this leads to a cramped position which is not to everyone’s taste.
5…0-0
And now the pinning move 6.Bg5 looks good. However, Black counterattacks effectively with 6…Na6! 7.a3 Bxc3+ 8.Qxc3 Nxc5. White has the two bishops, but Black has a good grip on the center, for example 9.Qc2 (to avoid …Nce4) 9…a5! 10.f3 a4 11.Rd1 Nb3 12.e4 Qa5+ 13.Bd2 Nxd2 14.Qxd2 d5 and Black has at least equality.
6.Nf3 Na6!
Here too the knight arrives rapidly at an influential post for controlling the center. If now 7.a3 Bxc3+! 8.Qxc3 Nxc5 9.b4 Nce4 and Black’s commanding centralized position makes up for White’s two bishops.
7.Bd2 Nxc5 8.a3 Bxc3 9.Bxc3 Nce4
As in the previous note, Black has equality, thanks to the position of his centralized knight.
(d) 4.e3 Variation
Nimzo-Indian Defense
White - Black
1.d4 Nf6 2.c4 e6 3.Nc3 Bb4 4.e3 (D)
Position after 4.e3
White’s last move is stronger than it looks. He prepares the development of his light-square bishop and is ready to benefit by any advantages that may accrue from his having the bishop pair after …Bxc3(+).
If now 4…0-0, the play may very likely transpose into one of the variations shown below. An independent possibility is 5.Nge2 d5 6.a3 Be7 7.cxd5 exd5 8.g3 (much more promising than 8.Ng3 c5! and if 9.dxc5 Bxc5 10.b4 d4!) 8…Nbd7 9.Bg2 Nb6 10.Qd3 a5 11.a4 c6 12.0-0 Nbd7 13.f3 with the idea of forming a powerful pawn center with e3-e4.
Against 4…b6 White can also proceed with 5.Nge2 and if 5…Ba6 6.a3 Be7 7.Nf4 d5 8.cxd5 Bxf1 9.Kxf1 exd5 10.g4! with a strong initiative.
Another way is 4…b6 5.Nge2 Bb7 6.a3 Bxc3+ 7.Nxc3 0-0 8.Bd3! c5 (not 8…Bxg2 9.Rg1 Bb7 10.e4 followed by e4-e5 with a withering attack) 9.d5! cramping Black’s game considerably. If then 9…exd5 10.cxd5 Nxd5? 11.Nxd5 Bxd5 12.Qh5 - or 10…Bxd5? 11.Nxd5 Nxd5 12.Be4 and White wins in either event.
4…d5 5.Bd3 0-0 6.a3
If White now continues 6.Nf3 c5 7.0-0 Nc6 8.a3, Black’s simplest course is 8…Bxc3 (Or Black may try 8…dxc4 9.Bxc4 cxd4 10.exd4 Be7. Then after 11.Qd3 b6 12.Ba2 Bb7 13.Bb1 g6 White has a freer game and attacking chances, while Black has pressure on White’s isolated d-pawn.) 9.bxc3 b6 with good prospects for Black despite White’s two bishops.
6…Bxc3+ 7.bxc3 (D)
Position after 7.bxc3
White’s sturdy pawn center and his possession of two bishops give him many powerful attacking chances.
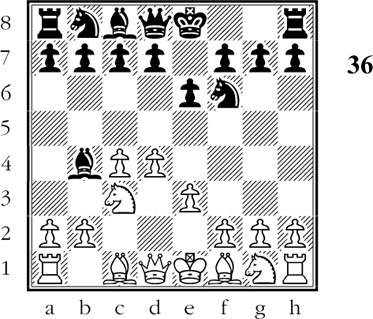
Black must handle the defense with great care. Thus, after 7…c5 8.cxd5! exd5 9.Ne2 b6 10.0-0 Ba6 11.Bxa6 Nxa6 12.Qd3 White has the makings of a powerful attack despite the disappearance of his attacking bishop. The sequel might be 12…c4 13.Qc2 Nb8 14.f3! Re8 15.Ng3 Nc6 16.Qf2 Qd7 17.Bb2 Re6 18.Rae1 Rae8 (Black strives in vain to prevent e3-e4) 19.Re2 g6 20.Rfe1 Na5 21.e4 Qb7 22.e5 followed by f3-f4 with a formidable “pawn-roller.”
7…dxc4! 8.Bxc4 c5 9.Nf3 Nc6 10.0-0 Qc7! 11.Bd3 e5 12.Qc2
An intensely interesting position. Black has freed himself admirably, but White hopes to open up the position and get his center pawns moving so that he can demonstrate the power of his bishops.
A possibility is 12…Rd8 13.Re1 Bg4 14.Nxe5 Nxe5 15.dxe5 Qxe5 16.f3 Be6 17.Rb1 c4 18.Bf1 Nd5! 19.Bd2 Qc7.
A wilder line of play is 12…Re8 (threatens …e4) 13.e4 exd4 14.cxd4 Bg4! 15.e5 Bxf3 16.exf6 Nxd4 17.Bxh7+ Kh8 18.fxg7+ Kxg7 19.Bb2 Rad8! 20.gxf3 Rh8! 21.Kh1 Rxh7.
In both cases Black holds his own because the free play of his pieces compensates for White’s bishop pair. This is often the verdict on Nimzo-Indian variations.
(e) Sämisch Variation
Nimzo-Indian Defense
White - Black
1.d4 Nf6 2.c4 e6 3.Nc3 Bb4 4.a3
This leads to a very difficult game for both sides. After the following exchange White hopes to get a good attack, based on his two bishops and his powerful-looking pawn center. Black hopes for a closed position where his knights can maneuver skillfully; he also has prospects of turning White’s pawn at c4 into a target.
4…Bxc3+ 5.bxc3 (D)
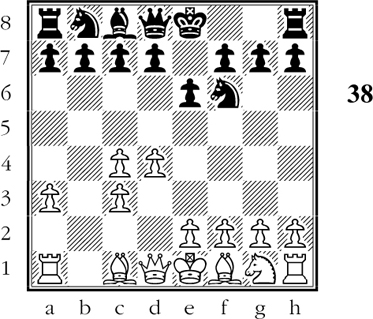
Position after 5.bxc3
Note that White’s pawn at c4 can no longer be protected by pawns, and must be protected by pieces. Hence this pawn is weak, and Black will try to train his guns on it.
5…c5!
This “fixes” White’s theoretically weak pawn a c4. In addition, Black exerts pressure on White’s pawn center.
6.e3 b6
Black’s bishop will go to b7 (later to a6, to press against the weak pawn).
On the other hand, playing for an early …e5 is a doubtful policy, as it often allows White to open the f-file with impressive effect, for example 6…Nc6 7.Bd3 e5 8.Ne2 d6 9.0-0 Qe7 10.e4! Nd7 11.f4 b6 12.Ng3 g6 13.fxe5 dxe5 14.d5 Na5 15.Ra2! Nb7 16.Raf2 Nd6 17.Bh6 with considerable positional advantage for White.
7.Bd3 Bb7 8.f3 Nc6 9.Ne2 0-0 10.e4 Ne8!
A star move. To allow the pinning maneuver would be fatal to Black’s freedom of action. The retreat of the knight also prepares for the blockading move …f5.
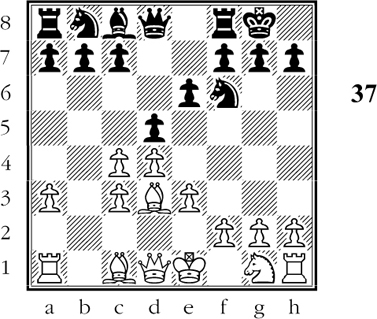
11.Be3 d6 12.0-0 Na5! (D)

Position after 12…Na5!
Black begins the attack on the c4-pawn.
Black has the initiative, as Black’s threats against the c4-pawn outweigh White’s attacking possibilities on the other wing. For example: 13.Ng3 Qd7 14.f4 f5 15.Qe2 (if 15.dxc5 dxc5 16.exf5 Rd8!) 15…g6! 16.Rfd1 Ng7 17.Ra2 Qa4! 18.Bc1 Rac8! (note the mounting pressure on White’s c4-pawn) 19.Qc2 Qxc2 20.Rxc2 Ba6! and Black wins the weak c4-pawn.