Hello, Bicycle: An Inspired Guide to the Two-Wheeled Life (2016)
A bicycle—be it a rusty old Schwinn that dates back to before you were born or a multi-thousand-dollar road bike that’s sure to make you win races—is a machine that needs love. Take care of it, and it will take care of you. Let it sit on the porch through the entire rainy season, without so much as a spin around the block, and it may not be so nice to you.
While different bicycles may require different levels of care—your around-town bicycle may need a little less love than a finely tuned mountain bike—one thing is sure: you can’t forget about your bicycle’s needs.
But where to begin? Parking it in a good spot and keeping it out of the rain—that’s easy enough to accomplish, but what about all those other things? There are two words that tend to intimidate many new cyclists, and even the seasoned two-wheeled crowd:
bike maintenance.
It’s time we all got a little more comfortable with bike maintenance, not just for the sake of our bicycles, but for our own sake, too. Few skills in life are as empowering as being able to change a flat on your own. When you know a few basic tweaks and fixes you can master with your bicycle, with just a handful of essential tools and a little elbow grease, you’re unstoppable.
But before we get there, let’s talk about bike shops. Ever gotten a flat and felt silly for walking into a bike shop because you didn’t have the right tools with you to change it yourself? That’s okay; every cyclist has been there. If you don’t know how to change a flat, don’t beat yourself up. That doesn’t make you any less of a cyclist. Keep reading and learn how to fix that flat, because there’s nothing quite like being on a ride, hearing a tire go “pop,” and knowing that you can take care of the problem all on your own.
But rest assured, you don’t have to learn how to do it all—and when you don’t know how to do a maintenance or repair item yourself, bike shops are there to help.
![]()
HOW DO I FIND A GOOD BIKE SHOP?
![]()
What should you look for in a good bike shop? Here are a few things to consider.
Proximity
Most people choose a bike shop simply because it’s close by, and that makes perfect sense. Especially if you live in a city, where you probably have a choice of bike shops, keep it local. There’s no point in driving across town with your trusty two-wheeled steed if you can get the work done next door. That being said, there are some factors that might lure you across town.
A good fit for you
A good bike shop is the one that makes you feel comfortable, the one that you want to go into. It’s the one that makes you feel at home, no matter what your cycling level. To find out whether your local shop is that shop, have a conversation; ask questions.
The golden rule
Bike mechanics are there to help you, but that doesn’t mean you get to be a jerk. If you want good service, you have to be a respectful customer. That means coming in when you say you’re going to come in, and knowing what you’re coming in for. Bike mechanics have busy schedules, and if you call ahead to get a chain repaired but then saunter in and ask to have your tires changed and your brakes checked as well, you are going to end up with a cranky mechanic. If you add work to their list, it affects the next person on the repair schedule. In other words, when you call to schedule a time to get your bike worked on, tell them everything you can about what’s wrong with your bicycle or what you need done so that they can determine how much time to allocate for the work. Happy mechanic, happy bicycle, happy rider; it all comes full circle. And while it’s not customary, bike mechanics also do appreciate tips, even if they come in the form of homemade cookies or a six-pack of craft beer.
But what if your bicycle is just making a funny sound and you actually don’t know what work you need done? A lot of bike shops offer free estimates, which allows you to bring your bicycle in for an assessment so that you know what you are getting into before you go in for the official service.
![]()
COMMUNITY BIKE SHOPS
![]()
Some cities have not only bike stores but also community bike shops or bike cooperatives. Their exact functions may vary, but in general they are set up as social enterprises, intended to build community and be a resource for anyone with a love of cycling. Often these places are set up so that you can bring in your bike not just to get it worked on but so you can work on it yourself. There may be volunteers who can help you figure out what your bike needs and how to do it, and an array of bike tools and workspace so that you can work more comfortably on your bicycle than, let’s say, in your kitchen. These are great places for people who want to feel empowered to work on their bicycles themselves but don’t have the space or all the tools at home. Often community bike shops offer workshops and classes, the perfect place to master your bike maintenance skills, and there is an emphasis on repurposing materials, so you will probably find used bike parts as opposed to new ones. These can provide some added flair and personality to your bicycle.
If you are interested in the concept of community bike shops and want to find out if there is one close to you, an excellent online resource is bikecollectives.org. They even have information for people interested in launching their own community bike shop. So if there isn’t one close to you, why not launch your own? If you build it, the cyclists will come.
Bike Shop Vocabulary
![]()
Need the right language to navigate the bike shop? Here are a few essential terms that a bike mechanic might use when talking about your bicycle.
CASSETTE → The cluster of sprockets that’s on your back wheel.
CHAINRING → The sprockets of the crankset, of which there may be one, two, or three.
CRANKSET → The part of the bicycle that takes your pedaling power and uses that power to drive the back wheel. It’s what your pedals are attached to.
DERAILLEUR → The mechanism that allows you to change gears.
FORK → The part that holds the front wheel.
FRAME → The main structure of your bicycle; essentially what is left if everything else—wheels, handlebars, seat, and so on—is stripped off.
HEADSET → The part at the front of the bicycle where the handlebar stem and fork are fitted.
PINCH FLAT → A flat you get from the bike tube’s being pinched between the tire and the rim. Also called a “snakebite flat.”
PRESTA → A valve that is smaller in diameter than the Schrader, common on road bikes. Presta tubes can be used in holes drilled for Schrader valves, but not vice versa.
PSI → Stands for “pounds per square inch,” the unit of measure for tire inflation. Often marked on your bike tire, next to the size.
SCHRADER → The type of valve on a bike tire tube. It’s the same valve as those used on automobile tires.
STEM → The part that connects the handlebars to the bicycle.
![]()
GENERAL BICYCLE CARE YOU CAN EASILY DO
![]()
Your bicycle doesn’t need all the bells and whistles of fine-tuned bike maintenance every single day of its life. But it does need some regular care. Just as we humans try to eat well, get enough exercise and sleep, and find a nice balance between work and play so that we stay healthy and happy, so too our bicycles need some regular care and maintenance.
Your regular bike maintenance should include the following:
Keep it clean
Bikes get dirty; having a bike with some dirt on it does show it’s used and loved, and there’s no need to keep it sparkling and pristine. But it’s good to wash it every once in a while. Spent the afternoon on an especially muddy trail? Give your bicycle a rinse off when you get home, being sure to use the most gentle hose pressure possible, as you don’t want to force water where it can do damage. Even if you ride mostly on urban streets, giving your bike a good wipe-down once in a while is a good habit to get into, because keeping your bicycle clean—especially the chain and sprockets, which are subject to the most wear on a bicycle—ensures that it runs smoothly and has a longer life.
Lube the chain
Buy some bicycle chain lube (you want lube that is specifically made for this purpose, as other types of oil can make your chain quite filthy) at a local bike shop, find a clean rag, and give your chain a good lube. How often you need to lube your chain depends on how much you use your bicycle. If the chain is particularly grimy, it may also need a good wash with warm water and dish soap. See “How to Lube the Chain” for more detailed instructions.
Check your brakes
It’s terrifying to be riding fast down a hill and realize you are going to have to drag your feet on the ground to come to a full stop. But even if your brakes are working, they may not be functioning as well as they could. Make a monthly habit of checking the brakes; that way you can be pretty sure your brakes will never fail you. To check your brake levers, simply pull them toward the handlebars. When the brake levers are squeezed, there should be an inch or more between the levers and the handlebars. If you squeeze them and have to pull them closer to the handlebars to fully engage the brakes, the brakes need to be tightened. To make your bike mechanic happy (see “Extra things your bike mechanic really wishes you would do”), check your brake pads too. Riding in a climate where it rains a lot? Note that rainy riding makes your brakes wear out much faster, so you’ll have to be more vigilant.
Check your lights
If you’re already in the habit of always keeping your bike lights with you (because you never know when you’ll be cycling in the dark), then also get into the habit of checking the light batteries. Try to check them on a monthly basis. If the light is starting to flicker or it’s not as bright as it used to be, switch out the batteries for new ones. Often that’s all you need to do, but if your lights are old, it may be the bulb, and it just might be time for a new light.
Check your tires
Checking your tires for wear and tear at home can prevent you from having to deal with a flat while out on a ride. A tire that is so worn that the tread is completely worn down is a flat tire waiting to happen. Time to take that tire in for an upgrade.
Get a yearly checkup
Unless you are a trained bike mechanic, be sure to take that bicycle of yours to a professional once a year. Drop it off, tell the bike shop the bicycle needs its annual checkup, and when you pick it up, it will be running like new. If you’ve ridden your bicycle hard, or if you haven’t been good about caring for it, a few parts and pieces may need to get switched out—something to keep in mind when you are budgeting for the checkup fee. Also keep in mind that all modern drivetrains require the chain to be replaced every 1,200 to 1,500 miles; if this doesn’t happen, you’re going to damage the cassette and chainrings pretty quickly, which will lead to a much pricier replacement. Think of it this way: an annual visit to the bike mechanic ensures your bicycle a long and happy life.
![]()
EXTRA THINGS YOUR BIKE MECHANIC
REALLY WISHES YOU WOULD DO
![]()
It’s easy to take your bike into a shop to get it worked on, but bike mechanics are people, too, and they prefer working on bikes that get some love at home. Tori Bortman knows all about at-home and in-the-shop mechanics. As the owner of Gracie’s Wrench, she empowers people to get to know their bikes and do some of their own work on them. Working as a bike mechanic, Bortman has a list of things that she, and every other bike mechanic out there, wishes you would do. It’s great advice not only for making sure that you take care of your bicycle, but also to ensure that you build a solid relationship with your mechanic and keep them happy working on your two wheels.
Pay attention to your rims
In rainy, wet, or humid weather, metal rims get coated with a horrible black grime. When you have your bike upside down to oil the chain, use a clean, dry towel to wipe the grime away. This simple act can add another year or more to the life of your wheels (which are the most expensive part of your bike).
Pay attention to your brake pads
When your brakes aren’t working, often it’s because your pads are worn down. Pads have wear indicators—little divots in the pad that you can easily see. If they are barely visible—or worse, you can’t see them at all—it’s time to get the brake pads replaced. If your pads seem worn, make an appointment with the shop before they ruin your rim or destroy your brake cables by pulling too hard on your brakes, trying to make them work.
Clean up your bike before you bring it in
Your bike runs better when it’s clean, and it’s also easier to fix when it’s clean. Do you shower before a doctor’s appointment or a massage? Treat your mechanic and your bike with the same respect. A simple shower with a very light pressure hose and some soapy water will help get it clean before you bring it to the shop.
Schedule regular appointments if you’re riding a lot
Put a reminder on your calendar to make an appointment every six months to a year if you’re riding over two thousand miles annually. (To figure this out, multiply the average number of times you ride each week, times your average miles in a ride, times fifty-two.) If these are commuter miles, which are a lot rougher on your bike, schedule service every six months. This way you don’t let parts wear too far and need replacement.
No offense!
Don’t be offended when a mechanic tells you everything that’s wrong with your bike. It’s not that they’re trying to gouge you; rather, they’re trying to save you from having to come back three times in one month for different problems. You can always refuse a service that’s not necessary, but the mechanic is just letting you know what to expect and giving you the chance to do some preventive maintenance.
Don’t wait until a strange noise gets really bad
If you notice something strange or out of the norm with your bike, don’t assume that it’s just you or that it will go away on its own. This is how little problems get to be big, expensive problems. If you think something is wrong, swing by the shop and have them take a look. Estimates are usually free and can save you money down the road.
![]()
DIY BIKE MAINTENANCE
![]()
We’re still working on those two important words: bike maintenance. But now we’re talking about what you can learn to do on your own in the way of tune-ups, repairs, and replacements. There are a few of these things that don’t require a degree in rocket science. One great benefit is that doing a few things at home regularly makes life a lot easier for your bike mechanic when you do have to take your bicycle in for a bigger overhaul.
You don’t need official bike mechanic training to learn how to do bike maintenance at home. For visual learners, the Internet is full of helpful videos for all sorts of problems you may encounter with your bicycle. If you want to be more empowered to work on your bicycle, consider taking a bike maintenance class. These are an excellent way to master the necessary skills with the help of a professional. Ask your local bike shop or bike club if they organize this kind of thing. Lessons are a terrific introduction—after that, the best way to master these things is to practice, practice, practice. And remember, the bicycle is, at its core, a simple and sturdy machine. Be gentle, don’t push on things too hard, but don’t be afraid that loosening a screw is going to make the entire thing fall apart.
And if you get in over your head? Take the bike to a bike shop. Whatever your bike problem is, there’s always an answer, and when things get too complicated, there is no shame in asking a professional.
Bike maintenance tools to have at home
If you don’t already have them, investing in a few tools and supplies will help make home maintenance much easier. The following are what you will want to have on hand for any kind of work on your bike, be it adjusting a seat that doesn’t have a quick release or changing a flat.
PATCH KIT
Just because you’ve gotten a hole in your bike tube doesn’t mean that you need to throw it away. A patch kit lets you repair a flat tire while on the road.
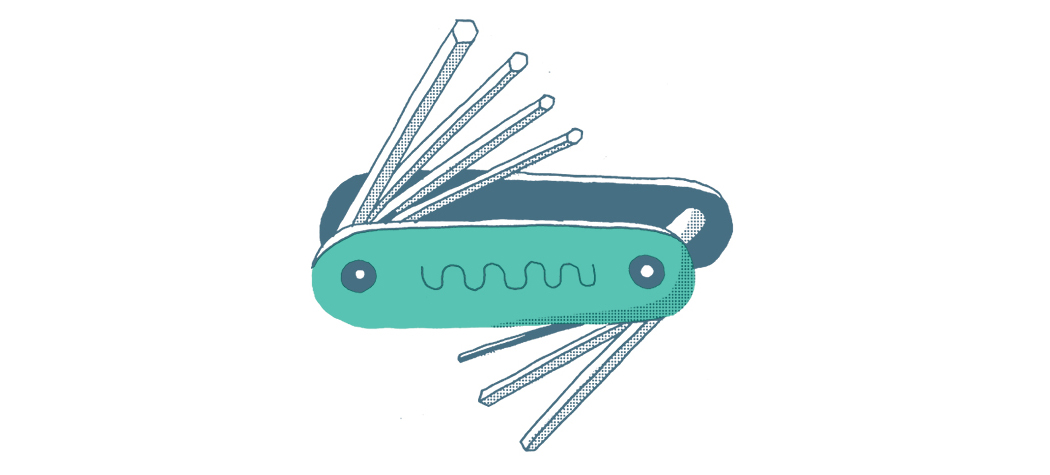
HEX WRENCH SET
Also referred to as an Allen wrench or hex key, this is an essential tool for the bicycle, as it’s used for everything from adjusting the seat post to tightening the brakes. While “loose” hex keys allow for more flexibility and enable you to handle a wider range of home-based bike maintenance tasks, for quick fixes on a bike, a hex wrench set or multitool that has a few sizes in one tool can work wonders. It’s also easily transportable.
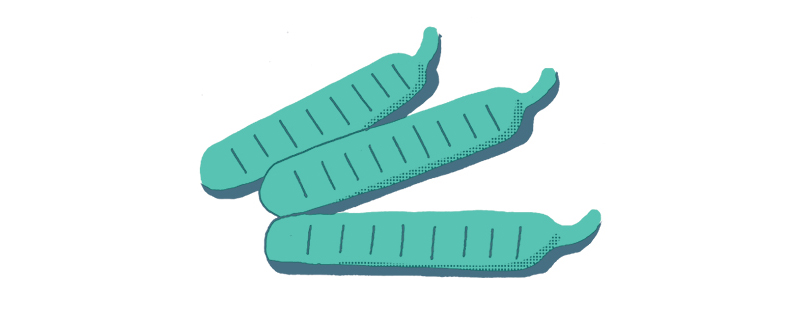
TIRE LEVERS
These simple tools are made to ease the process of removing the tire from the rim and putting it back on when you get a flat and need to replace the tube. They generally come in a set of three.
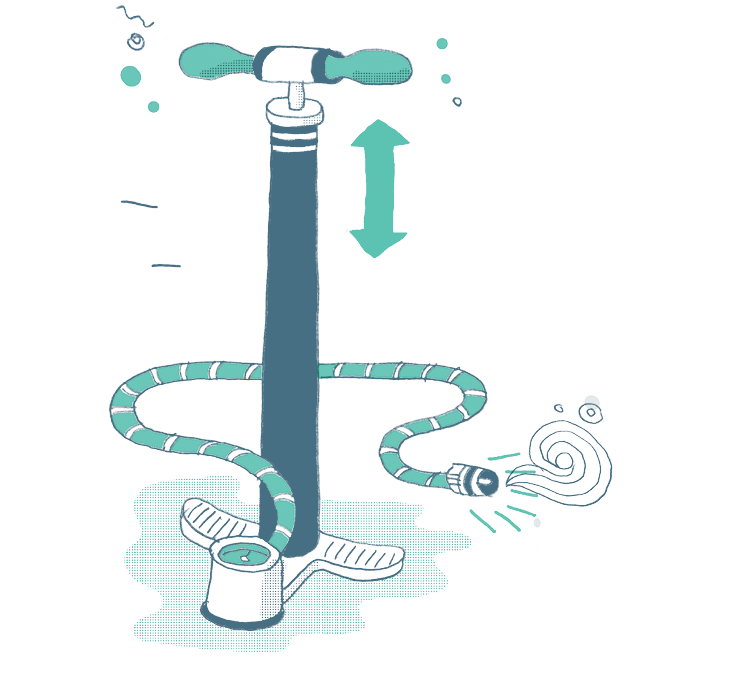
FLOOR PUMP
You’ll want this when pumping up that new and improved tire. It’s called a floor pump because it stands on the floor, as opposed to smaller pumps that are made for taking along on rides. Those are great for fixing a flat on the road, but investing in a heavy-duty floor pump for use at home will make life much easier. If you’re planning on doing a lot of long bicycle rides, get a mini pump that you can take along to fix a flat while on the road.
OLD TOOTHBRUSH
You’d be surprised how handy this is for cleaning the chain and sprockets and even for getting rid of the mud that’s caked into all the nooks and crannies. (Be sure to stash your bike brush absolutely nowhere near your actual toothbrush!)
CHAIN LUBE
I mentioned this earlier in “Lube the chain.” Keeping the chain lubed is one of the easiest and most helpful things that you can do to keep your bike happy and healthy. Again, be sure to buy lube that is specifically made for this purpose.
OLD RAGS
Don’t discard those old T-shirts—ripped up into rags, they are helpful for applying lube, washing the chain, and a variety of other bike maintenance tasks. It’s nice to have something to wipe your hands on, and trust me, you don’t want to be wiping them on your jeans.
HAND CLEANER
Speaking of wiping your hands, the lingering residue of bike grease isn’t the same as good old garden dirt, and you may find that the cleanup is a bit more difficult. To quickly clean those greasy hands, start with regular dish soap, which will work well if you’ve got a little chain lube on your hands. You’re greasier than that? Then invest in some cleaner that cuts grease. There are bicycle-specific ones available, but you can use the same hand cleaners you find in automotive stores.
Bike maintenance you can learn to do on your own
While no one is going to require you to know how to do these things at home, they are fairly easy tasks to learn and master. Put them into practice, and when you take your bicycle in for its yearly checkup you will make your bike mechanic very happy.
HOW TO CHANGE THE HANDLEBAR TAPE
If you have a road bike, old handlebar tape can get grimy or even start flaking off. That’s not so enjoyable to grip on a ride, so for an easy uplift to your cycling experience, remove the old handlebar tape and put on new stuff.
Handlebar tape comes in a variety of colors, and you can even get tape made from cork, which can give your bicycle a nice natural, vintage look. Start at the end of the handlebar, leaving a little extra tape, about half the width, hanging over the end. This will be stuffed into the end with a bar plug when you are finished. Wrap upward and outward (winding clockwise on the right side and counter clockwise on the left). Take off the adhesive backing little by little as you go, or you’ll end up in a sticky situation (pun intended). Wrap tightly, with each full circle covering a third to half of the tape that’s already on the handlebar. If it’s not tight, or there are gaps, pull the tape away and do it again. When you get to the brake lever, pull up the hoods, and wrap the tape in a figure eight around it (this won’t be visible when you pull the hood back). When you wrap the top of the handlebar, be sure to wrap toward the bicycle seat. When you get to the top of the handlebars, use electrical tape to tape down the end of the handlebar tape.

HOW TO CLEAN AND GREASE THE SEAT POST
If you have never cleaned or greased the seat post, chances are it may just be stuck. But it doesn’t have to be that way. It’s good, every once in a while, to remove the seat and clean inside the tube. Important: before you do this, be sure to mark your seat post height so that you can easily put it back exactly where it was. You can use electrical tape or even etch a mark into the seat post. Now loosen it up, take the seat out, and use a rag to clean out the inside of the seat tube. Add some grease, replace the seat, and you’re good to go.
HOW TO LUBE THE CHAIN
A clean and lubed chain is a happy chain, and you’ll also notice that pedaling is much smoother. To clean the chain, a chain cleaner can come in handy, but isn’t necessary. If you’re good about cleaning the chain and there are just a few spots that are a bit gunky, you can scrub that out from individual chain links with just your designated old toothbrush, or if need be, a little soap and water. Once the chain is clean, it needs lube.
Apply a little bit of lube every few chain links, then spin the pedal so that the chain goes all the way around, and the lube is now lubricating the entire chain and cassette. Wipe the excess chain lubricant off with a rag; less oil is much better than too much oil. Now that the chain is clean and lubed, keep it that way. Wipe the chain off regularly with a rag; this helps it stay clean and prevents a buildup of too much gunk everywhere.
HOW TO CHANGE A FLAT
The first bike fix that any two-wheeled lifer should learn is how to change a flat. You’ll want to master this either in the comfort of your own home or at a community bike shop where you have someone helping you. Because the side of the road is a much less comfortable spot to learn in.
Flats are far less common with newer, higher-quality tires. These are expensive, of course, but they mean that you can nearly eliminate flats. This is good news for anyone who doesn’t want to deal with flats or has a bicycle whose tires are a real pain to change, like a bicycle with an internally geared hub (with gears inside rather than outside the hub).
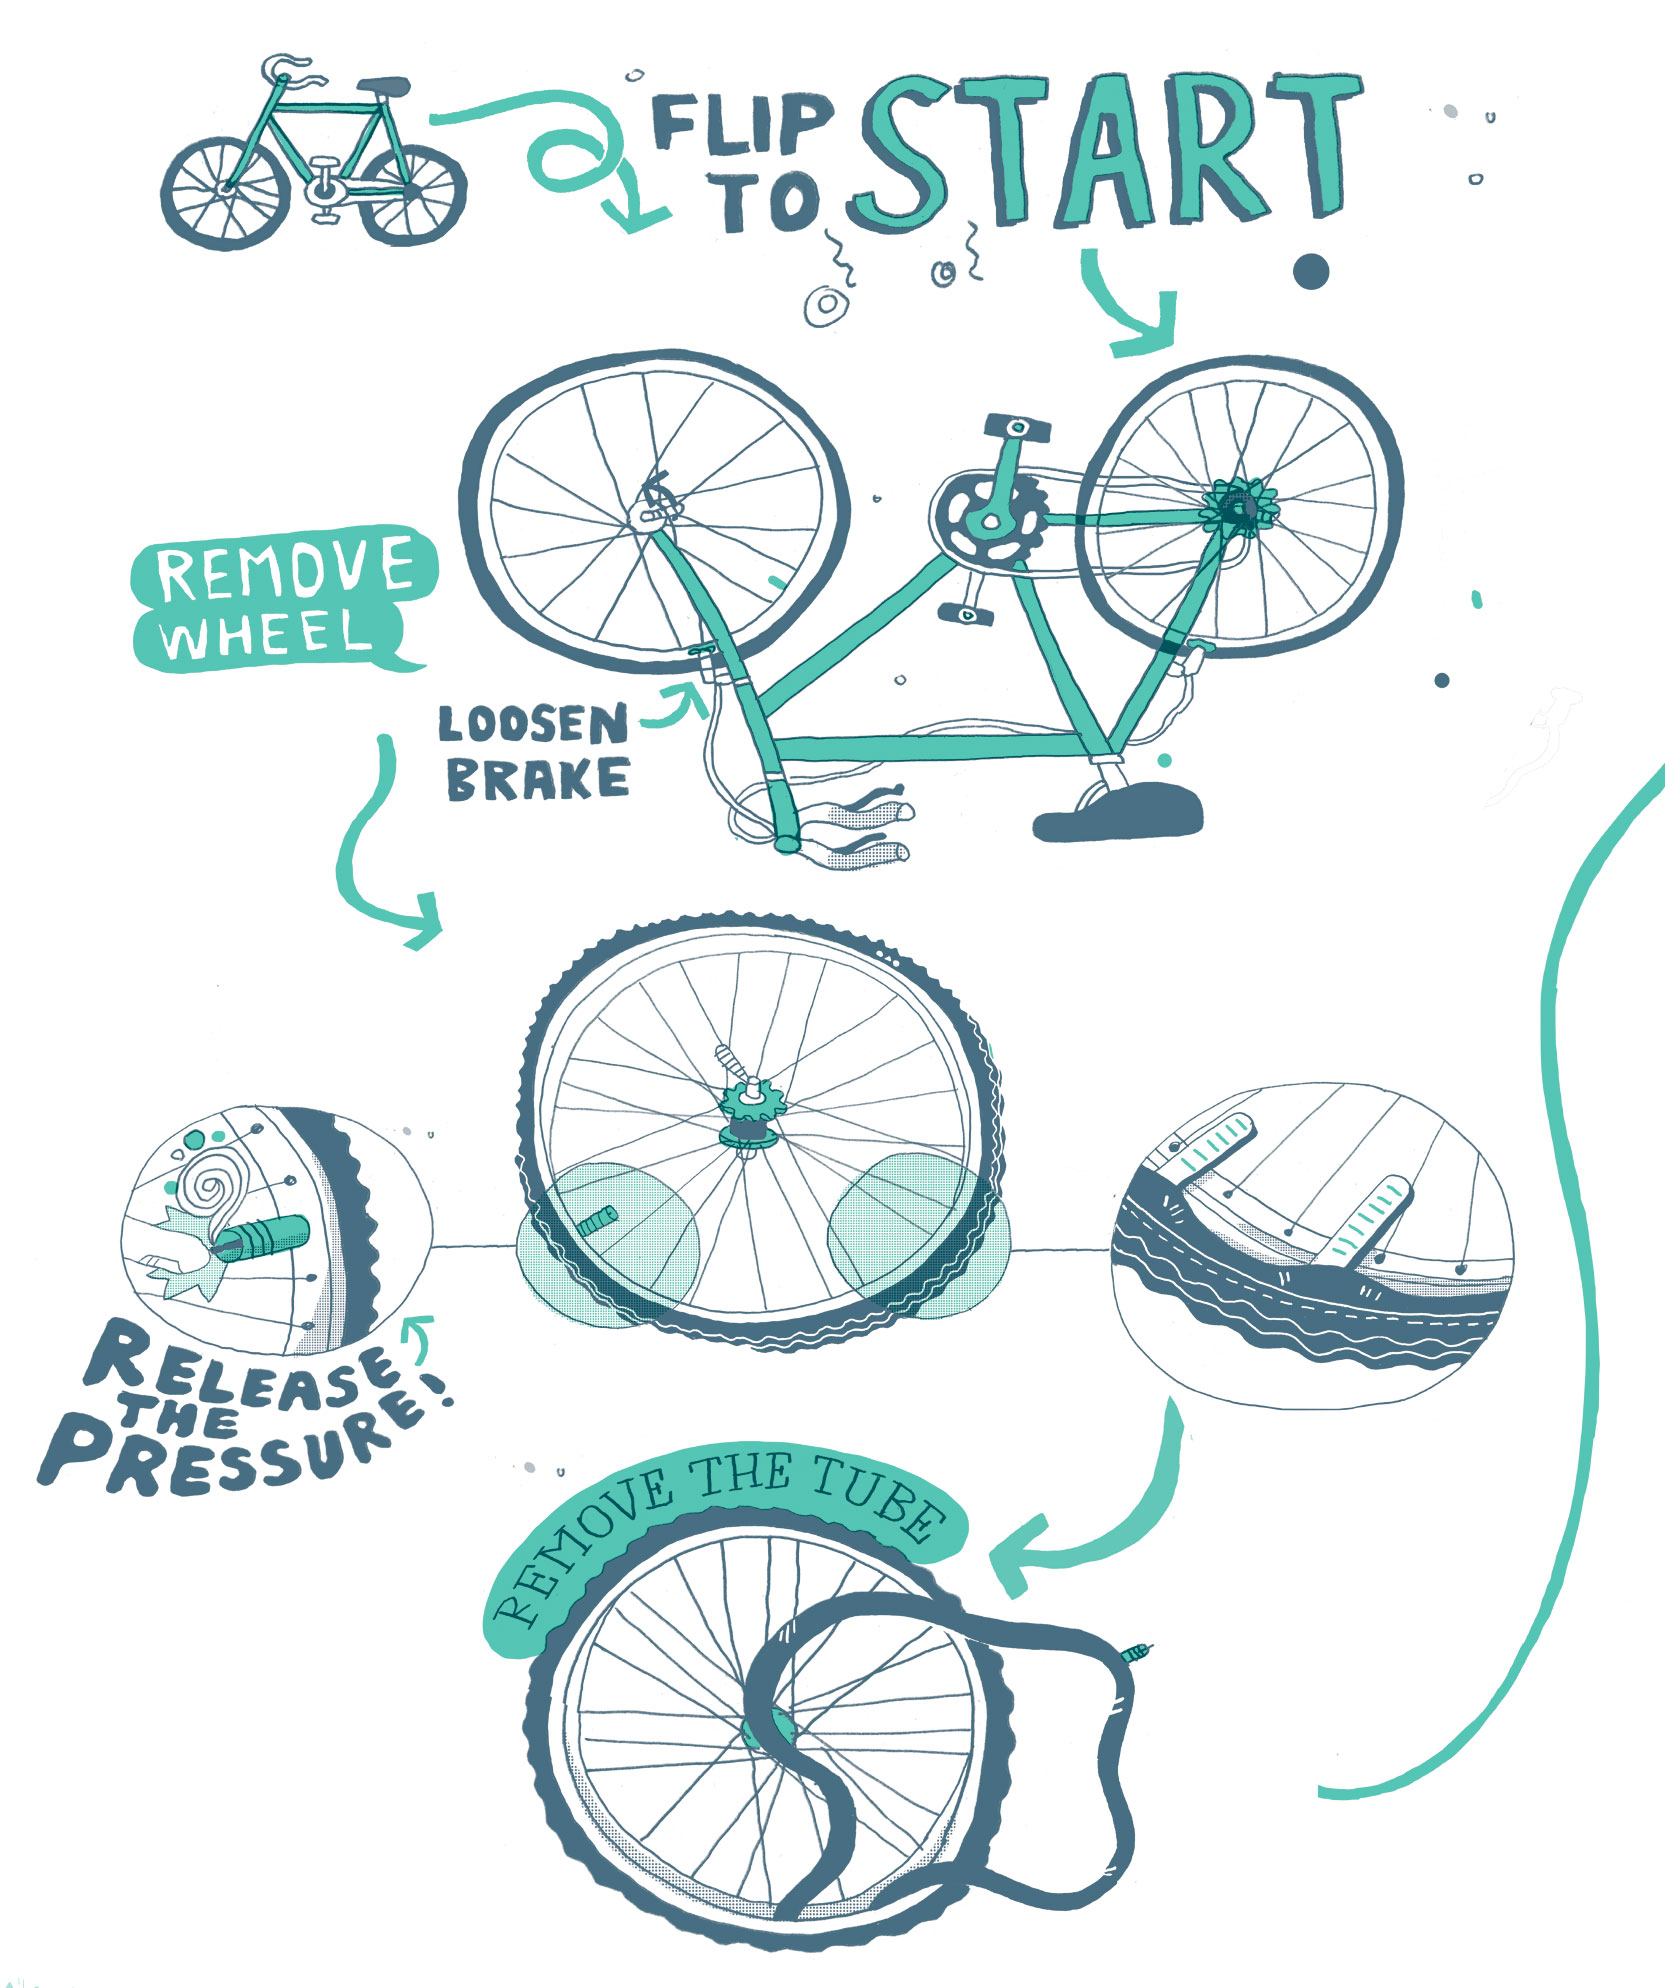
Changing a flat is simple in theory but can be hard in practice if you’re not used to doing it. The basics are removing the wheel, then the tube, patching or replacing it, putting it back in, putting the tire back on, and pumping it up. This can become difficult when you’re removing the tire from the rim and later when getting everything back into place, but with a little practice this too can become an easy routine. Here’s how it’s done on the front wheel (specifics for the rear wheel follow). Also, be sure to check out the illustrations.
1.Release the brakes, then release the wheel from the fork—the wheel is held to the fork by the wheel axle. You will have either a quick-release system or a bolt-on axle, which needs to be removed with a wrench. This is much easier to do if you turn the bike upside down so that the handlebars and seat are on the ground.
2.The tire is held in place inside the rim by pressure; the section where the tire meets the rim is called the tire bead. To remove the tire and gain access to the bike tube, you need to relieve that pressure. Start by getting any remaining air out of the tire by depressing the valve.
3.To loosen the tire bead from the rim, push the side of the tire wall in toward the center of the rim, or pinch the tire on both sides. Doing this, work your way around the whole tire.
4.When there is enough slack in the tire, pop the edge of the tire over the rim. This is where tire levers can come in very handy (as mentioned earlier, tire levers generally come in packs of three, because that is the most you will need to change a tire). If you’re using levers, start opposite the tire valve (which you want to avoid damaging) and use the tire lever to pry the tire bead up and over the edge of the rim. Hook the tire lever to the spoke, then insert an additional lever about two or three spokes down from the first one. You want the tire to be loose enough that you can run a tire lever around the entire rim, pulling one side of the tire over it, and leaving the other side in the rim. If necessary, place a third lever, spaced an additional two or three spokes away from the middle one; this will cause the middle one to come out. Keep repeating this until the tire is loose enough.
5.When the tire bead is free from the rim, you should be able to loosen the rest by hand. You do not need to take the entire tire off; while you pull one side of the tire up and over the rim, leave the other side of the tire in.
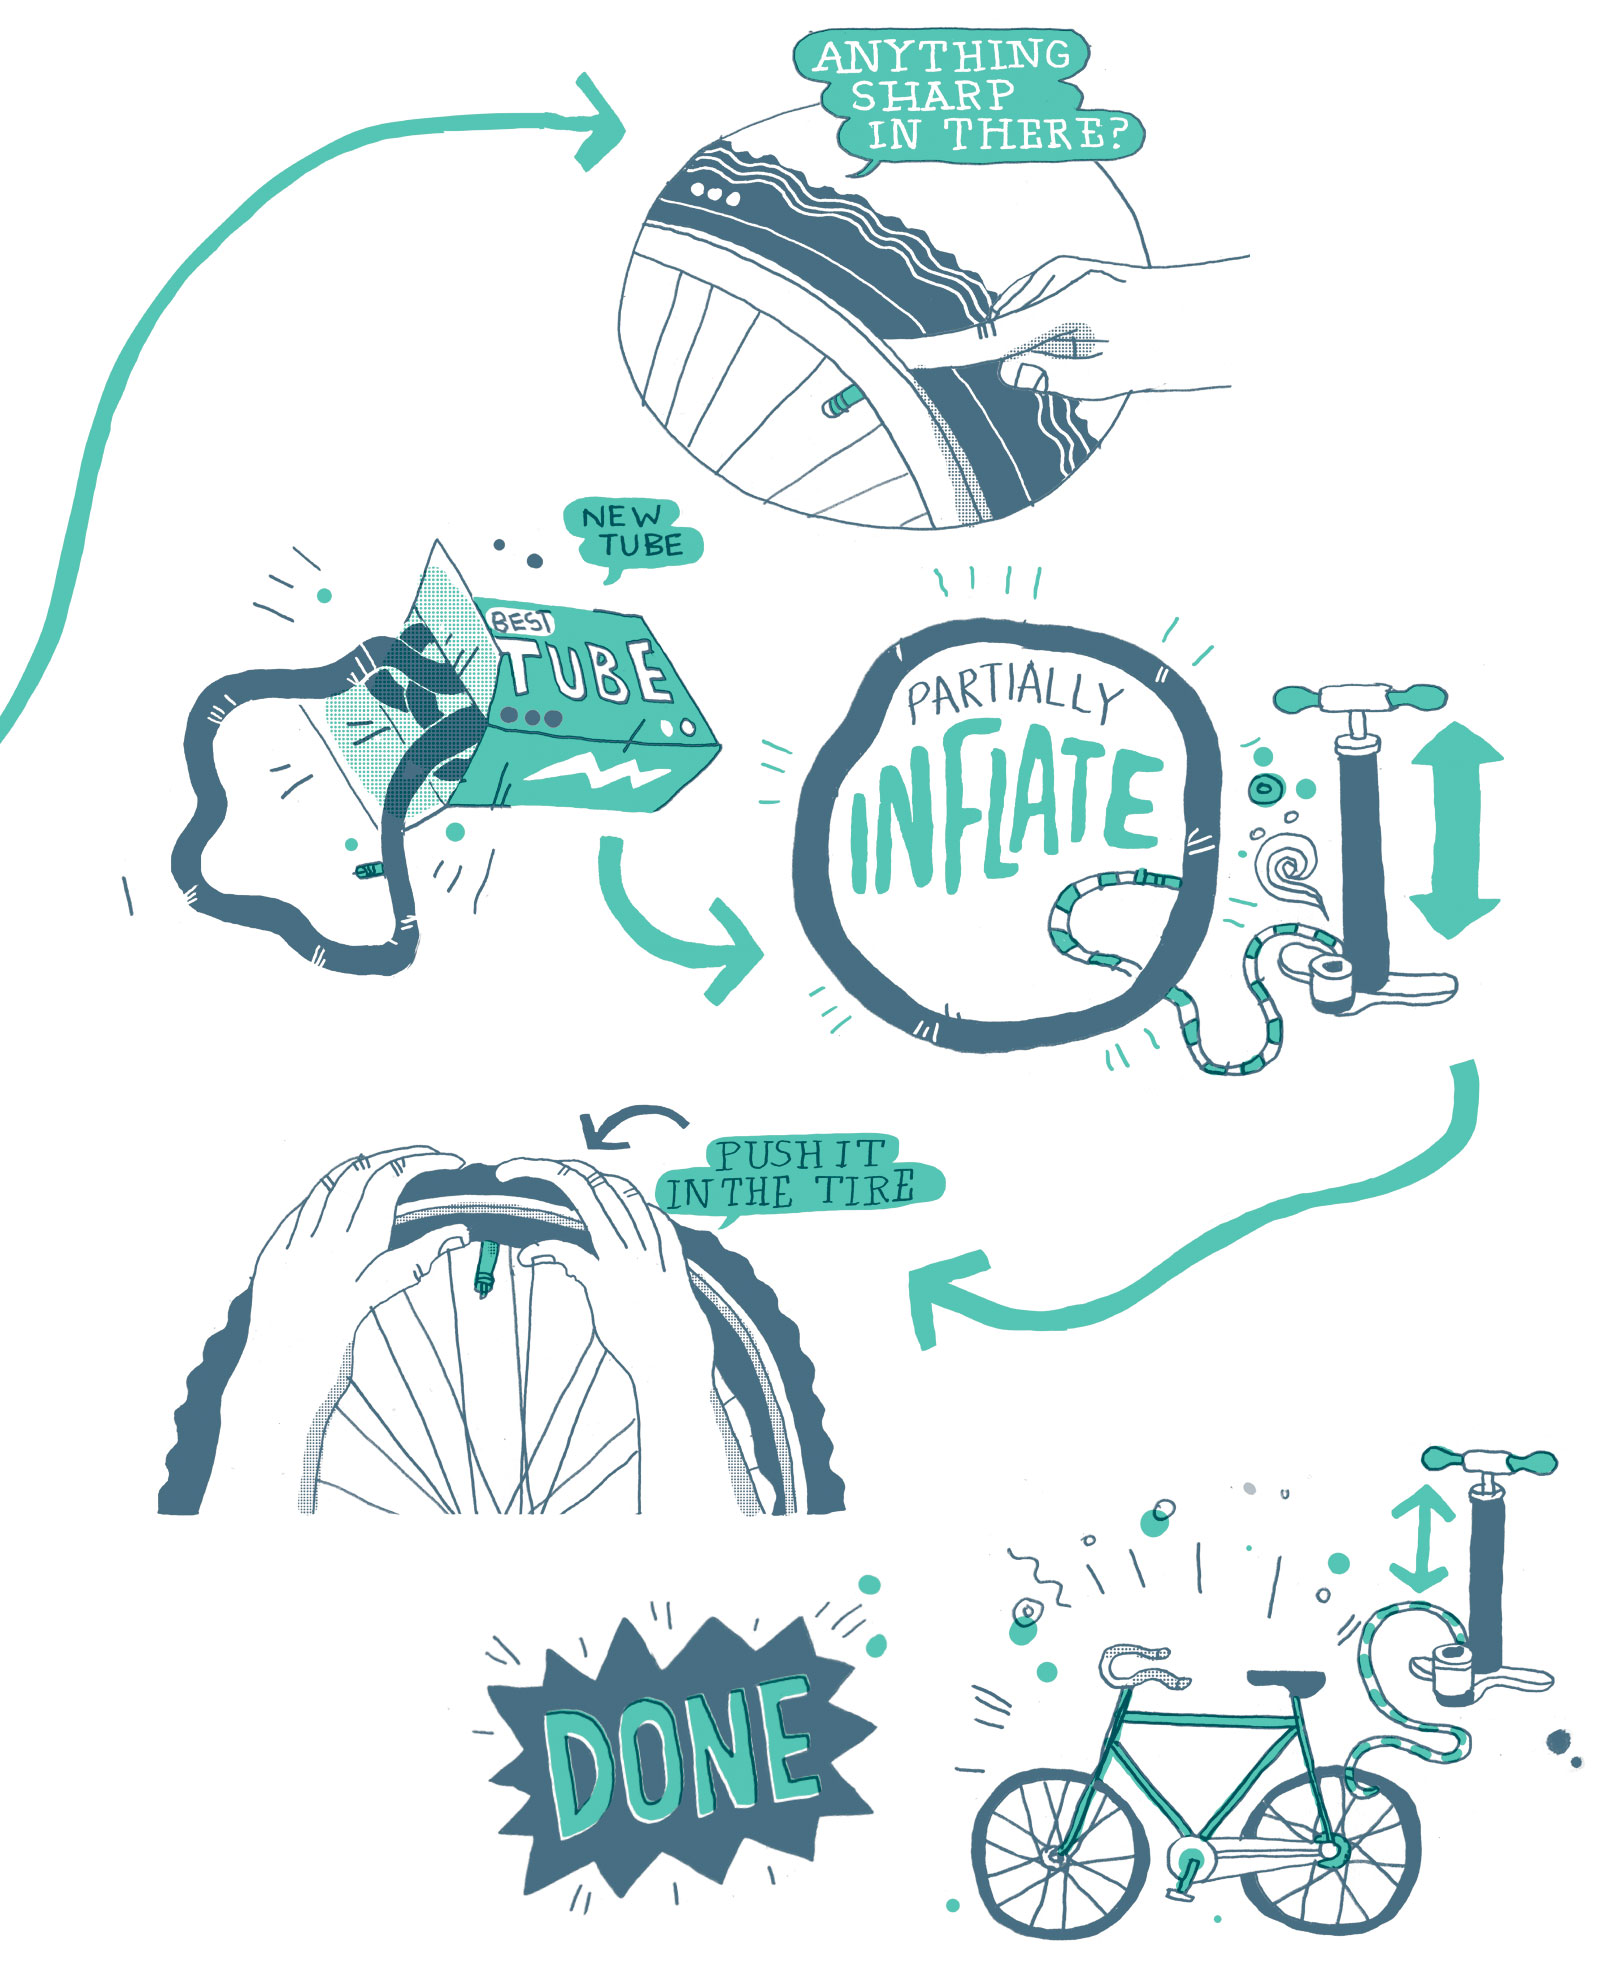
6.Remove the tube by first removing the valve from the rim, then pulling the rest of the tube out. Determine where the tube is punctured, and when you find the spot, locate the same area on the tire, to make sure that whatever made the puncture isn’t still in the tire. Then run your fingers (carefully) around the inside of the tire to make sure there are no foreign objects stuck inside that would cause more punctures once you have put the tube back in.
7.When you are ready to put the repaired tube or a new tube back in, partially inflate the tube to give it some shape.
8.Make sure one side of the tire is in place against the rim. Starting with the valve stem, place the tube inside the tire.
9.Once the tube is in, make sure the valve is straight; this is important, as you don’t want a bent valve. Starting close to the valve, put the tire back in place, so that the tire bead is positioned inside the rim. This will get harder (much harder) as you make your way around the tire.
10.Pinch both sides of the tire to get the final section of tire in place inside the rim, or use bike levers for help. Make sure that the bike tube isn’t pinched anywhere between the tire and the rim, as this could lead to yet another flat.
11.Inflate the tire partially and check that it is not pinched between the bead and rim by pinching in on both sides of the tire all the way around the circumference. Then fully inflate the tire—and get back to riding!
The process for changing the rear wheel is the same, except that if you are riding a bicycle with gears you will need to do a couple of additional things. As with changing the front tire, if you don’t have a bicycle repair stand, this can be easier if you turn the bicycle upside down. Shift so that the chain is down to the smallest cog, then turn your bicycle upside down. Release the brake and the quick release on the axle and push the wheel out. If it doesn’t easily come out of the derailleur, you can pull the derailleur back with your finger. Once you have repaired or replaced the tube, put the wheel back on. Push down on the derailleur and put the chain on the smallest ring. Pull the wheel into the frame and make sure it’s straight, then secure the quick release.
WHAT TO DO IF YOU GET A FLAT ON A RIDE
If you get a flat while out on a bicycle ride, stop and assess the situation. Examine the tire, looking for any signs of a puncture or the object that caused the flat, because if a sharp object has pierced the tire to puncture the tube, chances are it’s still there, and you want to remove it before putting in a patched or new tube.
Can’t see the culprit? It’s time to remove the wheel from the bicycle and take the tire off so that you can replace the tube. Once you have gotten the tire off, carefully look on the inside of the tire walls for glass, a nail, or anything else that may be the culprit. Often it’s something small, like a thorn, that may have penetrated the tire and punctured the tube without leaving a noticeable hole in the tire wall. In this case, remove whatever made the puncture—you don’t want to keep riding with a piece of glass in your tire, do you?—and then you can just repair or swap the tube out and be off on your merry way.
Other times, the puncture or cut is noticeable; there may even be a large slash in the tire. In this case, you need to cover it up; if it stays open, the bike tube inside is going to remain vulnerable to more punctures. In a pinch—in other words, on a ride where you have no access to a bike shop—a dollar bill can actually work for this. Fold the dollar bill so that you can wriggle it into the tire, and it will stay in place, covering the hole. This will keep the tube from popping through the hole, letting you ride home, where you can properly deal with the problem.
WHAT SHOULD YOU DO WITH A PUNCTURED TUBE?
Inevitably, you will have a punctured tire and tube; it happens to every cyclist. Here are a few options for what to do with them.
Repair. If you’re one to go on long rides away from civilization—I’m talking about those glorious Saturday rides in the countryside—carry a patch kit, an extra tube, and a mini bike pump. The extra tube can easily be switched out if you get a flat, and if you have the misfortune to get a second flat on the same ride, you have the patch kit for backup.
Once you’re home and have some time on your hands, get to repairing that punctured tube. A tube can be repaired many times before you have to toss it. Usually, a punctured tire is caused by something like a nail or piece of glass, and that makes the puncture small and easy to fix.
To patch, choose a patch that’s a little larger than the puncture. Roughen the surface around the puncture with some sandpaper or emery cloth. If you have a glueless patch, just put it on and apply pressure. If you’re using glue or rubber cement, put a thin, smooth layer of it on the tube, then put on the patch and press firmly.
Reuse. Don’t you dare throw those bike tubes away! Nowadays there are lots of independent businesses doing cool things with used bike tubes. Search around and see if anyone needs them. Those bike tubes can also be easily used for a variety of creations at home, like making your own earrings (DIY Bike Tube Earrings) or even a wallet (DIY Bike Tube Wallet).
HOW TO BUY NEW BIKE TUBES
It’s nice to have a few bike tubes on hand at home so that you don’t have to make a trip to the bike shop every time you need a new one. To buy the right ones, you need to know what size fits your bike tire and whether you have a presta or schrader valve. The size is marked on the side of the tire. These numbers can be a little confusing, especially given the fact that mountain bikes are almost always measured in inches and road bicycles in metric, but as a rule they refer first to the diameter of the tire and then the width of the tire.
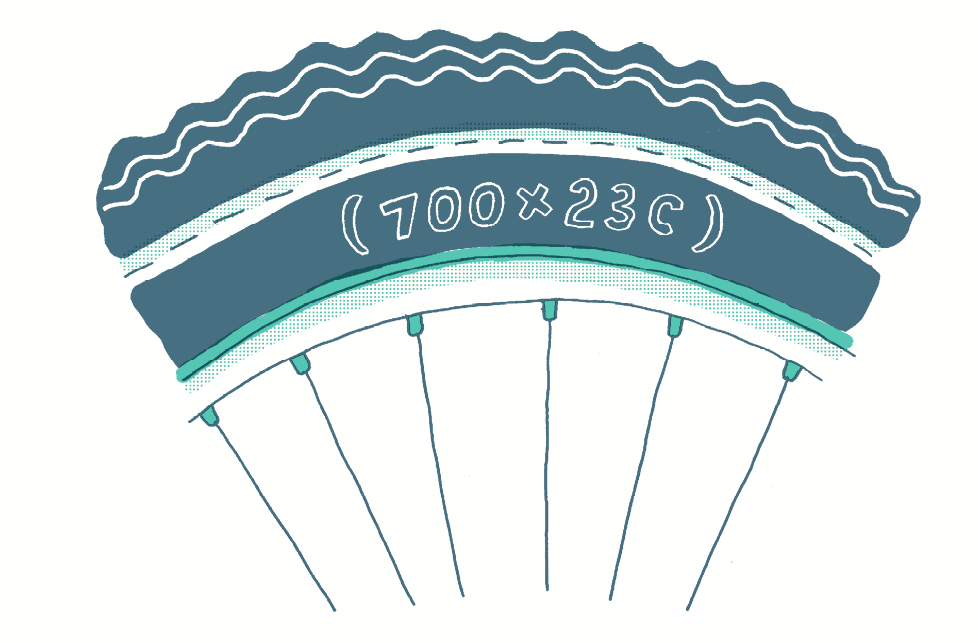
To make things even more confusing, there are two methods of measuring, so you will often see two number references printed or embossed on the tire. For example, a common road tire size is 700x23c, also written 23-622. Often bike tubes will give a range, like 700x18/23. Remember that the second number is the width of the tube, which means that this specific tube fits a tire that’s between 18 and 23 millimeters in width, so it will work for any tire in that range.
Write down those numbers and take them to the bike shop. They’ll be able to help you find the tubes that you need.
![]()
PUTTING BIKE PARTS TO A SECOND USE
![]()
The beauty of a bicycle is that it can be used for much more than its original purpose. A simple and fine-tuned work of engineering, a bicycle has parts that are often still usable after they have served their primary role as a part of your mode of transportation. Your bicycle continues to have a life even after its parts become old and dingy. Unlike the modern car, the design of bikes hasn’t gotten much more complicated since their early days. Their simplicity means that their many components can easily be pulled apart. We’re talking about bike upcycling, using parts of your beloved steed to make something new.
In the design world, as reclaimed materials become more and more popular, it’s no surprise that we’re seeing everyday items made from bike parts. A wheel becomes the base of a table. An old helmet is used as a planter. A bike tube lives a new life as a messenger bag.
But you don’t have to be an expert designer to turn your used bike parts into new creations. Many bicycle upcycling projects are simple, and you’re limited only by your imagination.
Bike Tubes
Let’s start with the easiest of bike parts to upcycle: the tire tube.
First things first: if you have a punctured tube, do what you can to patch it. Always try to repair first. But when a tube is totally blown or shredded, or you’re just stuck without a patch kit, don’t throw those bike tubes away. If you’re a fan of upcycling, bike tubes are like black gold.
If for some magical reason you or your friends aren’t prone to flats, you can also ask your local bike shop for their throwaways. Much better to upcycle them into something new than have them destined for the trash.
As a material, bike tubes are very friendly. Soft and pliable, they are easy to cut, and while from afar they may look like a dark metal, they’re lightweight and flexible. This makes them ideal for making a variety of things, from bracelets to bike bags. You can even cut them into long strips and knit with them. In this way, the options for bike tubes are more or less endless.
To prep bike tubes for use in any project, cut the tube lengthwise down the middle, so that you end up with one long, wide band. Wash the tube with warm water and soap and hang to dry. Once dry, the band can be rolled up and held together with a rubber band for easy storage. This also helps to keep the tubes flat, which makes measuring and cutting them a little easier.

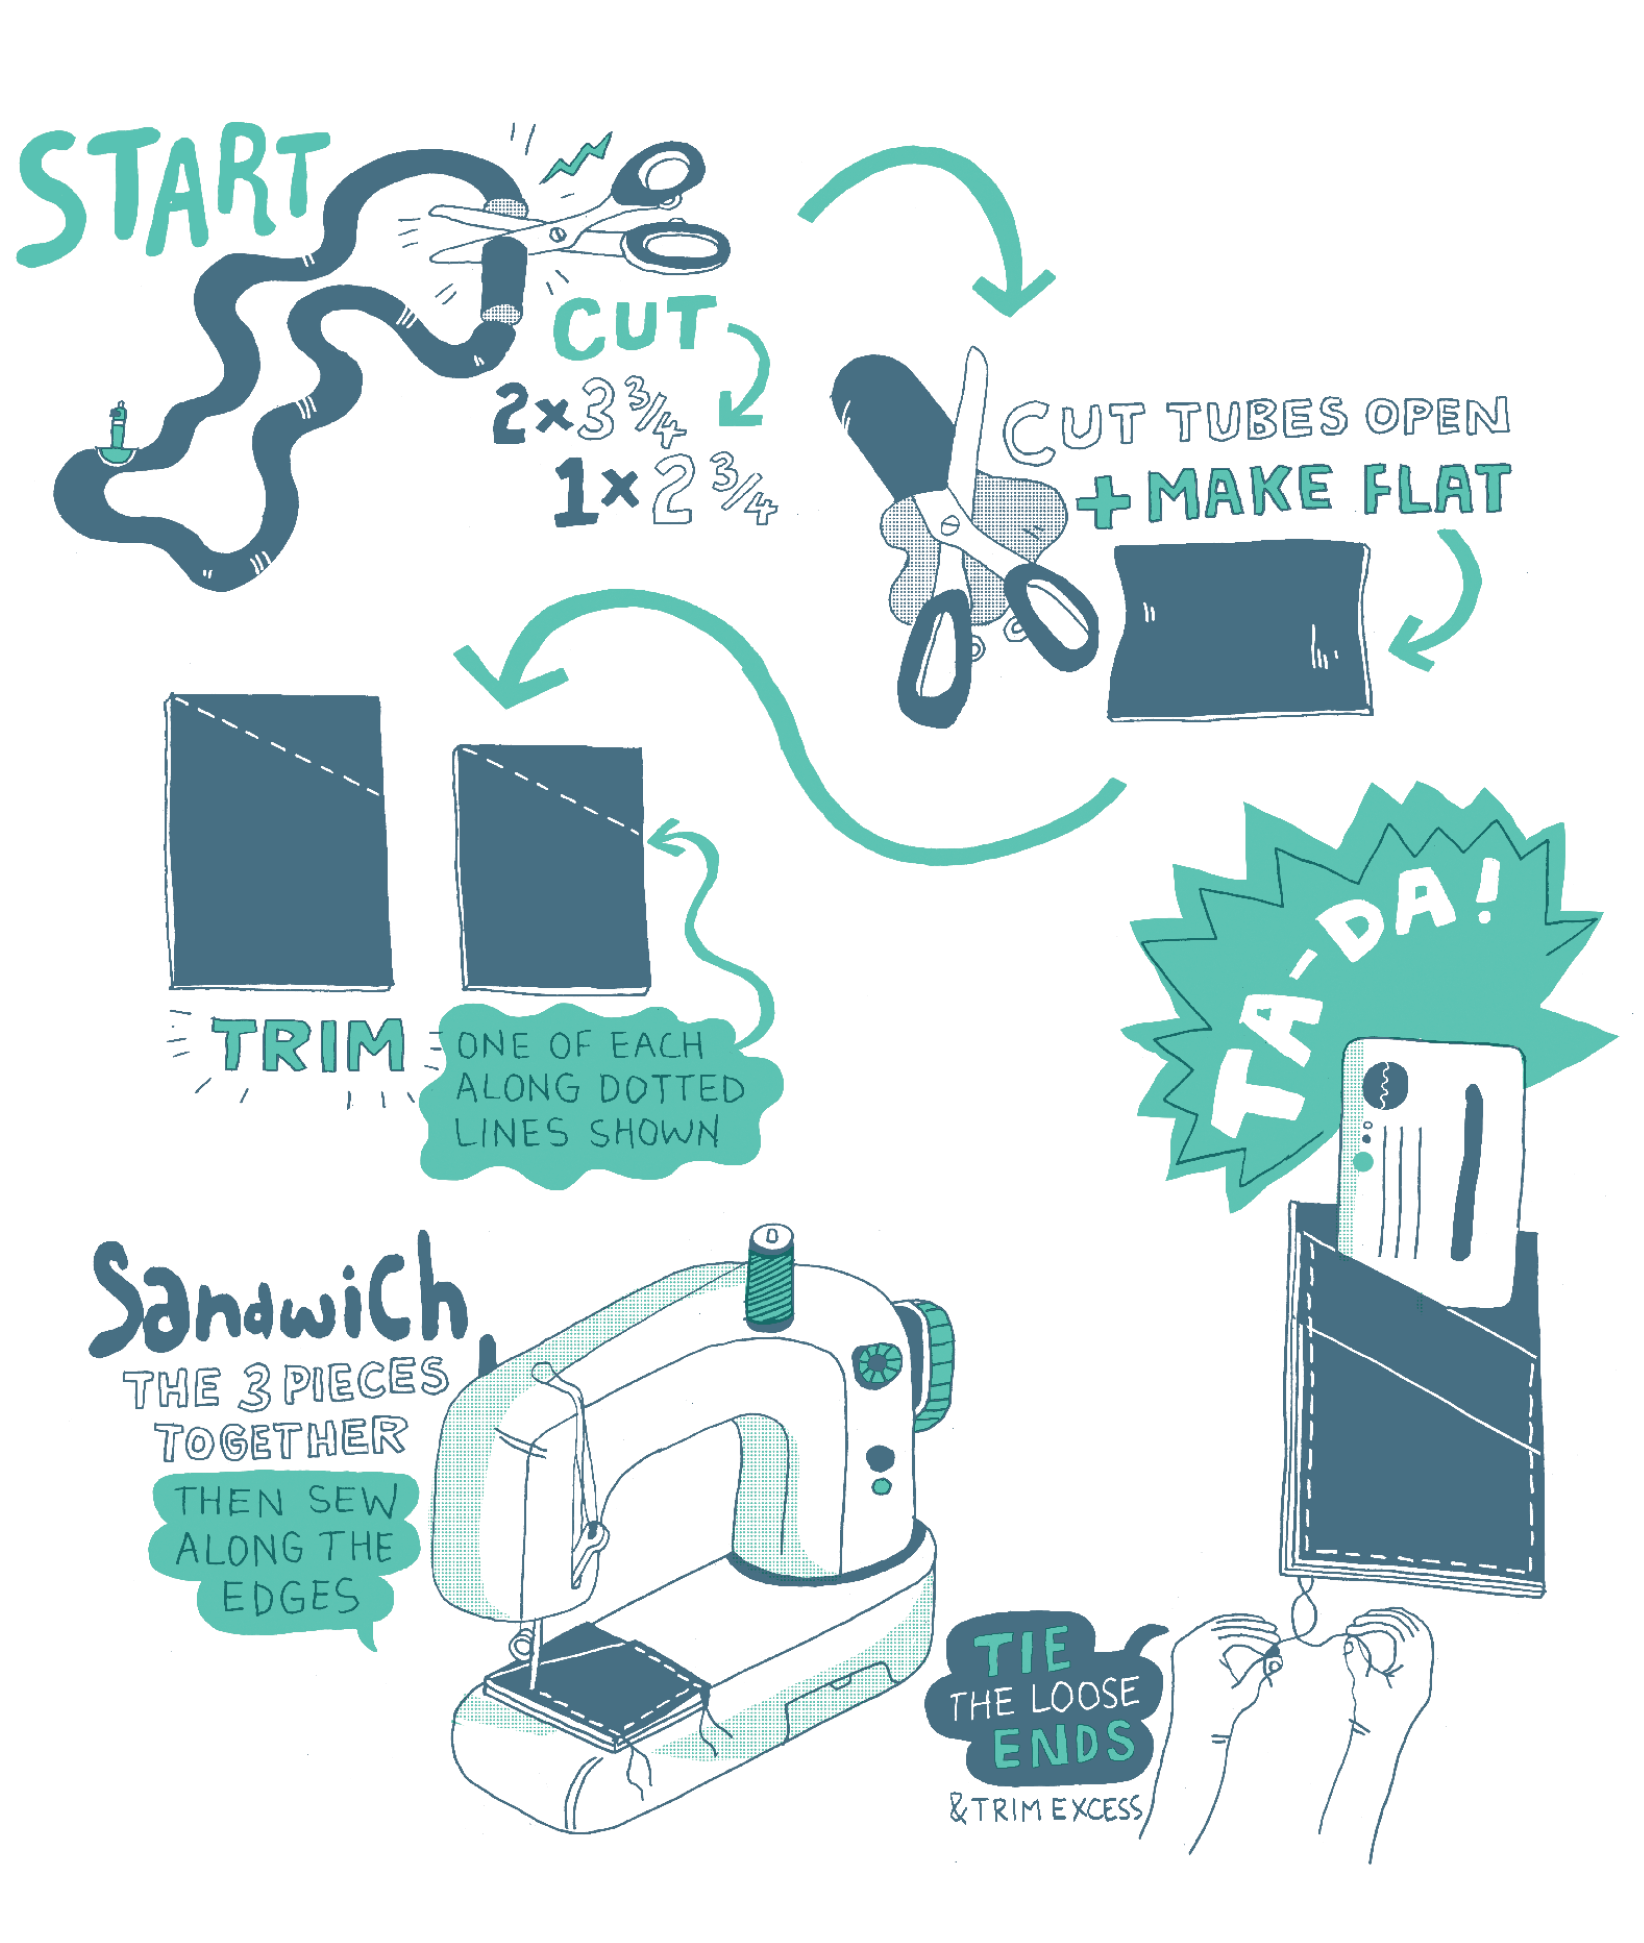
There are many ways you can sew a wallet, but here we stick to a simple, nonfolding design that’s big enough to carry a few credit cards, your driver’s license and insurance card, and some cash. For this project, wider tubes, like a mountain bike tube, work best. Bike tubes can be hard to sew in a regular sewing machine, so before you start, make sure you have the right equipment. If you don’t have an industrial sewing machine, there are a few tricks that will make sewing bike tubes easier. You can use paper on either side of the bike tube to help feed it through; another easy option is to buy a Teflon, or nonstick, presser foot, which is made to sew difficult materials like suede. You also want a needle that can handle the bike tube, so opt for a sewing needle that is made for tougher, thicker fabrics like denim. The thread tension may need to be adjusted, so do a sample first before you sew your wallet. You can choose the color of thread, but note that black will match the wallet and hide sewing mistakes, while color will make for a fun detail but mistakes will be more noticeable.
TOOLS
Bike tube
Scissors
Sewing machine
Thread
1→Cut three pieces of bike tube:
Two pieces, 2¾ inches x 3¾ inches (70 x 95 mm)
One piece, 2¾ inches x 2¾ inches (70 x 70 mm)
2→Place one of the larger rectangles vertically so that the outside of the tube is facing outward and the short side is at the top. On the right edge of the rectangle, measure ½-inch from the top and mark with a pencil. Starting at the top left edge, cut a diagonal line across to this point. Do the same with the small square, being sure to face the outside of the tube toward you. This cut will allow easier access to your cards and cash.
3→Place the rectangle with the diagonal cut on top of the other rectangle piece, so that the insides of the bike tubes are touching. The bottom edges and sides should be aligned. Adjust the stitch length on your sewing machine to be longer than usual.
4→Leaving a border of about ⅛ inch, sew the two rectangles first, sewing around three edges, leaving the side with the diagonal cut unsewn. Then add the smaller piece, with bottom edges aligned and the diagonal edges parallel. Sew a second seam close to, but not on top of the earlier one. If you have an industrial sewing machine, you may be able to sew all three layers together at the same time. Do not reverse to secure the thread ends; knot them instead. If you have used paper to feed the wallet through the sewing machine, wet the paper over the seams to make it easier to pull off without disturbing the stitches. Voilà!
For anyone who likes to wear big earrings, these are lightweight no matter their size, which means your ears won’t get weighed down. Note that because of the nature of the bike tube, they will curve over time.
TOOLS
Bike tube
Scissors
X-ACTO knife
Hook earring wires
Pliers
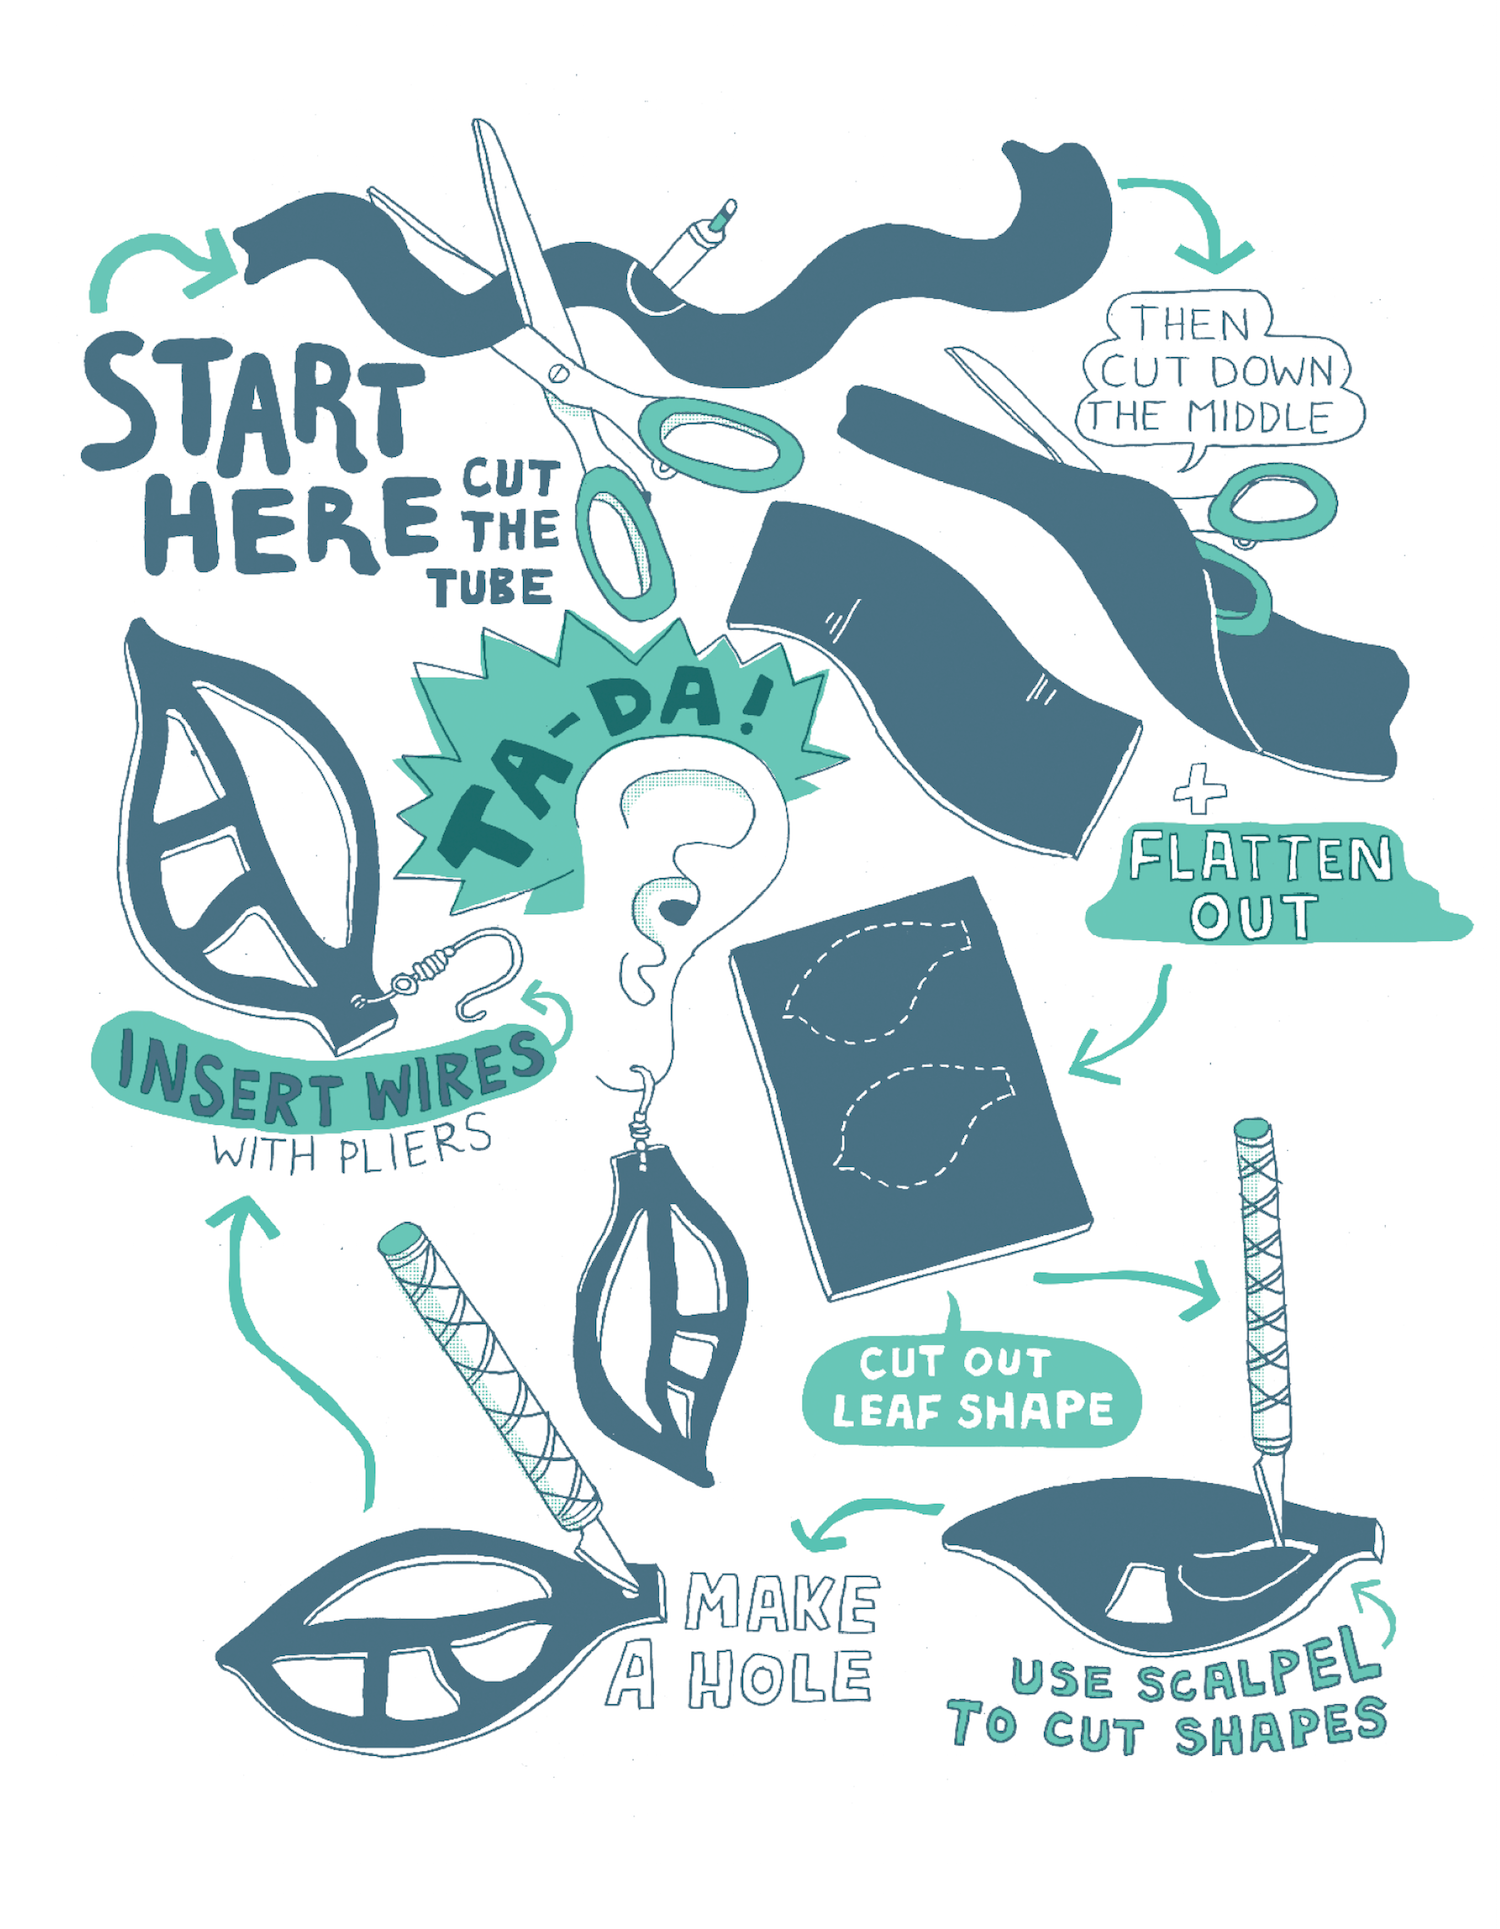
1→Using scissors, cut the earring shape out of the tube freehand, or use a paper stencil to help guide you. Think about how long and how wide you want your earrings to be. Note that, because of the bike tube’s inherent tubular shape, you will get a bit of a natural curl, so while flat, wide earrings may look good right when you cut them, they may not stay that flat for long.
2→Cut a design with finer cuts and straight lines in the inside of the earrings with an X-ACTO knife.
3→Once the design is cut out, use scissors or an X-ACTO knife to make a small hole at the top of the earring. With the pliers, bend the earring wire back so that you can easily insert it into the hole.
4→Wear your earrings with pride or gift them to all of your bike-loving friends or those who need inspiration to get on two wheels.
Spokes
Did you bend or a break a spoke that has to be replaced? Don’t throw the old one away! Just like bike tubes, bike spokes can be reused as well. If you have some heavy-duty pliers and a bit of arm strength, they can be bent into a variety of things, but even unbent they can be useful. Here are a few uses for both bent and unbent spokes.
USES FOR OLD SPOKES
Skewers → Thread marinated vegetables onto (clean!) old spokes (which pack easily and are great for bike trips) and pop them on the grill. Then be sure to invite all your bike friends over for a true feast.
Key chain → Bend the spoke into a funky shape (rectangle, star, and so on) and use as a key chain.
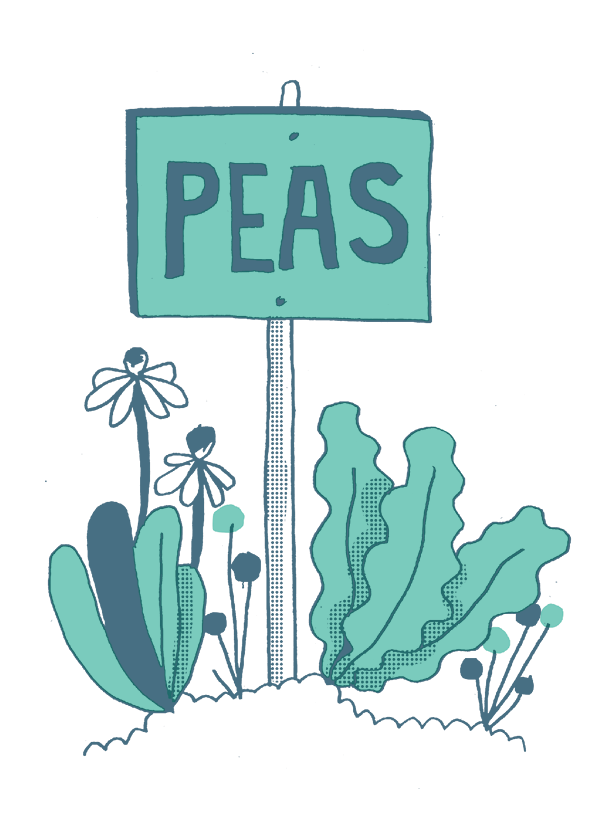
Plant markers → With a spoke and a piece of bike tube, you can label all your garden plants. Cut a rectangle out of a bike tube, then use a permanent white marker to write the plant name. Cut a small hole in the top and bottom of the rectangle, then slip the bike spoke through it and push it into the ground near the plant.
Oversized paperclips → Bend the spoke into a paperclip shape, and you can use it as a bookmark or even a money clip.
Cocktail stirrer → Give it a good cleaning first, of course.
Want to add a little flair to your bicycle? Make some spoke cards. Some people hate them, some people love them, but there’s no denying that spoke cards do bring a little personality to a bicycle. Spoke cards can serve a variety of purposes: marking bikes taking part in a bike race, a guerilla marketing tactic, or even just simple art. Making your own is as simple as designing a card, laminating it, and wedging into your bike spokes.
TOOLS
Paper
Scissors
Laminating sheets
1→Design your spoke card to be the size of a playing card, 2½ by 3½ inches (64 x 89 mm). The design can be a picture, a map of a bike route, an advertisement for your pedal-powered business, whatever!
2→Print your design and cut out the card.
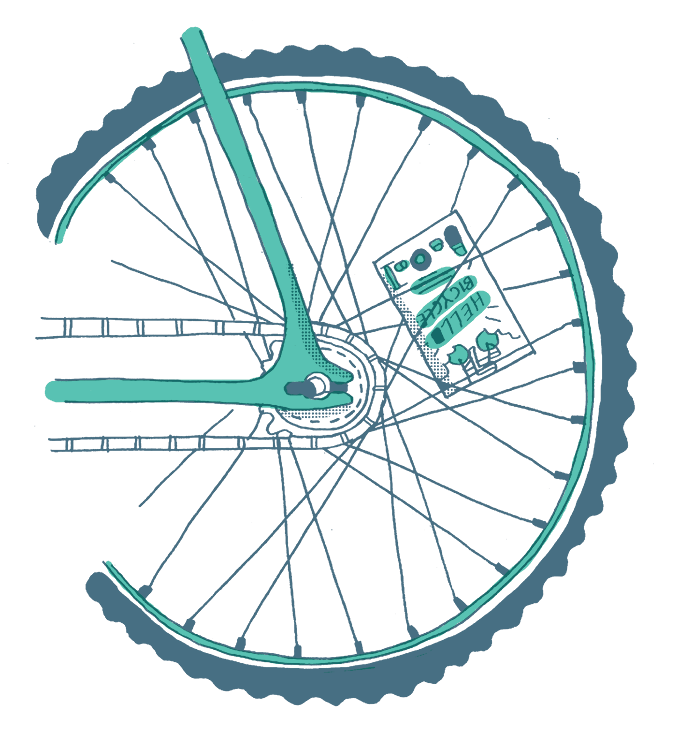
3→Laminate, then cut out the card, leaving a small border of the lamination sheet around the card to protect it.
4→Push the card in between the spokes, toward the hub so it is wedged securely in place.