Survive: Mountains (2016)
SURVIVAL SHELTERS
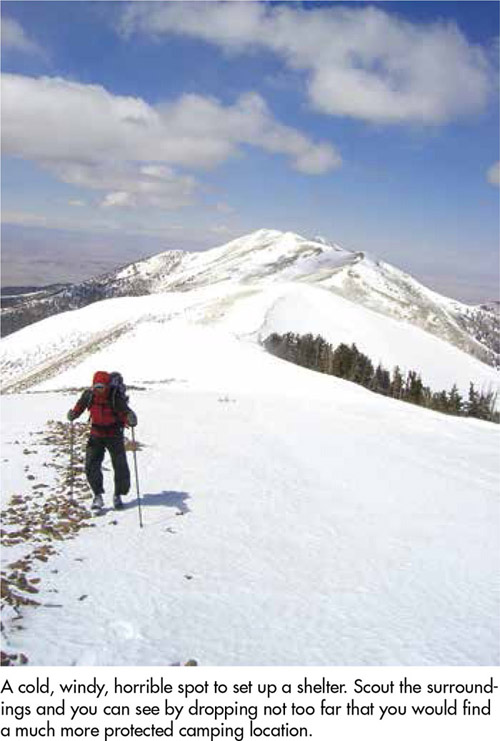
The weather can get nasty in the mountains and exposure is a serious threat, especially in the winter. It is critical to make a good shelter in a protected location when the weather is not ideal. Often the temperatures drop significantly overnight in mountainous regions. Make sure to find a good, safe, and protected location. Stay away a little from bodies of water, meadows, and low depressions where cold air will settle at night. Often the temperature will be over 10 degrees colder in these places. Setting up shelter under a nice tree will help maintain a warmer temperature, since the tree will prevent the long-wave radiation from the earth from escaping into the night sky. Also be mindful of high ground, as the winds are usually stronger.
A solid shelter should be big enough to sleep comfortably in, but not so big that you’ll have to warm excess space. It is important to get decent sleep to maintain a high energy level, a clear head, and a positive outlook.
Deciding what type of shelter to set up requires evaluating the terrain, weather, climate, and available resources. If something unexpected has happen like a car or plane crash, your best bet will usually be to use those materials to create a shelter, as long as it is safe from fire or leaking flammable fluids like gasoline.
Also think about how much time investment you should put into constructing the shelter. If you only expect to be out a day before being rescued, why create a bombproof shelter? Likewise if you expect to try to walk out or seek a new location the next morning. Building a good shelter is a considerable time commitment, so you may be better off constructing a series of temporary shelters if you intend to walk out. Also keep in mind how much daylight you have left when deciding what type of shelter to construct, as the last thing you want is to leave the site to collect resources and be unable to find it again.
Now here’s how to set up a shelter with only what you will find in the forest.
SUMMER
In the summer, even if the temperatures are warm, they can easily plummet in the mountains when inclement weather arrives. Hypothermia is common in the summer as well. The key to remaining warm is to stay dry. As a result, it is important to have a shelter in place in case the weather takes a turn for the worse.
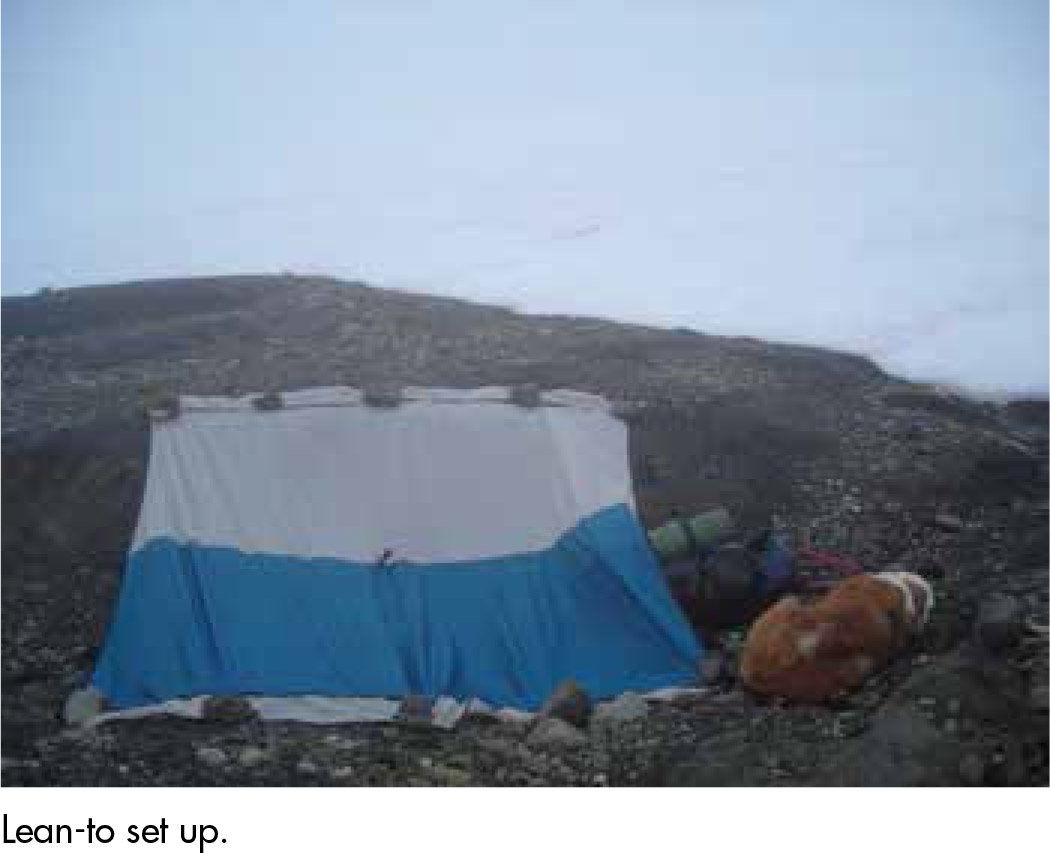
If you have a poncho with you, you can easily make a poncho lean-to and it will be a simple solution. Make sure to face the back of the poncho into the wind as you choose a site to set up. You don’t want the wind blowing into the raised side of the lean-to. To construct this shelter, find trees or a downed log. Attach cord to one side of the poncho and tie off to the trees or log. Stake or anchor the other side of the poncho into the ground. You will now have a relatively protected area underneath the poncho. To adjust the “living space” and headroom under the poncho, just raise or lower the attachments to the trees. You can also add a branch or stick in the middle to create a center support. Just make sure it isn’t sharp and won’t puncture your poncho.
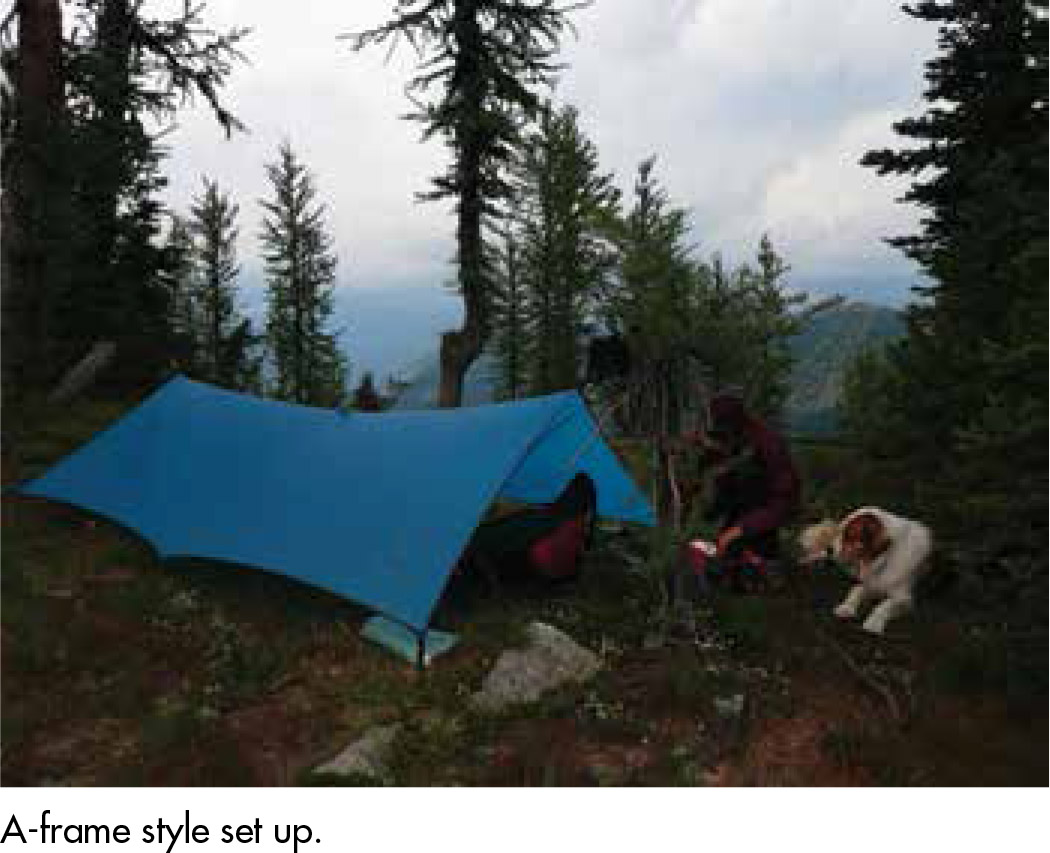
You can also set up a poncho in an A-frame style by attaching the center to two trees and anchoring the corners. This provides better coverage in storms.
The easiest way to “build” a good, weatherproof shelter if you don’t have a tarp or poncho is to find a rock alcove or cave. Another way is to pile rocks to construct a barrier on the windward side to prevent the wind from blowing in. If precipitation is imminent, you can also add additional walls and drape pine boughs or other sticks and broad-leafed foliage across the top to block the rain or snow. You can also look for downed trees to use as the support for the roof and pile sticks and foliage to make an A-frame-style structure or a lean-to.
It will save a lot of time when building if you can find a good log or start for the shelter, a relatively flat foundation, and an area with an abundance of good materials. Try to locate your shelter fairly close to a water source, near the materials that you will need to build it, and near an open area. You want to be safe from the elements and exposure but don’t want to hide your location so well that you would be overlooked by a search party or aerial search. Make sure to leave signs and signals outside your shelter and in the open area.
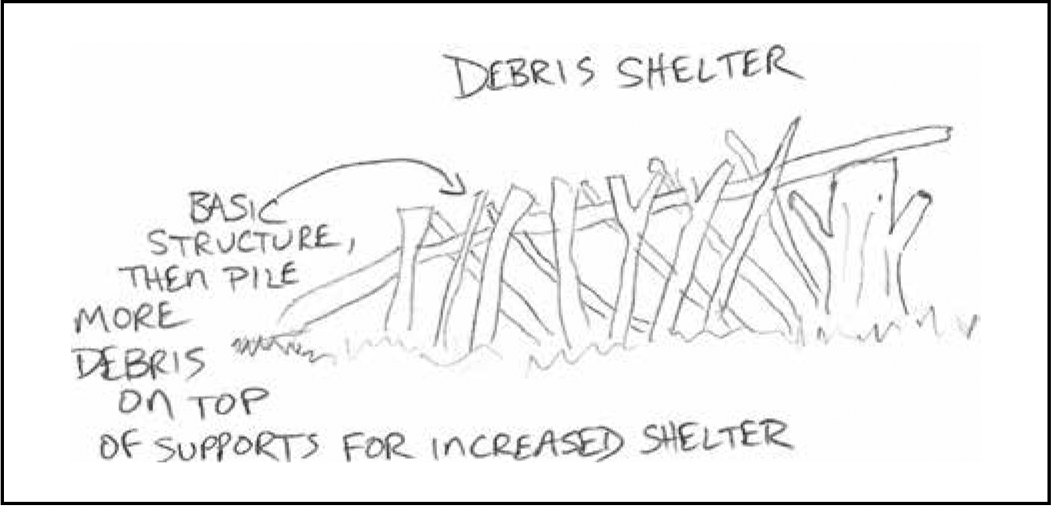
To build a debris shelter from tree branches, start by creating a tripod with two short branches and a long branch from the ridgeline. You can also raise the end of the branch away from the tripod to create a longer elevated area inside. Pile branches and limbs against the ridgepole, ensuring that it is stable, creates enough space on the inside for your body, and is steep enough to shed rain. Add other finer debris in the opposite direction. Then pile grass, pine needles, and leaves all over the top. The thicker the better, as this will also create insulation to keep your body heat inside the shelter. Finally add more sticks and branches over the debris to keep the smaller debris in place if it is stormy.
WINTER
In the winter you can look for the same opportunities that may arise by using a natural shelter, but you can also make one using the snow. Snow is a very good insulator. This can be an advantage to help keep the temperature just below freezing inside your shelter so it won’t plunge into the single digits or even below zero.
You can make a snow cave, igloo, trench, or quinzhee. Each is a great option for winter camping; however, they can be time-consuming to make. If you’re building it by yourself, allot about 2 to 3 hours. A trench is the fastest system to build. An igloo is the most time-consuming and not the best method for lightweight hiking and backpacking; it can require a snow saw and takes a lot of work to pack the snow. A quinzhee, or quinzee, is basically a snow cave, except you pile snow into a dome to make the cave because there isn’t enough snow to dig a cave out. If you’re making a quinzhee, make sure the snow settles enough to bond together. This can take a few hours, so you’ll need to check it over time. Without proper snow consolidation, the roof may collapse.
Snow caves require a lot of snow and a spot that’s out of avalanche danger. In order to find a spot safe from avalanches, look for a slope that is gentler than 30 degrees. Also take caution of being below steep slopes, even if the terrain is mellow where you are, and below cornices.
Look for a snow bank or drift to build a snow cave in. Start by digging a tunnel for the cave. The tunnel should be wider than your shoulders and should slope up toward the cave. That way cold air will settle outside the cave opening. Hollow out a cavity in the snow for the cave. Make it tall enough to sit upright in and big enough for you and your companions to lie down. Pack the roof of the cave, and smooth the surface so that it doesn’t drip on you or your gear.
+Tip: If new batteries aren’t working in winter, it’s most likely because they’re cold. Warm them up in an inside pocket or close to your skin. You may also want to carry them in your pocket for a while when you know you are going to use your electronics.
+Tip: Keep in mind that you will lose as much as 80 percent of your body heat to the ground when you are sleeping. Use an insulating material like leaves or pine boughs to reduce this heat loss and sleep better.
If you have space in the cave, you can make benches out of the snow, keeping you off the ground and above some of the cold air. Poke a trekking pole, ski pole, tree branch, or avalanche probe through the ceiling of the cave for ventilation. Cover the floor or the benches with waterproof material. Put your backpack in the doorway to block cold air and keep the cave warmer.
Snow trenches are the easiest and fastest winter shelters to make, but they’re not as comfortable or as warm as a snow cave. Also, they’re not recommended if you’re expecting a lot of snow, because they don’t have strong roofs. Dig a trench at least 3 feet deep, 6 feet long, and 3 to 4 feet wide for each person, with an entrance at one end. Lay your poles, skis, or smooth tree branches across the width of the trench. Spread your tarp, rain fly, or emergency blanket over the trench. Anchor the sides by covering the edges with snow, tree branches, or rocks.
DRYING AND PREVENTING GEAR FROM FREEZING IN COLD CONDITIONS
Eventually your winter gear is likely to get wet, whether it’s your shoes from hiking through snow all day or your gloves, socks, or other layers of gear. Wet or moist clothing leads to losing body heat and the potential for hypothermia and frostbite.
Since winter temperatures usually don’t get above freezing in the mountains, the only way to dry gloves and clothes is to wear them, hang them in your shelter, or sleep with them in your sleeping bag. When I have moist—not soaked—clothes at the end of the day, I prefer keeping them with me in my sleeping bag. I’ll either wear them to bed underneath dry layers or put them in dead space within the sleeping bag.
Frozen footwear is painful to put on and wear. To keep your boots, shoes, or boot liners from freezing overnight, sleep with them in your sleep system or sleeping bag’s foot box, or a dead space in your sleeping bag. If your boots are wet, put them in a waterproof bag, in a pack liner or stuff sack, before putting them in your sleeping bag. Shake any dirt, mud, or excess snow off before putting them in your sleeping bag or in a stuff sack. Turn your pack liner inside out so that when you pack up the next day, you are placing your gear into the dry side of the pack liner.