Greenhouse Vegetable Gardening (2015)
EARLY HARVESTS IN THE GREENHOUSEEven when nights are chilly, the air and soil warm up quicker in the greenhouse than outside; by taking advantage of this warmth, you can easily harvest young spring vegetables several weeks early. Not in large quantities, but still—what a treat! |
9 |
In order to do this, you’ll have to start the seeds in store-bought planting or sowing soil, at room temperature, and leave the plants inside to germinate. Afterwards, place the seedlings out in the greenhouse’s warm soil in early spring, and if you’re lucky the spring weather will bring forth uncommonly good produce.
Spring’s first tender vegetables
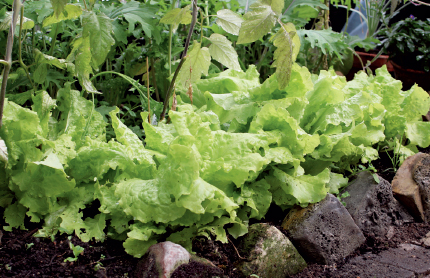
The plants most suited to early sowing and harvesting are also the most common ones, which makes their seeds inexpensive. Loose-leaf lettuce, arugula, spinach, sorrel and radishes are all delicate first spring vegetables. A salad made from grocery-store iceberg lettuce, with added freshly snipped greens from the greenhouse, is a perennial spring delicacy. Scallions can also be sown early; their leaves impart a mild taste of onion no matter how tender they are.
Lettuce can be picked carefully, leaf by leaf, and then the plants are left alone to mature. Soon enough there will be plenty of leaves to harvest—depending on the weather, naturally. If it’s sunny and warm everything will grow like the proverbial weed; if it’s chilly, things will grind to a halt. When the time comes to plant tomatoes and cucumber where the lettuce grew, we can plant new lettuce seeds outside. Another option is to plant new lettuce in between the larger plants, but make sure that the area is clean and free of debris, and keep an eye out for, and remove, slugs.
Sowing seeds
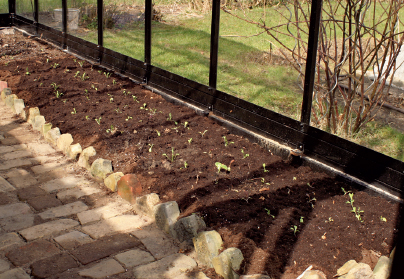
Sowing seeds in anticipation of an early harvest is done the usual way—in a pot or a flat. Lettuce, spinach, onions and radishes are good cold-weather crops and only need between 5°C to 7°C (44°F to 45°F) to germinate. They can grow faster in slightly higher temperatures, but at that point the room might be too warm. Afterwards, the plants are potted up into small pots in the greenhouse, and then later transplanted into beds or bigger pots. The ideal condition is when the nights are frost free or around 0°C (32°F) when starting cultivation.
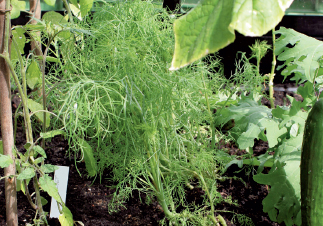
Dill for an early harvest is best grown in the greenhouse.
Another way is to sow the seeds in larger, shallow flats with sides about 10 cm (4”) high. Fill the flat with soil and pat it down; tamp it down a little more in the corners. Fill it with soil up to within 1 cm (about 1/4”) of the rim. Water the flat or pots with lukewarm water from a watering can with a spray nozzle. Then sow in planting soil, leaving plenty of space between the seeds, and cover the flat or pots, following the instructions on the seed packet. Let the seeds germinate and leave the seedlings to grow in the flat/pots. When the seedlings have reached a few centimeters (an inch or so) in height, water them with liquid fertilizer. This way the whole cultivation is done in the flat, and in the fall simply empty the soil and plant leftovers into the compost pile. You can also sow the seeds in cell trays and then plant out the seedlings in the garden bed.
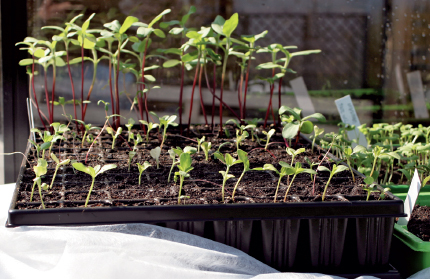
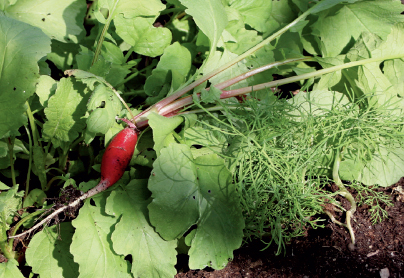
Early sowing and planting in the greenhouse brings on an early harvest of easily grown vegetables, such as radishes.
A little extra
There are more plants that can be grown in the greenhouse that produce earlier harvests—keeping in mind that ‘early harvest’ doesn’t mean the same thing all over the country. In the north of Sweden you can grow pole beans and peas in the greenhouse for early harvest; they grow quickly and easily around twine that’s attached to the ceiling. Sow the seeds one by one in slightly larger pots and then plant them in the ground bed when the soil has warmed up. Fresh dill to sprinkle onto new potatoes, basil, and other herbs are both delicious and convenient to have on hand, and are easy to grow.
Pre-sprouting potatoes
The advantage of a greenhouse is that it’s a relatively warm and light environment, which in turn makes it a perfect place to pre-sprout potatoes. The best way to do this is to place the potatoes directly on the soil—a bag of planting soil works well. Place the potatoes on a 5 to 10 cm (2” to 4”) layer of damp soil and move them into the light, preferably where it’s a bit cooler, to start them sprouting. When the time comes to plant the potatoes, they will have become sturdy plants complete with roots and fine chubby green shoots. They’ll grow and yield a harvest long before non-sprouted potatoes.
Pre-sprouting potatoes are especially important now that the risk of late blight has increased. It attacks the foliage, which dies down; the grease-like fungus travels down the stem to the potatoes, and becomes potato blight, making the potatoes inedible. Therefore it’s critical that the potatoes get their start quickly, which they will do if they’re pre-sprouted.
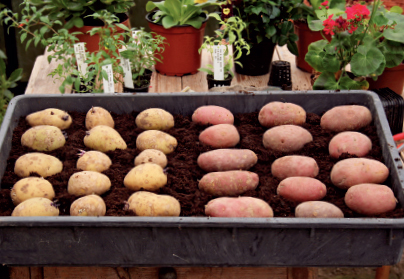

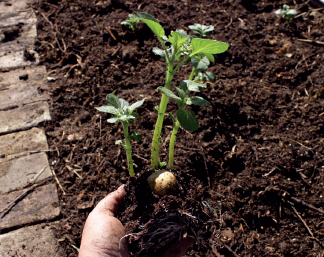
Potatoes undergoing pre-sprouting. They will be planted in a bucket in the greenhouse for an extra early harvest. Pre-sprouted potatoes grown outside will also bring on a much earlier and disease-free harvest.
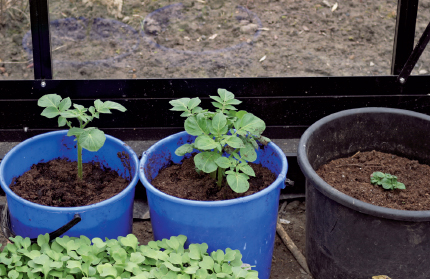
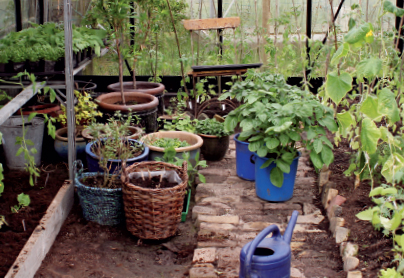
Potatoes grown in buckets
Potatoes can be grown in one or two buckets. By pre-sprouting the potatoes and then planting them in buckets, you can bring on an extra early harvest. Buy the early and quick type of certified seed potatoes, and grow them according to the instructions below.
Place the pre-sprouted potatoes in a bucket that has a 10 cm (4”) bottom-layer of soil. Don’t fill the bucket completely at first - simply cover the potatoes with soil. Water, then water again once the soil has dried up. Place the bucket in the greenhouse. As the potato tops grow, add more soil to the bucket until it’s full. The potatoes will be ready to harvest when the potato plant flowers—just tip out the contents of the bucket for a saucepan full of potatoes that need very little cleaning.