Greenhouse Vegetable Gardening (2015)
|
19 |
CARING FOR THE GREENHOUSEA greenhouse needs care and looking after, just like any other building. Tidying and cleaning are integral and necessary steps of caretaking. Cultivation only becomes more difficult if you neglect these tasks, and it increases the likelihood of pests and diseases gaining a foothold. |
The greenhouse needs to be cleaned, partly to let in more light during the darker seasons, but also to keep pests and diseases at bay. Insects tend to collect in nooks and crannies—they lay eggs, which then turn into pupae that emerge the following year. Diseases may lurk in the soil, so it needs to be changed out each year.
A greenhouse with an aluminum frame is easy to keep clean, but it should still be rinsed down every so often. A wooden frame requires the same maintenance as any other wooden exterior, including sanding and painting at even intervals. No matter what material the frame is constructed with, the greenhouse’s cover material has to be kept clean; dirt, bird droppings, plant debris, soot, and miscellaneous particles landing on the greenhouse need to be washed off. This can be done any time, and preferably several times a year. Most important, though, is to make sure that the greenhouse is clean in the early spring and fall.
Fall cleaning
Fall cleaning is the biggest chore of the year, and one of the few ‘musts’ of caring for the greenhouse. Whether you start working on the interior or the exterior first, however, is up to you.
Exterior
Most greenhouses have some type of drain or gutter along the roof’s edge. Start by cleaning this out by hand; you can also pressure wash it with a hose. Check that the rubber edging (if there is one) doesn’t come loose. When the gutter is empty of debris, you can give the whole greenhouse a good rinse. An excellent tool for this job is a pressure washer, but use it carefully, as it can put undue pressure on the glass panes. It’s often enough to simply give the glass or plastic a thorough rinse.
The lower part of the wall that’s nearest the ground often gets very dirty, even on the outside. To limit the spattering of soil along this area, it’s a good idea to place stone slabs or gravel along the perimeter when you’re building the greenhouse. This lower part is also the most shaded and dampest part of the structure, which makes it an ideal environment for mold and moss to thrive; rinse them off and then scrub the wall with a brush or a sponge, and rinse again. Repeat these steps several times—the moss comes loose pretty easily when it gets wet. There are special products to deal with moss and mold removal.
Once the greenhouse is thoroughly cleaned, it’s time to check the condition of the weather strips and clamps holding the glass panes in place; this is done so they stay fastened securely and fit tightly. Gaps that leach in cold air are difficult to fix once temperatures go below freezing, and weather strips around the door are especially vulnerable to wear and tear. Remove sand and debris from doorjambs and tracks. Depending on your greenhouse, it might be necessary to grease the hinges or use silicon spray to make the door open and close more easily. Check also around the base and foundation of the building to ensure no gaps or dents let water seep in or pool inside while the greenhouse is being hosed off.
Interior
Cleaning starts by removing everything that can be shifted out of the greenhouse. First to go outside: the plants to be saved in addition those to be disposed of. Pots, worktables and furniture are next, tools too. Bring out the window openers from winter storage, as well as strings, ropes, and clips, and throw away any plant debris. Immerse drip irrigation systems, hoses, and drip points in a large bucket filled with warm cleaning water.
Place strings and ropes and clips in hot water. Rinse and change the water several times, always using hot water to kill pests that might have sneaked onto the clips; they won’t survive the hot water. Rinse your drip and soaker hoses the same way several times to loosen dirt, soil, and soil particles. If the water is hard and limy, soak the hoses in a citric acid solution to loosen mineral deposits. After soaking, rinse the hoses several times with clean water.
In the spring, recheck all the hoses and drip points before attaching the drip irrigation system. Blow through them to make sure there are no clogs. Until then, keep them, along with the window openers, stored under cover in a frost-free spot—preferably inside.
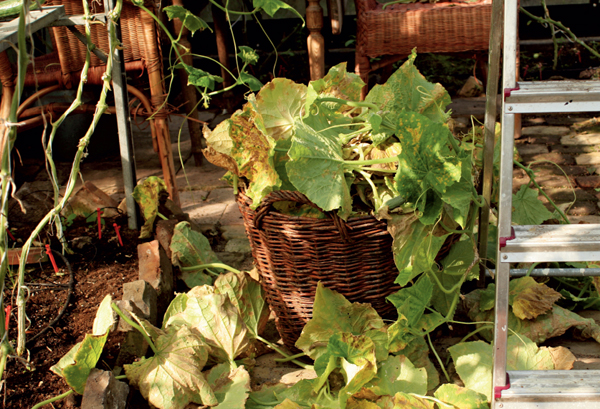
Plants are not the only things that thrive in the greenhouse.
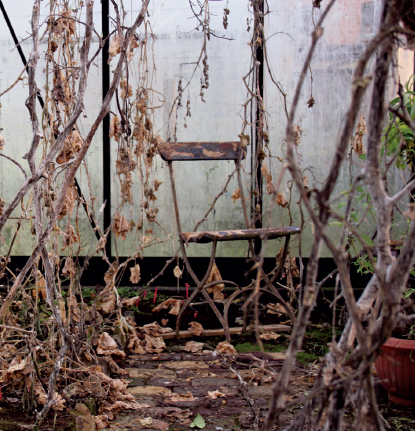
Fall cleaning in the greenhouse starts with the removal of all wilted plants.
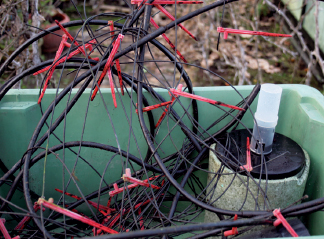
Hoses, drip irrigation, and fertilizer containers should be cleaned and then stored in a frost-free area.
Houseplants
All your plants need to be taken outside the greenhouse to be rinsed off. Be extra careful to spray underneath the pots and on the underside of leaves. All diseased plants—unless extremely rare or truly special—should to be discarded. Otherwise you run the risk of spreading the disease throughout the greenhouse, in which case you’ll have to discard all the plants. Once the plants are rinsed, treat them with horticultural pesticides, if needed, and leave them outside for a while in a sheltered area. You can place diseased plants in a warmer spot to make an infestation run its course, and then run another treatment.
Plants that are going to overwinter should not be potted up until in spring. There's no point in adding new nutrient-rich soil when the plants go dormant through the winter.
Annual plants in pots are to be emptied, soil and all, onto the compost pile. Don’t save the soil in the pots for next year’s plantings. The soil is nutrient poor and compacted and doesn’t reach up to the top of the pot any longer. The plants have consumed the soil, so they need to be potted in new soil in the spring. Don’t just add new soil on top of old soil. That's not enough to give the plant a favorable start.
All spent soil that ends up in the compost bin is reusable, but not right away. It needs to be refreshed over a period of time; if left for six months and mixed with other composted materials, it’ll be much healthier and can then be used in beds and borders.
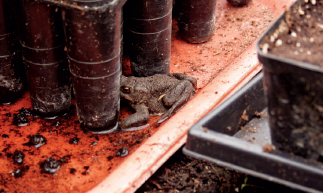
Wash the empty pots out, preferably in hot water. Check carefully for slugs, especially at the bottom of the pot where they like to set up house. Leave the pots outside to dry until the greenhouse is clean and ready for them to come back in.
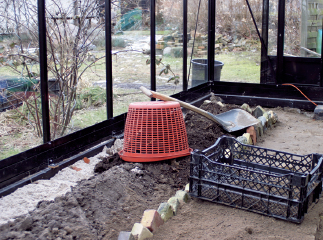
Change the ground soil and/or add soil from the compost pile.

It’s important that the glass panes are clean so they let in as much light as possible.
The ground soil
Unlike other dirt, the soil in the ground of the greenhouse needs to be replaced as early as fall. The earth you remove can be recycled in the vegetable patch, the compost pile, or used to cover roses and to fill in around bushes and in beds. While there is nothing inherently wrong with the soil used for tomatoes and cucumbers, it’s best not to grow the same vegetables in the same soil in consecutive years, as pests that feast on tomato and cucumber plants might overwinter and attack the new plants in the spring. For this reason it’s better to refresh at least some of the soil each spring.
You can fill up with a good amount of composted soil in the fall if you like, but not until the fall clean up chores have been seen to. Compost is beneficial and keeps the soil healthy; it even contains nutrients. You don’t have to pass the soil through a sieve if there are some larger pieces in it. If composted soil is added in the fall, those chunks will have enough time to decay before spring. Plus, if you add a 10 cm (4”) layer of commercial bagged soil on top, you’ll avoid a lot of weeds.
Composted soil is good for the plants and minimizes the risk of disease, but it carries one big disadvantage: it might contain slugs. Slugs feel right at home in compost since they live on plant debris. Check carefully for and kill all slugs immediately, and spread slug bait (the Swedish product called Snaileffect, for example) in the greenhouse once clean-up is complete.
Scrub and rinse
Once the ground soil is dug out and all the pots are emptied, it’s the time for scrubbing and rinsing. Wash, by working from the top down, all the edges, joints, nooks, and crannies; all corners must be rinsed very thoroughly. This will get rid of all insect eggs, pupae and larvae, as well as overwintering insects, fungal spores and the like. If the glass panes are very dirty, use a glass cleaning solution or meth spirits after scrubbing them with soft soap and a bristle brush, although try not to let too much cleaning product drip into the ground soil. Soft soap is excellent for scrubbing frames and wooden surfaces. Rinse the paths well, and leave the greenhouse to dry. It’s better to take care of this task on a sunny day to give the greenhouse a proper chance to dry out.
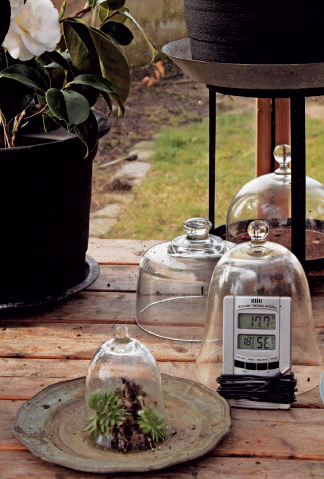
The thermometer is an important tool year round. If it is not too cold, it is often too warm.
Seal and overwinter
After this thorough cleaning, it’s time to move the plants you’re keeping back into the greenhouse, and to fill in ground soil. If the greenhouse is fit for winter use, your work is done after cleaning. Plastic bubble wrap is then used to fill in edges, nooks, and crannies. You can also make freestanding plastic tents, bubble wrap tents or tents from rigid plastic sheets. Before the winter cold sets in, make sure there’s a fan heater in place as well as adequate lighting. The thermometer should be in its place, and be visible.
Potted plants that are to be overwintered are moved back inside and placed together for protection. Some plants can be dug down into the ground and then covered with leaves. Other plants might fare better if packed up in pots or boxes with polystyrene, and then covered with burlap. Others are placed close together and then wrapped in shade fabric; it all depends on the plants’ individual needs. Everything that is moved inside must be as clean as possible, and the soil in the pots should be slightly humid, but not wet.
Winter snow
The greenhouse remains mostly dormant during the winter. Plants that are overwintering should be checked at regular intervals, and temperatures should be noted. If it snows, it’s OK to leave the snow as an insulating layer; however, the greenhouse roof is usually steep enough so the snow simply slides off. Just keep an eye on things—it’s best to sweep the snow off the greenhouse if the weather turns warmer. If the temperature rises suddenly, the snow melts and becomes wet and heavy; if left as is, it will freeze if it gets cold again, and the weight of the ice might make the glass crack. What’s more, it’s a good thing to shovel or brush the snow up against the sides of the greenhouse, where this added layer provides extra insulation and protection for the plants inside.
Spring sun
Once the spring sun reappears, it’s very important to check the thermometer and the plants. If potted, non-hardy plants have overwintered, they might begin budding green, at which point the soil needs to be humid. When warmer temperatures become more common and it’s time to start cultivating, we’ll need to start the season with a little sprucing up.
Clean the windows if needed, brush away cobwebs and insects, remove plant debris and wilted leaves, and make sure the place is clean and tidy. Inspect plants closely for pests like aphids, since all small nooks and crannies are potential hiding places for pests.
Install the window openers when the danger of night frost has passed. Until then, keep an eye on things if you have plants in the greenhouse. Temperatures can reach 30°C to 40°C (86°F to 104°F) very quickly on a sunny, late winter’s day, and that’s not good for the plants. Open the window vents manually during the hottest hours of the day, but close them as soon as the temperature starts dropping again in the afternoon. Soon a new growing season will be in full flower.