Greenhouse Vegetable Gardening (2015)
|
10 |
HOTBEDS AND COLD FRAMES“In the season when cold is the lone ruler of all growing things, we can by simple means produce the finest vegetable harvests.” This is how vividly a leaflet from the beginning of the 1920s describes hotbeds and cold frames. |
Hotbeds and cold frames are not common sights these days, and that’s a shame because they’re a convenient substitute for a greenhouse when space is limited, like in a small yard or allotment. The cost of raw materials is minimal and it makes for a relatively simple DIY project.
Hot beds or cold frames
A frame or a bed is a simple box, often made out of wood, with 30 to 60 cm (12” to 24”) high sloping sides. There is no bottom to the box, so it rests directly on the ground. The lid is a window made of glass or plastic. The volume inside the box is small so it doesn’t require much energy to heat. Traditionally, frames/beds can be either hot or cold.
A hotbed is simply a heated growing box. Early on it was heated by composting horse manure and straw together. Composting produces heat and also carbon dioxide, which plants need to grow. Today, hotbeds are heated with electrical coils similar to those used for heated flooring tiles.
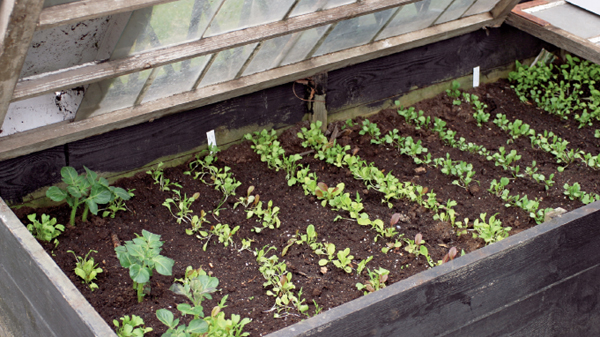
It’s easy to both sow and plant in a hotbed or cold frame for an early harvest.
A cold frame is an unheated growing box. The heat is generated by the sun shining through the glass, which is a much quicker way to warm the box and its contents than to heat up the soil outside the cold frame.
The old-fashioned method
The traditional cold frame/hotbed is built in the fall and stored away before the cold or frost sets in. A user-friendly box for today’s garden is a simple ‘raised bed’ version of a cold frame. Even though it’s a simple construction, it’s still very handy in helping to grow early vegetables when you run out of space in the greenhouse. Besides, it’s easier to cultivate vegetables in the raised cold frame compared to a conventional garden patch, as there’s little need to bend all the way to the ground. In fact, raised-beds have made gardening much more accessible to people with limited mobility and those who use wheelchairs.
The simplest way to set up your own cold frame is to buy or build a wooden raised bed border, and cover it with a plain sheet of fluted plastic to use as a window lid.
How to’s—Cultivating in a hotbed/cold frame
♦ In the fall, place the raised bed border in its assigned spot. Fill it completely with dry leaves or similar material, and cover it with the plastic sheet window/lid. The leaves will insulate the ground against the cold and prevent the frost from penetrating into it too deeply. Carpets made of mineral wool, fiberglass, or other insulating material can also be used.
♦ You can start cultivating in the frame once the spring light starts to shine. Buy bagged planting soil and leave it inside for a few days to warm up a little. Remove the insulating material from the frame and fill it with soil up to within 10 cm (4”) of the rim. Cover it with the window lid. (You can attach a soil thermometer to better gauge the warmth of the bed.)
♦ After a few days you’ll be able to sow cold-hardy plants such as lettuce, radishes and spinach. Alternatively, you can put those same plants, started from seed, directly outside.
Not only is the time shorter between sowing and harvesting in a raised bed, it’s also easier to sow and plant in one.
♦ Cover the box with the window at night, and remove the cover from the box in the morning, so that the warmth from the day’s sun can be absorbed by the soil; that way the soil doesn’t cool down as much at night. In the past, the windows were covered with straw mats that were kept rolled up during the day. Today you can use rugs, woven blinds, several layers of thick cloth, old blankets, or specially plasticized insulating mats as cover. The important thing is that they dry out completely after a rainfall and don’t stay waterlogged.
♦ Air out the box on sunny days. The small amount of air trapped between soil and glass or plastic cover can heat up quickly, and while we want to use this warmth we can’t let the inside of the box get too hot. To air it out, simply prop open the window with wooden wedges between the window and frame rim. The size of the opening will depend on how far in the wedges are pushed and which side is used.
The old-fashioned way
Traditionally, as the sun made its way across the sky during the day, the window of the frame was opened and closed at different degrees according to the time of day—a little bit at daybreak, then gradually some more, perhaps even to the point of removing the whole window at midday. Later the top was reattached but still kept open, and then closed for the night around 3 or 4 pm. This is an impractical routine to keep up with today, as it would require you to be in the vicinity of the cold frame at all times. Still, some monitoring needs to take place in the morning and at night, so you might want to use frame windows made of fluted plastic that have automatic openers that look a little like window vents on a greenhouse roof.
A classically built cold frame is 180 x 360 cm (5.9 x 11.8 feet) for three windows which are 180 x 120 cm (5.9 x 3.95 feet); or 150 x 300 cm (4.9 x 9.84 feet) for two windows measuring 150 x 100 cm (4.9 x 3.28 feet). The frame sides are usually 20 to 22 cm (8 to 8 ½ inches) high, and several frame sides are stacked on top of one another. The last one is higher at the back and lower at the front to make the window lid slope - preferably towards southern exposure so a maximum of light and warmth can enter the box. When first sowing and while the seedlings are still small, only the top enclosures of the box need to be in place—additional sides are subsequently added to the frame to make headroom for the growing plants.
Of course, nowadays the frame size can be adapted to each site, as you’re no longer dependent on window size for your cold frame top. Instead, you can use sheets of fluted plastic for your lid, so the top size no longer needs to fit a specific window measurement. Old salvaged windows are also fine to use. In this case it’s better to use several small windows rather than a single large one. If they’re made of glass they’ll be very heavy; if they’re plastic they’ll be light but might blow off and away in a strong wind. Plastic windows can be attached to the wooden side with a hinge. Pre-fabricated cold frames are usually outfitted with hinges, too.
Plants for pre-cultivation and growing in hotbeds/cold frames
Celery, Apium groveolens
Plants from the cabbage family (i.e., cauliflower and broccoli), Brassica
Cantaloupe, Cucumis melo
Cornichons, pickles, Cucumis sativus
Squash, summer squash, winter squash, Cucurbita
Lettuce, Lactuca
Ground cherry, Cape gooseberry, Tomatillo, Physalis
Potato, Solanum tuberosum—requires pre-germination four to six weeks on soil in a well-lit area
Bush tomato, Solanum lycopersicum
Spinach, Spinacia oleracea
Plants for direct seeding in cold frame/hotbed, and for early harvest
Onion, from onion sets and seed, Allium
Scallion, spring onion, Allium fistulosum
Dill, Anethum groveolens
Beetroot, Beta vulgaris
Carrot, Daucus carota ssp.sativus
Arugula, Eruca
Lettuce, Latuca
Sugar snap pea, Pisum sativum
Radish, Raphanus sativus
Spinach, Spinacia aleracea
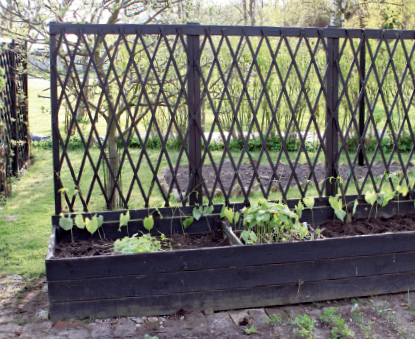
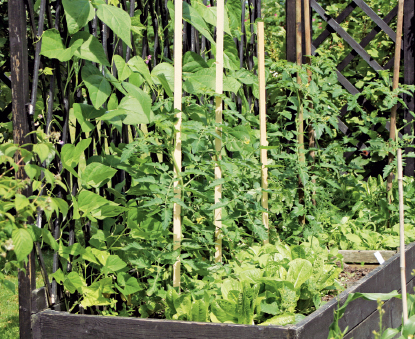
Many flowers can be cultivated in frames/beds to make beautiful bouquets. A trellis placed at the back of the frame/bed makes an excellent place for squash, pole beans, sweet peas, scarlet beans and climbing plants to grow.
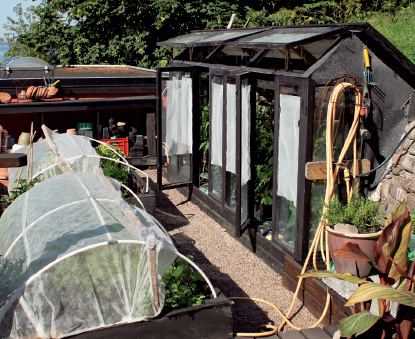
The cold frame/hotbed complements the greenhouse.
A row tunnel made of fiber cloth provides extra warmth and protection.
Summer harvest
Later in the spring, the cold frame/hotbed can be used for heat loving plants such as melon, tomato, and cucumber. Attaching an out-turning thin metal rim around the raised bed’s edge protects plants against slugs, which are a constant problem. When nights are still cold and the plants are young, cover up the plants during the night. Over the peak of summer, however, leave them uncovered day and night, without the window top on. When fall and the first frost arrive, cover the frame/bed again to prolong the harvesting season. Delicate plants like dill and beans, which are difficult to get to germinate and which need warm and loose soil, are also well suited to be grown in cold frames/hotbeds.
Frame garden
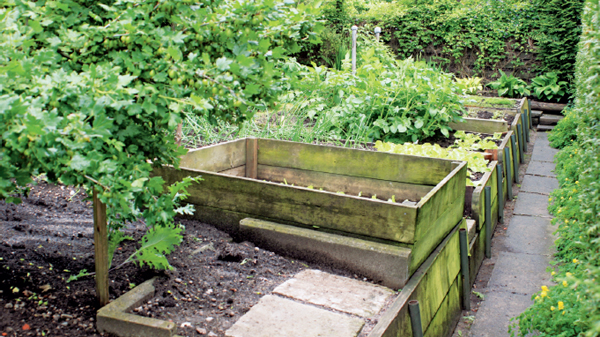
Planting in boxes, frames or pallet collars is a very simple way to garden. If you replenish them every year with bagged weed-free soil, you’ll hardly have to weed at all. It’s easy to irrigate the loose soil, so plants thrive. The growing surface is elevated, which makes the plants easier to tend to. Strawberries, for example, are rewarding to grow in a framed garden, as they otherwise require a lot of work. Pre-sprouted potatoes can be planted in the frame and can be harvested early. After they’re done, lettuce or some other fast-growing green leafy vegetable can be planted in the same soil. Herb gardens can also be grown in frames.
Several raised beds or frames can be placed side by side, and the ground between them covered with flat pavers. This makes for an easy-to-care for planting area where the warmth absorbed by the paving stones during the daytime lingers through the night. Each spring, renew the beds with new bags of healthy soil, and avoid planting the same plants in the same area two years in a row. This type of raised bed garden makes a great complement to your greenhouse.
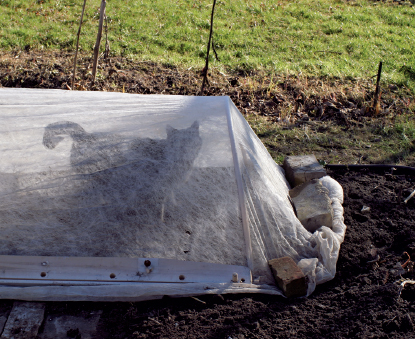
Textile covers and tunnels
Another variation of greenhouse gardening is to use growing tunnels. It’s the same idea, that is, the ground is covered to keep in the warmth. As with everything, there are more or less intricate ways of doing this. A simple option is to use hoop-shaped PVC tubing across a narrow, 80 to 120 cm (2.6 to 3.28 feet) in-ground bed. Place several tubing hoops in a row across the bed, set 140 to 180 cm (4.6 to 5.9 feet) apart. Cover them with wide, white or translucent plastic, or white floating fabric cover, to make a long, narrow tent.
Set up the tent a few weeks prior to sowing time to give the soil enough time to warm up, then move the cover aside and weed thoroughly. Level the soil, sow, and irrigate as usual. Return the cover and fasten it securely to the bed. Sand bags, stones, or tent stakes work well for this. Seedlings or plants in cell trays can also be grown in tunnels.
The cover protects the plants against flying pests like the diamondback moth and the carrot fly. To ensure full protection, the plants need to be covered during most of the summer. The cover can also be fitted across beds/frames. Tube holders are screwed down to the wooden frame itself and then the cover is draped across.
Using small moveable plastic huts to cover certain plants is another idea. An open plastic tent is perfect for bush tomatoes if their growing area is open and windy.
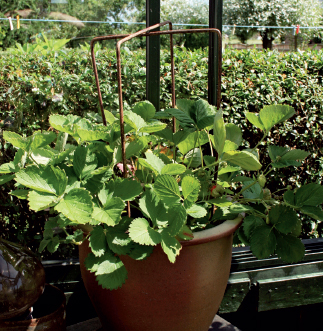
Early strawberry harvest
Strawberries are perennials. They’re planted in frames and covered during the winter and early spring with glass to make them flower early. Remove the glass to allow insects to pollinate the flowers; a floating row cover must then be used during ripening to protect against disease and pests, as well as to speed up the ripening.
In the greenhouse, strawberry plants can either be planted in large pots or in the ground. It’s very important to help pollination along early on, because bees won’t be out if it’s too cold and there won’t be any fruit. You can lend a hand with this task by using a small brush, just to be on the safe side.
The classical way to grow strawberries was in the greenhouse. At Sofiero, the Swedish Royal summer retreat, tradition held that the king be served fresh strawberries on the 1st of May.

Early summer greenery in the garden beds. In front are asparagus, behind are seed-started onions and pre-sprouted potatoes that were covered by a floating row cover.
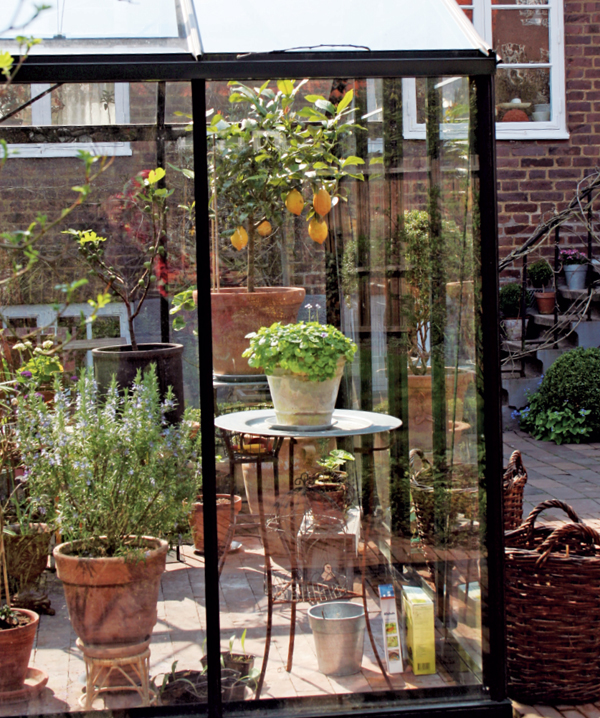
Citrus, figs and flowering rosemary all provide a Mediterranean feel.