Sensationally Sugar Free: Delicious sugar-free recipes for healthier eating every day - Susanna Booth (2016)
Cakes & Gateaux
Chocolate Tea Cake
Apricot & Lemon Cake
Sticky Date & Apple Cake
Fruit Cake
Nectarine Upside Down Cake
Spicy Ginger Cake with Apricot Topping
Carrot Cake
Gateau Marcel with Cherries & Blueberries
Chestnut Tiramisu Cake
Pear Kuchen
Red Velvet Cake
Portuguese Custard Tarts
Raspberry Tarts
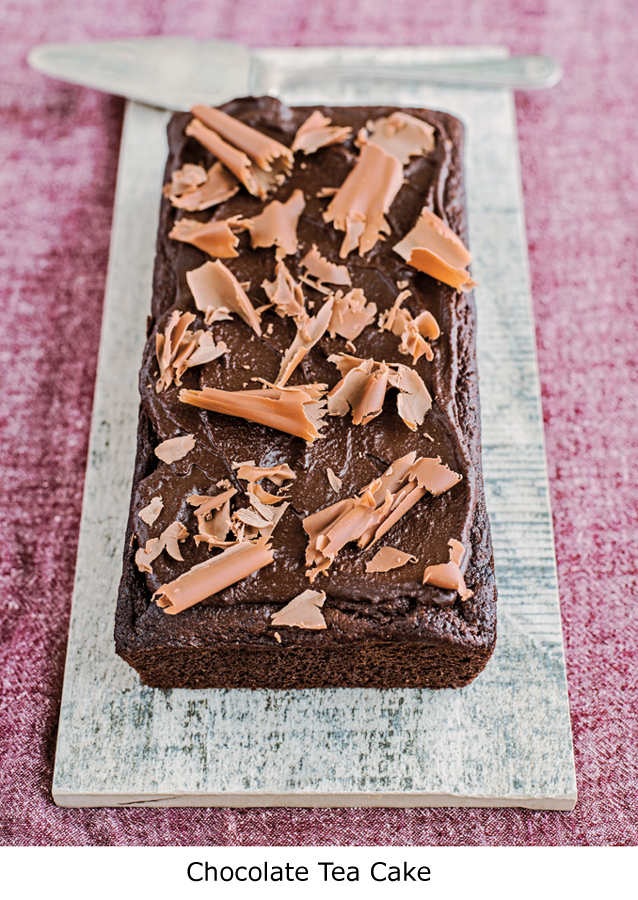
Chocolate Tea Cake
In a very roundabout way, this cake was inspired by a recipe from British Michelin-starred chef Tom Kerridge. It uses tea to create an extra depth of flavour and a springy, moist texture. A wicked chocolate ganache finishes it off nicely.
MAKES ABOUT 12 SLICES
1 Earl Grey teabag
110g (3¾oz) pitted dried dates
75g (3oz) wholemeal plain flour
25g (1oz) cocoa powder
100g (3½oz) unsalted butter, very soft, plus extra for greasing 2 eggs
2 teaspoons baking powder
pinch of ground cloves
pinch of salt
50g (2oz) no-added-sugar plain dark chocolate, plus extra for decorating Use the teabag to make a pot of tea, using about 150ml (¼ pint) boiling water and leaving it to brew for 5 minutes. Pour off the tea into a measuring jug, then soak the dates in 125ml (4fl oz) of the tea for at least 4 hours or overnight, reserving the remaining tea for the ganache.
When the dates are softened and have absorbed most of the tea, preheat the oven to 180°C/160°C fan/350°F/Gas Mark 4. Lightly grease a 22 x 11 x 7cm (8¾ x 4½ x 3-inch)/1kg (2lb) loaf tin with a little butter.
Place the soaked dates and the tea they were soaking in in a food processor and process until smooth. Add the flour, cocoa powder, butter, eggs, baking powder, cloves and salt and process for 3-4 seconds until everything has combined.
Scoop the cake mixture into the tin and smooth the top with a spatula. Bake for 30
minutes until well risen and an inserted skewer comes out clean. Leave to cool in the tin before removing and placing on a serving plate.
Meanwhile, make the ganache. Break up the chocolate into small pieces and place in a small saucepan with the reserved tea over a low heat until the chocolate has melted, then stir well. Pour into a bowl and chill in the refrigerator for 30 minutes until the mixture has set. Spread it on the cooled cake. Use a vegetable peeler to create curls of chocolate and sprinkle over the top of the ganache to decorate. Eat within 2-3 days.
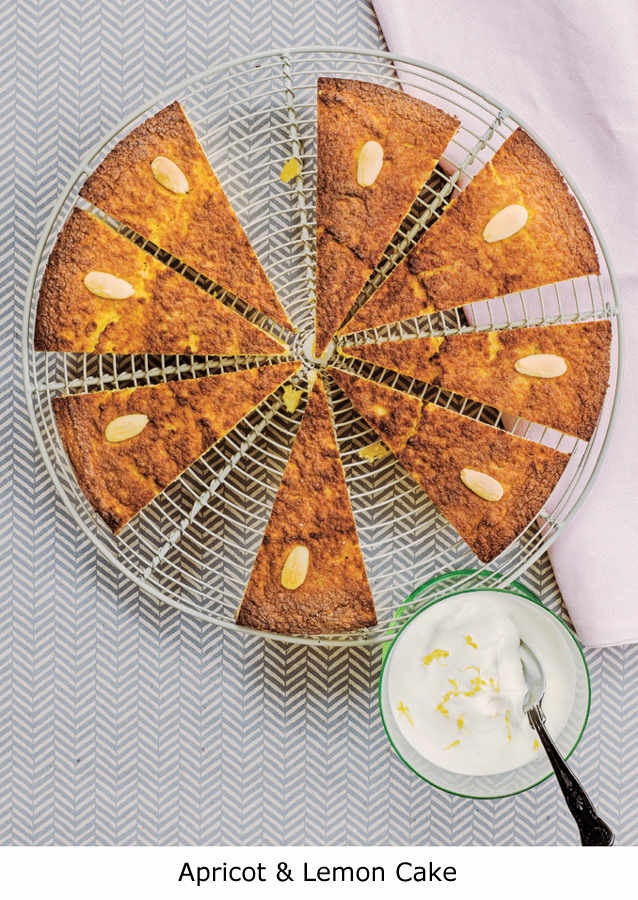
Apricot & Lemon Cake
For this naturally gluten-free cake I’ve used the sunny Mediterranean flavours of apricots, almonds and lemon. It uses store cupboard ingredients and its gentle fragrance and moist, chunky almonds help to make it a tempting prospect at any time of the year. Try it at tea time or as more of a dessert with a little crème fraîche.
MAKES ABOUT 12 SLICES
250g (8oz) soft dried apricots
300g (10oz) whole almonds
500ml (17fl oz) boiling water
sunflower oil, for oiling
juice and zest of ½ unwaxed lemon, plus extra zest 4 eggs
2 teaspoons baking powder
pinch of salt
12 blanched almonds
3 tablespoons fresh orange juice
crème fraîche, to serve
Set side 75g (3oz) of the apricots. Place the remaining apricots in a bowl. Place the whole almonds in a separate bowl. Pour 250ml (8fl oz) boiling water into each bowl and leave to stand for 2 hours or overnight.
Preheat the oven to 180°C/fan 160°C/350°F/Gas Mark 4. Generously oil a 28cm (11-inch) springform tin and line the base with baking parchment. Finely chop the reserved apricots.
Drain the soaked almonds and apricots and place them in a food processor with the lemon juice and zest, eggs, baking powder and salt. Blend for about 1 minute until the almonds are finely minced. Stir in the chopped apricots, then transfer the mixture to the tin. Arrange the blanched almonds on top.
Bake for 30 minutes, then cover with foil, reduce the heat to 160°C/fan 140°C
/325°F/Gas Mark 3 and bake for a further 10 minutes. An inserted skewer should
come out clean.
Leave the cake to cool in the tin. Run a butter knife around the edge before unclipping the tin. Transfer to a serving plate. Drizzle the orange juice over the top and let stand for 10 minutes before serving with a little crème fraîche topped with lemon zest.
Sticky Date & Apple Cake
Flavours of treacle and toffee permeate this soft, super-moist cake. It is based on an Omani recipe, and though it is rather laden with dates, the small portion size keeps the sugar per slice to a minimum. I eat this cake cold as a mid-morning treat, but it would also be fabulous served warm with custard.
MAKES 25 PIECES
1 large dessert apple, about 200g (7oz), plus 1 extra, about 150g (5oz), for decorating
250g (8oz) pitted dried dates
250ml (8fl oz) water
100g (3½oz) unsalted butter, plus extra for greasing 1 teaspoon bicarbonate of soda
2 eggs
150g (5oz) wholemeal plain flour
2 teaspoons baking powder
1 teaspoon unsweetened vanilla extract
Preheat the oven to 200°C/180°C fan/400°F/Gas Mark 6. Lightly grease a 20cm (8-inch) square baking tin with a little butter.
Core the large apple (leave the skin on) and chop it roughly into pieces about 2.5cm (1 inch) in size. Place them in a saucepan with the dates and measurement water and bring to the boil. Boil the mixture for about 3 minutes until the apple is soft.
Meanwhile, quarter and core the smaller apple for decorating the cake (leave the skin), then cut it into thin slices and set aside.
Take the pan off the heat, then stir in the butter and allow it to melt. Next, stir in the bicarbonate of soda. It will foam up rather impressively.
Place the eggs, flour, baking powder and vanilla extract in a food processor. Add the foamy date mixture and blend for about 5 seconds until everything has combined.
Pour the cake mixture into the tin and gently smooth the top with a spatula.
Arrange the sliced apple decoratively on top - I prefer a Modernist aesthetic, with the slices arranged in rows, but it’s entirely up to you!
Bake for 40 minutes until the cake has risen and the edges are pulling away from the sides of the tin, and an inserted skewer comes out clean. Leave it to cool in the tin before cutting it into 25 pieces. Eat within 2-3 days.
Variation
You can easily make a dairy-free version of this cake by using dairy-free margarine in place of the butter.
Fruit Cake
This is a rich, moist fruit cake made using nutritious wholemeal flour, packed with raisins and apricots and topped with whole almonds.
MAKES 8 SLICES
50g (2oz) dried apricots, finely chopped
160g (5½oz) raisins
40g (1½oz) sultanas
2½ teaspoons ground mixed spice
grated rind and juice 1 large unwaxed orange
2 bananas, about 250g (8oz) total weight
50g (2oz) butter, softened, plus extra for greasing 100g (3½oz) wholemeal plain flour
50g (2oz) ground almonds
2 teaspoons baking powder
1 egg, beaten
75g (3oz) whole almonds
Preheat the oven to 160°C/140°C fan/325°F/Gas Mark 3. Lightly grease a deep 18cm (7-inch) round cake tin with a little butter, then place the tin on a sheet of baking paper and draw round it. Cut out the circle of baking paper and lay on the base of the tin.
Place all the dried fruit, mixed spice and orange rind in a bowl and stir to coat the fruit in the spice.
Peel and mash the bananas, then mix into the softened butter in a large bowl. Stir in the flour, ground almonds, baking powder and egg until you have a paste.
Make up the orange juice in a measuring jug to 125ml (4fl oz) with water if necessary and stir into the cake mixture. Now add the spiced fruit mixture and then stir well.
Scoop the cake mixture into the tin and smooth the top with a spatula. Use the whole almonds to decorate the top.
Bake for 1 hour 40 minutes (don’t open the door!) until the cake is well browned and an inserted skewer comes out clean. Leave to cool in the tin, then run a butter knife around the edge before carefully turning the tin upside down to remove the cake. This cake is best eaten within a week.
Variation
Make this cake dairy free by using dairy-free margarine in place of the butter.
Tip
If you don’t have any mixed spice, you can use a mixture of 1 teaspoon ground cinnamon, 1 teaspoon ground coriander, ¼ teaspoon ground nutmeg and ¼ teaspoon ground cloves instead.
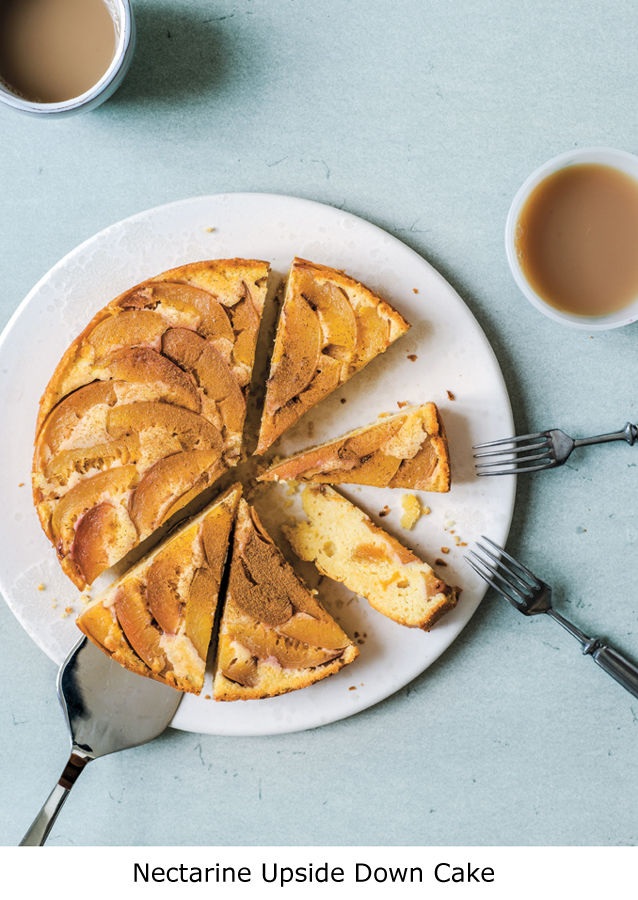
Nectarine Upside Down Cake
The colourful nectarine slices are embedded within the soft vanilla sponge of this cake, making it not only attractive but also providing a lovely burst of sweetness. This cake works well both warm or cold, and
if you want to make it more of a dessert, try it with some of my Vanilla
Ice Cream.
MAKES ABOUT 8 SLICES
75g (3oz) soft dried apricots
2 fresh nectarines
100g (3½oz) plain flour
75g (3oz) ground almonds
150g (5oz) unsalted butter, very soft, plus extra for greasing 2 teaspoons baking powder
1 teaspoon unsweetened vanilla extract
4 eggs
1 teaspoon ground cinnamon, plus extra for dusting Place the dried apricots in a mug and cover with boiling water. Leave them to soak for about 15 minutes.
Meanwhile, preheat the oven to 180°C/160°C fan/350°F/Gas Mark 4. Lightly grease a 20cm (8-inch) springform tin with a little butter.
Working over a bowl to catch the juice, slice the nectarines in half and remove the stone, then cut each half into about 8 segments. Arrange the segments decoratively across the base of the cake tin, aiming to cover as much of it as possible.
Drain the soaked dried apricots and place them in a food processor with all the remaining ingredients, including any juice reserved from preparing the nectarines.
Process the mixture for about 10-15 seconds until you have a smooth cake mixture. Pour it on top of the nectarine slices and gently smooth the top with a spatula.
Bake the cake for 30 minutes until risen and golden brown, and an inserted skewer comes out clean. Leave the cake to cool in the tin for about 5 minutes, then run a butter knife around the outside of the cake, place an upturned serving plate on top and carefully flip both over together. Remove the tin to reveal your cake. Dust it with cinnamon to serve. Store the finished cake in the refrigerator and eat within a couple of days - it actually tastes better a day after it is made.
Spicy Ginger Cake with Apricot Topping
This is goodness in cake form, packed with butternut squash, dates and apricots. It tastes best the day after it is made, so it’s perfect for when you want to get your baking done in advance.
MAKES 16 SQUARES
For the cake
150g (5oz) butternut squash
2 teaspoons sunflower oil, plus extra for oiling
75g (3oz) unsalted butter, melted
100g (3½oz) pitted dried dates
125ml (4fl oz) milk
2 teaspoons ground ginger
1 teaspoon ground cinnamon
grated rind of 1 large unwaxed orange
200g (7oz) plain flour
2 teaspoons baking powder
1 egg, beaten
For the topping
50g (2oz) unsweetened smooth cashew nut butter
25g (1oz) salted butter, very soft
75g (3oz) soft dried apricots, finely chopped
15g (½oz) raw unsalted cashew nuts, finely chopped Preheat the oven to 200°C/180°C fan/400°F/Gas Mark 6. Lightly oil a 20cm (8-inch) square tin with a little sunflower oil.
Deseed the butternut squash (keep the skin on) and cut into pieces about 1cm (½
inch) square, then toss them in the oil in a roasting tin. Roast for 20 minutes until cooked through but only just browned. Remove them from the oven and leave to cool for about 5 minutes.
Place the roasted squash in a food processor with the melted butter, dates, milk,
spices and orange rind. Process until nearly smooth. Stir in the flour, baking powder and egg.
Transfer the mixture to the tin, smooth the top with a spatula and bake for 20-30
minutes. Leave to cool in the tin.
To make the topping, beat the cashew nut butter and butter together. Spread the mixture across the top of the cooled cake, then sprinkle the apricot and cashews across the nut paste. Chill the cake in the refrigerator for an hour until the topping has set, then cut into 16 squares. This cake will keep for 2-3 days.
Variation
Use dairy-free margarine in place of butter and soya milk in place of milk to create a dairy-free version of this recipe.
Carrot Cake
This is a fabulously moist, spiced carrot cake, with natural sweetness provided not only by the carrot and raisins but also by the generous quantity of dreamy, orange-flavoured frosting.
MAKES ABOUT 12 SLICES
For the cake
150g (5oz) walnuts, chopped
250g (8oz) carrot, peeled and finely grated
150g (5oz) wholemeal plain flour
2 teaspoons ground cinnamon
¼ teaspoon ground cloves
2 teaspoons baking powder
½ teaspoon bicarbonate of soda
125ml (4fl oz) sunflower oil, plus extra for oiling 250ml (8fl oz) milk
2 eggs, beaten
2 tablespoons stevia powder
1 tablespoon fresh orange juice
75g (3oz) sultanas
For the frosting
85ml (3¼fl oz) whipping cream
140g (4½oz) cream cheese
1 tablespoon stevia powder
1 tablespoon fresh orange juice
grated rind of 1 unwaxed orange, plus extra for decorating 2 tablespoons chopped walnuts
Preheat the oven to 180°C/160°C fan/350°F/Gas Mark 4. Lightly oil a 22 x 11 x 7cm (8¾ x 4½ x 3-inch)/1kg (2lb) loaf tin with a little sunflower oil.
Place 100g (3½oz) of the walnut pieces in a food processor and process them to the texture of coarse coffee grounds. Transfer to a bowl and add the grated carrot, flour, spices, baking powder and bicarbonate of soda. Give everything a good stir.
Mix the oil, milk, eggs, stevia powder and orange juice together in a jug. Pour the liquid mixture into the bowl with the other ingredients and stir quickly until everything is combined. Add the sultanas and remainder of the walnuts, give another quick stir and then pour the cake mixture into the loaf tin. Smooth the top with a spatula.
Bake the loaf for 45-50 minutes until browned and risen, and an inserted skewer comes out clean. Leave the cake to cool in the tin.
To make the frosting, whip the cream until it forms soft peaks and then beat in the cream cheese. Stir the stevia powder into the orange juice in a jug until it has dissolved and then pour it into the cream cheese mixture. Add the grated rind and fold everything together with a spatula.
Remove the cake from the tin. Smear the cream cheese mixture across the top, then use a fork to make a decorative pattern. Finish by scattering the chopped walnuts across the top, along with a little extra grated rind. Store the finished cake in the refrigerator and eat within a couple of days.
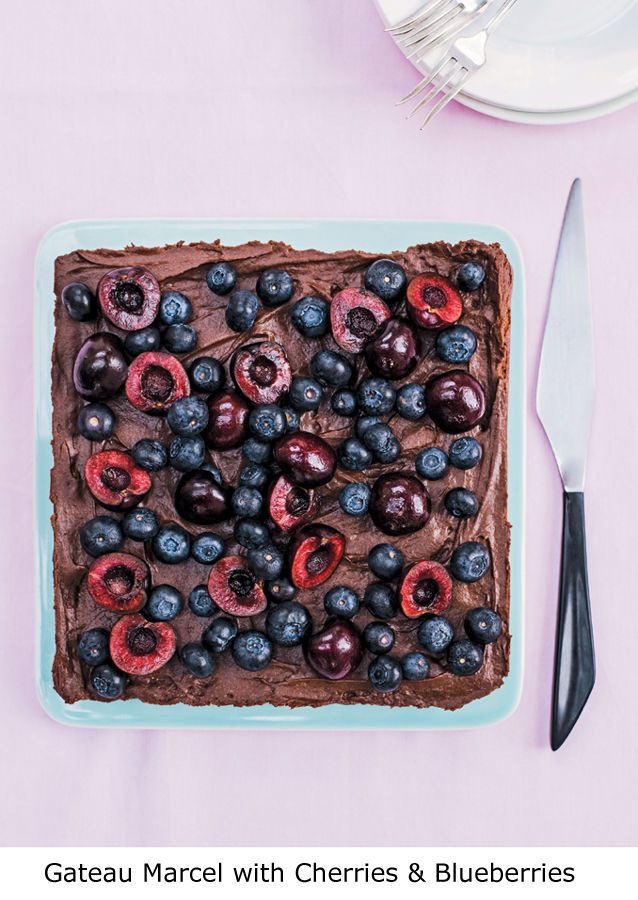
Gateau Marcel with Cherries & Blueberries
Gateau Marcel is a two-tier chocolate mousse, one raw and one baked into a soft cake. Invented by the Michelin-starred chef Michel Michaud, this indulgent and gluten-free creation is easy to make, although it does need to be prepared in advance.
SERVES 6-8
sunflower oil, for oiling
100g (3½oz) no-added-sugar plain dark chocolate, brokeninto small pieces 50g (2oz) no-added-sugar milk chocolate, broken into small pieces 150g (5oz) unsalted butter, chopped
pinch of fine salt
2 eggs
3 egg whites
150g (5oz) fresh black cherries, pitted and halved 75g (3oz) fresh blueberries
Preheat the oven to 180°C/160°C fan/350°F/Gas Mark 4. Line the base of a 20cm (8-inch) square cake tin with baking paper and lightly oil the sides with a little sunflower oil.
Place the chocolates and butter with the salt in a saucepan over a low heat until they have melted, stirring occasionally.
Separate the whole eggs. Place all the whites in a medium bowl and the yolks in a large bowl.
Using an electric whisk, whisk the whites until very stiff - you will have reached the right level of stiffness if they won’t move when the bowl is tipped to the side.
Use the whisk to whisk the yolks until they have turned a few shades paler and become fluffy. While continuing to whisk, very slowly pour in the hot chocolate mixture in a thin stream. You’ll be left with a thick and glossy chocolate paste.
Fold the whisked egg whites into the chocolate paste. When everything has been combined and you have a mousse, pour half the mixture into the cake tin. Bake for 20 minutes until puffy.
Leave the cake to cool in the tin (it will sink significantly), then pour the remaining chocolate mousse on top of the cake. Place in the refrigerator for at least 4 hours until set.
When you are ready to serve, run a butter knife around the edge of the gateau and lift it out of the tin. Remove the lining paper. Place the gateau on a serving plate. Scatter the cherries and blueberries across the top of the gateau.
Tip
If you have egg yolks left over after making this recipe, consider using them
to make the Portuguese Custard Tarts, Vanilla Ice Cream or Chocolate Chip
Ice Cream.
Chestnut Tiramisu Cake
There’s a hint of tiramisu flavouring in this light sponge cake, which is filled with a rich and creamy chestnut and prune centre. A dusting of cocoa finishes everything off nicely.
SERVES 8-12
For the sponge
sunflower oil, for oiling
6 eggs
125g (4oz) chestnut flour
pinch of salt
4 tablespoons freshly made strong coffee, cooled
2 tablespoons white rum (optional)
For the filling and decoration
100g (3½oz) pitted prunes
85ml (3¼fl oz) boiling water
2 teaspoons unsweetened vanilla extract
2 teaspoons stevia powder
375ml (13fl oz) whipping cream
200g (7oz) unsweetened chestnut purée
2 teaspoons cocoa powder, for dusting
Before you start, soak the prunes for the filling and decoration in the measurement boiling water, ideally for a minimum of 2 hours.
Preheat the oven to 180°C/160°C fan/350°F/Gas Mark 4. Lightly oil two 20cm (8-inch) sandwich tins with a little sunflower oil, then place one tin on a double-thickness sheet of baking paper and draw round it. Cut out the circles of baking paper and lay one on the base of each tin.
To make the sponge, separate the eggs and place the whites in a large bowl and the yolks in a separate bowl.
Using an electric whisk, whisk the whites until very stiff - they shouldn’t move when the bowl is tipped to the side.
Whisk the yolks until they have turned a few shades paler and become fluffy. Fold into the whisked egg white, followed by the chestnut flour and salt.
When everything is well combined, divide the mixture between the tins and bake for 15 minutes until just browned. Leave the sponges to cool in the tins.
For the filling, place the softened prunes and their soaking water in a blender and blend to a purée, then set aside.
Stir the vanilla extract and stevia powder together in a jug until the stevia has dissolved. Pour into a large bowl with the cream. Whip the cream until it forms firm peaks, then fold in the chestnut purée.
Now it’s time to assemble your cake. Place the first sponge layer on a serving plate. Stir the coffee and rum together, if using. Pour half across the sponge layer, followed by one-third of the cream mixture, spreading it evenly across the sponge base. Spread the prune purée on top.
Add the second sponge layer and drench it with the remaining coffee mixture, followed by a further one-third of the cream. Pipe the remaining cream around the sides of the cake. Dust the top with the cocoa powder and serve. Store in the refrigerator and eat within a couple of days.
Pear Kuchen
This German-style cake is topped with juicy pears and flaked almonds.
I’ve used canned pears for ease, but peeled, ripe dessert pears would make a wonderful alternative.
MAKES 9 PIECES
125ml (4fl oz) milk, plus 1 tablespoon for glazing 1 teaspoon unsweetened vanilla extract
1 tablespoon stevia powder
25g (1oz) salted butter, chopped, plus extra for greasing 1 teaspoon fast-action dried yeast
150g (5oz) plain flour
50g (2oz) ground almonds
1 egg, beaten
225g (7½oz) drained canned pear halves in fruit juice 1 tablespoon flaked almonds
Lightly grease a 20cm (8-inch) square cake tin with a little butter.
Heat the milk with the vanilla extract and stevia powder in a saucepan. Just before it starts to boil, take the pan off the heat, add the butter and leave it to melt. When the liquid has cooled to hand-hot, stir in the yeast.
Mix the flour and ground almonds together in a bowl. Pour the milk mixture and egg into the bowl, and stir to combine everything into a soft, sticky dough.
Press the dough into the tin, using the back of a spoon to ease it into the corners and to create an even layer. Leave it under a clean damp tea towel somewhere warm for an hour or so until it looks puffy.
Preheat the oven to 200°C/180°C fan/400°F/Gas Mark 6. Cut each pear half into 6
slices and arrange them on the top of the dough. Brush all the exposed dough with the remaining tablespoon of milk and sprinkle over the flaked almonds.
Bake for 25 minutes until the dough has risen and become golden. Cut into 9
pieces, then leave to cool for a while in the tin and serve warm. This is best eaten the same day.
Red Velvet Cake
I love the dramatic colour contrast of red velvet cake and this recipe gives a moist and moreish result, yet it’s packed with goodness, so different from shop-bought versions! Of course, no red velvet cake would be worth its name without a wicked cream cheese frosting, so there is plenty of that too.
SERVES 8-12
For the cake
250g (8oz) fresh beetroot
150g (5oz) wholemeal plain flour
150g (5oz) white plain flour
4 teaspoons baking powder
1 tablespoon cocoa powder
250ml (8fl oz) sunflower oil, plus extra for oiling 175ml (6fl oz) milk
85ml (3¼fl oz) natural yogurt
4 tablespoons freshly made strong coffee, cooled
2 eggs
4 tablespoons stevia powder
2 teaspoons unsweetened vanilla extract
2 teaspoons red food colouring (optional)
1 teaspoon balsamic vinegar
For the frosting
375ml (13fl oz) whipping cream
150g (5oz) cream cheese
3 teaspoons unsweetened vanilla extract
2 tablespoons stevia powder
Preheat the oven to 180°C/160°C fan/350°F/Gas Mark 4. Lightly oil two 20cm (8-inch) sandwich tins with a little sunflower oil and line the bases with nonstick

baking paper.
Finely grate the beetroot into a large bowl and add both flours, the baking powder and cocoa powder. Mix all the remaining cake ingredients together in a separate bowl or jug. Pour the liquid mixture into the beetroot mixture and stir quickly until you have a sloppy pink mixture. Divide it evenly between the cake tins.
Bake the cakes for 40 minutes until risen and browned, and an inserted skewer comes out clean. Remove the cakes from their tins and leave them to cool upside down on a wire rack.
To make the frosting, whip the cream until it forms soft peaks, then whisk in the cream cheese. Stir the vanilla extract and stevia powder together until the stevia has dissolved, then add to the cream cheese mixture. Whip briefly until everything is combined.
To assemble the cake, place the first cake layer on a serving plate and spread half the frosting across it. Add the second cake layer, followed by the remaining frosting. Use a fork to add a few decorative swirls to the frosting. Keep the finished cake in the refrigerator until ready to serve. Eat within a couple of days.

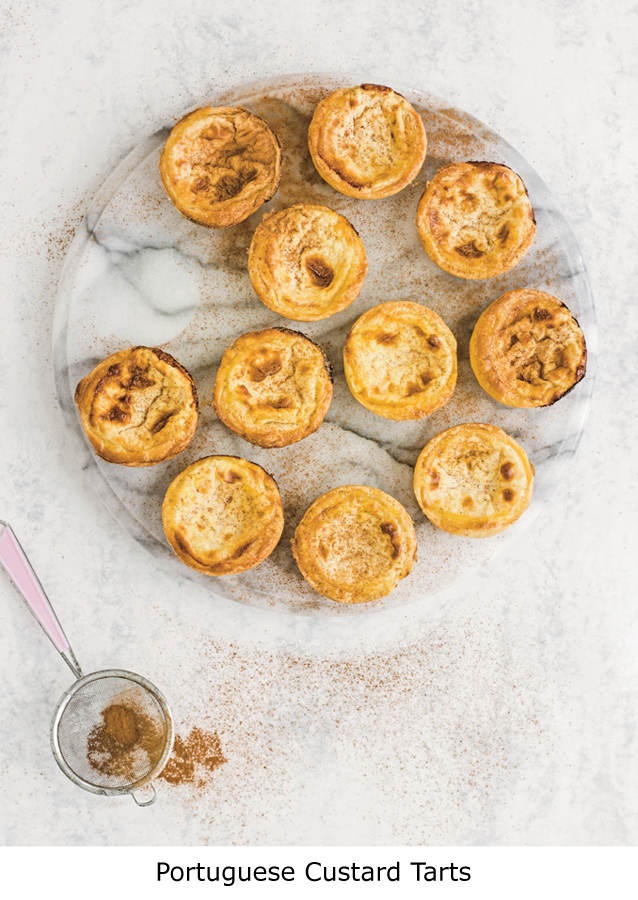
Portuguese Custard Tarts
These tarts are known as pasteis de nata and I became familiar with them after living in London’s ‘little Portugal’ district. They can be tricky to make at home (the recipe originates from a Lisbon café that has an extremely hot oven), but by using my technique it is possible to achieve great results.
MAKES 12
butter, for greasing
300g (10oz) ready-made puff pastry
85ml (3¼fl oz) milk
1 tablespoon plain flour, plus extra for dusting
2 egg yolks
2 eggs, beaten
175ml (6fl oz) rice milk
2 teaspoons stevia powder
1 teaspoon unsweetened vanilla extract
½ teaspoon ground cinnamon, for dusting
Bring the pastry out of the refrigerator an hour before you want to use it to allow it to reach room temperature.
Preheat the oven to 240°C/220°C fan/475°F/Gas Mark 9. Grease the cups of a 12-cup muffin tin with butter.
Roll out the pastry on a worktop well dusted with flour to a rectangle about 17 x 12cm (6¾ x 5 inches), and about 1cm (½ inch) thick, but don’t worry if you accidentally make it a little larger than this. Brush the top with water and then, starting from one short side, roll it up tightly. You’ll now have a cylinder of pastry.
Trim the ends of the pastry cylinder to neaten it, then cut it into 4 equal lengths and cut each length into 3 slices. With the cut side uppermost, roll your rolling pin over each slice a couple of times so that you get a rough round about 7cm (3
inches) in diameter. Place a pastry round into each cup of the muffin tin and use your fingertips to stretch the pastry until you have lined each cup and there are no gaps.
For the filling, stir the milk and flour together in a bowl until smooth. Beat the egg yolks and whole eggs together in a separate bowl and set 1 tablespoon aside.
Pour the remaining egg into the milk. Add the rice milk, stevia powder and vanilla extract and whisk until everything is combined.
Pour the filling into the pastry cases, dividing the mixture evenly between them.
Brush the exposed pastry with the reserved egg.
Bake the custard tarts for 15 minutes until the filling has risen and has brown spots. Leave the tarts to cool in the tin for about 10 minutes - the filling will sink down as they do so. Dust a little of the cinnamon over each one and then serve.
These are best eaten the same day.
Tip
If you have egg whites left over, why not use them to make my Gateau
Marcel?
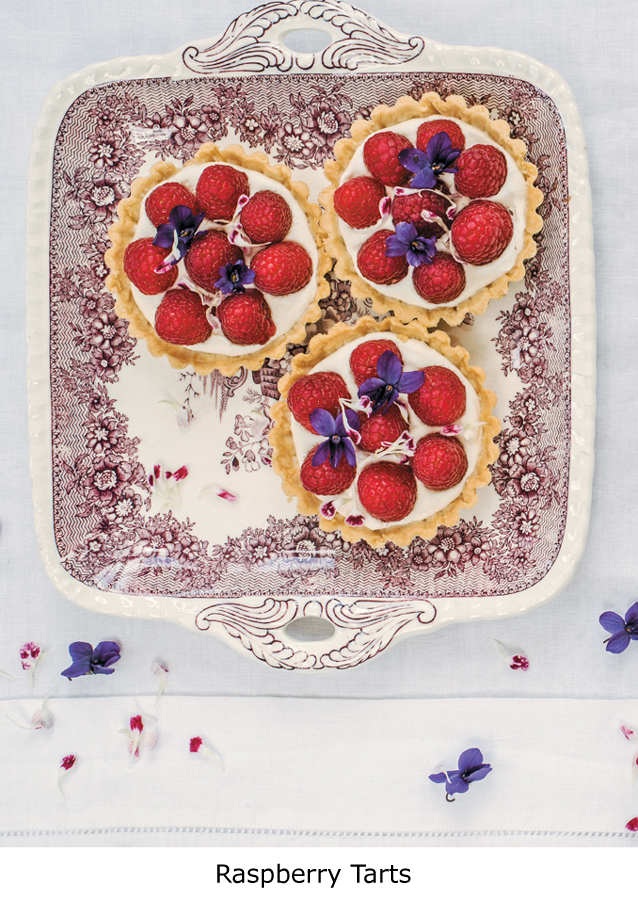
Raspberry Tarts
These simple fruit tarts are fresh and easy, and are a great idea for an elegant event - scattered with edible flowers, they’ll easily be the star attraction.
MAKES 4
sunflower oil, for oiling
plain flour, for dusting
1 quantity of Low-carb Dessert Pastry
125ml (4fl oz) whipping cream
1 large ripe dessert pear, about 175g (6oz), peeled and cored 275g (9oz) fresh raspberries
handful of edible flower petals, such as viola or dianthus (optional) Preheat the oven to 200°C/180°C fan/400°F/Gas Mark 6. Lightly oil four 10cm (4-inch) round fluted tart tins with a little sunflower oil.
Roll out the pastry on a worktop well dusted with flour to a thickness of about 3-
4mm (about ⅛ inch). Roughly cut out 4 rounds slightly larger than the tins. Press each pastry round into a tin and trim the excess with a sharp knife.
Place a layer of foil over the top of each pastry case, then fill with dried beans or baking beans. Bake for 20 minutes until the pastry is crisp and just turning golden brown. Leave the pastry cases to cool in the tins and then lift the beans and foil out.
Just before you want to serve your tarts, remove the pastry cases from the tins and place them on a serving plate. Whip the cream until it forms soft peaks. Place the pear in a separate bowl and use a stick blender to purée it, then fold it into the cream. Spread the cream mixture evenly across each of the tarts and arrange the raspberries on top. Finish with a scattering of edible flower petals, if you like.
These are best eaten immediately.