Sensationally Sugar Free: Delicious sugar-free recipes for healthier eating every day - Susanna Booth (2016)
Treats & Party Food
Glittering Chocolate Truffles
Apricot Hearts
Mini Chocolate Eclairs
Rocky Road
Macadamia Chews
Chocolate Fondue
Baklava
Mint Chocolate Crunch
Cinnamon Toasts
Toffee-flavoured Popcorn
Sweet Chilli Bites
Butter-fried Plantains with Smoky Dip
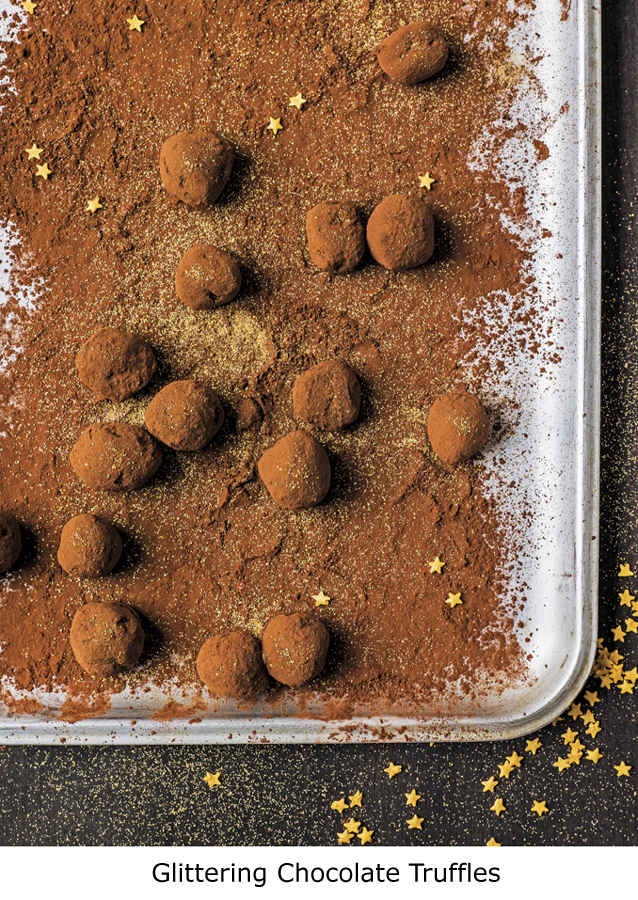
Glittering Chocolate Truffles
Cream, whisky and a sprinkling of edible gold stars and gold dust make these melt-in-the-mouth truffles extra special. Look for stars or other decorations made without added sugar.
MAKES ABOUT 15
100g (3½oz) no-added-sugar plain dark chocolate, broken into small pieces 25g (1oz) unsalted butter, chopped
4 tablespoons single cream
3 teaspoons whisky
15g (½oz) cocoa powder
1 teaspoon edible gold stars or edible gold dust
Place the chocolate and butter with the cream in a small saucepan over a low heat until they have melted, stirring occasionally. Stir in the whisky, then leave the mixture to cool. Place it in the refrigerator for about 1 hour until it hardens.
Sift the cocoa on to a plate and place a second plate alongside. Scoop out a heaped teaspoonful of the truffle mixture and quickly roll it into a ball in your palms. Place it on the plate with the cocoa and gently shake the plate from side to side until the truffle is well coated, then transfer the truffle to the clean plate.
Repeat until all the truffle mixture is used up.
Sprinkle the edible gold stars or some edible gold dust over the truffles to give a touch of magic and sparkle. The truffles will keep in the refrigerator for up to a week.
Apricot Hearts
I find fruity soft-centred chocolates irresistible, so these little hearts tick all the boxes for me. You’ll need some small silicone chocolate moulds to make them, but these are easily available from cook shops or online.
MAKES ABOUT 18
125g (4oz) no-added-sugar plain dark chocolate, broken into small pieces 25g (1oz) dried apricots
4 tablespoons water
25g (1oz) cream cheese
15g (½oz) ground almonds
Place 100g (3½oz) of the chocolate pieces in a heatproof bowl set over a saucepan of barely simmering water (make sure the base of the bowl doesn’t touch the water), or in the microwave on a medium setting for about 45 seconds (my preferred method), until nearly all the chocolate has melted. Give it a stir and leave to rest for a couple of minutes until it has all melted.
Use a teaspoon to smear a layer of melted chocolate around the inside of each mould, making sure the sides and bases are well covered. Chill in the refrigerator for about 30 minutes until set.
Meanwhile, finely chop the apricots, place them in a small saucepan with the measurement water and heat them gently for 5 minutes. Pour the mixture into a mug and add the cream cheese. Insert a stick blender and blend to create a relatively smooth paste. Stir in the ground almonds. Spoon ½ teaspoonful of apricot filling into each chocolate and use the tip of your finger to smooth it in place so that none of the filling is protruding from the mould. Chill in the refrigerator for a further 30 minutes.
Finally, melt the remaining chocolate as before. Use a butter knife to spread an even layer of melted chocolate over the top of the apricot filling. Chill the chocolates for a further 30 minutes until set, then gently pull the silicone apart to release each heart. Turn them out on to a plate and keep chilled until ready to serve. They can be kept for a couple of days in the refrigerator.
Note
Be careful when melting the chocolate - it can be a rather temperamental beast, particularly in situations where you want an attractive finish. The key things to remember are not to let it get too hot and not to allow water into the melted chocolate, otherwise it will ‘seize’ and turn grainy and paste-like. If this happens, you will have to throw it out and start again.

Mini Chocolate Eclairs
Here I’ve combined wholemeal flour and no-added-sugar chocolate to create a healthier version of an enduring favourite - they are always the first to go at a party.
MAKES ABOUT 18
For the choux pastry
sunflower oil, for oiling
50g (2oz) unsalted butter
175ml (6fl oz) water
100g (3½oz) wholemeal plain flour
2 eggs, beaten
For the topping
100g (3½oz) no-added-sugar milk chocolate, broken into small pieces 2 tablespoons water
For the filling
250ml (8fl oz) whipping cream
Preheat the oven to 200°C/180°C fan/400°F/Gas Mark 6. Lightly oil 2 baking sheets, then run them under the cold tap in order to wet the surface. Tip the excess water away.
Heat the butter and measurement water in a saucepan until the mixture boils.
Take the pan off the heat, add the flour and quickly whisk everything together (this requires quite a bit of arm strength, so you might want to use an electric whisk).
Leave the mixture to cool for a minute, then whisk in the eggs until you have smooth paste with the consistency of thick custard.
Transfer the paste to a food bag. Snip off the corner, starting your cut about 1cm (½ inch) along the side of the bag. Pipe out sausage shapes of the paste about 7-
8cm (3-3¼ inches) long on to the prepared baking sheets, making sure you space them well apart. It can be hard to finish the sausage shapes neatly, though a flick of the wrist usually works well. Use a moistened finger to gently smooth out any lumps that result.
Pop the baking sheets into the oven. After 10 minutes, increase the oven temperature to 220°C/200°C fan/425°F/Gas Mark 7 and bake the éclairs for a further 10 minutes until they are golden brown. Make a small hole in the side of each one with a skewer to release the steam, then leave them to cool on a wire rack.
Meanwhile, for the topping, place the chocolate and the measurement water in a small saucepan over a low heat until the chocolate has melted, stirring occasionally. Pour into a bowl and place in the refrigerator for 15 minutes until it has the consistency of buttercream.
Smooth a layer of the chocolate topping across each éclair and then chill in the refrigerator for 30 minutes until set.
Just before serving, whip the cream until it forms stiff peaks. Cut each éclair in half lengthways and use a butter knife to spread a generous quantity of the cream inside, or use a food bag to pipe it in.

Rocky Road
Perfect for those times when you want a treat without too much preparation, this rocky road uses wholemeal savoury crackers alongside fruit and nuts to create a tempting combination of crunch and chew. Finding wholemeal crackers with no added sugar can be difficult
- if you struggle, consider using rough unsweetened oatcakes instead.
MAKES 16 PIECES
sunflower oil, for oiling
85g (3¼oz) soft dried apricots
75g (3oz) whole almonds
75g (3oz) whole hazelnuts
50g (2oz) wholemeal savoury crackers
85g (3¼oz) seedless raisins
150g (5oz) no-added-sugar milk chocolate
Lightly oil a 20cm (8-inch) square baking tin with a little sunflower oil.
Roughly chop the dried apricots and nuts. Break the crackers into pieces about 1-
2.5cm (½-1 inch) square. Place everything in a bowl and add the raisins.
Break the chocolate into small pieces. Place in a heatproof bowl set over a saucepan of barely simmering water (make sure the base of the bowl doesn’t touch the water), or in the microwave on a medium setting for about 45 seconds (my preferred method), until nearly all the chocolate has melted. Give it a stir and leave to rest for a couple of minutes until it has all melted.
Pour the melted chocolate into the bowl with the nut mixture and stir everything well together.
Transfer the mixture to the baking tin and spread it evenly until the tin has been filled. Use a spatula to smooth the surface as much as possible. Chill in the refrigerator for at least an hour until set. Cut into 16 pieces with a sharp knife. You can store the rocky road in an airtight container in the refrigerator for up to a week.
Macadamia Chews
If you’re a fan of caramels, you’ll be very happy with these chewy chocolate treats. I’ve specified dark chocolate because in the stevia-sweetened brand I use there are far fewer naturally occurring sugars than the milk chocolate version, but it’s up to you - these are amazing either way.
MAKES ABOUT 16
75g (3oz) whole macadamia nuts
125g (4oz) chewy dried banana slices
2 teaspoons water
75g (3oz) no-added-sugar plain dark chocolate
Line a baking sheet with silicone baking paper.
Finely chop one macadamia nut and set aside. Using a large sharp knife, finely chop the banana slices. Place them in a food processor with the remaining nuts and measurement water. Pulse the mixture until the nuts are finely chopped and the mixture is starting to clump together. Give everything a good stir.
Take a heaped teaspoonful of the mixture and roll it firmly into a ball (if the mixture seems crumbly, add a drop more water). Place the ball on a large plate. Repeat until all the mixture has been used up.
Break the chocolate into small pieces. Place in a heatproof bowl set over a saucepan of barely simmering water (make sure the base of the bowl doesn’t touch the water), or in the microwave on a medium setting for about 45 seconds (my preferred method), until nearly all the chocolate has melted. Give it a stir and leave to rest for a couple of minutes until it has all melted.
Using 2 forks, roll each ball in the melted chocolate until coated all over. Allow the excess chocolate to drain through the prongs of the forks, then place the ball on the lined baking sheet.
Once all the balls have been coated, sprinkle them with the reserved chopped macadamia nut and then place the baking sheet in the refrigerator until the chocolate has set. The chews should be kept in a cool place and eaten within a week.
Variation
If you use chocolate that is dairy free, this recipe is also suitable for vegans.
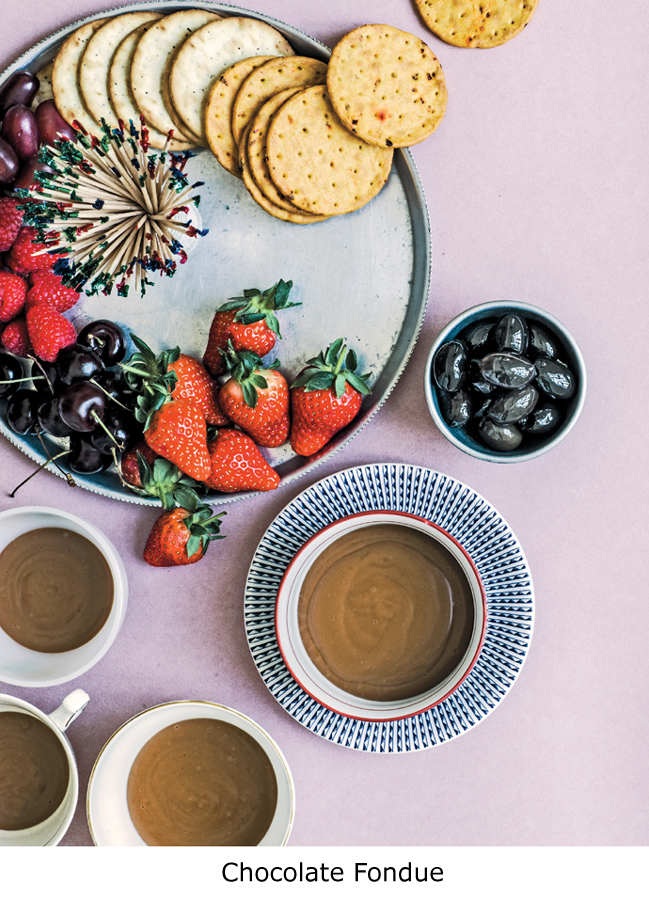
Chocolate Fondue
This is a simple dessert that nonetheless offers a wealth of possibilities, making it perfect as a party treat or for children. I love serving everyone their fondue in a teacup, with the assorted items for dipping, impaled on cocktail sticks, around the saucer. The question is what to dip? You could go for the usual suspects like sliced banana, sliced pineapple or strawberries, but don’t discount the savoury options: salted pretzels, crispy bacon and pitted black olives are all surprisingly delicious too.
SERVES 6
For the fondue
150g (5oz) no-added-sugar milk chocolate, broken into small pieces 375ml (13fl oz) single cream
3 teaspoons cornflour
2 tablespoons water
To serve
selection of bite-sized food morsels, such as chopped fruit, berries and savoury crackers, for dipping
Place the chocolate with the cream in a small saucepan over a low heat until the chocolate has melted, stirring occasionally.
Mix the cornflour with the measurement water in a cup until smooth. Pour the mixture into the chocolate cream and stir to ensure everything has combined.
Gradually bring the mixture to the boil, stirring continuously, until it has the consistency of custard. Pour your fondue into 6 teacups and serve immediately, surrounded by your selection of items for dipping.
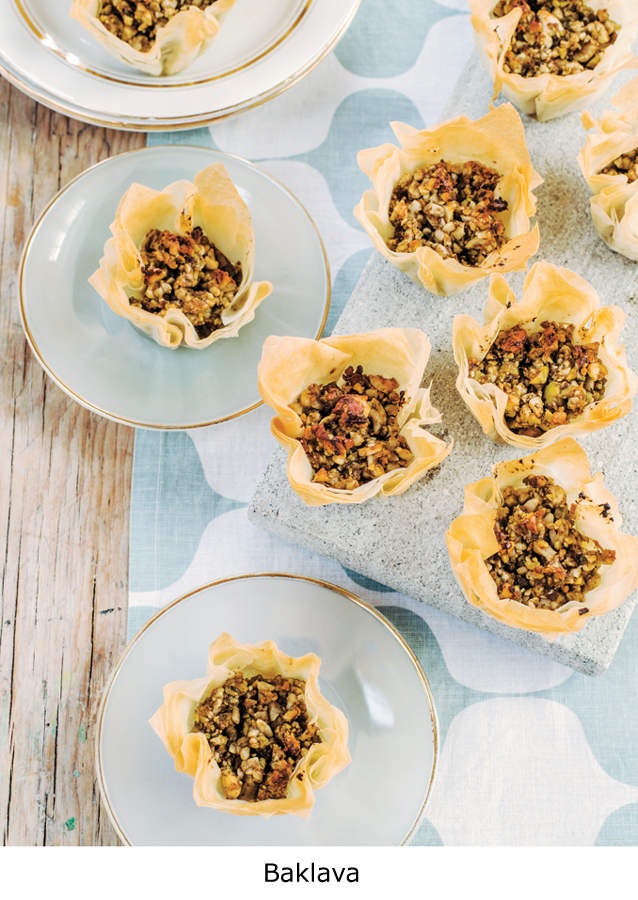
Baklava
Baklava is usually steeped in a sugar syrup, but for this version I’ve used date purée with a hint of lemon. This provides not only sweetness but also nutrients and fibre. The overall effect is gorgeously buttery and nutty, with hints of toffee flavour. This recipe assumes a filo pastry sheet size of 30 x 40cm (12 x 16 inches).
MAKES 12
50g (2oz) pitted dried dates, chopped
250ml (8fl oz) water
2 teaspoons fresh lemon juice
150g (5oz) raw cashew nuts, finely chopped
75g (3oz) shelled raw pistachio nuts, finely chopped ¼ teaspoon ground mixed spice
5 sheets of ready-made filo pastry, about 100g (3½oz) total weight 75g (3oz) salted butter, melted
Preheat the oven to 200°C/180°C fan/400°F/Gas Mark 6. Line a 12-cup muffin tin with paper muffin cases.
Place the dates and measurement water in a blender and blend to a purée.
Transfer the purée to a saucepan and bring it to the boil. Reduce the heat to medium and simmer for 15 minutes until the mixture has thickened to the consistency of yogurt, then add the lemon juice. Stir the cashews and pistachios into the date mixture with the mixed spice.
Place the stack of filo pastry sheets lengthways. Now liberally brush melted butter on to the top of each pastry sheet. I find it easiest to do it like this: fold the right-hand side of the top sheet over the left-hand side, almost as if you were turning the pages of a book. Brush melted butter on the exposed surface of the next sheet in the stack, then turn the page, as it were, to expose the next sheet and brush that one with butter too. Continue until you reach the final sheet, then turn all the ‘pages’ back until your sheets are unfolded. Repeat for the left-hand side of each sheet. The final step is to butter the top sheet.
Cut the stack of pastry into 12 squares 10cm (4 inches) in size. Bring the corners of one square together to form a sort of flower shape and place it in a muffin case, then repeat for the remaining squares. Pour any remaining melted butter into the date and nut mixture and give it a stir. Place about 3 teaspoonfuls in the centre of each case until all the mixture is used up.
Bake for 20-25 minutes until the pastry has turned golden. These are best served warm, glistening and crispy from the oven.
Mint Chocolate Crunch
Mint and dark chocolate are one of those fail-safe combinations. The crunch comes from oatcakes - it doesn’t matter if you use the ‘smooth’
or ‘rough’ kind, just as long as they have no added sugar. I’ve used
lucuma powder, to add sweetness and because it’s packed with nutrients, but if you prefer, you could just add 4 extra dried dates instead.
MAKES 16 SLICES
200g (7oz) unsweetened oatcakes
100g (3½oz) pitted dried dates
100g (3½oz) unsweetened smooth cashew nut butter
1 tablespoon raw lucuma powder
4 teaspoons cocoa powder
2 teaspoons mint extract
100g (3½oz) unsalted butter, melted
100g (3½oz) no-added-sugar plain dark chocolate
Place the oatcakes, dates, cashew nut butter, lucuma powder, cocoa powder and mint extract in a food processor. Pulse until you have a rough, rubbly mixture.
Pour in the melted butter and stir until everything is well coated. Spoon the mixture into a 20cm (8-inch) square baking tin and spread it out evenly. Press it down firmly with the back of a metal tablespoon to compact it and flatten the surface.
Break the chocolate into small pieces. Place in a heatproof bowl set over a saucepan of barely simmering water (make sure the base of the bowl doesn’t touch the water), or in the microwave on a medium setting for about 45 seconds (my preferred method), until nearly all the chocolate has melted. Give it a stir and leave to rest for a couple of minutes until it has all melted.
Spread the melted chocolate evenly across the minty biscuit base with a spatula.
Chill in the refrigerator for at least an hour, and then use a sharp knife to cut it into 16 pieces. Keep in the refrigerator until ready to serve. This will keep for up to 3
days.
Variations
If your chocolate is dairy free and you use a dairy-free margarine in place of the butter, this recipe would be suitable for dairy-free and vegan diets. Use gluten-free oatcakes for a gluten free version of this recipe.
Cinnamon Toasts
These simple snacks are great by themselves, or try them dipped into cream cheese or hot chocolate! All you need is a part-baked demi-baguette - one of those bake-at-home breads sold in convenience stores - and a few bits from the store cupboard. White baguettes are fine, but if you can find a wholemeal version, so much the better.
MAKES ABOUT 40
1 part-baked demi-baguette, about 150g (5oz)
2 tablespoons sunflower oil
2 teaspoons ground cinnamon
1 teaspoon stevia powder
Preheat the oven to 200°C/180°C fan/400°F/Gas Mark 6.
Slice the baguette into slices about 5mm (¼ inch) thick. Brush each side with a little sunflower oil and place on a baking sheet.
Stir the cinnamon and stevia powder together. Sprinkle liberally all across the baguette slices, then shake the baking sheet to get some of the cinnamon mixture on the underside of the slices as well.
Bake for 15 minutes until the baguette slices have become completely hard.
Leave them to cool on a wire rack. Store them in an airtight tin and eat within a week.
Toffee-flavoured Popcorn
Watching a film just isn’t the same without a bowl of popcorn, so if you’d like an alternative to your usual sweet flavour, try this version.
The toffee taste of lucuma powder mixed with butter makes for a moreish treat.
SERVES 3-4
1 tablespoon sunflower oil
85g (3¼oz) popping corn
50g (2oz) salted butter
4 tablespoons raw lucuma powder
2 teaspoons stevia powder
Place the oil and popcorn in an 18cm (7-inch) diameter saucepan and put the lid on. Heat over a medium heat. After about 10 minutes you’ll hear the corn kernels start to pop; after about 15 minutes they should all be done. Transfer the corn to a large bowl, discarding any unpopped kernels.
Melt the butter in the saucepan that held the corn, then stir in the lucuma powder and stevia powder until combined. Pour the buttery mixture over the corn and toss the corn to get an even coating, then serve.

Sweet Chilli Bites
This is one of those very simple yet stunningly effective recipes. I love how the juicy sweet and fragrant lychees get a hit from the very finely chopped chilli, while the cream cheese prevents the combination becoming too fiery. Because chillies vary in their spiciness, choose your quantity according to how much fire you want in your final dish.
MAKES ABOUT 15
2-3 red chillies
150g (5oz) cream cheese
175g (6oz) pitted fresh or drained canned lychees 1 teaspoon paprika
Start by preparing the chillies. Cut the chillies in half lengthways and remove the pith and seeds, then chop the flesh extremely finely. Stir it into the cream cheese.
Use the handle of a teaspoon to fill each lychee with the cream cheese mixture.
Sprinkle the finished bites with the paprika and serve.
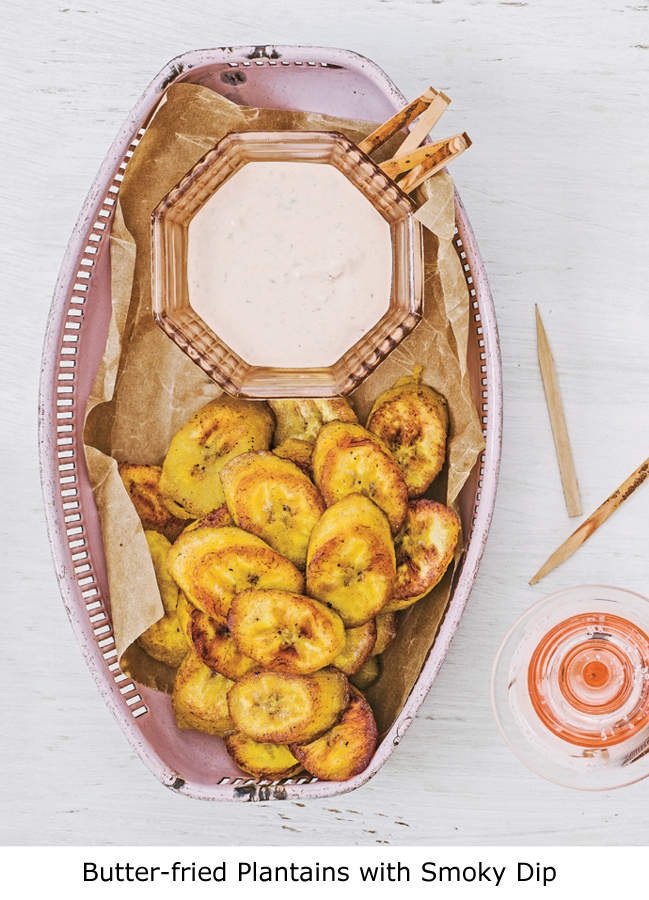
Butter-fried Plantains with Smoky Dip
I absolutely adore plantains, especially when they are fried in butter -
add a cool smoked chilli dip and you have a great party snack. Make sure your plantains have turned black before you use them, though, and don’t forget the cocktail sticks!
SERVES 4
4 tablespoons crème fraîche
grated rind of 1 unwaxed lime and ½ teaspoon juice ½ teaspoon chipotle paste
3 ripe plantains, about 550g (1lb 2oz) total weight 25g (1oz) salted butter
To make the dip, place the crème fraîche in a serving bowl, then stir in the lime rind and juice and the chipotle paste (use only ¼ teaspoon of the paste if you prefer just a hint of heat).
Top and tail the plantains, then lightly run a knife down each one to split the skin.
Remove the skin and slice the plantains on a slant into pieces roughly 1cm (½
inch) thick.
Heat the butter in a frying pan and fry the plantains over a medium-high heat for about 1-2 minutes per side until browned. Serve them as soonas they are done, with the dip alongside.