Cooking Sous Vide - Thomas N. England (2016)
Introduction to Sous Vide
WHAT IS sous vide?
Sous vide is a French term that translates to “under vacuum.” The sous vide process involves sealing food in a bag and cooking it in a temperature-controlled water bath.
Cooking “Under Vacuum”
Originally referring to the process of vacuum sealing food in order to extend its shelf life, sous vide became known as a cooking process in the 1940s. At that time, people began experimenting with placing vacuum-sealed food in a pot of boiling water to heat it.
This rudimentary process wasn’t refined until the 1970s, when a European scientist tested water temperatures in relation to sealed packages of food being cooked. His discoveries led to the adoption of sous vide as a tool to cook gourmet foods.
However, it really wasn’t until 2000 that chefs in the United States started to understand and utilize the technique. By then, immersion circulators could heat water to exact temperatures. Thus, sous vide cooking became much more controlled and attainable.
How Sous Vide Is Different
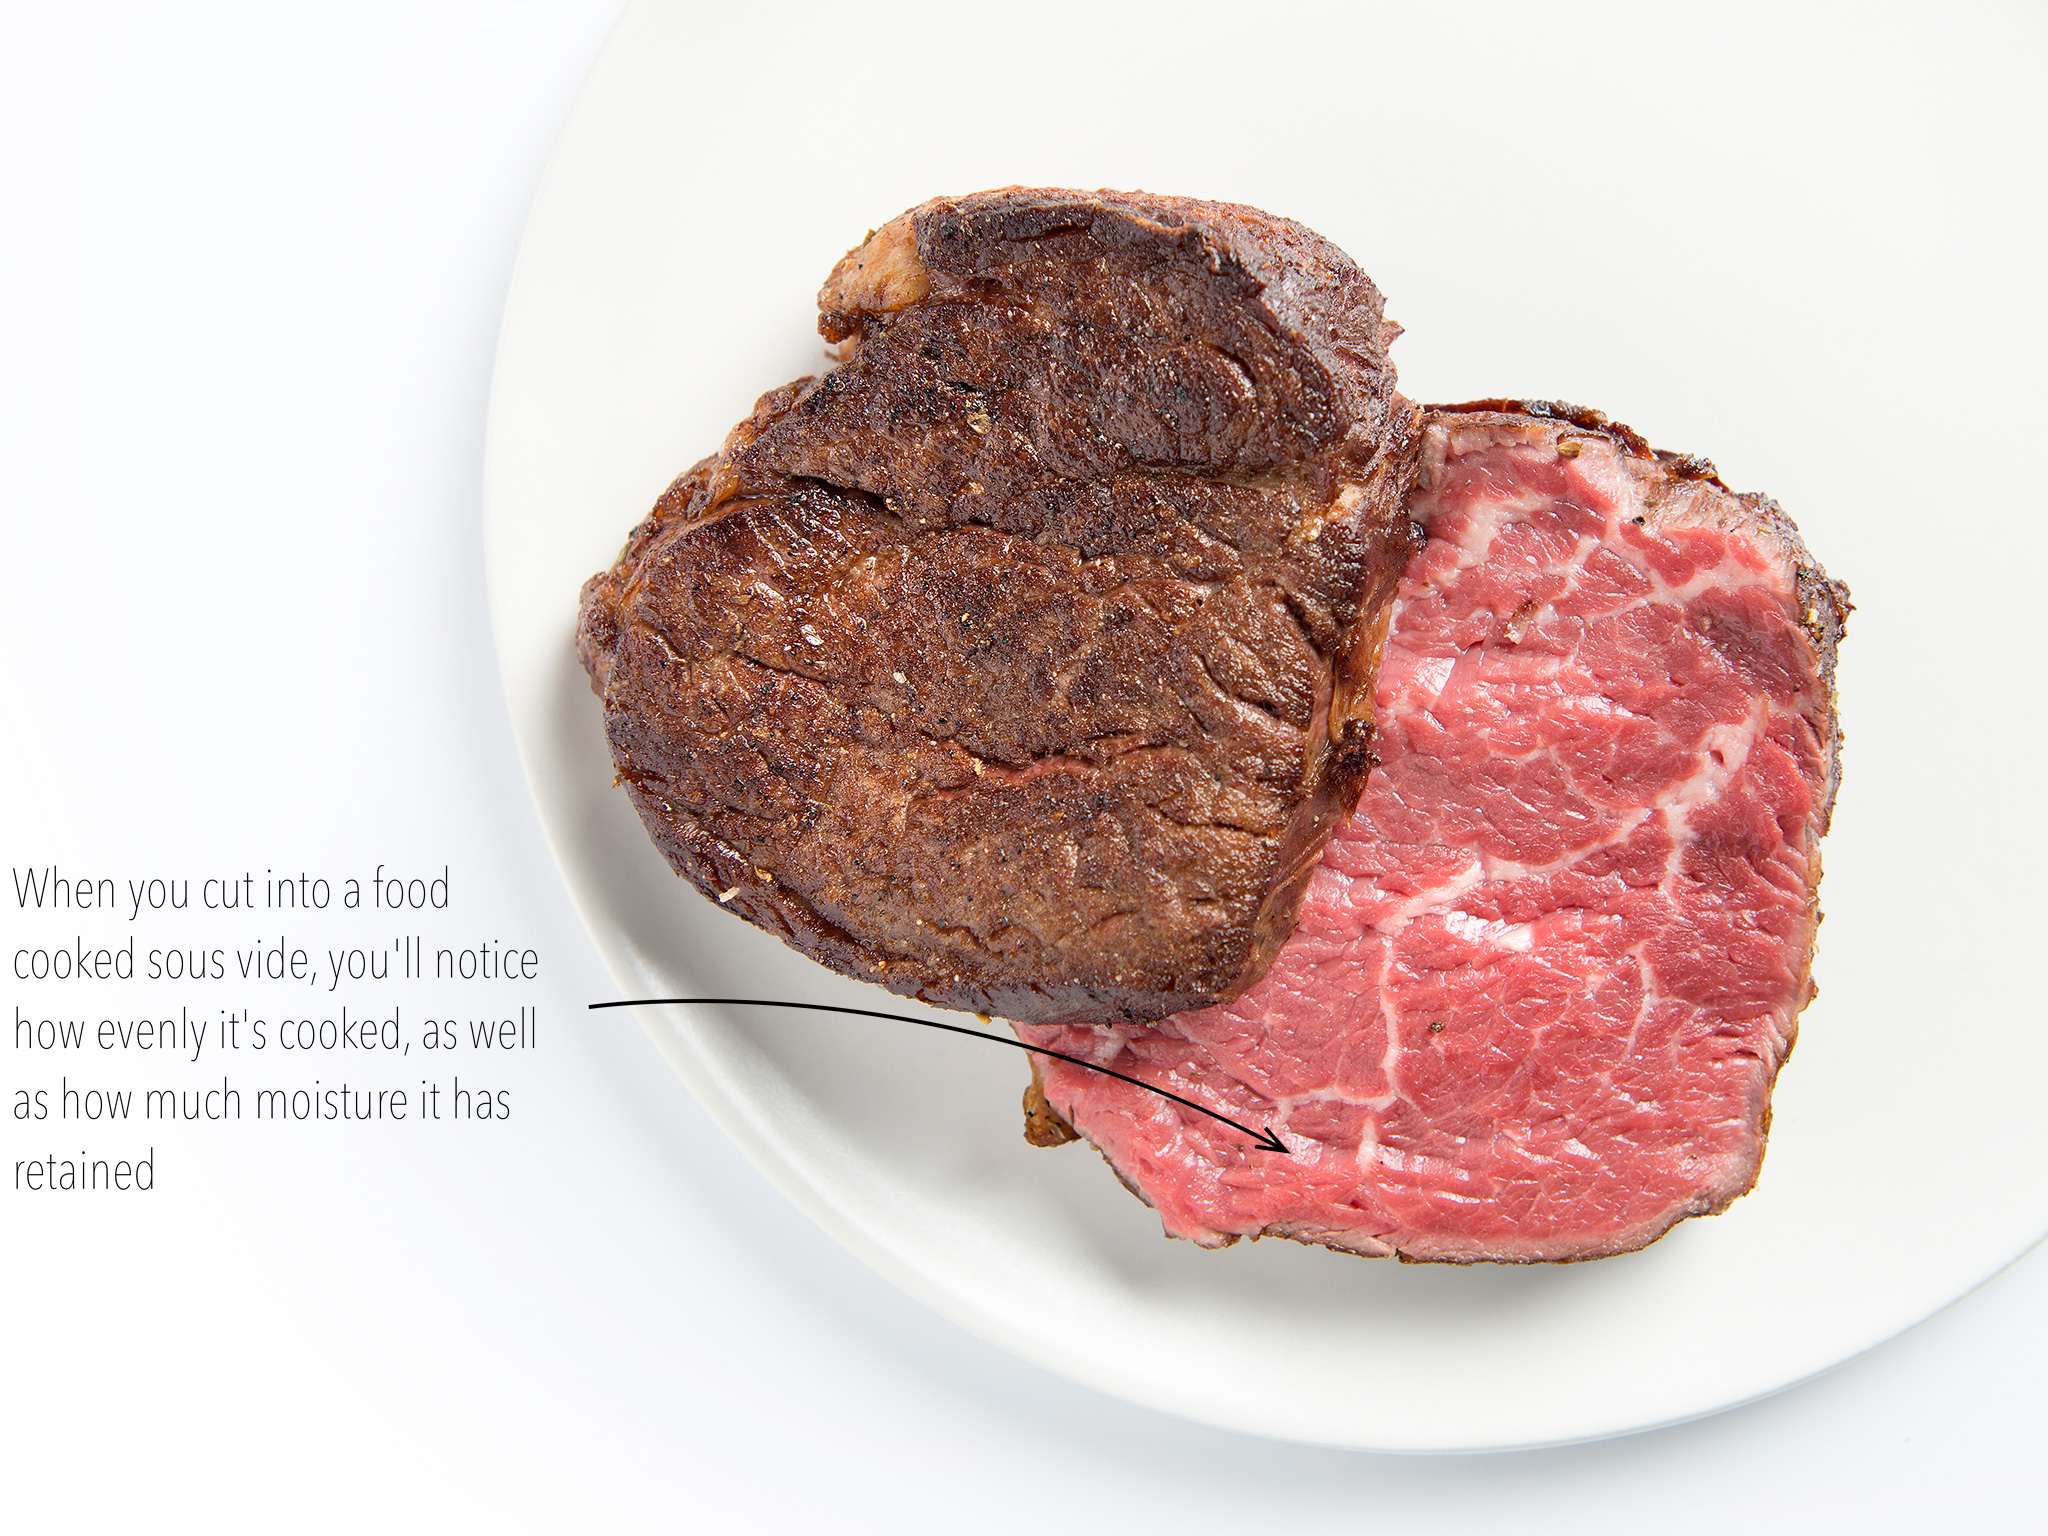
Unlike traditional methods of cooking, sous vide cooks food evenly and at a lower temperature, leading to a better finished product.
Normally, foods are placed onto a heat source that’s much hotter than the ideal temperature of the final cooked food. For instance, a piece of filet mignon is often sautéed at a temperature between 300°F and 500°F (149°C and 260°C); however, the desired internal temperature is 135°F (57°C) for medium-rare steak. This results in a piece of meat that varies from very well done near the outside to medium-rare in the middle. With sous vide cooking, the filet mignon can be seasoned, put into a bag, and cooked in a water bath set to exactly 135°F (57°C). In just a few minutes, the whole steak is exactly medium-rare; it can then be put in a very hot sauté pan for a few seconds to gain a flavorful brown exterior.
The sous vide technique also sets itself apart when it comes to cooking tougher cuts of meat. Normally, tough cuts are braised at a high temperature in order for the connective tissue to melt. For instance, a tough meat may be braised in a flavorful liquid in a 250°F (121°C) oven for 3 hours. If it’s cooked at too hot of a temperature though, the moisture literally boils out of the meat. With sous vide, the seasoned meat can be sealed in a plastic bag and placed in a water bath set at a much lower temperature. Because connective tissue readily melts at 150°F (66°C), you get a juicier slice of meat than if you braised it.
What sets sous vide apart from other methods is its ability to evenly cook any food.
Why Cook Sous Vide?
Beyond cooking foods evenly and at the perfect temperature, sous vide helps seal in flavor and nutrition. For instance, when making soup, you’re likely familiar with how the smells of the broth waft through the air. While this helps build the feeling of hunger, it also means the smells in the air are no longer in the soup. Sous vide makes up for the loss of those delicious smells by sealing them into the bag, resulting in food that truly bursts with a multitude of flavors.
When it comes to nutrition, you can use sous vide to preserve the nutrients in your food, as it takes into account the different temperatures at which food still maintains them. So you don’t have to rely on outdated cooking methods that can rob foods of nutrients. Instead, you can cook your food at the ideal temperature and end up with foods that yield the best nutrition, because the nutrients aren’t lost to less efficient cooking methods. For instance, you can cook green beans sous vide at just the right temperature so the bright green colors develop and the chlorophylls release their nutrients.
Based on these benefits, it’s easy to see why sous vide cooking is becoming popular in homes everywhere.
HOW DOES SOUS VIDE work?
The sous vide process differs from traditional cooking by using water instead of air to transfer heat, allowing you to set more precise cook times and letting you cook to an exact temperature. This method results in food that’s perfectly cooked.
 Without Oxygen
Oxygen is the enemy of freshness. When heating up foods using convential cooking methods, the food molecules expand and allow oxygen to enter as they heat up (a process known as oxidation). Oxidation causes foods to lose their flavor and color. On the other hand, sous vide packaging removes oxygen from the equation by requiring you to seal foods in plastic bags or jars. This prevents oxidation, keeping your foods bright and flavorful.
When cooking food in a conventional oven, moisture and aromas can be leached out due to the type of open-air vessel being used, such as a baking pan, a casserole dish, and so on. By sealing foods in plastic bags or jars, you lock in the pleasant aromas and water vapor, so you end up with cooked foods that are moist and full of flavor.
 More Precise Times
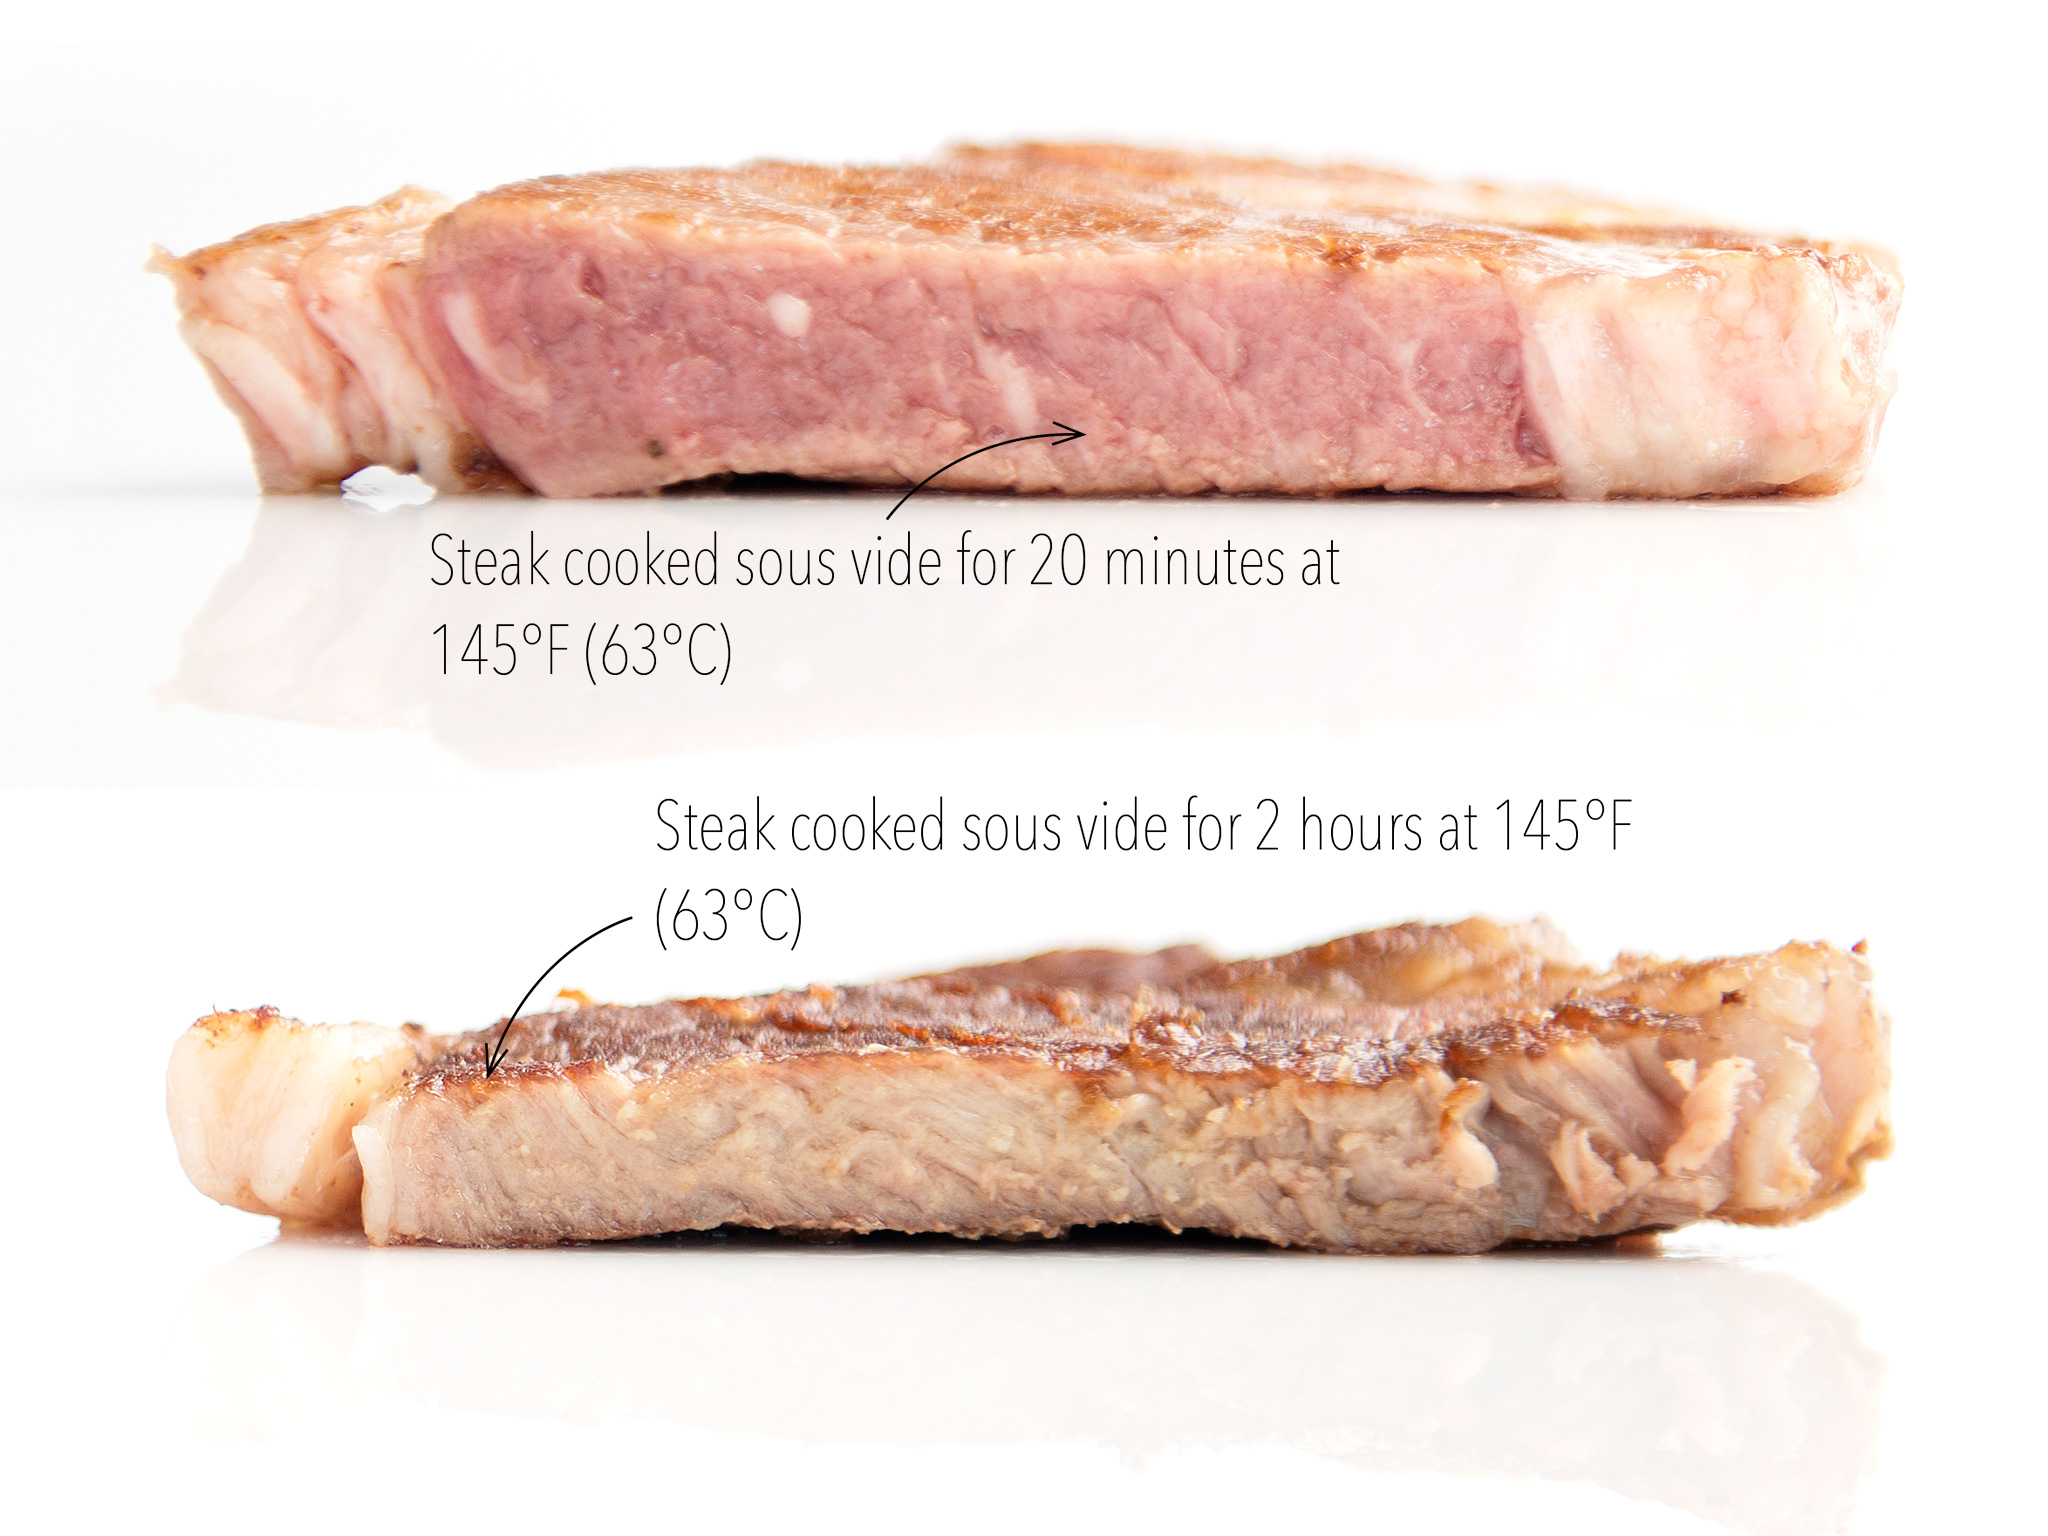
While cooking times for sous vide are usually longer than for conventional methods, the longer times are more forgiving, meaning you’re less likely to overcook food and more likely to achieve the results you desire. For instance, tough cuts of meat are typically cooked at higher temperatures over a shorter period of time to break down the connective tissue and make them tender, which tends to dry them out. When you cook these cuts sous vide at lower temperatures over a longer time frame, however, the connective tissues are still broken down without a loss in moisture.
 More Exact Temperatures
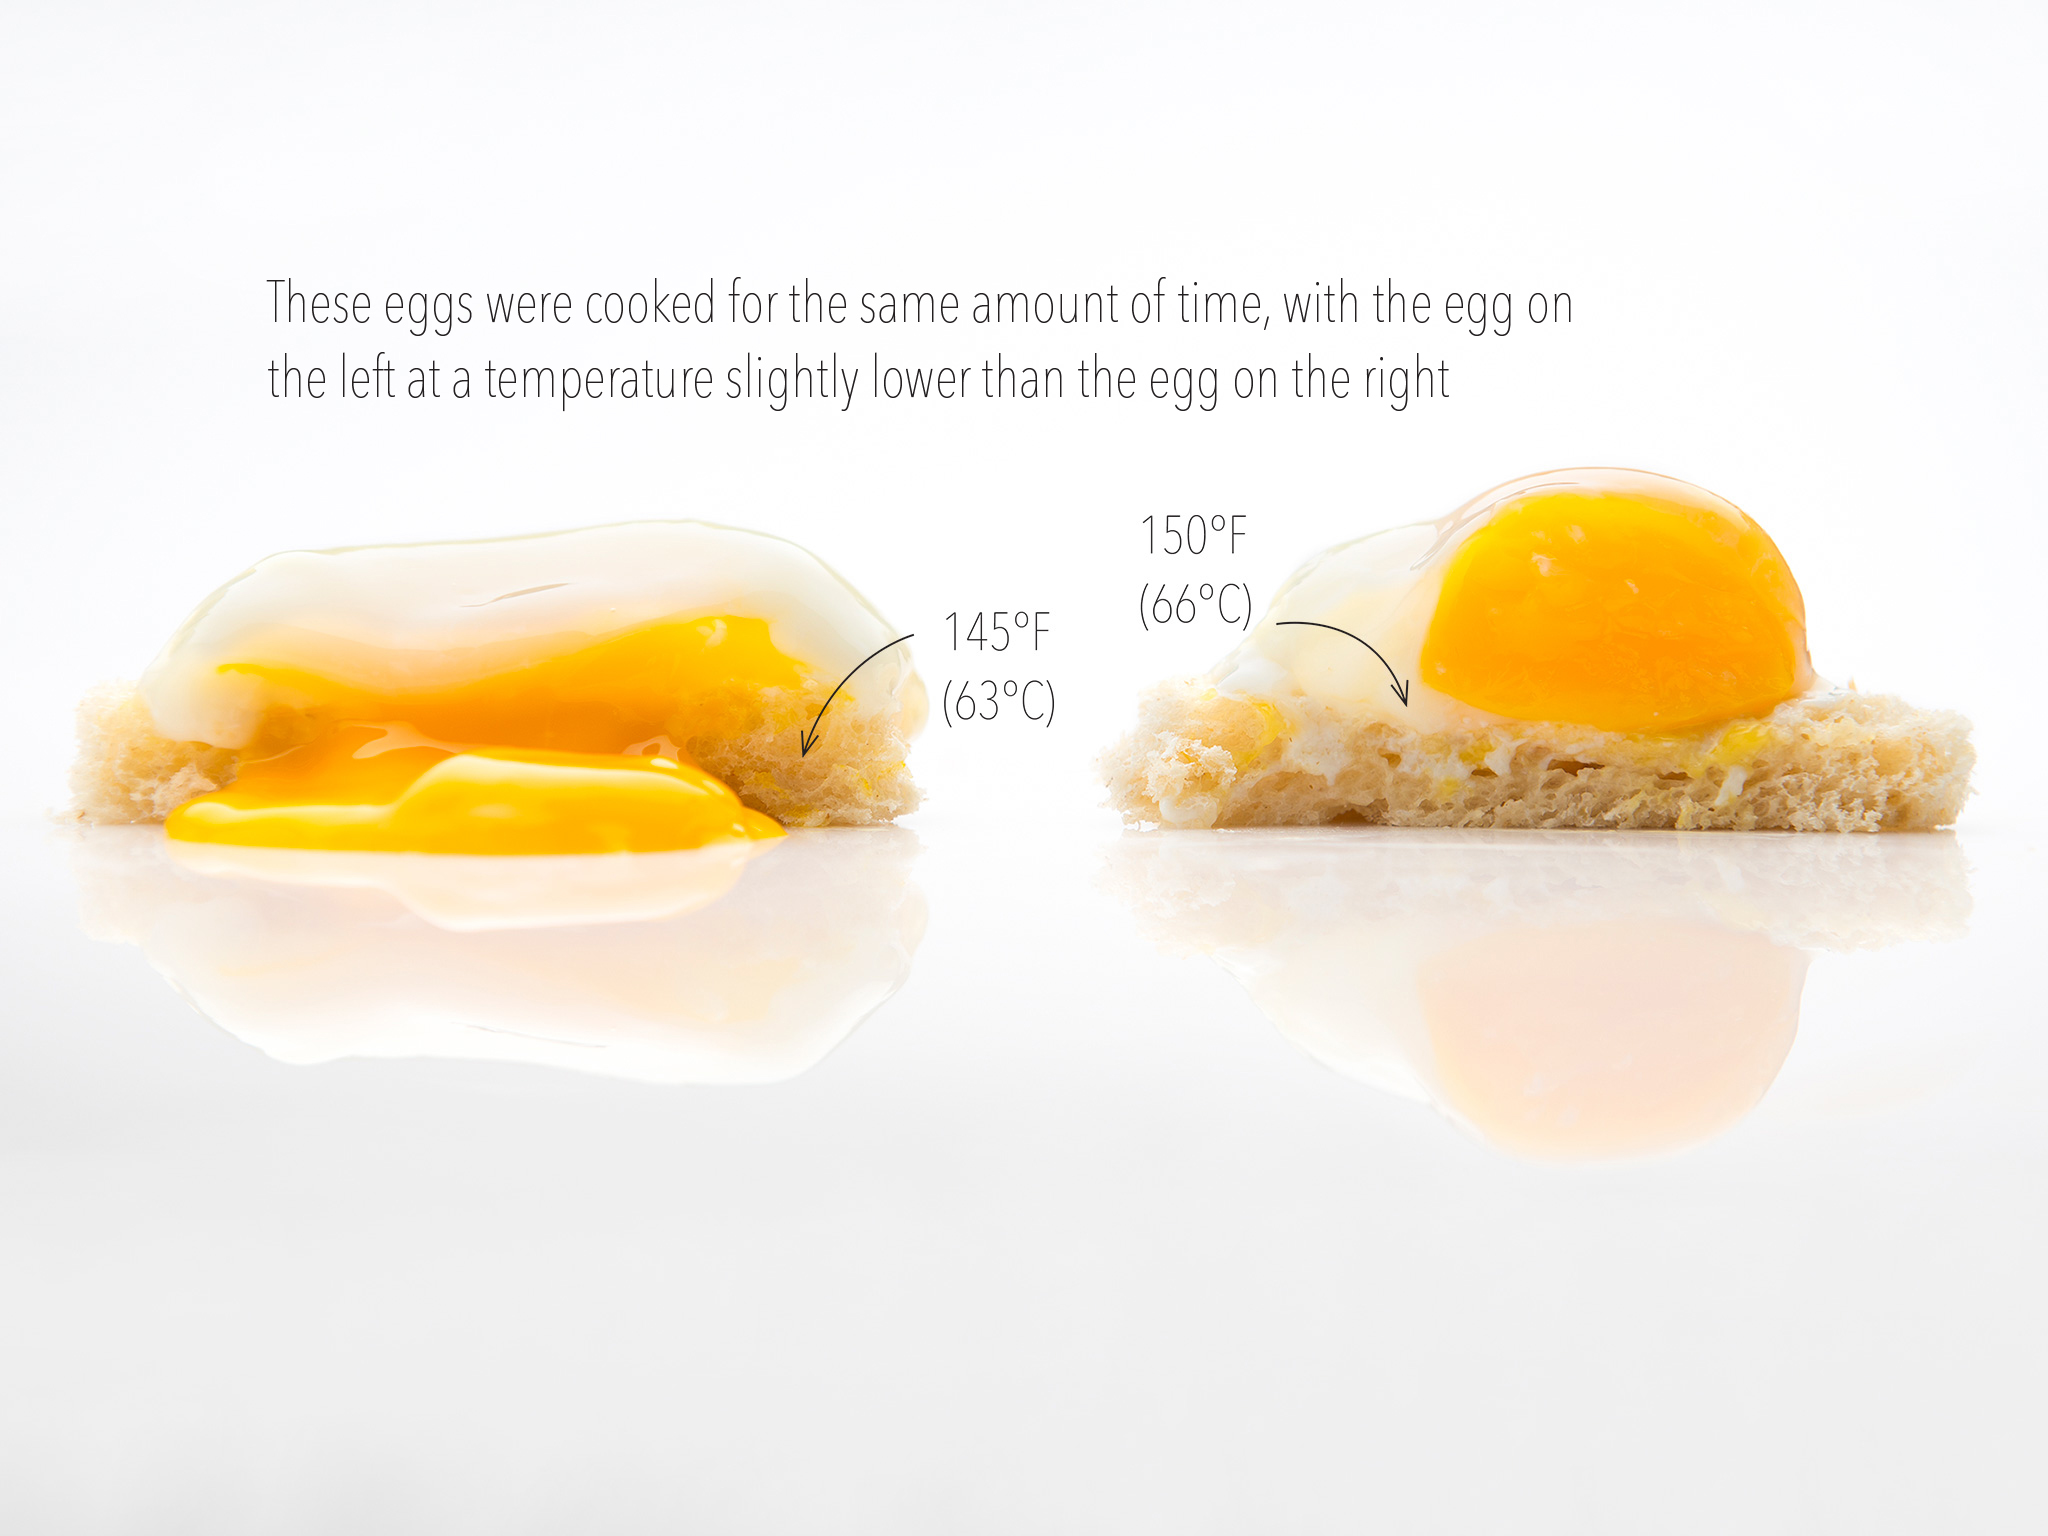
Traditional cooking methods require you to set temperatures much higher than the food actually needs; this is done to ensure the center is cooked and to kill off any bacteria. With sous vide, you can accomplish the same thing without sacrificing taste. The machine is simply set at the required temperature necessary for doneness, so you get a product cooked to your liking that’s also safe to eat.
SOUS VIDE machines
When it comes to cooking food sous vide, keeping the water at an exact temperature is crucial. Maintaining consistent heat during the process is primarily accomplished by a water oven or an immersion circulator.
While both sous vide machines are capable of maintaining temperature, they vary in terms of cost, range of temperatures, and calibration guarantee. In terms of cost, water ovens range from $400 to $1,400. On the other hand, immersion circulators are a bit more affordable, with a starting price of $100, though high-end versions can cost thousands of dollars.
When evaluating machines, you should also look at the temperature ranges they can maintain for long periods of time. The temperatures should range from 126°F to 190°F (52°C to 88°C). Some devices may have difficulty maintaining low temperatures and will cycle too hot.
A third consideration when choosing a machine is the guarantee of calibration. When cooking sous vide, a variation of 1 degree can make a big difference. Look for a guarantee with a variation of only a ½ degree.
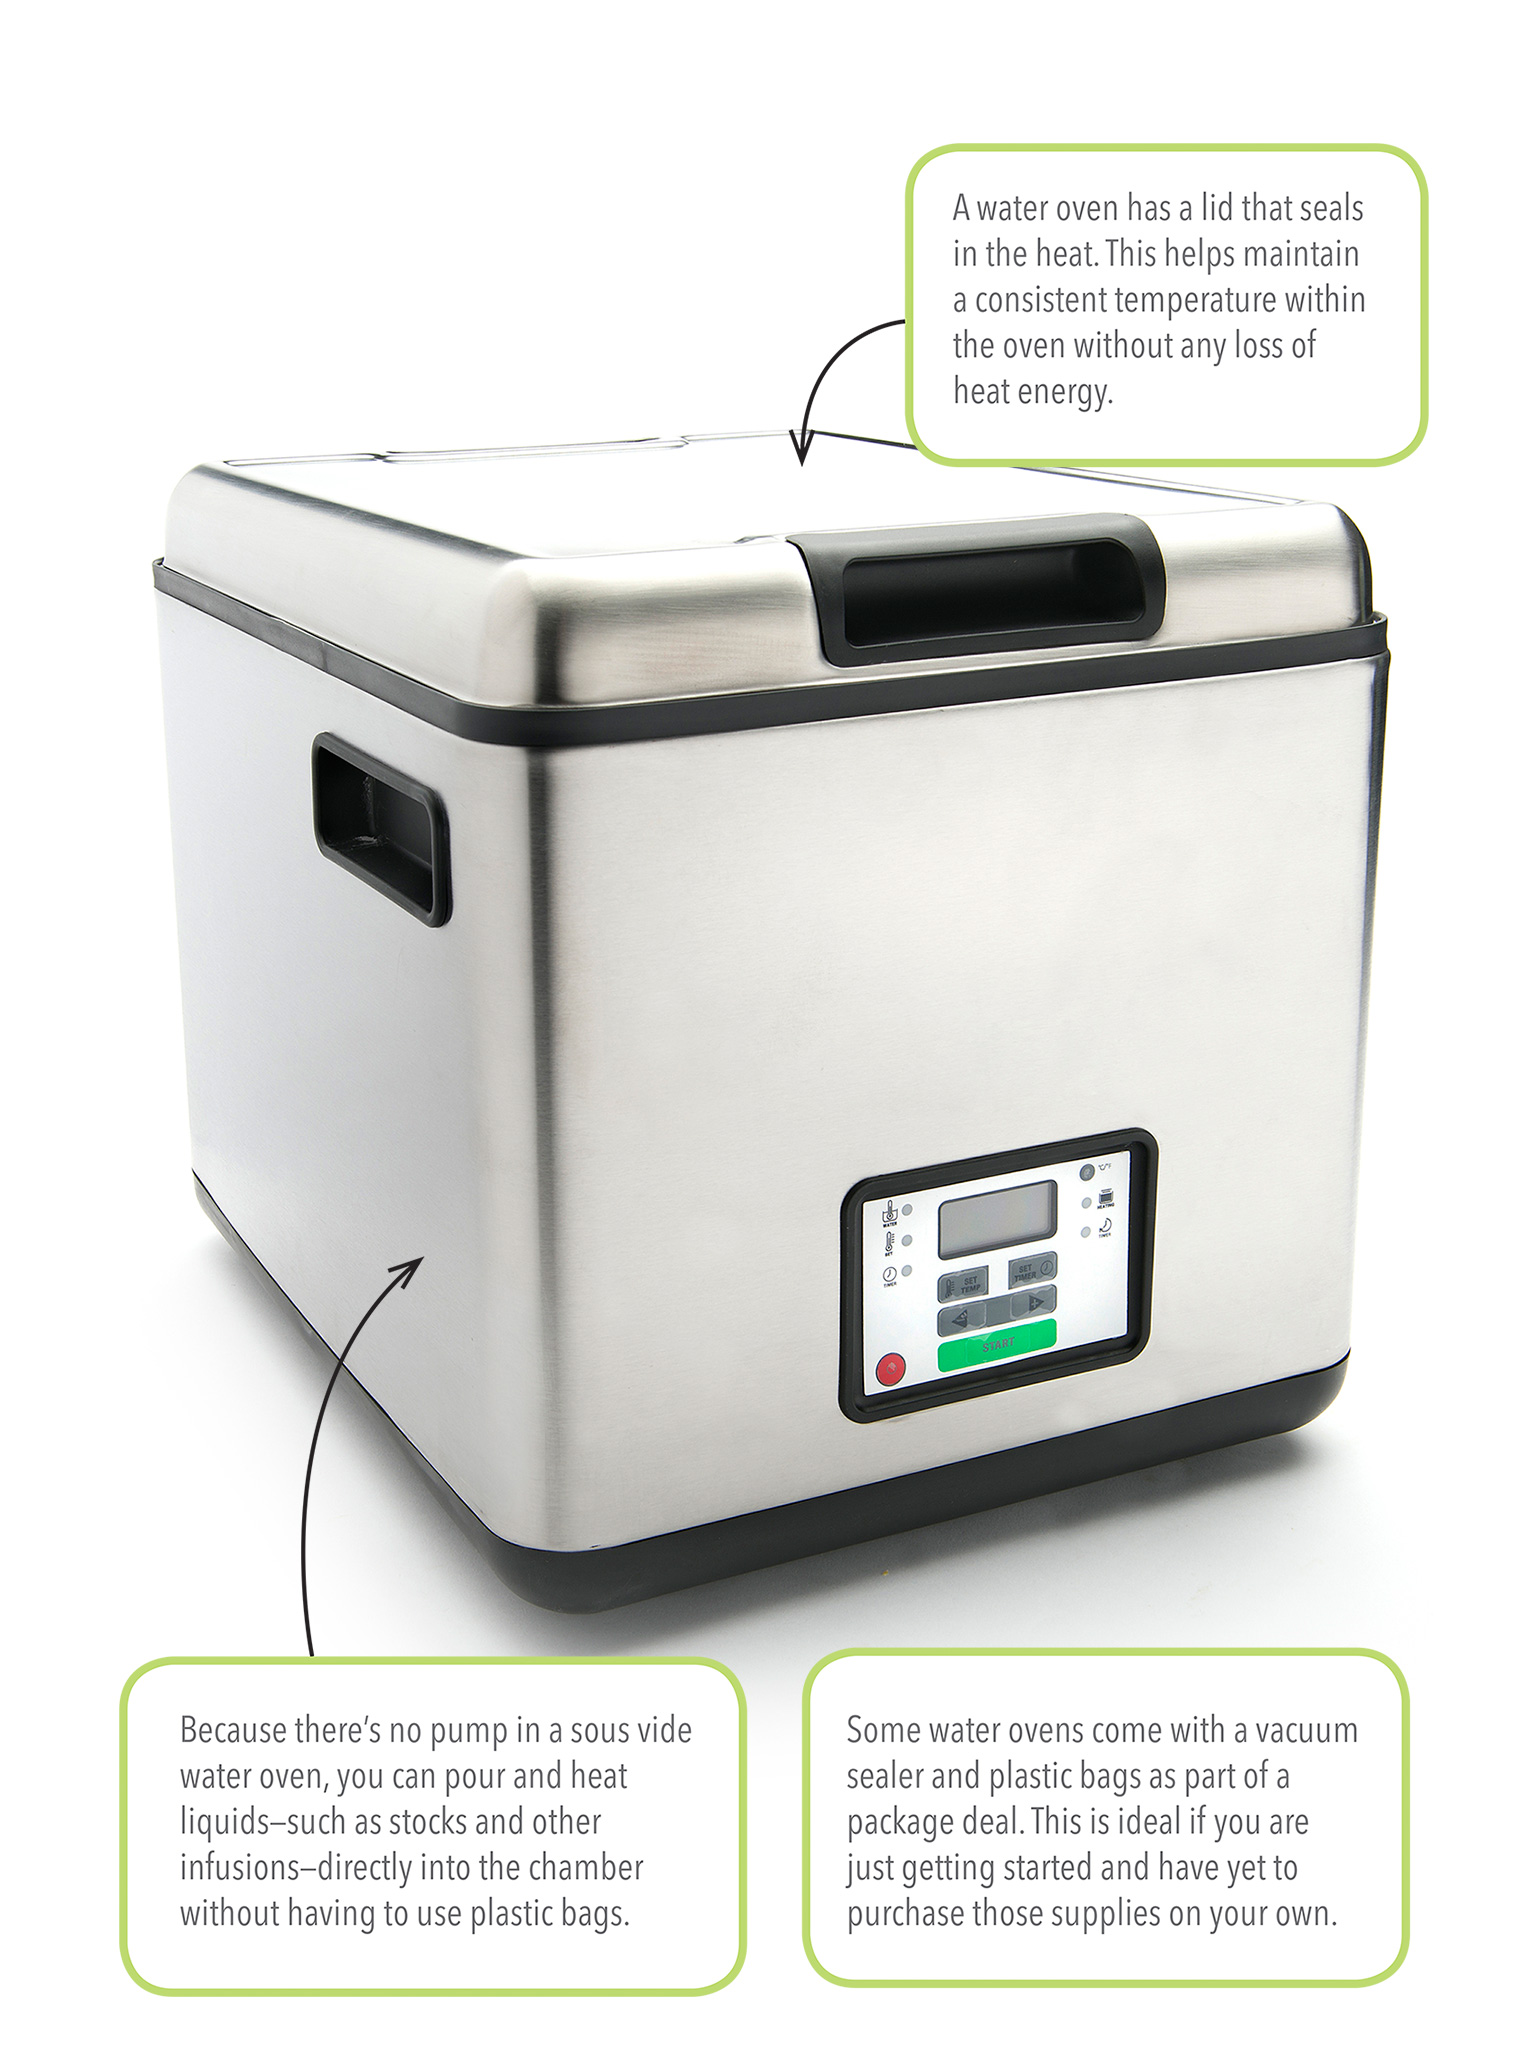
Water Oven
A water oven is an insulated container with a heating element surrounding the inside of a water bath chamber. The temperature of the oven is controlled by a preset temperature you input through controls on the outside of the appliance. Additionally, there may be a heating element under the container to raise the temperature more quickly as needed.
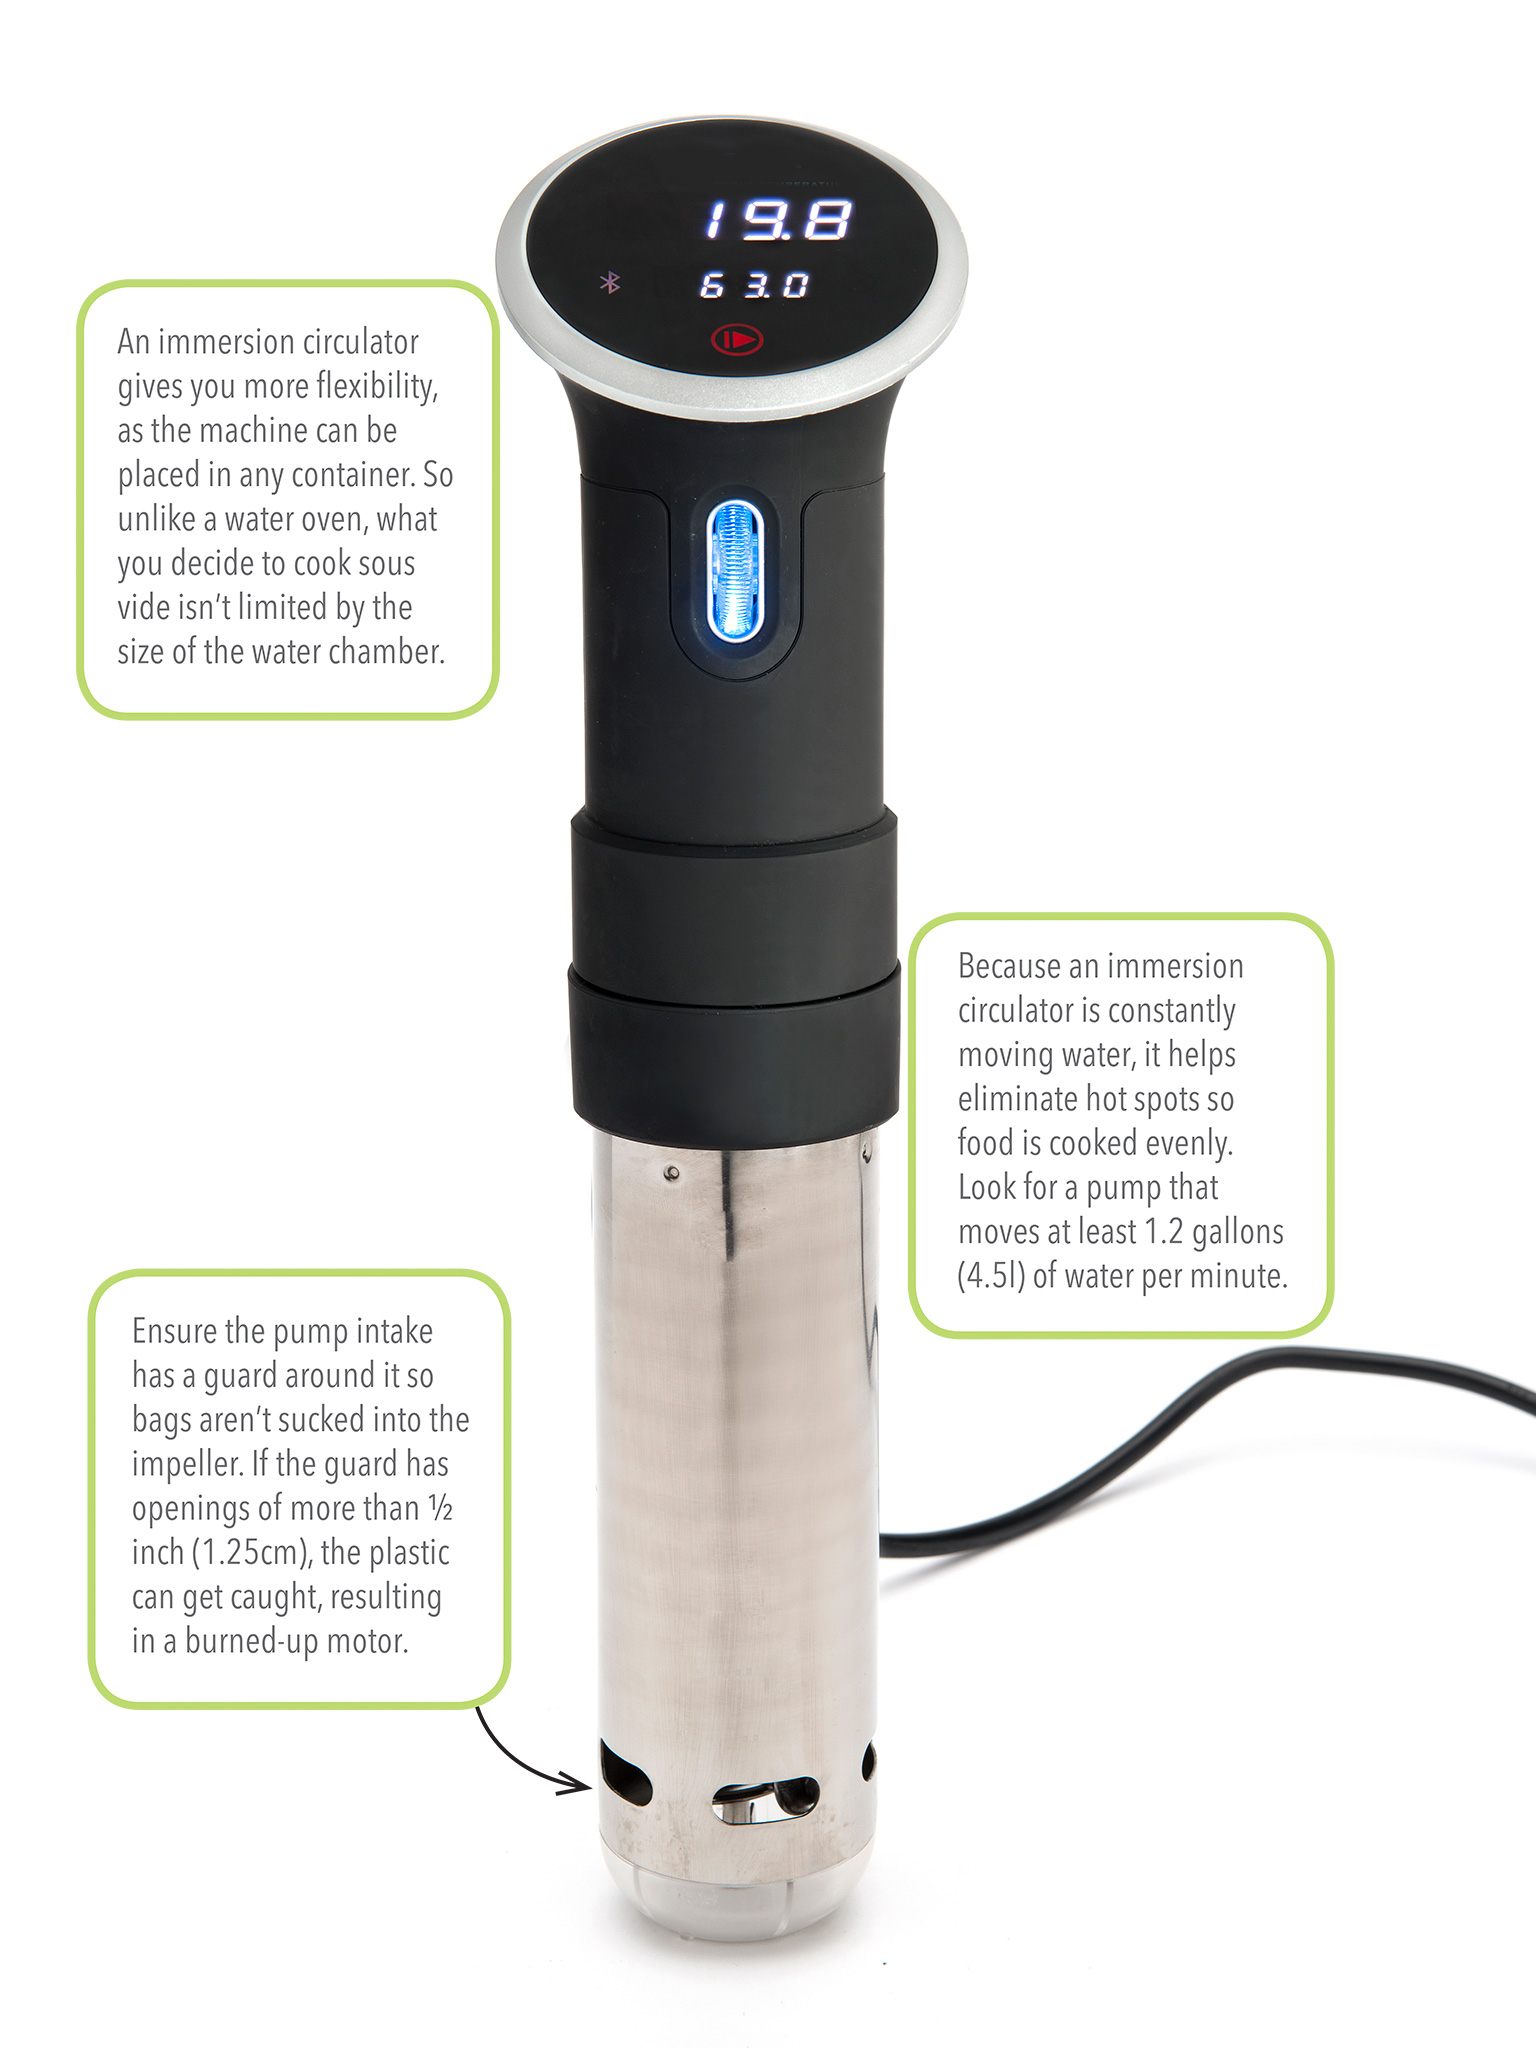
Immersion Circulator
An immersion circulator combines a pump, heater, and thermometer all in one device. The circulator pumps water up from the bottom of a container, heats it to an exact temperature, and recirculates it through the container. The pump continuously runs in order to regulate the heat, which helps keep the water at a constant temperature.
Professional Machines
Professional circulators and large combi ovens were the only choice for sous vide cooking until the advent of cheaper home versions. Professional immersion circulators typically set themselves apart from the home versions due to speed. Whereas most home versions will pump water at about 1.2 gallons (4.5l) per minute, professional versions can go as high as 3.2 gallons (12.1l) per minute. The main reason for the need for speed is that restaurants may have many different bags in the container at one time, meaning water needs to flow faster to get around all of the bags.
Combi ovens differ from typical sous vide water ovens because they use steam instead of a true water bath. In combi ovens, temperature-controlled water vapor is blown across the sous vide packages. This allows for a constant flow of water in an exact temperature across a very large oven, so hundreds of sous vide bags can be cooked at one time.
While this professional gear is great for the controlled cooking of many items, it isn’t really needed by most home cooks.
SOUS VIDE basics
The sous vide process includes four basic steps: prep, seal, cook, and finish. Before going through each in more detail later in this part, I’d like to take you through just how all of them work together to create a delicious final product.
Cooking with Ease
While at first glance the sous vide method might appear more complex than traditional cooking methods, it’s really not that complicated. You simply seal ingredients in a plastic bag, place the bag in a water bath, and hold a target temperature to within a degree or two. With your water oven or immersion circulator, you can warm a water bath to any temperature you set and keep it there for hours—or even days, if needed. When the food reaches your target temperature, you take it out, give it a quick sear or other finish, and serve it. That’s it.
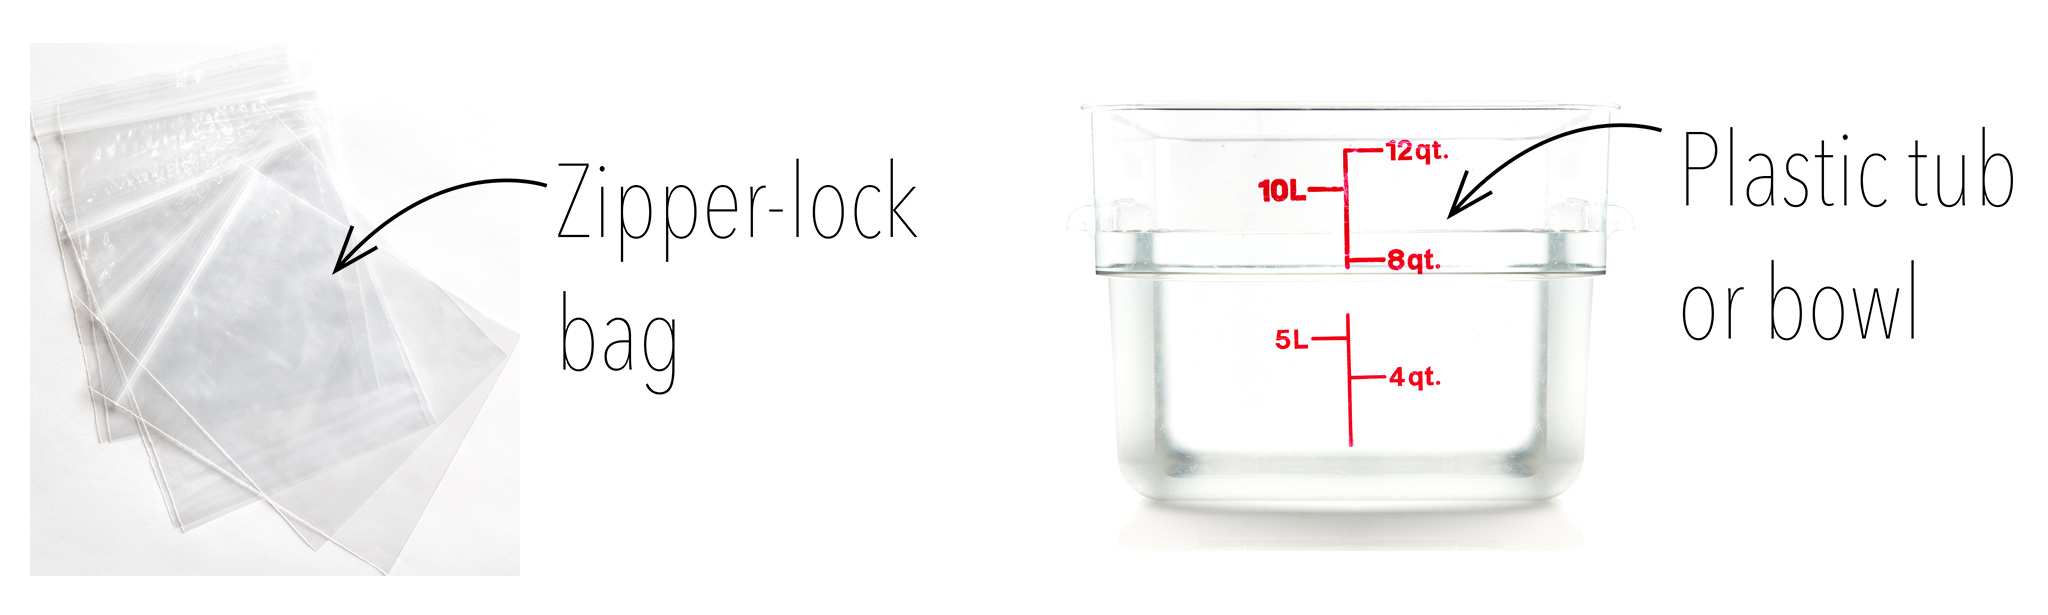
For softer foods that might get squished during the vacuum-sealing process (such as ground beef), you have the option of using a zipper-lock bag instead.
Sous Vide: Not Just for Steak
Sous vide is best illustrated with steak, as that's where you'll see the most dramatic difference between how it cooks traditionally versus the sous vide way. However, you can employ the sous vide process on just about any type of food. Fruits, vegetables, poultry, pork, seafood, and even desserts all benefit from cooking sous vide.
With fruits and vegetables, you'll notice how they retain their vibrant colors when vacuum sealed due to the lack of oxygen. As for poultry, you can cook it to a safe temperature without sacrificing flavor. Leaner cuts of pork benefit because the lack of fat is made up for by keeping the moisture contained in the sealed package. Sous vide helps seafood keep its delicate, tender nature without overcooking it. And when it comes to desserts, you'll get a lighter and softer texture.
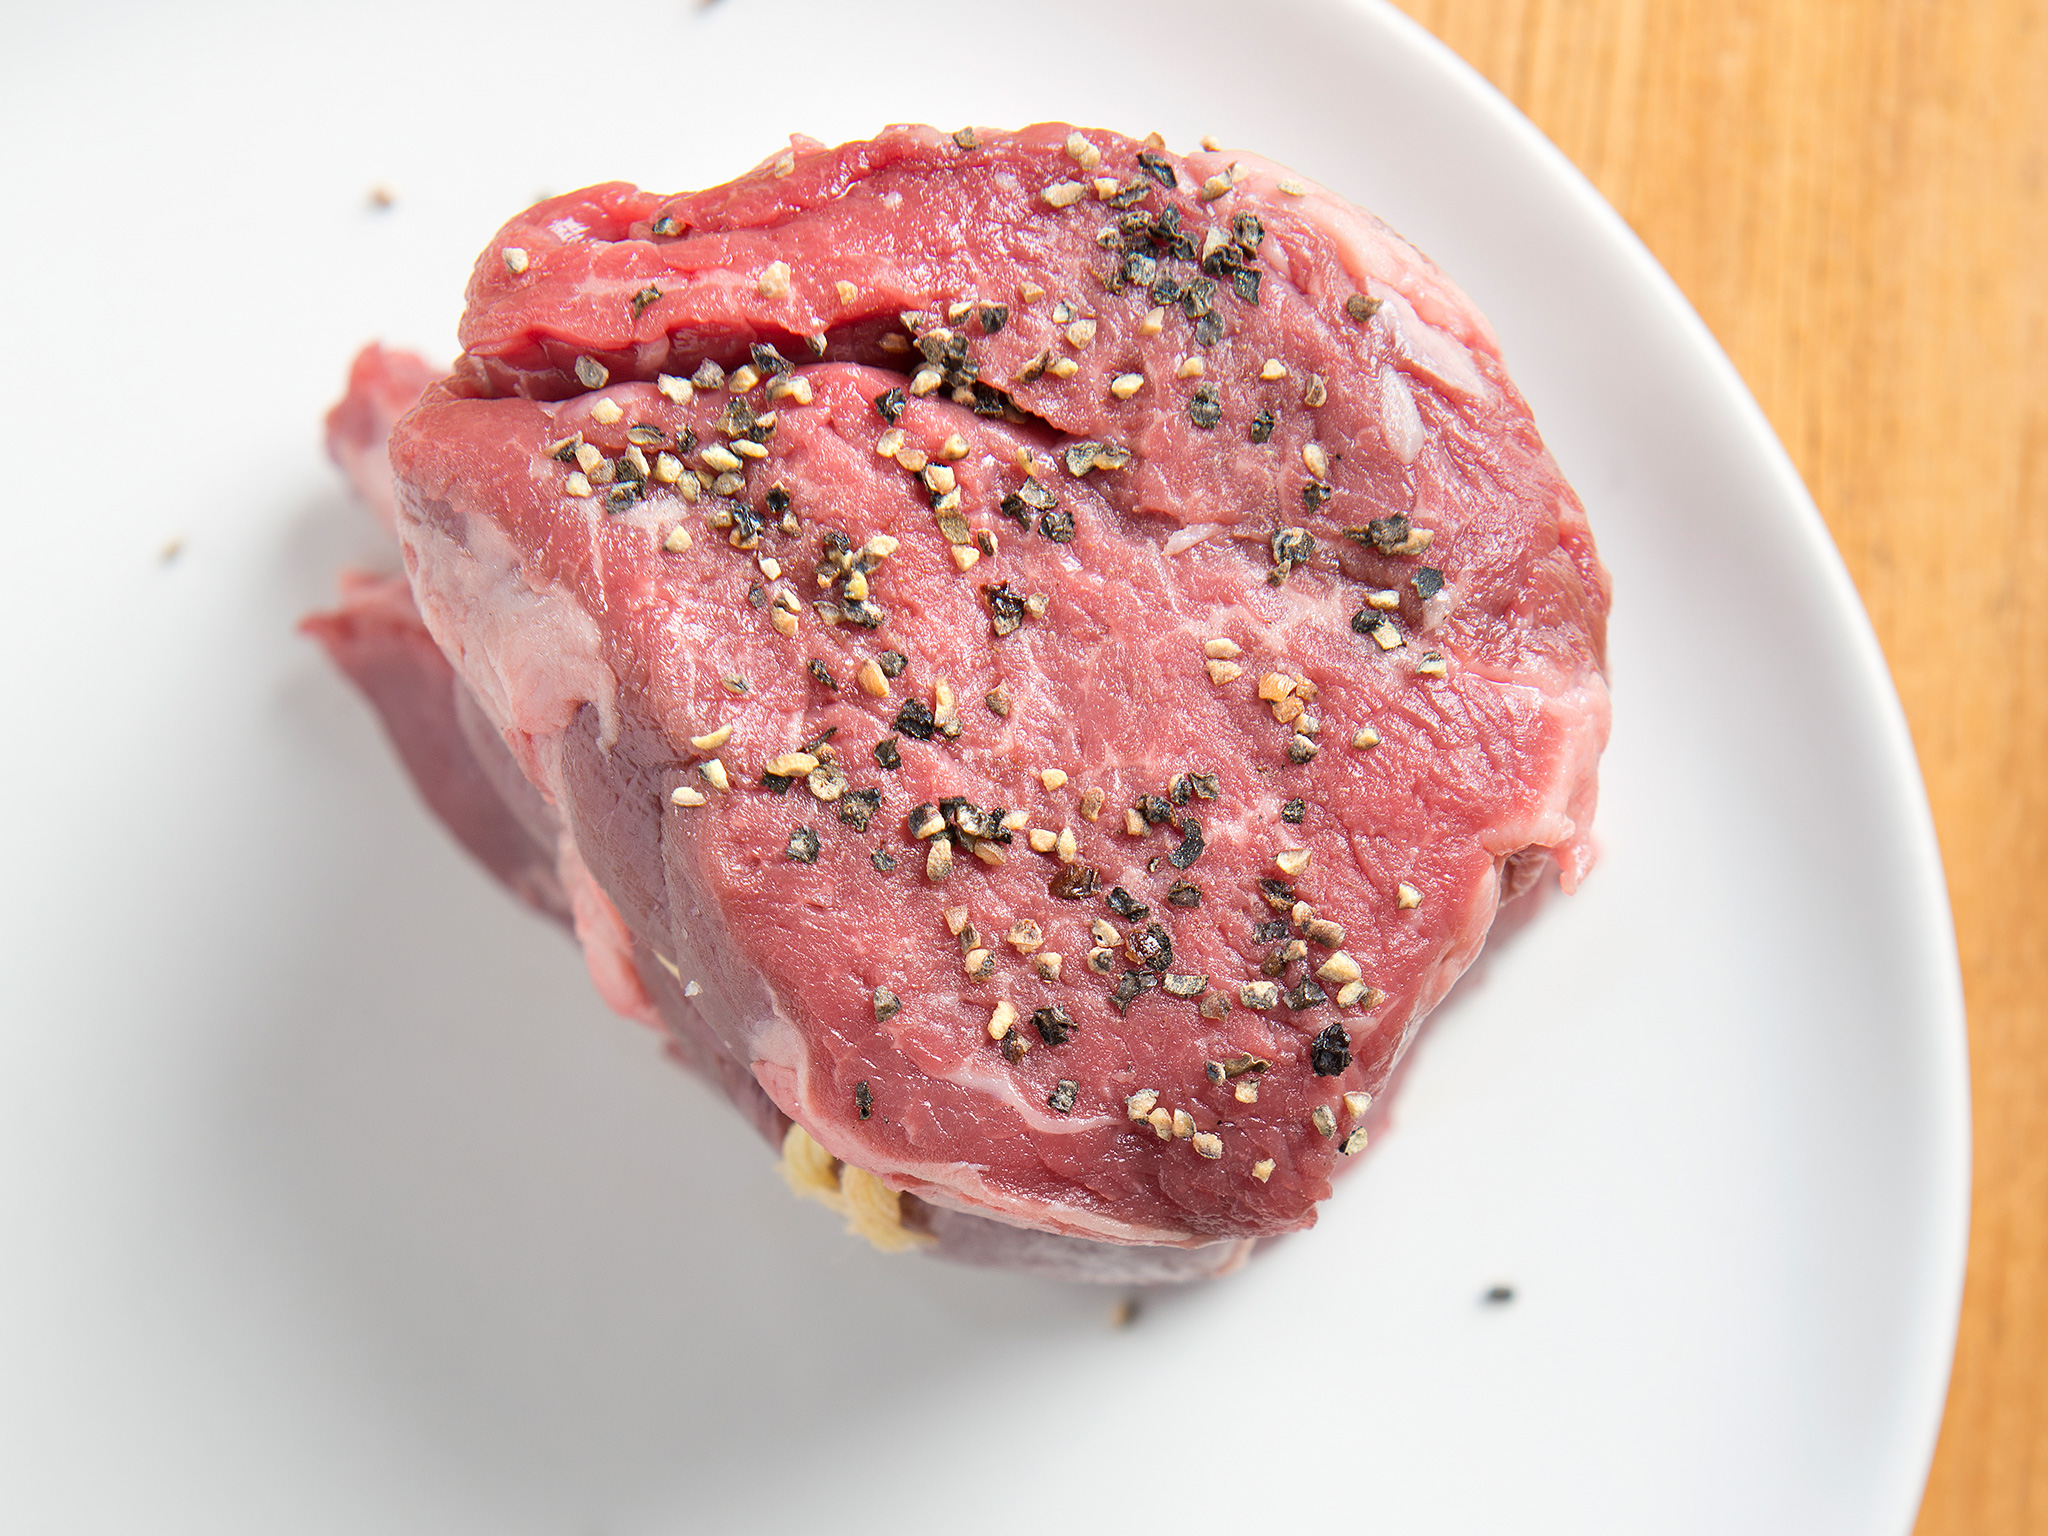
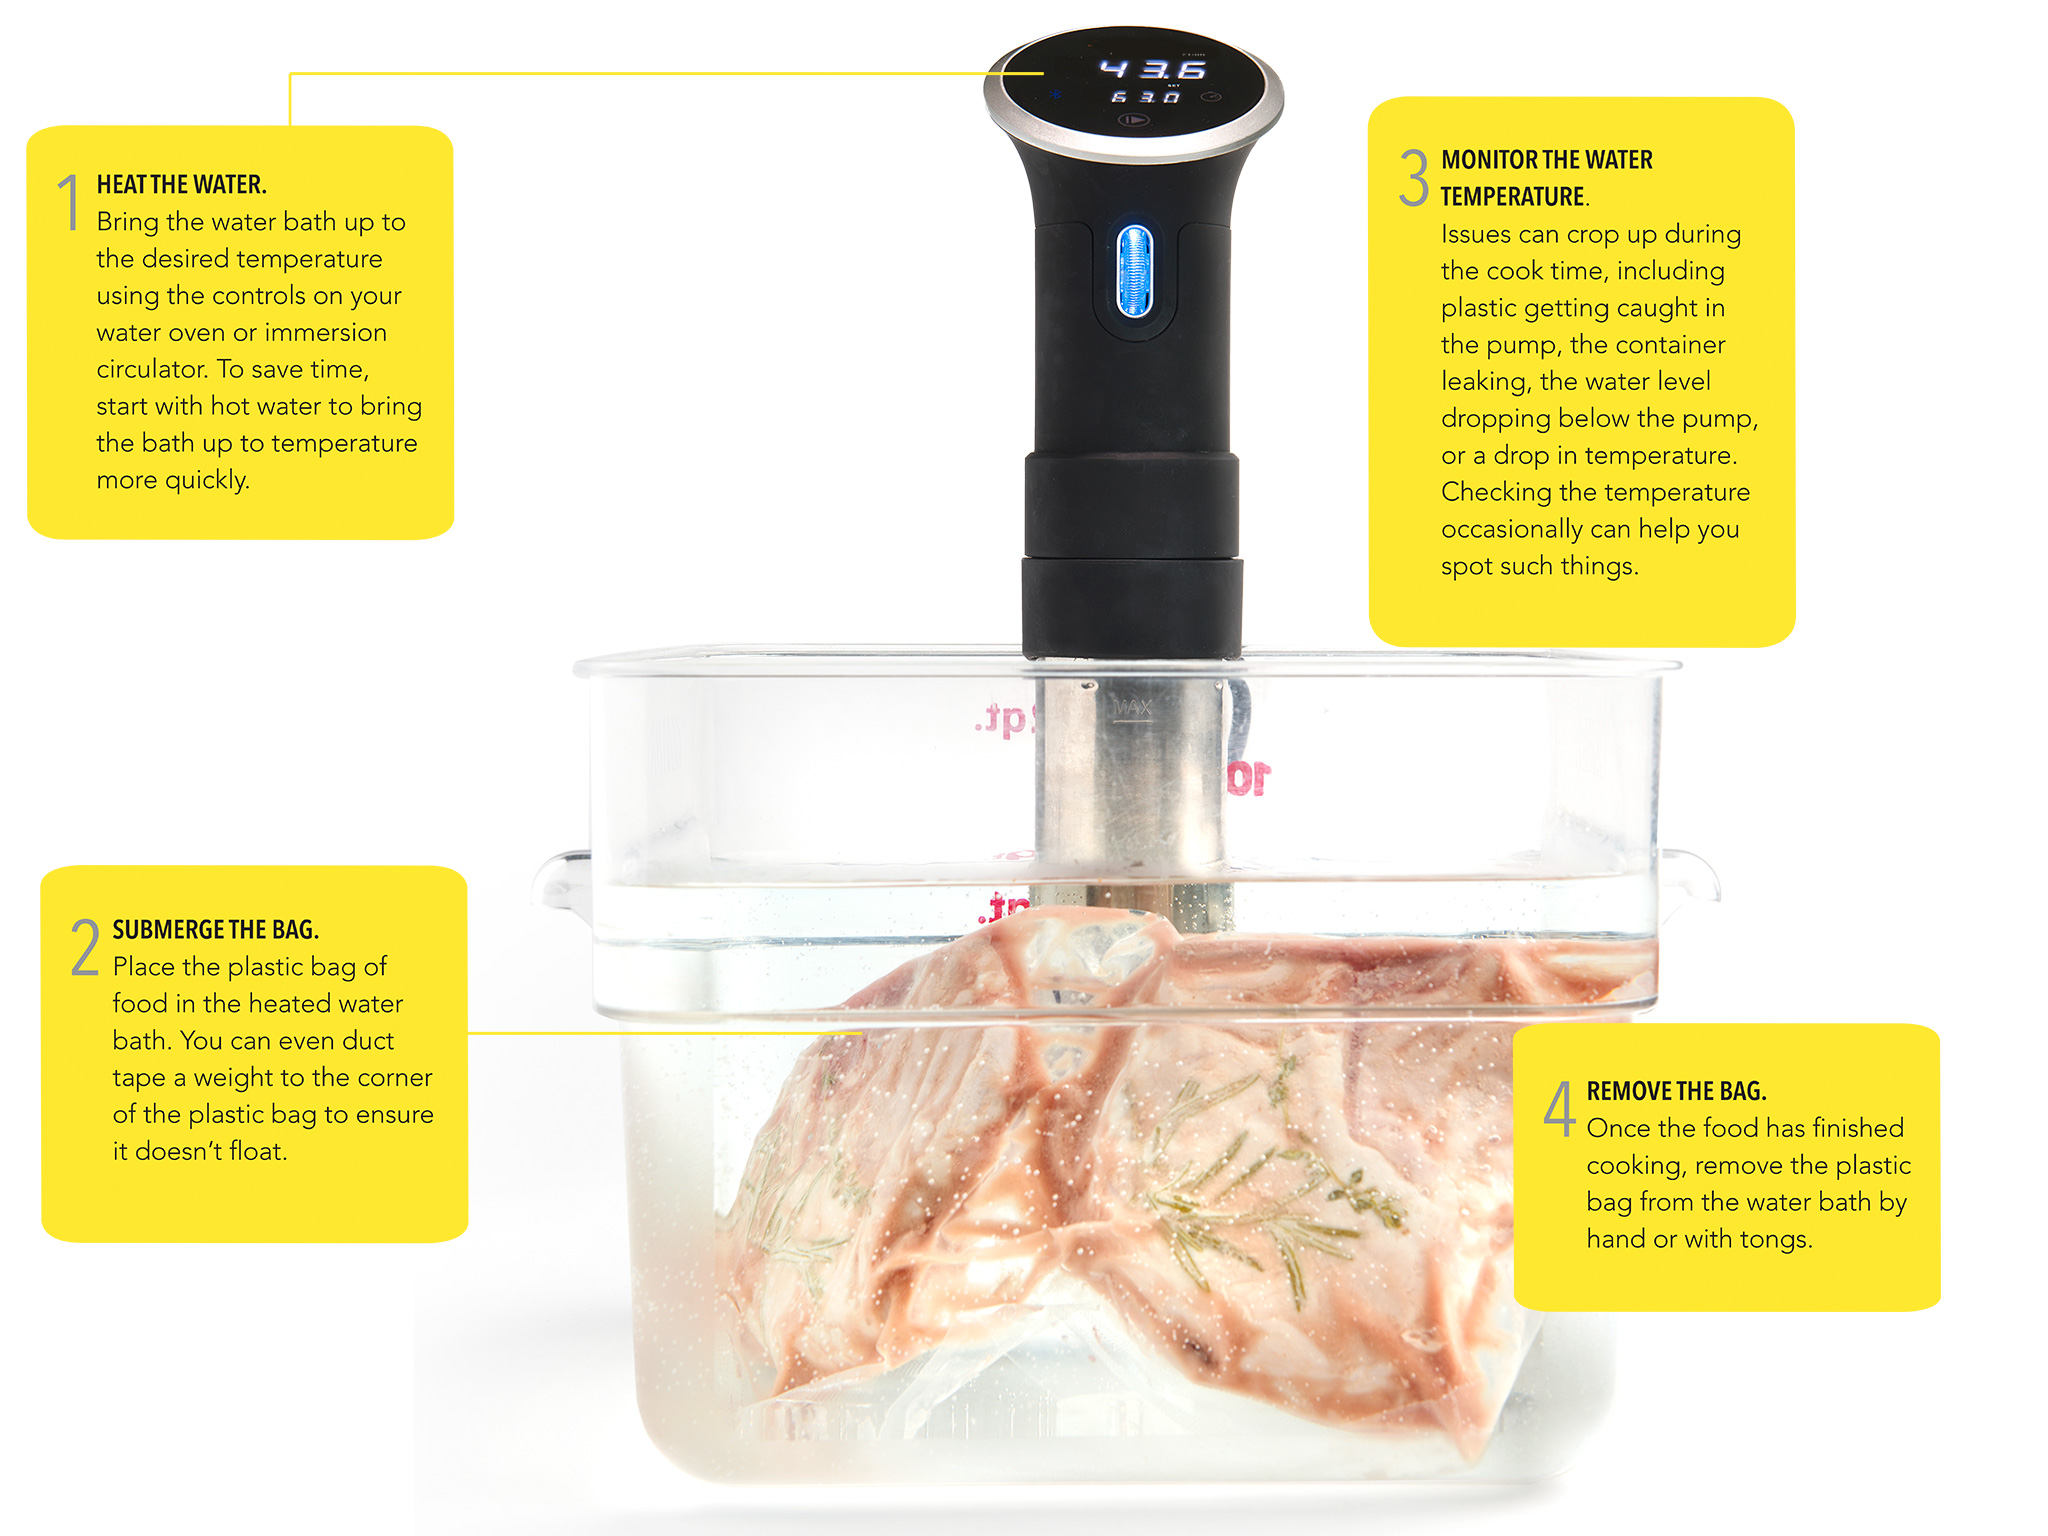
1 PREP
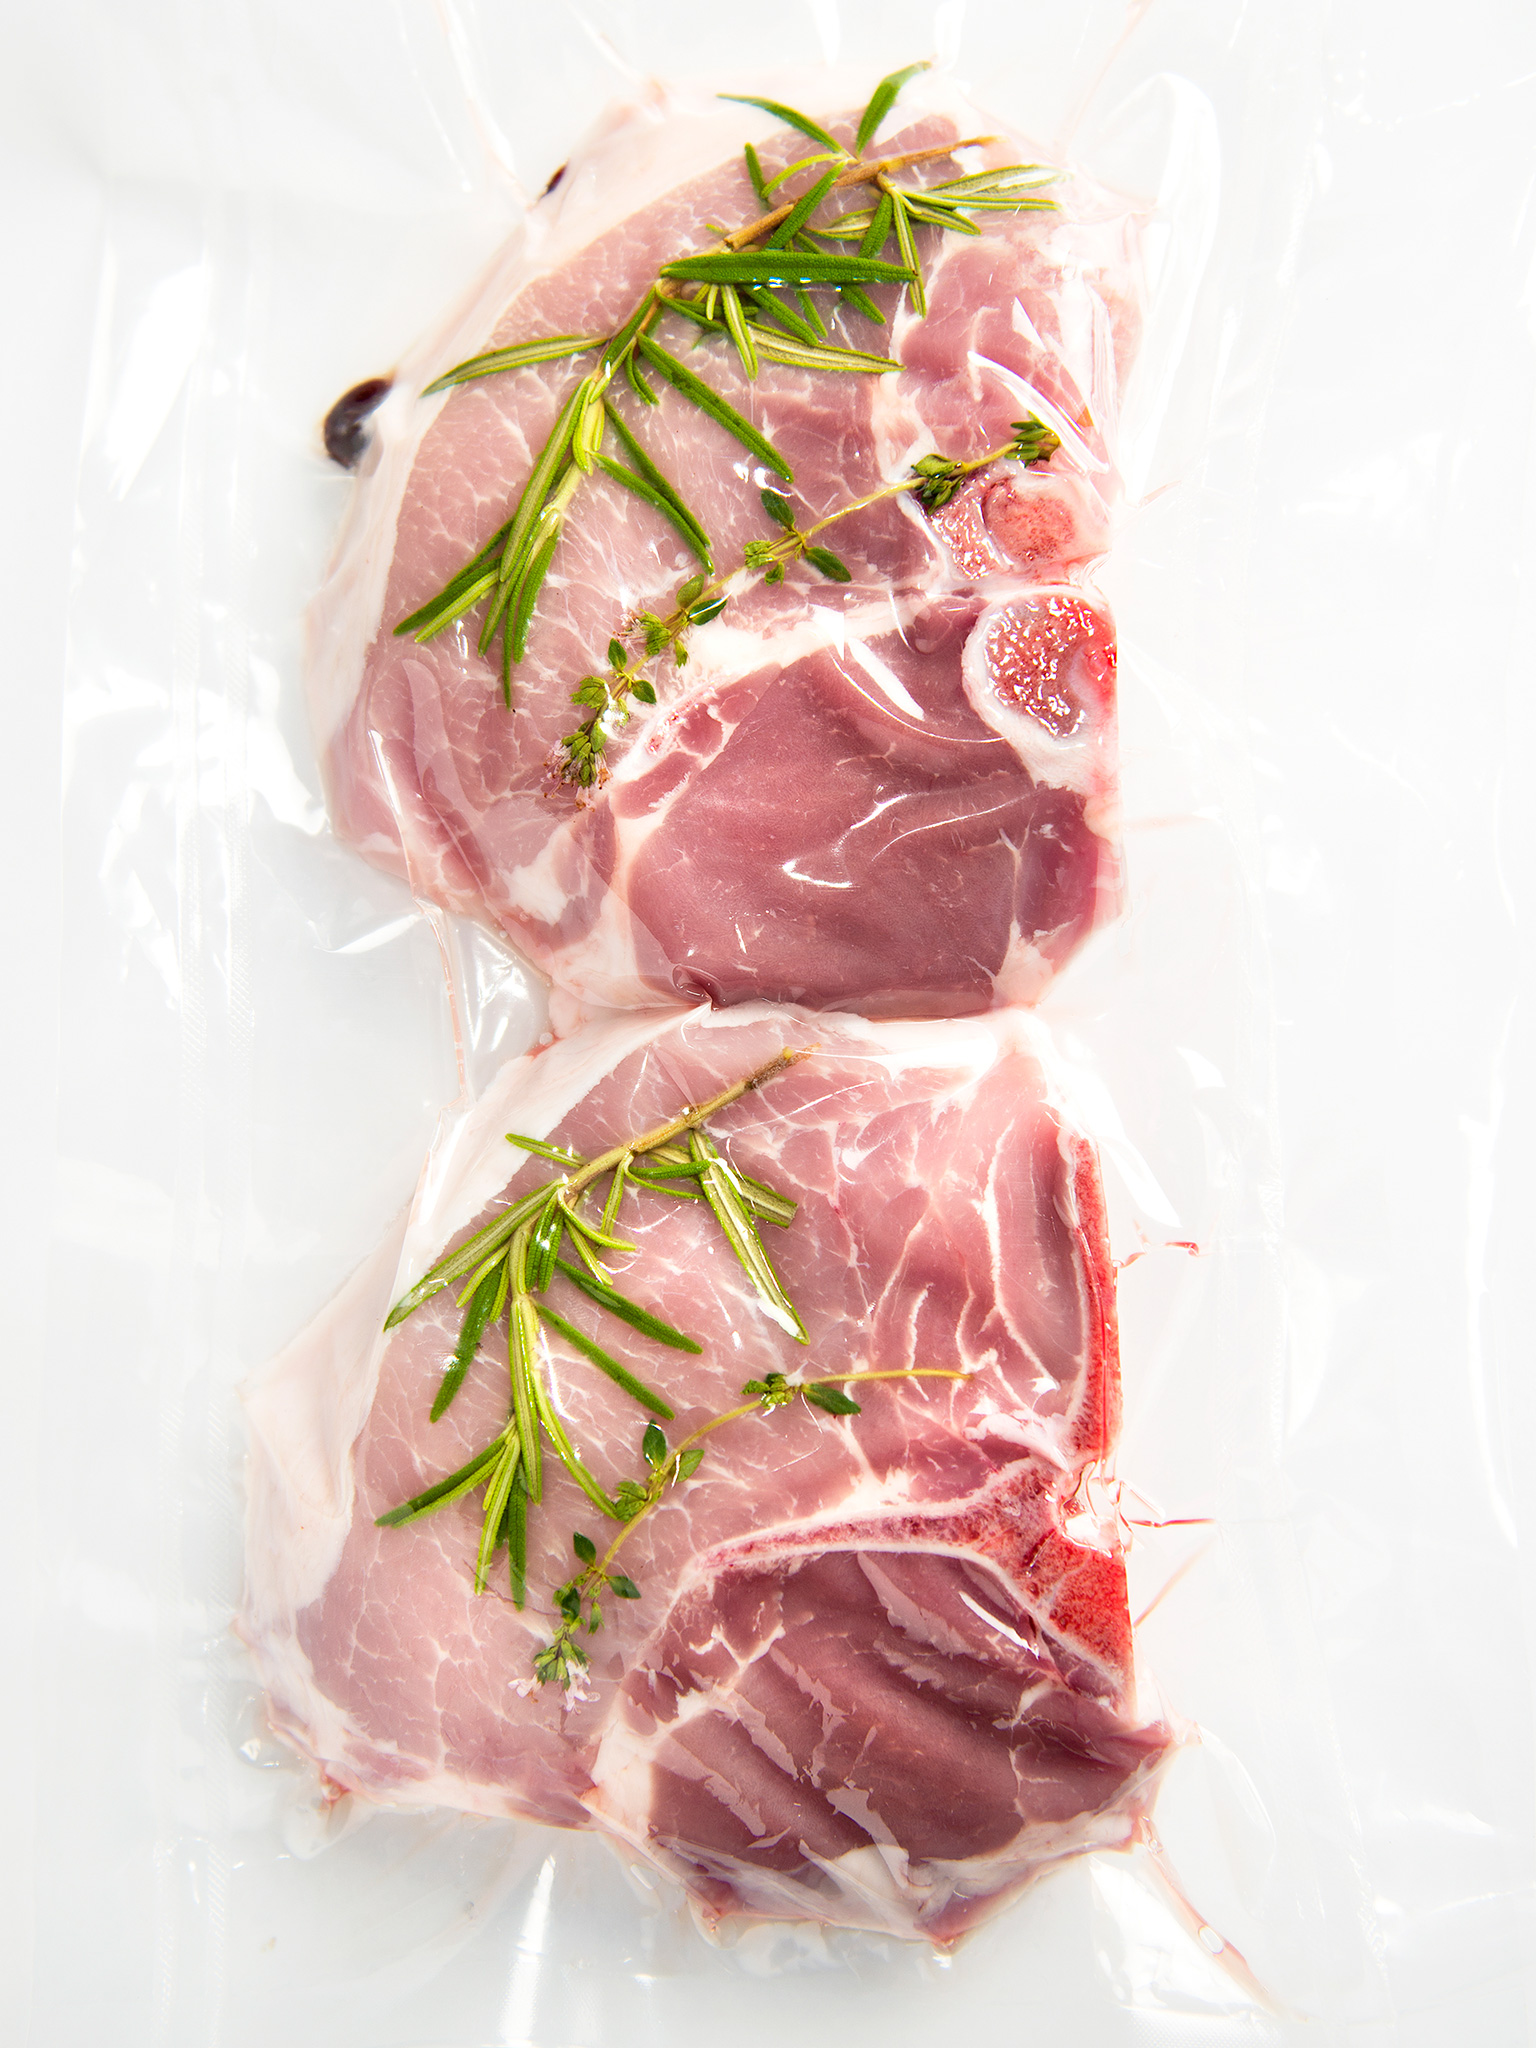
The first step in the cooking process includes cleaning, trimming, and adding flavors to the food. These flavorings could be in the form of seasonings, herbs, rubs, or marinades.
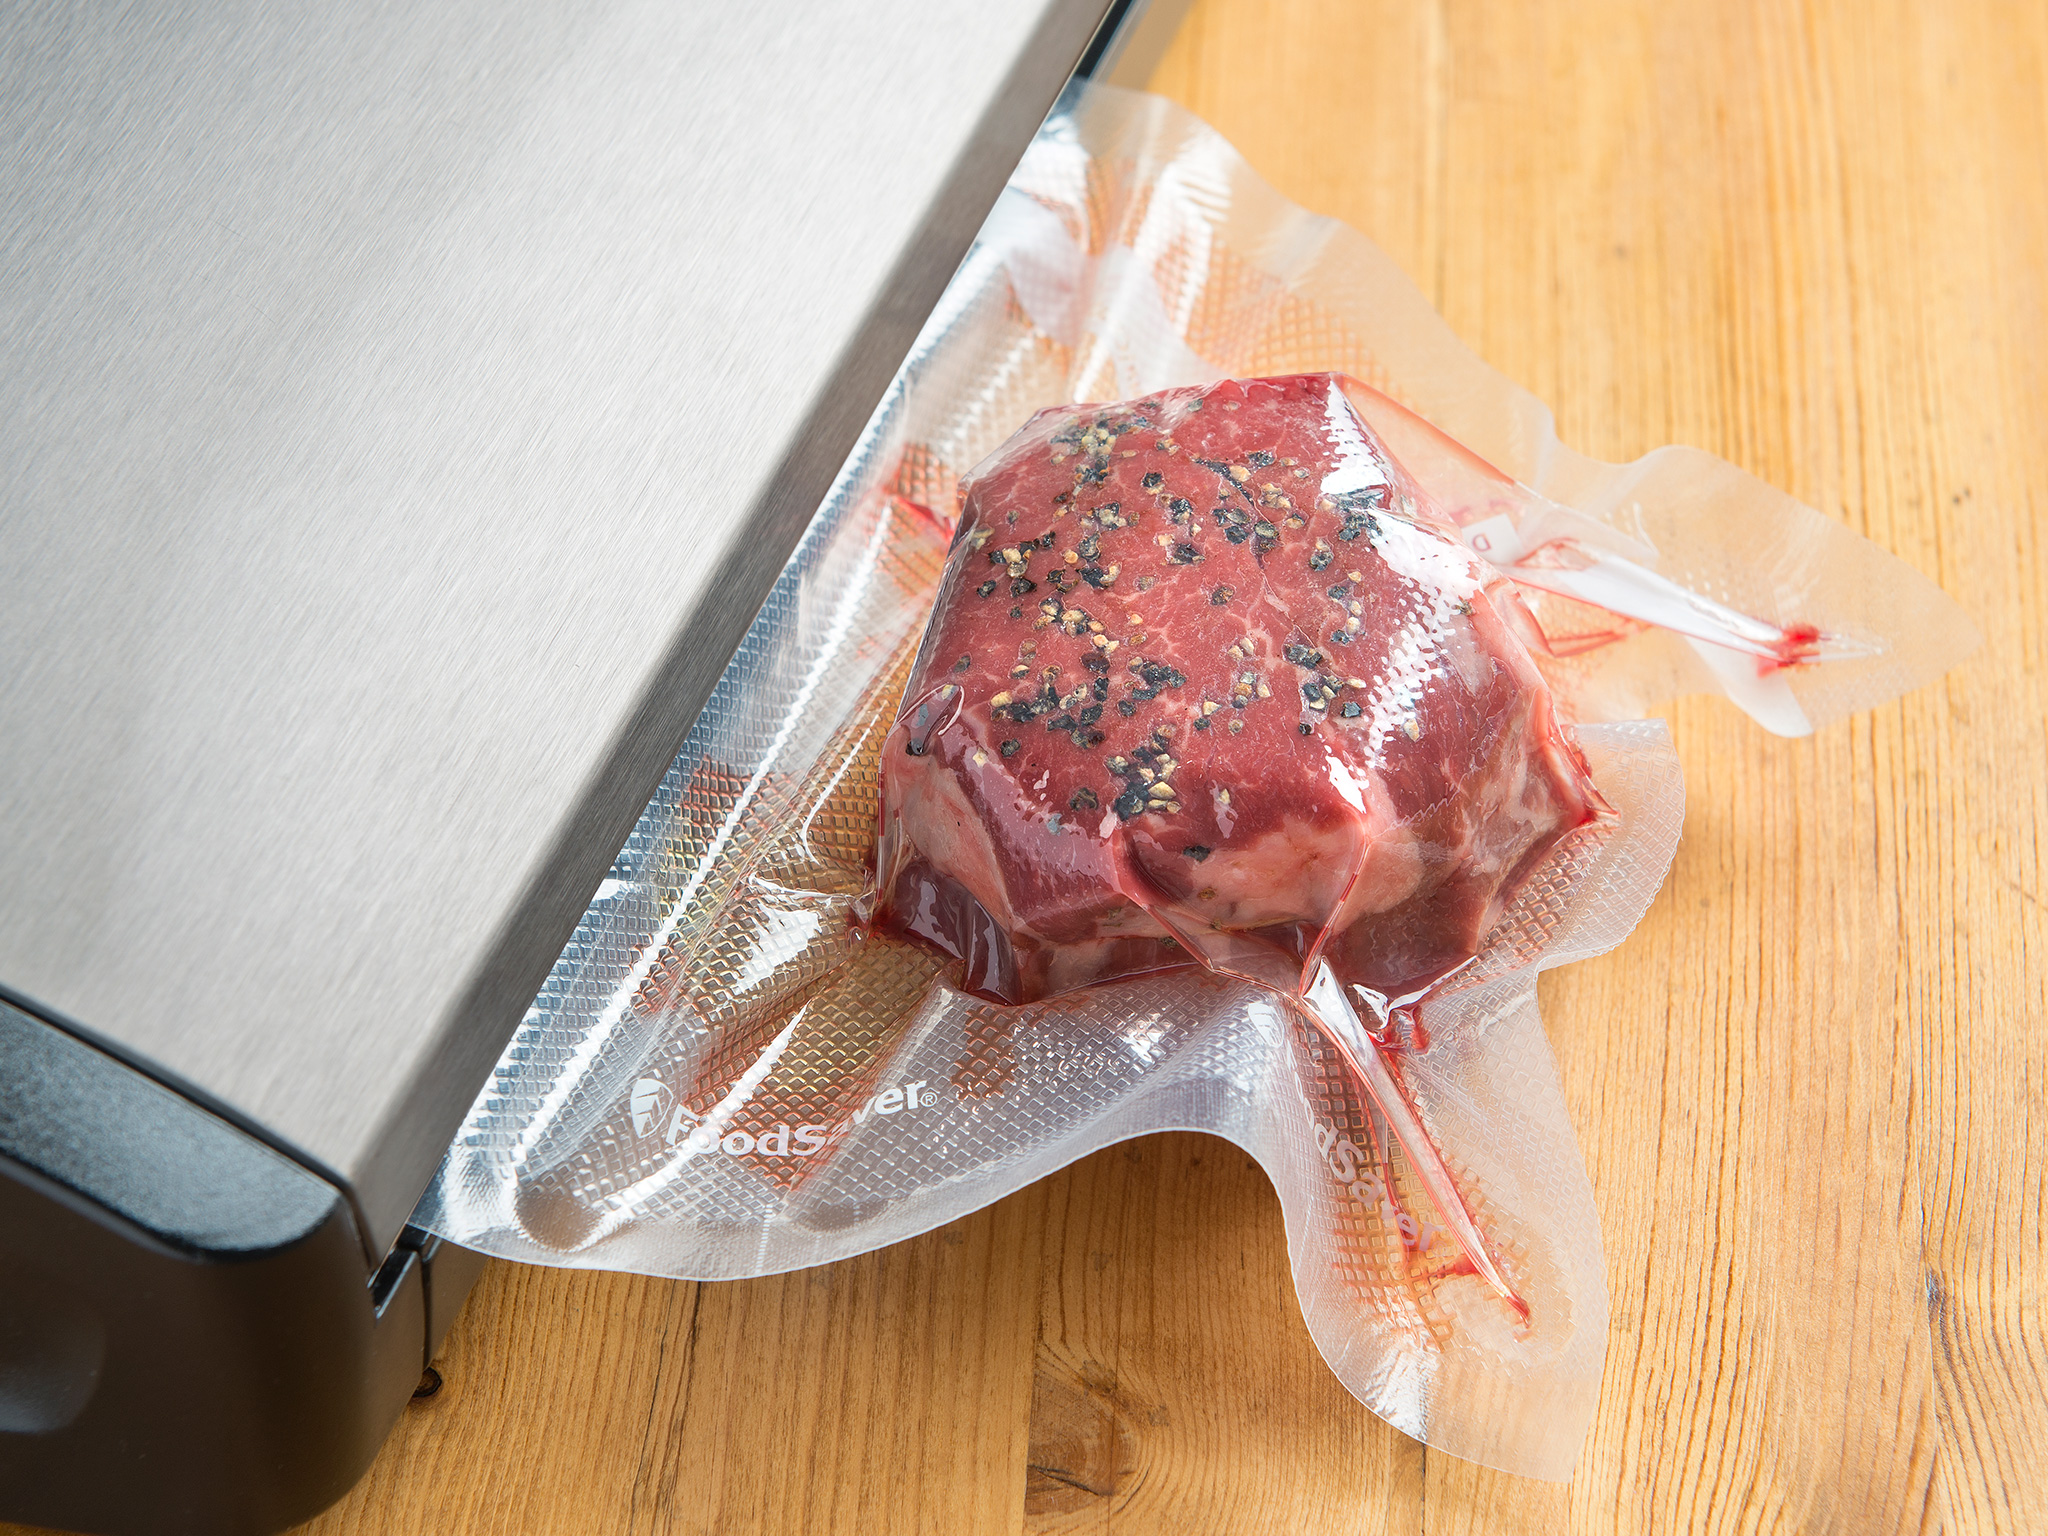
2 SEAL
Most often, the second step is done using a heavy-duty plastic bag that's sealed using a vacuum sealer. This type of packaging removes air from around the food, allowing for a more even cooking surface when placed in a water bath.
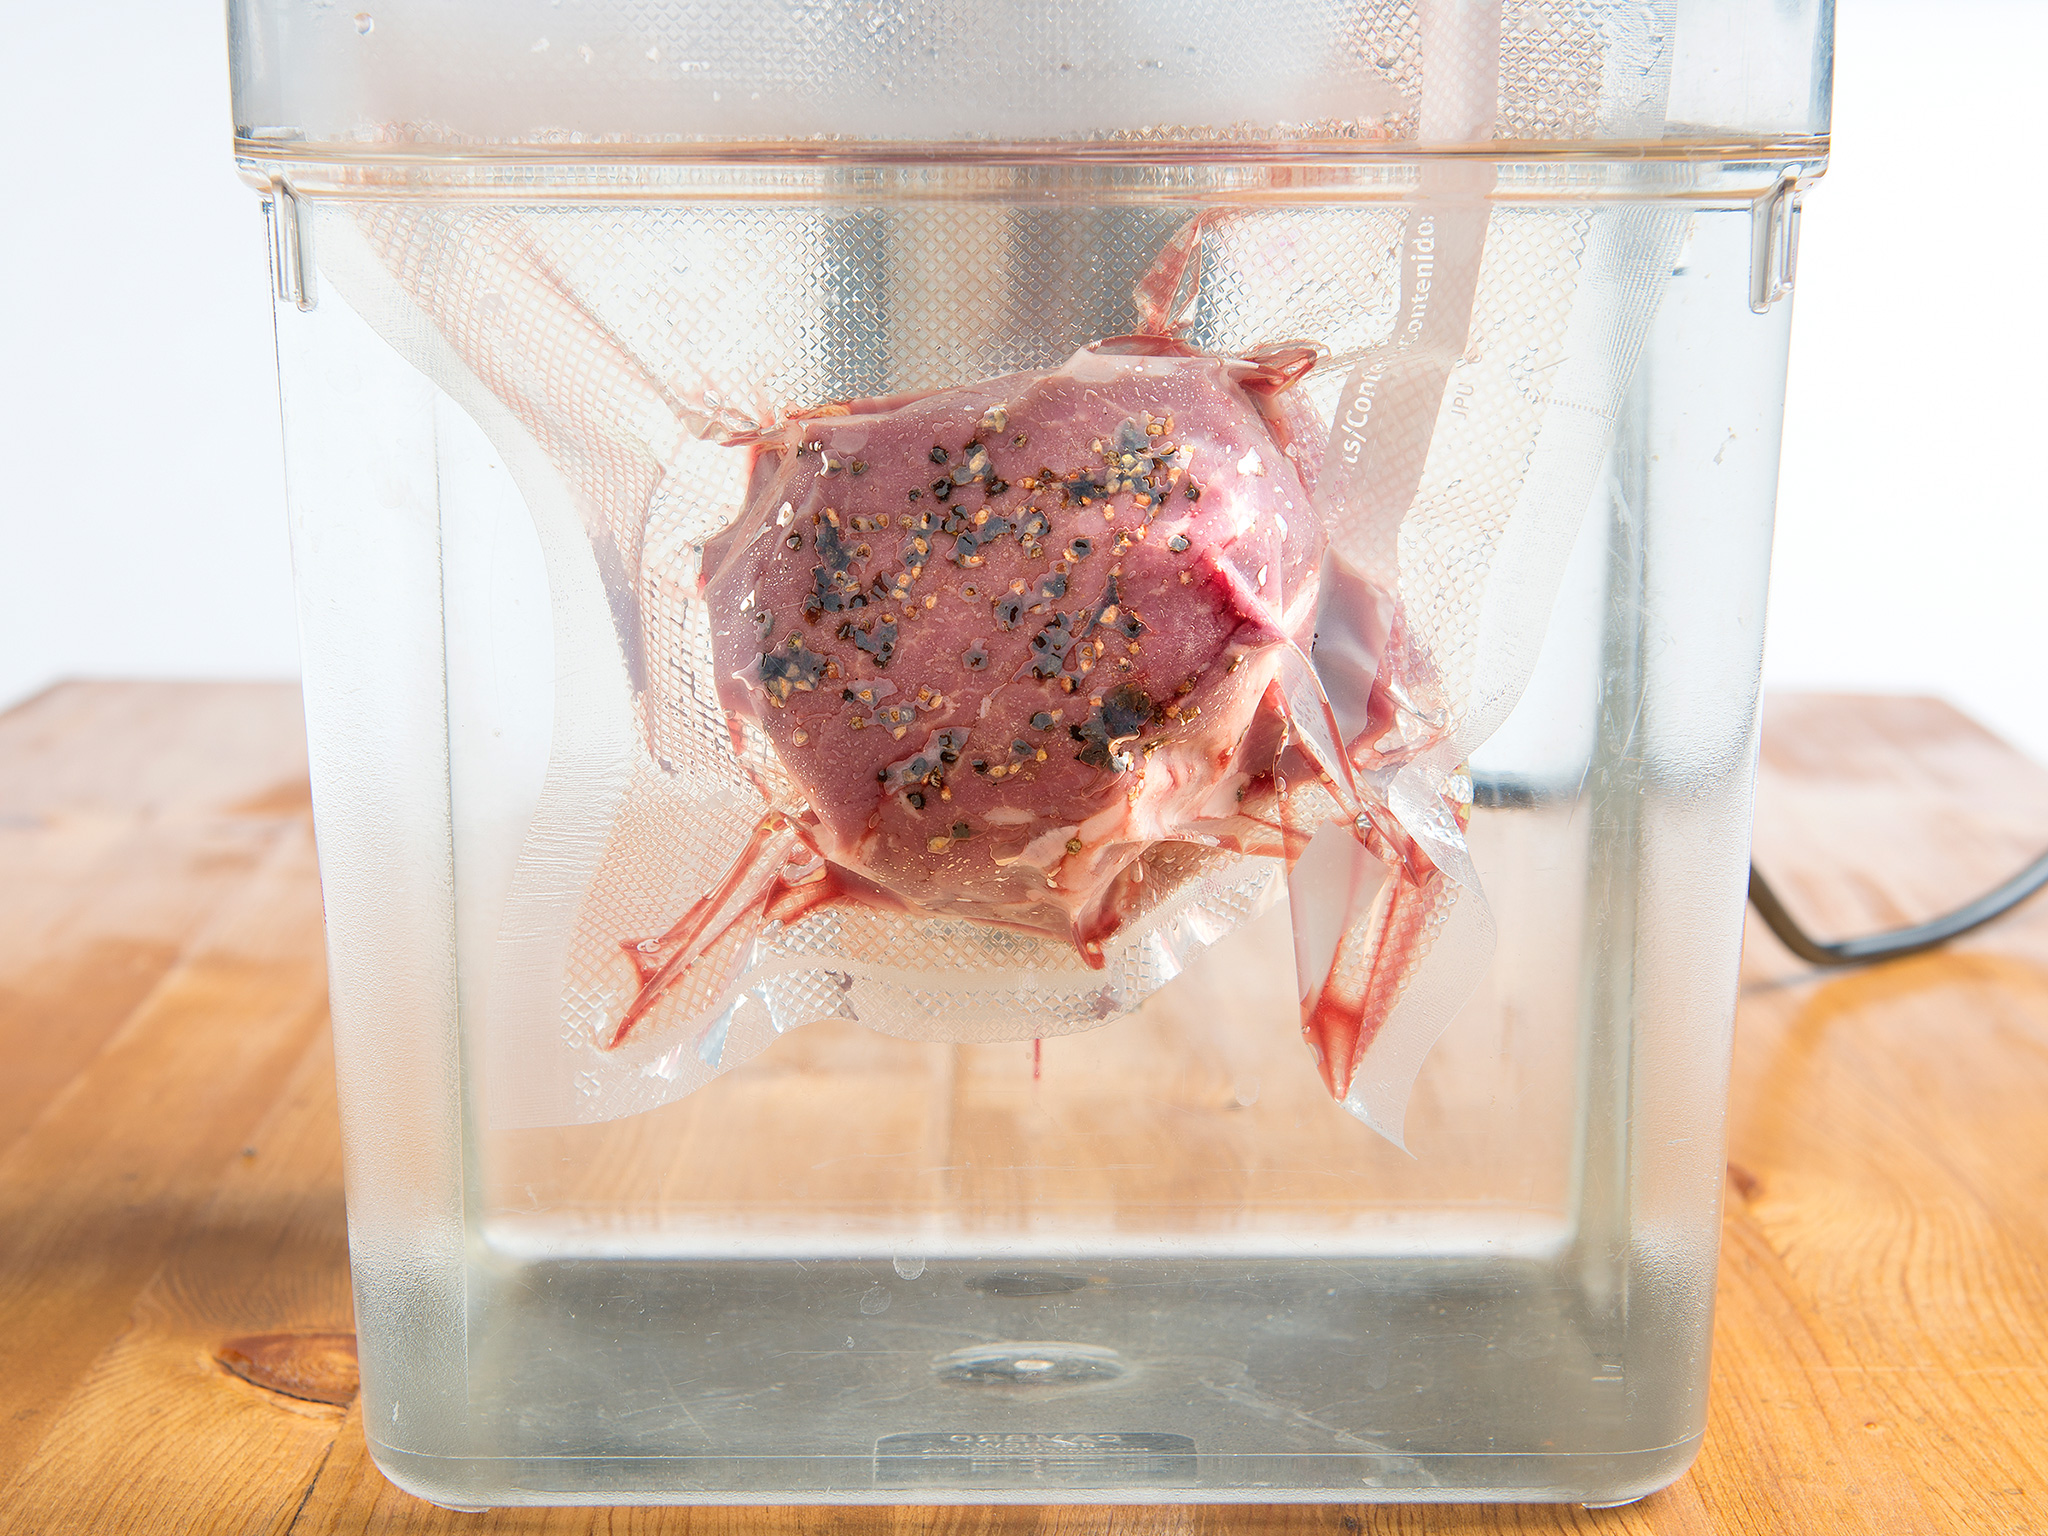
3 COOK
The third step is completed in a water oven or using an immersion circulator. The wrapped food floats in a water bath and cooks to the desired temperature, retaining moisture and flavor usually lost with other methods.
4 FINISH
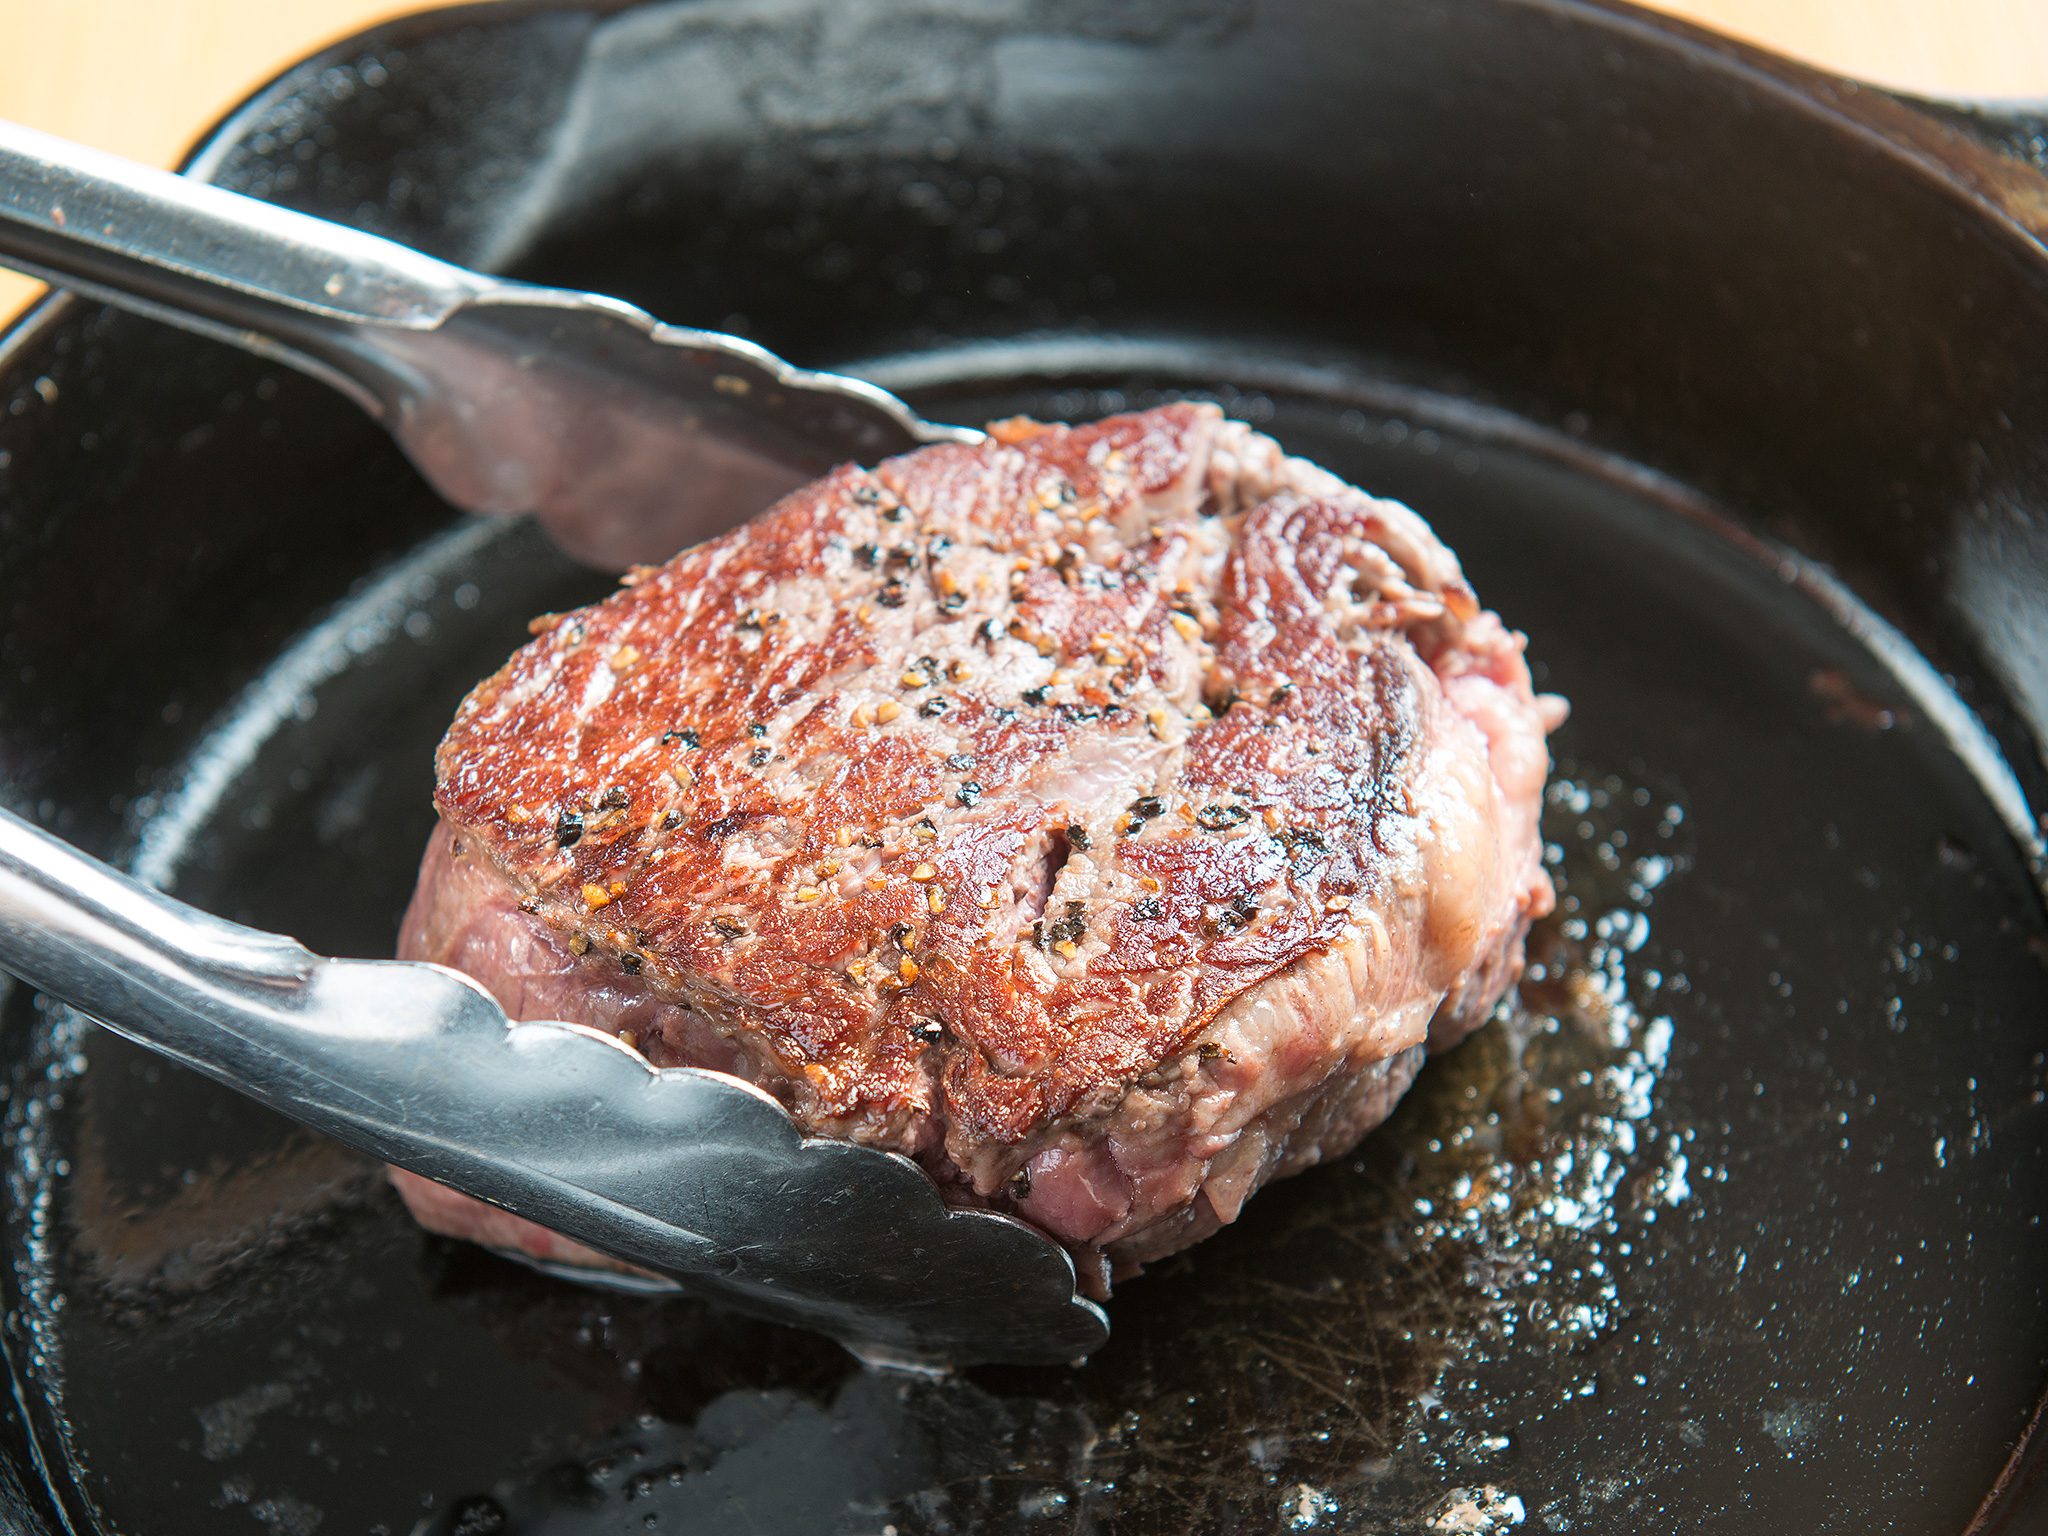
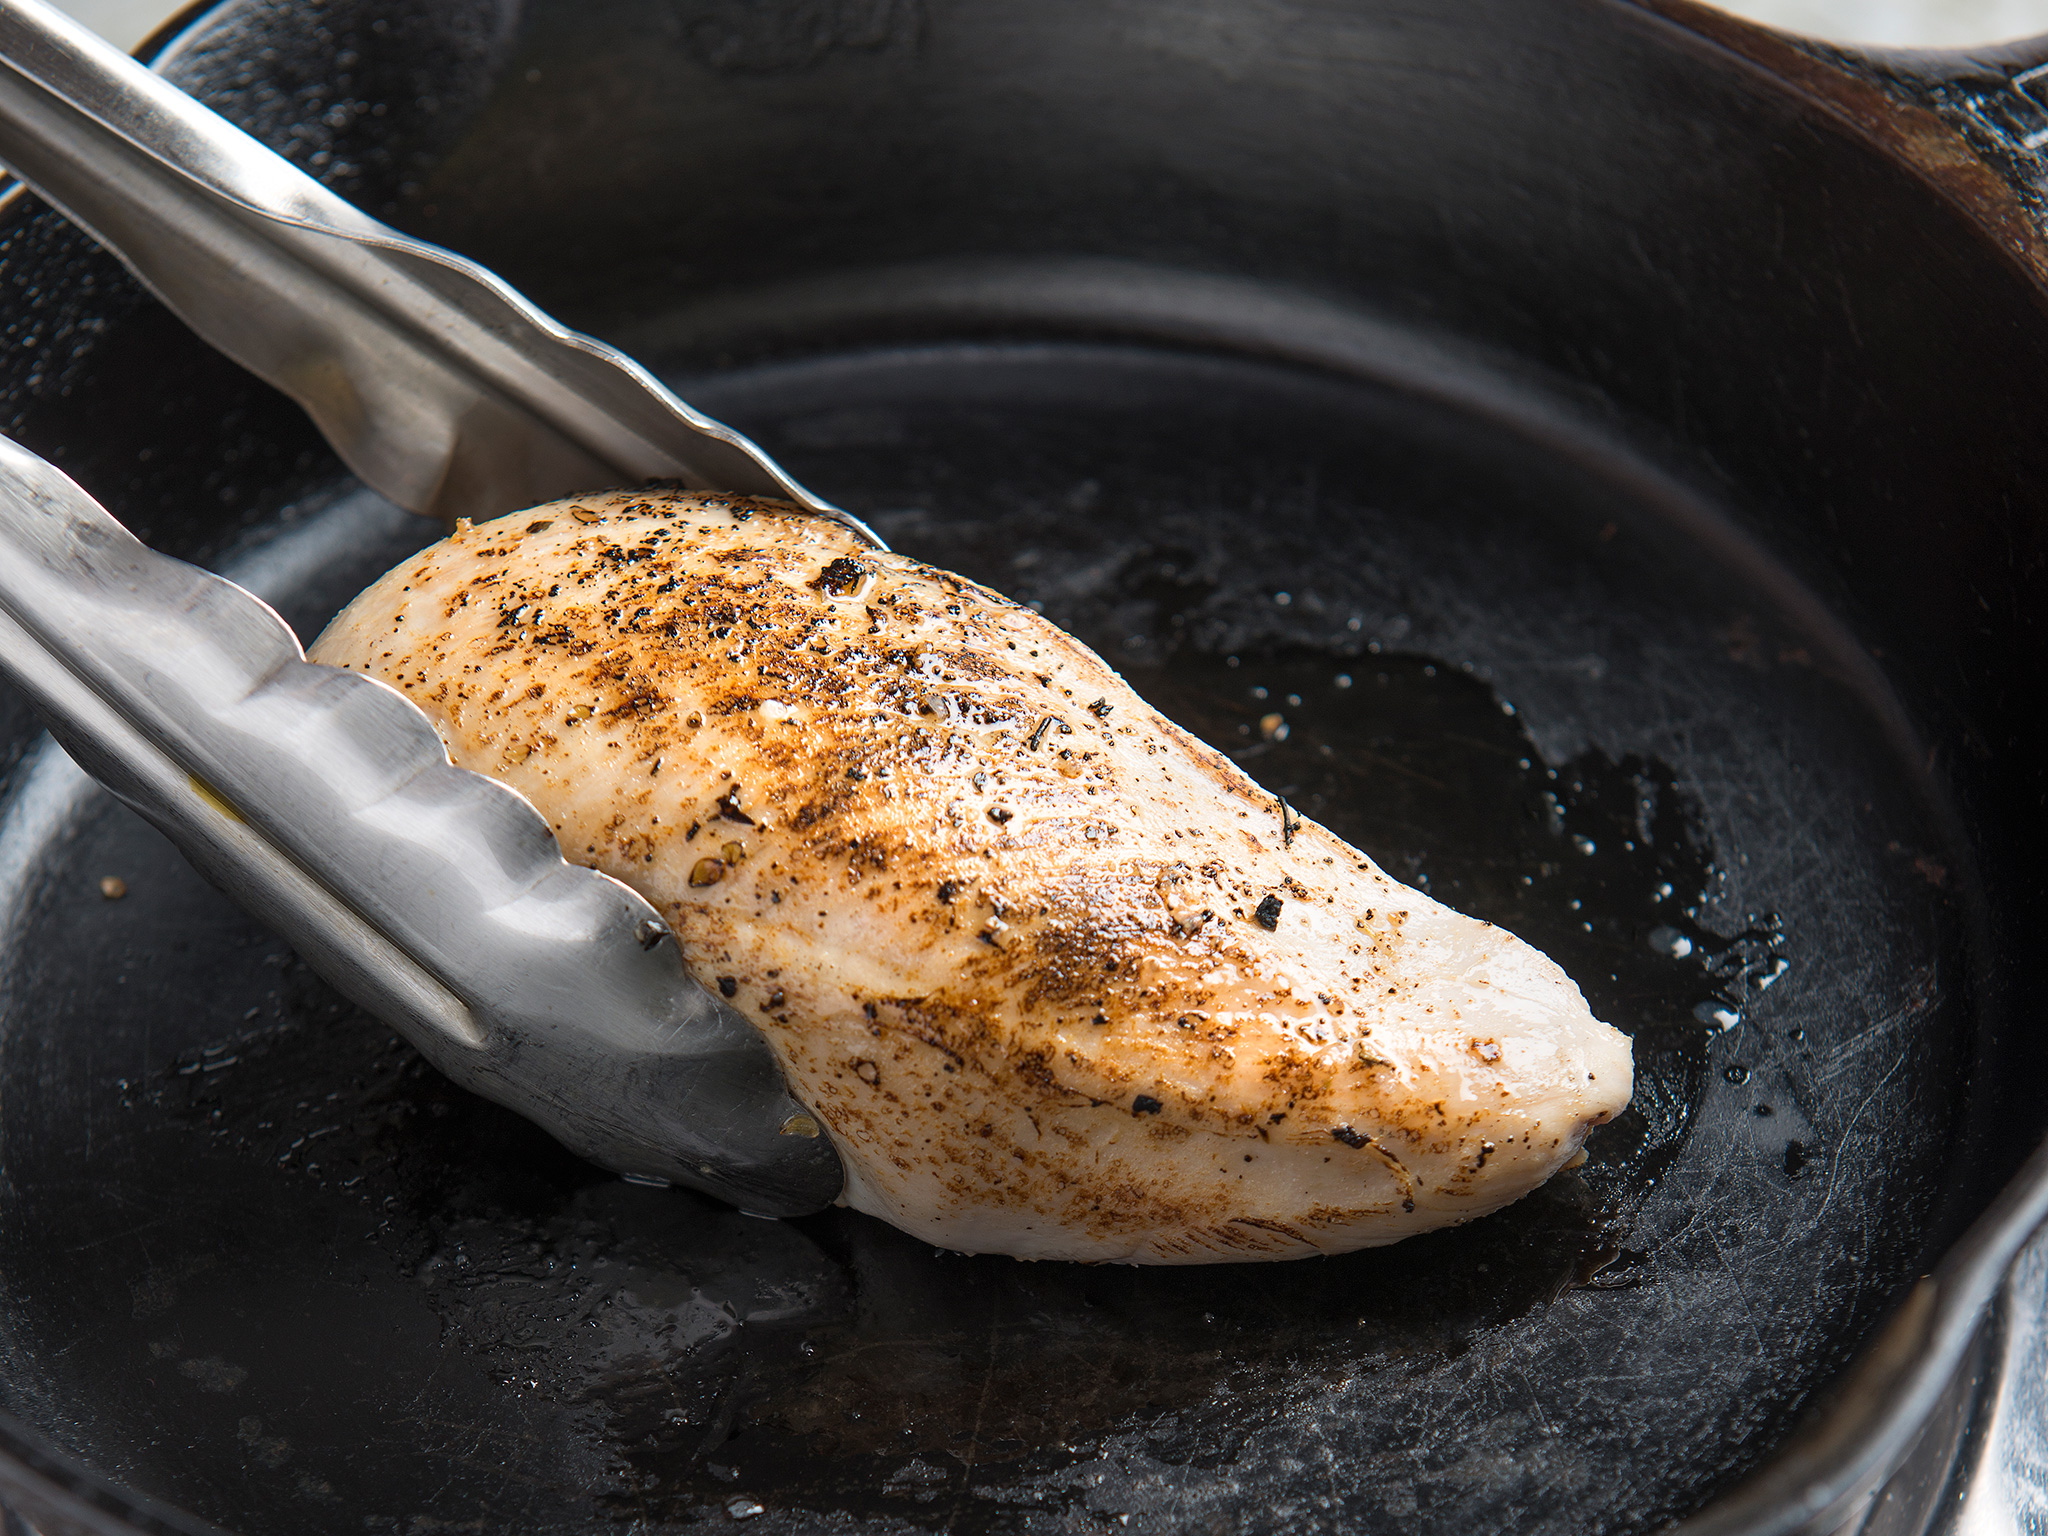
With this final step, you remove the food from the plastic and get it ready to serve. This could involve anything from chilling it in the refrigerator, to boiling it with other ingredients (such as when making a soup), to searing the exterior to caramelize it.
You can finish a piece of meat by searing it in a sauté pan, on a grill, or with a blowtorch.
prep
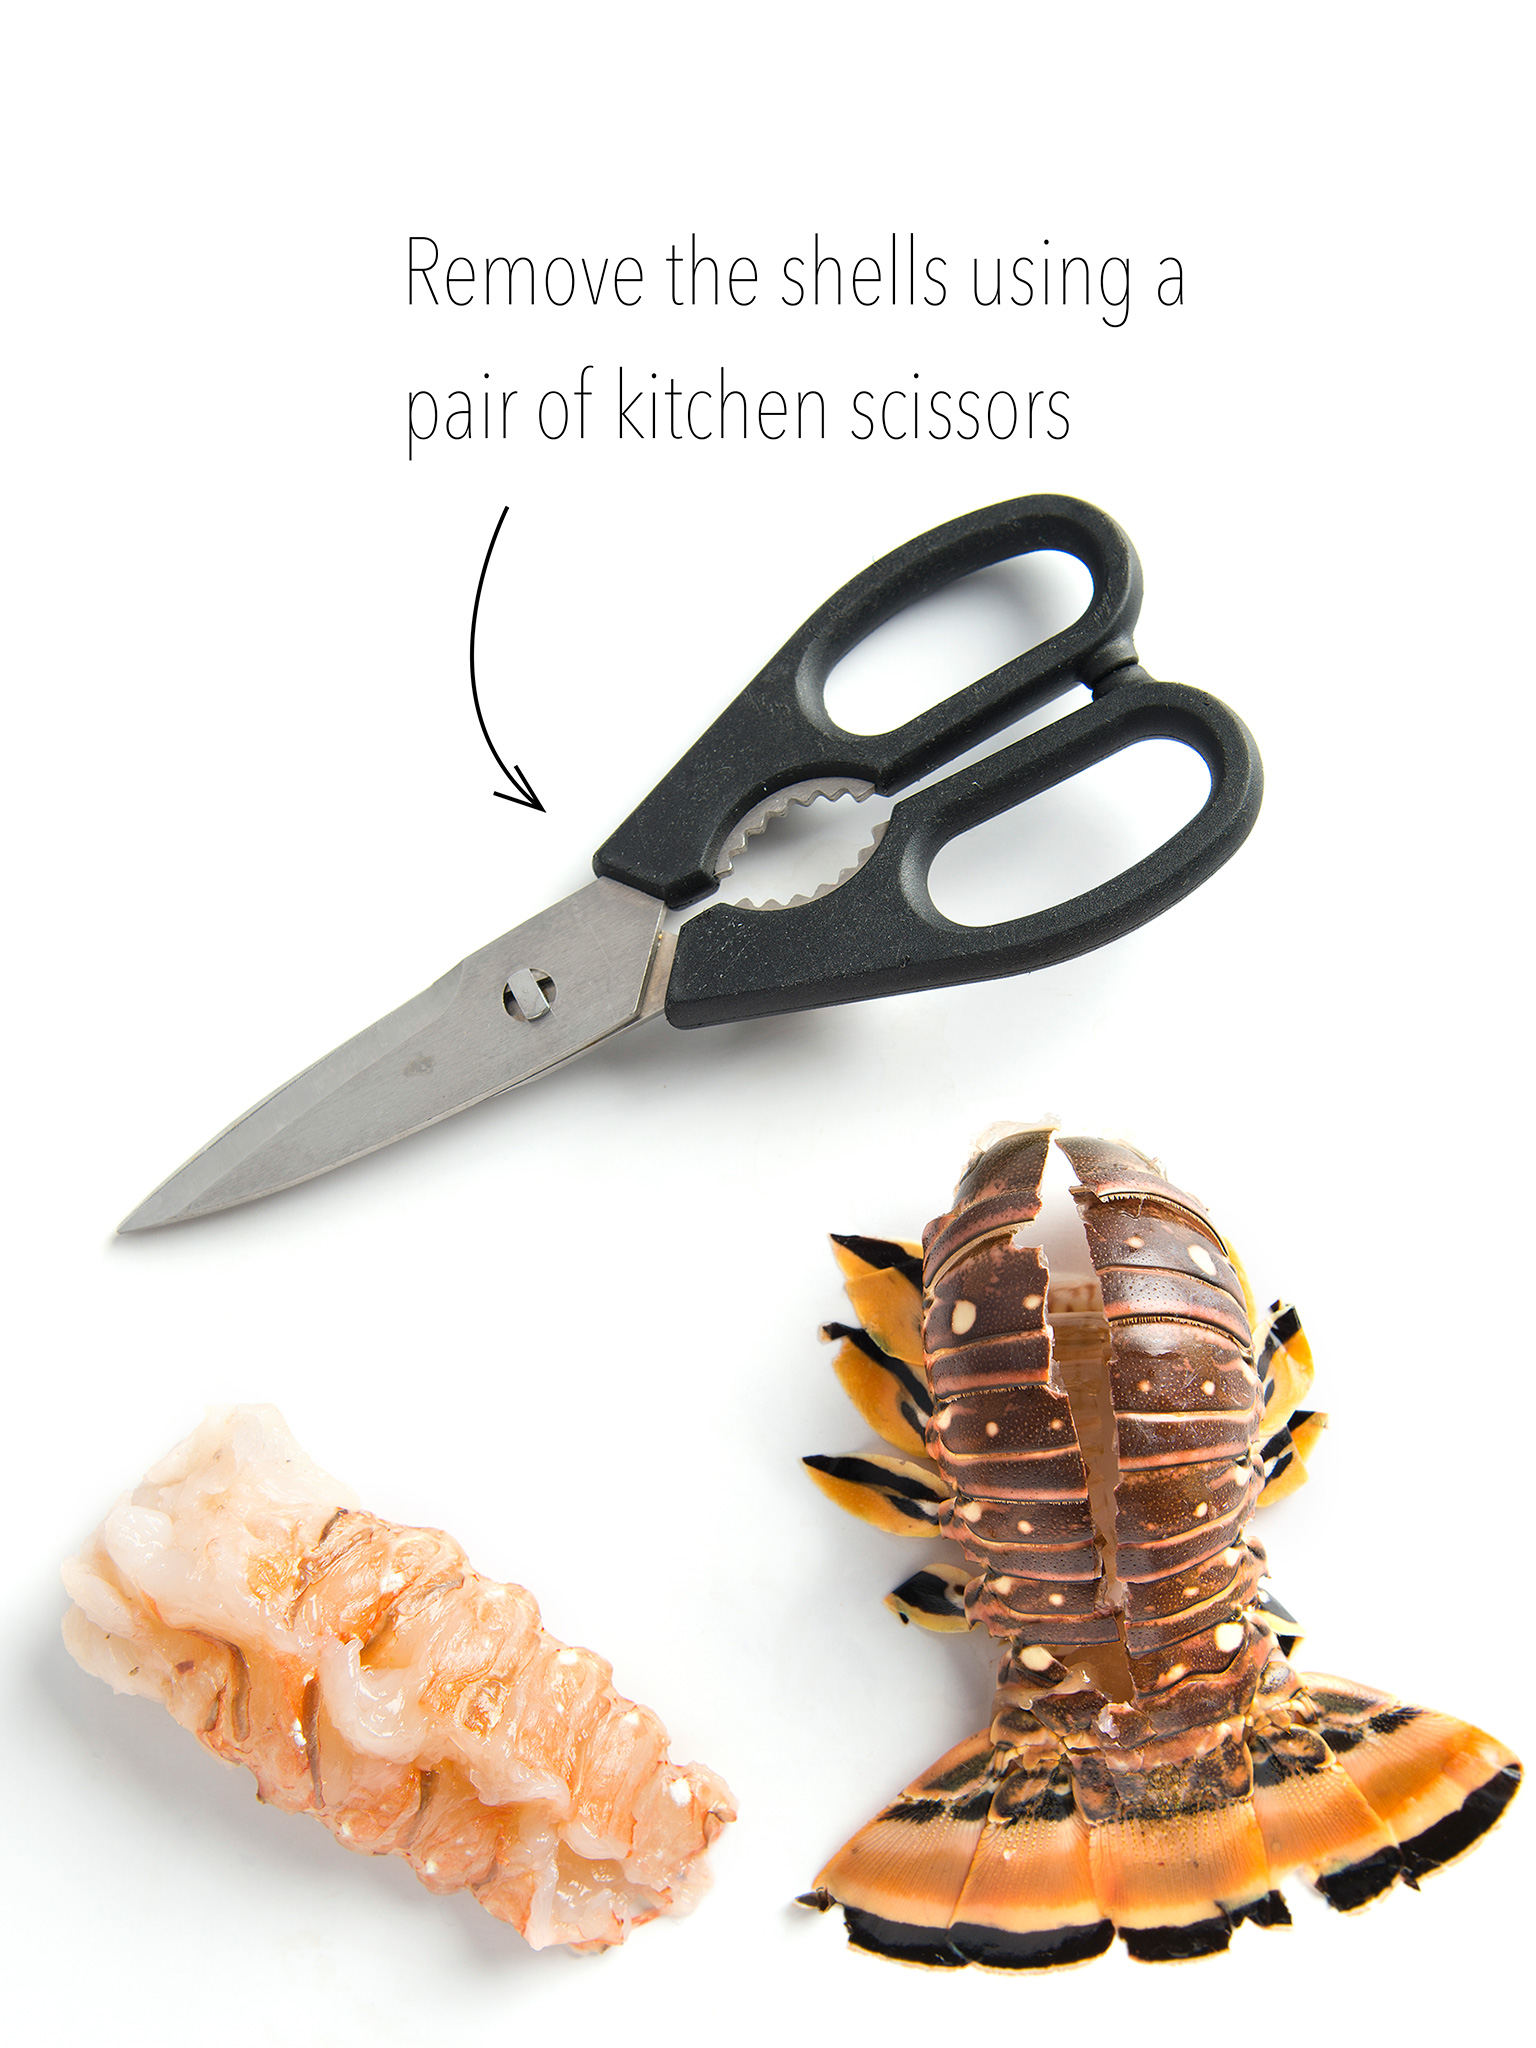
Whether it’s removing seafood shells or peeling vegetables, your food needs some prep work before being sealed in a bag. Fortunately, preparing food for sous vide is as easy as cooking it.
While prep work for sous vide is slightly different than for traditional cooking, it’s not a completely foreign concept. Meat and poultry are still dried and crustaceans are still shelled the same way they are with conventional methods.
However, certain preparation steps involve adding something to the bag to ensure the food retains its natural appearance—such as oil to reduce albumen on seafood, or vinegar to enrich the color of certain vegetables.
You’ll also notice that any food that contains sharp bones or shells—such as poultry or seafood—requires the removal of those bones and shells before sealing and cooking. Otherwise, the bones or shells could break through the bags and ruin the food. So take special care to prep your ingredients, and enjoy the first step in the sous vide process.
Meat
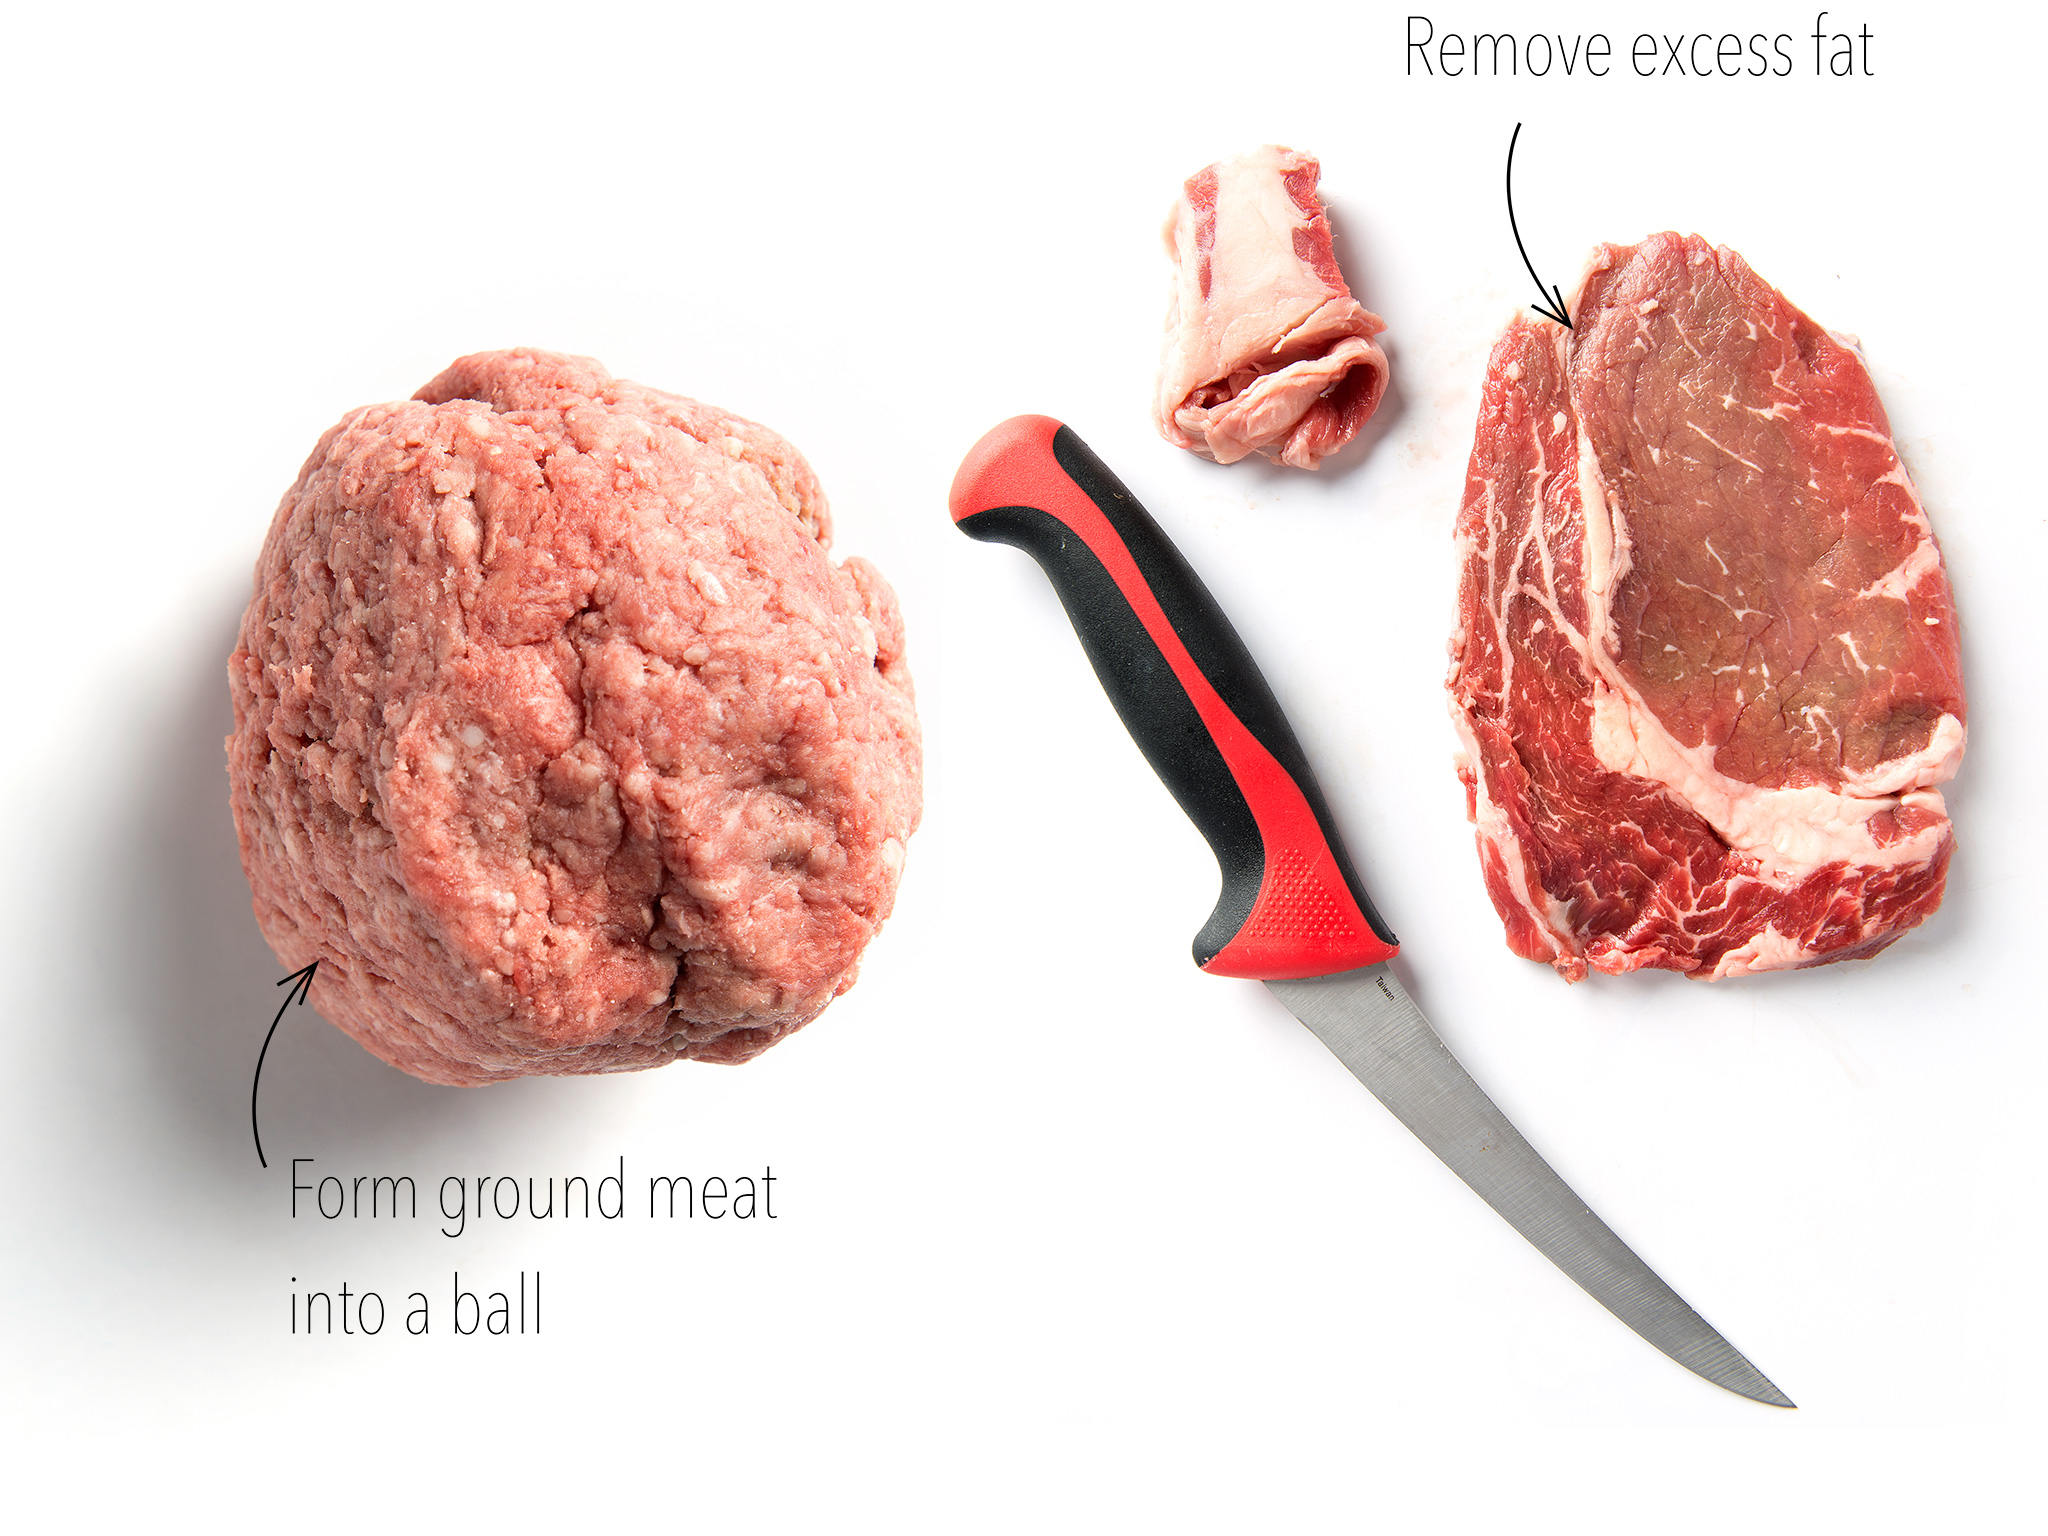
· Trim away any excess fat.
· Dry meats to allow seasoning to stick to the protein.
· Arrange meats in the shape you want them to be when finally cooked so they’re easier to place in sous vide bags.
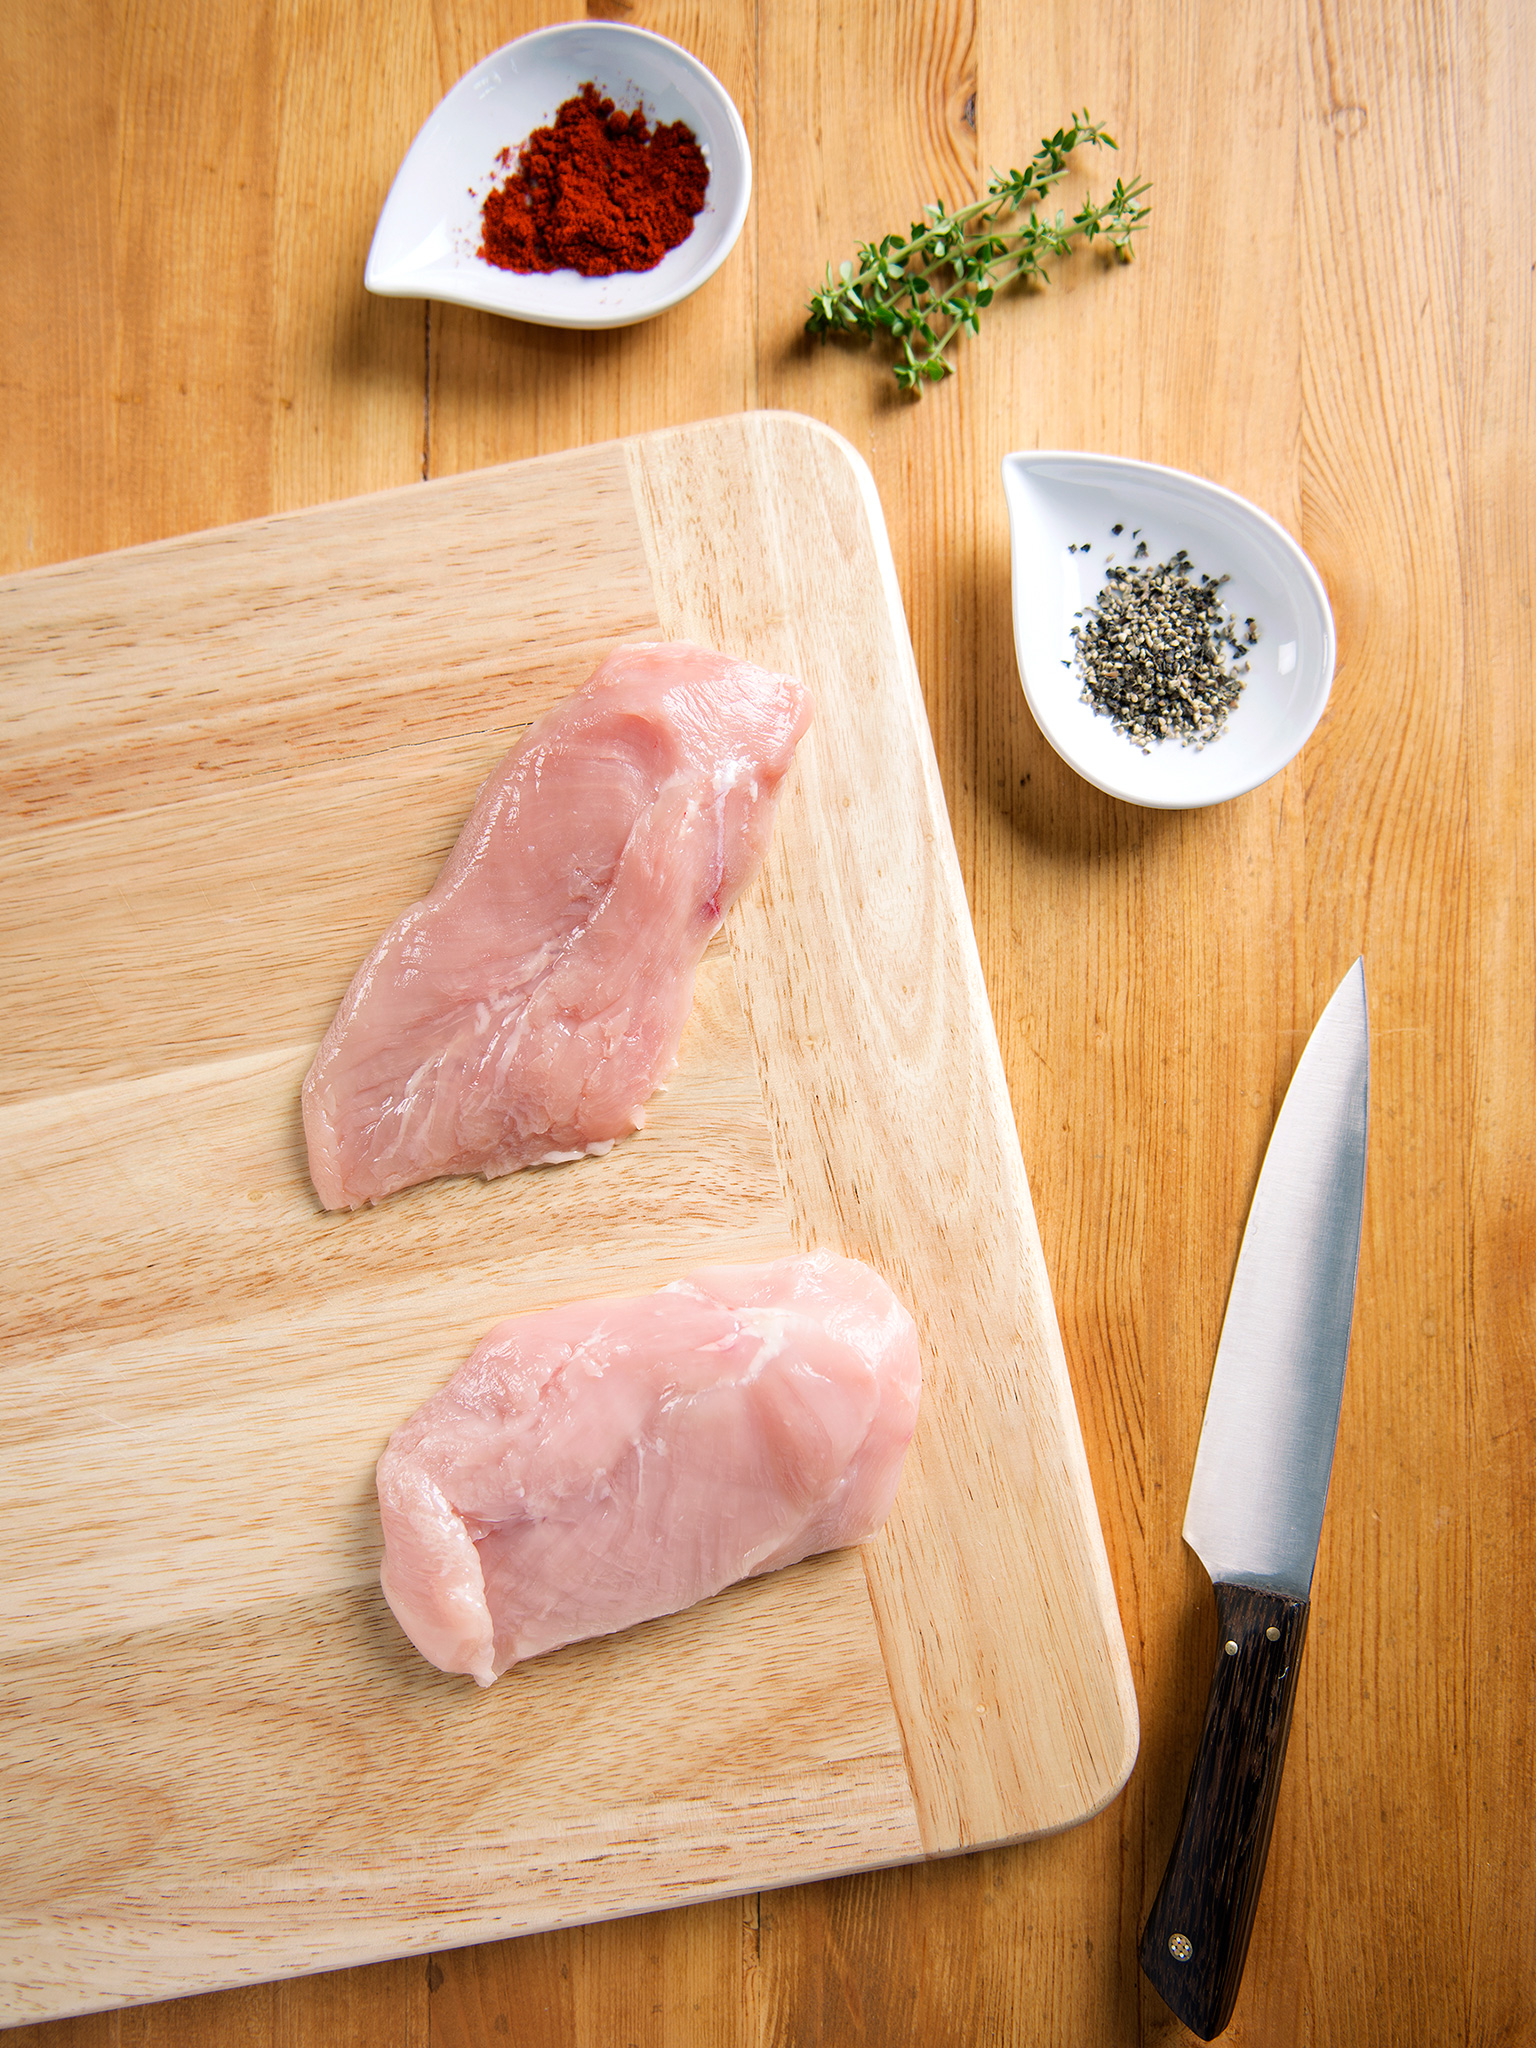
Poultry

In some cases, you may need to debone chicken. This is done not only to ensure the bones aren’t consumed, but also to keep the bones from penetrating the plastic bag during cooking.
· Dry poultry with a paper towel. This lowers foodborne illness risks when you slide poultry into the plastic bags, as the meat is likely to touch the exterior of the bags.
· To make the meat juicier, you may cure poultry during this time.
· When it comes to a dish like coq au vin, sear poultry as part of the preparation process.
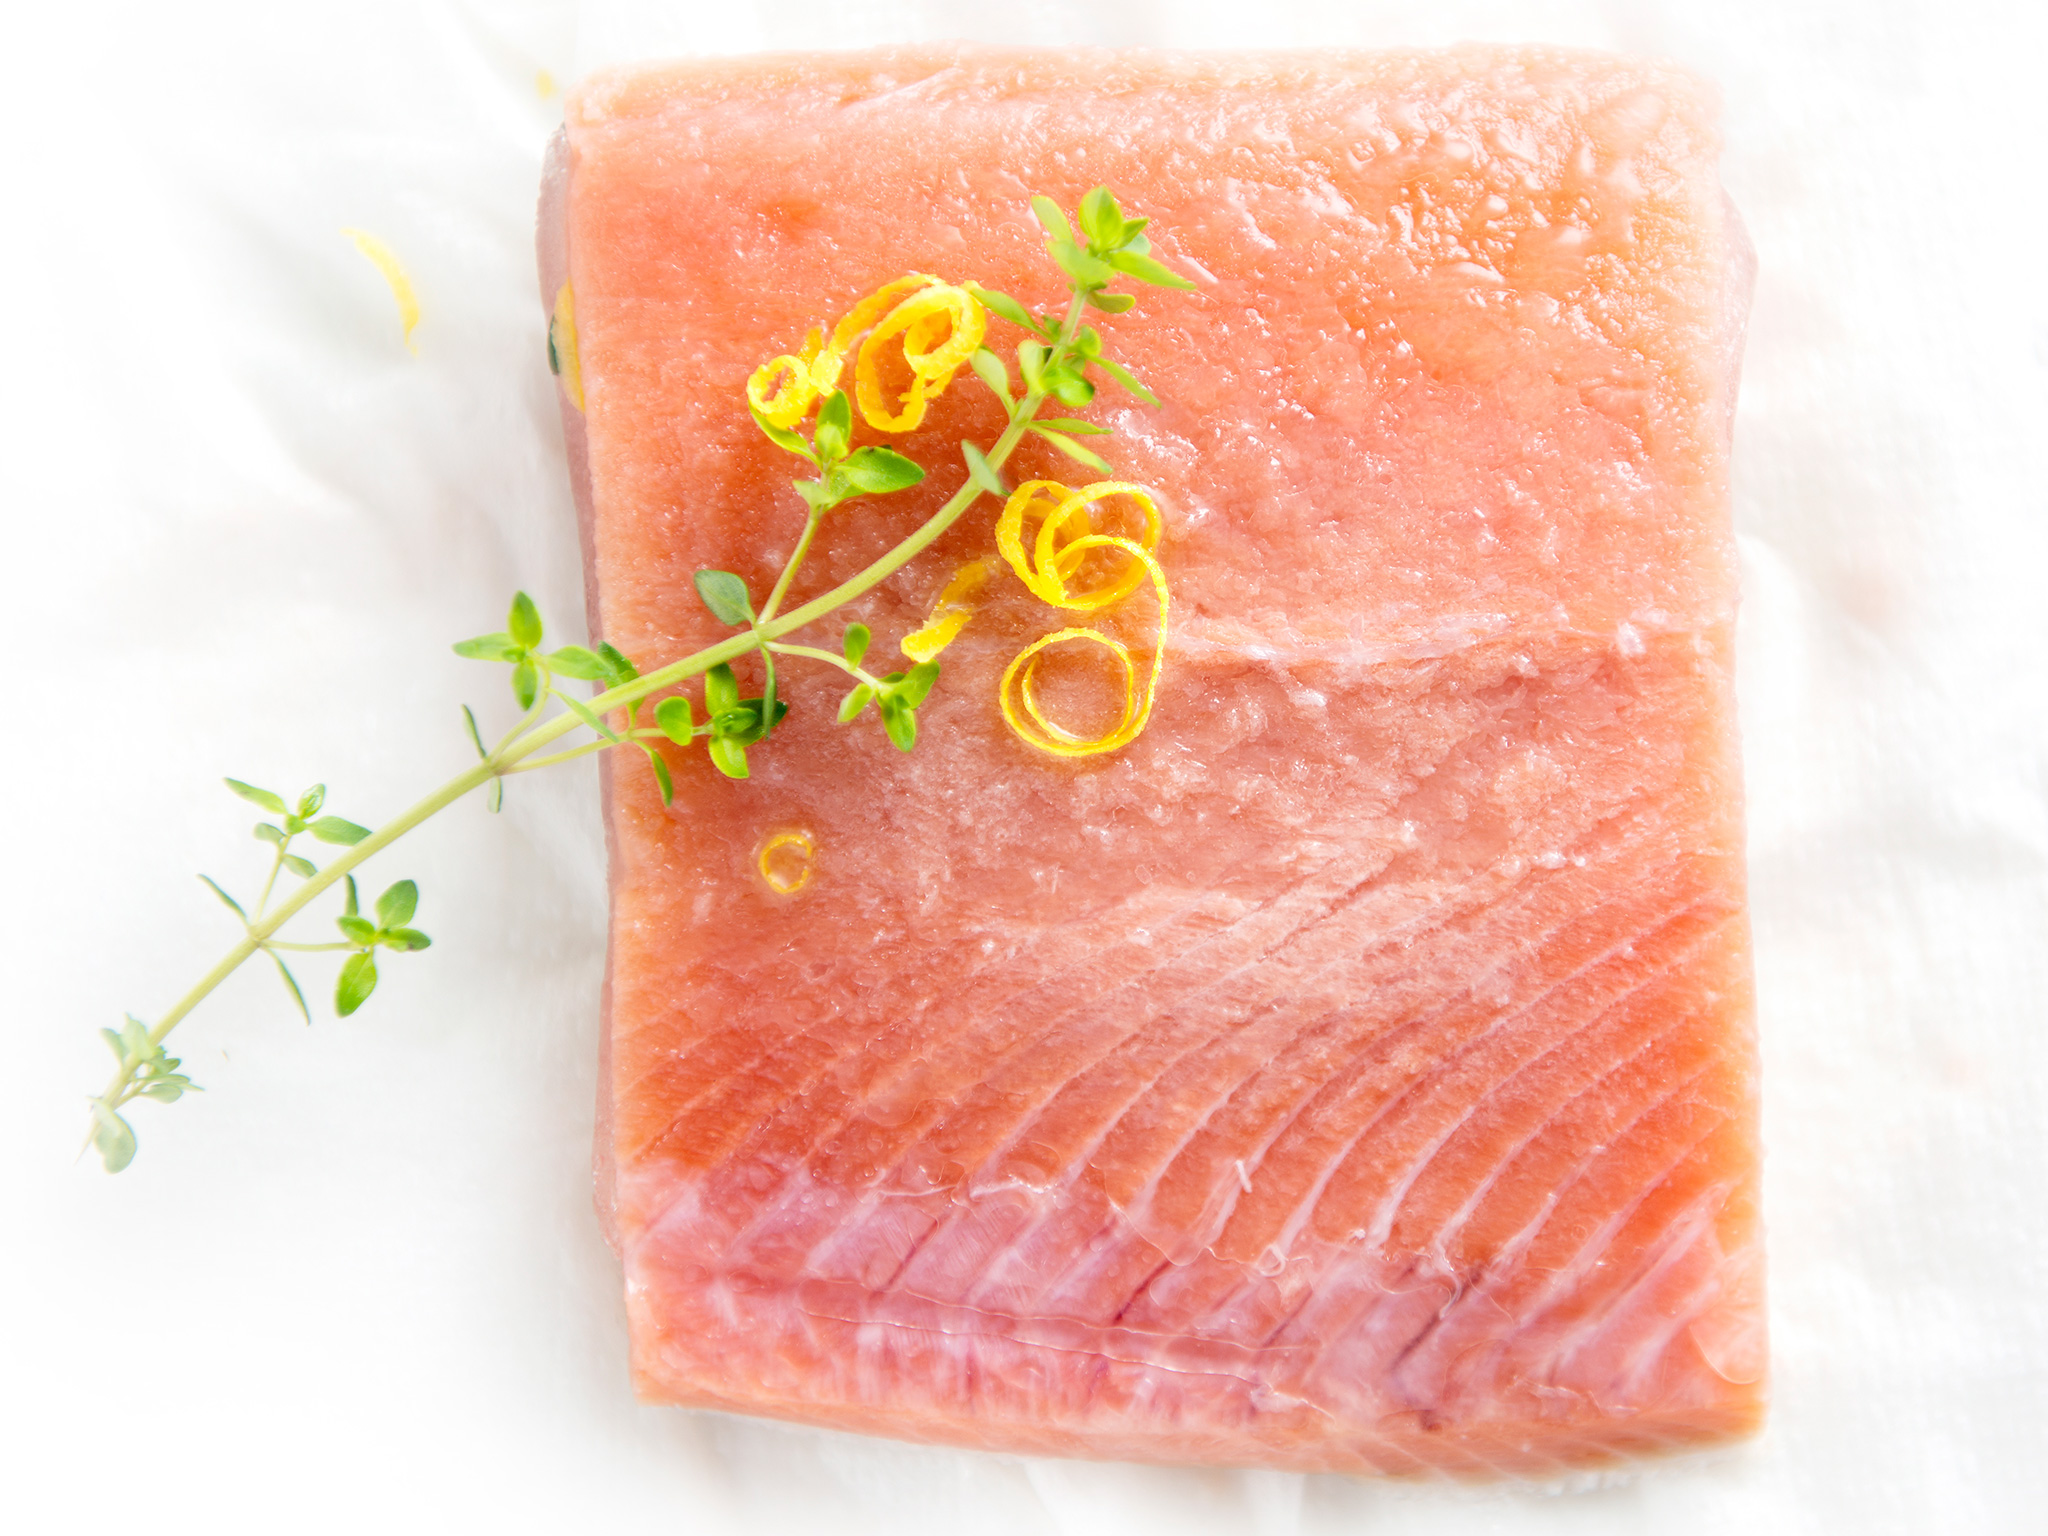
Seafood
· Seafood lends itself well to brining before cooking. Simply brine the seafood for 1 hour before seasoning and packaging.
· As with poultry, debone fish and remove shrimp and lobster shells so the shells and bones don’t penetrate the plastic bags.
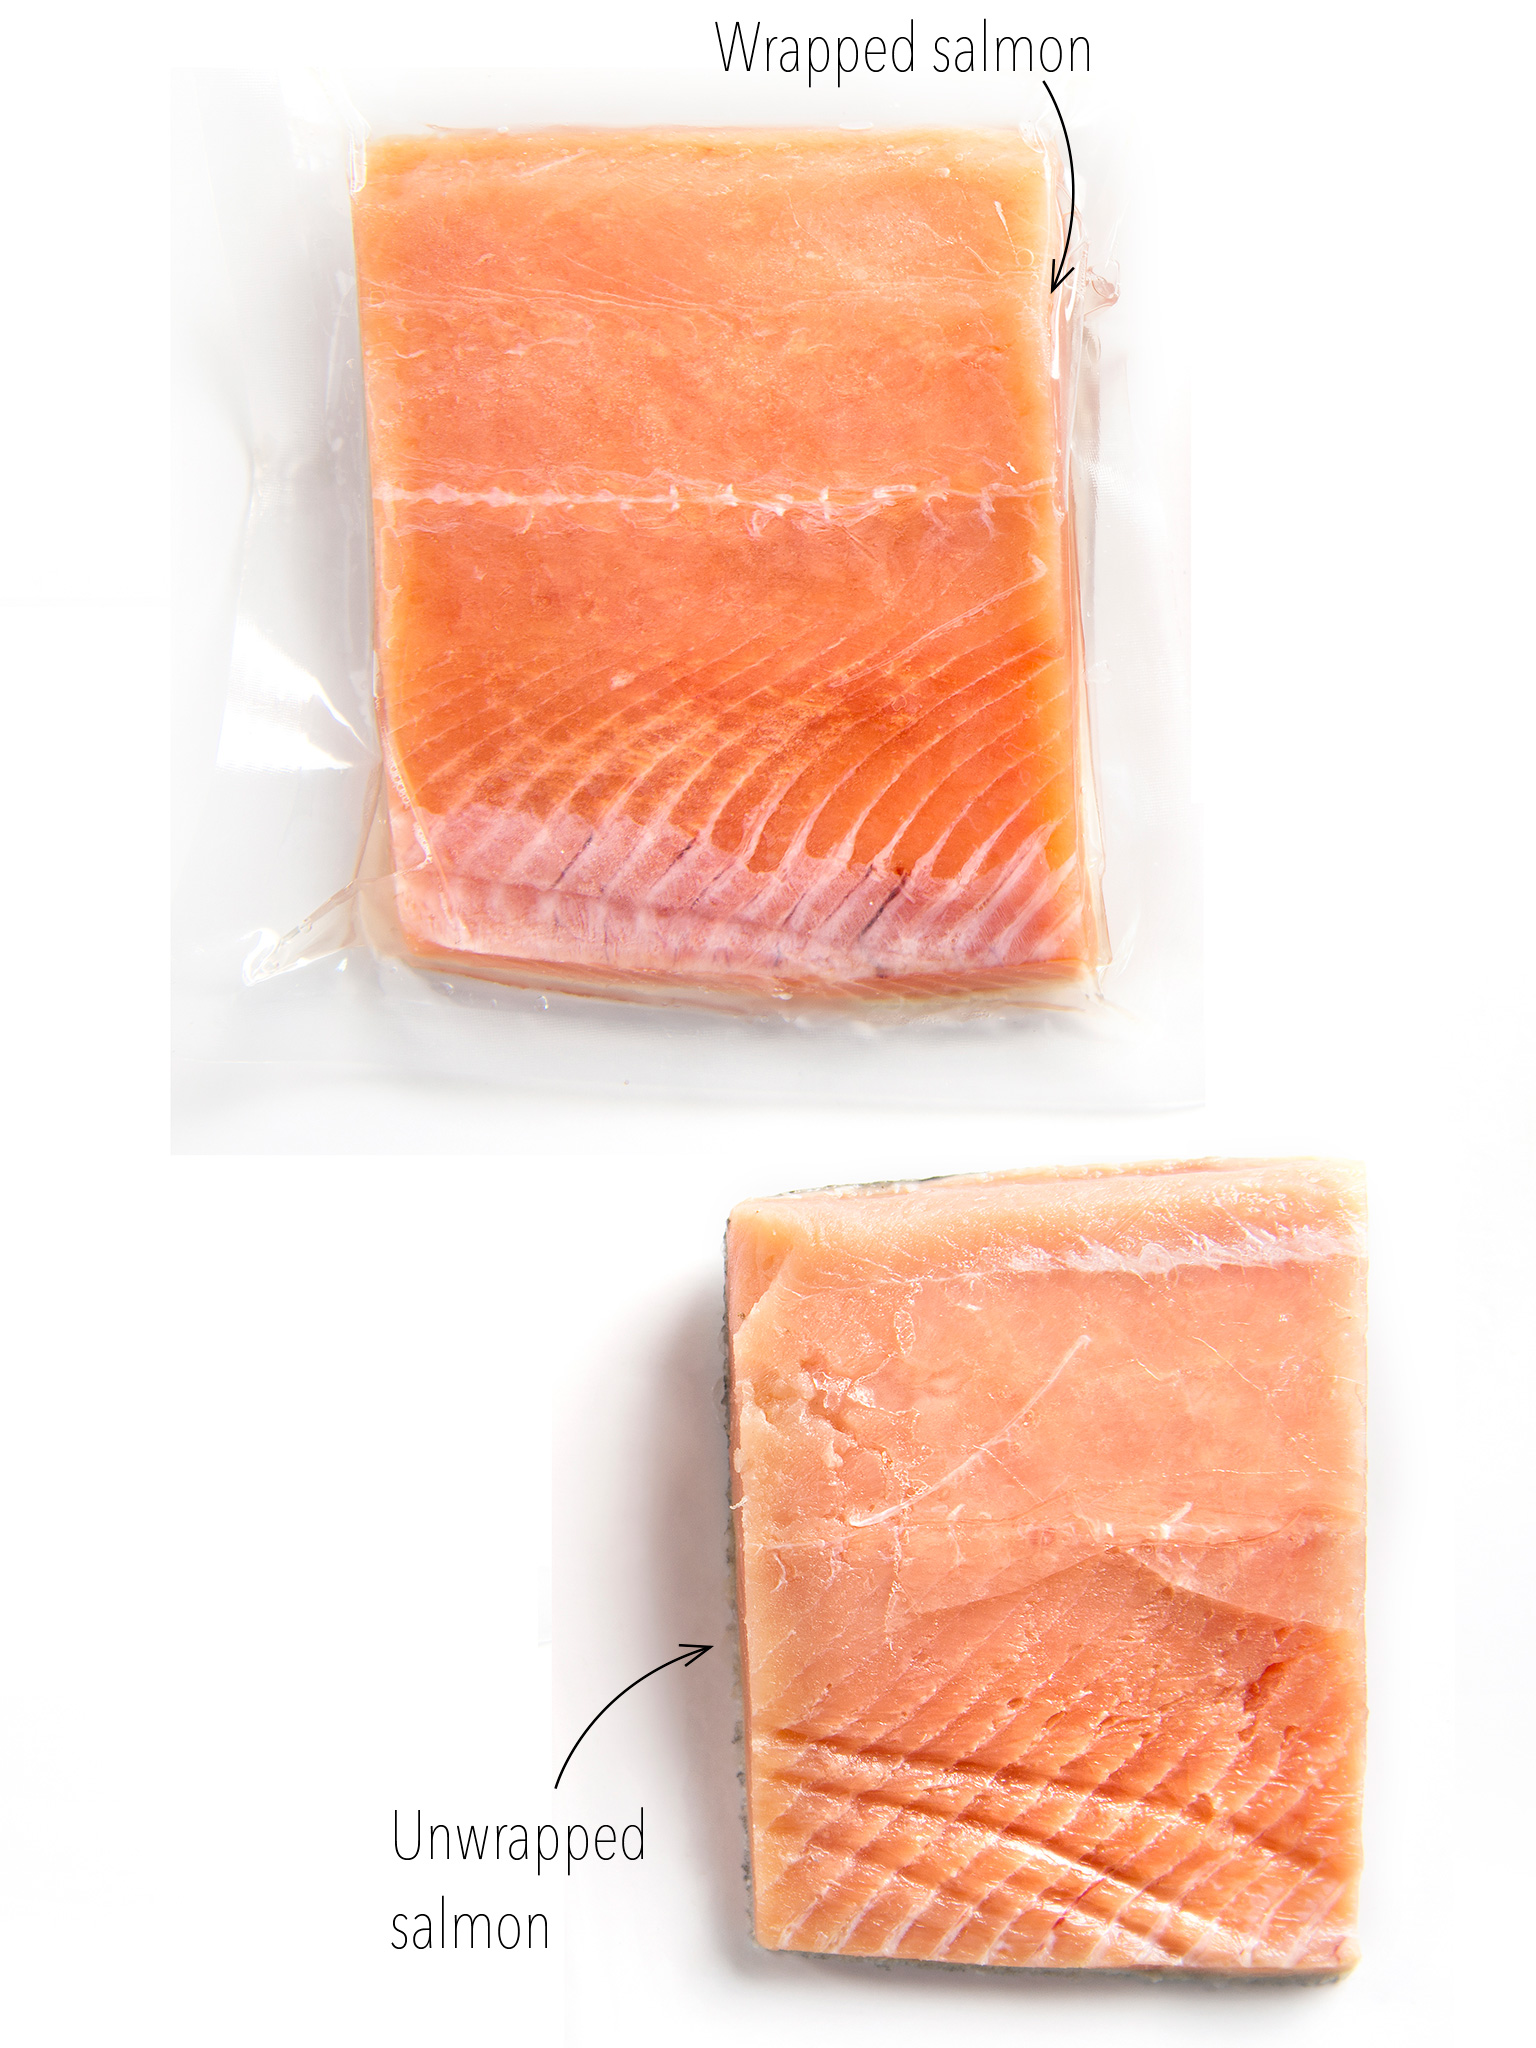
· Adding oil to seafood beforehand helps reduce the unsightly white albumen that forms on the outside as it‘s cooked and maintains the fish’s shape during sealing.
Vegetables
· Thoroughly wash vegetables to remove any dirt before cooking. This ensures that foodborne illnesses aren’t grown during the cooking process.
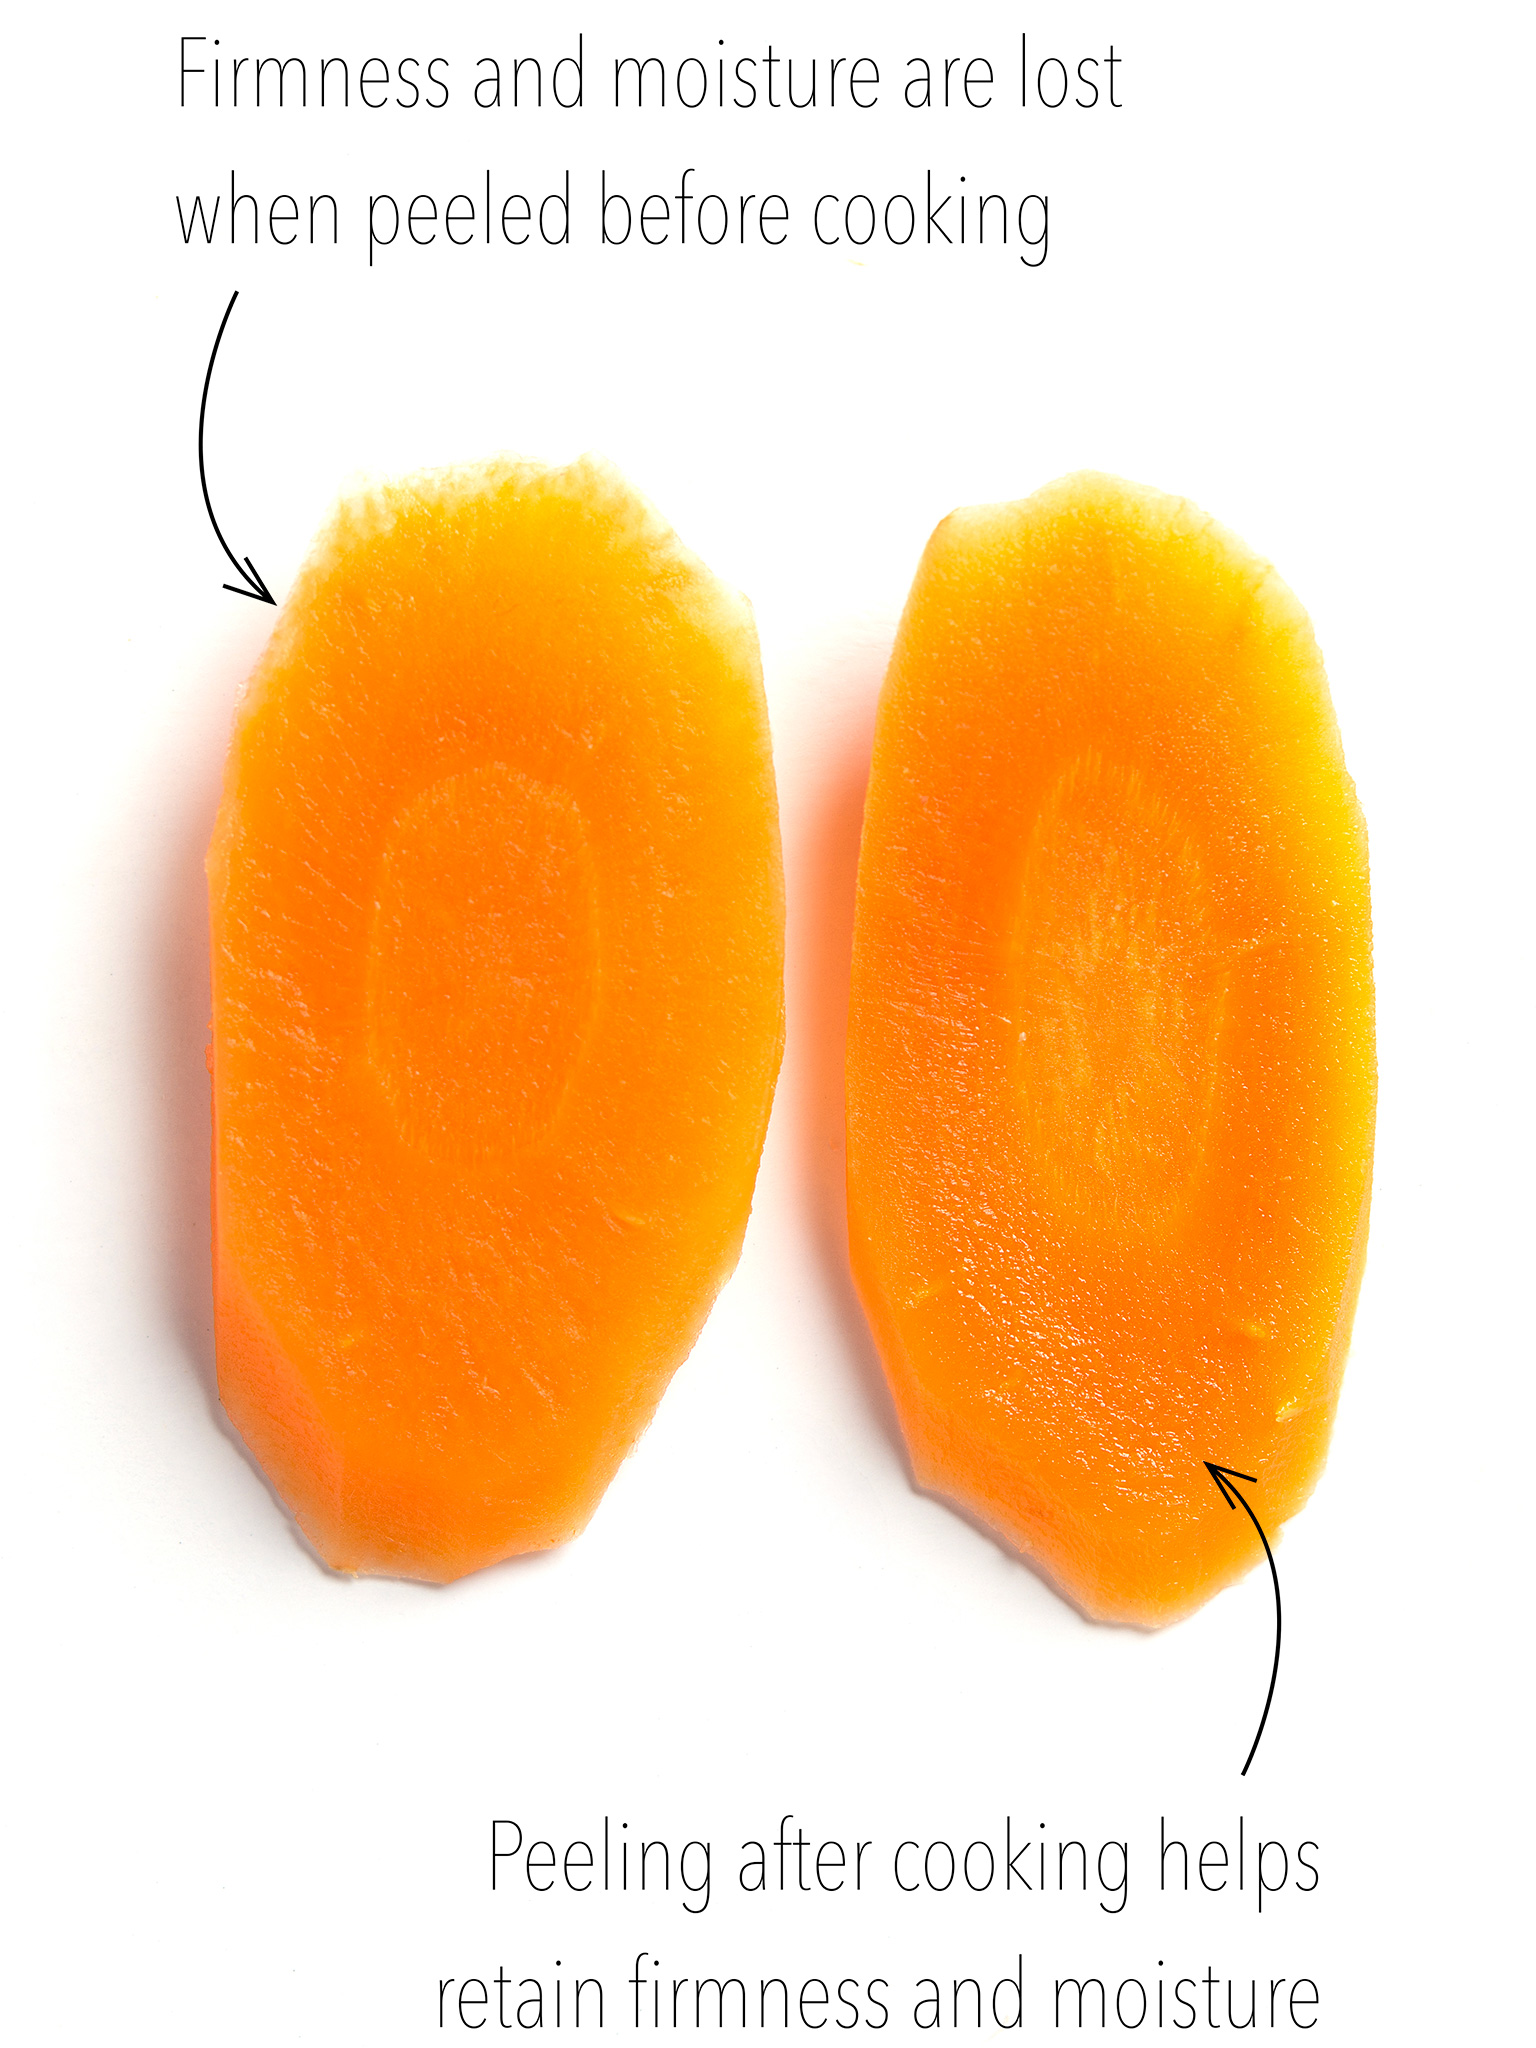
· Avoid peeling vegetables as part of prep. Otherwsie, ridges and raised dots will form as the cell structure falls apart and loses moisture. Cooked vegetables are easier to cut and peel and have cleaner appearance.
· For white root vegetables, add a bit of oil to the bag with them to help them retain their color.
· For red and purple vegetables, add vinegar to the bag to enrich their color.
PREPPING ALCOHOL FOR SOUS VIDE COOKING
Typically used in marinades or sauces, alcohol is an important part of cooking. However, there are certain issues you should be aware of when prepping it for use during the sous vide process.
Because alcohol will start to steam at 160°F (71°C), you must heat the liquor before putting it in the bag. Otherwise, it will create an air space as it cooks, which could cause the bag to break open or lead to your food being unevenly cooked. Also, because alcohol doesn’t boil off when cooked sous vide, it can lend a harsh, unpleasant taste to your food.
To prepare alcohol for sous vide cooking, simply boil it with the other marinade or sauce ingredients until it’s reduced by half. Once reduced, pour the liquid into a container and allow it to chill in the refrigerator for a few minutes. You can then add the liquid to the plastic sous vide bag with your food before placing the bag in the machine.
Seasoning
Seasoning is an essential component of sous vide preparation. Anything from a simple sprinkling of salt and pepper to marinating imparts flavor to food that’s then further enhanced through the sous vide process.
BEFORE OR AFTER?
There’s been a big debate in the sous vide world concerning how much you should season foods during prep versus after the bag comes out of the water.
Some purists believe the magic of sous vide is how the cooking process brings out the natural flavors of the food, which could be compromised by mixing other flavors in with the bag beforehand. The other side of the debate—and the philosophy I follow in this book—is that seasonings and other flavors will have more impact if they are sealed in with the food and allowed to penetrate during the cooking process.
However, one process isn’t better than the other. Feel free to experiment and develop your own philosophy. No matter what, you’ll always have a great meal.
SALTING
Salt is the most highly discussed topic when it comes to sous vide cooking. With conventional cooking techniques, salts are applied to the exterior of meats to help with the browning process. By putting kosher or sea salt on the outside of meat before sautéing, grilling, or broiling, the salt will soak up water on the exterior of the meat. This allows heat to get directly to the meat and caramelize it. However, because high heat isn’t in direct contact with meat during sous vide cooking, you really don’t need the caramelization qualities in salt before cooking.
Salt also has an osmotic effect, transferring the calcium into the protein cell and thereby releasing some of the water from the cell in the process. This effect can cause the meat to lose some of its moisture and tighten up, making it firmer and drier. In most cases, you don’t want this osmotic effect. Therefore, if you’re cooking meat sous vide for an extended amount of time, you shouldn’t add salt to it beforehand. However, if you’re cooking the meat more quickly (less than 2 hours from seasoning to service), you can add salt from the start.
In most cases, adding salt after the cooking process is the best practice. Dry the meat with a paper towel after it’s removed from the package, and then add the kosher or sea salt. You can then sear, grill, or use a blowtorch to get the carmelization you desire for your meat.
BRINING
Brining is when you enhance the flavor of a food and create a firmer product by soaking it in a salt solution. However, because brining may actually cause a drop in the moisture levels of some foods, it’s generally discouraged. If you’re working with a food that’s usually brined, such as seafood, ham, or pickles, you can follow these steps when cooking sous vide.
1 At a rate of 1 tablespoon salt per 1 quart (1l) water, combine water, salt, and any spices to make a brining liquid.
2 While keeping below 70°F (21°C), place the brining liquid and the food together in a plastic zipper-lock bag. Seal the bag, removing as much air as possible.
3 After brining for the specified time based on thickness, remove the food from the bag and rinse under cold running water, making sure to remove all the brine from the exterior.
MARINATING
Marinating is the process of adding flavor to food by letting it sit in a liquid comprised of acidics, spices, and occasionally oils. You should only use a marinade before cooking sous vide if the food will be completely cooked and served within 20 hours. Otherwise, the acids will continue to break down the proteins, causing the food to turn to a soft consistency.
1 Combine marinade ingredients in a blender or large bowl until they’re fully dissolved.
2 While keeping the marinade below 70°F (21°C), place the marinade and the food together in a plastic zipper-lock bag. Seal the bag, removing as much air as possible.
3 After cooking it sous vide, remove the food from the bag and rinse under cold running water, making sure to remove all the marinade from the exterior.
AROMATICS
Aromatics are vegetables and herbs that infuse their aromas into the food being cooked. Adding a bit of oil to the bag before adding the aromatics will help keep the aromatics from sticking to the food.
COMMON AROMATICS
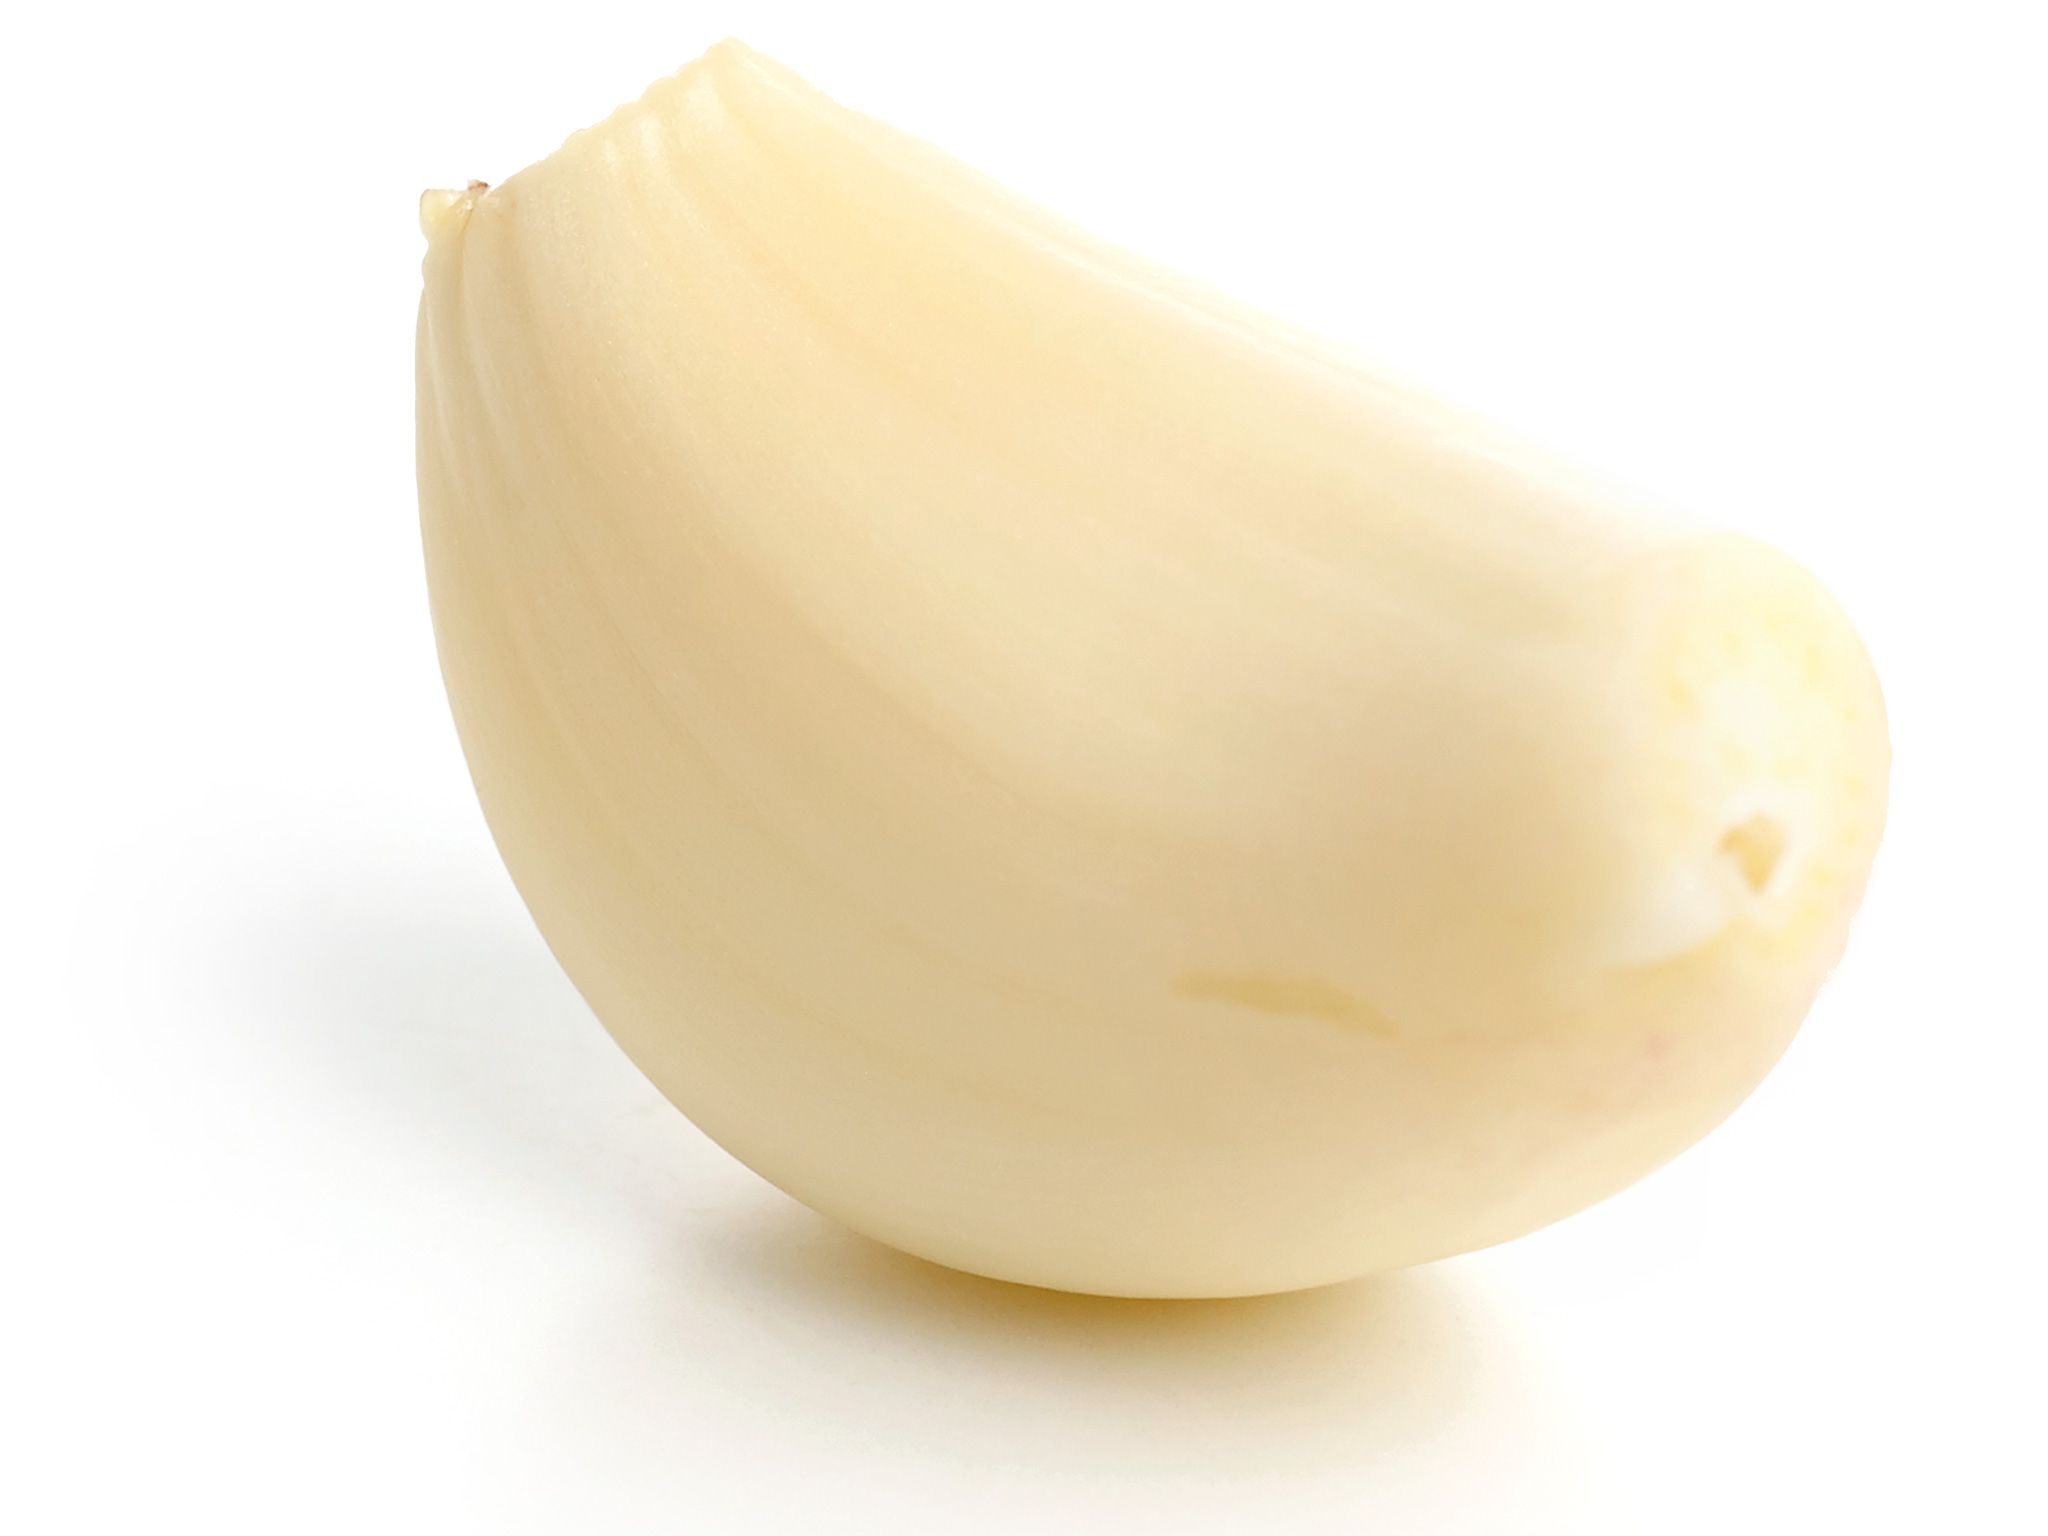
Garlic
Garlic: A pungent aromatic with a spicy, bitter flavor in its raw form, it adds to a mellow, sweeter taste to food when cooked
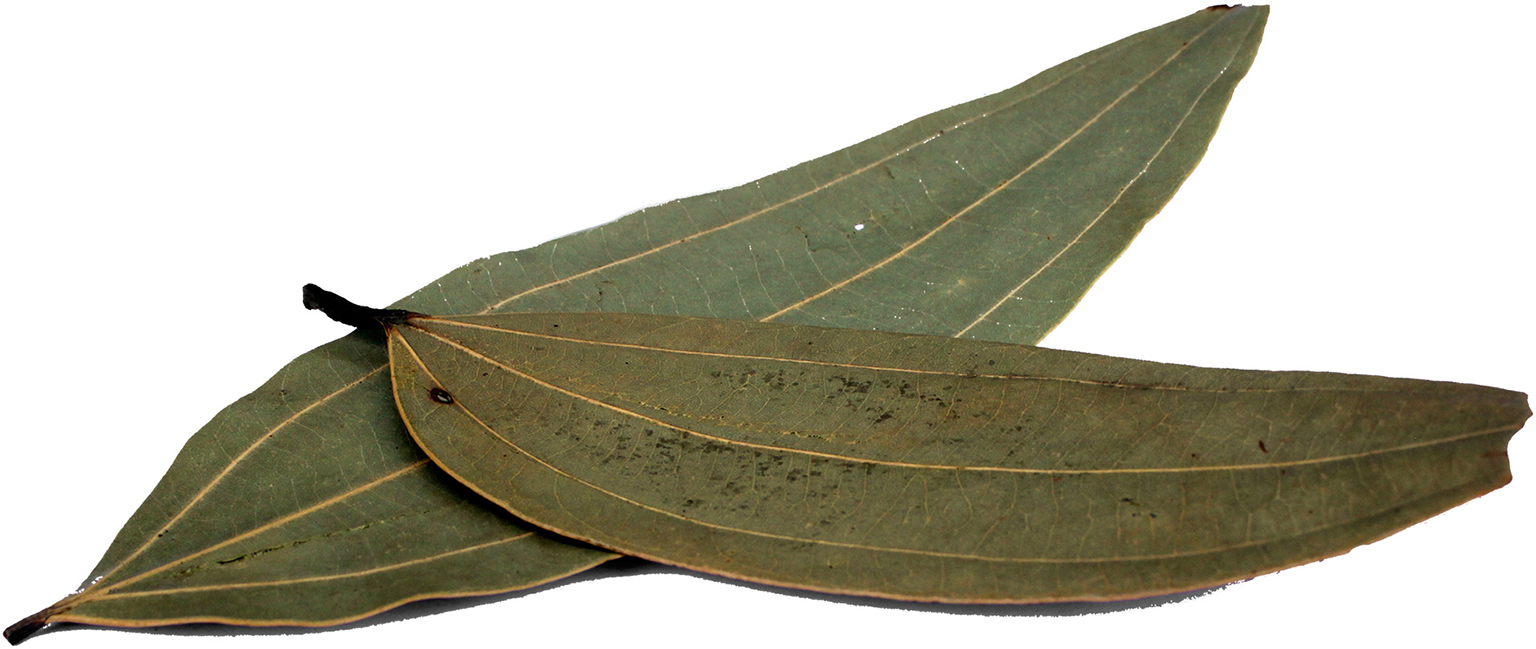
Bay leaf
Bay leaf: Adds a subtle citrus flavor to food
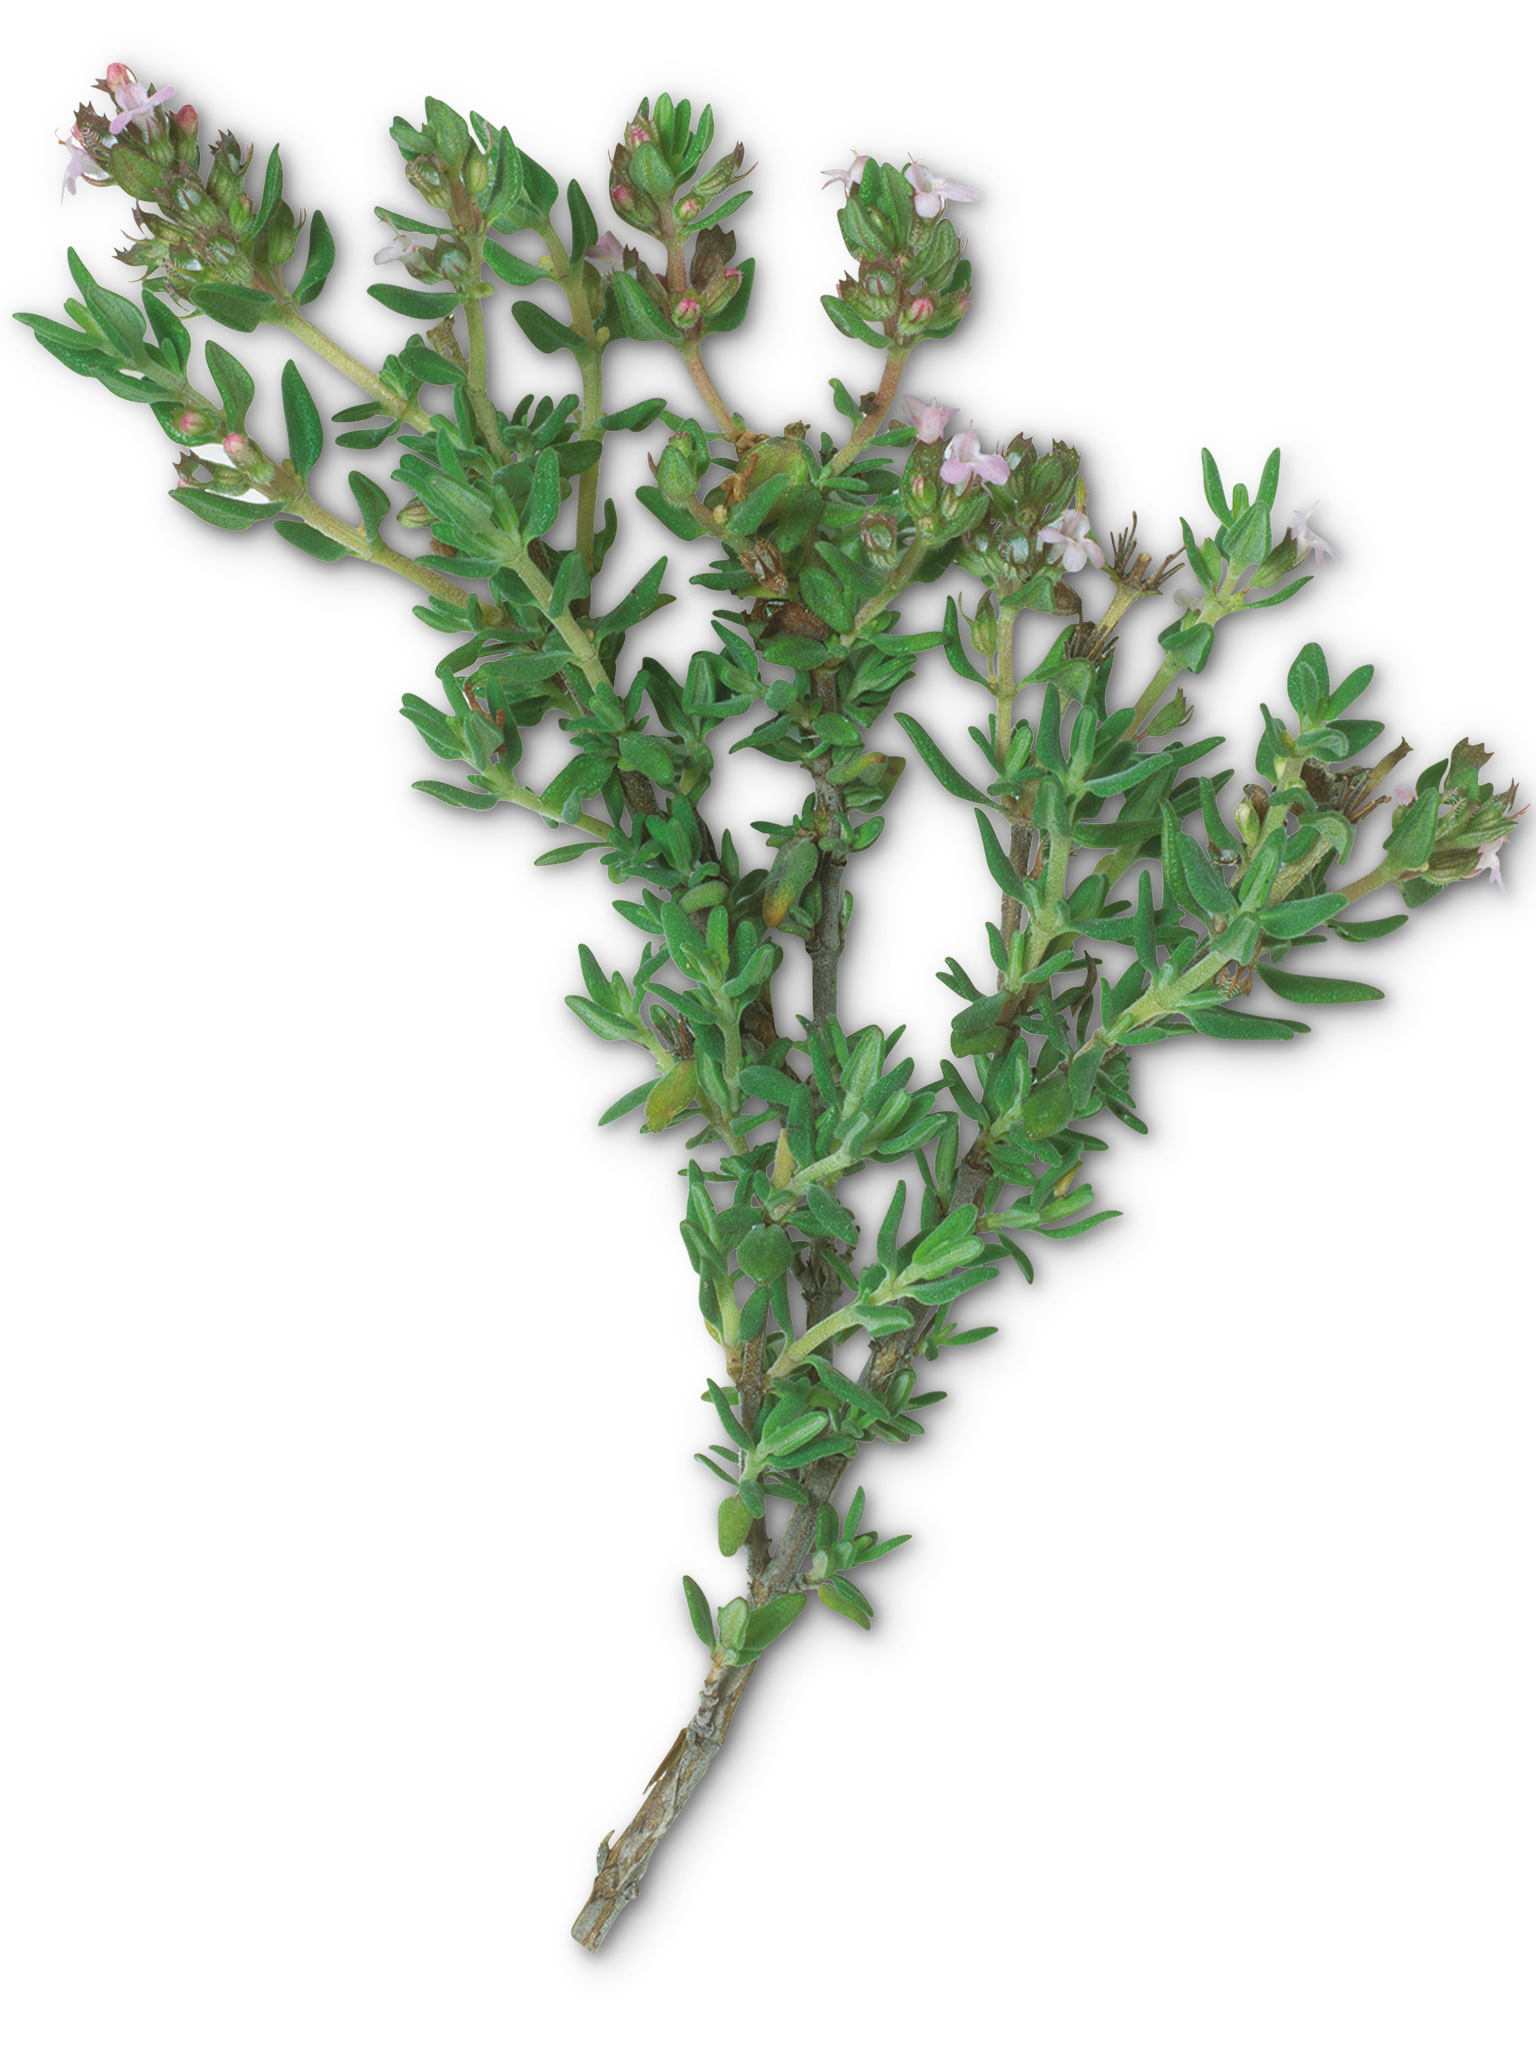
Thyme
Thyme: Provides a distinctive flavor commonly associated with soup broth
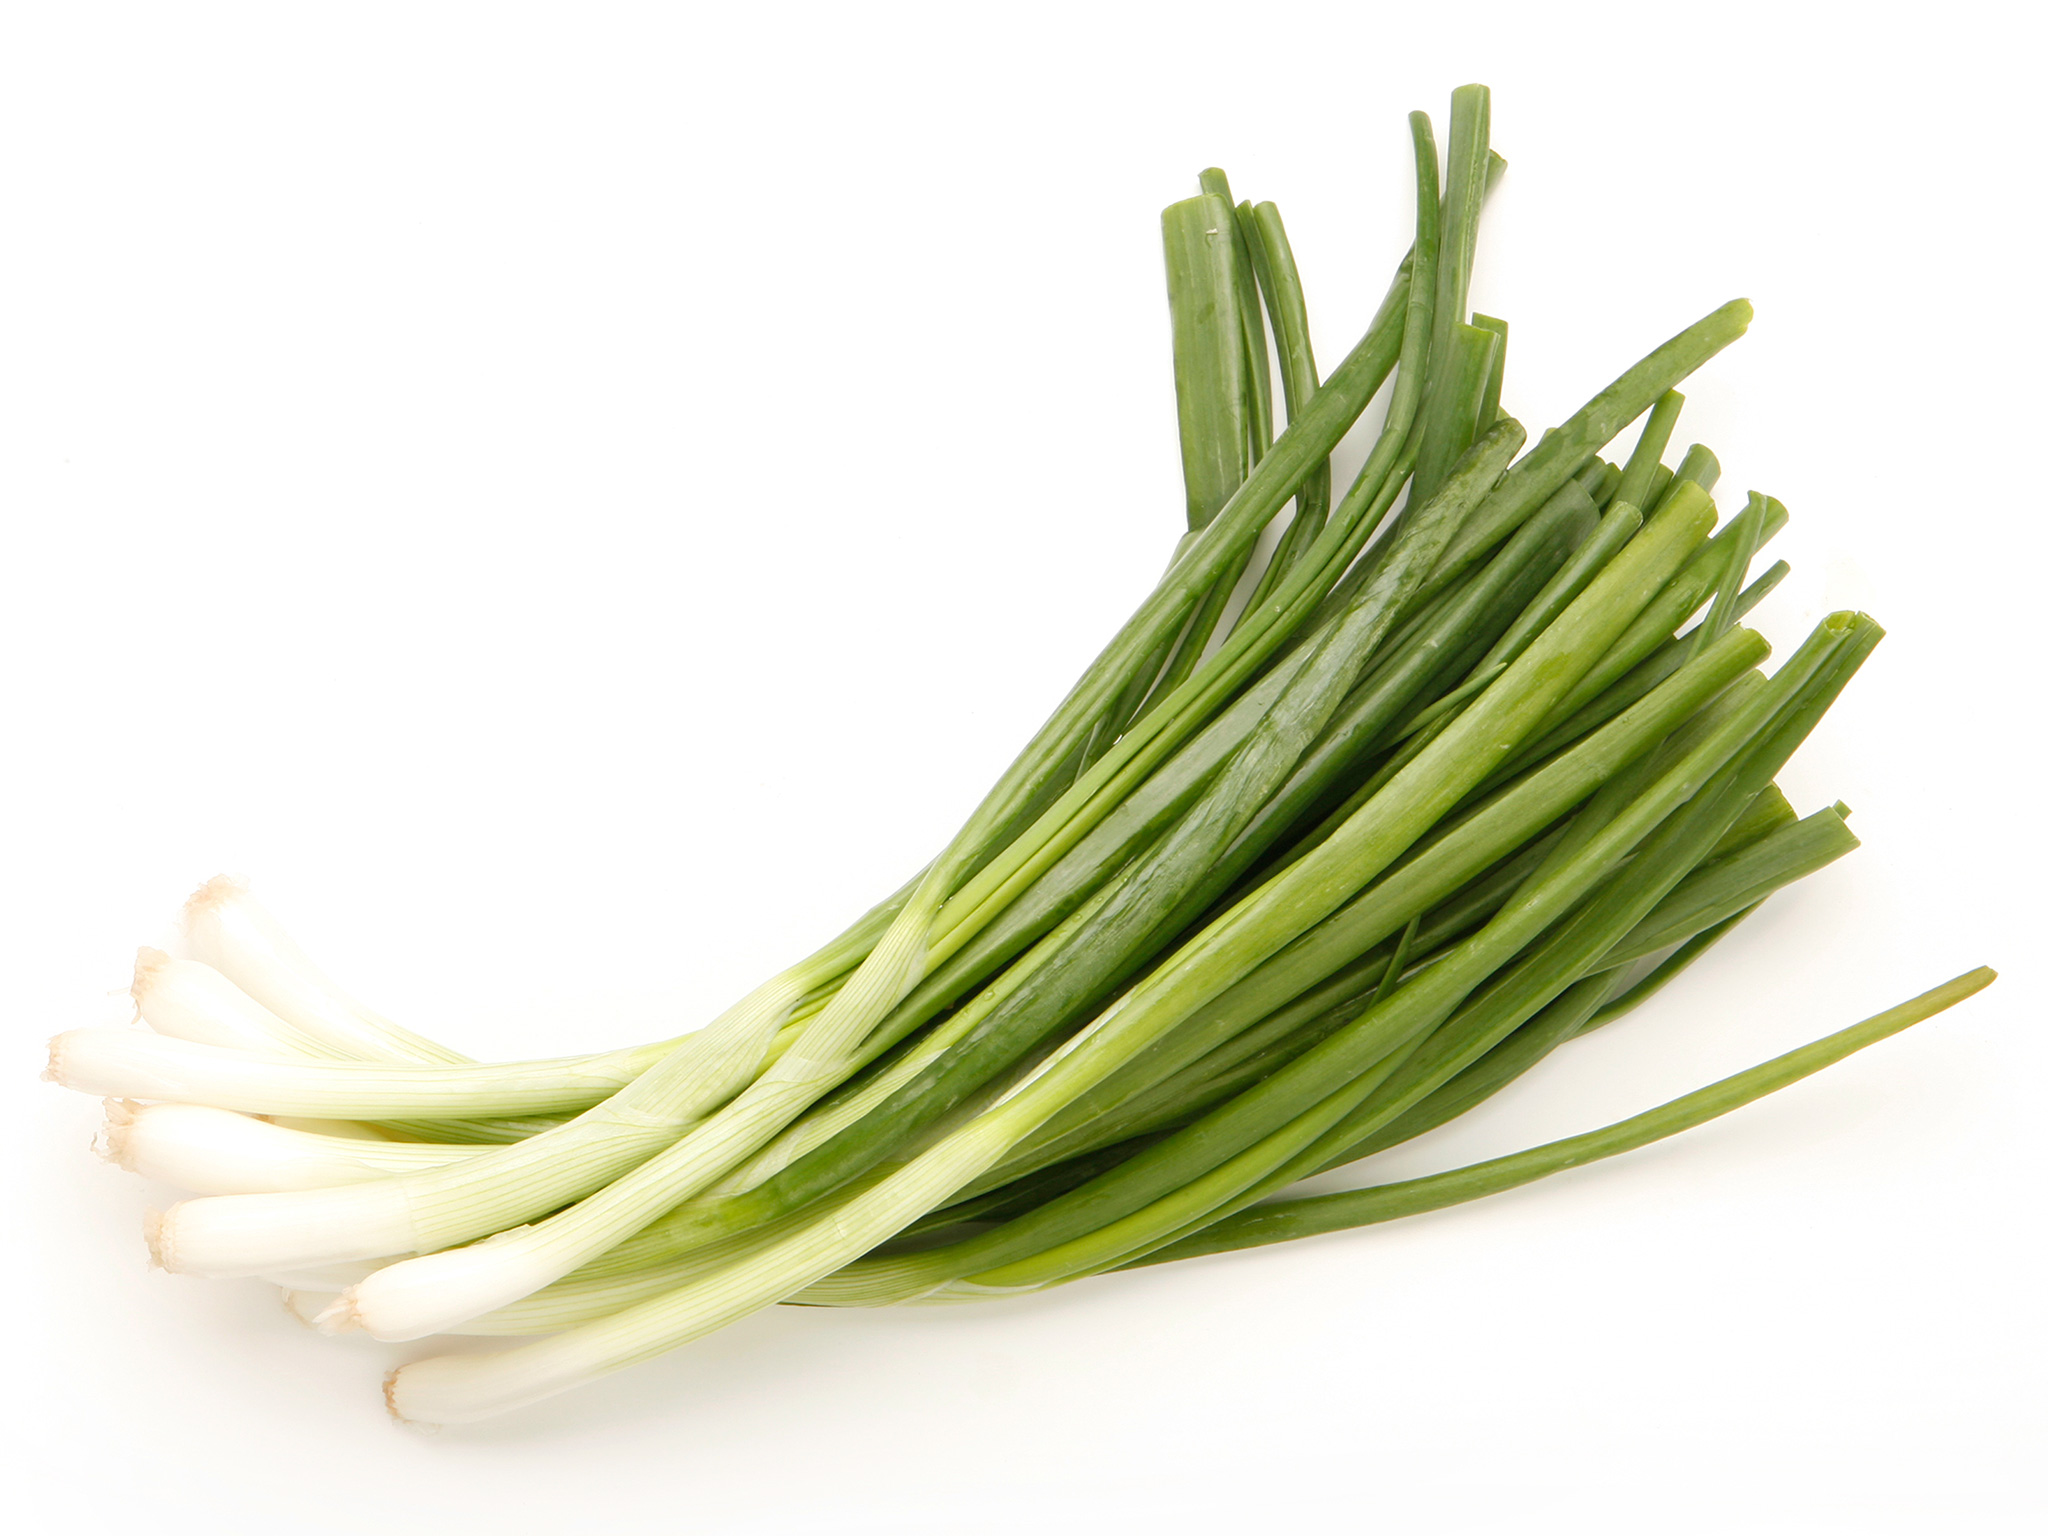
Green onion
Onion: Depending on the type, can give food a sweet or spicy flavor, as well as a strong aroma
SPICES
Spices can add a deep, earthy tone to food. They should be toasted before being added to a food that will be cooked sous vide in order to encourage the oils to come to the surface.
COMMON SPICES
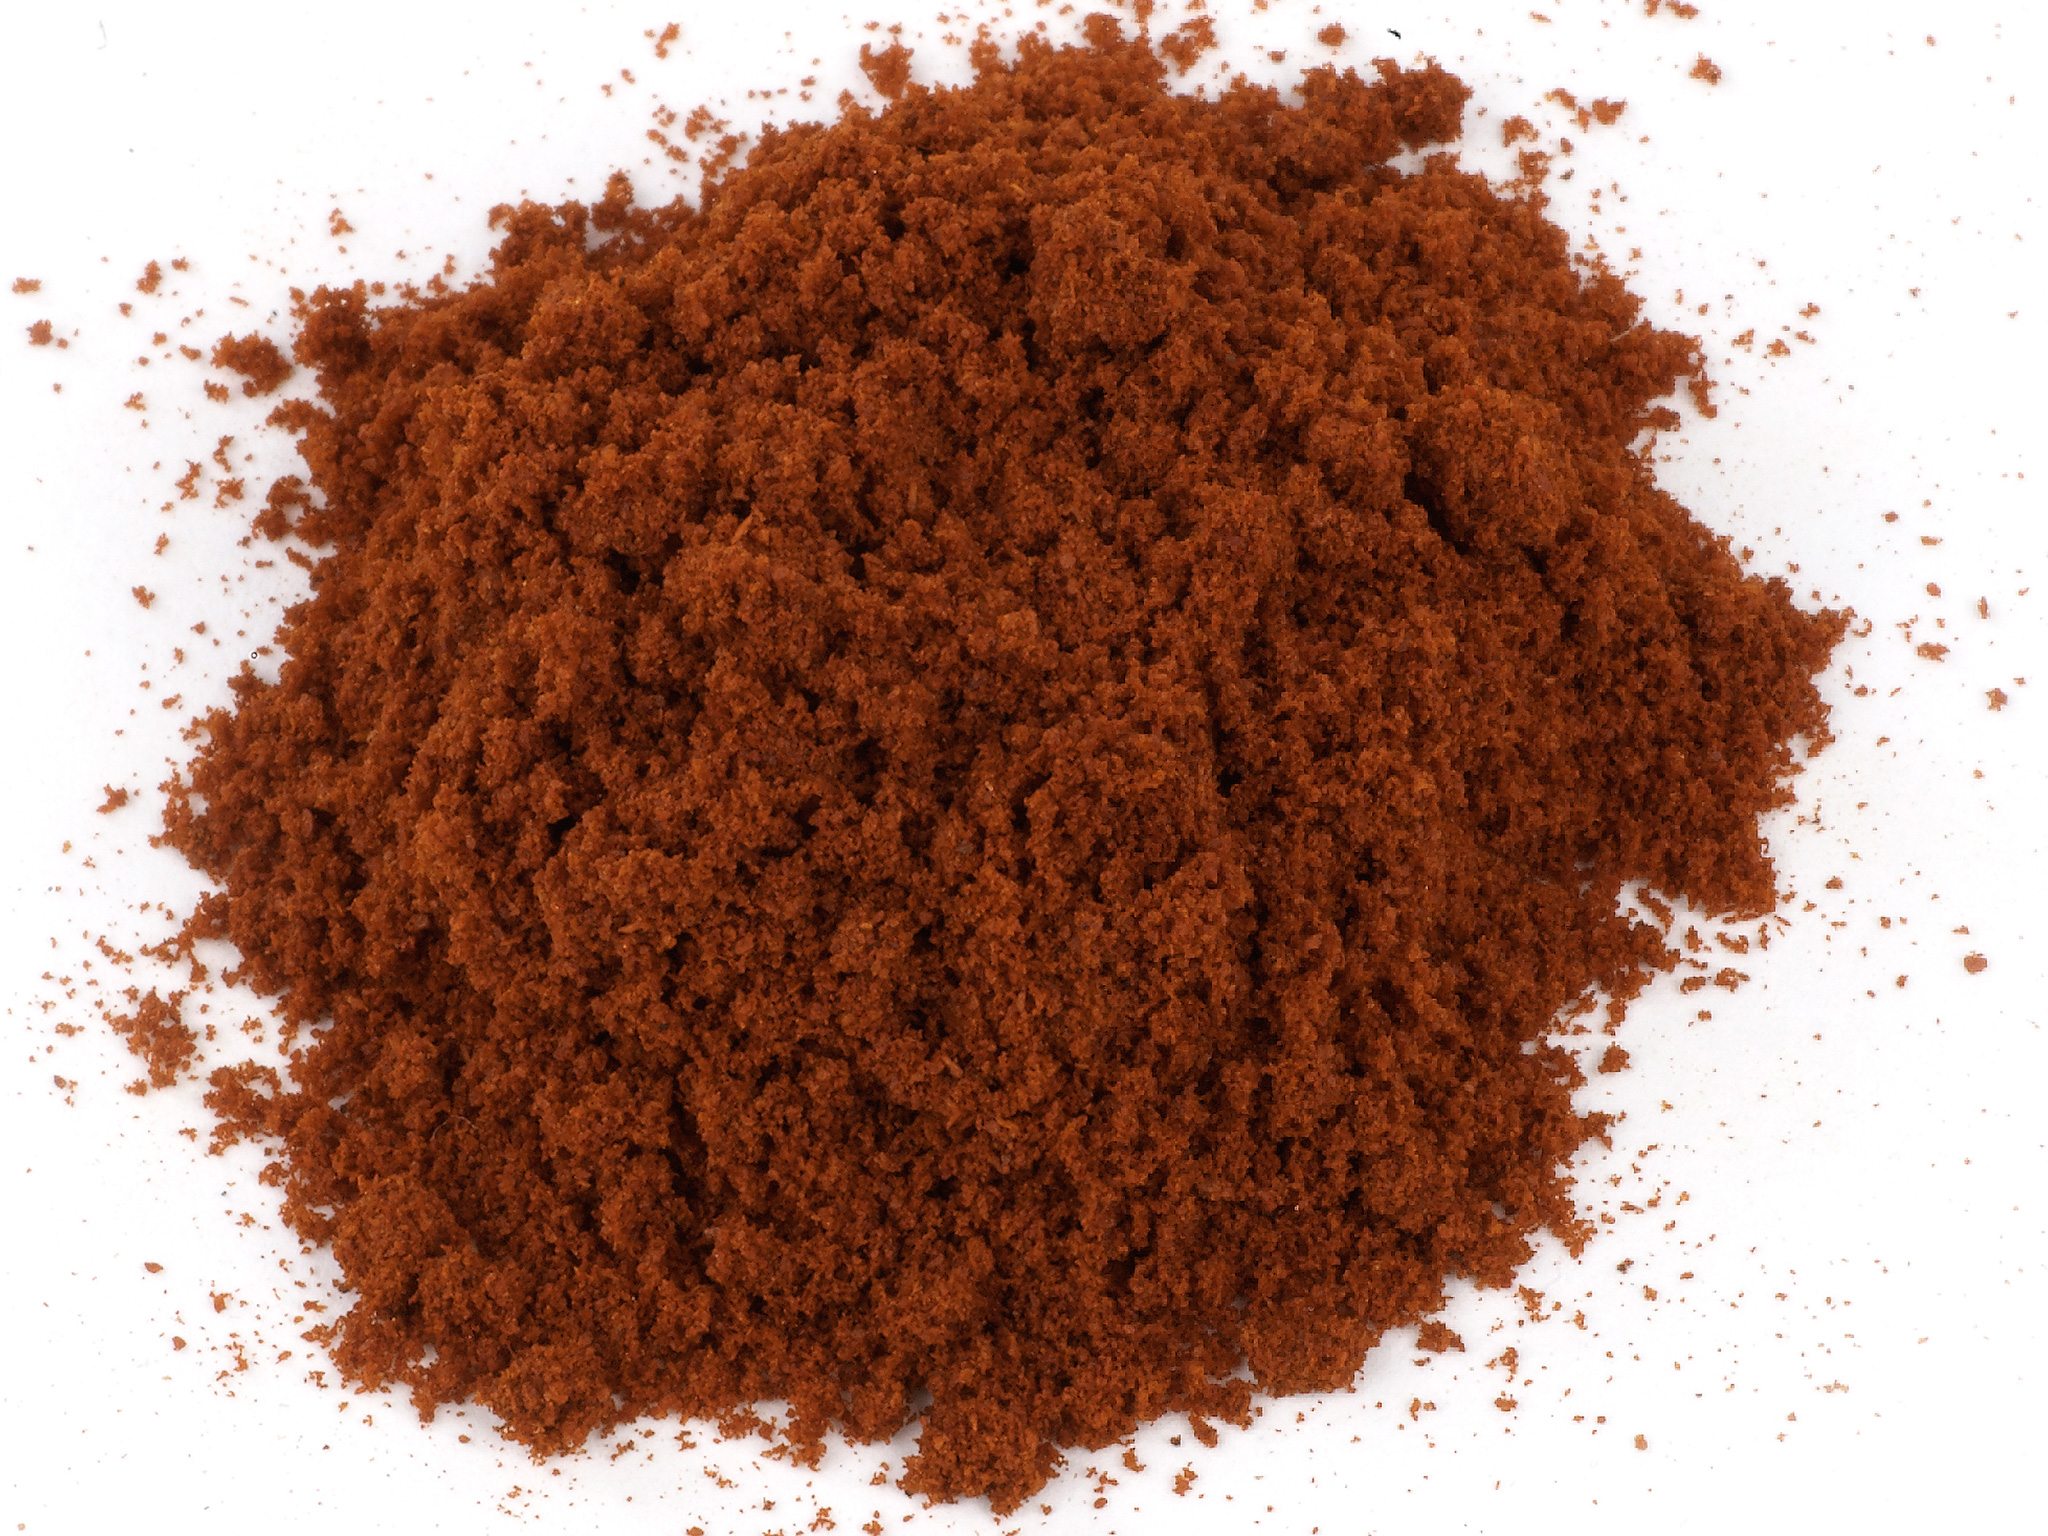
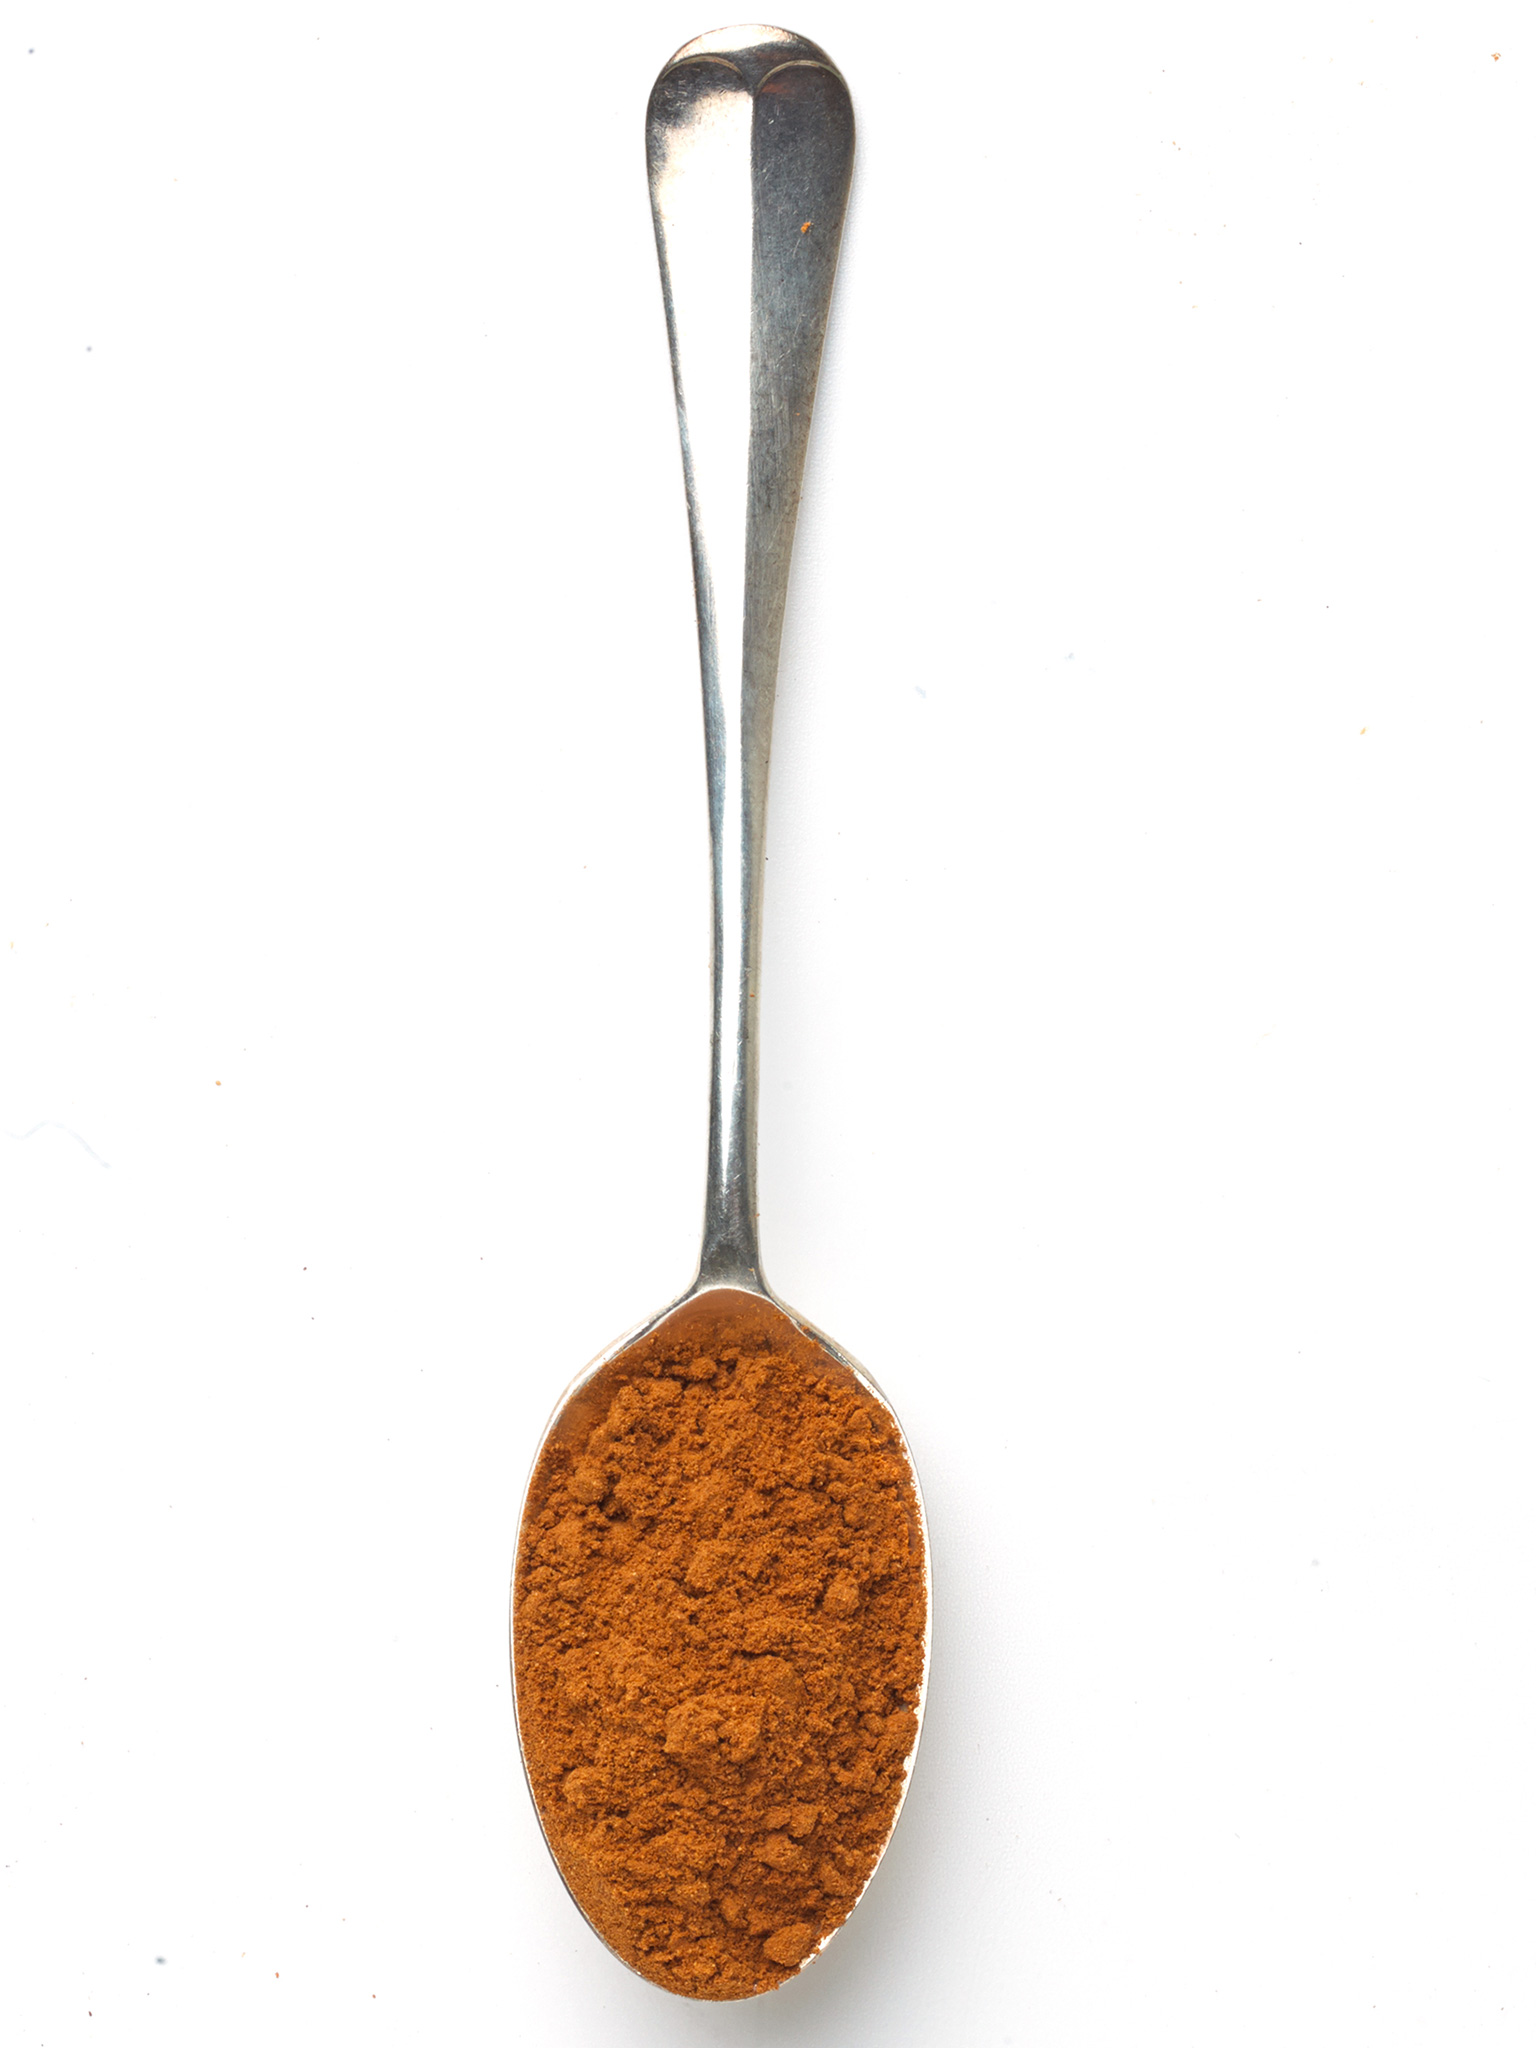
Smoked paprika
Smoked paprika: Adds a smoky quality, as well as a rich, spicy tone
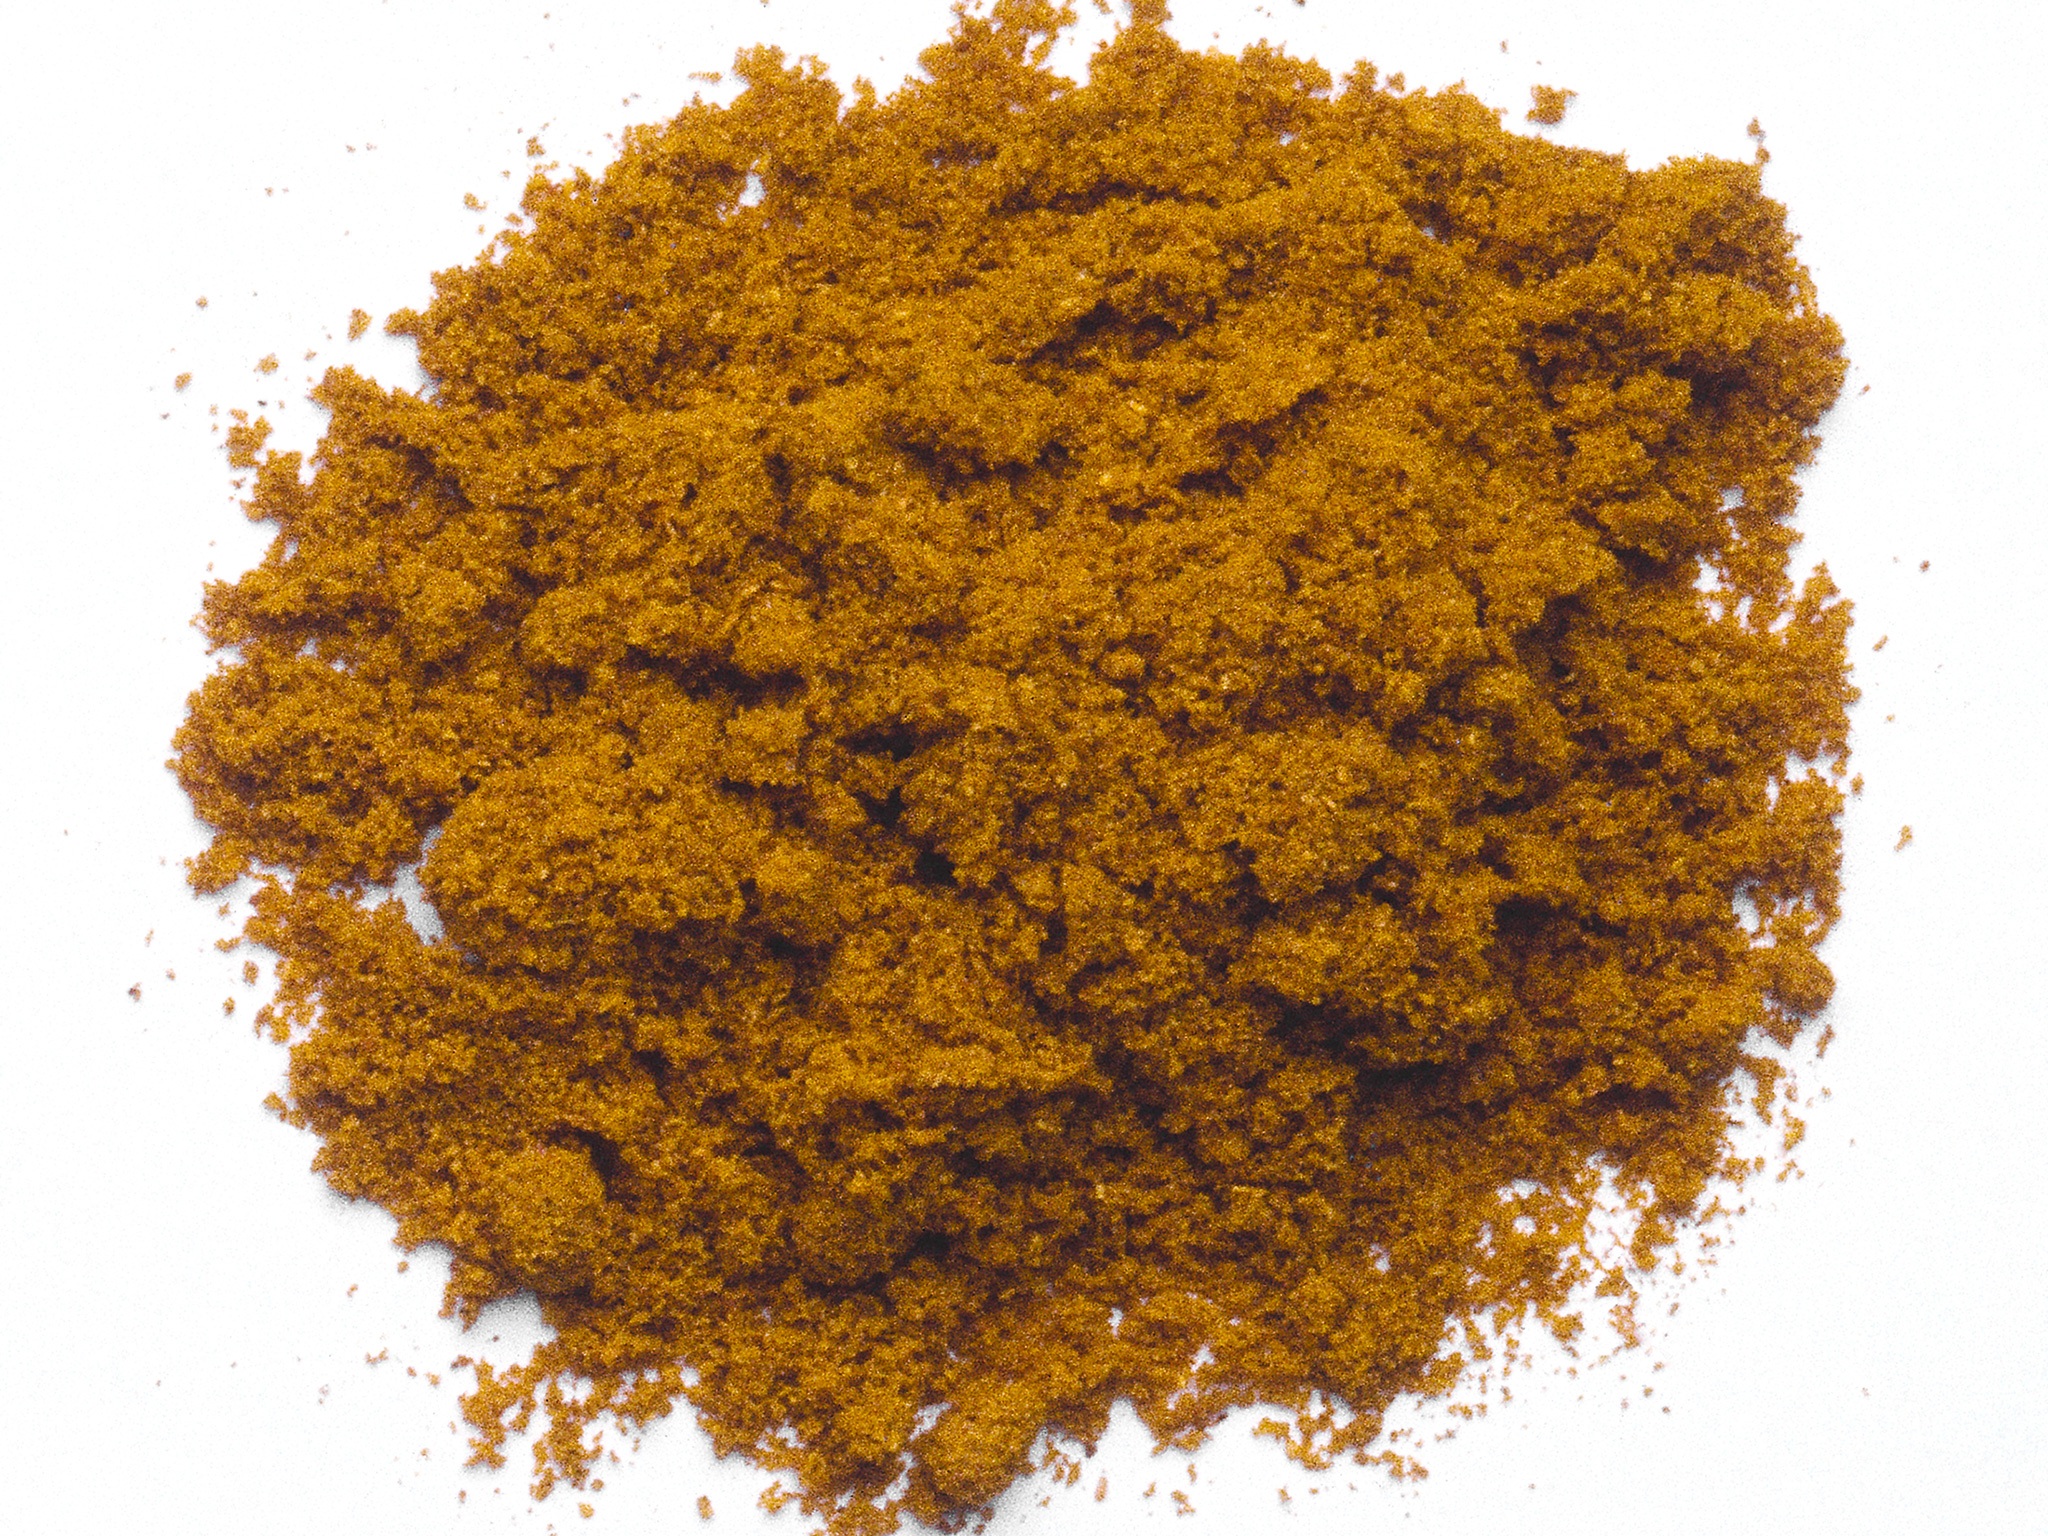
Curry powder
Curry powder: Brings a balance of lightness and boldness that makes it perfect for sous vide foods
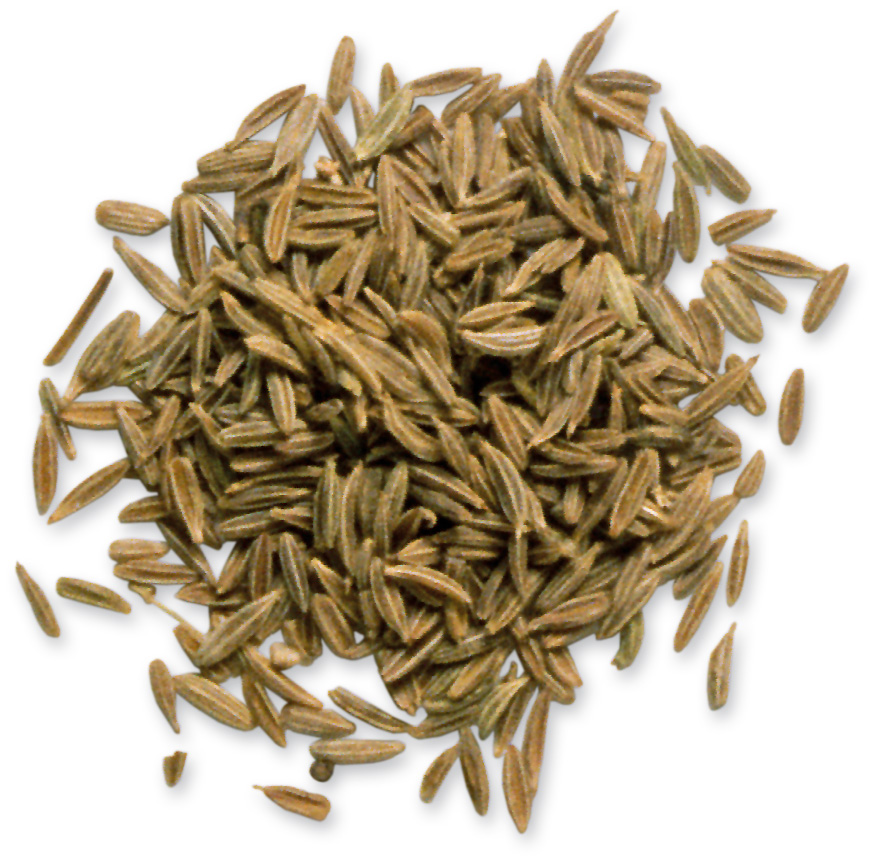
Cumin
Cumin: Commonly used with barbecue as the backbone of a rub, it has a nutty, peppery taste
Cinnamon
Cinnamon: Brings a bright, nutty character; however, should be added sparingly to avoid overpowering the dish
seal
Sealing ingredients in packages is an important part of sous vide cooking. Not only does it keep out the water from the water bath, it also keeps air out of the cooking process in order to promote optimum temperature control.
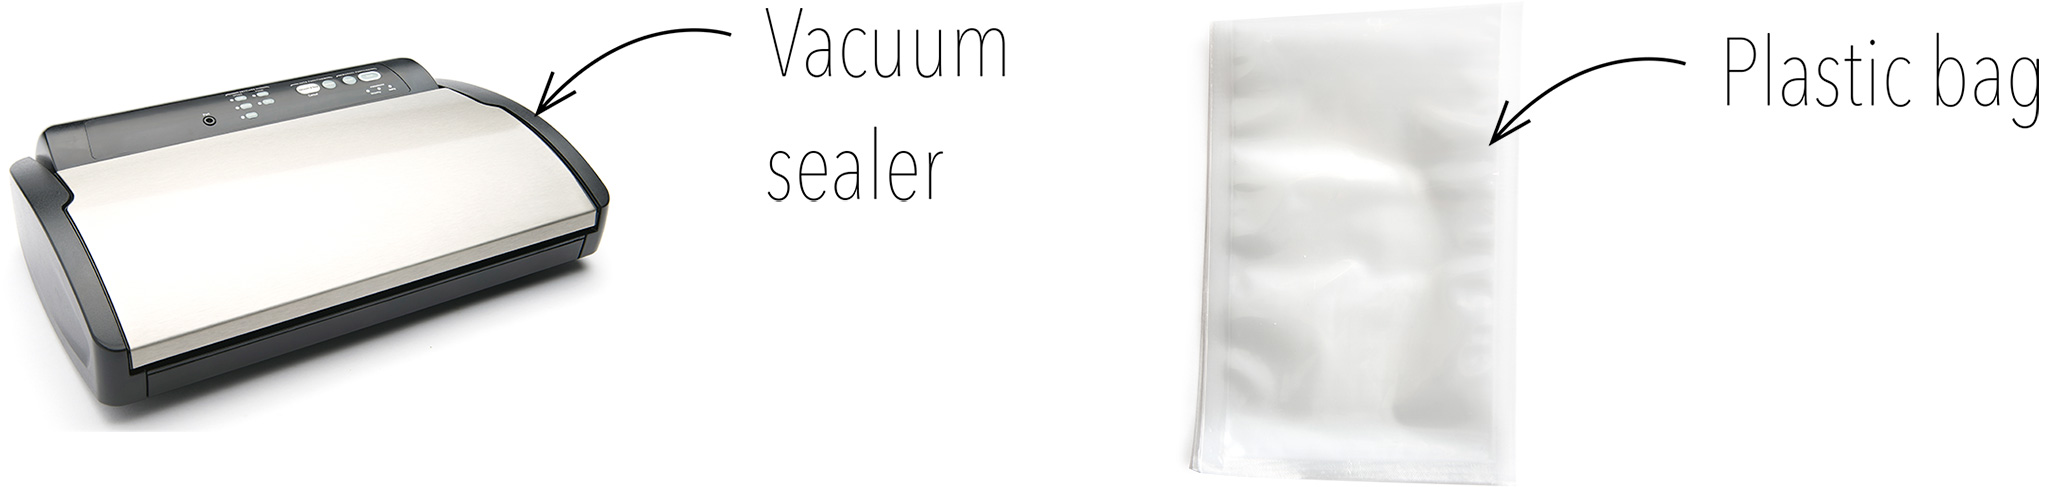
There are two primary ways of packaging food before putting it into the sous vide water bath to cook. The most common way to seal sous vide packaging is to use a vacuum sealer. Once the food and seasonings are put into a precut 1-quart (1l) or 1-gallon (3.75l) plastic bag or a manually measured plastic bag from a roll, the machine pumps the air out of the bag and seals it.
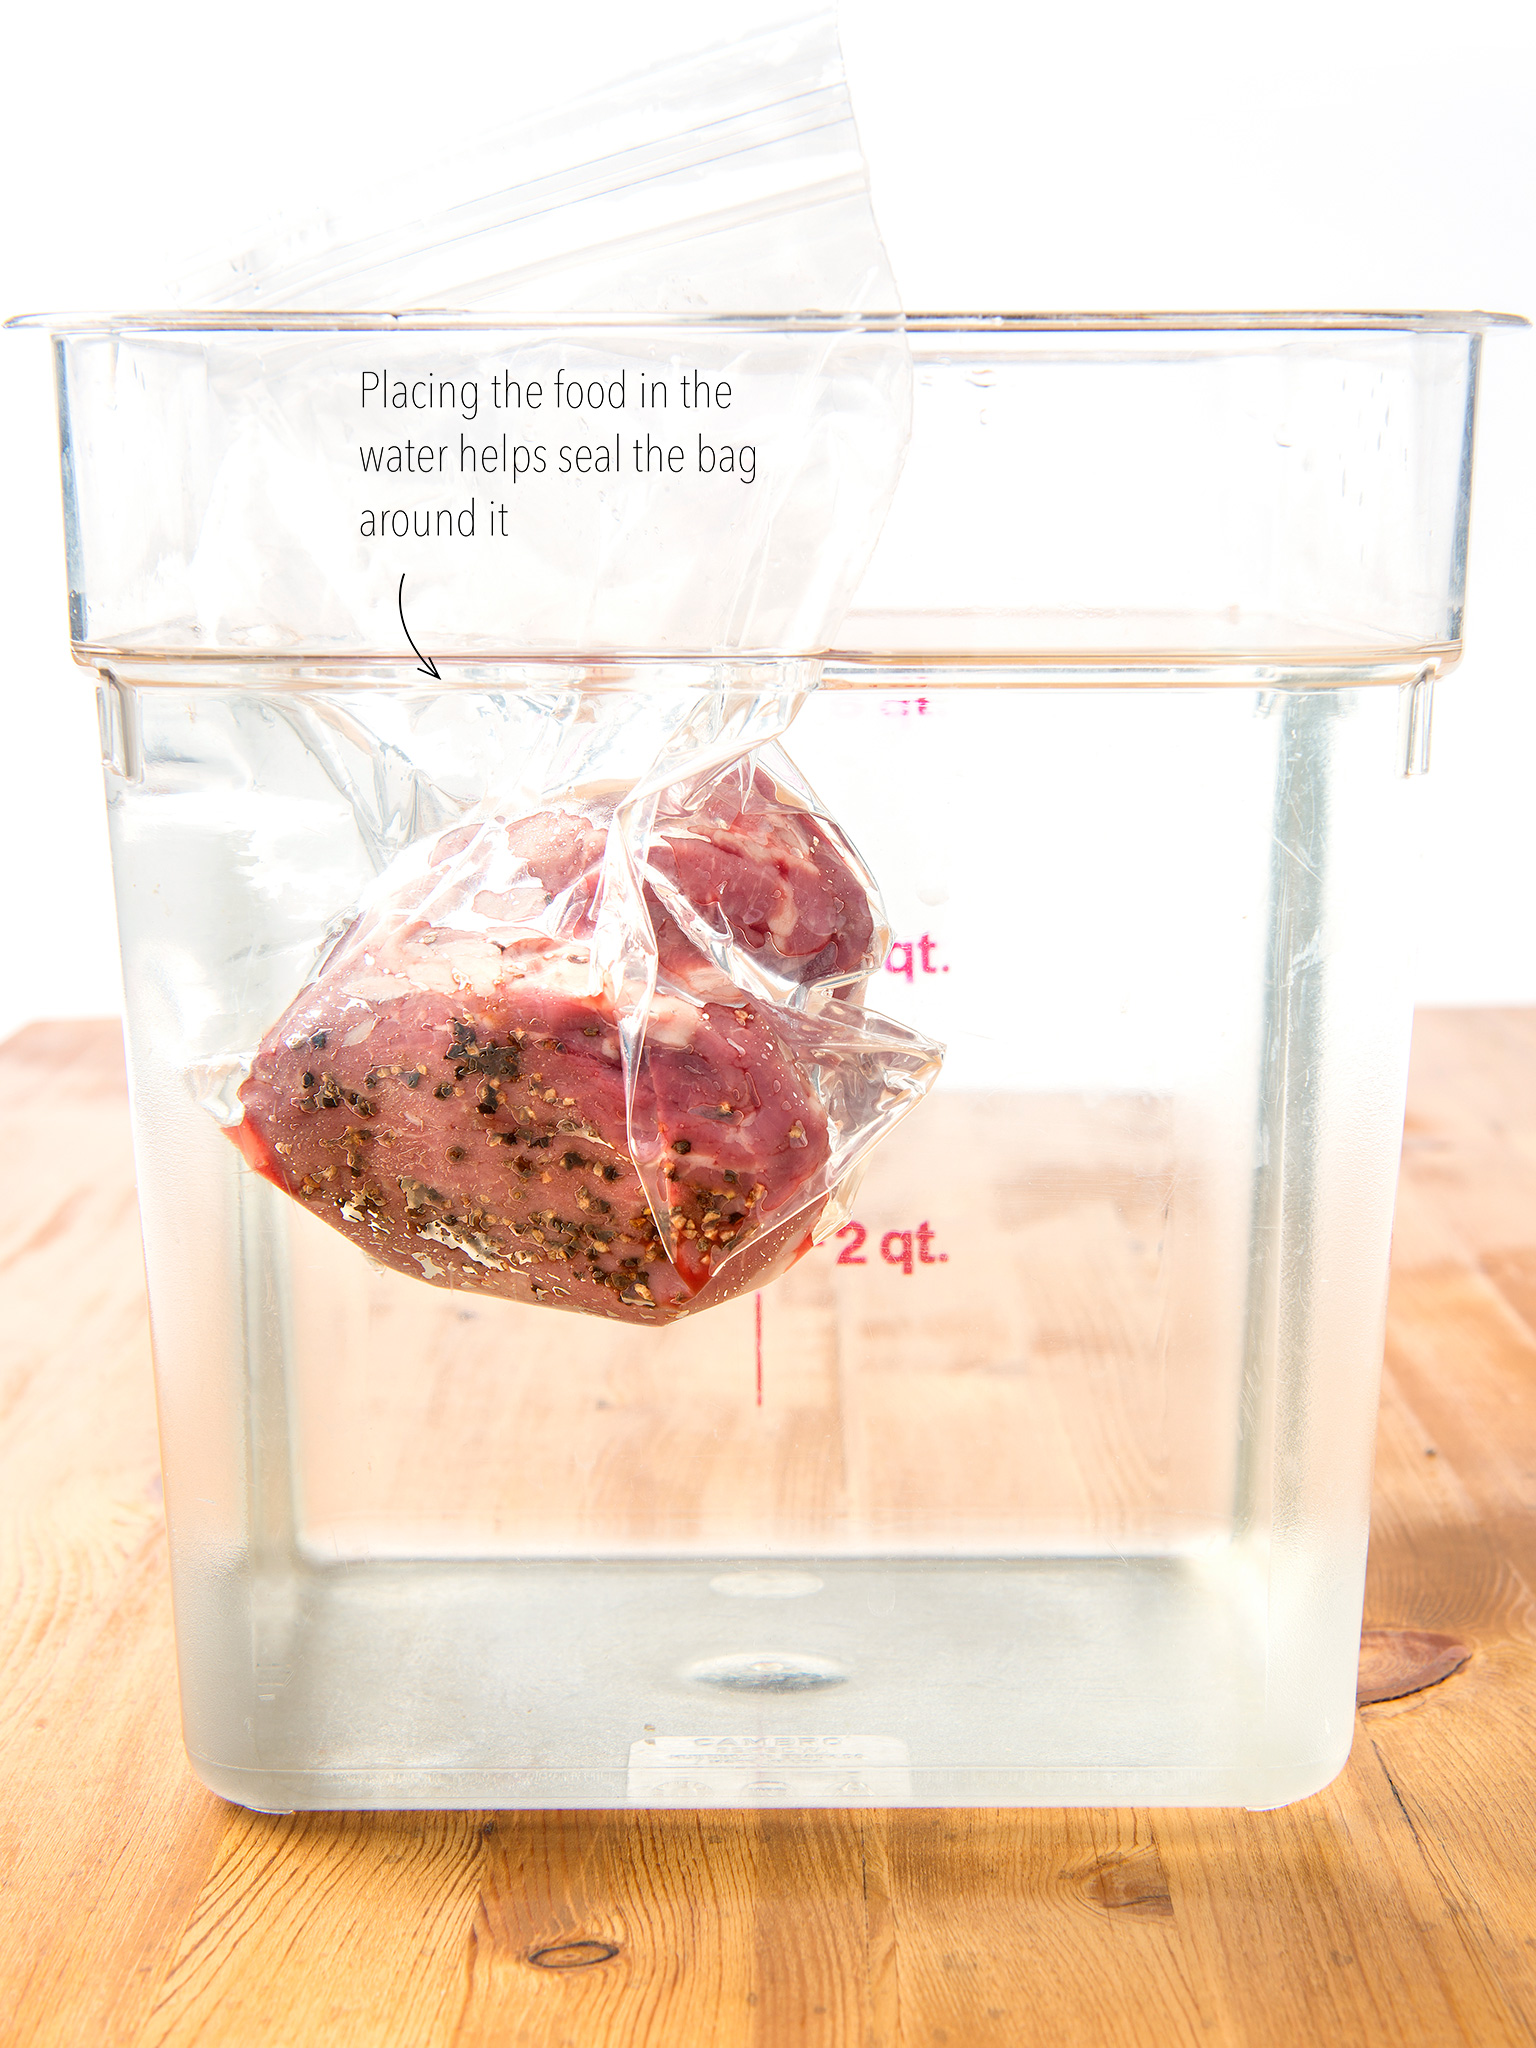
The second way food can be sealed for sous vide is through the use of a zipper-lock bag. This option is great for short cooking times and doesn’t require any fancy equipment. The air in the bag can be removed using the displacement method, which involves submerging the bottom of a partially sealed bag into a water bath and slowly pushing it down until the remaining air is out of the bag, at which point the bag can be sealed.
Sealing with a Vacuum Sealer
Tools needed
1 Place food in a single layer in the plastic bag, along with any liquids. (You have the option of freezing the liquids to help avoid pumping any out of the package.)
2 Clean the inside and outside lip of the plastic bag to ensure a good seal.
3 Place the open side of the plastic bag into the machine and lock it down. Adjust to seal a moist or dry food and start the machine.
Use sous vide bags that are BPA chemical free. That way, you’ll avoid leaking dangerous toxins into the food, which can happen when plastic is exposed to heat for long periods of time.

Sealing with a Zipper-Lock Bag
Tools needed
1 Place food in a single layer in the zipper-lock bag, along with any liquids. (You have the option of freezing the liquids to help avoid pumping any out of the package.)
2 Seal all but a corner of the bag. Place in the water bath just up to the open corner. Once in the water, seal the rest of the way.
3 Using a clamp-style paper clip, fold the sealed edge of the zipper-lock bag over the side of the water bath container.
The zipper-lock bag method is best suited for cooking times of less than 2 hours. Longer cooking times often result in the zipper-lock bag breaking or falling into the water.
cook
Now that you’ve prepared and sealed the food, it’s time to get cooking. Like a slow cooker, a sous vide machine allows you to set it and (mostly) forget it. The difference from other methods is the precise level of control you have over the cooked food.
Cooking sous vide is a matter of controlling the temperature of water around a food as it’s cooking. While the circulator will control the temperature, there are a few things you’ll need to monitor during the entire sous vide cooking process.
First, you need to ensure the food is surrounded by hot water at all times. If the food isn’t covered completely, any part that’s floating above the water won’t cook. This can potentially lead to the food being in a temperature “danger zone,” in which harmful bacteria can breed.
Second, you must maintain the temperature of the water during the entire cooking process. If the water isn’t at the right temperature due to cold air cooling or water loss from the container, your food may get undercooked or not turn out at the doneness level you desire.
Choosing a Container to Use with an Immersion Circulator
If you plan to use an immersion circulator instead of a water oven, you may be wondering what type of container you can use to hold your water bath. While you can invest in specialized containers with lids that have cutouts to fit around the circulator, you can just as easily use a container you may already have at home.
For instance, many people use a large pot or a plastic cooler. You don’t even need a lid for them, and for coolers in particular, the insulated walls help keep the water at the right temperature. One way you can maintain the water temperature without a lid is by adding a bunch of old ping-pong balls to the water bath. These not only act as double-walled insulation, they also allow you to reach through them to put in or take out the bag.
Keep an eye on plastic bags containing vegetables, which tend to float due to gases expelled during cooking. If this happens, remove and dry the vegetables, transfer them to a new bag, and seal. You can then add the new bag to the water.
finish
After the food has been cooked in the sous vide water bath, you can then move on to finishing the food. One aspect of finishing is browning, which is done by searing, torching, or grilling the food.
Cooking in a vacuum-sealed bag inhibits the development of umami, a pleasantly savory taste that enhances all of the other flavors in food. Searing, torching, or grilling can help you achieve this desired taste.
Browning proteins helps caramelize the meat in order to develop that umami taste. In vegetables, these methods are used to brown the natural sugars in the food. When the browning process is complete, you’ll notice an obvious increase in the overall flavor of the food; the richness of the foods will pop out and make your mouth salivate.
The keys to the development of umami vary based on the process with which you choose to finish the food.
Searing
Searing is a process in which food is sautéed in a very hot pan for a short amount of time. This isn’t meant to cook the middle of the food; instead, searing helps brown the exterior of the proteins, leaving them darkened and delicious.
1 Remove the food from the plastic bag and place on paper towels. Strain the liquid from the bag through a fine-mesh sieve and reserve.
2 Dry the food completely with paper towels. Once dry, season with kosher salt and then coat in vegetable oil.
3 Preheat a heavy skillet until it starts to smoke. Place the food in the skillet and allow to cook for 30 seconds on each side. Remove the food from heat.
4 Turn off the heat to the burner. Pour the reserved liquid into the still-warm skillet to heat it up. Serve as a sauce with the food.
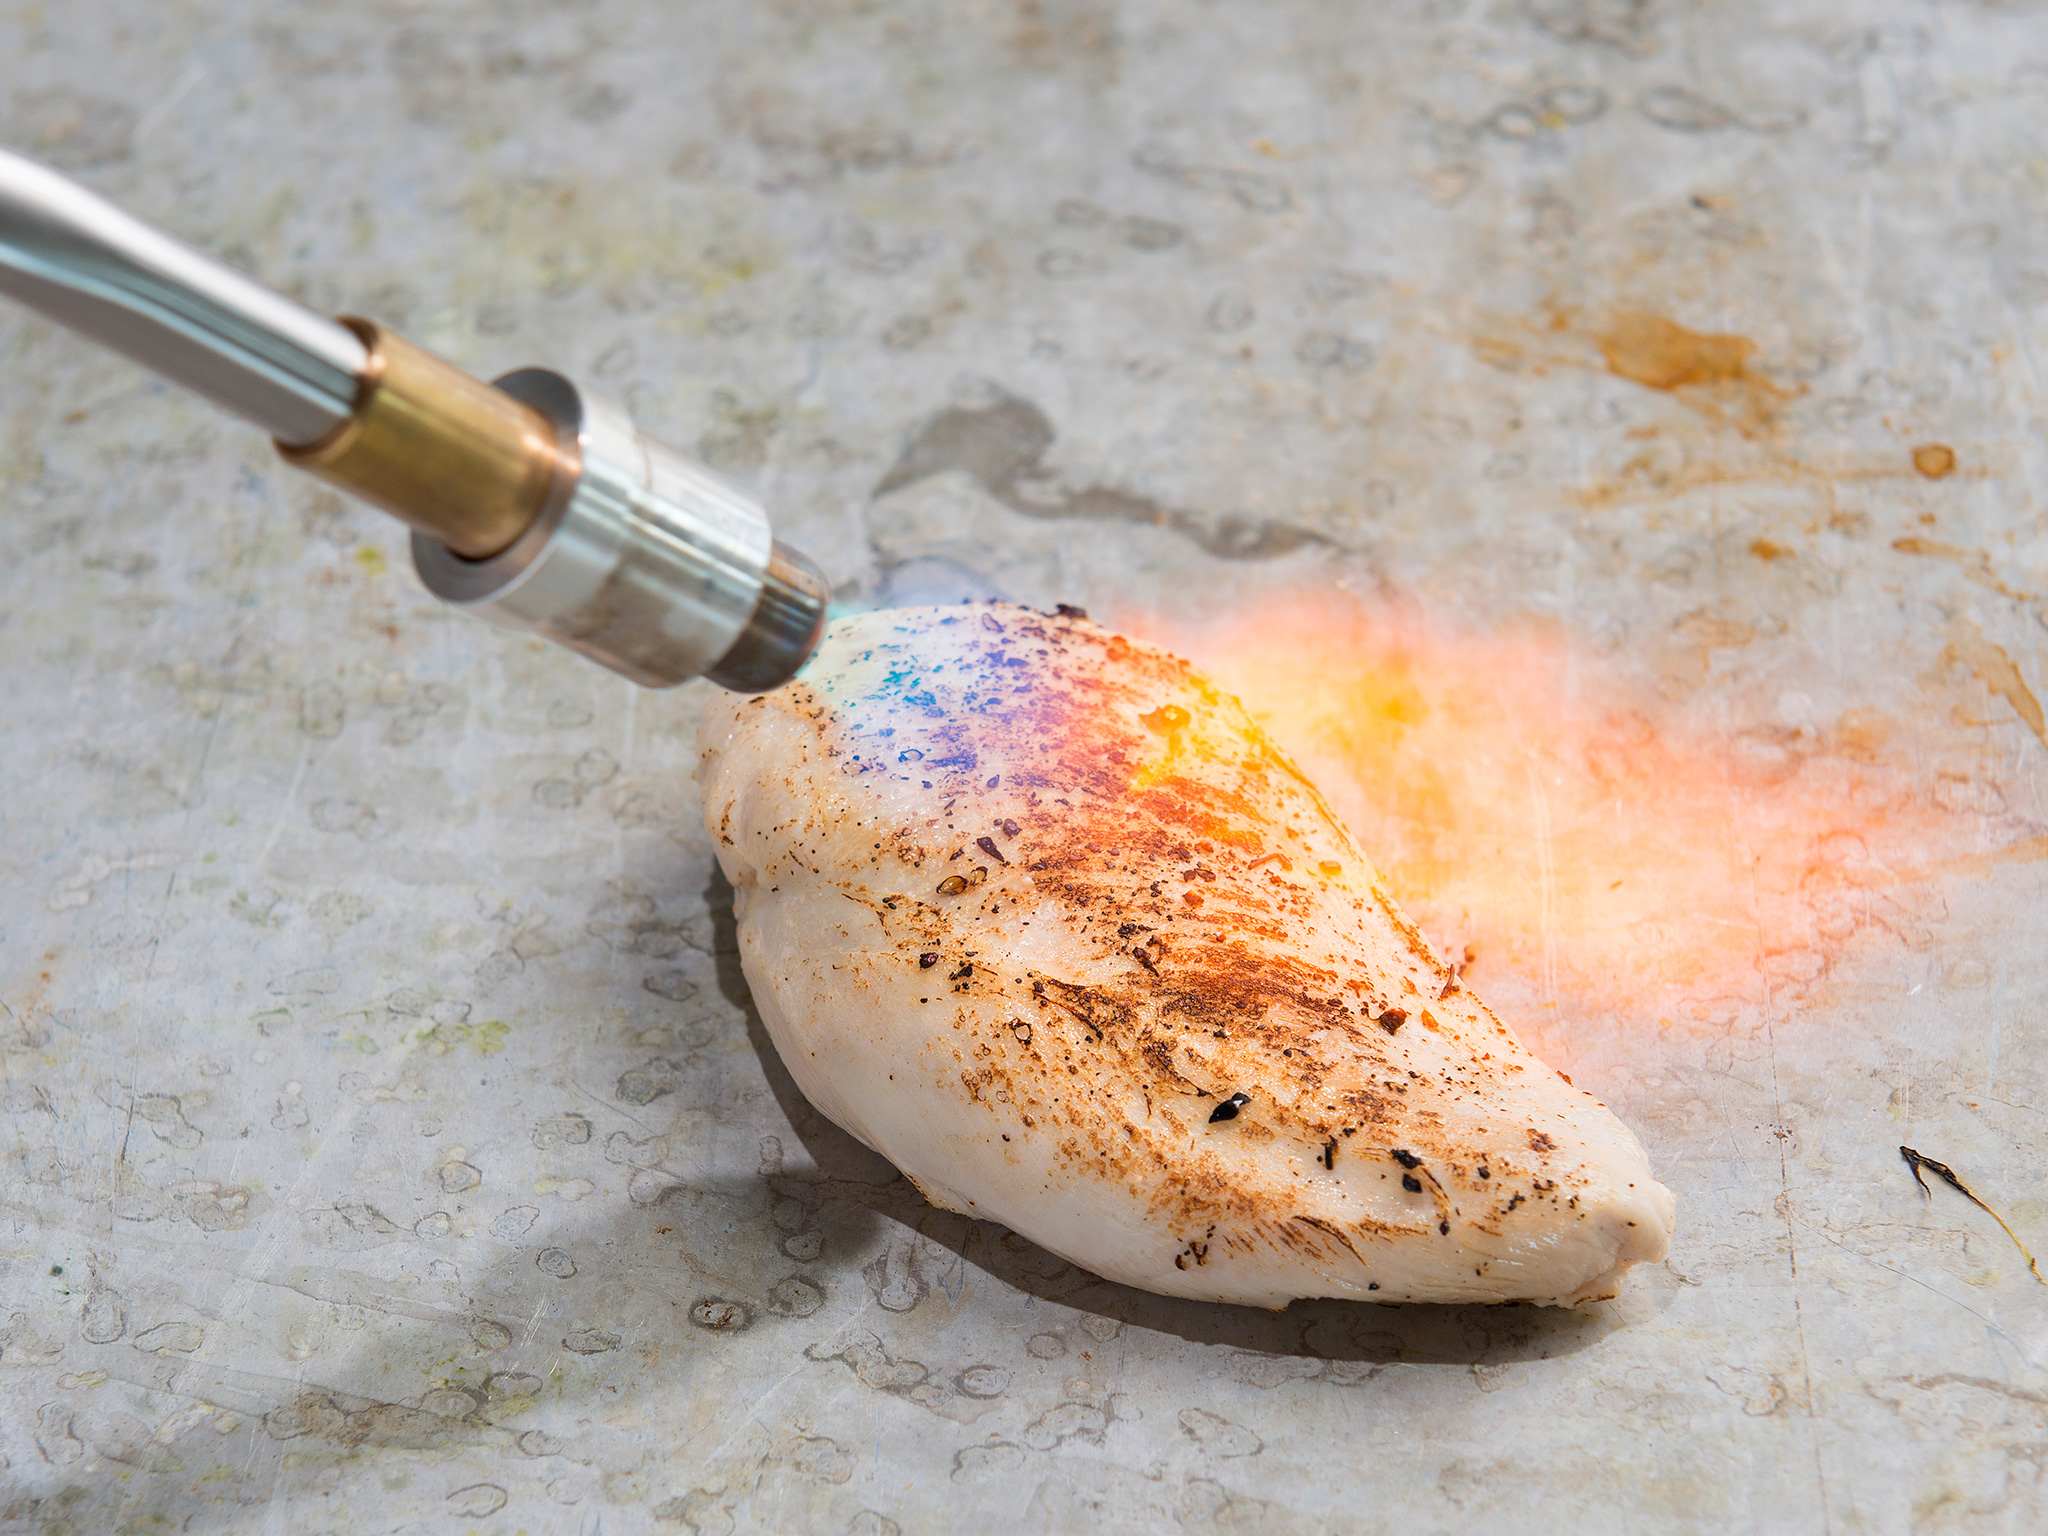
Torching
While people typically don’t turn to a torch to finish their food in home kitchens, it’s often done in commercial kitchens. With the high heat produced by a torch, you can brown the outside of food without overcooking the inside.
1 Remove the food from the plastic bag and dry it completely with paper towels. Once dry, season with kosher salt.
2 Place the food on a heat-resistant plate. Sear all sides of the food by passing the blue part of the flame directly across it.
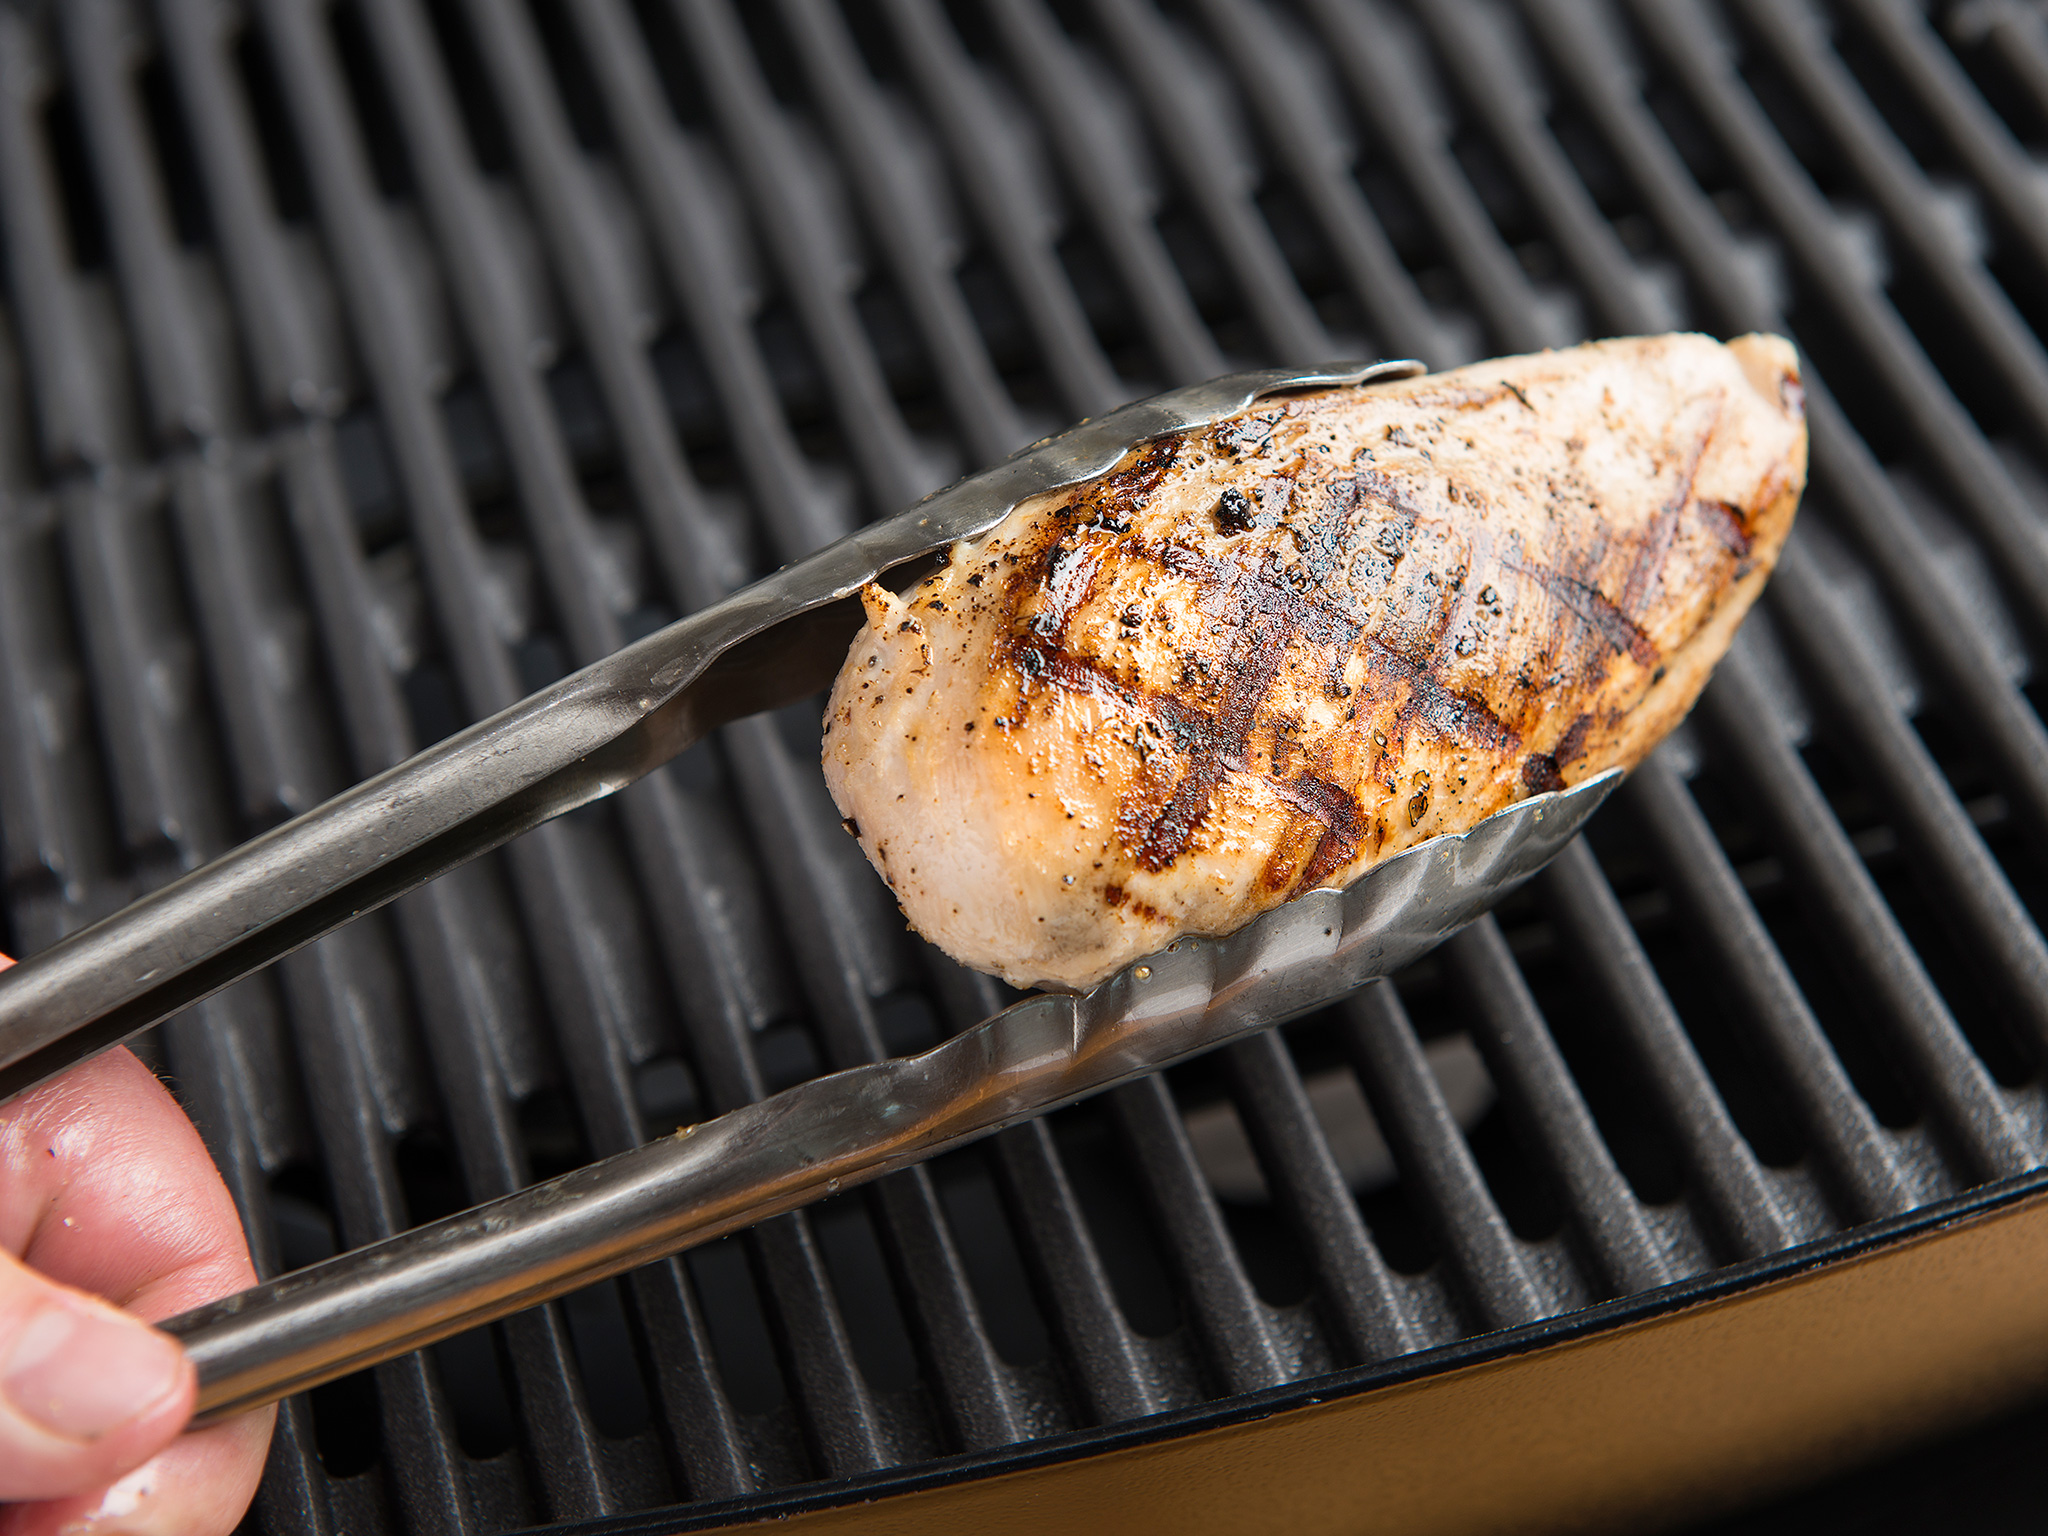
Grilling
Grilling develops extra flavor through the rapid burning of fats as they drip from the food. This flavor can be brought on in a matter of seconds after the food is cooked sous vide. Once the food is covered in oil, it can start taking on flavor the minute it hits the grate.
1 Remove the food from the plastic bag and dry it completely with paper towels. Once dry, lightly oil all sides with vegetable oil.
2 Preheat a grill to the hottest point it will go. Place the food on the hot grill and allow to cook for 30 seconds to 1 minute on each side, or until the food browns.
TOOLS
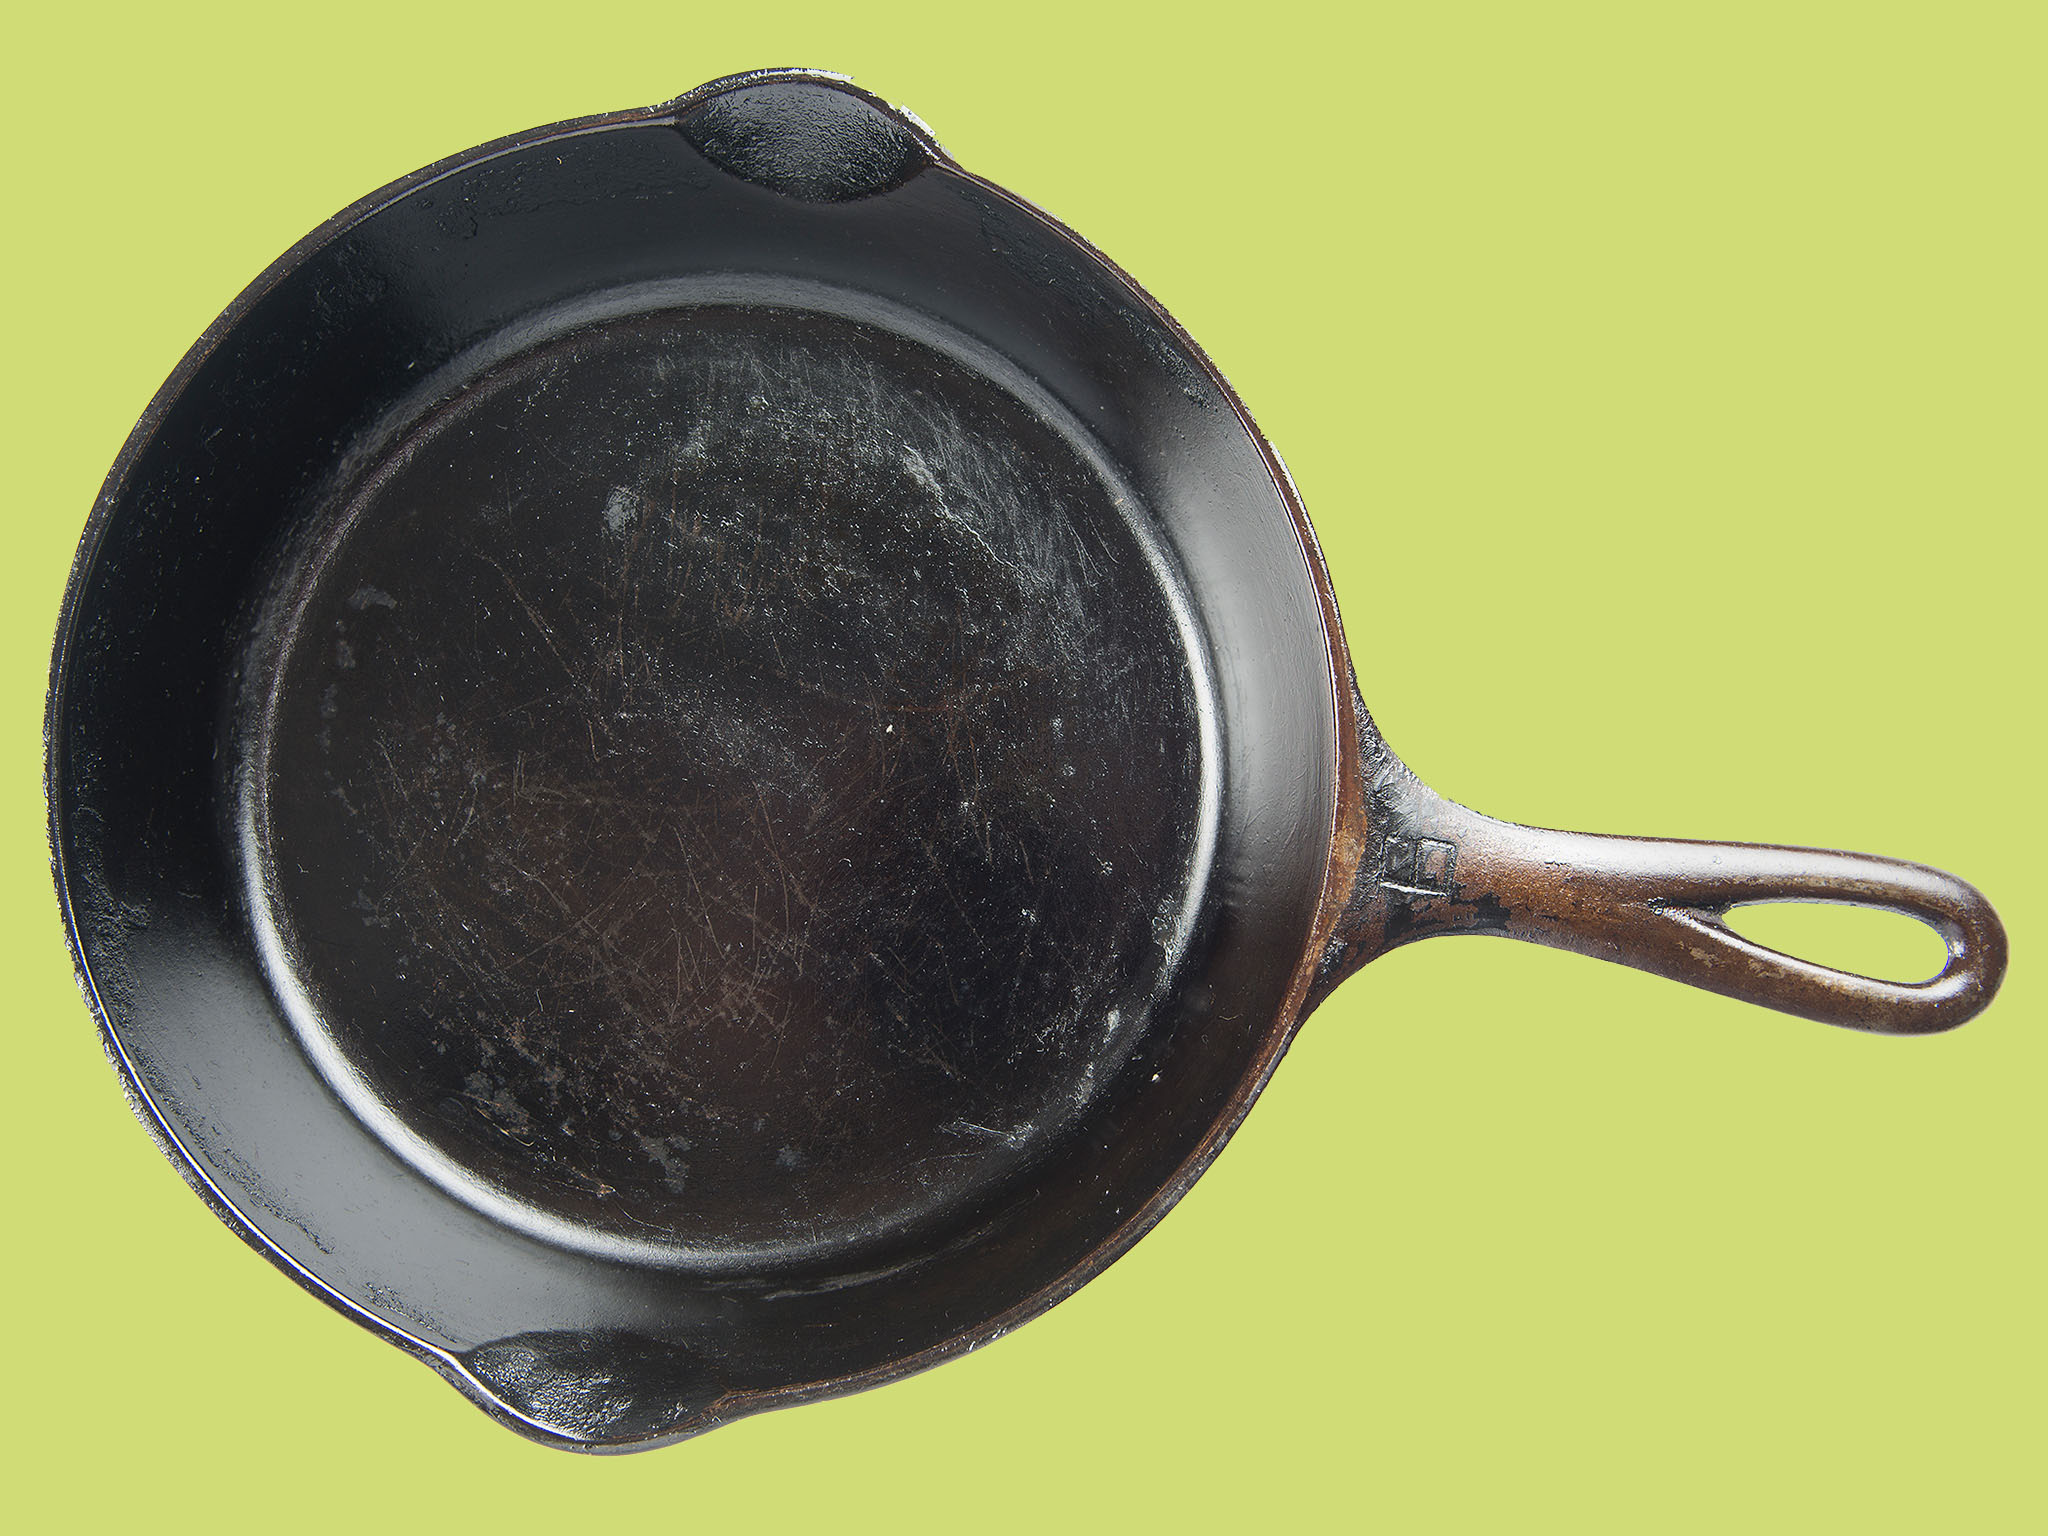
For searing, you need a good cast-iron skillet. Cast iron holds heat well and can be heated to high temperatures. This helps food brown quickly, which reduces moisture loss.
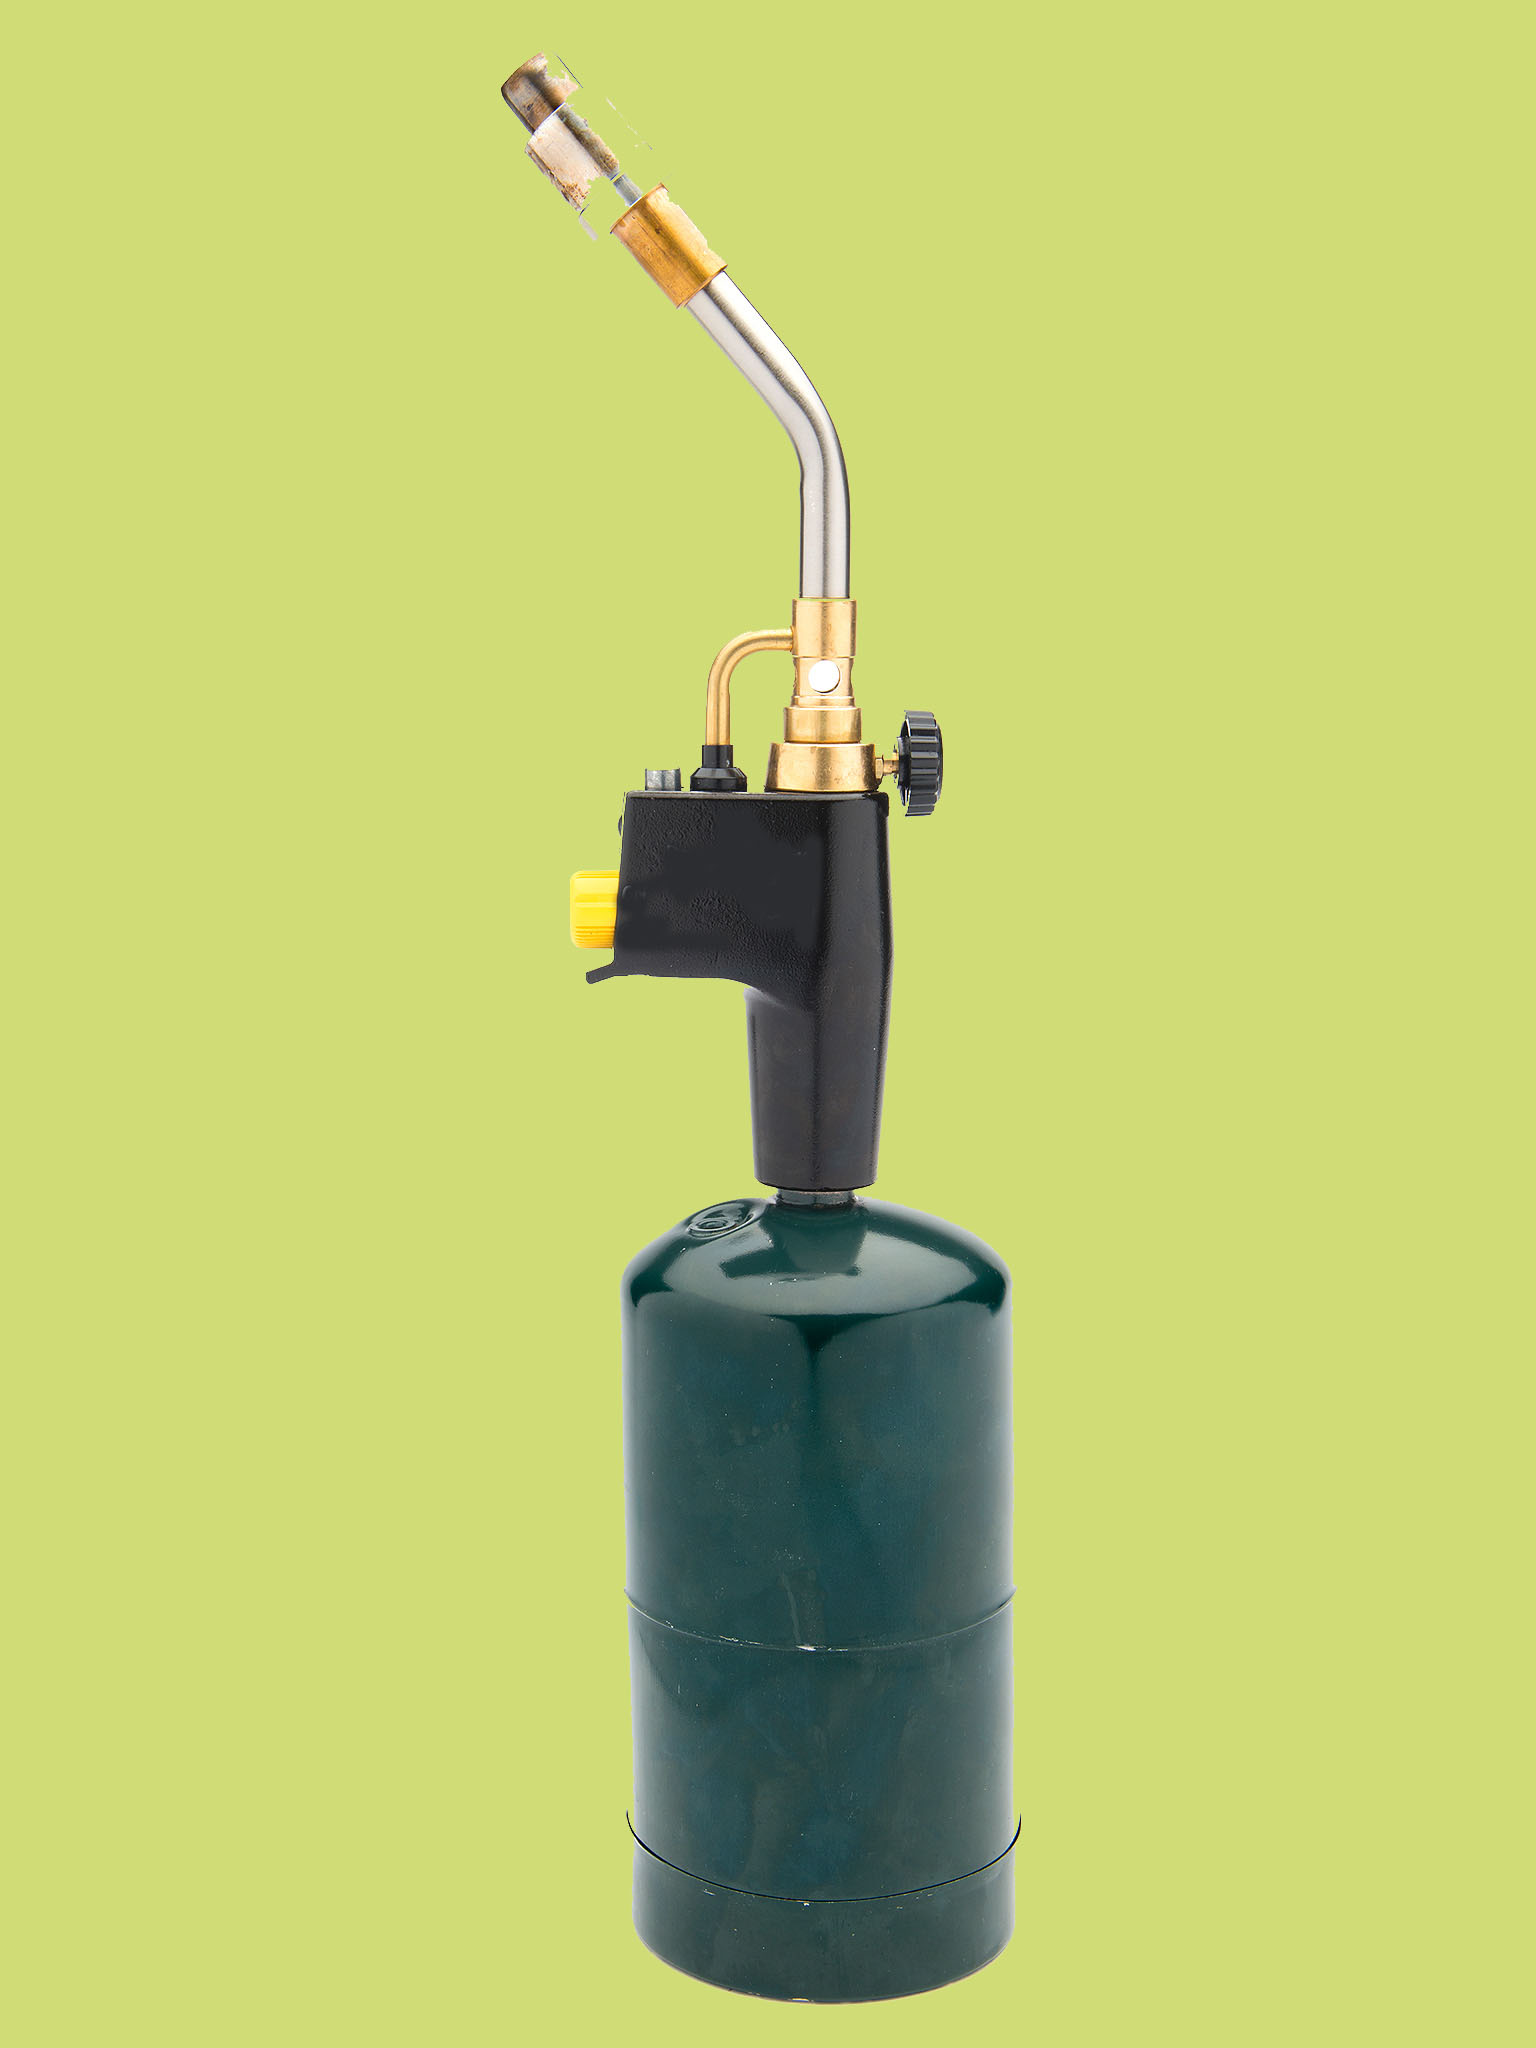
For torching, you can choose from multiple types of blowtorches. The most common is a torch that connects to a normal propane cylinder. An attachment (such as a Searzall) can be added to the tip of the blowtorch to spread out the heat for more even browning.
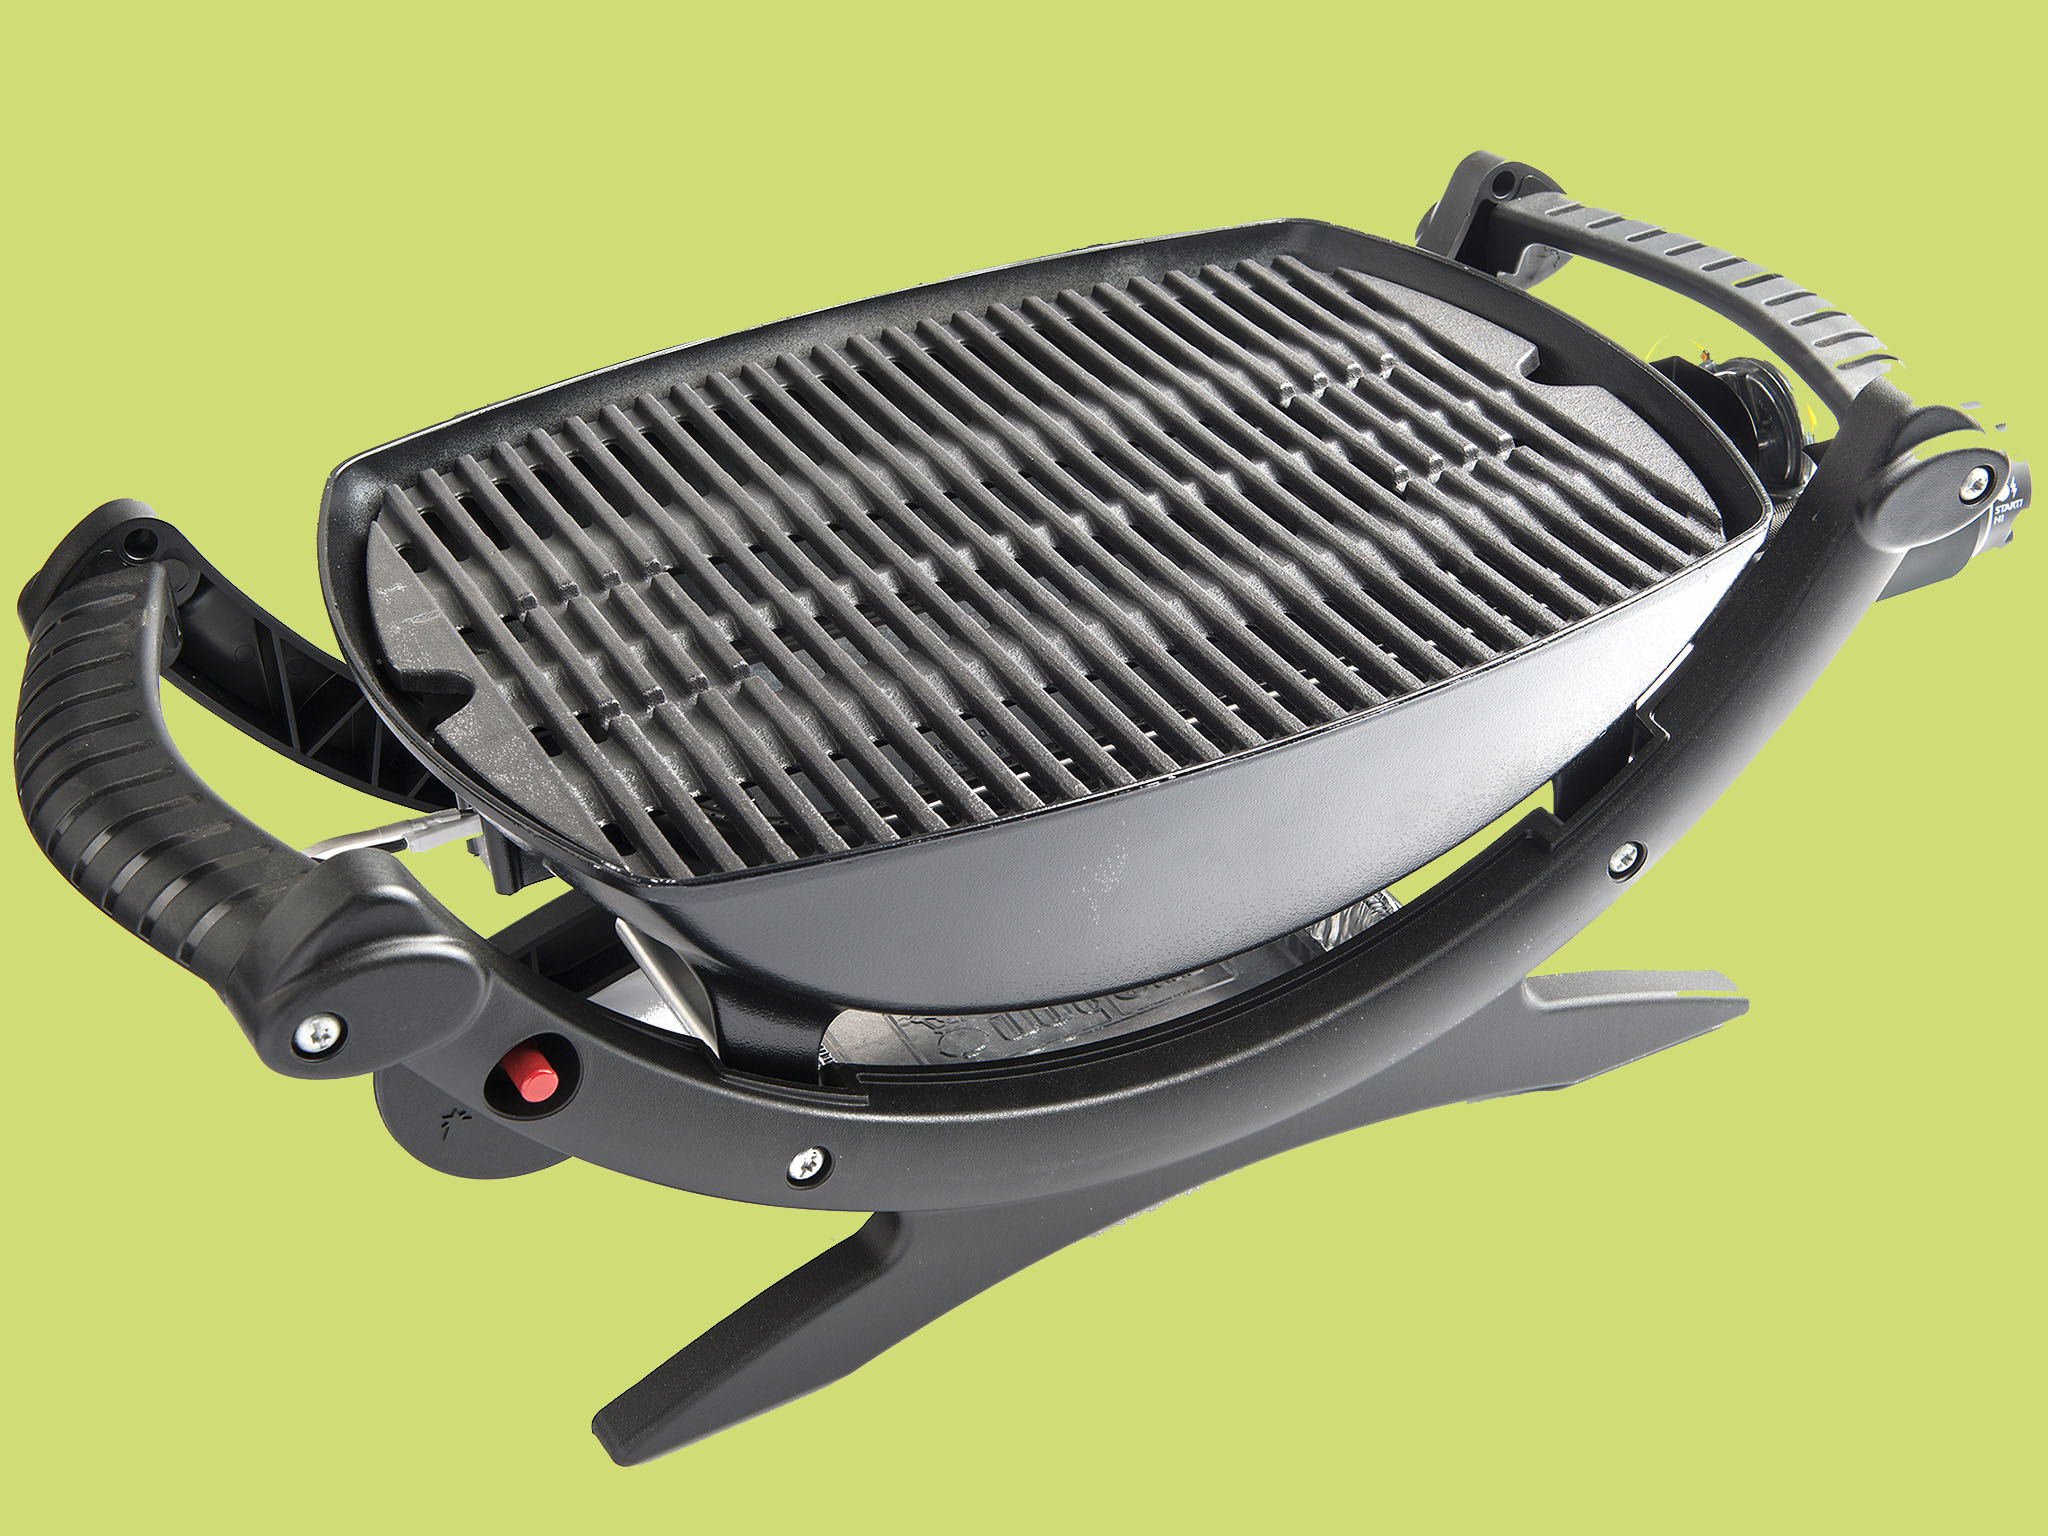
For grilling, you can use a gas or charcoal grill. However, charcoal grills tend to preheat to the required temperature much faster than gas grills. The surface of the grill should be able to reach temperatures above 600°F (316°C).
Developing Texture & Flavor
Finishing a food after cooking it sous vide can go beyond browning. Smoking or frying sous vide-cooked food adds more interest to your final dishes while allowing them to stay moist and tender internally.
A food cooked sous vide often has a very soft mouthfeel. Coating the food in flour, egg, and breadcrumbs and then frying it provides a crunchy texture to the exterior that can’t be attained through the sous vide cooking process. This creates a nice balance with the juicy interior for truly mouthwatering food.
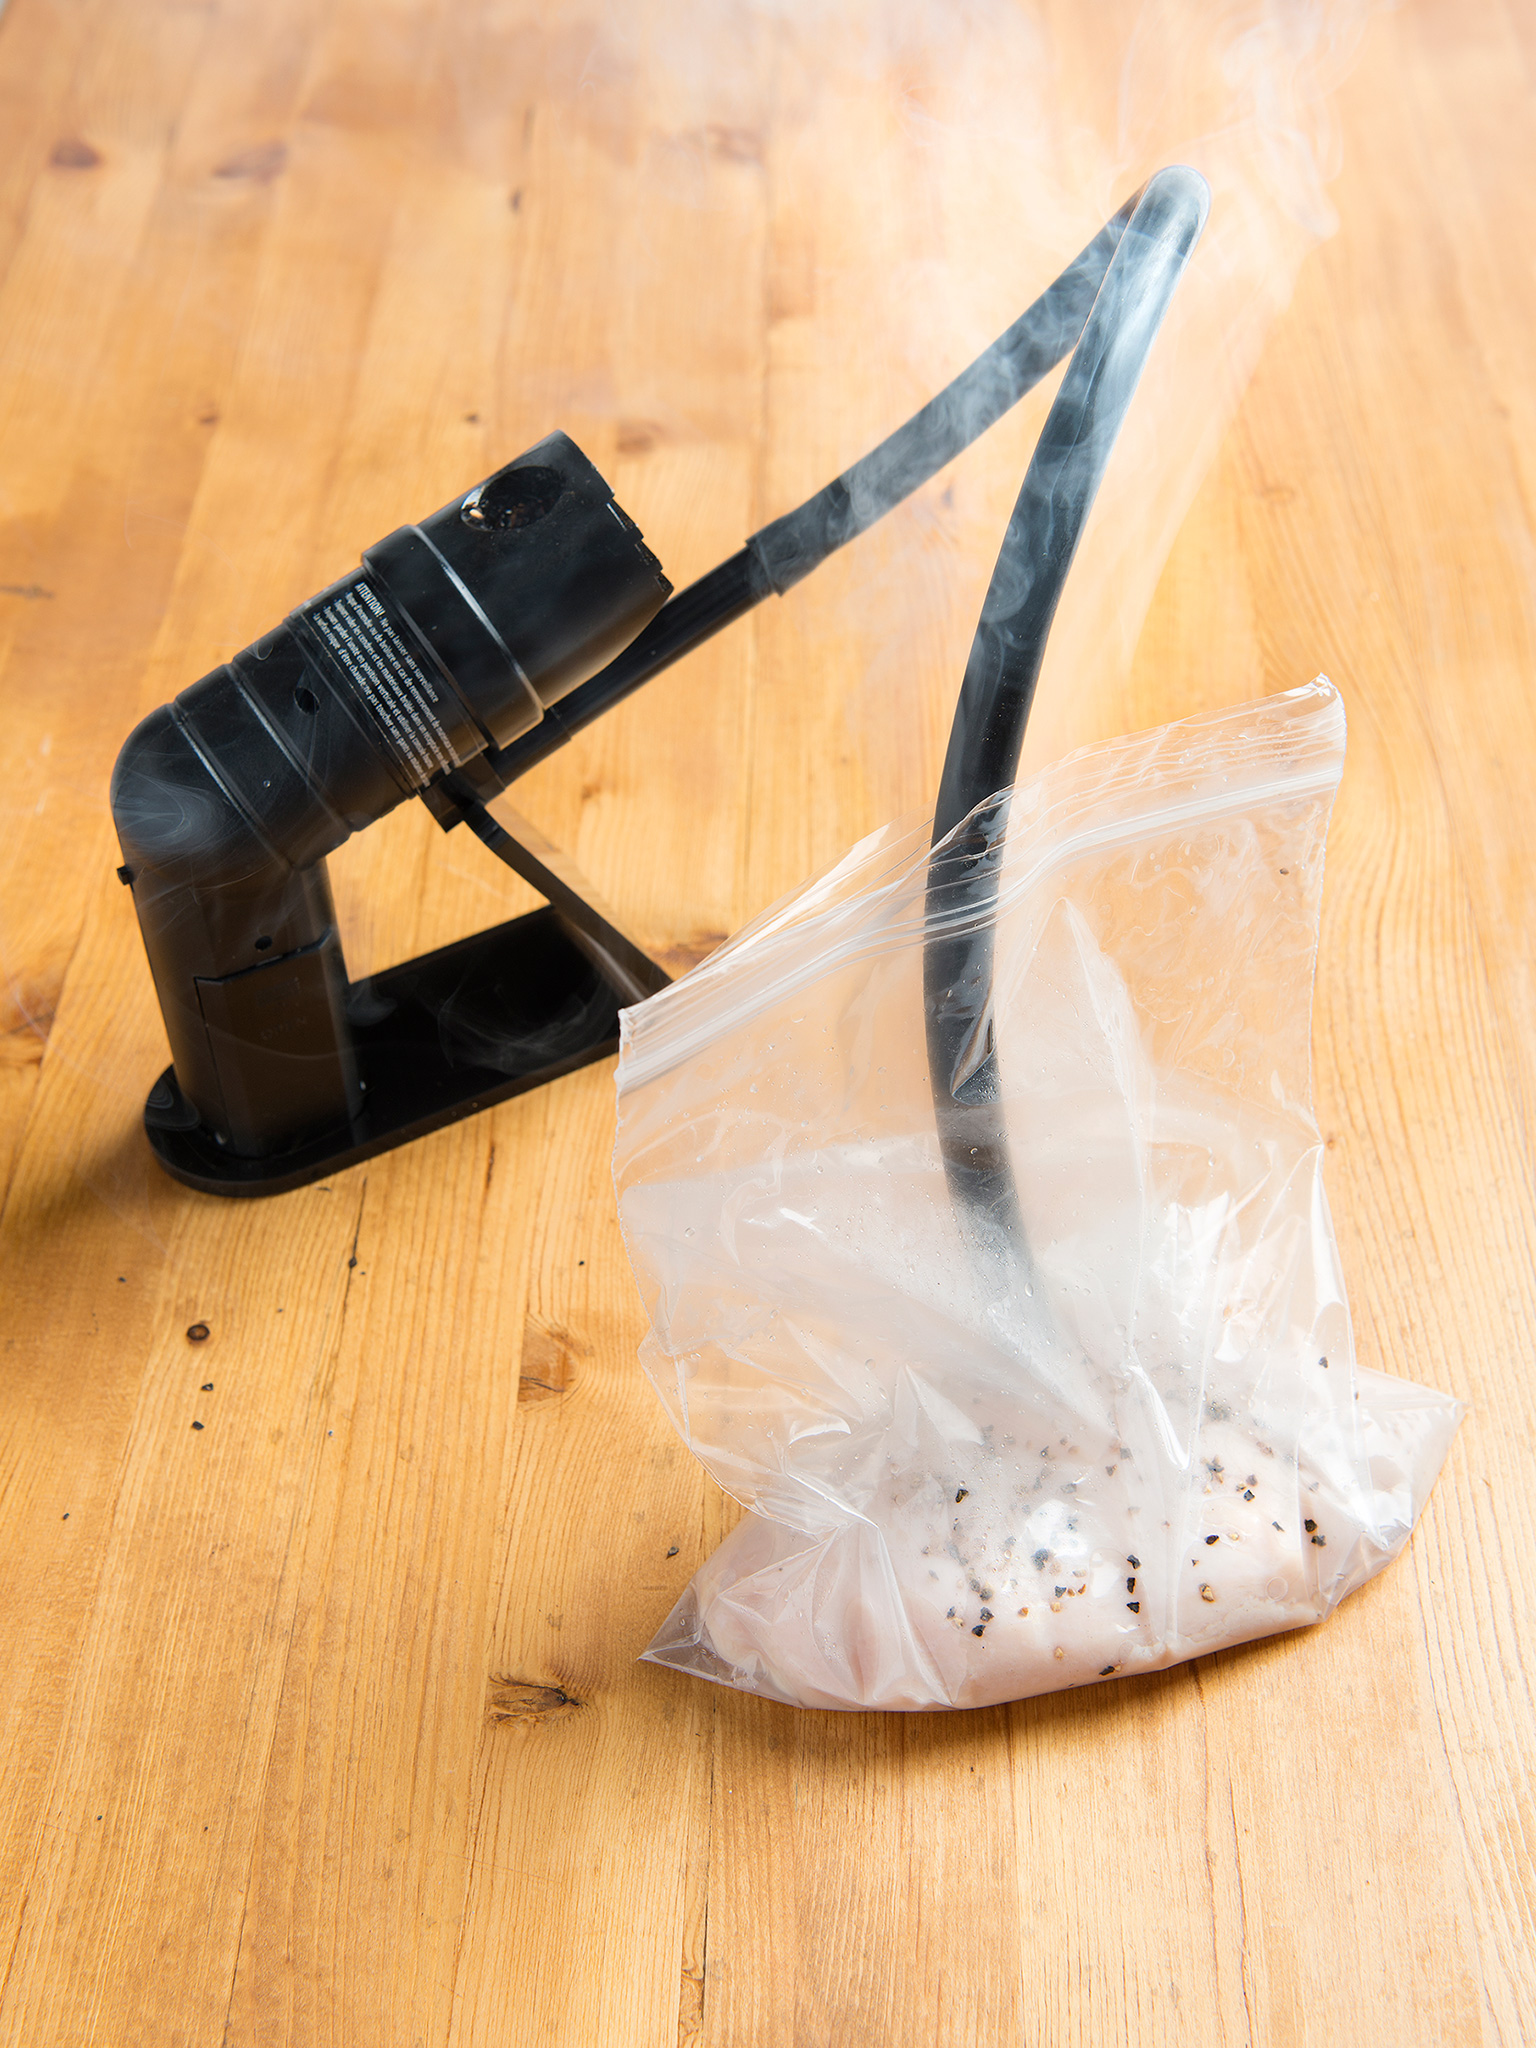
Smoking can be done in a dedicated smoker, with a smoke gun, or on the grill. The benefit of finishing your food this way is it combines a nice texture with an added layer of smoke flavor. While you can smoke a food before it’s cooked sous vide, the food is less likely to dry out if you smoke it after cooking it.
Using smoking as the finishing step also allows the food to reach its ideal doneness before it goes in the smoker. This saves you cook time on the smoker and also gives you the option of storing the food for a day or two before smoking it.
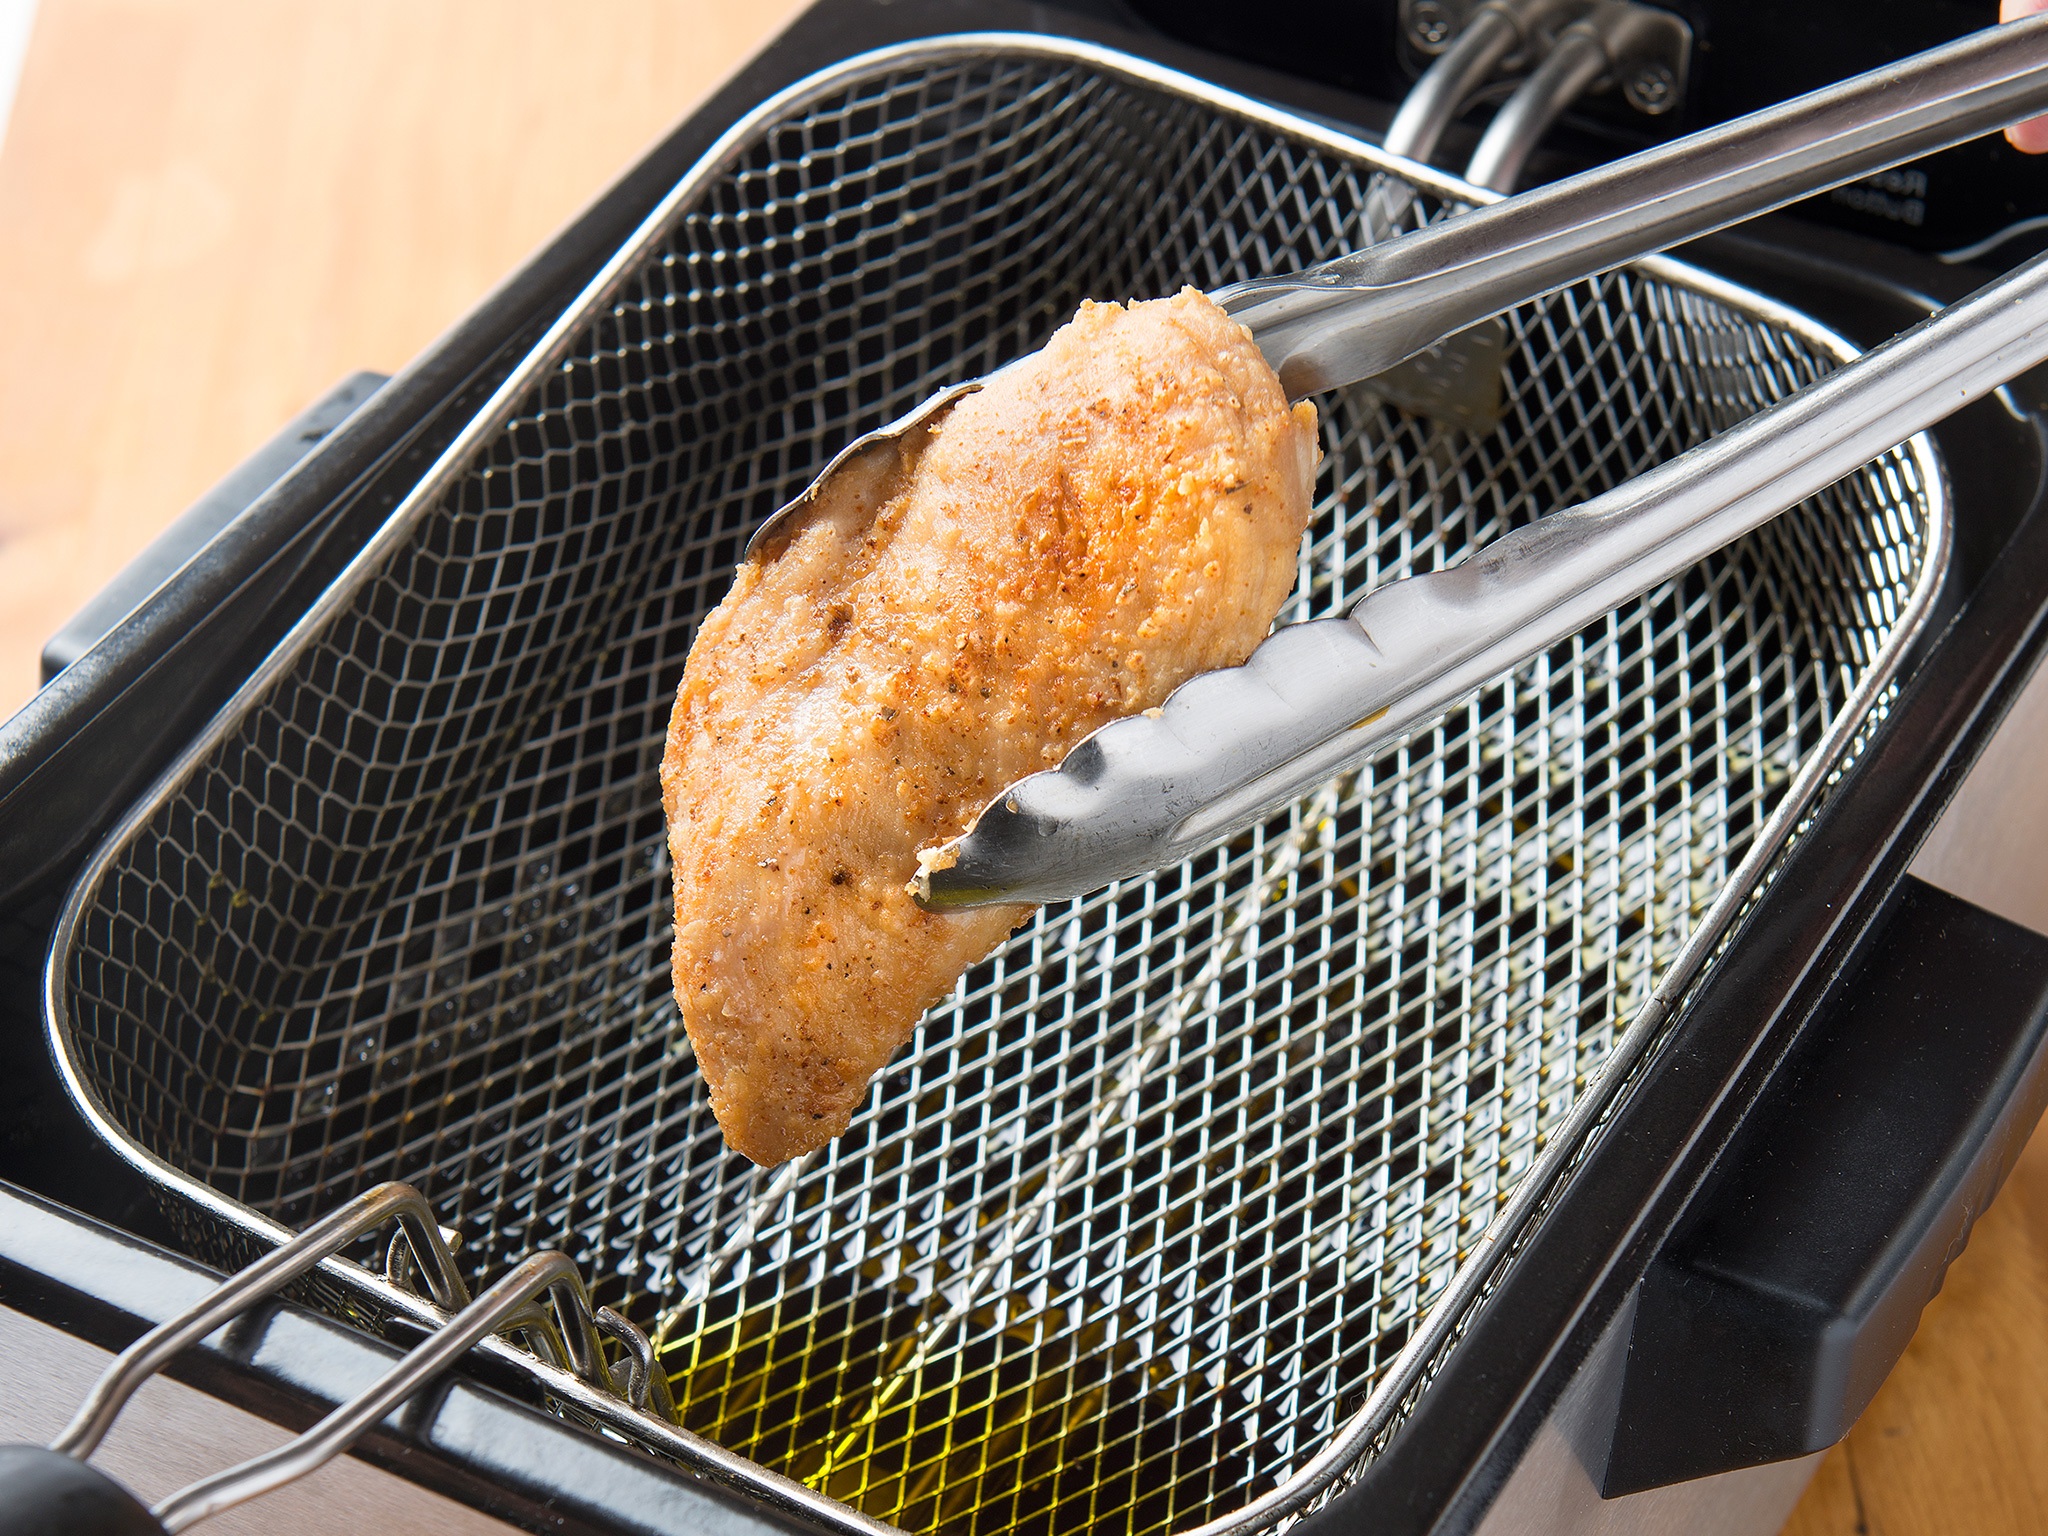
Frying
The crunchiness developed through frying helps bring out nuances in the food beyond what can be accomplished in a hot water bath alone. This type of finish provides an interesting texture to the exterior without drying out the interior.
1 Remove the plastic bag from the water bath. Immediately place the bag into a large pot of ice water and allow to cool for 15 minutes.
2 Remove the food from the plastic bag and dry with paper towels. Once dry, season with kosher salt and any other desired seasonings.
3 Cover the food in flour. Coat the food in a mixture of equal parts egg and water. Roll the food in breadcrumbs.
4 Preheat a fryer to high. Place the food in the hot fryer and cook until it’s a golden brown color, about 2 minutes. (Don’t overcook.)
Smoking
Smoking sous vide-cooked food is a popular method for making perfect barbecue. With the sous vide process, you can cook the meat to the perfect firmness before adding the smoke flavor. Smoking after cooking sous vide helps the meat remain at its maximum juiciness.
1 Remove the plastic bag from the water bath. Immediately place the bag into a large pot of ice water and allow to cool for 30 minutes.
2 Remove the food from the plastic bag, dry with paper towels, and rub off any herbs stuck to the food (to avoid smoking them).
3 Preheat a smoker from 168°F (76°C) to 200°F (93°C), depending on the food. Place the food in the smoker and smoke for 20 minutes, until it develops a complex flavor.
4 Remove the food from the smoker and allow it to sit for 30 minutes. This allows the smoked food to shift from a blackish color to a reddish color.
TOOLS
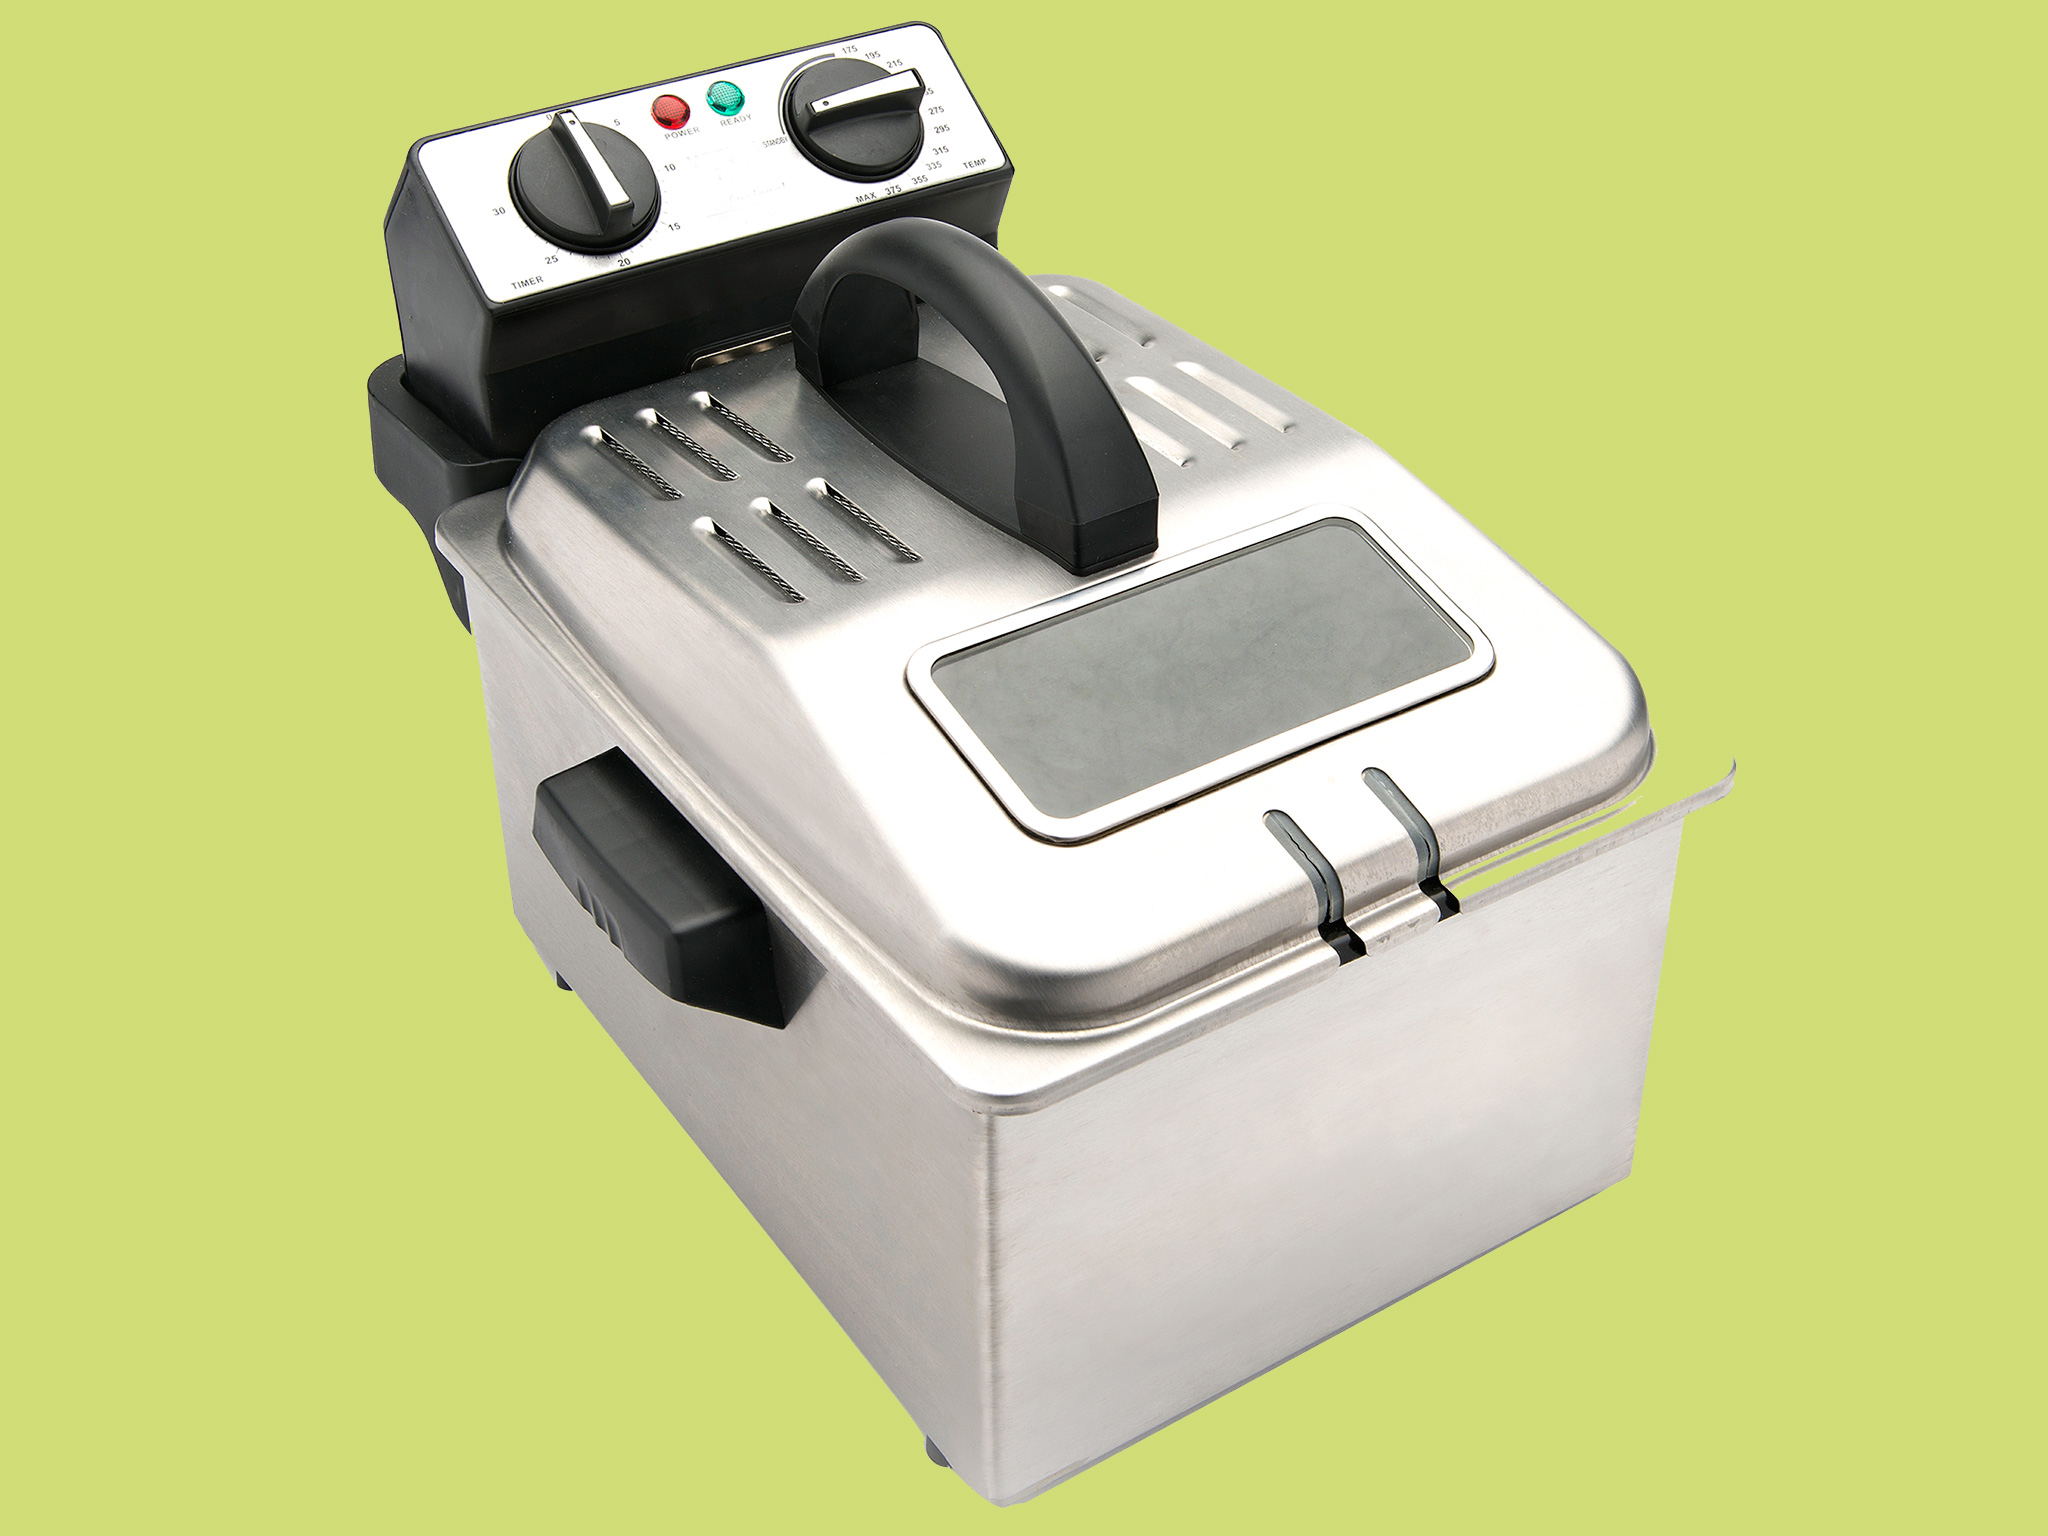
For frying, you can can use a countertop fryer or a cast-iron skillet. If you plan to use a fryer, look for one with the highest heat generation, as the heat drops dramatically when food is placed in it . With a high heat output, you can ensure the heat of the oil recovers quickly. If you plan to use a cast-iron skillet, find one with high sides so the oil can cover the food.
For smoking, the equipment can vary widely, from a pan of smoking wood chips in the bottom of a box to multi-thousand-dollar custom trucks. You can even use a smoke gun to smoke your food, which involves pumping smoke in the plastic bag with the food and then sealing the bag for 20 minutes. However, smoking after cooking sous vide doesn’t require anything elaborate; you can use whatever’s easiest for you.
TROUBLESHOOTING & tips
As you begin your journey into sous vide cooking, you may encounter some bumps in the road. These tips and tricks can help you cook like a pro and avoid many of the common pitfalls that new sous cooks often encounter.
PREP HELP #1
The best kind of prep is no prep at all. Many foods in the meat section of stores are now prepackaged in sous vide-friendly sealed plastic with an added-water solution. The solution includes a salt base that helps the meat retain moisture when cooked. These packaged foods can be put directly into the sous vide water bath and cooked without any additional prep. There are also companies that preseason foods for sous vide cooking that you simply need to seal and add to the water bath.
PREP HELP #2
Would you like to brine a food in seconds? Vacuum sealers can do much more than just seal foods in plastic bags. You can also put meat and a marinade in a bowl and place the bowl into the vacuum chamber. Once the vacuum is turned on, it pulls the air is out of the meat. When the vacuum is then released, the liquid marinade takes the place of the air that was pulled out of the meat. And poof! The meat is brined.
PREP HELP #3
Putting raw garlic in with your food can bring out some very bitter qualities, making it a poor choice for sous vide when uncooked. Asafoetida—a spice that’s in the same family as garlic and onions—can stand in for raw garlic and not add that bitter taste. Simply sprinkle asafoetida on the food you’ll be cooking like you would any other spice. When finished cooking, your food will taste as though you had fresh garlic sealed in with it.
SEAL HELP #1
When foods are vacuum sealed, they often end up flat around the edges. This detracts from the appearance of certain foods, such as a nice, tall steak. To help with this problem, add a couple tablespoons of a flavorless oil, such as vegetable oil, to the bag before sealing. This will help the food better retain its shape when vacuum sealed, giving you a photo-worthy final product.
COOK HELP #1
Hurry up and get cooking! With some immersion circulators, heating the water in a sous vide bath can take hours. Waiting on the water to get hot is, well, like watching a pot of water as you wait for it to boil. However, you can speed up preheating the water bath by bringing the water up to temperature in a pot on the stove. You not only help your sous vide machine, you save yourself the headache of waiting a long time for the water to reach the correct temperature.
COOK HELP #2
When green vegetables are cooked at warmer temperatures during the sous vide process, they can develop brown edges from acid development. To make them more alkaline and better able to retain their color, all you need to do is add a pinch of baking soda. You can sprinkle the baking soda in the seasoning mixture you’re applying to your vegetables. Once cooked, you’ll have vegetables with a green color that truly pops.
FINISH HELP #1
If you find the breading on a fried food falls off like it was never attached, that means the “glue” wasn’t given time to set. When you’re coating the food, first add a combination of flour and egg wash before applying the breading. The flour-egg mixture works as the glue to attach the breading to the food. In order to seal the crust, allow the coated food to set for 15 minutes after breading before adding it to the fryer.
FINISH HELP #2
Warm your torch first. While torch fuel comes in different gases, propane—available in most sporting goods stores, garden centers, and hardware stores—is the most popular and accessible type. With propane torches, the gas will not completely burn for roughly 30 seconds after it’s ignited. To avoid ending up with unburned gases on your food, let the torch run for a bit before using the flame.
FINISH HELP #3
When searing your food, time is of the essence. You need an extremely hot pan so the food going onto the surface will cook quickly. You also need to make sure you have tongs or some other tool on hand to roll the food to the other side and then quickly remove it from the pan. Prepare for the searing process by preheating the pan before the food is cooked and keeping tongs next to the stove.
FINISH HELP #4
Make sure to fully dry meat before searing, grilling, or torching it. The Maillard reaction happens when the amino acids in a protein interact with a form of sugar to create browning. This develops over 200 new flavors in the food, with umami adding the most to the flavor profile. Capturing this flavor profile requires a high heat source. However, the reaction won’t happen if the meat is moist on the outside, as the water will inhibit the high heat interacting with the meat. This makes drying crucial to the finishing process.
FINISH HELP #5
Grills can take a long time to preheat and often don’t get as hot as necessary in order to produce the best sear on a food. To get the highest degree of heat, try placing an old cookie sheet on the grill in the area you plan to sear the food. The cookie sheet will hold the heat directly over the grill rods, leading them to become supercharged. Just before the food is ready to sear, carefully remove the sheet.
COOKING SOUS VIDE safely
Like all other cooking methods, sous vide cooking requires you to handle and serve food in a safe manner. Following some basic safety practices will help ensure your food is cooked not only perfectly, but safely.
Food Safety
With any food, it’s critical to cook it long enough so any foodborne pathogens are eliminated. If you don’t know the necessary times and temperatures, government institutions typically provide these guidelines. In the United States, the USDA (usda.gov) has information on low long food should be cooked and at what temperatures in order to kill any bad bacteria. You’ll notice the figures are based on a sliding scale, where higher temperatures kill bacteria over a shorter period of time than lower temperatures. These guidelines vary based on the specific food, so confirm what’s safe for the food you’re cooking before you begin.
Poultry Temperature Guidelines
This table shows how long poultry must cook at a certain temperature in order for it to be safe to eat. These figures are based on keeping the food at that temperature for 1 second. So, for instance, to eat a safely cooked piece of chicken, you need to heat it to 165°F (74°C) for instant pasteurization or to a lower temperature for a longer time in order to achieve pasteurization.
|
Temperature |
Time |
|
136°F (58°C) |
68.4 minutes |
|
140°F (60°C) |
27.5 minutes |
|
145°F (63°C) |
9.2 minutes |
|
150°F (66°C) |
2.8 minutes |
|
155°F (68°C) |
47.7 seconds |
|
160°F (71°C) |
14.8 seconds |
|
165°F (74°C) |
Instant |
Sealing and Storing
The safest way to cook sous vide is to seal the food and put it directly into a preheated water bath. When sealing foods in plastic, you must consider the temperature at which it’s sealed, as well as how long it should be stored. Sealing food creates an environment in which there’s no oxygen, meaning different anaerobic bacteria can grow. To avoid this, when initially sealing, be sure that meats and poultry are below 40°F (4°C) and that seafood is frozen. When it comes to storage, sealed foods shouldn’t be stored in the refrigerator for more than 1 week. Storing them in the freezer will stop that clock and allow longer shelf life.
Safe Handling
Cross-contamination is the most common way to spread foodborne illness. People handling uncooked meat, fish, or poultry can easily spread contaminants to other locations. This means it’s crucial to sanitize every surface where you’ve placed and worked with these items with hot water or a chlorine solution. Another major handling concern involves the packaging equipment. When putting food into plastic bags, the bags can become contaminated around the lip. When the lip of the bag is put into the sealing device, the device then becomes contaminated. To deter the spread of contaminants to future bags, wash all surfaces of your device before using it again.
broths
When making soups and sauces, the broth is the canvas onto which all other flavors are painted. By cooking sous vide, you retain the fragrant smells from the base meat, as well as develop the gelatin through the long cooking time.
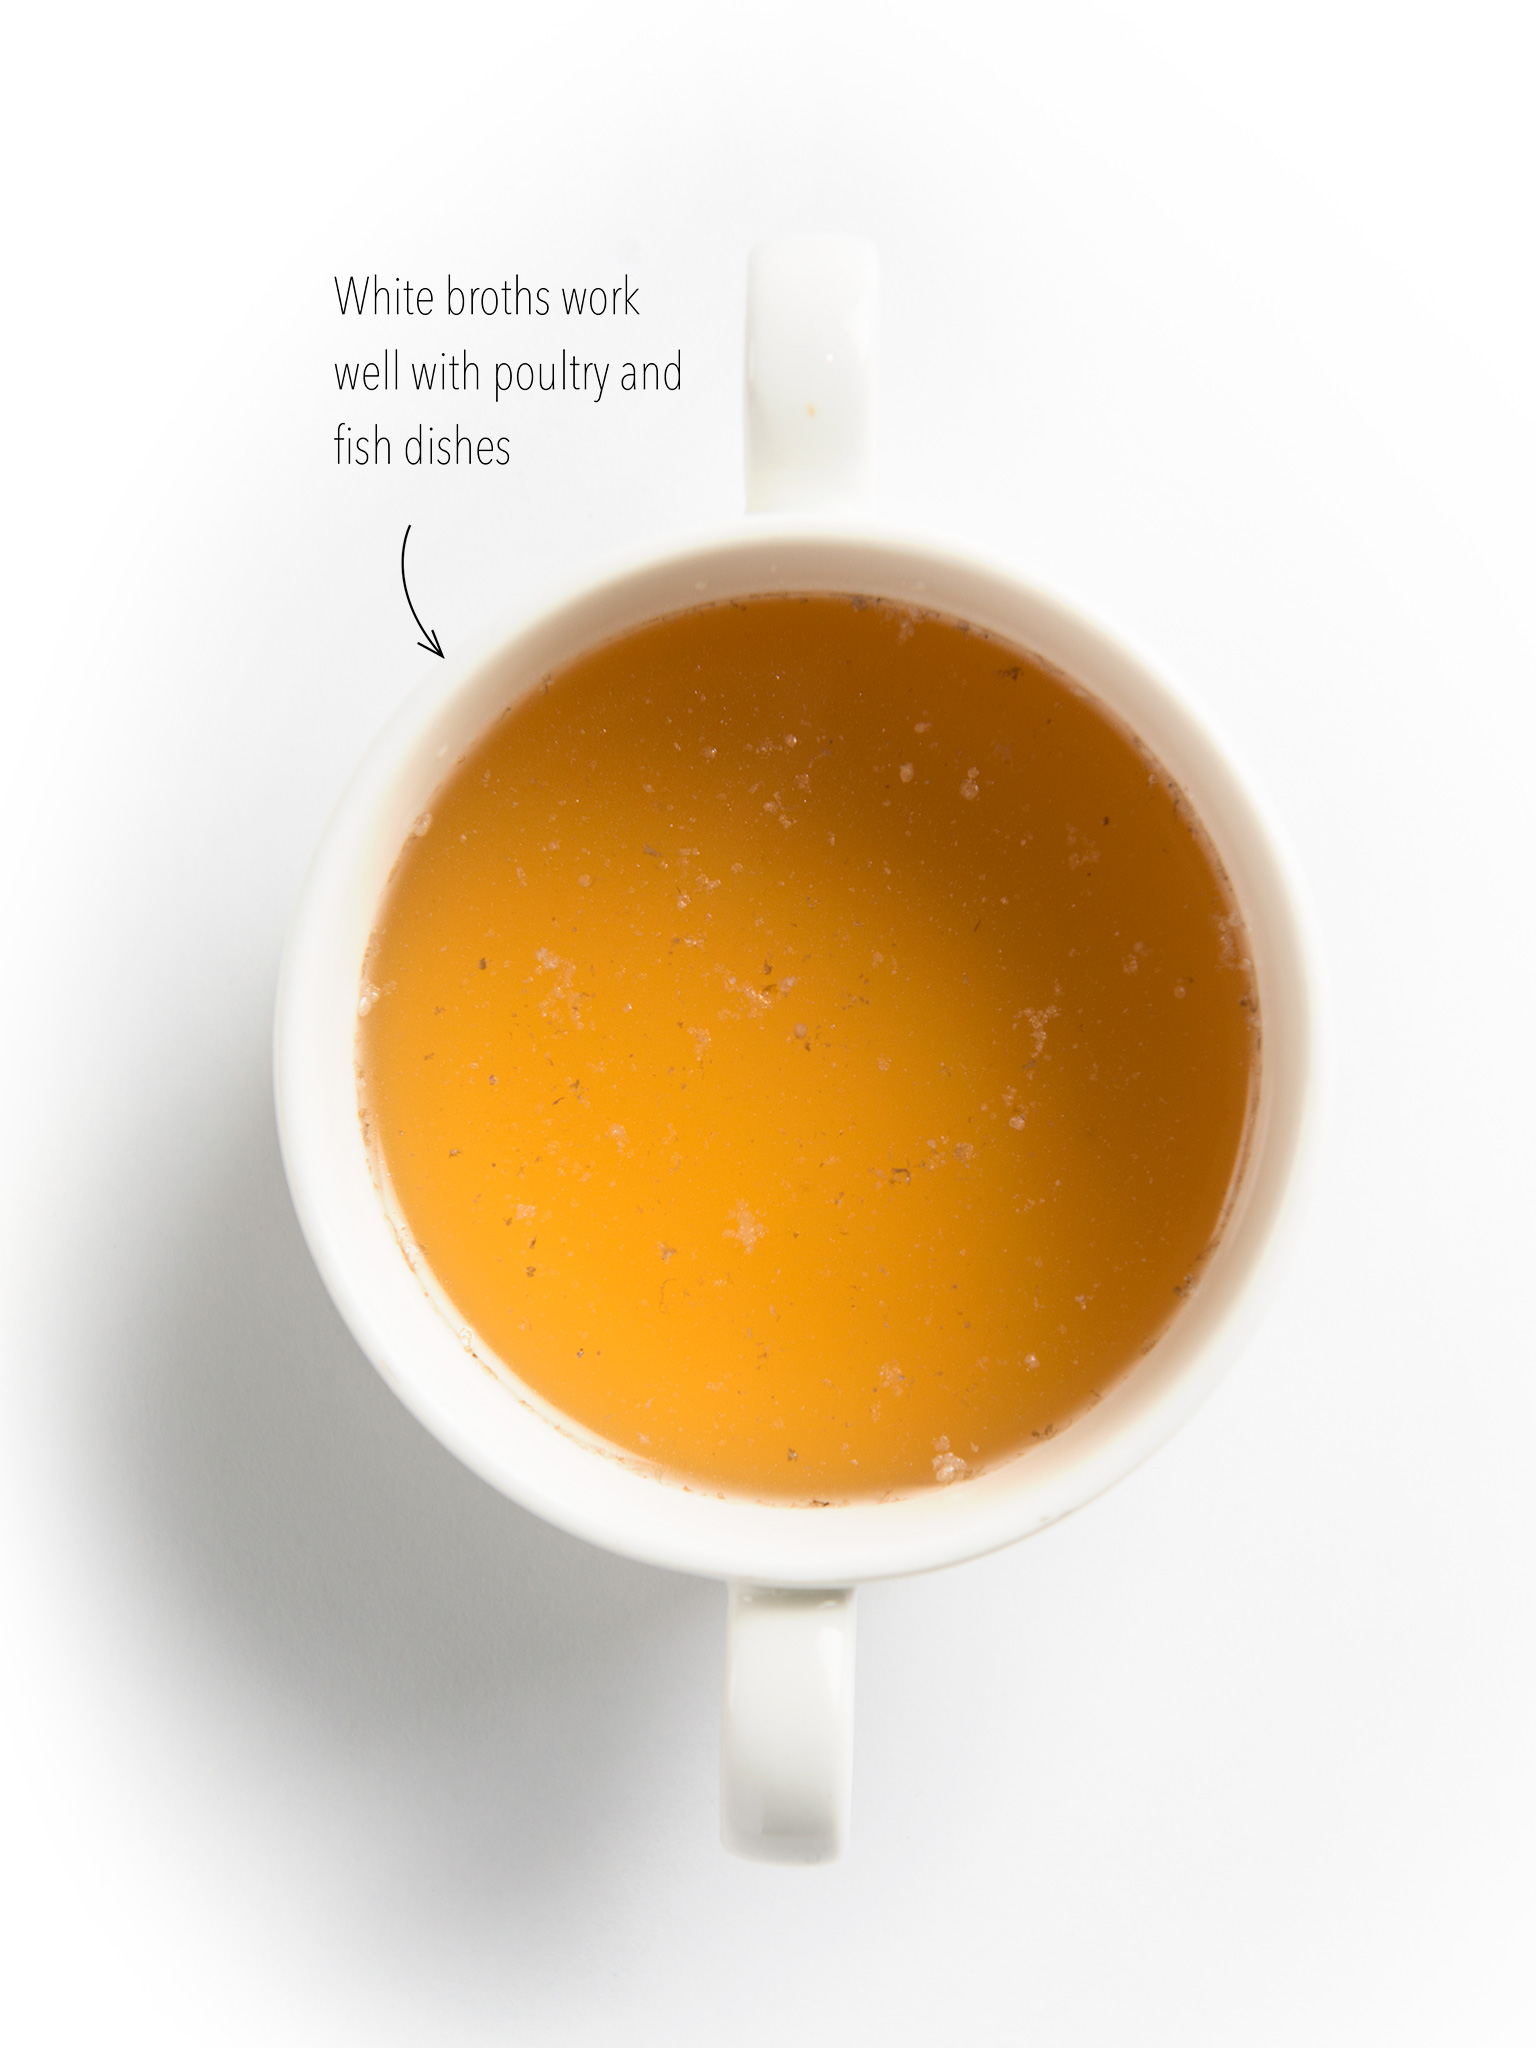
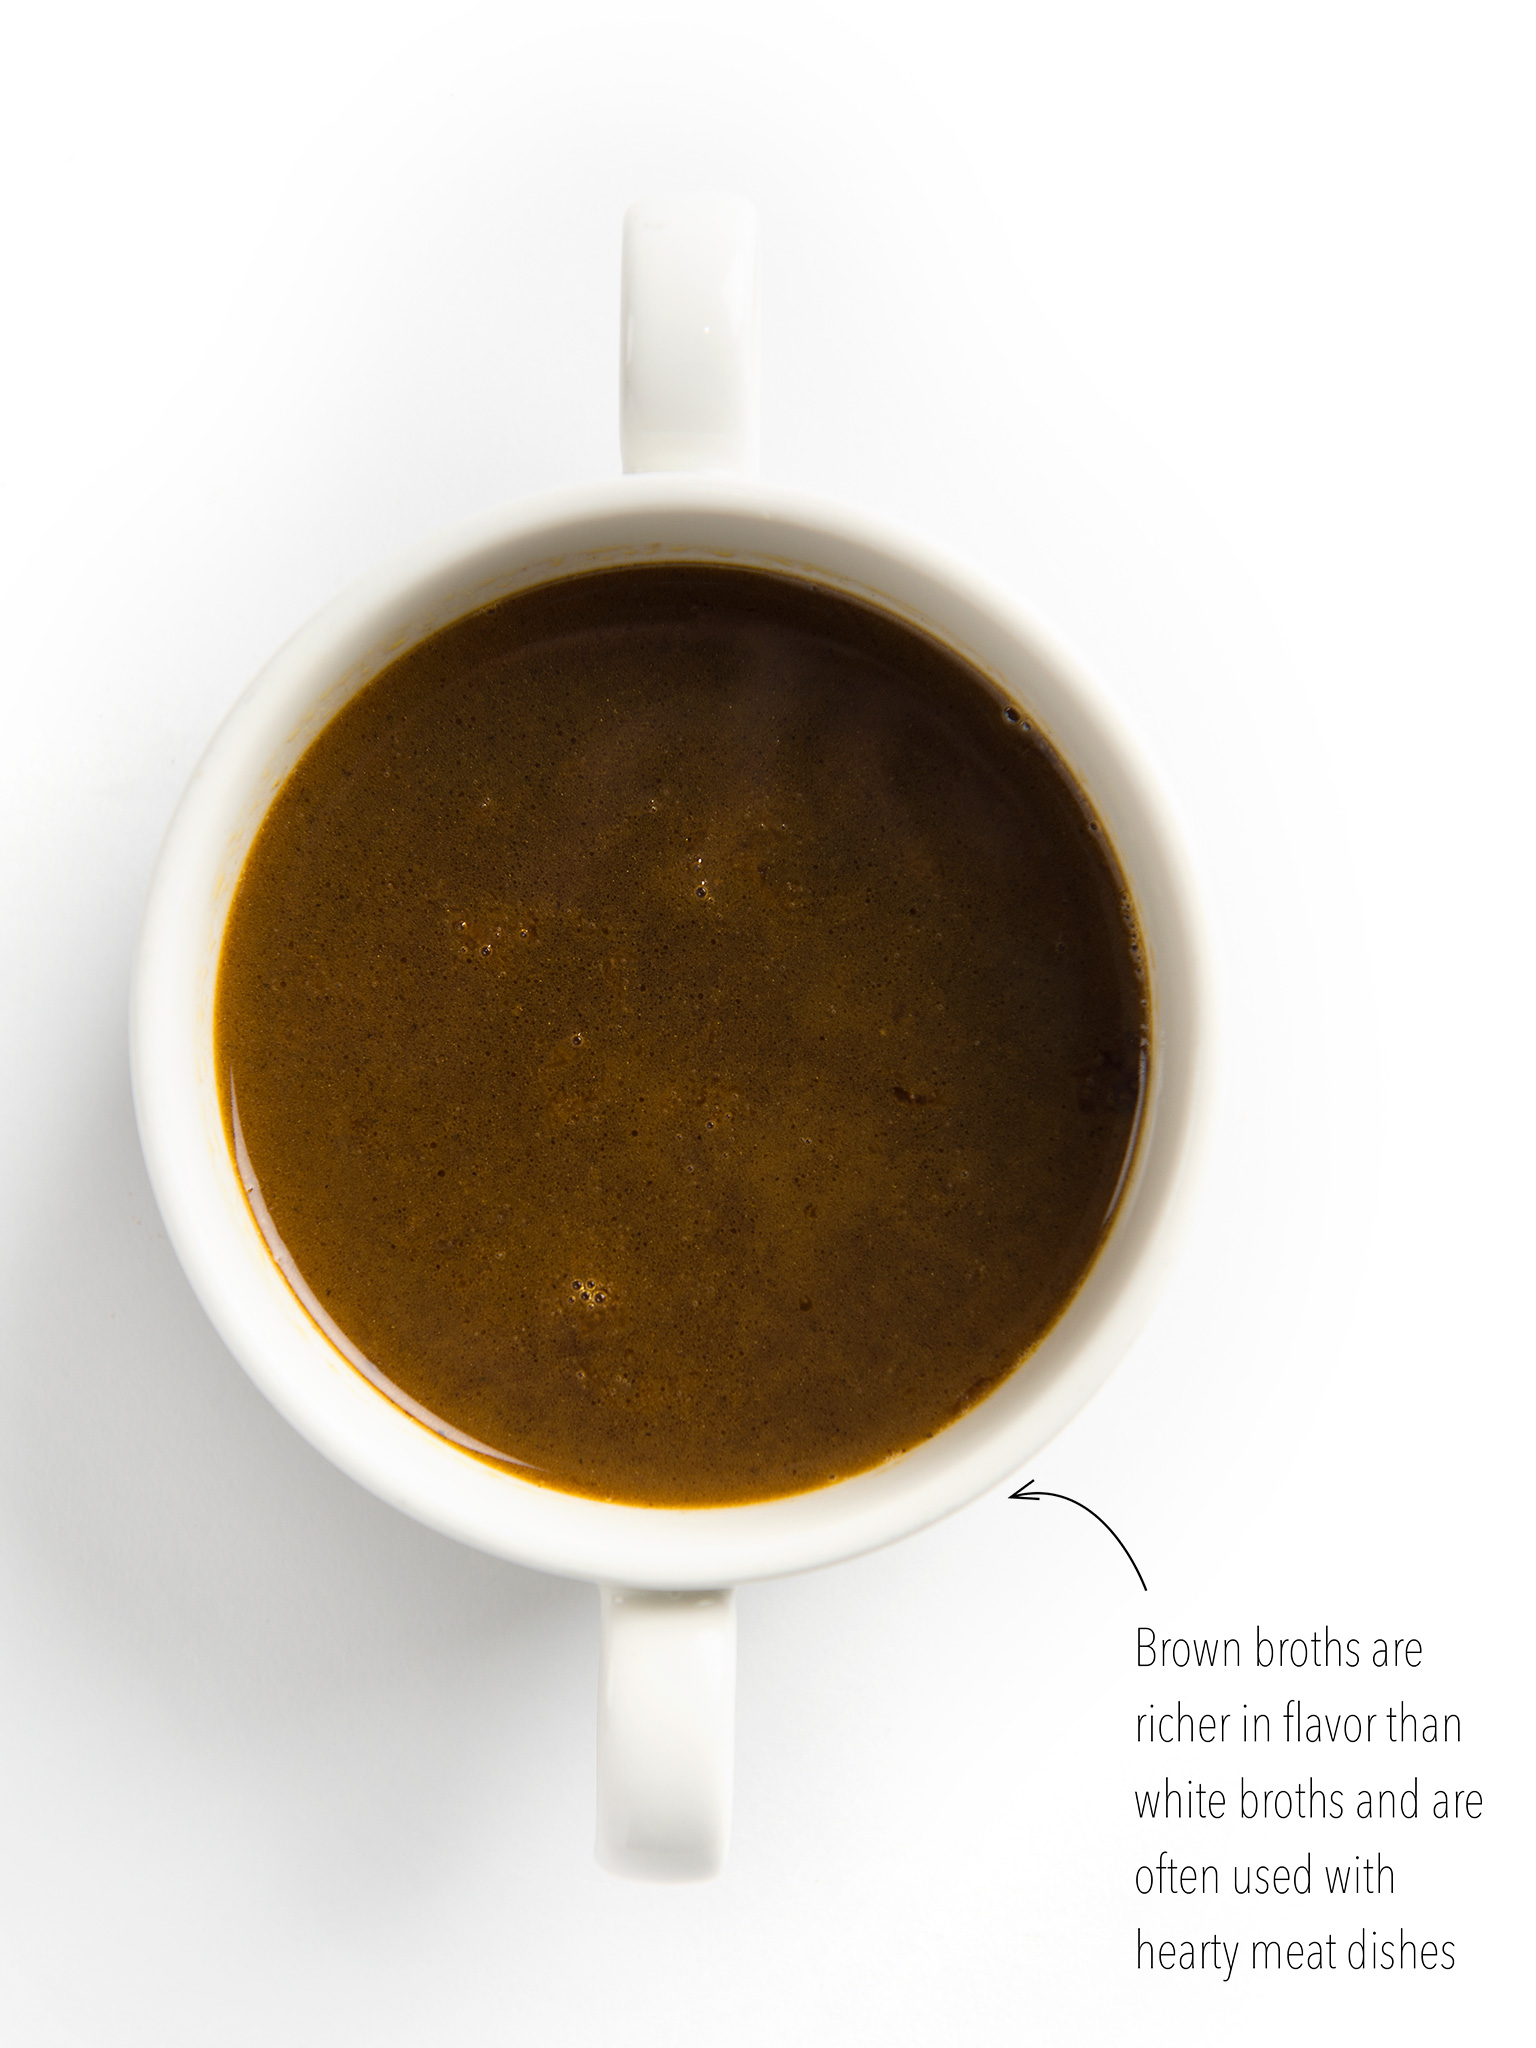
Here, I’ve provided two different broths as your base: white and brown. The white broth has a bright, lighter flavor from the chicken. The brown broth has a richer, roasted flavor accomplished by searing the ingredients first.
SOUS VIDE BROTH TECHNIQUE
The Pho recipe in the Pork section of this book instructs you to use the broth technique shown in this spread. Simply follow the instructions for making Brown Beef Broth, substituting the ingredients here with the ingredients listed in Pho prep step 2.
White Chicken Broth
Time: 24 hours, 20 minutes
Temp: 170°F (77°C)
Yield: 2 quarts (2l)
2 lb. (1kg) chicken thighs, backs, and/or feet
½ lb. (225g) parsnips, chopped
½ lb. (225g) celery, chopped
1 lb. (450g) white onions, chopped
1 stem parsley
1 clove garlic
5 black peppercorns
½ tsp. dried thyme
1 bay leaf
2 qt. (2l) filtered water
1 Preheat the sous vide machine to 170°F (77°C).
2 Combine chicken thighs, parsnips, celery, white onions, parsley, garlic, black peppercorns, thyme, bay leaf, and filtered water in a 1-gallon (3.75l) plastic bag and seal.
3 Once the sous vide water bath has reached the desired temperature, insert the bag and allow to cook for 24 hours.
4 Remove the bag from the water bath and strain liquid through a fine-mesh sieve into a stockpot, discarding solids.
5 Use for soups and sauces. Broth can be stored for up to 4 days in the refrigerator or 6 months in the freezer.
Brown Beef Broth
Time: 24 hours, 45 minutes
Temp: 170°F (77°C)
Yield: 2 quarts (2l)
2 lb. (1kg) beef bones
1 TB. tomato paste
½ lb. (225g) carrots, chopped
1 lb. (450g) white onions, chopped
2 oz. (60ml) red wine vinegar
2 oz. (60ml) dry red wine
1 qt. (1l) water
1 stem parsley
1 clove garlic
5 black peppercorns
½ tsp. dried thyme
½ lb. (225g) celery, chopped
1 bay leaf
1 Place a large cast-iron skillet in the oven and preheat the oven to 450°F (232°C). Remove the hot skillet, add beef bones, and allow to roast for 15 minutes.
2 Add tomato paste, carrots, and white onions to the skillet. Return to the oven and allow to cook for 20 minutes.
3 Remove from the oven and scrape ingredients into a large container. Place the container into the refrigerator to cool.
4 Put the skillet on the stovetop over high heat. Add red wine vinegar and dry red wine, scraping the bottom of the skillet to loosen any browned bits. Remove from heat, add water to cool, and mix.
5 Place liquid, parsley, garlic, black peppercorns, thyme, celery, and bay leaf in a 1-gallon (3.75l) plastic bag and seal.
6 Once the sous vide water bath has reached the desired temperature, insert the bag and allow to cook for 24 hours.
7 Remove the bag from the water bath and strain liquid through fine-mesh sieve into a stockpot, discarding solids.
8 Use for soups and sauces. Broth can be stored for up to 4 days in the refrigerator or 6 months in the freezer.
infusions
Low-temperature infusions combine a primary ingredient with seasonings. For instance, oils can be pumped full of herbal flavors, and creams can be enhanced with floral components. Sous vide makes this process a snap.
OILS AND BUTTER
These flavored oils can be used for high-heat applications (such as searing), while the butter can be used as a nice topper for any dish.
Mint Butter
Time: 1 hour, 10 minutes
Temp: 135°F (57°C)
Yield: 1 pound (450g)
1 lb. (450g) whole butter
½ cup mint leaves, packed
1 Preheat the sous vide machine to 135°F (57°C).
2 Combine whole butter and mint leaves in a 1-quart (1l) plastic bag and seal.
3 Insert the plastic bag and allow to cook for 1 hour.
4 Remove the bag from the water bath. Use immediately or store in the freezer for up to 1 year.
Garlic Oil
Time: 3 hours, 10 minutes
Temp: 135°F (57°C)
Yield: 32 ounces (1l)
32 oz. (1l) extra-virgin olive oil
10 garlic cloves
1 Preheat the sous vide machine to 135°F (57°C).
2 Combine extra-virgin olive oil and garlic cloves in a 1-quart (1l) plastic bag and seal.
3 Insert the plastic bag and allow to cook for 3 hours.
4 Remove the bag from the water bath. Use immediately or store in the freezer for up to 1 year.
Thyme Oil
Time: 3 hours, 10 minutes
Temp: 135°F (57°C)
Yield: 8 ounces (237ml)
8 oz. (237ml) extra-virgin olive oil
1 TB. dried thyme
1 Preheat the sous vide machine to 135°F (57°C).
2 Combine extra-virgin olive oil and thyme in a 1-quart (1l) plastic bag and seal.
3 Insert the plastic bag and allow to cook for 3 hours.
4 Remove the bag from the water bath. Use immediately or store in the freezer for up to 1 year.
CREAMS
With infused creams, you can go beyond using them as a thickener and give dishes a sweet or savory boost.
Basil Cream
Time: 2 hours, 10 minutes
Temp: 165°F (74°C)
Yield: 16 ounces (473ml)
16 oz. (473ml) heavy whipping cream
8 basil leaves
1 Preheat the sous vide machine to 165°F (74°C).
2 Combine heavy whipping cream and basil in a 1-quart (1l) plastic bag and seal.
3 Insert the plastic bag and allow to cook for 2 hours.
4 Remove the bag from the water bath. Use immediately or store in the refrigerator for up to 1 month.
Mushroom Cream
Time: 2 hours, 10 minutes
Temp: 165°F (74°C)
Yield: 16 ounces (473ml)
16 oz. (473ml) heavy whipping cream
¼ cup shiitake mushrooms, chopped
1 Preheat the sous vide machine to 165°F (74°C).
2 Combine heavy whipping cream and shiitake mushrooms in a 1-quart (1l) plastic bag and seal.
3 Insert the plastic bag and allow to cook for 2 hours.
4 Remove the bag from the water bath. Use immediately or store in the refrigerator for up to 1 month.
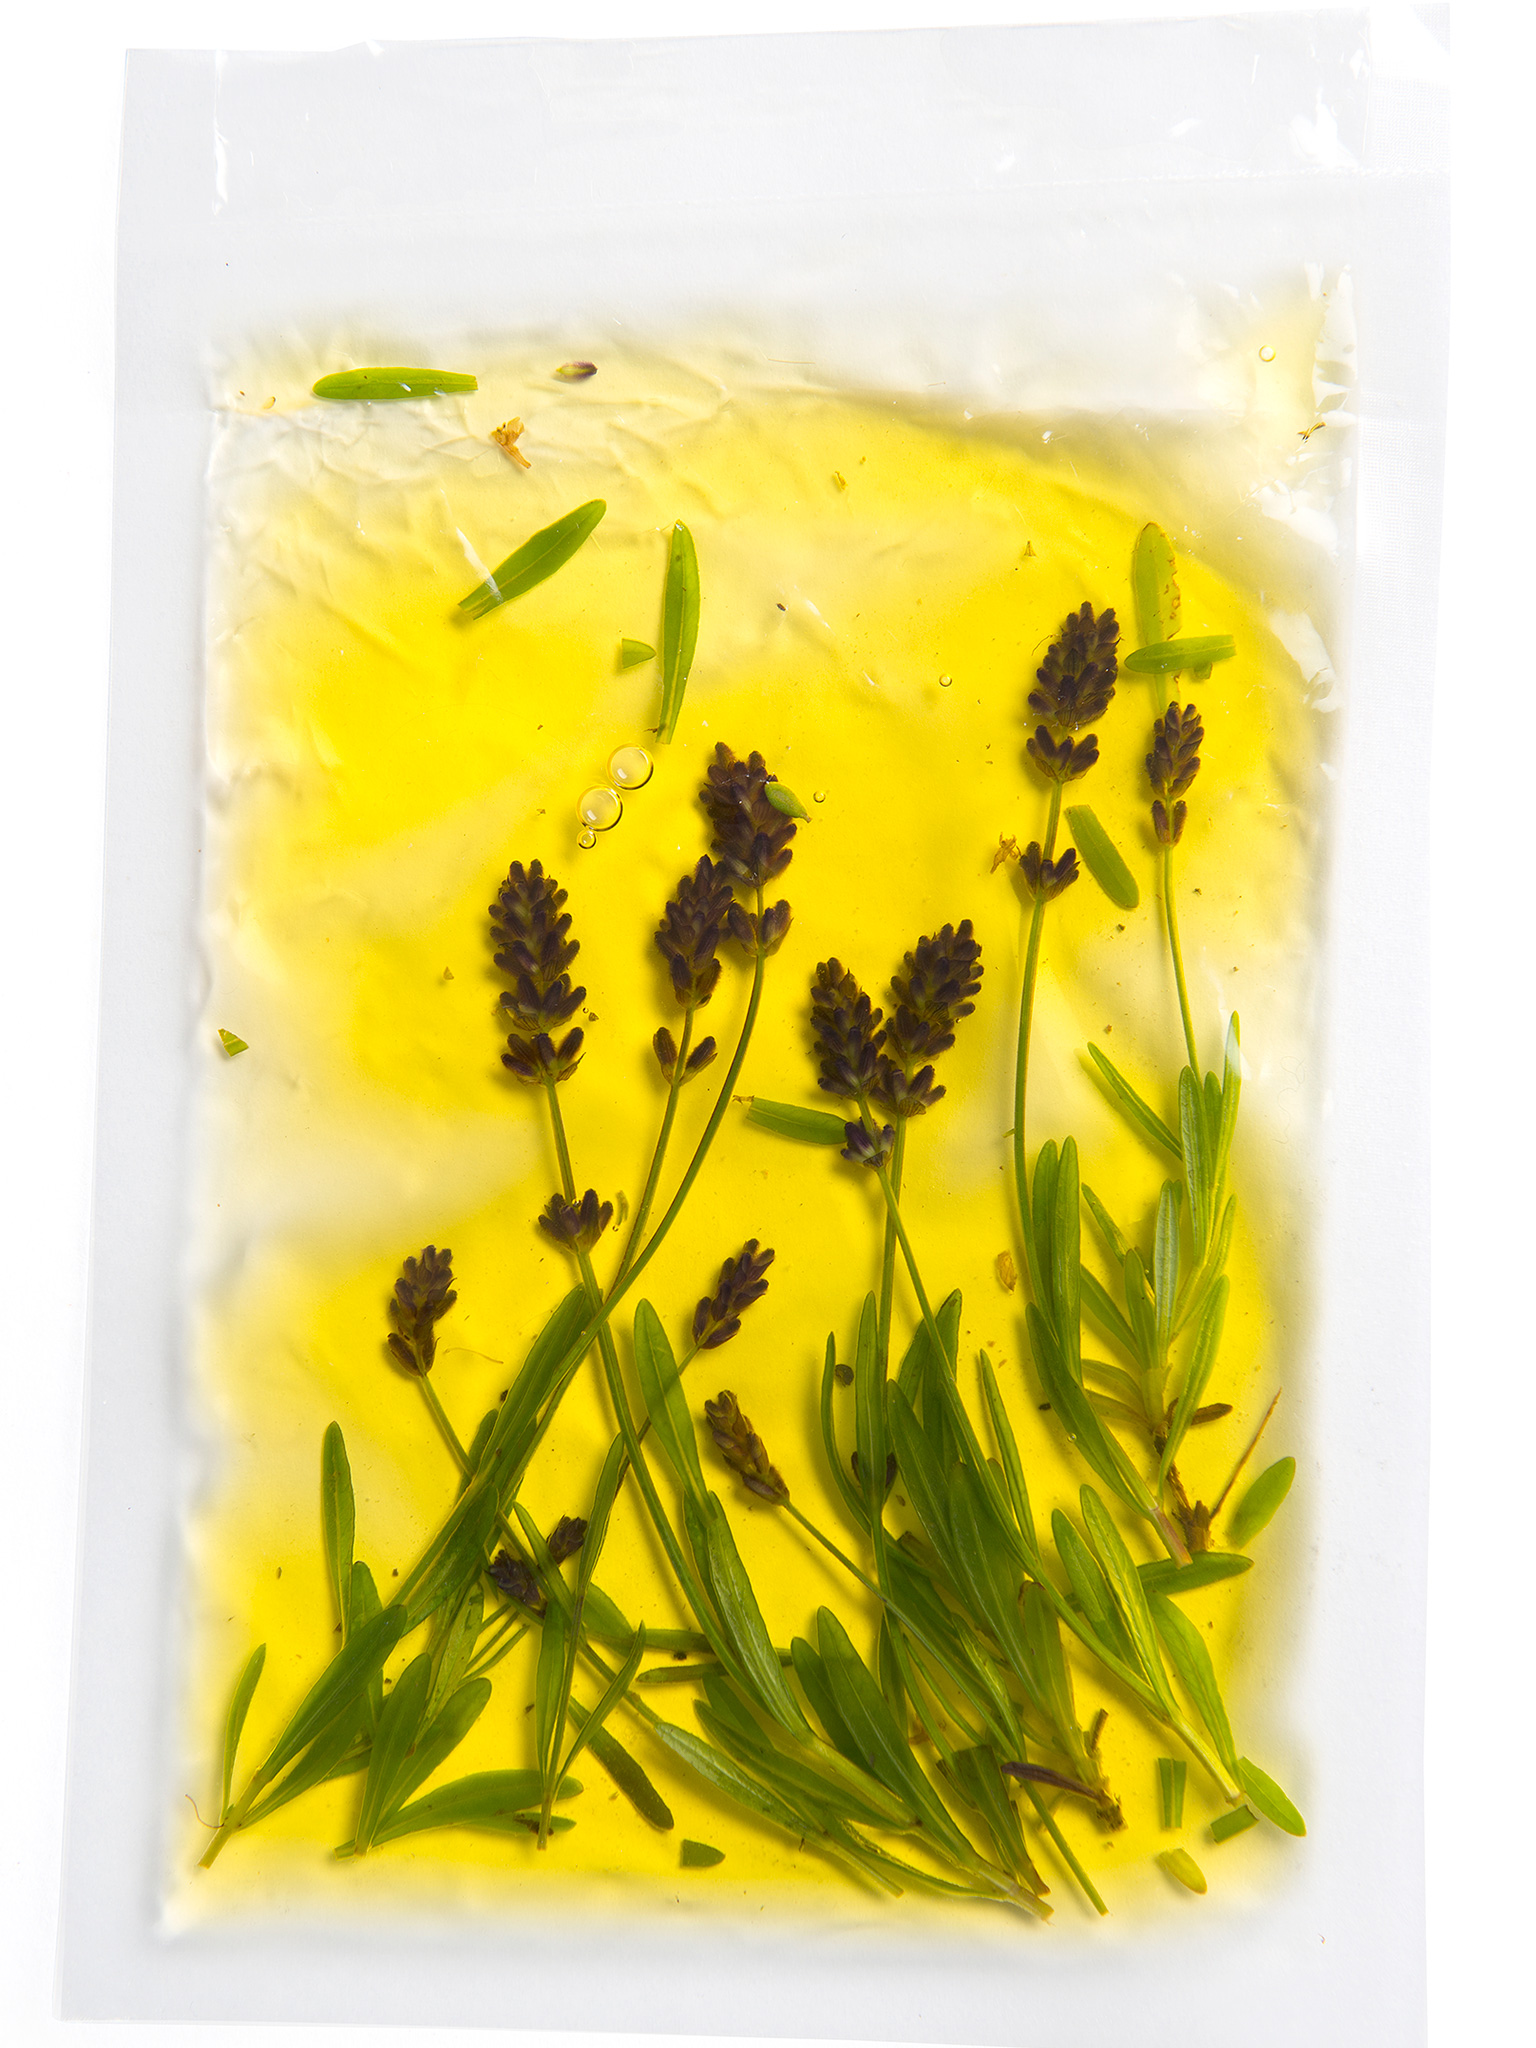
Lavender Cream
Time: 2 hours, 10 minutes
Temp: 165°F (74°C)
Yield: 8 ounces (237ml)
8 oz. (237ml) heavy whipping cream
8 lavender flower stems
1 Preheat the sous vide machine to 165°F (74°C).
2 Combine heavy whipping cream and lavender in a 1-quart (1l) plastic bag and seal.
3 Insert the plastic bag and allow to cook for 2 hours.
4 Remove the bag from the water bath. Use immediately or store in the refrigerator for up to 1 month.
SOUS VIDE COCKTAIL INFUSIONS
You can infuse about anything using your sous vide machine, including alcohol! For Vanilla-Orange Vodka, combine 16 ounces (473ml) vodka, 1 orange zest, and 1 vanilla bean in 1-quart (1l) glass canning jars and place in a 130°F (54°C) water bath for 2 hours; strain and serve. For an Old-Fashioned, combine 16 ounces (473ml) whiskey, 1 orange zest, 3 ounces (85g) granulated sugar, and 4 luxardo cherries in 1-quart (1l) glass canning jars and place in a 130°F (54°C) water bath for 2 hours; strain and serve. For Limoncello, combine 10 lemon zests, 1 (25-oz.; 750ml) bottle vodka, 1 cup granulated sugar, and ½ cup water in a 1-quart (1l) plastic bag and place in a 135°F (57°C) water bath for 3 hours; strain into a decorative bottle and place in the freezer for 1 week before serving as a cold beverage.