Everyday Cook - Alton Brown (2016)
EVENING
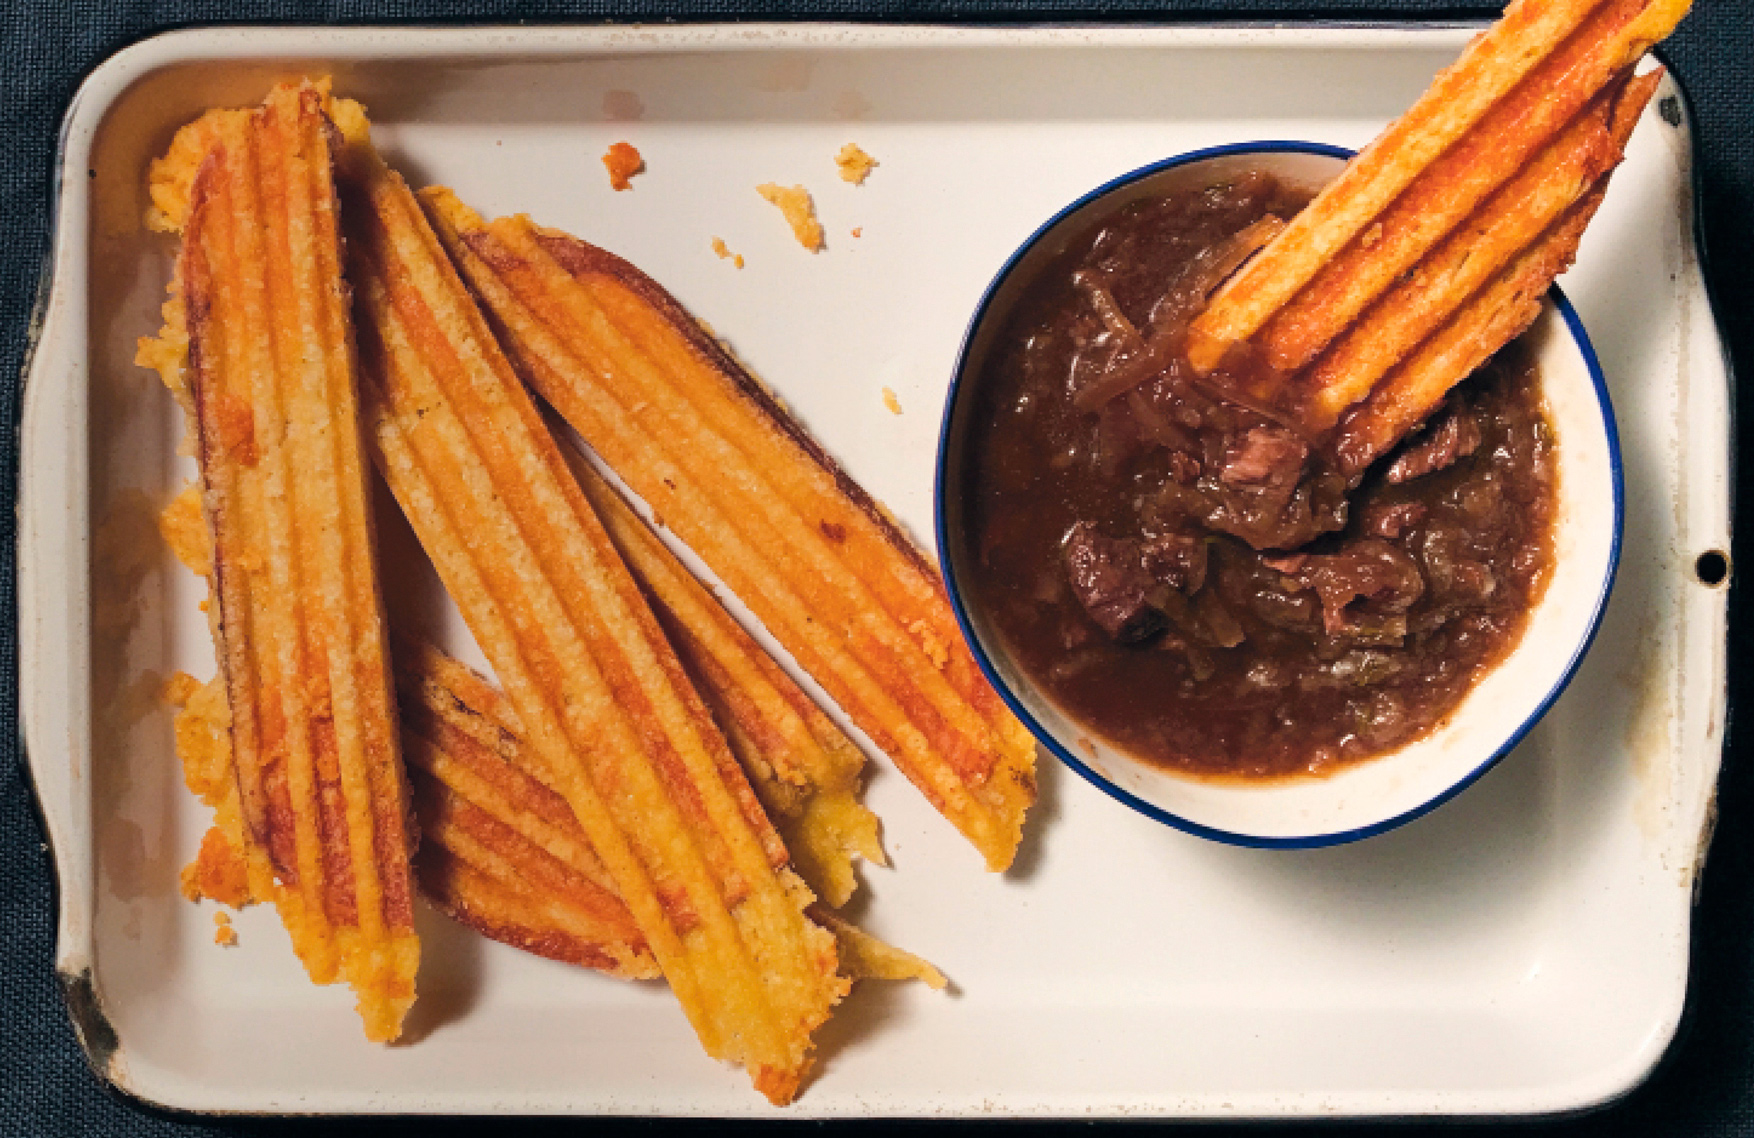
Onion Oxtail Soup
FEEDS 4
3 pounds yellow onions (2 to 3 large)
2 tablespoons kosher salt
1 tablespoon dark brown sugar
½ teaspoon baking soda
2 pounds beef oxtails (4 large)
1 cup red wine
5 thyme sprigs, tied into a bundle
1½ quarts beef broth
¼ teaspoon black pepper (a few grinds)
Groovy Gruyère Sticks
1. Heat the oven to 300ºF.
2. Halve and peel the onions, then slice on a mandoline H set to 3 millimeters and place in a bowl. Toss with 1 tablespoon of the salt, the brown sugar and baking soda, then place in a large colander for 15 minutes, tossing occasionally.
3. Meanwhile, place a heavy 4-quart Dutch oven over high heat for 5 minutes.
4. Season the oxtails with 2 teaspoons of the remaining salt and sear in the Dutch oven. Set the seared oxtails aside, but don’t wipe the pot out…you’ll need a little fat for the onions.
5. Wring as much moisture out of the onions as possible by pressing them down into the bottom of the colander.
6. Sauté the onions in the Dutch oven over high heat until they brown, about 8 minutes. When the onions are brown, add the wine and cook for 5 minutes.
7. Place the oxtail meat and thyme bundle on top of the onions. Pour in the broth (should just cover the oxtails). Lid the pot, place in the center of the oven, and simmer for 3 to 4 hours, until the oxtails pull apart easily.
8. Remove the oxtails and thyme from the soup. When cool enough to handle, remove the meat from the oxtails and chop coarsely.
9. Add the oxtail meat back to the soup and bring back to a simmer before serving. Taste and correct the seasoning with the remaining 1 teaspoon salt and the black pepper.
Groovy Gruyère Sticks
I know that at this point, a few of you are wondering what the heck happened to the big, melty, cheesy crouton that’s supposed to cap the crock? Oh, you mean the soggy, stringy, goo heap that is typically used to camouflage a substandard soup? The way I see it, a little cheese toast on the side is a better way to go because you get all the flavor and some crunch, and frankly, who doesn’t like cheese toast? Here’s how I do it.
8 ounces grated Gruyère cheese
4 thin sourdough bread slices, about ¼ inch thick
1. Heat your panini press H to high.
2. Take 2 ounces of the Gruyère and sprinkle it into two bread-shaped beds on either side of the panini press. Immediately lay 1 piece of bread onto each bed, top each with an additional ounce of the cheese, and press for 1 minute. Immediately remove the cheese toasts to a cooling rack and repeat with the remaining cheese and bread.
3. Once the cheese toasts cool, cut into sticks and serve with Onion Oxtail Soup.
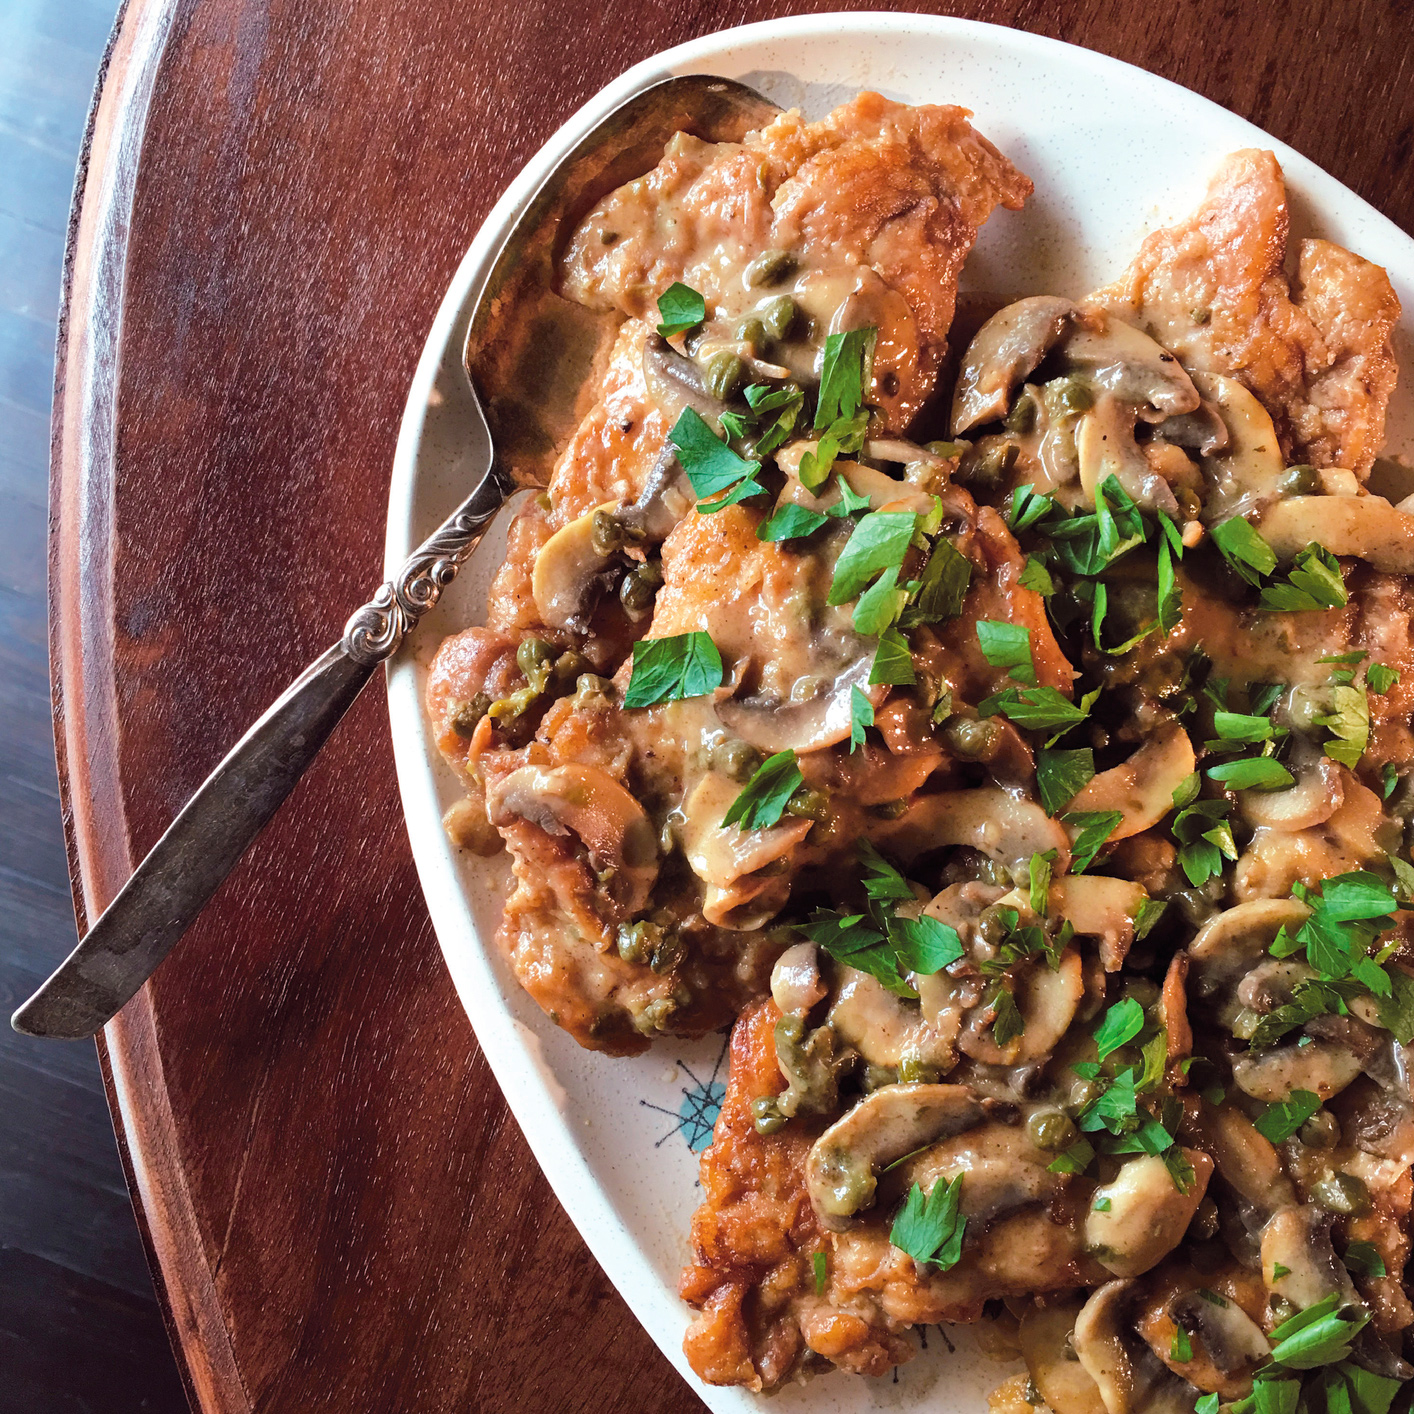
Chicken Piccata
FEEDS 6
I used to think that piccata meant “sharp” and referred to the tang of the sauce. Truth is, it refers more to the shaping and pounding of the meat, which is typically chicken breast. I never send a breast to do what thighs could do better (and cheaper), and this dish certainly falls into that category. If you don’t want to mess with boning, go with boneless, skinless thighs; otherwise, you’ll need a thin sharp knife for boning.
3 ounces white wine (I usually go with a Sauvignon Blanc)
4 ounces chicken broth
1 lemon, sliced into 8 wafer-thin slices, plus ½ lemon for 1½ tablespoons juice
8 boneless, skinless chicken thighs
2 teaspoons kosher salt
½ teaspoon freshly ground black pepper, plus more for serving
1 cup all-purpose flour
3 tablespoons unsalted butter
2 tablespoons olive oil
8 ounces white button mushrooms, sliced thin
3 tablespoons capers, drained but not rinsed
2 tablespoons chopped fresh flat-leaf parsley
1. Combine the white wine, broth and lemon juice in a beaker or measuring cup. Set aside.
2. Season the thighs with 1 teaspoon of the salt and the pepper.
3. Place the flour in a gallon freezer bag and add one thigh to the bag. Seal, and shake to coat. Then open the bag just enough to allow air out. Place the thigh on a sturdy counter or cutting board and flatten that sucker with a meat pounder, flipping the bag once during the process, until the thigh is about ¼ inch thick. Remove to a plate and repeat with the rest of the thighs.
4. Place a heavy, 12-inch straight-sided sauté pan with a tight-fitting lid over high heat for 1 minute.
5. Add 1 tablespoon each of the butter and the oil to the pan. When the butter just stops bubbling, carefully add 4 of the thighs. Cook, gently shaking the pan, for 90 seconds, then flip and repeat for another 90 seconds.
6. Remove the chicken from the pan, add another 1 tablespoon each of the butter and oil, and when the butter is melted, add the remaining 4 thighs and cook as before.
7. Remove the chicken from the pan and immediately add the mushrooms and the remaining 1 teaspoon salt. Toss or stir to sauté for 2 minutes, or until the mushrooms start to turn golden on the cooked sides.
8. Stir the mushrooms out to the circumference of the pan and add the capers right into the middle. Stir, cooking for another 1 minute.
9. Add the chicken back to the pan and reduce the heat to low. Distribute the lemon slices across the top of the chicken, add the wine mixture and slap on the lid. Braise thusly for 5 to 7 minutes, until the chicken is cut-with-a-fork tender.
10. Evacuate the thighs (discard the lemon slices atop) to a serving platter. Increase the heat to high and add the remaining 1 tablespoon butter to the sauce. Boil gently, stirring constantly until it reaches sauce consistency…about 30 seconds, then pour it over the chicken. Grind on some more pepper and top with the parsley. Serve with rice or noodles, if you like.
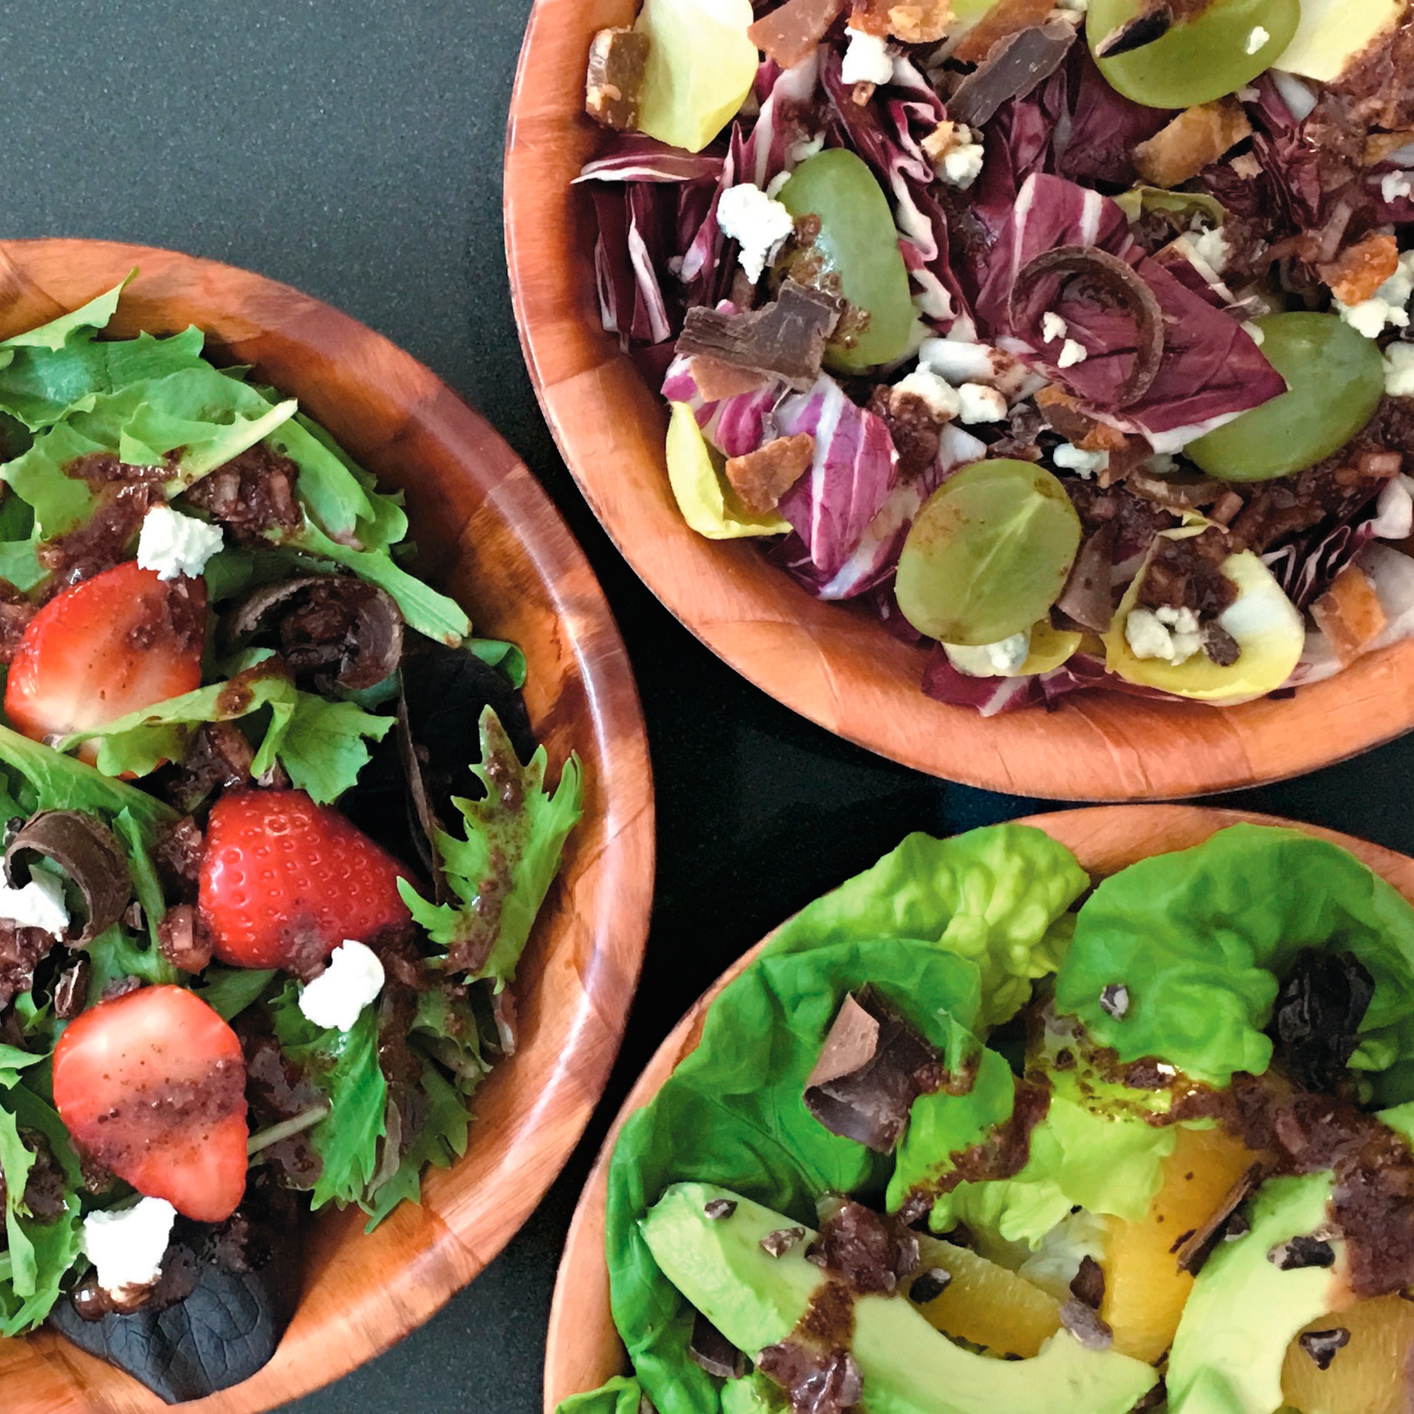
Cocoa Nib Vinaigrette
MAKES 3/4 CUP
Children of the world, rejoice! I, Alton Brown, have invented a salad with chocolate! Chocolate, I say! Worship me and together we…Sorry. So, cocoa nibs, those roasted seed things that chocolate comes from, are really good in salad.
2 tablespoons cocoa nibs*
4 tablespoons extra-virgin olive oil
3 tablespoons balsamic vinegar
2 tablespoons minced shallot
½ teaspoon kosher salt
½ teaspoon red pepper flakes P
SALAD SUGGESTIONS TO DRESS IN COCOA NIB VINAIGRETTE
8 ounces torn butter lettuce
1 avocado, pitted, peeled and diced
2 oranges, suprêmed
2 ounces dried cherries
1 ounce bittersweet chocolate shavings
2 tablespoons cocoa nibs
OR
8 ounces chopped endive or radicchio
1 cup halved green grapes
2 ounces crumbled cooked bacon
2 ounces crumbled blue cheese
1 ounce bittersweet chocolate shavings
2 tablespoons cocoa nibs
OR
8 ounces spring mix
1 cup halved strawberries
2 ounces crumbled goat cheese
1 ounce bittersweet chocolate shavings
2 tablespoons cocoa nibs
1. Pulse the cocoa nibs in a spice grinder 4 or 5 times, until finely ground.
2. Combine the ground cocoa nibs and the olive oil in a 1-quart saucepan, and heat on low for 2 to 3 minutes, until warm and fragrant.
3. Add the vinegar, shallot, salt and red pepper flakes, and let sit for about 1 hour, until cooled to room temperature.
4. Transfer to a jar, twist on the lid, and shake like crazy to combine.
* Available at most quality megamarts these days, as well as the Interwebs…just like everything else.
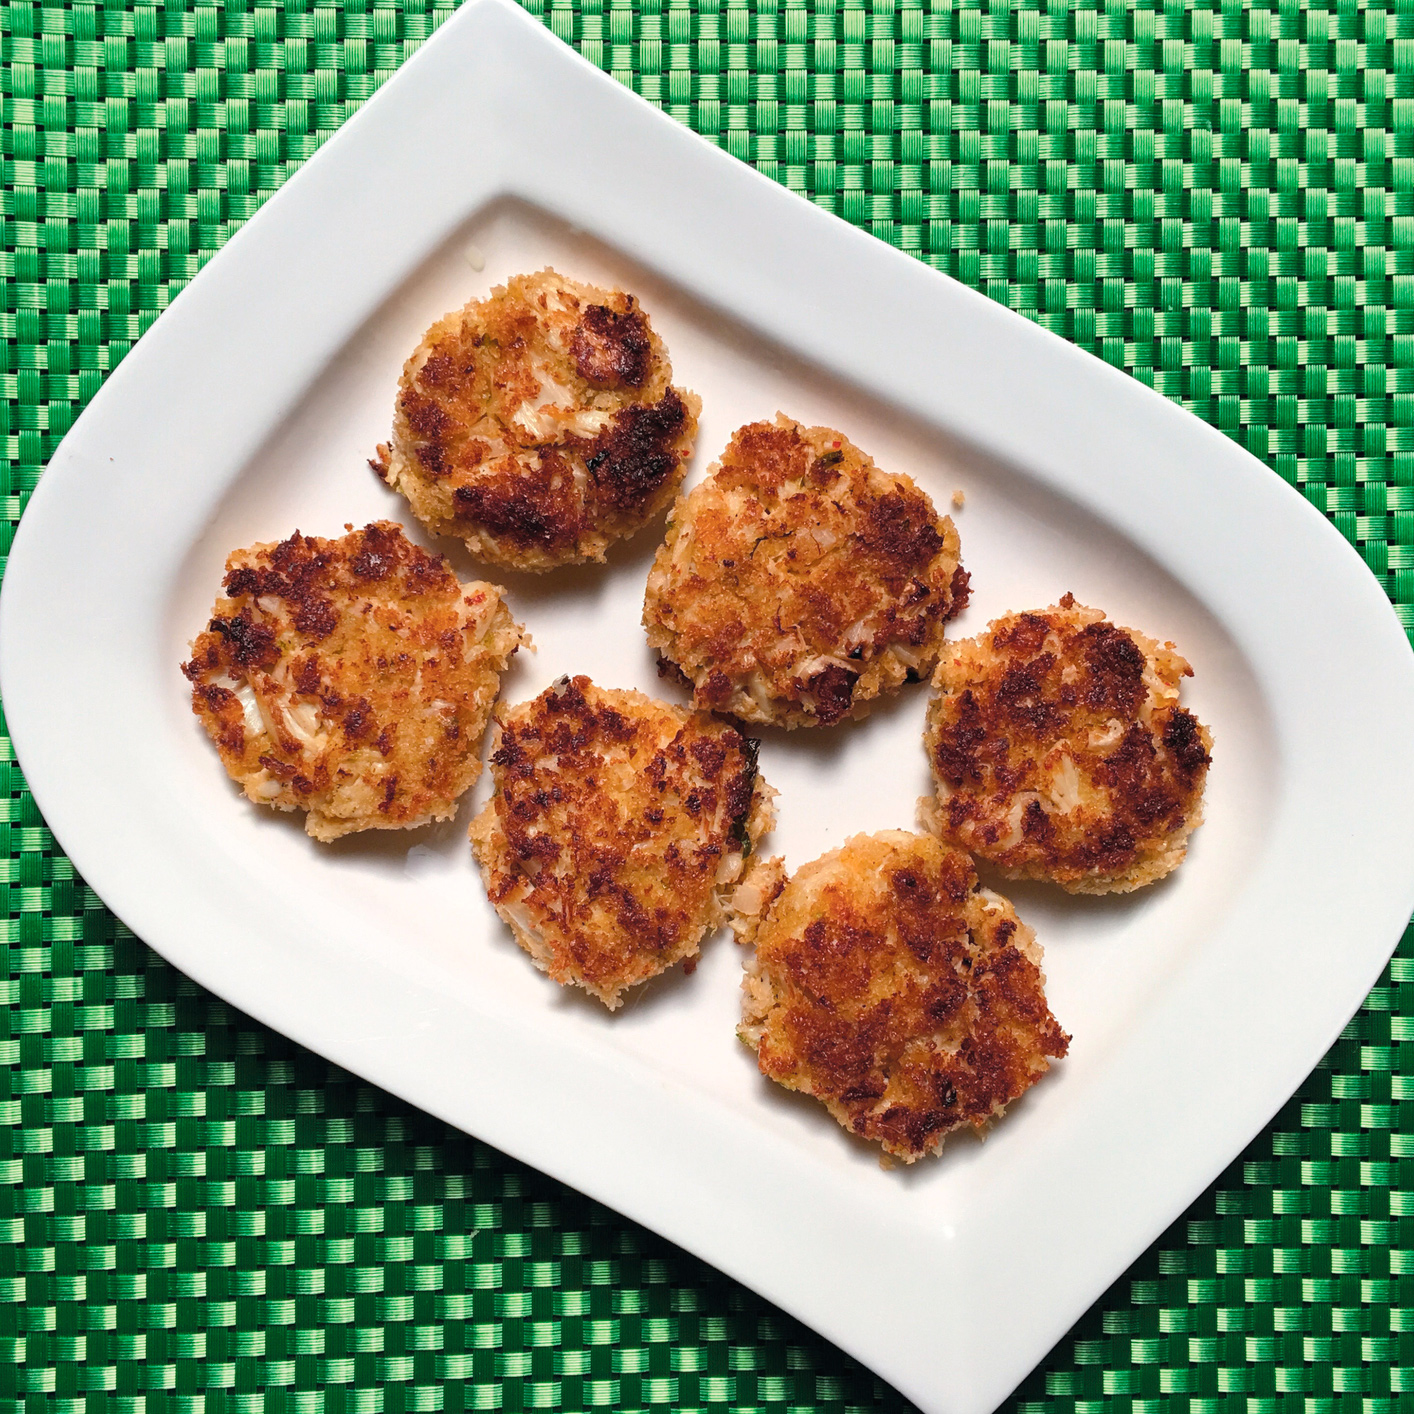
Kimchi Crab Cakes
MAKES TWELVE 2-OUNCE CAKES, FEEDS 6
Don’t worry…you’re not going to have to make spicy, fermented cabbage. Mind you, it’s delicious and relatively simple to make, but the truth is, the kimchi I buy at my local Korean market is way better than any I’ve ever made. Even if you’re not lucky enough to have a Korean market nearby, most decent megamarts carry it these days. And here’s the shocker: Kimchi goes well with crab.
½ cup mayonnaise
1 lime, zested and then cut into 6 wedges
1 large egg
3 ounces kimchi, drained and finely chopped
½ teaspoon freshly ground black pepper
½ teaspoon kosher salt
3 ounces panko bread crumbs
8 ounces lump crabmeat (aka “backfin meat”)
8 ounces jumbo lump crabmeat (aka “the good stuff”)
¼ cup canola oil
1. Set a cooling rack inside a half-sheet pan and set aside.
2. Whisk the mayonnaise, lime zest, egg, kimchi, pepper and salt together in a large bowl, then fold in 1½ ounces of the panko and the lump and jumbo lump crabmeat.
3. Fill a pie pan with the remaining 1½ ounces panko. Divide the crab mixture into twelve 2-ounce portions and shape into patties. Coat the crab cakes in the panko, then place on the prepared cooling rack. Refrigerate for 30 minutes.
4. Heat the canola oil in a 12-inch sauté pan over medium heat. When the oil shimmers, cook the crab cakes, 4 at a time, for 3 minutes per side, or until golden brown. Remove to a clean cooling rack set over paper towels to drain. Repeat with the remaining crab cakes.
5. Serve immediately with the lime wedges. Sauce?!?! We don’t need no stinkin’ sauce!
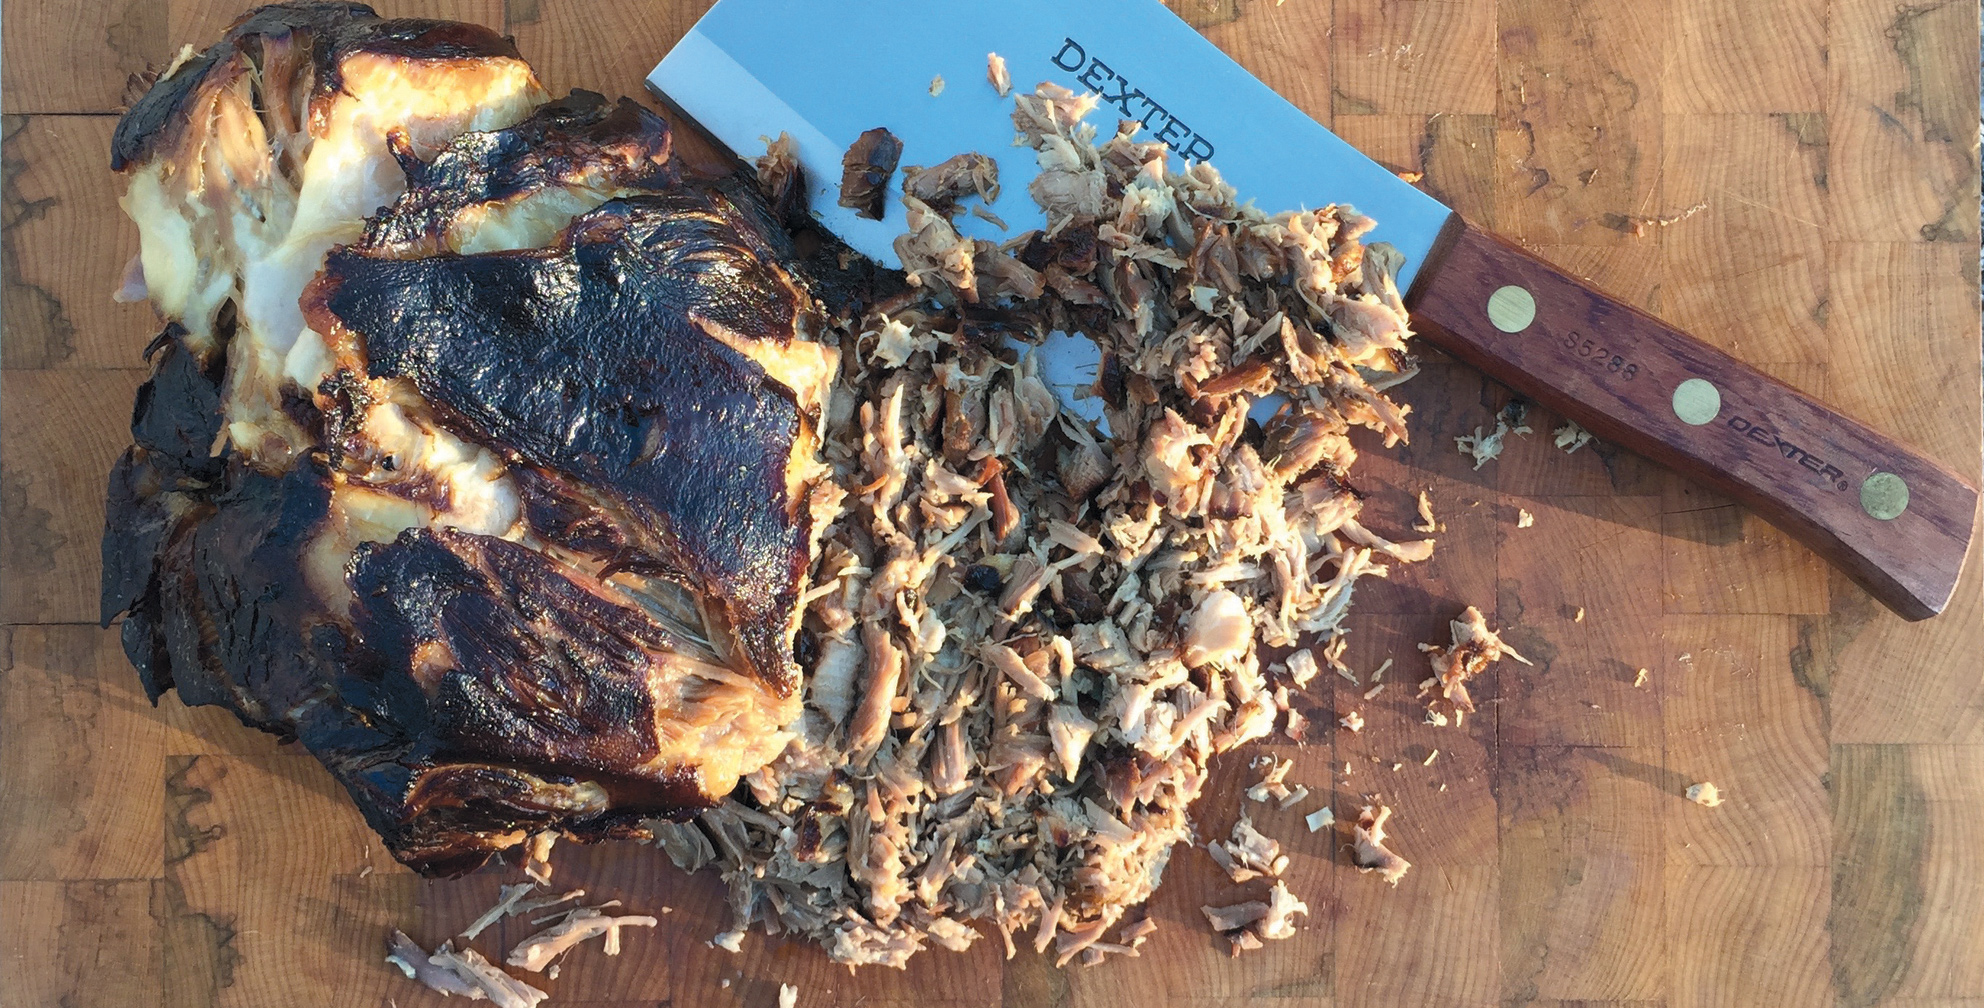
Barbecue Pork Butt
MAKES 4 TO 6 POUNDS PULLED PORK
Barbecue purists call this cheating. I call it freakin’ awesome. The smoke is for flavor; the foil time is for texture. If you have an electric smoker that runs to 300ºF, feel free to use it for the entire cooking time. But do not skip the foil.
12 ounces kosher salt
8 ounces molasses
8- to 10-pound boneless pork butt*
SPECIAL EQUIPMENT
Smoker and 4 ounces hickory or oak wood chunks.
And you really need a decent instant-read/meat thermometer H…not that that’s “special” equipment.
1. Stir 3 quarts water, the salt, and molasses together in a large 12-quart container until the salt dissolves. Move 2 cups of the brine into a zip-top bag. Add the pork butt to the remaining brine and weigh it down with the bag. Refrigerate for 8 to 10 hours.
2. Remove the pork from the brine and pat dry. Discard the brine.
3. Heat the smoker to 225ºF.
4. Load the pig part into the smoker and add the wood chunks according to the manufacturer’s instructions.
5. Once the meat reaches 140ºF (after 3 to 4 hours), crank the oven to 300ºF.
6. Wrap the pork in heavy-duty aluminum foil H and transfer to a sheet pan or roasting pan. Place on the center rack and cook until the pork reaches an internal temperature of 200°F and is tender and pulling apart easily, 3 to 5 hours.
7. Remove from the oven, loosen the foil so heat can escape, and park at room temp for 30 minutes before shredding with a couple of big forks and serving to a grateful world.**
* Actually part of the shoulder. It’s named “butt” after the type of barrel that commonly housed it.
** I go with white bread and bread and butter pickles. As for sauce…we don’t need no stinkin’ sauce.

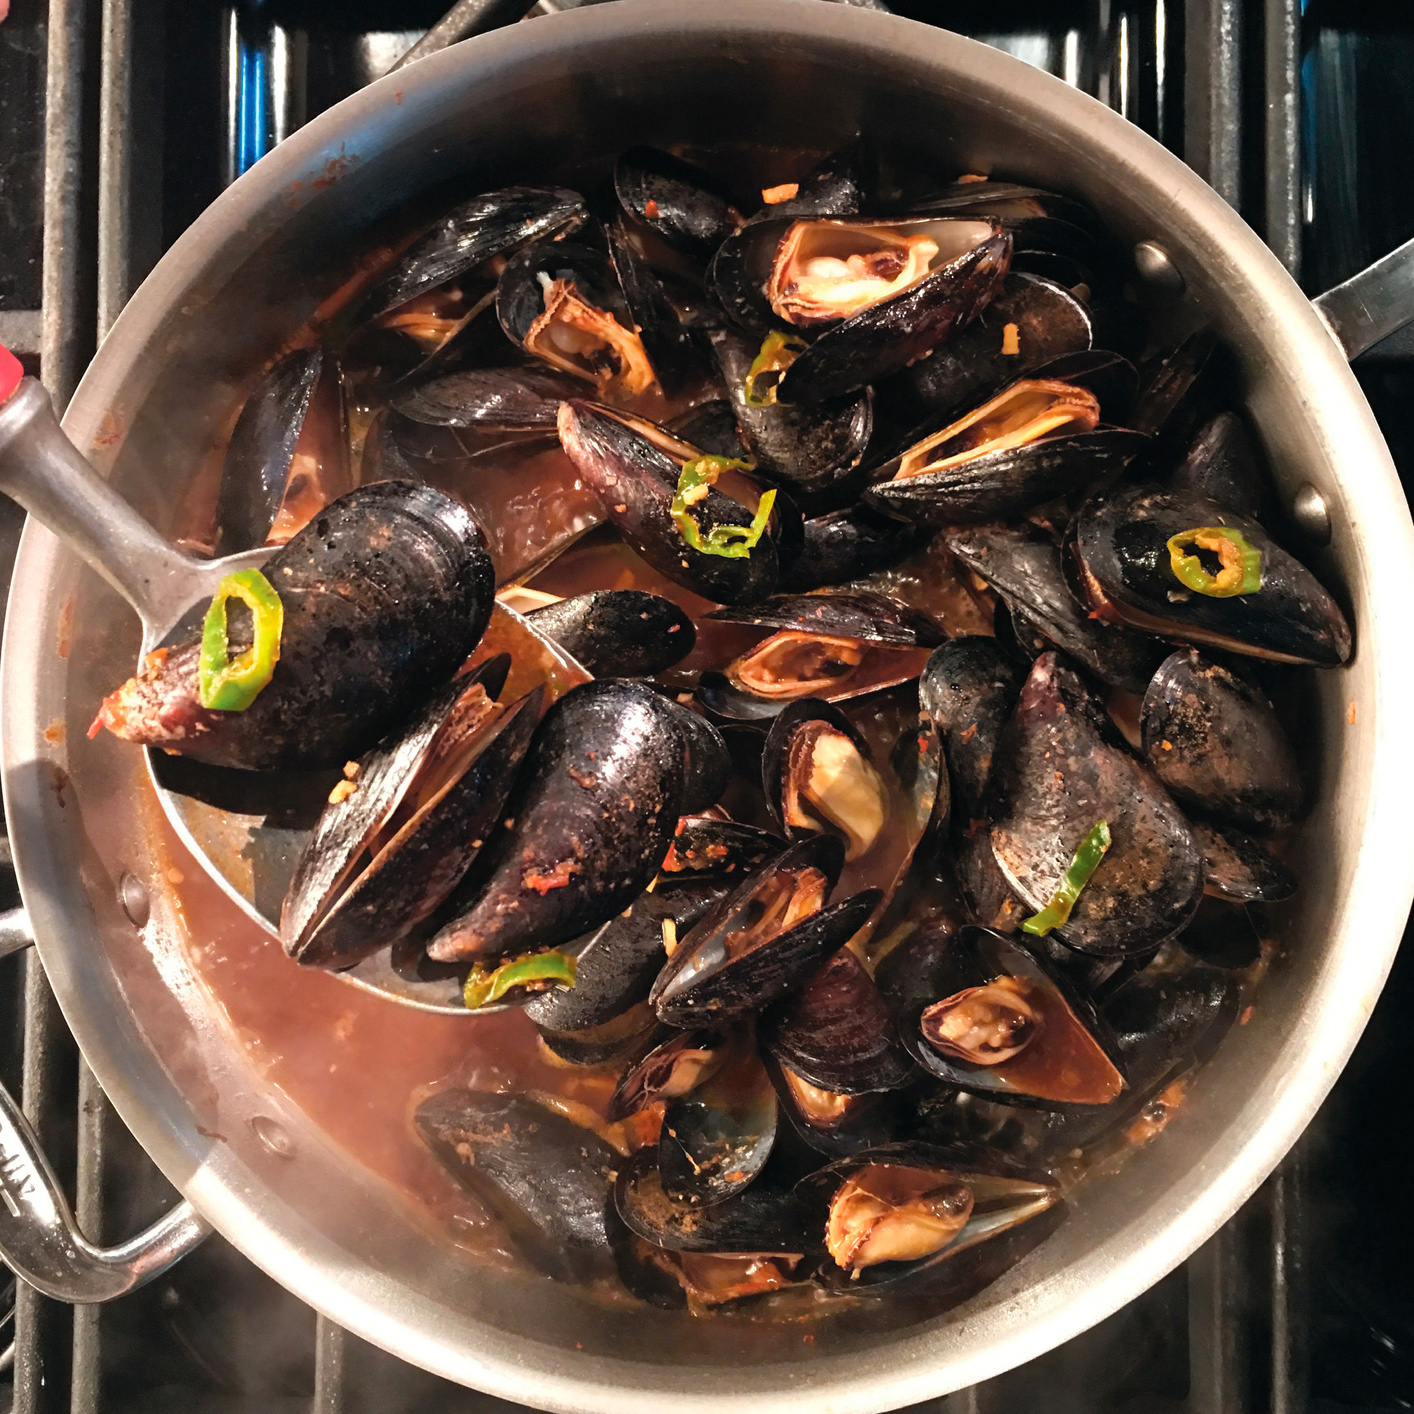
Mussels-O-Miso
FEEDS 2 AS AN ENTREE
This may seem like a rather exotic dish, given the ingredient list, but several of the odder ingredients here are multitaskers worthy of permanent residency in your kitchen.
2 pounds mussels
1 tablespoon vegetable oil
6 shishito peppers, sliced
2 tablespoons fresh ginger, minced
2 large garlic cloves, minced
½ cup chicken broth
¼ cup brown miso paste
1 tablespoon fish sauce P
1 tablespoon dark brown sugar
2 bottles lager beer (½ cup for the recipe, the rest to drink with it)
1 tablespoon harissa paste
3 limes, 2 juiced and 1 quartered, for serving
½ cup fresh cilantro leaves, chopped
1. Rinse and scrub the mussels under cool running water. Remove any “beards” by pulling the fiber down toward the hinge end. Discard the beards and any open mussels that do not close within 30 seconds after a hard tap. Set aside the mussels while you prepare the broth.
2. Heat the vegetable oil in a large saucepan over medium-high heat until shimmering. Add the shishitos and cook until fragrant and just beginning to brown, about 1 minute. Add the ginger and garlic and cook for another minute.
3. Whisk in the broth, followed by the miso, followed by the fish sauce, brown sugar and finally the beer. Bring to a simmer, then add the mussels. Cover and cook for 1 to 2 minutes, until most of the mussels have opened.
4. Stir in the harissa and juice from 2 limes.
5. Turn out into a large bowl and finish with the cilantro. Serve with the lime quarters, the cooking broth and some crusty bread.
Note: If you have any broth left over, freeze it and use it in the next batch.
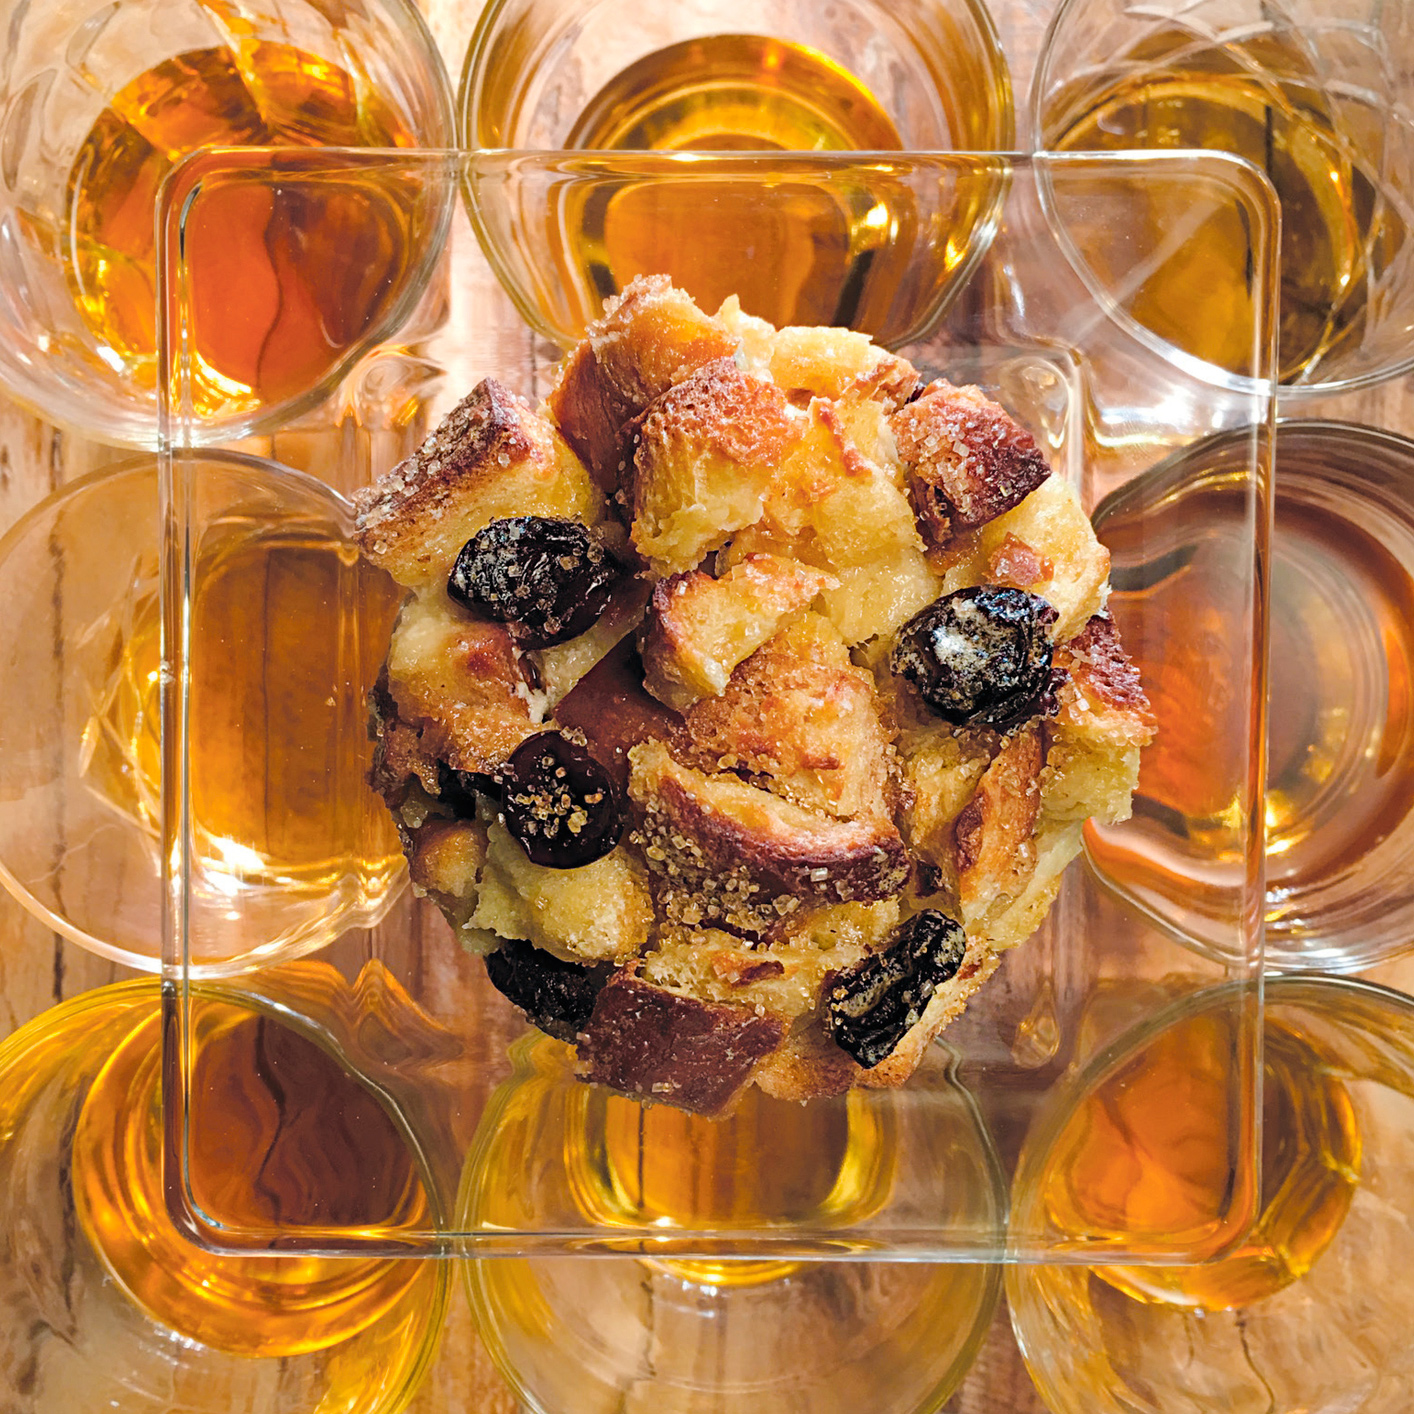
Bourbon Bread Pudding
FEEDS 6 TO 8
Bread pudding is one of my favorite desserts because it delivers such a depth of flavor and a range of textures, with its custardy interior and crusty and slightly chewy outer crust. In order to develop that, you really need the bread to absorb all the dairy…so don’t skimp on the soak time. As for the bourbon…no explanation required, but if you don’t have bourbon, just about any good whiskey (or whisky) will do. Try a spiced rum B sometime.
3 ounces dried cherries, blueberries, and/or raisins (about ½ cup), chopped
3 ounces bourbon B
1 teaspoon unsalted butter, at room temperature
12 ounces cubed bread, such as challah, French or focaccia
4 large eggs, separated
⅓ cup plus 1 tablespoon sugar
2 cups whole milk
1 cup heavy cream
1 teaspoon freshly grated nutmeg P
1. Heat the oven to 350°F.
2. Combine the dried fruit and bourbon in a large bowl and set aside.
3. Coat a 1½-quart round baking dish with the butter, add the bread to the dish and set aside.
4. Beat the egg yolks and ⅓ cup of the sugar in a stand mixer fitted with the paddle attachment until the yolks lighten in color and the sugar is completely dissolved.* Stir into the fruit-bourbon mixture. Add the milk, cream and nutmeg. Set aside.
5. Load up your mixer’s whisk attachment and beat the egg whites to soft peaks. With the mixer still running, gradually add the remaining 1 tablespoon sugar and beat until stiff peaks form. Fold the whipped egg whites into the custard mixture, being sure to remove about 2 cups for you to drink as the pudding bakes. Pour the remainder over the bread, pushing the bread down into the liquid and allowing it to soak for 20 minutes before baking.
6. Bake for 35 to 40 minutes, until golden brown on top and the interior hits 190ºF. Remove from the oven and cool for 10 minutes before serving.
* This could also be accomplished with an electric hand mixer or even a whisk if you’ve got the arm for it. (Actually, it’s all in the wrist.)
Bad Day Bitter Martini
SERVES 1
I am a great lover of martinis, but the classic varieties lack the bitterness I crave; here I out vermouth for amaro. My favorite gin to use is infused with grapefruit so I use the peel of the fruit instead of an olive. For a dirty martini—add a squeeze of grapefruit juice.
General note regarding vodka- and gin-based drinks: Because I want to have the option of having my drinks strong, I tend to keep both gin and vodka in the freezer (along with cocktail glasses). This means I don’t have to shake all my drinks with ice. That said, sometimes you want to mix with ice, either to emulsify/aerate or to allow the melting ice to soften the drink a bit. In this case, the two spirits involved are of different viscosity, so I find a quick stir does the trick.
2 cups ice cubes
2½ ounces London dry gin, such as Beefeater 24 B
½ ounce Amaro Montenegro B
Grapefruit peel
1. Wrap the ice cubes up in a clean towel and smack it against the counter a few times to crush.* Fill a martini glass with 1 cup of the crushed ice. Add the remaining 1 cup of crushed ice to the bottom of a Boston-style cocktail shaker H.
2. Add the gin and Amaro Montenegro and stir until chilled, about 15 seconds. Discard the ice from the martini glass and strain the gin mixture into the serving glass. Garnish with grapefruit peel and serve immediately.
* At the end of a hard day, this action in and of itself is quite refreshing.

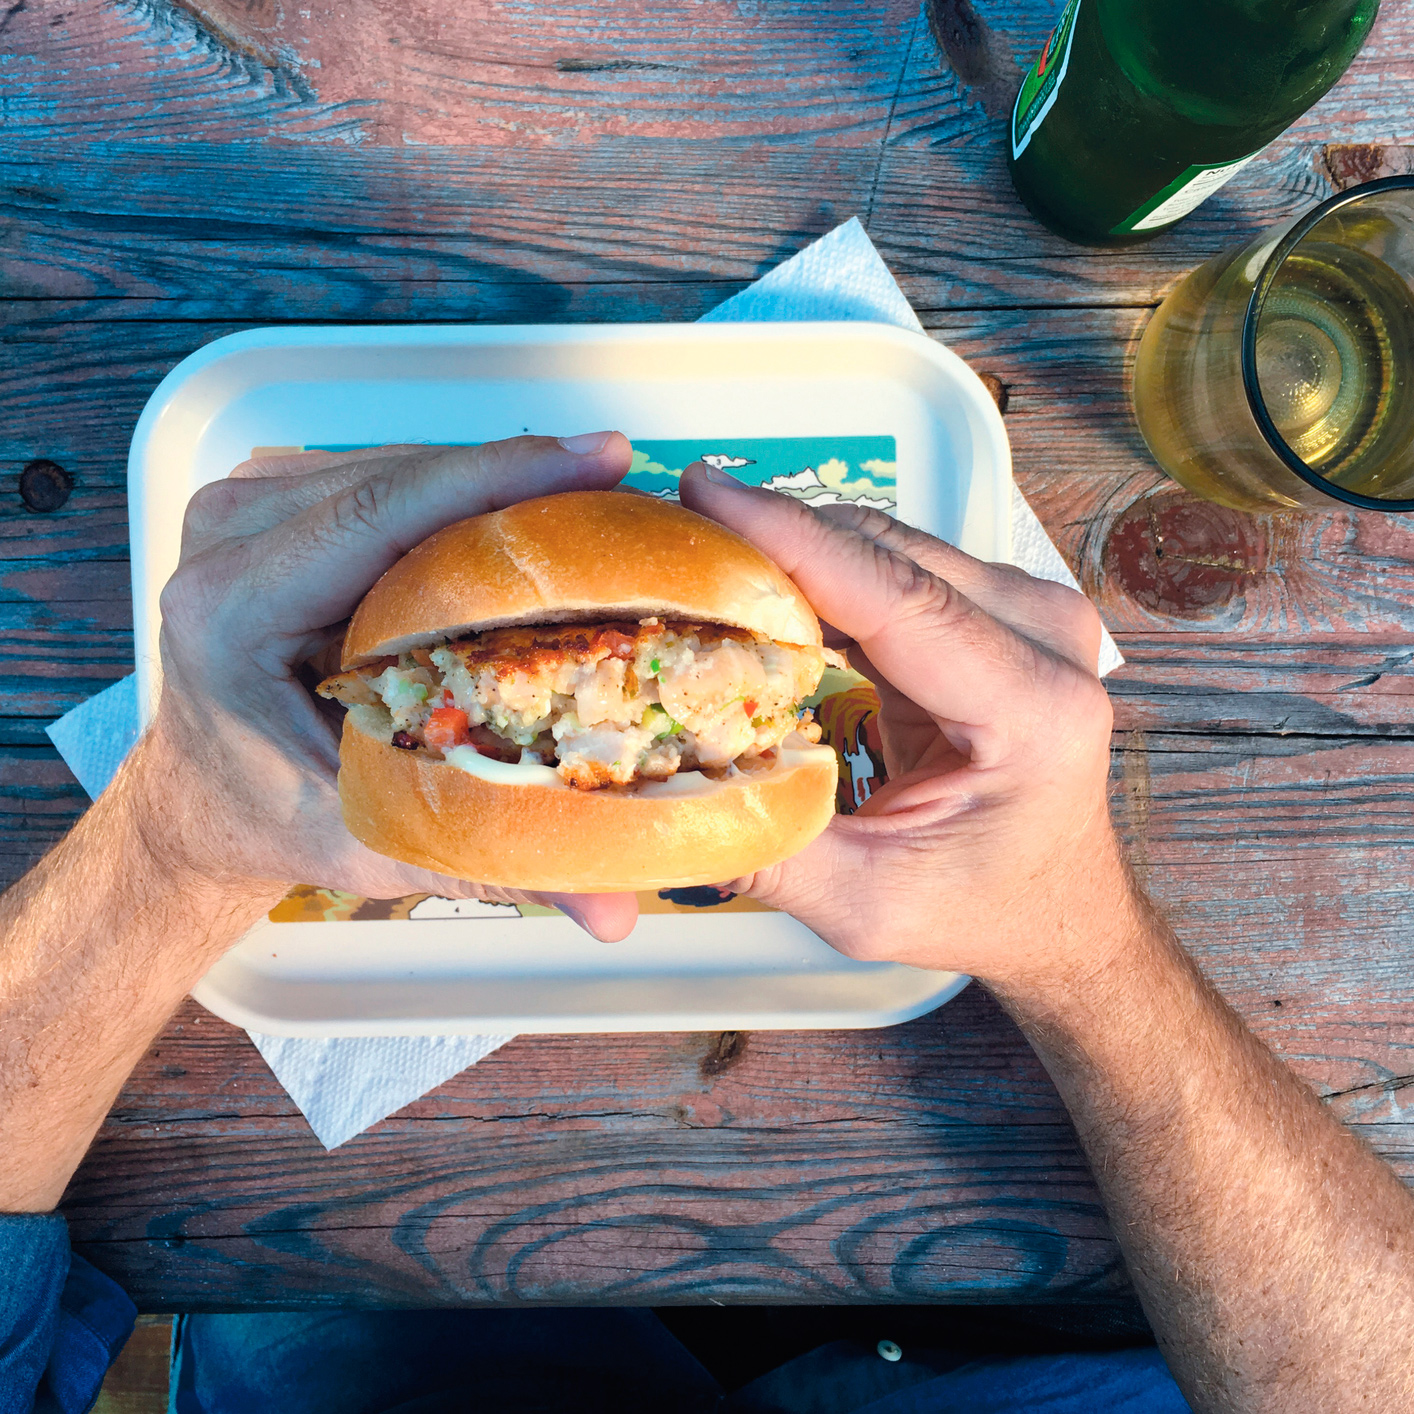
Char-Burgers
MAKES 4 BURGERS
Everybody loves a good charbroil burger, right? Well, I love a good char-burger; that is, a burger composed of Arctic char, a member of the salmon family that is not only darned good for you (omega fatty acids…you can never have too many), but sustainable as well.
1 pound boneless, skinless Arctic char fillets
⅓ cup panko bread crumbs
¼ cup finely diced scallions
¼ cup finely diced red bell pepper
1 teaspoon prepared horseradish
1 large egg white
2 teaspoons wasabi fumi furikake P
1 teaspoon kosher salt
¼ teaspoon freshly ground black pepper
2 tablespoons vegetable oil
4 onion rolls
Kewpie mayonnaise* (optional), for serving
1. If the char is frozen, thaw at room temp for about 30 minutes before chopping. If it’s raw, freeze for 30 minutes first. Chop the char into ¼-inch cubes and transfer to a medium mixing bowl.
2. Fold in the panko, scallions, bell pepper, horseradish, egg white, fumi furikake, salt and pepper.
3. Divide the mixture into 4 equal portions and shape into ¾-inch-thick patties. Cover and refrigerate for 30 minutes.
4. Heat the vegetable oil in a 12-inch cast-iron pan H M over medium-high heat until it shimmers. Add the burgers to the pan and cook for 4 minutes, or until lightly browned. Flip and cook for another 3 to 4 minutes, until lightly browned and the burger has reached an internal temperature of 135°F.
5. Move the patties to a plate and let rest for 3 minutes before serving on onion rolls and with a good squeeze of mayonnaise.
Note: By the way, this is my favorite dish in this book…just so you know.
* A Japanese version of mayo that includes MSG and rice wine vinegar. Its distinctive squeeze bottle is all but ubiquitous in Asian markets. If you don’t have it, love the mayo you’re with.
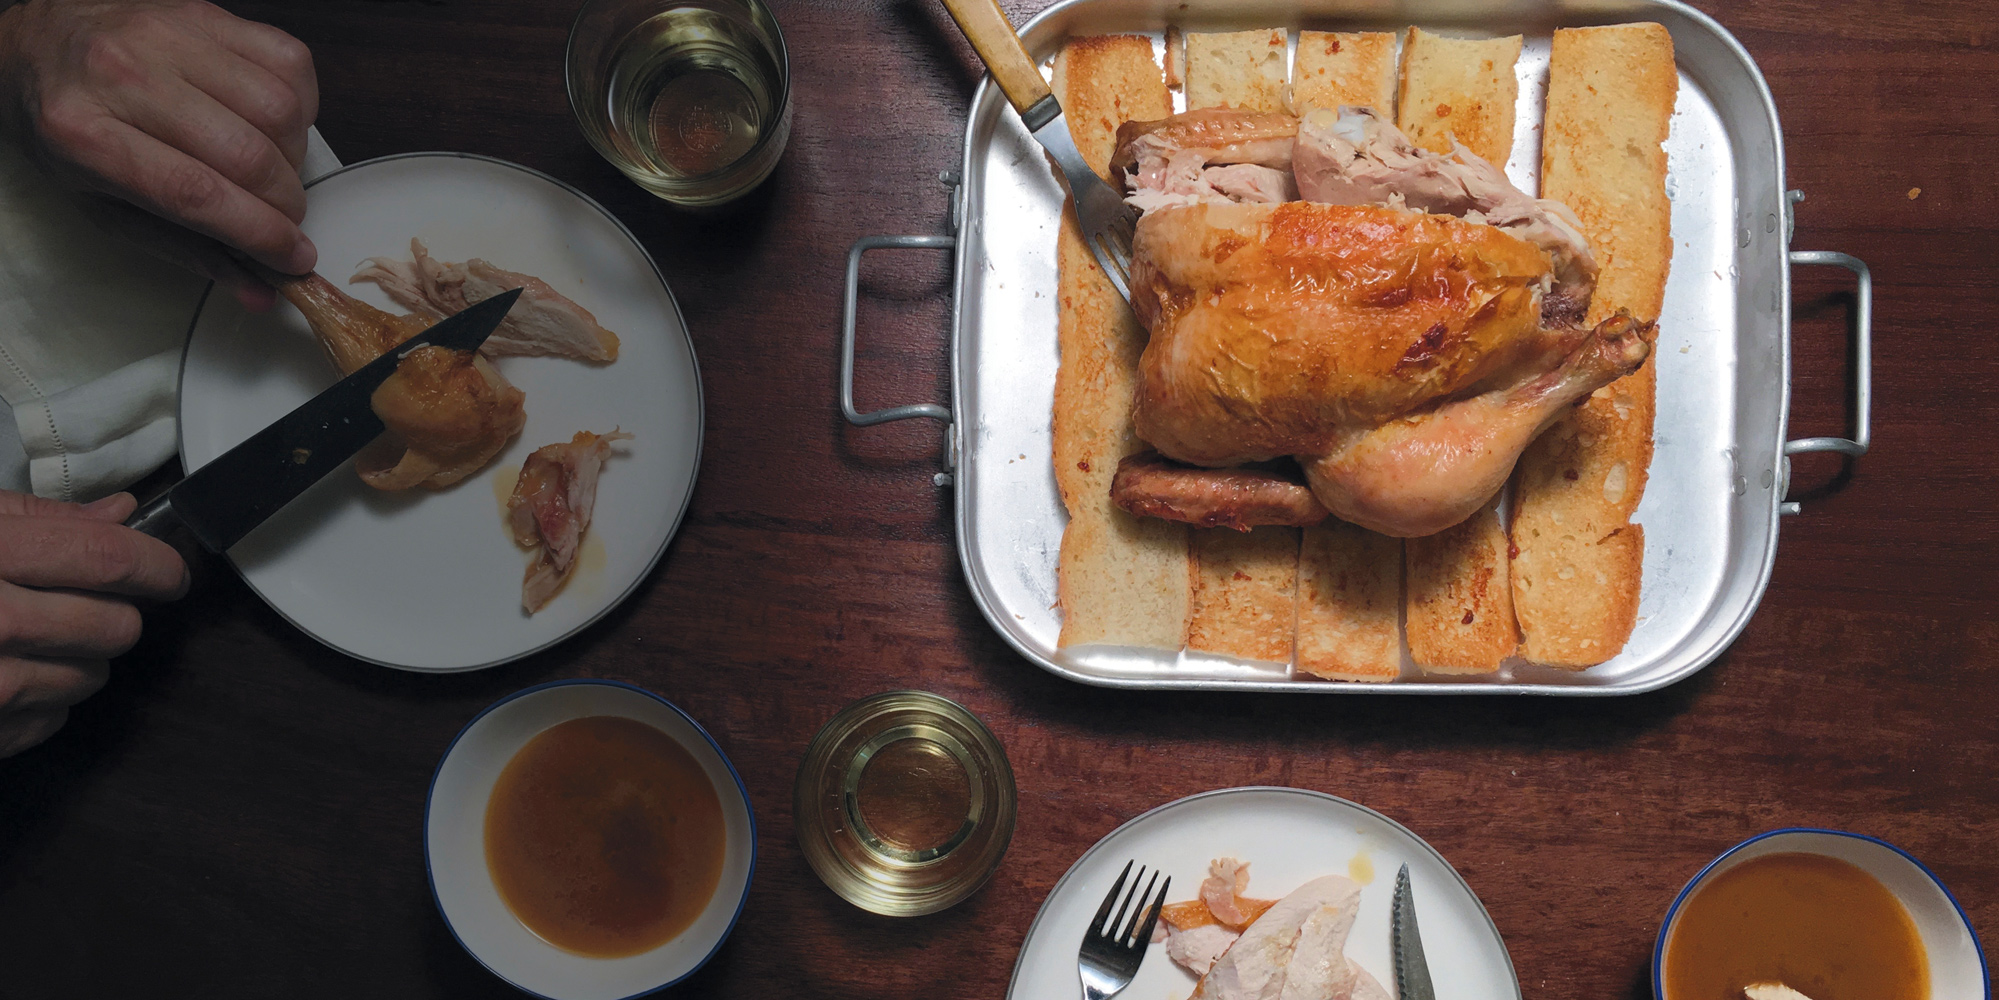
One Pot Chicken
FEEDS 6
True confession: When it comes to a roast or rotisserie chicken, I don’t care a hoot about crisp skin. Sure, I want it flavorful, and golden brown is always nice, but what I’m after is great meat. Freak? I think not. Consider those rotisserie chickens that fly out of megamart deli sections. By the time they get to the parking lot, steam has erased any “crispness” from the equation, and yet Americans probably buy more of them than they do whole raw chickens.
So here is my recipe for roast chicken. I’ve never done this on television because it rarely creates a “camera perfect” skin, but listen to me…it’s the best chicken I’ve ever made. And it may just be the easiest.
⅓ cup plus 1 teaspoon kosher salt
1 “roaster” chicken in the 4-pound range
2 teaspoons peanut or canola oil
1. Dissolve ⅓ cup of the salt in 2 quarts water in a container large enough to hold the chicken. Make sure the bird’s cavity is empty and place in the brine, breast-side down. I typically use a straight-sided container to make sure the bird will submerge. Cover and refrigerate for 8 to 12 hours. (I usually do this in the morning after I make coffee so that I can cook it that night.)
2. To cook, place a 4-quart cast-iron Dutch oven H M in the middle of your actual oven (the one with knobs and buttons on it) and crank the controls to 550°F. This is typically as hot as a residential oven gets unless you file down the lock and set it to “clean,” which you never would because it’s illegal…right?
3. Give the ovens (both of them) at least 30 minutes to get hot. Meanwhile, drain and thoroughly dry the bird with paper towels, allowing it to come to room temp while you wait on the oven.
4. When the oven is good and hot, rub the bird down with the peanut oil and sprinkle on the remaining 1 teaspoon salt, then open the oven door, slide out the rack holding the Dutch oven, remove the lid, and drop the bird straight down into it, breast-side up. Quickly position the rocket-hot lid atop, slide the rack back in, and get the door closed as quickly as possible.
5. Leave the chicken alone for 15 minutes. Then remove the lid and baste the top of the bird with some of the juices that have accumulated at the bottom of the pot.* Cook, uncovered, for 12 minutes more. Leave the Dutch oven’s lid in the oven to keep it warm for the next step.
6. Remove the Dutch oven to a safe spot (the cooktop would be fine), replace the lid, and don’t touch for 10 minutes. Then remove the lid and allow the bird to rest for 5 minutes. At this point you might want to use your instant-read thermometer H to take a reading right in the middle of the breast. I usually see 150°F at this point. And yes, that’s okay. Carryover will take care of the rest.
7. Slide a pair of tongs H or a wooden spoon into the cavity and gently lift the bird out to a platter or carving board, tilting it first so that any hot juices can exit into the pot.
8. I serve this in a rather unorthodox but insanely satisfactory manner. Pour the juices (a lovely comingling of schmaltz and jus) into a few bowls and position them around the platter, which should be central on the table. Give everyone a knife (not too long or sharp) and allow them to carve off hunks of bird, which should then be dipped (by hand) into the juices and consumed forthwith. Plates? We don’t need no stinkin’ plates! But you will need several napkins. You’re welcome.
* I know…I’ve gone on the record many times as being anti-baste, but that’s when turkey was the critter in question, and turkey ain’t chicken. In this case we want to promote browning, and getting some of the fallen fat up top will assist that process…
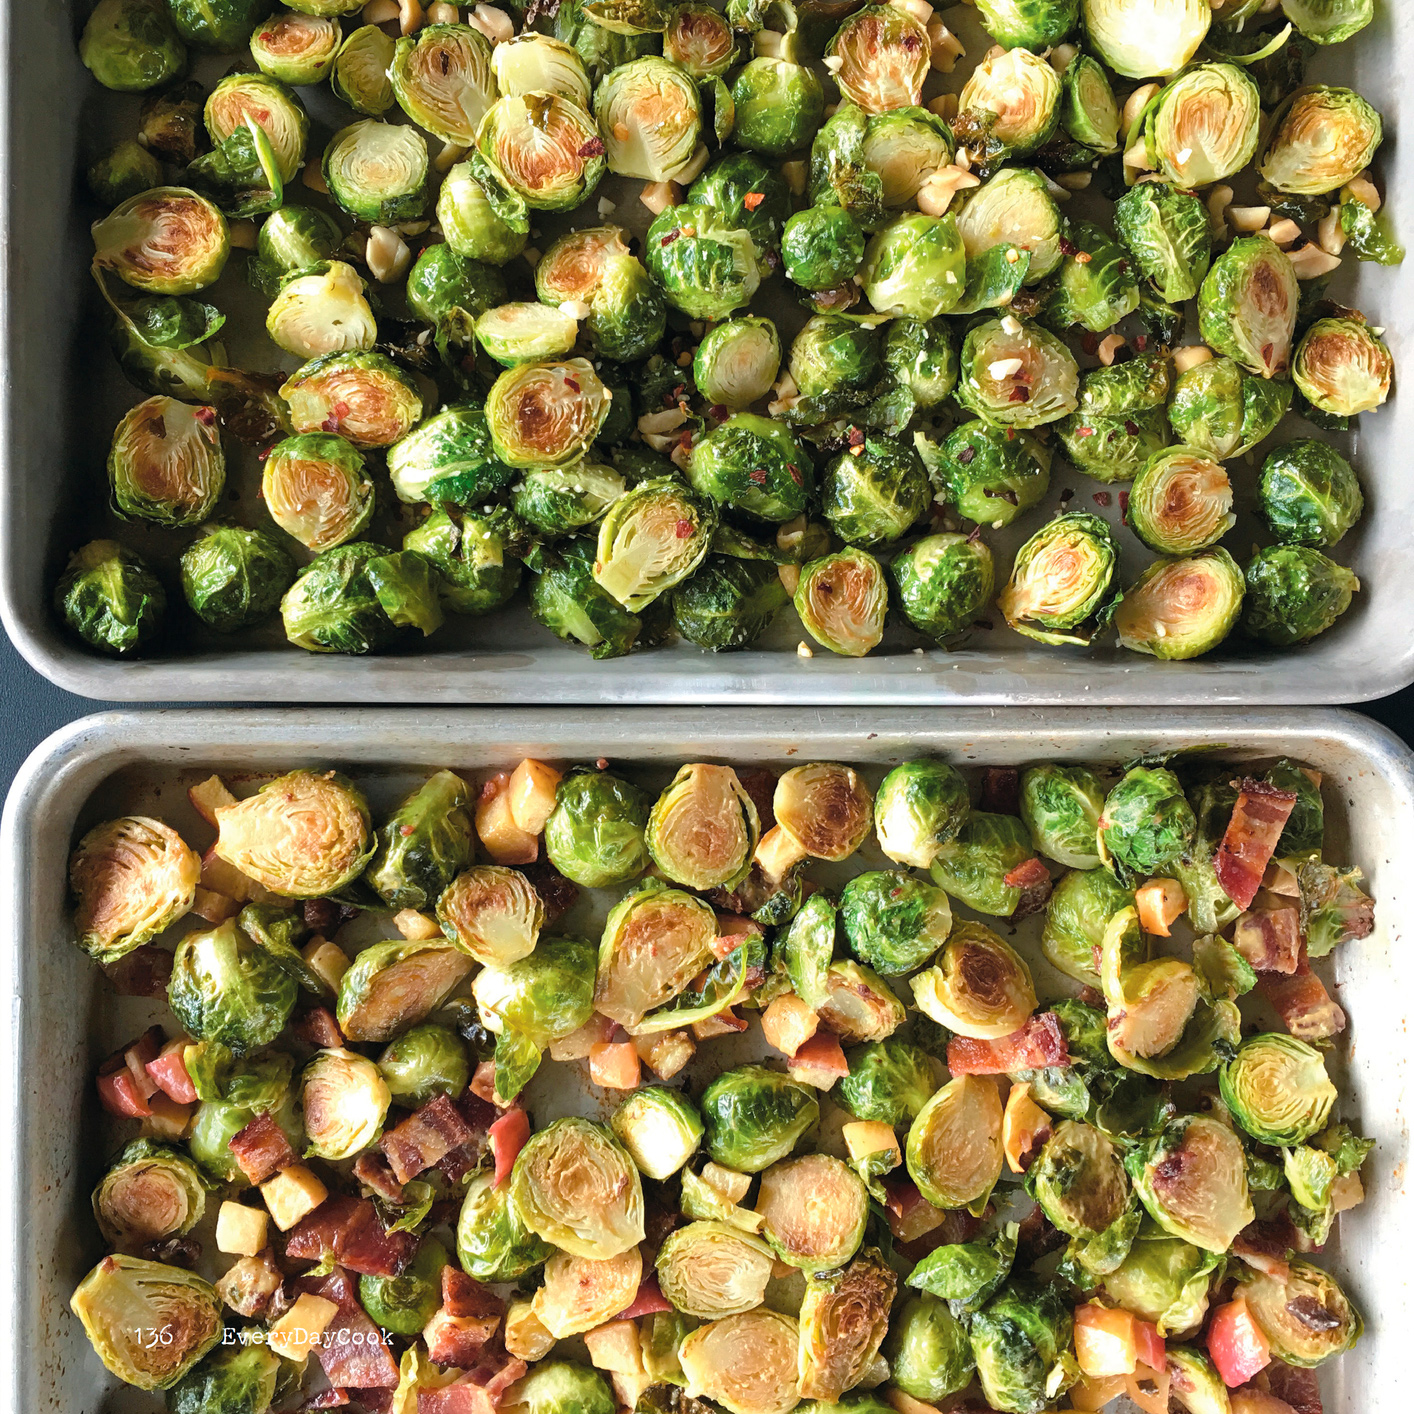
Heavenly Orbs of Belgian Goodness
FEEDS 4 AS A SIDE
In November 2008, a Swede named Linus Urbanec set the world record, consuming 31 brussels sprouts in one minute. I’m telling you right now…I can beat that. These pygmy cabbages are hands down my favorite vegetables and this is my everyday method for cooking them…with a variation.
1½ pounds fresh Brussels sprouts
3 tablespoons olive oil
kosher salt
½ teaspoon sesame oil
½ teaspoon fish sauce P
½ teaspoon red pepper flakes P
2 ounces roasted peanuts, chopped
1. Heat the oven to 425°F.
2. Trim the dry ends from the sprouts and remove any yellow outer leaves, then halve the sprouts longitudinally.
3. Coat the sprouts with the olive oil and salt to taste in a large bowl and spread in an even layer on a half-sheet pan, placing the cut sides down. Roast for 20 to 25 minutes or until the sprouts are lightly browned and tender.
4. Toss the warm sprouts with the sesame oil, fish sauce, red pepper flakes and peanuts. Serve warm.
Bacon Maple Sprouts
FEEDS 4 AS A SIDE
Nothing complements the flavor (and counteracts the health benefits) of Brussels sprouts quite like salty pig candy.
4 rashers bacon
1½ pounds Brussels sprouts
1 large apple, chopped
2 tablespoons Dijon mustard
1 tablespoon maple syrup
1. Heat the oven to 350°F.
2. Place the bacon on a half sheet pan and roast for 20 minutes, flipping once, until crisp. Remove the pan from the oven and the bacon from the pan.
3. While the bacon is making the kitchen smell awesome, trim and split the sprouts as described in step 2 of Heavenly Orbs of Belgian Goodness.
4. Toss the sprouts and apples with the bacon fat and spread into an even layer on a half sheet pan, placing as many sprouts cut-side down as possible.
5. Roast for 20 to 25 minutes, until the sprouts are browned and tender. Crumble the bacon while the sprouts roast.
6. Meanwhile, whisk together the mustard and syrup. When the sprouts and apples are brown, put them back in the bowl you seasoned them in and toss with the maple mustard and bacon.
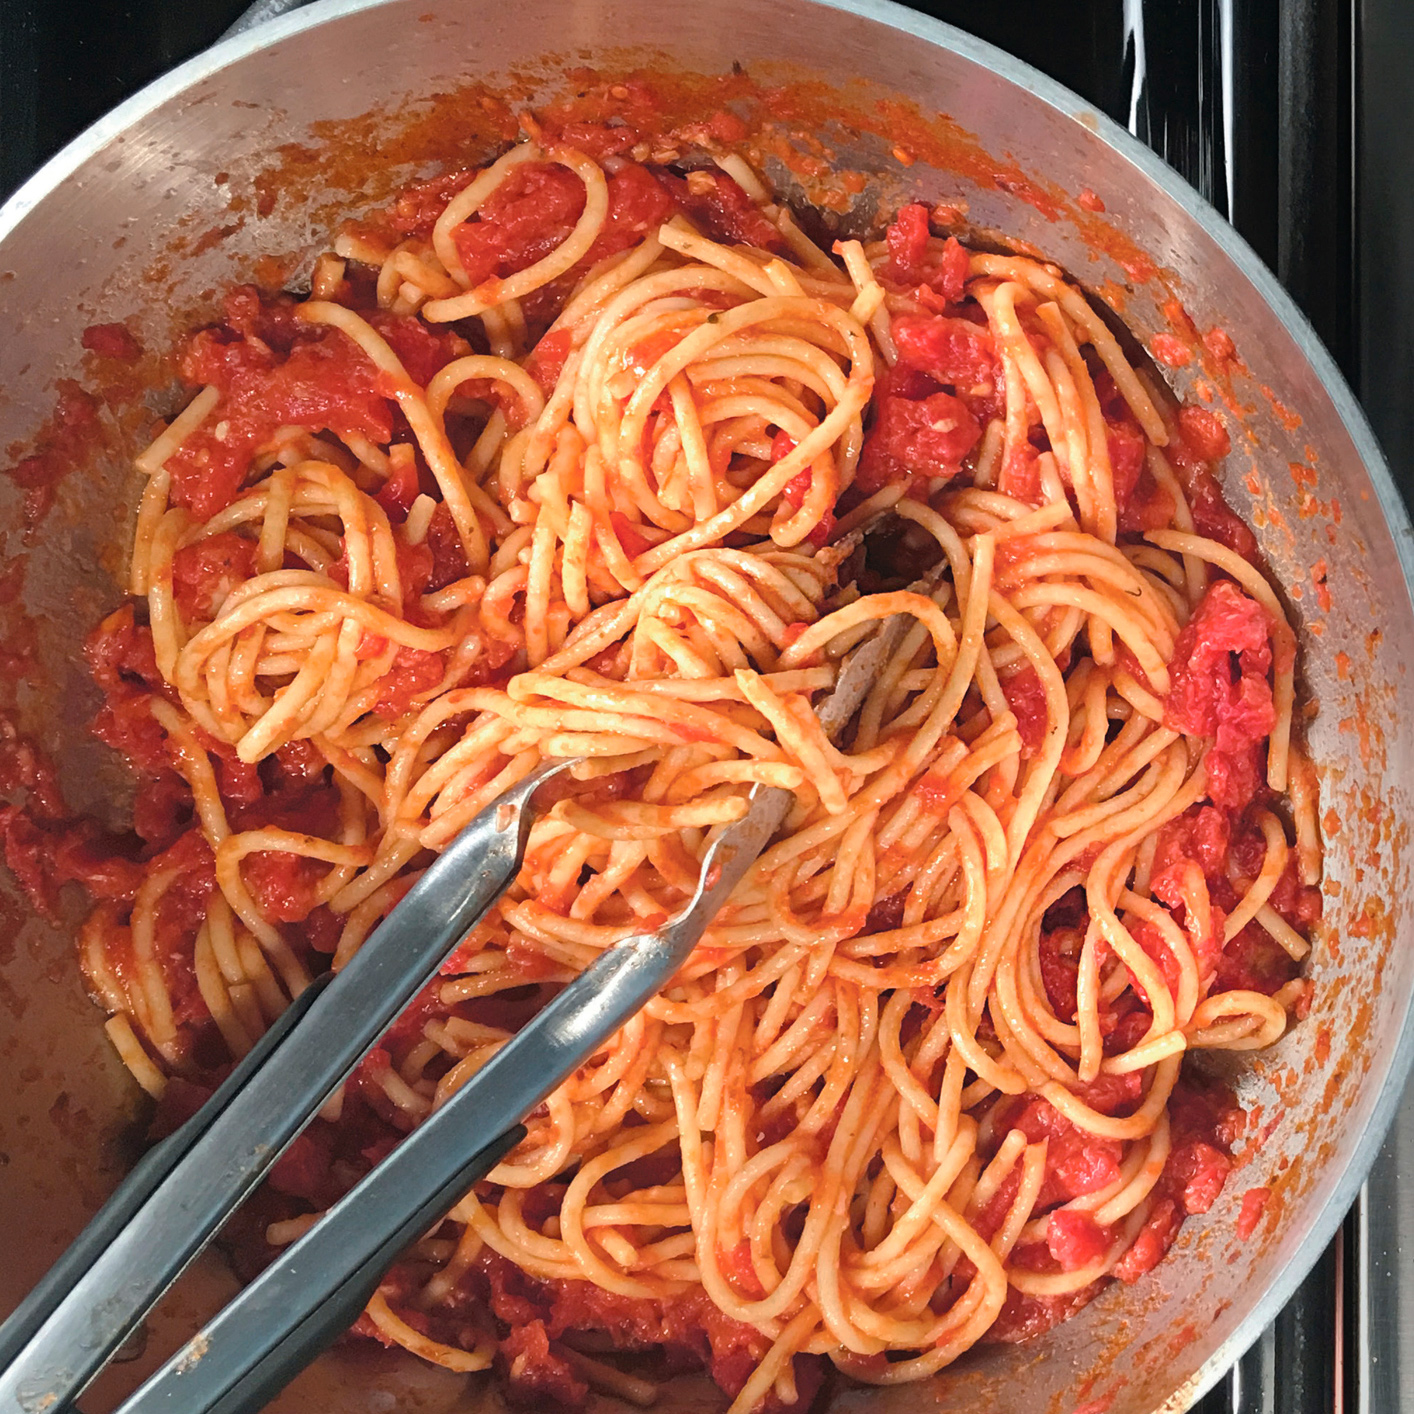
Weeknight Spaghetti
FEEDS 2
I remember sneaking into the theater to see The Godfather when it first came out, and it taught me a few valuable lessons.
1. Horses are messy.
2. Whatever cannoli are, they’re better than guns.
3. When you “go to the mattresses,” the best spaghetti sauce you can make is built on canned tomatoes.
Well, I feel like I’m “going to the mattresses” just about every day, so I’ve Bobby Flay-ed* my old recipe for quick assembly.
16 ounces extra-virgin olive oil
6 large garlic cloves, crushed
3 thyme sprigs
2 rosemary sprigs
10 basil leaves, plus more for serving
1 teaspoon red pepper flakes P
1 28-ounce can whole San Marzano tomatoes, drained
1 teaspoon kosher salt
1 or 2 white anchovies P
½ pound dry spaghetti
1 tablespoon kosher salt
2 tablespoons (¼ stick) unsalted butter
Parmesan cheese
1. Combine the olive oil, garlic, thyme, rosemary, basil and red pepper flakes in a narrow saucepan over medium heat. As the heat builds, there will be considerable bubbling as the water cooks out of the garlic and herbs. When this dies down and the basil and garlic turn brown, kill the heat and let the mixture steep until cool. Strain the oil into a jar and toss the solids. Use immediately or cover tightly and freeze for later use.**
2. Heat 3 tablespoons of the herb oil in a wide sauté pan over medium heat. Add the tomatoes and salt to the pan, and cook for 5 to 7 minutes, breaking up the tomatoes as they soften, using a wooden spatula or an old school potato masher.
3. Reduce the heat, stir in the anchovies, and cook for another 5 minutes, or until the anchovies completely vanish from view.
4. Meanwhile, cook the pasta using the Cold Water Pasta Method M.
5. Fish the spaghetti out of the water with tongs H or a hand strainer, allowing most but not all the water to drain away. Stir the pasta into the sauce and cook on low for 5 minutes. Finish with the butter, Parmesan and fresh basil. If the sauce seems too dry, add ¼ cup of the pasta water and serve.***
* I served for several years as the culinary commentator on a TV program called Iron Chef America. One of the Iron Chefs, a guy named Bobby Flay, started pretty much every battle by having one of his sous-chefs make up batches of herb and chile oils. Smart move, because if you have a good flavored oil around, you can basically start a lot of dishes in medias res.
** The U.S. government considers herbal oils, especially those containing garlic, to be potentially dangerous because the anaerobic environment provided can support the growth of the microbial nasty that causes botulism. The heat of cooking will kill the nasties, but any spores they produce are heat resistant. The freezer is your best bet for keeping the oil stable for up to 2 months.
*** Starchy pasta water is the perfect liquid for adjusting pasta sauces at the last minute. I don’t know a single chef who throws this magical elixir down the drain until the night is over.
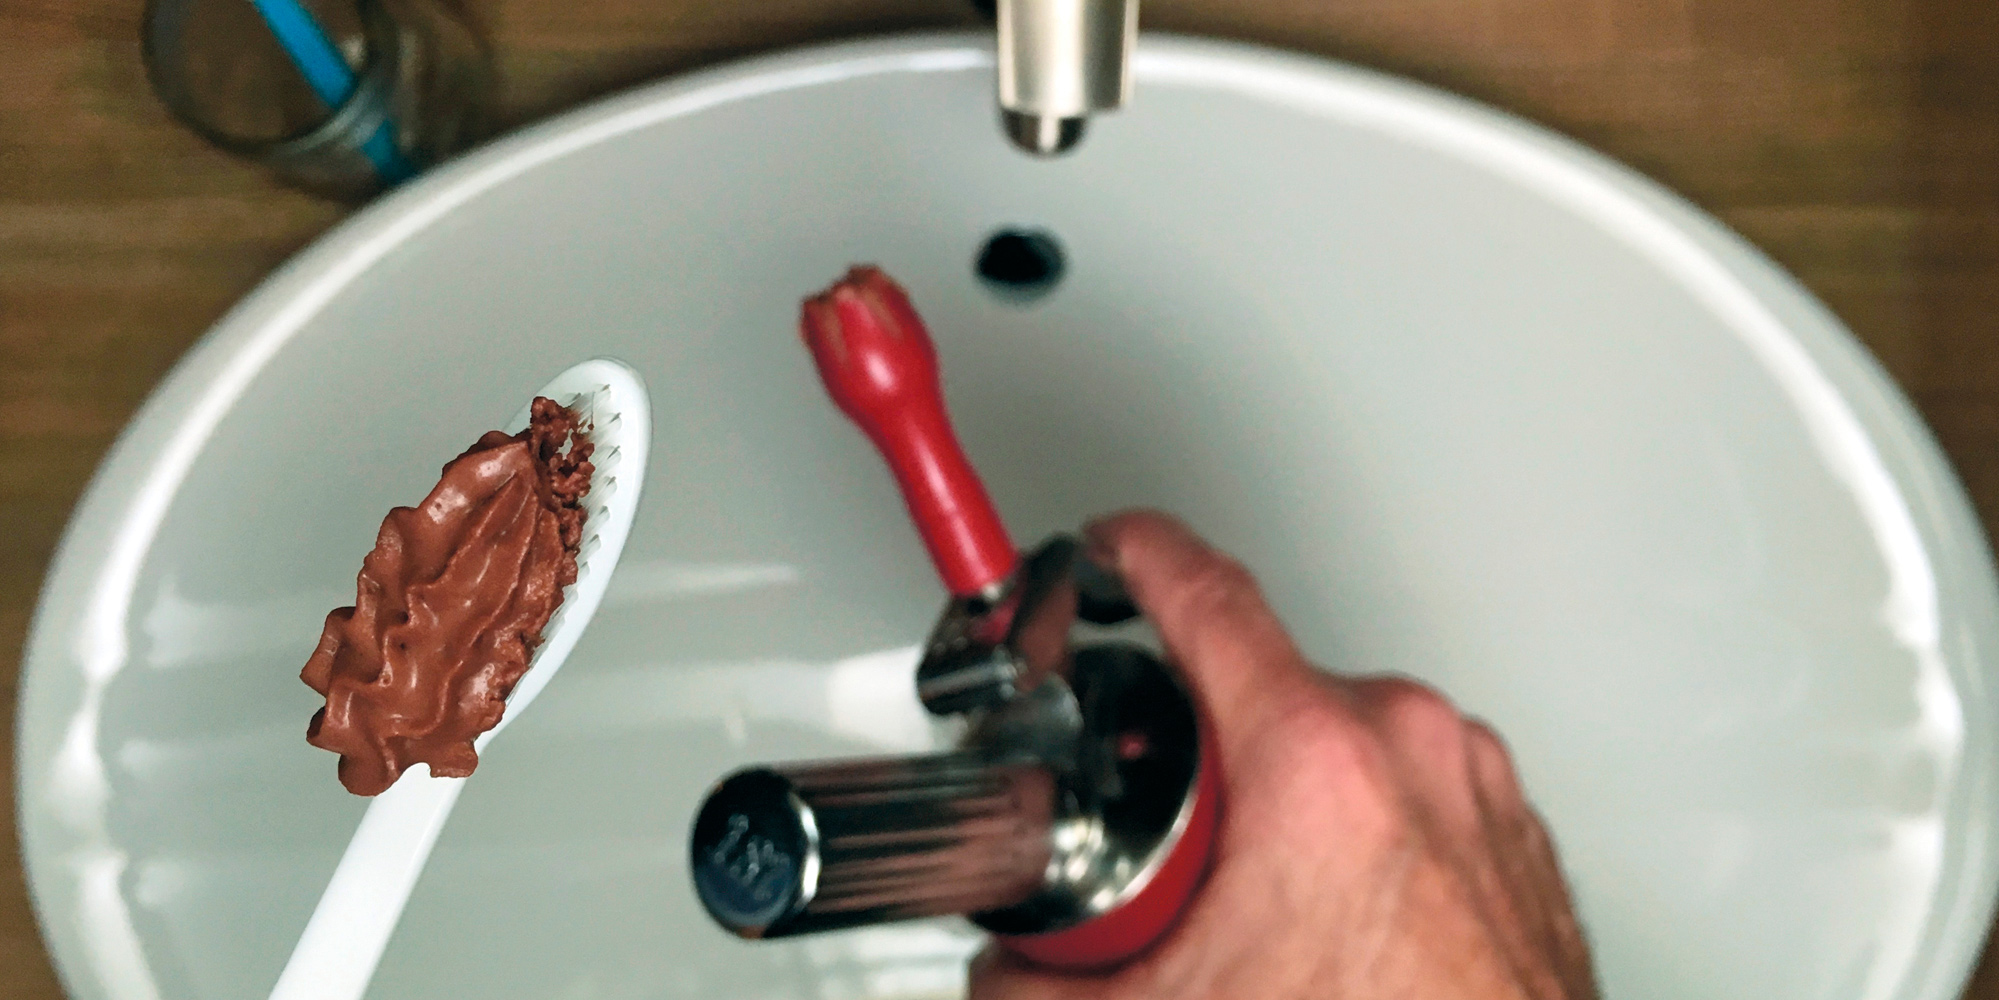
Cream Whipper Chocolate Mousse
FEEDS 4 AS DESSERT
8 ounces 54 percent bittersweet chocolate, finely chopped
4 ounces strong coffee, at room temperature
4 ounces water
1½ ounces sugar
SPECIAL EQUIPMENT
1 liter whipped cream siphon H
One N2O charger cartridge
1. Combine a few handfuls of ice cubes with a couple quarts of water in a large bowl and set aside.
2. Add enough water to a 10-inch straight-sided sauté pan to come 1 inch up the side and bring to a bare simmer over medium heat. Combine the chocolate, coffee, water and sugar in a medium metal bowl and set in the simmering water.* Stir occasionally for 4 to 5 minutes, until the chocolate is almost completely melted and the sugar is dissolved.
3. Remove the bowl from the water and set on the ice bath. Whisk for 2 to 3 minutes, or until the mixture drops to 60°F and is the consistency of heavy cream.
4. Load the mixture into the whipper, being mindful of the maximum fill line. Screw on the lid and, following the manufacturer’s instructions, charge with one N2O cartridge. After you hear the gas discharge, shake vertically 15 to 20 times, then set aside for 1 minute.
5. To serve (into cocktail glasses, of course), invert and slowly squeeze the trigger to dispense.
* Chocolate is often melted in a double-boiler rig, that is, a bowl suspended over boiling water so that steam alone heats the bottom of the pan. This isn’t one of those times. Since a considerable amount of liquid has already been added to the chocolate, you can be a bit more aggressive, thermally speaking, and let the bowl touch the water.
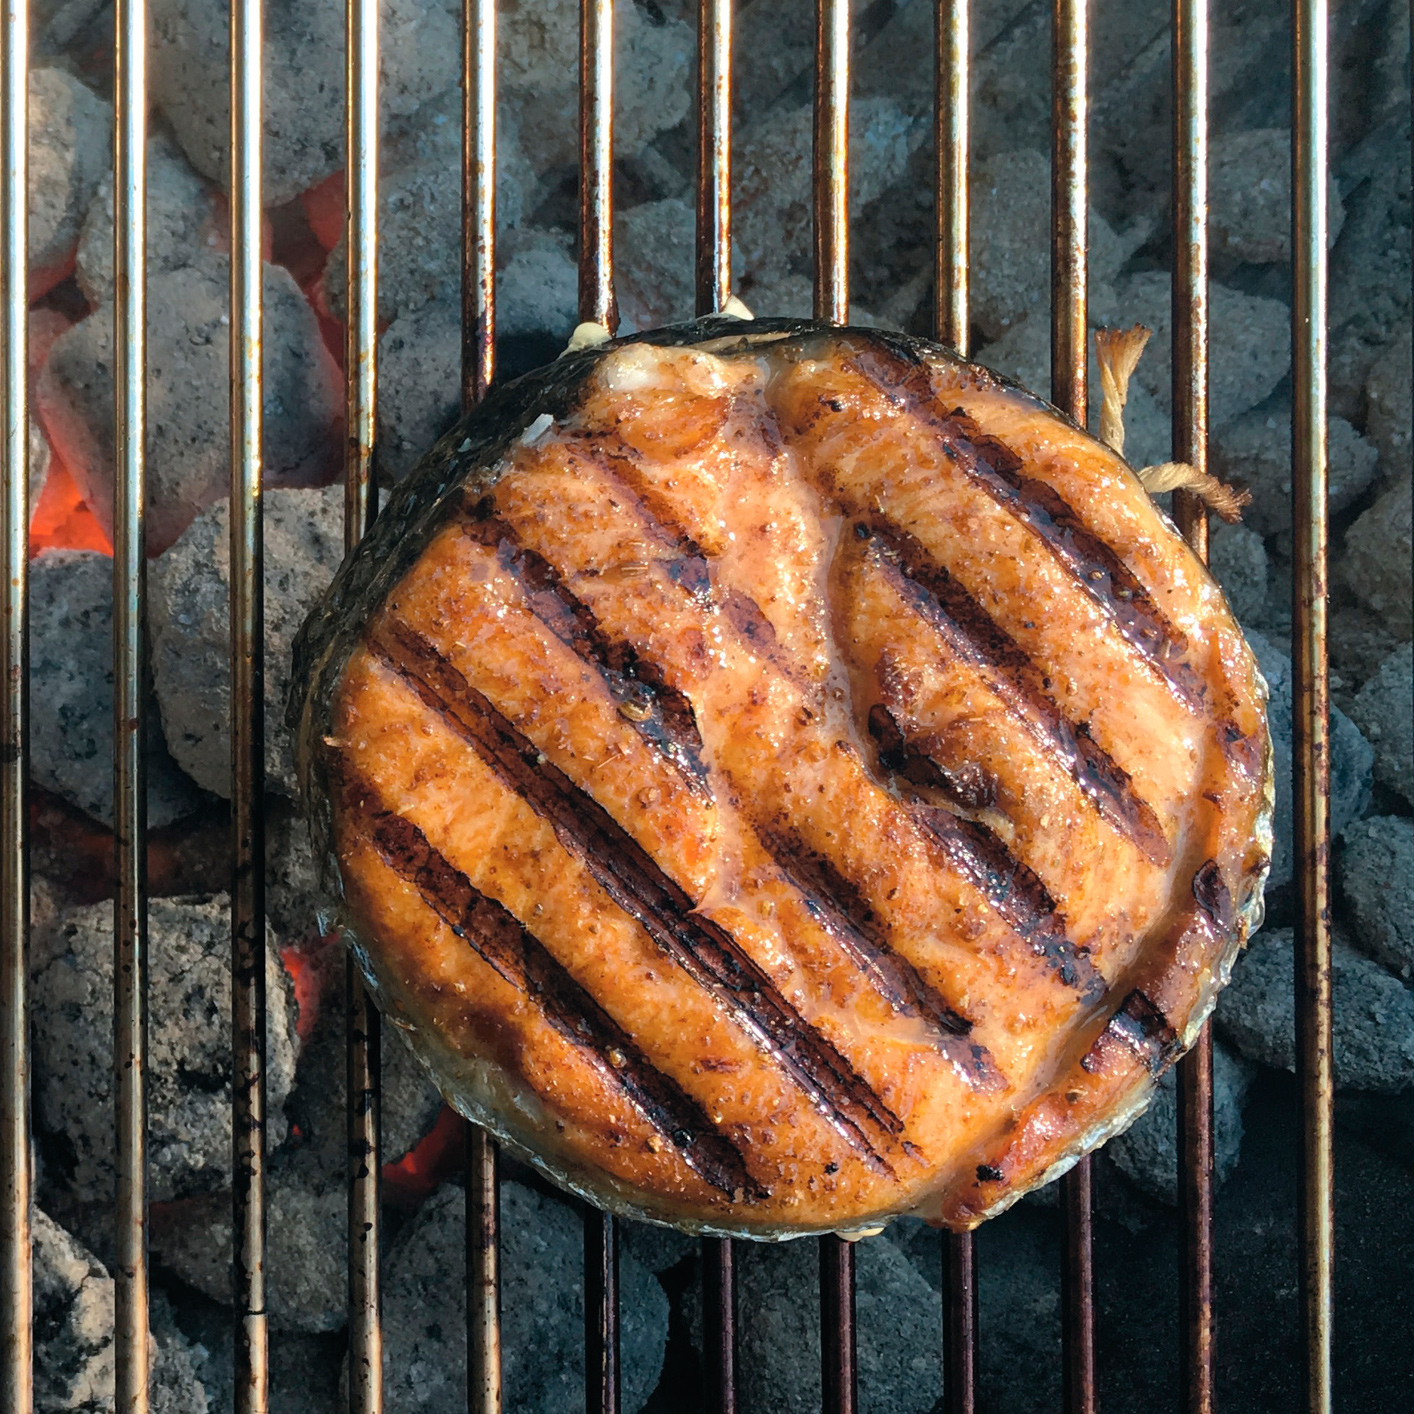
Garam Masalmon Steaks
FEEDS 4
Salmon is one of the best grilling fish on earth because it responds so well to smoke and high heat. This spice mix isn’t actually a full-on garam masala, but it’s close enough to throw around in the title of the recipe.
By the way, if your grill grate looks more mineral than metal, you need to get after that thing with either a steel brush or a pumice stone or brick, which can take off just about anything. Just make sure to give the grate a good rubdown with a lightly oiled cloth before cooking because pumice dust is a little too crunchy.*
4 1-inch-thick salmon steaks (about 12 ounces each)
1 teaspoon cumin seeds
1 teaspoon coriander seeds
1 teaspoon fennel seeds
½ teaspoon dry green peppercorns
Canola oil
Kosher salt
1. Prepare the grill by lighting 4 quarts of charcoal (one starter chimney’s worth M) or turning a gas grill to medium-high.
2. Examine the steaks for pin bones by rubbing your fingers lightly over the surface of the meat and use a clean pair of needle-nose pliers to remove them.** Using a sharp paring or boning knife, trim the backbone from the inside of the steak, then trim the stomach flaps of each steak so that one side is missing about 2 inches of skin and the other, 1 inch of meat. Roll the skinless section up into the hollow cavity, then wrap the flap of skin around the outside to form a round resembling a filet mignon. Tie in place with two passes of butcher’s twine. Do not tie it too tight or the fish will pop out during cooking.
3. Combine the cumin, coriander, fennel and peppercorns on a double thickness of heavy-duty aluminum foil H and toast over the charcoal starter, shaking gently with tongs H until the seeds become fragrant. Cool briefly, then coarsely grind in a blade-style electric coffee grinder.
4. Coat the steaks lightly with canola oil, season with a sprinkling of salt, then liberally sprinkle the toasted spice mixture on both sides of the steaks.
5. When the charcoal is completely lit, move it from the starter to the grill grate and pile so the coals cover an area about 13 by 9 inches. Place the cooking grate over for several minutes to heat, then quickly wipe with a rolled dish towel or paper towels (held with tongs) dipped into a bit of cooking oil.
6. Grill the fish to medium-rare, about 3 minutes per side. Keep the grill lid closed and do not move the fish more than once during the process. The fish should be well colored on the outside and barely translucent at the center.
* At least once a year I put my grill grates in my oven and put them through a “self-clean” cycle. This works well with steel or iron. If you’ve got nonstick grates, you have some serious self-examination to do.
** I keep a pair of stainless steel (food-grade) pliers around for this H. Oh, and make sure you pull with the grain of the meat.
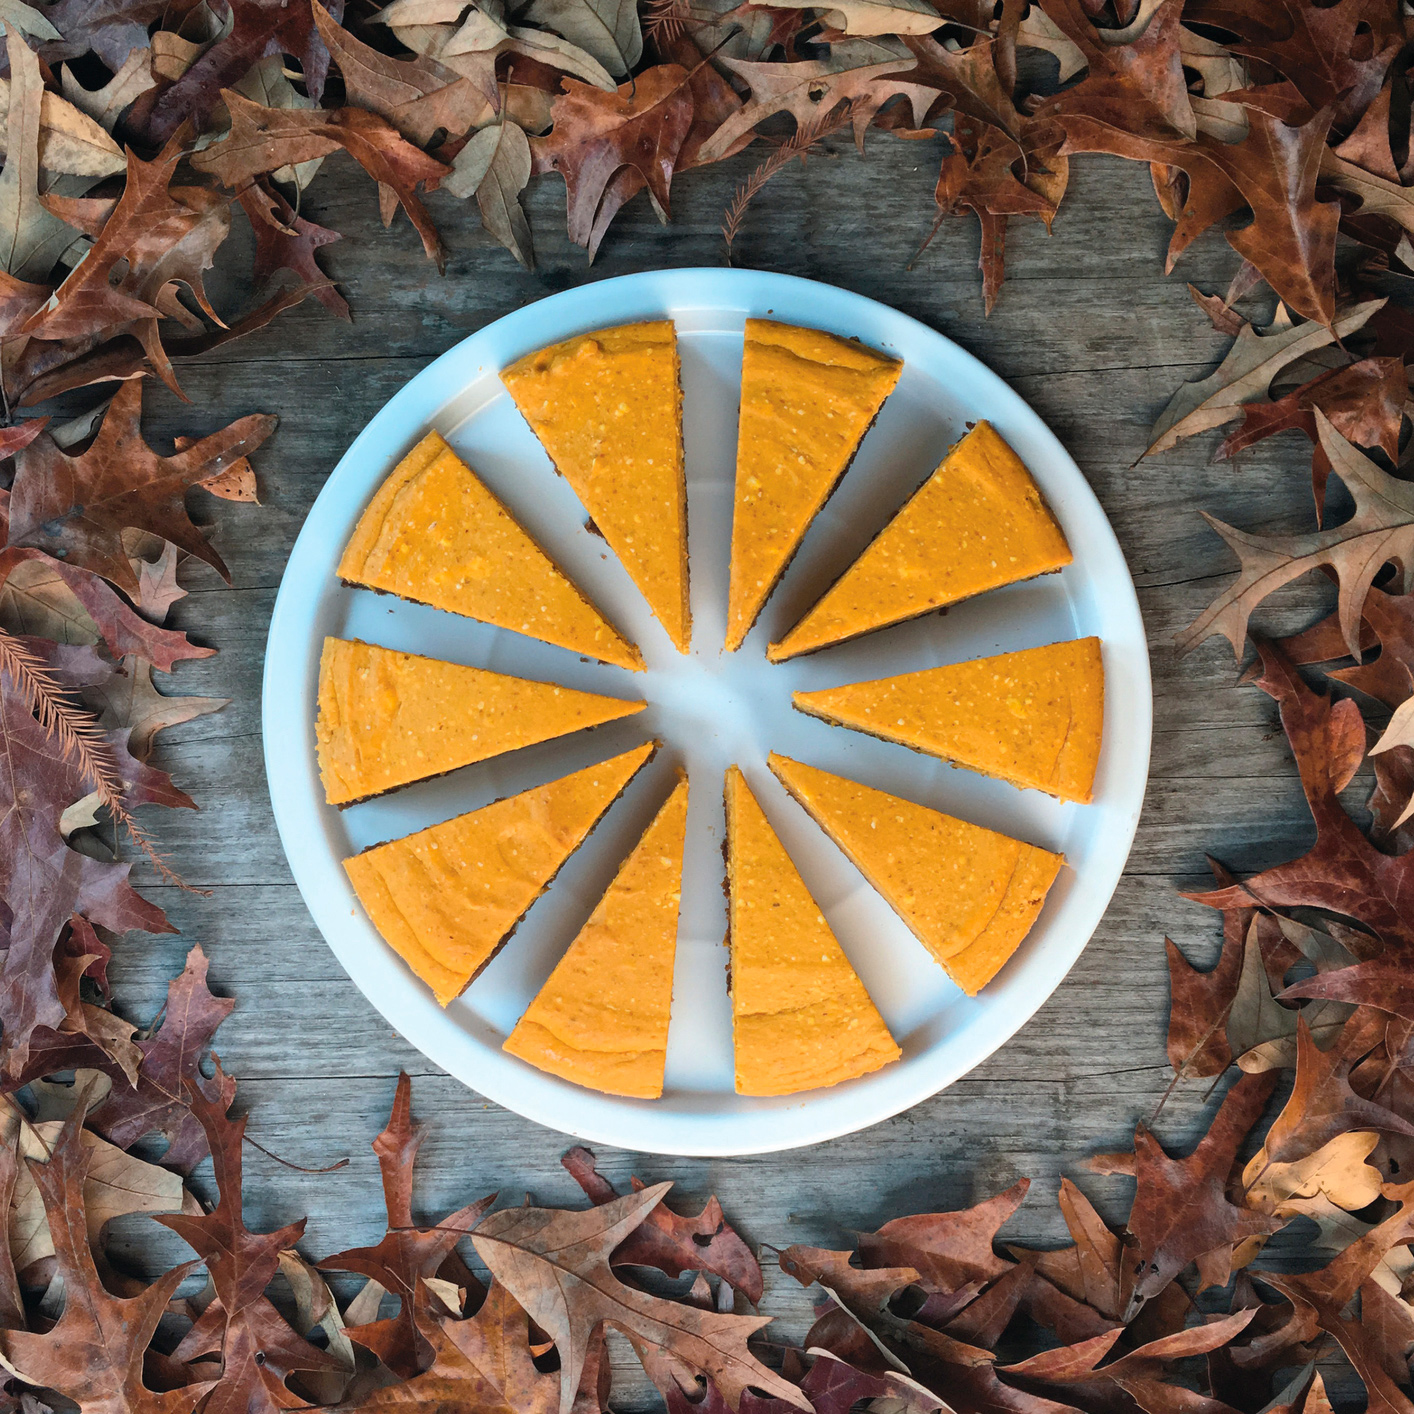
Pumpkin Cheesecake
SERVES 12
This procedure is all about bringing the temperature of the custard up slowly so that the texture will be smooth. Since water can absorb a lot of heat without actually increasing in temperature, it (and the towel) provides considerable thermal cushioning. Also, when exiting the oven, the center should still be a bit wobbly. If it’s completely set, it’s gonna crack like the San Andreas Fault when it cools.
15 ounces canned pumpkin puree
1 teaspoon ground ginger
1 teaspoon freshly grated nutmeg P
6 ounces plus 1 tablespoon packed dark brown sugar
7 ounces gingersnap cookies
¼ teaspoon kosher salt
2 ounces (½ stick) unsalted butter, melted
3 large eggs
1 tablespoon vanilla extract
16 ounces cream cheese, at room temperature
SPECIAL EQUIPMENT
Electric kettle H
1. Bring the pumpkin puree to a simmer over medium heat in a 2-quart pot and stir occasionally for 2 to 3 minutes, until slightly thickened. Remove from the heat and stir in the ginger, nutmeg and 6 ounces of the brown sugar. Set aside for about 1 hour.
2. Heat the oven to 300ºF. Cut a parchment paper circle and long strip to fit the bottom and sides of a 9 × 3-inch round cake pan. Spray the inside of the pan with nonstick cooking spray, then stick the parchment pieces to the bottom and sides.
3. Spin the cookies, the remaining 1 tablespoon brown sugar and the salt in a food processor to fine crumbs. Drizzle the butter in while pulsing to combine. Transfer to the prepped pan and use the bottom of a 1-cup measuring cup or a water glass to uniformly tamp the cookie mixture into place.
4. Bake for 15 minutes, then remove and cool for at least 10 minutes. Meanwhile, bring 2 quarts water to a boil in an electric kettle. Position a rack in the middle of the oven and crank the heat to 300°F.
5. Whisk the eggs and vanilla together in a small mixing bowl and set aside.
6. Beat the cream cheese in a stand mixer fitted with the paddle attachment on low speed for 10 seconds. Add the cooled pumpkin mixture and mix for 30 seconds. Stop and scrape down the sides of the bowl, then crank the speed to medium and beat until the mixture is lump-free.
7. Reduce the speed to low and slowly incorporate the egg mixture, stopping to scrape down the sides of the bowl as needed. Mix for 1 minute or so more to make sure the mixture is uniform and smooth.
8. Lay a kitchen towel in the bottom of a roasting pan and position the cake pan in the center of it. Pour in the batter, then place the roasting pan on the oven rack. Finally, carefully pour the boiling water into the roasting pan, being careful to avoid getting any in the cake.
9. Bake for 2 hours. Turn the oven off and open the door for 1 minute, then close the door for 30 minutes.
10. Remove the cheesecake from the water bath and refrigerate for 6 hours to completely cool before serving. Do not attempt to remove the water bath from the oven with the cheesecake in it, unless you like water in your cheesecake.
11. To serve, place the cake pan into hot water for a few seconds, then run a small knife or metal spatula around the inner perimeter to free the parchment. Place a piece of parchment paper atop the cake and top with a large plate. Flip the cheesecake over and lift the pan off. Peel away the parchment and place a cardboard cake circle or large plate on the bottom of the cake and flip the whole thing over again so that it’s right side up. Remove any remaining parchment paper and you’re good to go.
12. To slice, before cutting, warm a long, thin knife over a low flame or in a glass of hot water; wipe it clean after every cut. I typically go for 12 slices. Store in the fridge, covered, for up to 1 week.
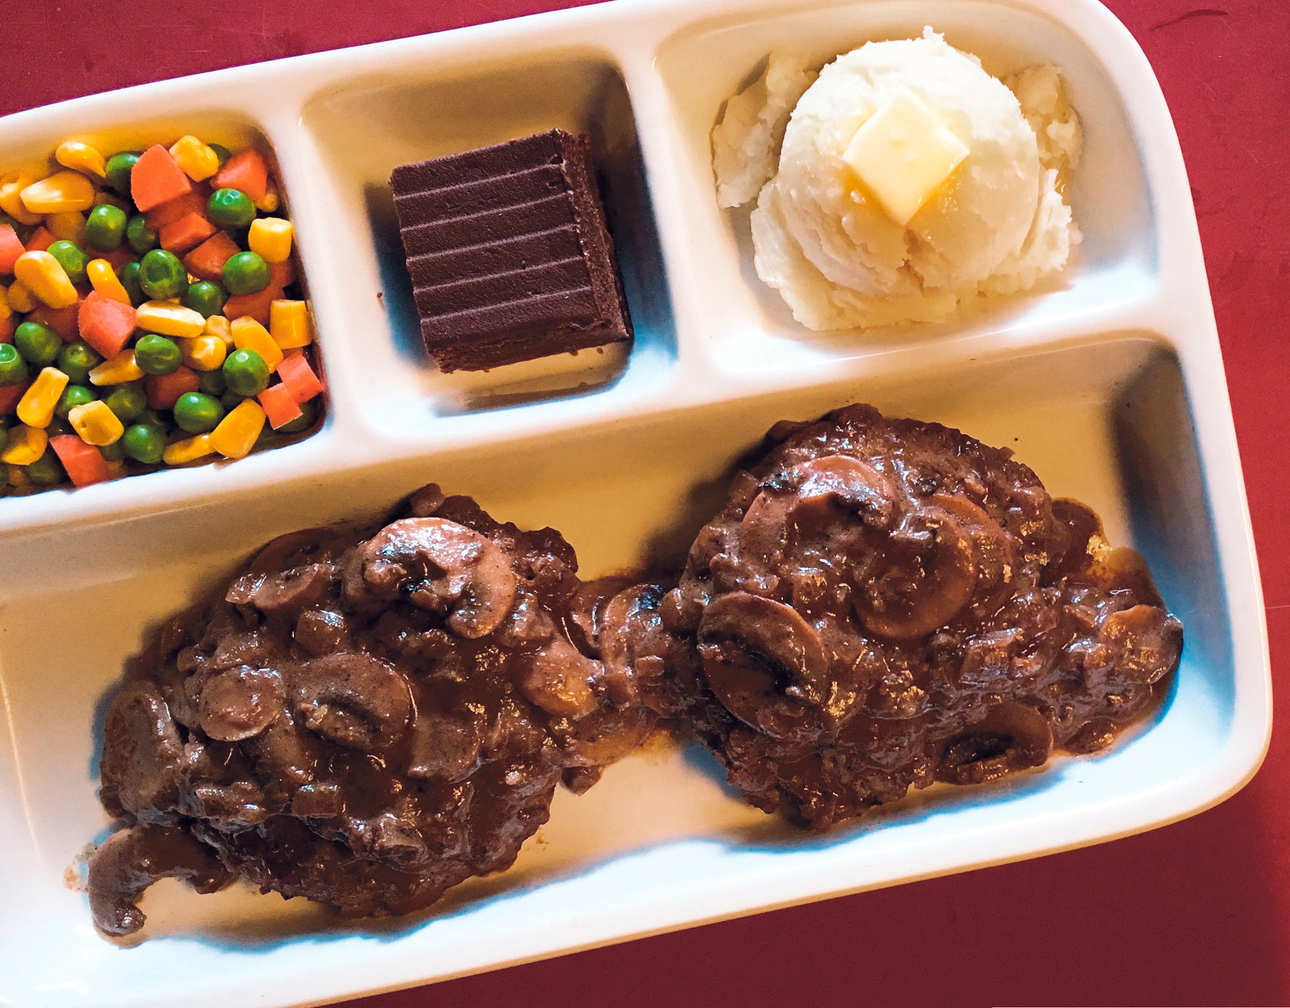
Salisbury Steak
FEEDS 4
Salisbury steak is actually named after one J. H. Salisbury, an English physician who prescribed beef back in the nineteenth century the way some doctors dose out Lipitor today. Although the classic is baked, my version is braised and served in a pan sauce enriched with my secret weapon: milk powder.
⅓ cup all-purpose flour
2 tablespoons nonfat dry milk powder
1 pound ground sirloin, dry aged if possible
½ teaspoon kosher salt
1 yellow onion, diced
2 teaspoons plus 1 tablespoon Clarified Butter M
1 pint button mushrooms, stemmed and sliced
⅔ cup low-fat milk
⅓ cup red wine
1 beef ramen flavor packet
1. Whisk the flour and milk powder together in a small bowl.
2. Divide the beef into 4 oval patties approximately 3 × 4 inches. Season both sides with the salt and dredge in the flour mixture. Set on a rack and set aside at room temp.*
3. Heat a large heavy sauté pan over medium-high heat and sauté the diced onion in 2 teaspoons of the clarified butter. When the onion is brown and soft, invite the mushrooms to the pan and cook until the mushrooms brown and reduce by half.
4. Transfer the mushroom mixture to a plate and add the remaining 1 tablespoon clarified butter to the pan. Once melted, add the patties and cook for 4 minutes on the first side.
5. Meanwhile, whisk together the milk, red wine and beef flavor packet in a separate bowl.
6. Flip the patties and cook for 2 minutes on the second side. Add the mushroom mixture back to the pan, distributing it evenly around the beef patties.
7. Pour in the milk mixture, cover, reduce the heat to medium and simmer for 10 minutes to thicken the sauce.
* This is to keep the surface of the meat as dry as possible.
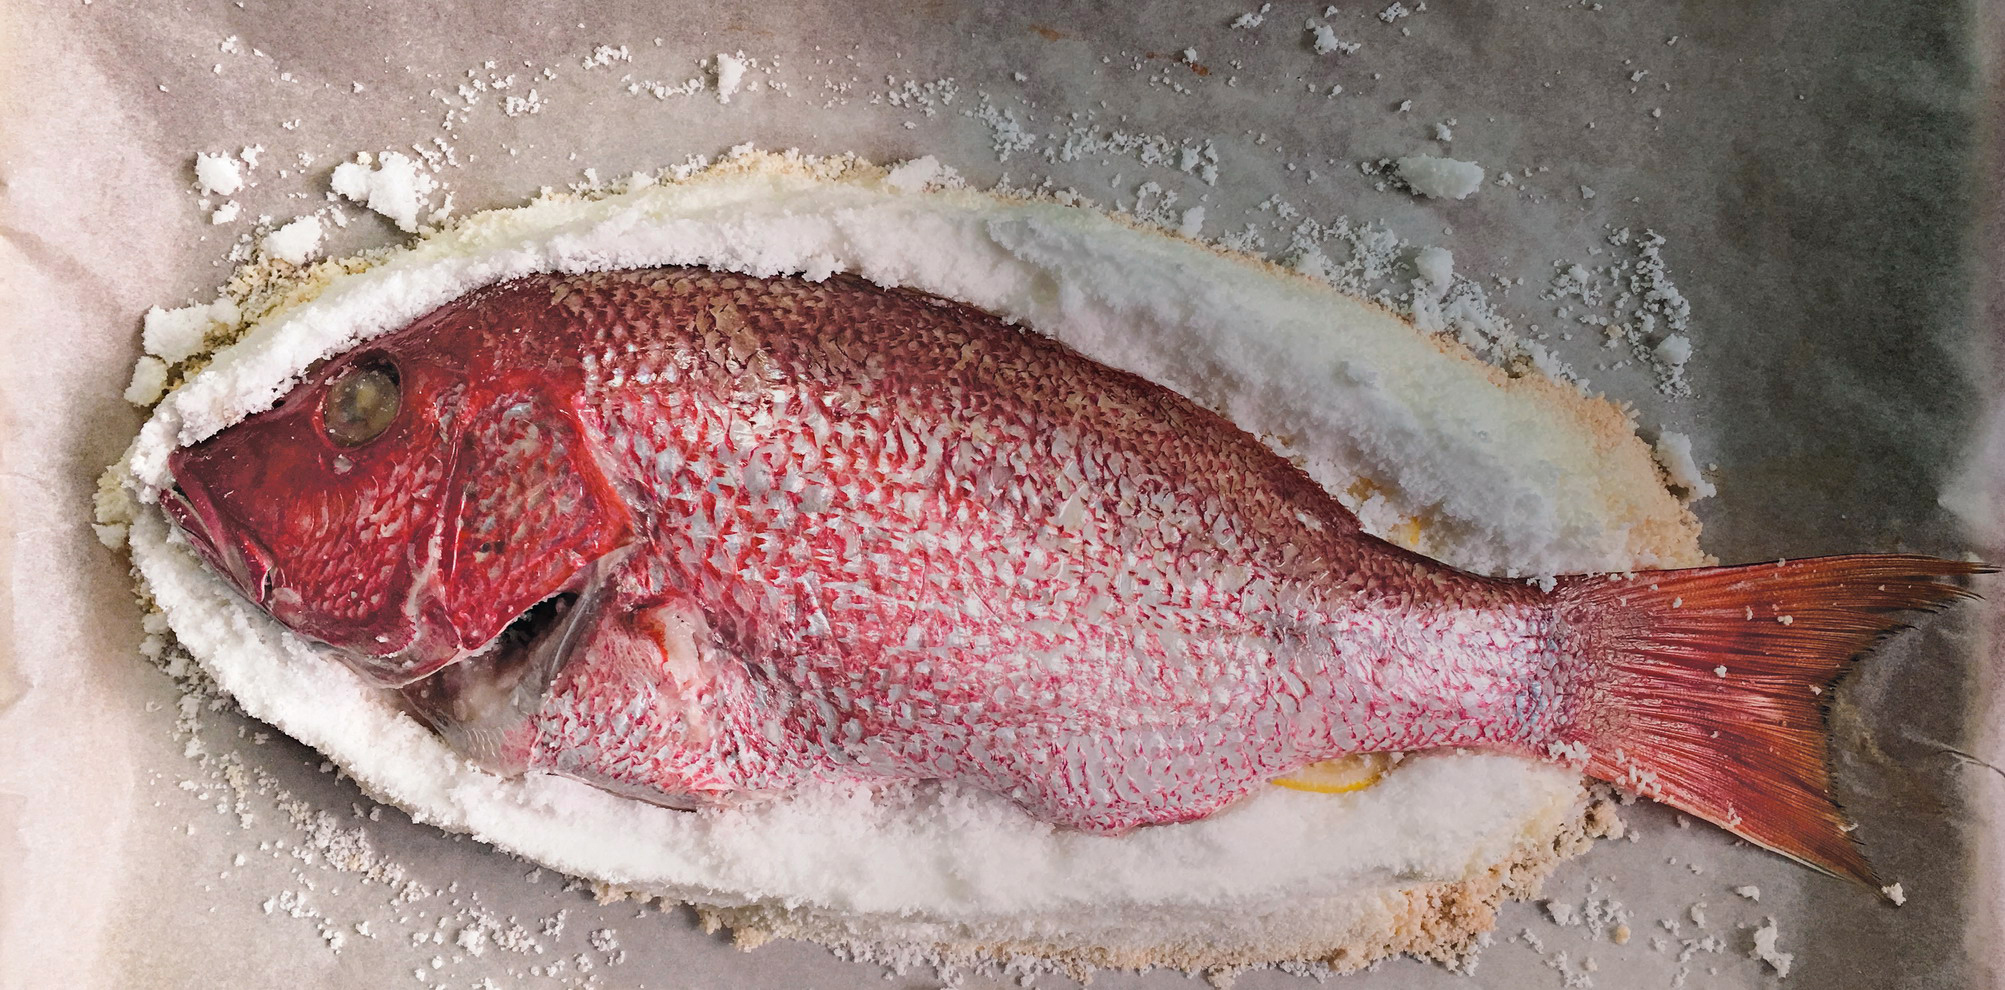
Snapper-Dome
FEEDS 4 AS AN ENTREE
“One fish enters, four meals leave.”
2 lemons, very thinly sliced
6 fresh flat-leaf parsley sprigs
1 1- to 2-pound whole yellow or vermillion snapper, cleaned and trimmed
3 pounds kosher salt
3 large egg whites
1. Heat the oven to 450°F. Line a half sheet pan with parchment paper.
2. Place a few lemon slices and the parsley sprigs inside the cavity of the fish.
3. Combine the salt, egg whites and ¼ cup water in a large mixing bowl, working it together with your hands until it resembles wet sand and holds together when squeezed. Place about a third of the salt mixture on the sheet pan and shape it into an oval roughly the size of the fish and ½ inch thick. Lay a few lemon slices across the salt and park the fish on top.
4. Pile the remaining salt mixture onto the fish, patting it into a dome ½ inch thick. The end of the tail should stick out of the end of the dome. (Depending on the size of the fish, you may not need all of the salt mixture.)
5. Roast for 15 to 20 minutes, until the dome is lightly browned and the fish reaches an internal temperature of 130°F. How will you know? Because you’ll jab your instant-read thermometer H right through the dome, that’s how.
6. Remove from the oven and let rest for 10 minutes.
7. Use a small hammer, meat tenderizer, mallet or rolling pin to crack the dome. The salt should come off easily in a few large slabs. Use a basting brush to brush any excess salt off the fish.
8. Use a fish knife or serrated pie server to make an incision all the way down the back of the fish and around the gill plate. Lift off the skin, working from head to tail.
9. Remove the fillet in pieces from the top side of the fish. Once the top fillet is removed, gently remove the bone by pulling the tail up and forward. Remove the bottom fillet below, leaving the skin behind.
Smoky Tequila Sour
SERVES 1
Sours are a classic cocktail family that includes the whiskey sour and the margarita. All sours call for a spirit, citrus and a sweetener. This one adds bitterness and smoke.* The drying sensation that lingers on the tongue after consuming something bitter leaves me wanting more. Amaro Montenegro is an Italian digestif, light and slightly bitter with a hint of orange.
2 limes
1 ounce 100 percent agave silver or blanco tequila B
1 ounce Amaro Montenegro B
½ small orange, juiced (about 1½ ounces)
1 tablespoon light agave nectar**
1 dash liquid smoke P
1. Fill an old-fashioned glass with ice and set aside.
2. Cut a wedge from 1 of the limes and reserve, then juice both limes (you should get about 2 ounces) into the bottom of a Boston-style cocktail shaker H. Add the tequila, Amaro Montenegro, orange juice, agave nectar and half a dozen or so ice cubes. Cover and shake for 30 seconds.
3. Strain the mixture through a cocktail strainer into the prepared glass. Add the liquid smoke, garnish with the lime wedge and serve immediately.
* I realize that many mezcals deliver smokiness, but I want to be able to mix with a tequila blanco, which is typically devoid of such complexity.
** If you’re going to sweeten a tequila drink, it makes sense to use a sweetner derived from the same botanical source.

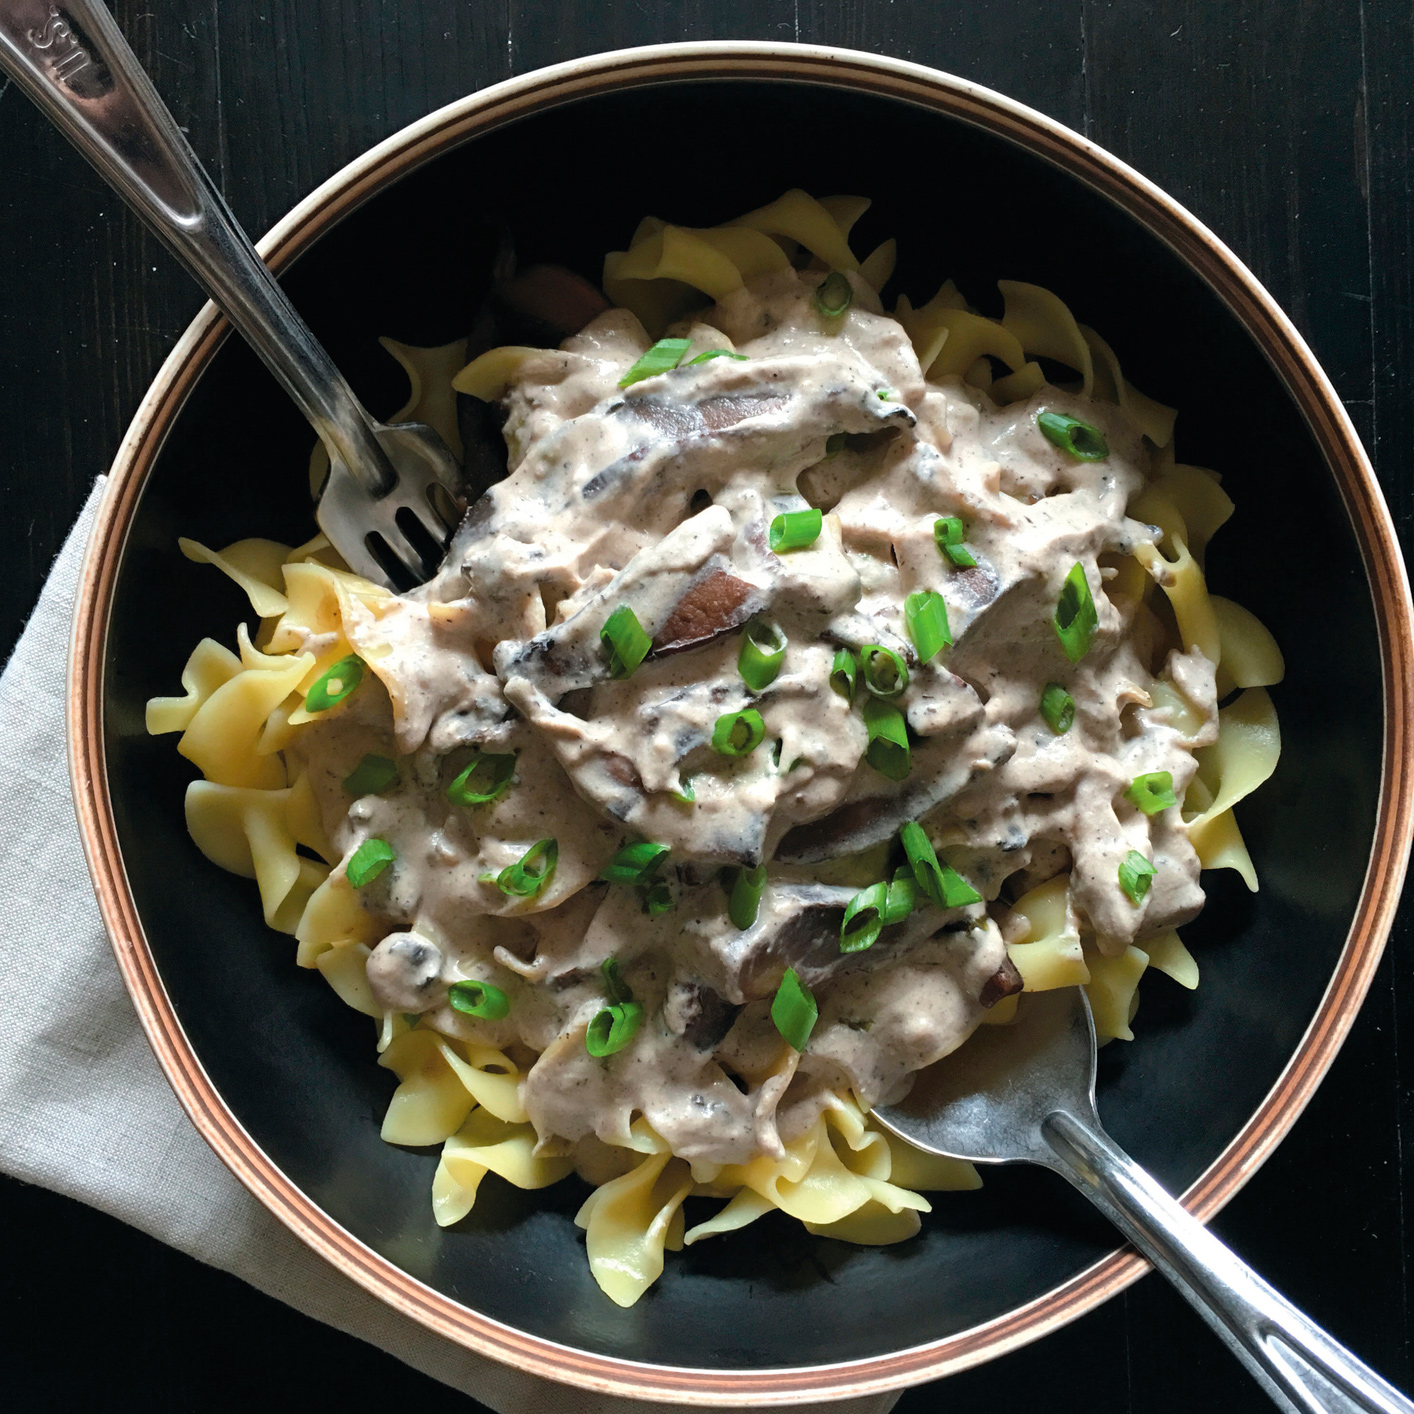
Mushroom Stroganoff
FEEDS 6 TO 8
When I was growing up, beef stroganoff was my jam. My mom’s version was solid, but over the years I became suspicious of the beef. I’m just not convinced it’s at home in this dish. After all, Russians eat noodles, sour cream is practically their national condiment and both Tolstoy and Chekhov wrote about mushrooms. I rest my case.
10 ounces extra wide egg noodles
2 tablespoons (¼ stick) unsalted butter
5 portobello mushrooms, stems and gills removed, thinly sliced*
1 teaspoon kosher salt
10 scallions, thinly sliced on the bias, white bottoms and green tops separated**
1 tablespoon all-purpose flour
14 ounces beef broth
1 cup sour cream
4 ounces goat cheese
½ teaspoon freshly ground black pepper, plus more for serving
1. Add the noodles to 4 quarts cold water in a large pot, cover, and place over high heat. Cook to al dente, 18 to 22 minutes, stirring occasionally (Cold Water Pasta, see M).
2. Melt 1 tablespoon of the butter in a 10-inch straight-sided sauté pan over medium-high heat.
3. Increase the heat to high, add half of the mushrooms and sprinkle with ½ teaspoon of the salt. Sauté for 5 to 6 minutes, until the mushrooms darken and reduce in volume by half. Remove to a bowl.***
4. Repeat with the remaining 1 tablespoon butter, the remaining mushrooms and the remaining ½ teaspoon salt, along with the white bottoms of the scallions.
5. Return the first batch of mushrooms to the pan, sprinkle in the flour and stir to combine, cooking for 1 minute, or until the flour disappears and a dark “fond” appears on the bottom of the pan.
6. Deglaze the pan with the beef broth and as soon as it simmers (almost immediately), decrease the heat to low and cook for 10 to 12 minutes to reduce the liquid.
7. Add the sour cream, goat cheese and pepper and stir to combine. Bring to a bare simmer and cook, covered, for 2 to 4 minutes.
8. Drain the noodles and stir gently into the mushroom mixture. Turn onto a platter and garnish with the scallion tops and additional pepper.
* The portobello is nothing but an overgrown cremini mushroom. The name was devised as a marketing ploy in the early 1980s.
** I think scallions are way underutilized in the American kitchen. You just need to remember to toss the top inch or so because it’s typically too fibrous and dry. Also always cut on the bias. If you cut straight across, you get rounds that roll off the cutting board!
*** If the pan is really hot, when you toss the mushrooms they’ll make a funny hissing sound, kind of like they’re singing…or screaming, which I guess makes more sense.
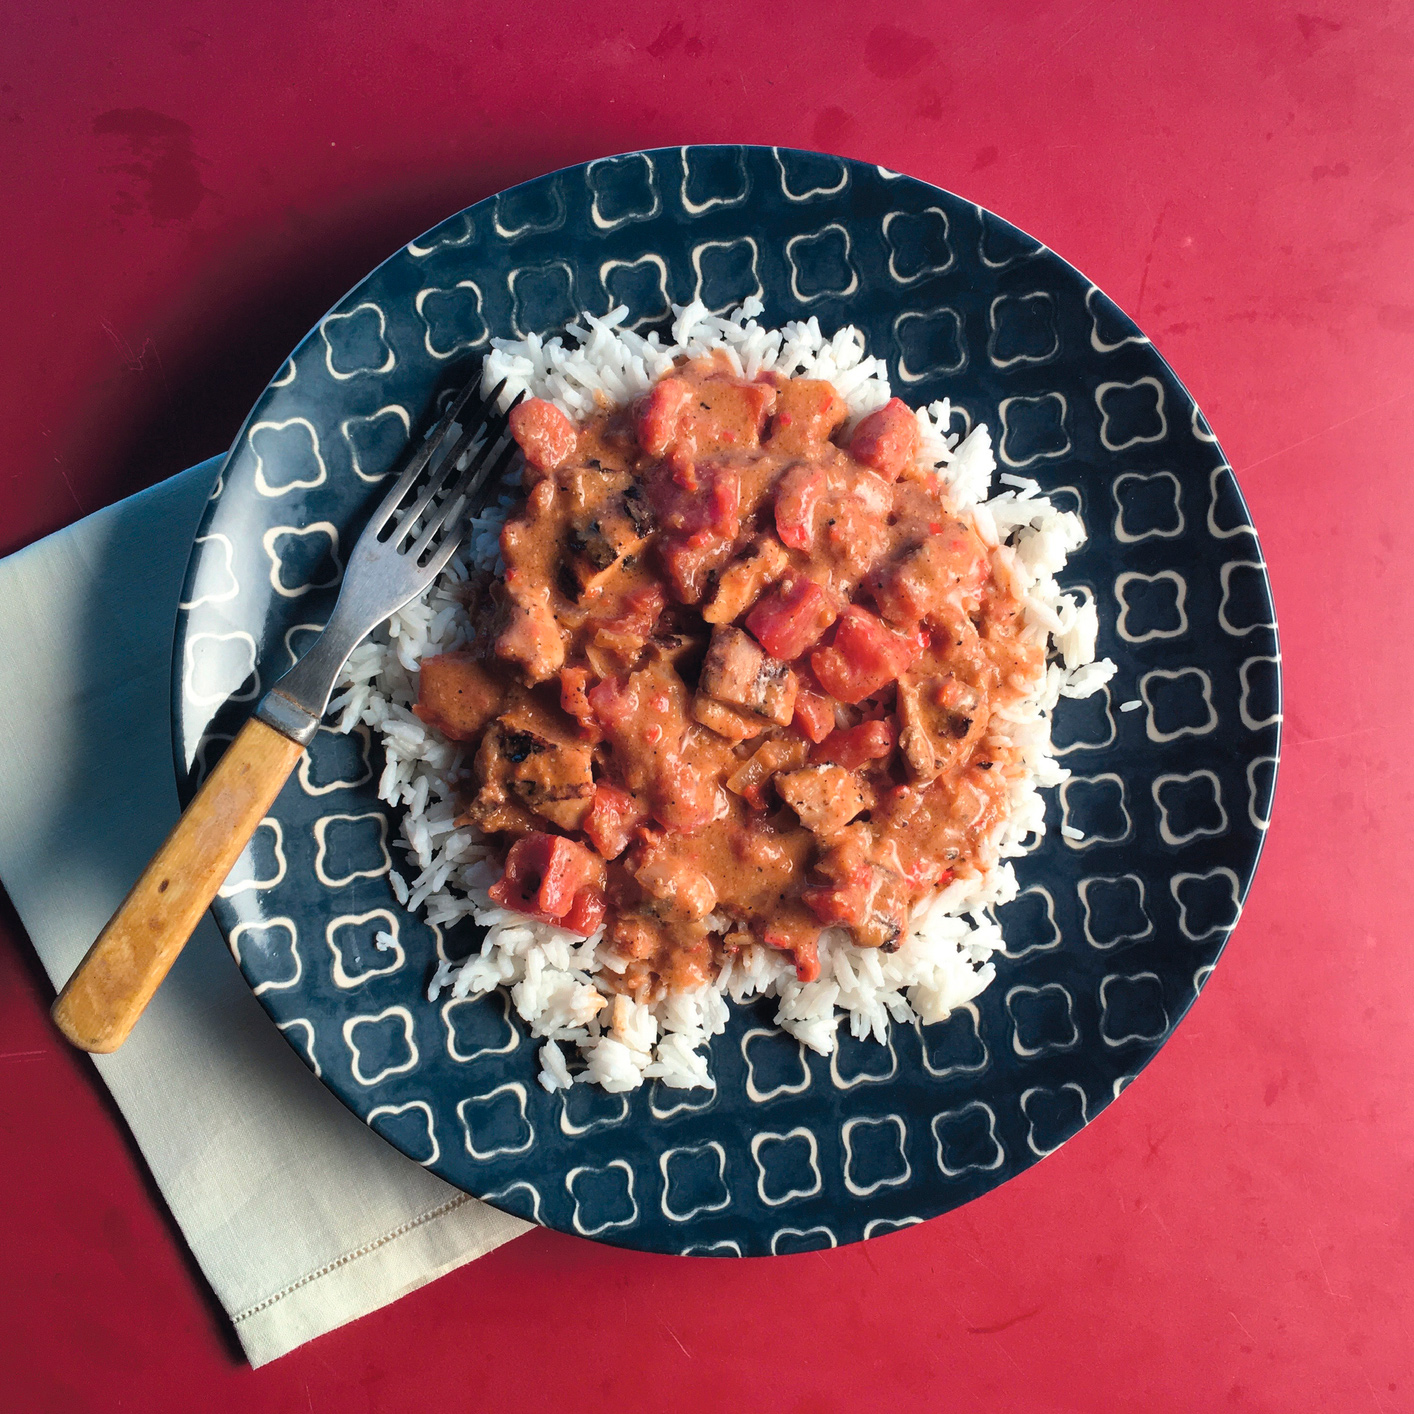
Turkey Tikka Masala
FEEDS 4
There ought to be a name for dishes that everyone thinks are from one place but are actually from another…something like “malageoism” or some such. Chicken tikka masala would certainly be a poster food for malageoismbecause here in the United States everyone thinks it’s “Indian” food when it’s 100 percent British. Of course, it wouldn’t have happened if England hadn’t soaked up the culture of the subcontinent during the days of the Raj. Well, I’m putting a distinctly North American spin on it by replacing the chicken with an American bird named after Turkey. Namely…turkey. It may be a postcolonial double malageoism, but it’s damned tasty.
2 teaspoons coriander seeds
1½ teaspoons black peppercorns
1 teaspoon cumin seeds
¼ teaspoon brown mustard seeds
2 whole cloves
½ teaspoon cardamom pods
¼ teaspoon ground cinnamon
⅛ teaspoon red pepper flakes P
⅛ teaspoon freshly grated nutmeg P
2 teaspoons kosher salt
1½ pounds boneless, skinless turkey thighs
1 cup plain whole-milk yogurt
¼ cup canola oil
1 large onion, chopped
4 garlic cloves, grated on a rasp grater H
2 tablespoons grated fresh ginger
2 small fresh red chiles, such as Fresno or cayenne, seeded and minced
1 28-ounce can diced tomatoes
1 cup coconut milk
1 tablespoon fresh lime juice
Cooked basmati rice, for serving
Fresh mint or cilantro leaves, for serving
1. Combine the coriander seeds, peppercorns, cumin seeds, mustard seeds and cloves in an 8-inch cast-iron skillet H M over medium-high heat and toast, moving the pan constantly, until you can smell the cumin, 3 to 4 minutes. Remove the mixture from the hot pan and cool on a plate for 5 minutes. Grind the mixture, along with the cardamom, cinnamon, red pepper flakes and nutmeg, in a spice grinder for 1 minute.
2. Transfer half of the spice mixture, 1 teaspoon of the salt, and the turkey to a 1-gallon resealable bag. Seal the bag and shake to coat the turkey in the spice mixture. Add the yogurt to the bag and “squish” to coat. Refrigerate the bag for 30 minutes.
3. Meanwhile, heat the canola oil in a 12-inch straight-sided sauté pan over medium-high until it shimmers. Add the onion and the remaining 1 teaspoon salt and cook until the onion is browned around the edges, 11 to 12 minutes, stirring occasionally.
4. Reduce the heat to low and add the garlic, ginger and chiles. Cook, stirring constantly, until the onion has softened and browned completely, 7 to 8 minutes more. Add the remaining half of the spice mixture and the tomatoes. Cook, stirring occasionally, until reduced and darkened in color, 15 to 20 minutes.
5. Heat your grill (gas, charcoal M, doesn’t matter) to high.
6. Remove the turkey from the yogurt mixture, keeping as much yogurt on the meat as possible. Grill the turkey until the yogurt is charred, about 5 minutes per side. Rest the turkey for 5 minutes and trash the remaining yogurt mix still in the bag.
7. Chop the turkey into bite-size pieces. Add the turkey, coconut milk and lime juice to the tomato mixture; stir to combine and heat through.
8. Serve over basmati rice with fresh mint or cilantro.
Note: If you really don’t want to mess with your grill for the turkey, I’m not going to judge. You could use a grill pan or even a cast-iron skillet, but you need to get it really, really hot. Me, I’d rather crank up the grill. Look at it this way, you could make the whole dish on your grill. Just a thought.
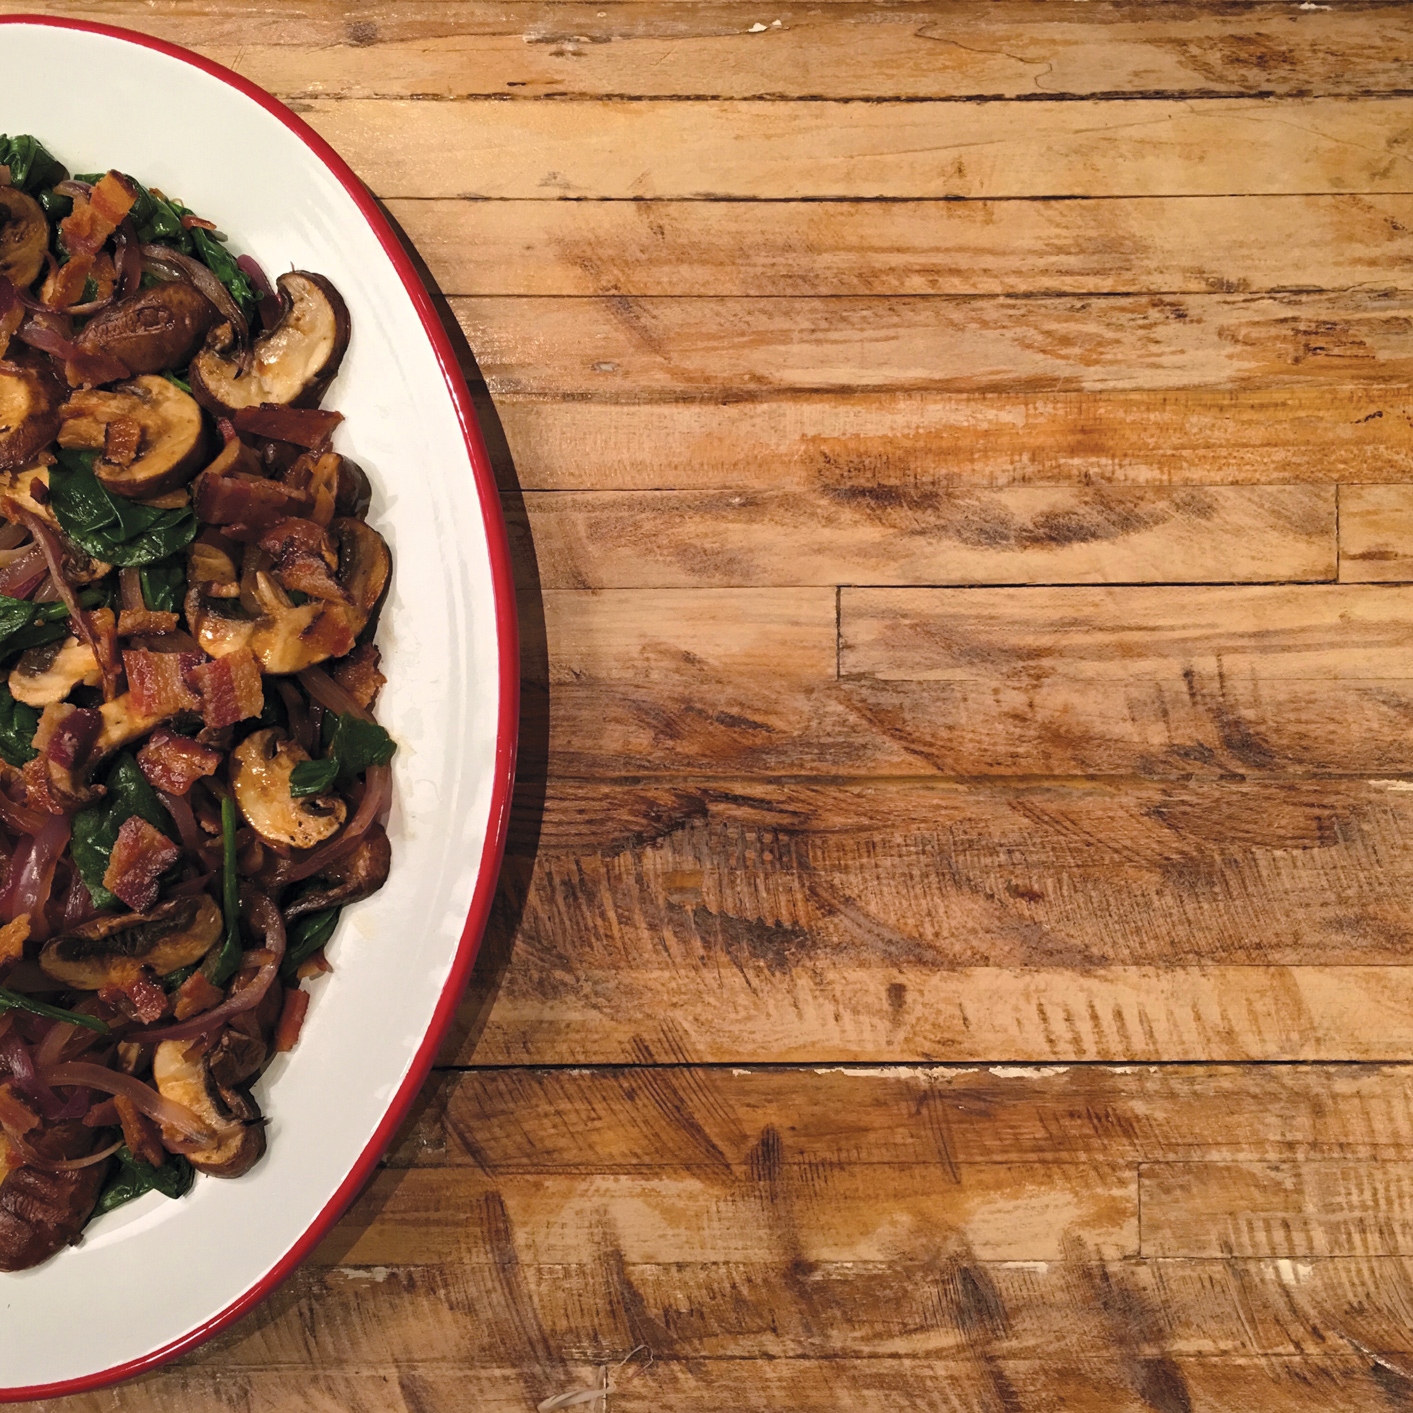
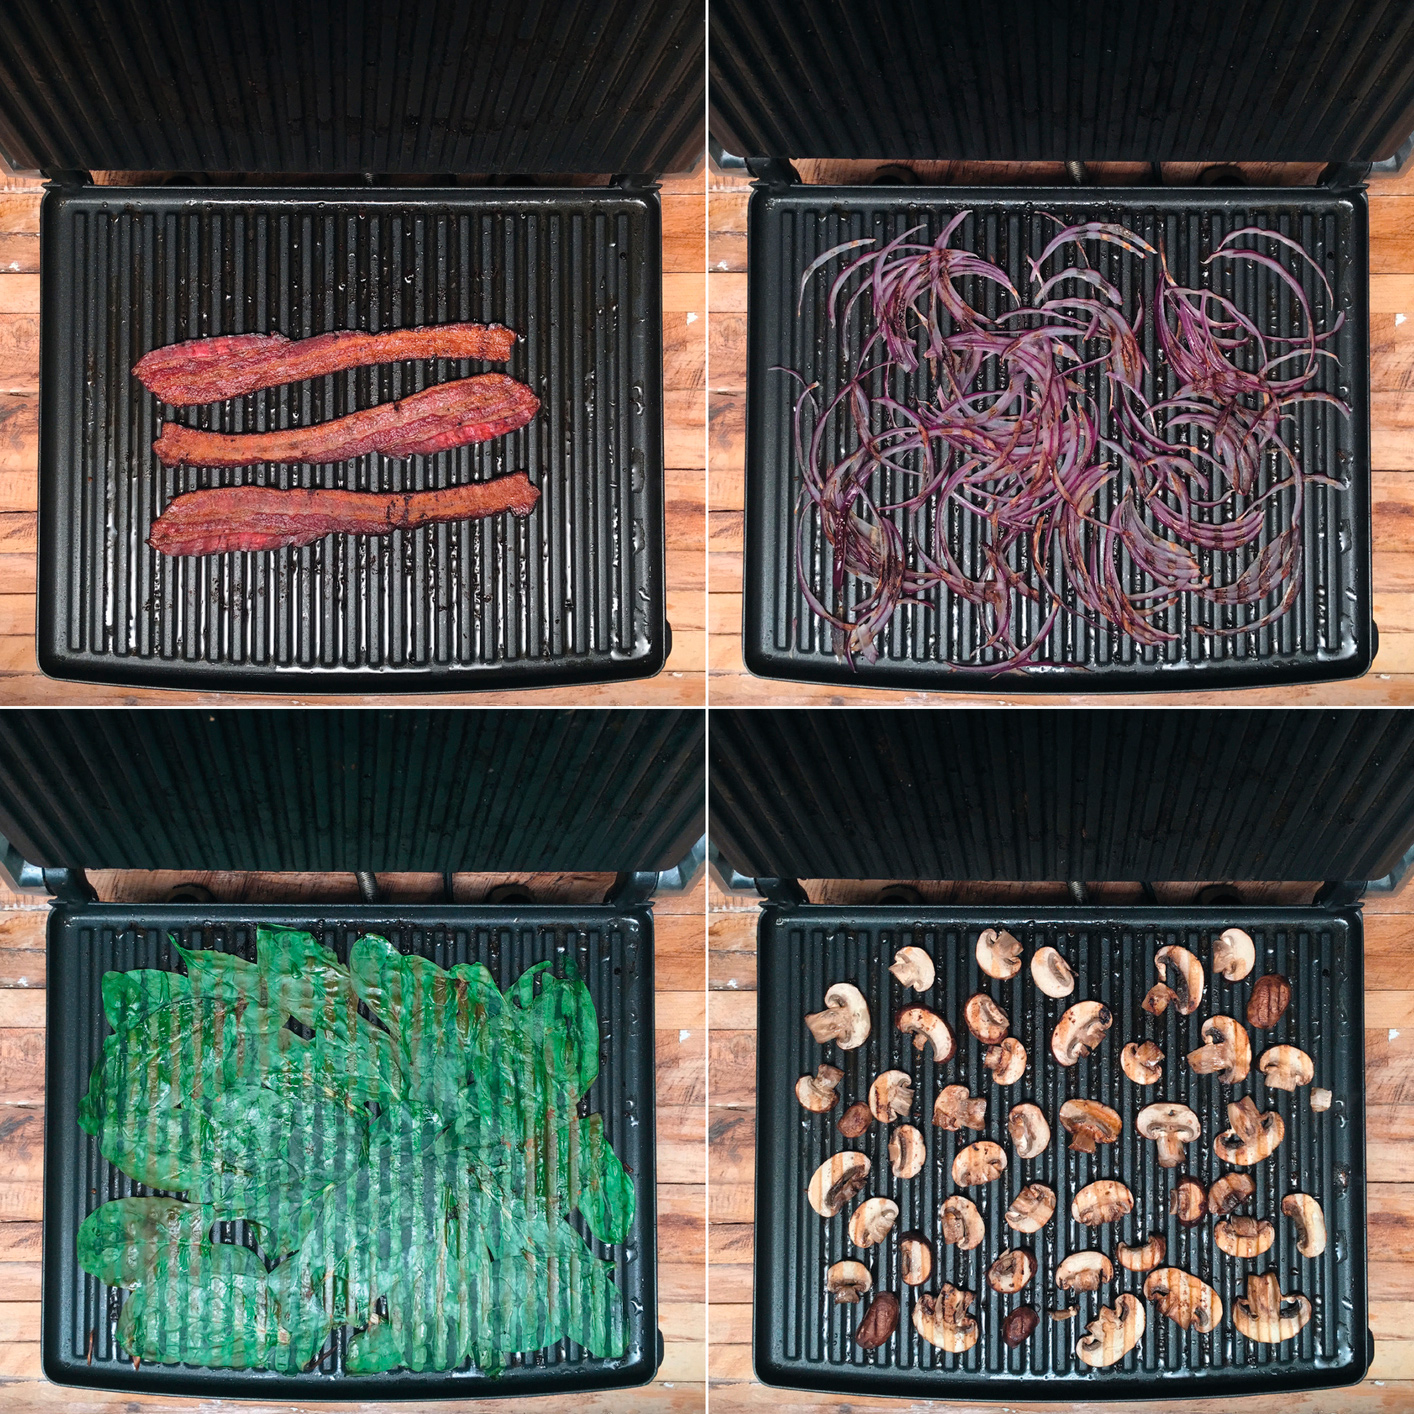
Totally Panini-Pressed Dinner
FEEDS 1
I am totally in love with my panini press, a heavy-duty thing made by Krups. I don’t think I’ve ever made an actual panini, but I have made just about everything else, including this deceptively simple dish that can be served as a side (nice with steak) or as a meal all on its own.
3 rashers thick-cut bacon
1 small red onion, frenched M
1 pint cremini mushrooms, sliced ¼ inch thick
2 ounces baby spinach
1 teaspoon buffalo wing sauce
SPECIAL EQUIPMENT
Panini press H
1. Place the bacon in a panini press, close the lid and heat to high. Cook the bacon until crisp, 7 to 8 minutes. Remove the bacon to a paper towel-lined plate.
2. Add the red onion, close the lid and cook for 4 minutes. Remove to a mixing bowl.
3. Add the mushrooms in a single layer, close the lid and cook for 2 minutes. Meanwhile, crumble the bacon into the bowl with the onion. Remove the mushrooms from the press and add to the bowl.
4. Add the spinach, close the lid and cook for 30 seconds. Transfer the spinach to the bowl.
5. Drizzle on the buffalo wing sauce. Toss and serve.
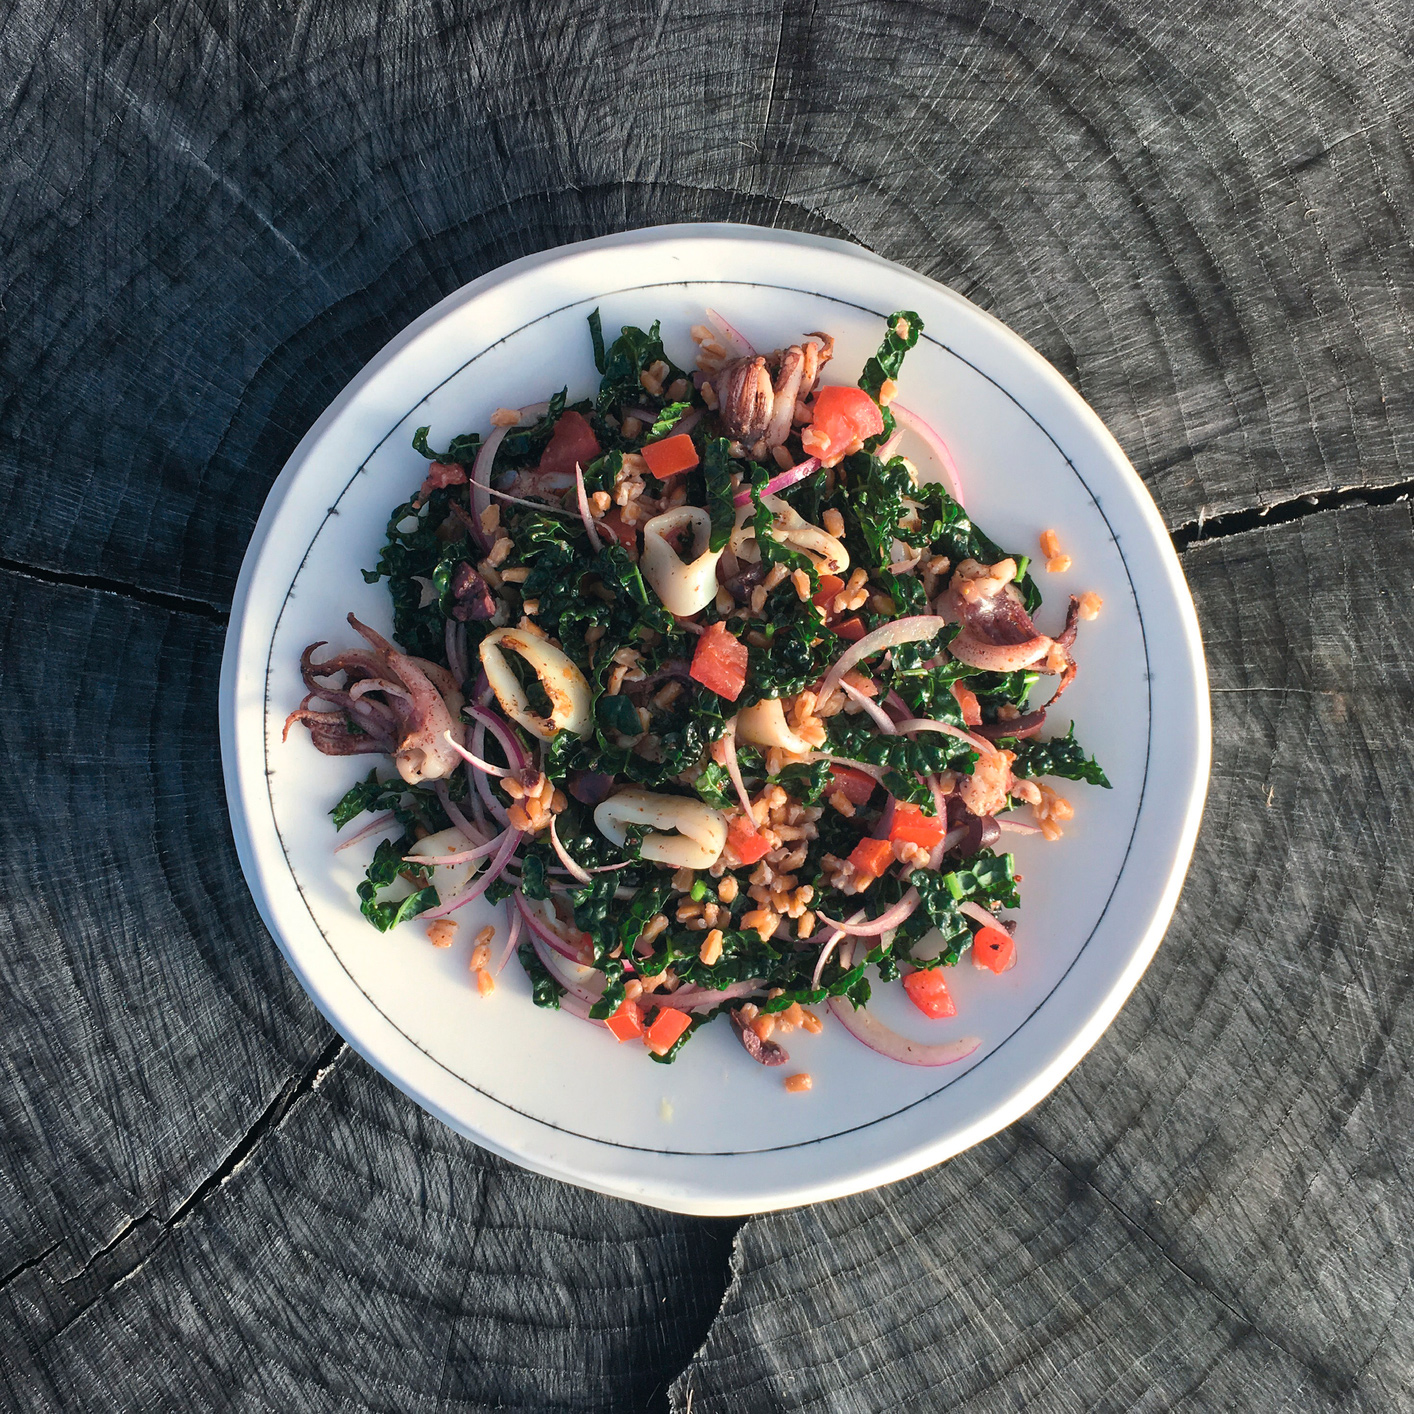
Grilled Squid Salad
FEEDS 6
Here are some simple facts to consider: Loligo opalescens, or California market squid, which makes up a vast majority of the squid in American markets, is high in protein, low in fat, and extremely plentiful. I personally suspect it to be of alien origin and probably just increasing its numbers until the giant squid, along with the velociraptors of the sea, the Humboldt squid, rise up and press humankind into slavery. What can we do? Eat as many of them as possible. It’s your duty to mankind.
2 pounds whole squid, cleaned, or 1½ pounds precleaned
1 teaspoon plus 1 tablespoon olive oil
1½ teaspoons kosher salt
1 teaspoon freshly ground black pepper
½ teaspoon ground sumac P
½ teaspoon ground cumin
½ cup julienned red onion
3 ounces kale, cut into ribbons (chiffonade)
1 cup cooked farro
⅓ cup chopped kalamata olives
1 small tomato, coarsely chopped
1 tablespoon red wine vinegar
1. Set a cooling rack on one side of a grill and heat the grill to high.
2. To clean the whole squid, grip the squid body, or “mantle,” in one hand and the head with the tentacles in the other. Gently pull the head away from the mantle. Most of the innards will stay attached to the head and will be pulled out of the body. Pull out the clear, feather-shaped backbone, or “quill.” Cut off the tentacles just above the eyes, remove the pea-shaped beak and innards, and discard. Remove the skin by grabbing with a paper towel and pulling away from the body; discard.
3. Place the cleaned squid in a mixing bowl with 1 teaspoon of the olive oil, 1 teaspoon of the salt, the pepper, sumac and cumin. Set aside.
4. Set the red onion in a large mixing bowl.
5. Place the squid tentacles on the cooling rack and the tubes directly on the grill grate and grill for 1½ to 2 minutes. Flip and cook for another 1½ minutes. Be careful not to overcook.
6. Immediately chop the tentacles and tubes into bite-size pieces and add to the bowl of onion. Top with the kale and let rest for 2 minutes. Toss to combine while still warm so the squid helps to slightly wilt the kale.
7. Add the remaining 1 tablespoon olive oil, the farro, olives, tomato, vinegar and the remaining ½ teaspoon salt and toss to combine. Serve warm or at room temperature.