DIY Nut Milks, Nut Butters, and More (2014)

Did you know that most fruits, vegetables, seeds, and nuts are more nutritious in their raw state? Cooking or processing whole foods often depletes some of the precious nutrients we need for good health. When it comes to raw desserts, nuts and seeds are the stars, and they usually form the main base for cookies, fudge, tarts, and truffles. In this chapter you’ll see how much variety these few simple ingredients can provide. Once you become used to not baking your desserts, it’ll be a “piece of cake” to whip up sweet treats that everyone will love. If there’s one recipe in this section you shouldn’t miss, it’s for the Chocolate Almond Banana Cups, which were featured on the Today show.
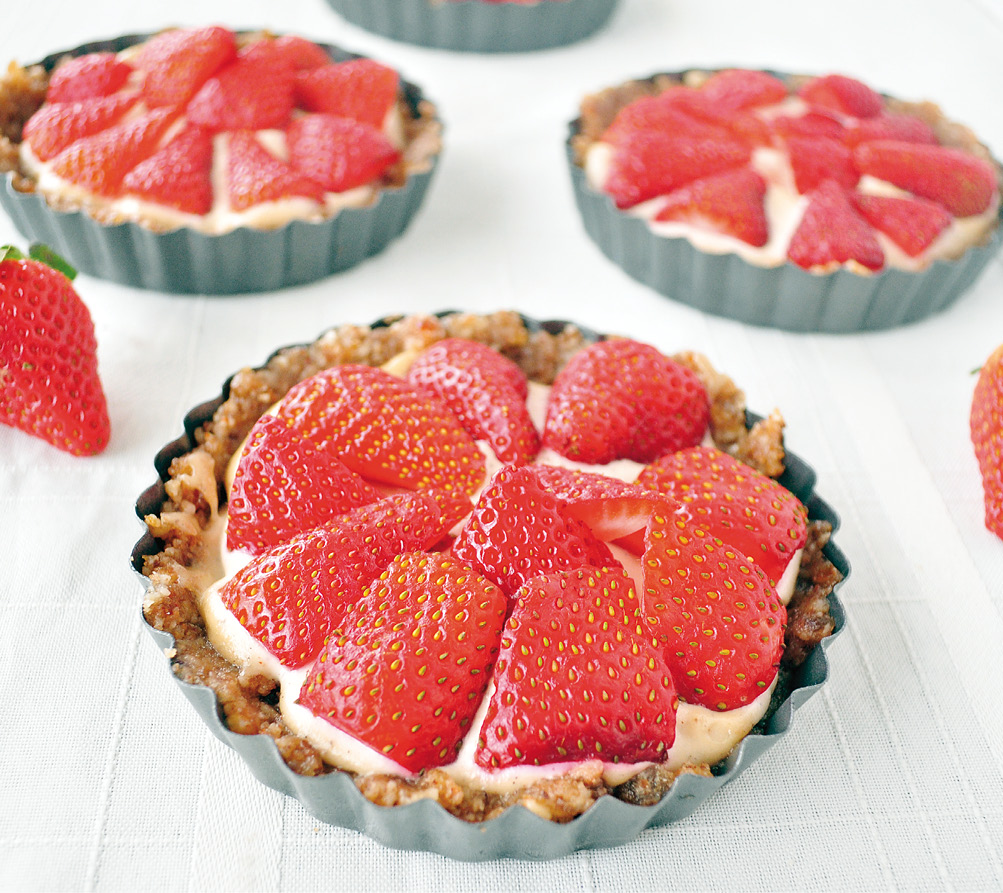
Strawberry Tarts with Cashew Cream
SPRING IS MY favorite time of year, especially since all the best seasonal fruits start to become available then. One of the absolute best things about springtime has to be the strawberries. Since I try to buy produce only in season, when strawberries begin to pop up, I take full advantage. I included this recipe to demonstrate two things: tarts are pretty easy to make, and cashew cream is delicious and versatile. I hope you enjoy these as much as my family does.
MAKES FOUR 4-INCH (10 CM) MINI-TARTS
FOR THE CRUST:
1 cup (125 g) raw, unsalted almonds
1 cup (100 g) raw, unsalted walnuts
½ teaspoon sea salt
8 Medjool dates, pits removed
2 tablespoons water
Oil, to grease the tart pan (I use coconut oil, but any kind will do)
FOR THE FILLING:
2 cups (260 g) raw, unsalted cashews, soaked overnight
¼ cup (60 ml) almond milk (see Basic Nut Milk)
2 to 3 tablespoons pure maple syrup
2 teaspoons ground vanilla beans
1½ cups (180 g) sliced strawberries (see Notes below)
1. To make the crust, put the almonds, walnuts, and sea salt in a food processor. Pulse until the mixture has a coarse consistency, about 1 to 2 minutes. Add the dates and water and pulse until a dough starts to form. This will take another minute or so.
2. Grease the tart pans with a little oil. I use pans with detachable bottoms, which makes the tarts much easier to remove when you’re ready to serve them.
3. Gently press the dough mixture into the greased tart shells, to about ¼-inch (.6 cm) thickness. Once all of the dough has been evenly distributed and pressed into the pans, stick them into the fridge to firm up.
4. While the tart shells set, make the filling: Drain and rinse the cashews. Place them in a high-powered blender with the almond milk, maple syrup, and vanilla. Blend on high speed until smooth, 2 to 3 minutes.
5. Spoon the cashew cream mixture into each tart shell, then top with sliced strawberries. Serve immediately, or store in the refrigerator for up to a week (see Notes below).
NOTES
· You can use either fresh or frozen strawberries in this recipe. If you’re using frozen berries, you’ll need to let them thaw first. I set mine out on the counter and let them gently defrost for about an hour.
· These tarts are best when the cashew cream is fresh. Once the cream sits in the fridge for a while, it starts to harden a bit. It’s still very good like this, but the “cream” will be thicker and start to resemble a nut butter consistency. If you plan on featuring the tarts at a party, make the shells ahead of time, and then blend the cashew cream right before serving them.
· If you can’t find ground vanilla beans, use 1 teaspoon of vanilla extract instead. You can also use a whole vanilla bean; just slit the pod open and scrape the seeds into the mixture, then incorporate them fully. Don’t throw away the pod, since it can be used to add flavor to sauces and milks.
PREP AND CHILL TIME: 20 minutes (not including the overnight soak for the cashews)
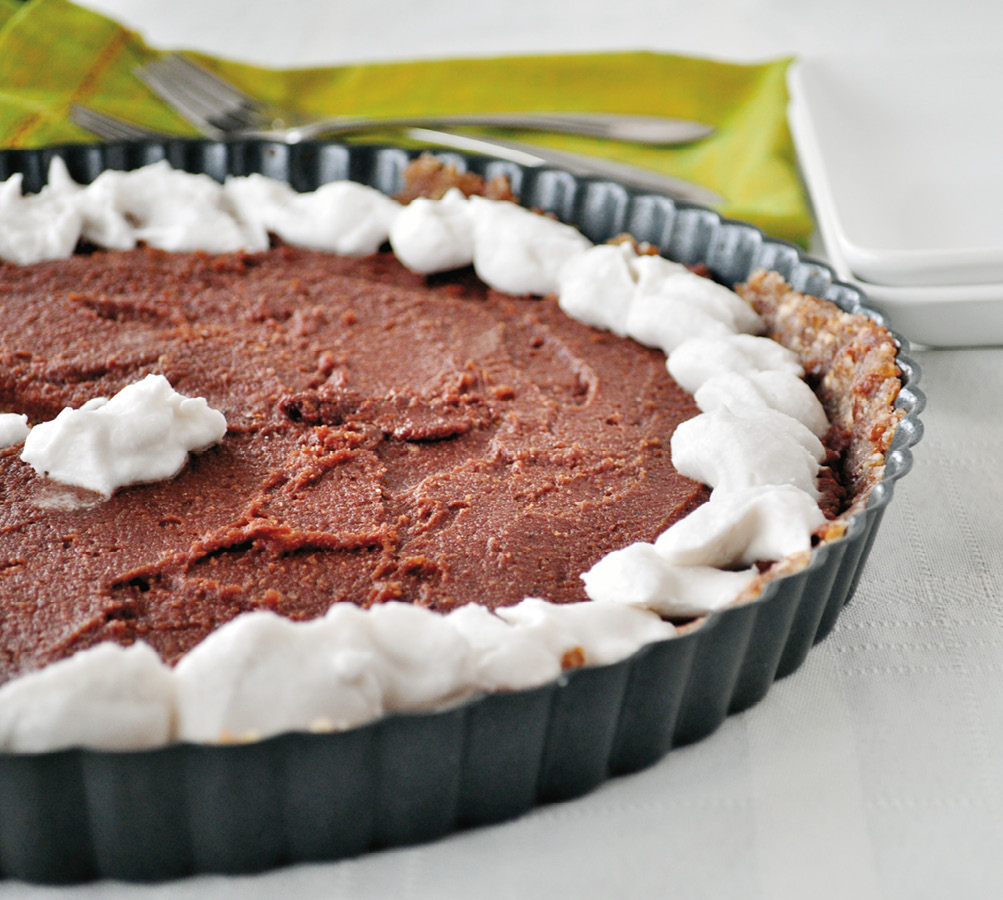
Chocolate Hazelnut Coconut Tart
TARTS, A STAPLE dessert in the raw food world, can be filled with fruit, chocolate, nut spread, or whatever else comes to mind. They might look fancy, but they’re actually easy to put together. Making them is mainly about having the proper tools. I strongly suggest using a tart pan with a removable bottom so that when you’re ready to serve, you can just lift out the tart with a little care, and voilà! You have a beautiful tart that took minutes to make, with an even quicker presentation.
MAKES ONE 9-INCH (23 CM) TART
FOR THE CRUST:
1 cup (140 g) raw, unsalted Brazil nuts
1 cup (100 g) raw, unsalted walnuts
½ cup (65 g) flax meal
½ teaspoon sea salt
8 to 10 Medjool dates, pits removed
2 to 3 tablespoons water
FOR THE FILLING:
1 cup (240 g) Chocolate Hazelnut Spread
1 cup (200 g) coconut butter (see shredded coconut)
¼ cup (60 ml) almond milk (see Basic Nut Milk)
FOR THE WHIPPED CREAM TOPPING:
One 14-ounce (400 ml) can full-fat coconut milk, refrigerated overnight (see Coconut Whipped Cream)
1 tablespoon pure maple syrup
1 teaspoon ground vanilla bean or vanilla extract
1. To make the crust, combine the Brazil nuts, walnuts, flax meal, and sea salt in a food processor. Pulse until the mixture has a coarse consistency, about 2 minutes. Add the dates and pulse another 2 minutes, then add the water and pulse until a dough forms, another minute or so.
2. Carefully press the dough into a greased 9-inch (23 cm) tart shell. Once it has been pressed evenly into the tart shell, place it in the fridge. It doesn’t take long for the crust to set, about 10 minutes. By the time you’re finished making the filling, the crust should be ready.
3. While the crust is setting in the fridge, make the filling: Combine all the filling ingredients in a blender and mix until smooth, about 3 to 5 minutes.
4. Once the filling is completely mixed, spread it evenly into the tart crust, using a silicone spatula. The mixture will be slightly thick but spreadable. If it seems a little too sticky, wet the spatula a bit. Place the tart back in the fridge while you make the whipped cream topping.
5. To create the whipped cream topping, make the Coconut Whipped Cream according to the directions, adding the maple syrup and vanilla to the bowl with the coconut milk fat before whipping everything together.
6. To pipe the whipped cream into the tart, simply transfer it to a ziplock bag, then cut a small hole in one of the corners. Slowly squeeze the cream out a little at a time to decorate the tart any way you wish.
7. Serve immediately, or store in the refrigerator for up to a week (see Note below).
NOTE
If you’re topping this tart with the coconut whipped cream, I highly suggest adding it right before serving. Once the coconut whipped cream is stored in the fridge, it will begin to harden.
VARIATION
This tart also looks beautiful topped with raspberries or strawberries.
PREP AND CHILL TIME: About 20 minutes (not including the overnight refrigeration of the coconut milk)
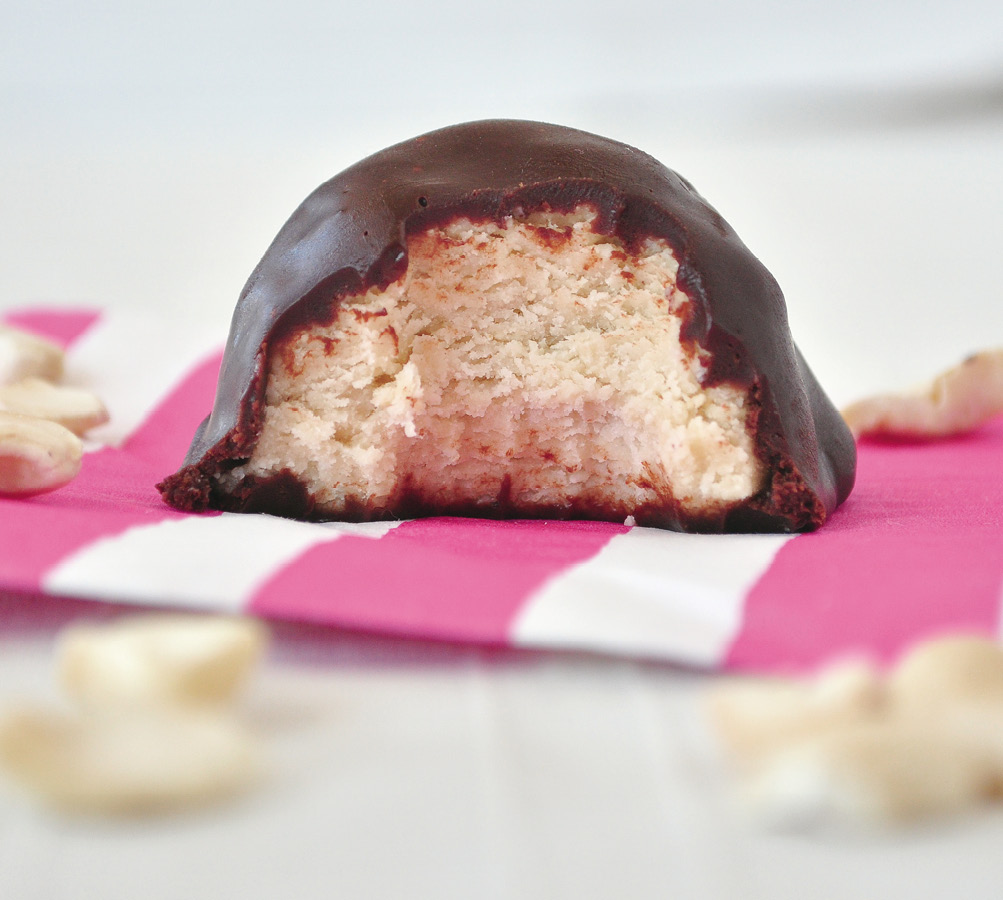
Salted Honey Cashew Truffles
WHEN I THINK of truffles, I imagine high-end chocolate shops. Truffles seem so decadent, like something only a well-trained professional could make. The truth is, though, it’s super easy to create amazing truffles with a crunchy, chocolaty shell and a sweet surprise inside. This recipe features a buttery, velvety-smooth filling that will literally melt right in your mouth. It’s pure bliss, I promise.
MAKES EIGHT 1-INCH (2.5 CM) TRUFFLES
1 cup (240 g) cashew butter (see Basic Nut Butter)
2 tablespoons raw honey or pure maple syrup
1 teaspoon ground vanilla beans
½ teaspoon sea salt
One 3-ounce (85 g) dark chocolate bar or 1 cup (160 g) dark chocolate chips
3 tablespoons almond milk (see Basic Nut Milk)
1. Combine the cashew butter, honey, vanilla, and sea salt in a food processor. Pulse until the ingredients are well mixed, 2 to 3 minutes.
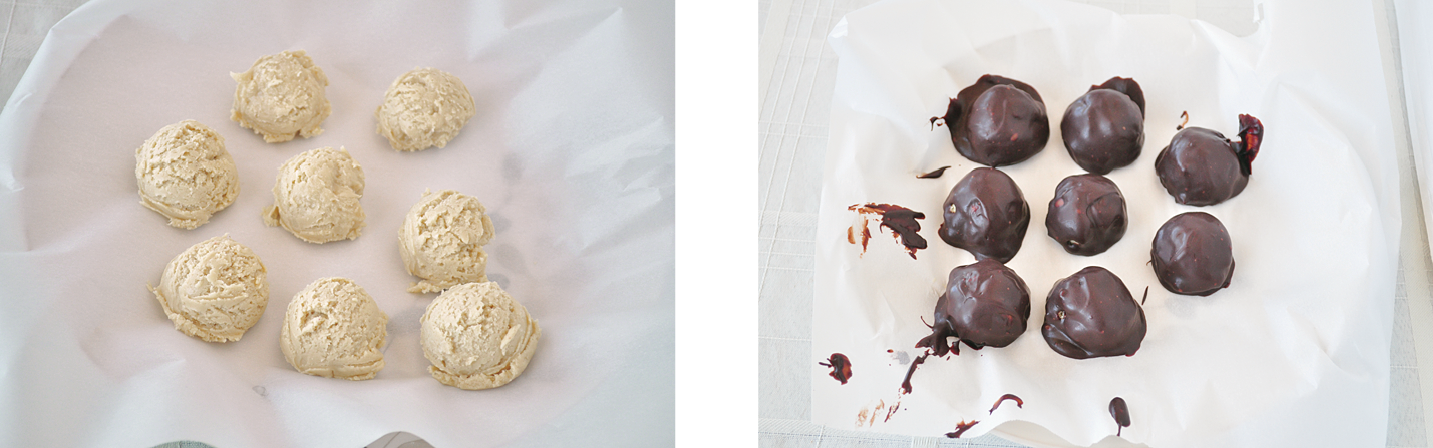
2. Roll the mixture into bite-size balls by hand, or use a cookie scoop to make them. I’ve tried both methods and come out with eight truffles each way. I do find that the cookie scoop keeps things neater, though.
3. Place the balls on a parchment-lined baking sheet, and stick them into the freezer for at least an hour to harden.
4. While the cashew balls are freezing, heat the chocolate and the milk in a double boiler (see Notes in the next column) over medium-high heat. Stir constantly until all the chocolate is melted, about 5 minutes.
5. Using two forks, roll the frozen cashew balls in the chocolate, working quickly so that the cashew butter doesn’t melt, then place them back on the parchment-lined baking sheet. Once all the balls are coated in chocolate, transfer them to the freezer for 3 hours so that the chocolate coating can firm up.
6. Store the truffles in an airtight container in the fridge for up to 2 weeks.
NOTES
· The cashew butter might seem as if it doesn’t want to stick together as you roll it, but it will firm up while chilling in the freezer.
· To create a double boiler, fill a medium saucepan with water and bring it to a boil. Once the water is boiling, place a heatproof glass bowl on top of the boiling pot of water. Add the chocolate and almond milk to the glass bowl to gently melt the chocolate without burning it.
PREP AND CHILL TIME: About 30 minutes, plus 4 hours for chilling the truffles
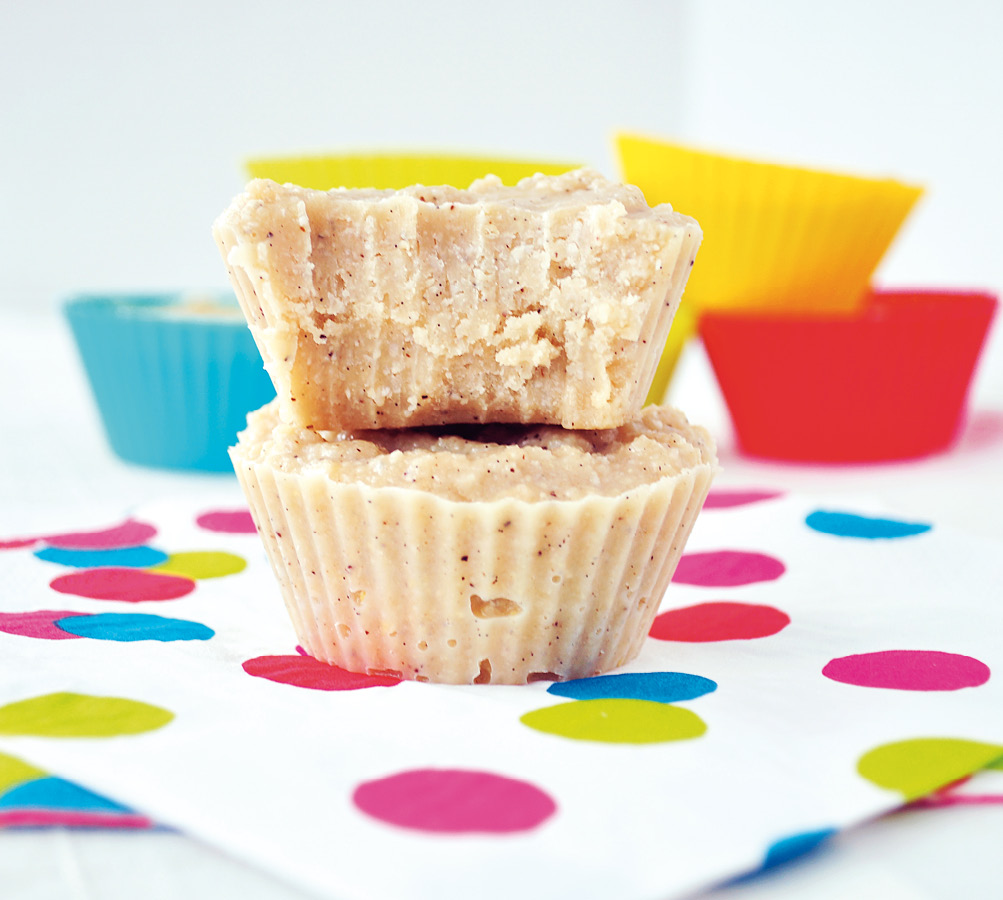
White Chocolate Coconut Fudge
ALTHOUGH I DON’T talk about being a vegan all that often, I do follow that lifestyle. One thing I thought I would have to give up when I went vegan was white chocolate. For almost two years I didn’t touch the stuff. One day I simply couldn’t take it anymore. I had to have some. So I developed my own alternative. I’m here to tell you that, yes, you can enjoy the taste of white chocolate on a vegan, whole-food diet without feeling guilty—just try this recipe.
MAKES SIX 2½-INCH (6.4 CM) OR TWELVE 1¼-INCH (4 CM) PIECES
1 cup (130 g) raw cashews or ½ cup (120 ml) cashew butter (see Basic Nut Butter, and Note below)
1 cup (200 g) coconut butter (see shredded coconut)
½ cup (220 g) cocoa butter
¼ cup (60ml) pure maple syrup
¼ teaspoon sea salt
2 teaspoons ground vanilla bean or 1 teaspoon vanilla extract
1. Chop the cashews in a blender or food processor until they are very fine. It should take 2 to 3 minutes.
2. Mix the coconut butter, cocoa butter, maple syrup, cashews, sea salt, and vanilla in a small saucepan. Stir over medium heat until the ingredients are well combined and the cocoa butter has melted, 3 to 5 minutes.
3. Spoon the mixture into the cups of a lined or greased muffin pan until each cup is about three-quarters full. I like to use a standard muffin pan with silicone liners, although paper liners work, too. If you use standard muffin pans, you’ll get 6 large pieces of fudge; mini-muffin pans will give you 12 small pieces. Another option is to use chocolate molds. If you go this route, be sure to grease the molds first to ensure the fudge comes out easily.
4. Stick the fudge into the freezer for about 40 minutes or into the fridge for about 3 hours to firm up. Once firm, store the pieces of fudge in the fridge for up to 2 weeks, or in the freezer for up to 3 months. If you freeze the fudge, you’ll need to let it thaw for about 5 minutes before eating.
NOTE
· If you’d like to use cashew butter instead of raw cashews, cut the amount by half, to ½ cup (120 g) of cashew butter.
· If you don’t have muffin pans or chocolate molds, line an 8 x 8-inch (20 cm x 20 cm) baking pan with parchment paper and spread the fudge mixture into it evenly. Cut it into bars or squares once the fudge has set.
VARIATION
To make coconut almond fudge, omit the cocoa butter, substitute almond butter for the cashews, add 2 tablespoons of coconut oil, and ½ teaspoon of almond extract.
PREP AND CHILL TIME: About 40 minutes if chilling fudge in the freezer; up to 3 hours if chilling fudge in the refrigerator.

Chocolate Peanut Butter Fudge
IT’S AMAZING HOW much these little gems taste like traditional dairy fudge. Coconut butter is the perfect choice to give this vegan fudge a velvety texture. If you’re not a fan of coconut, don’t worry—the flavors of the chocolate and peanut butter almost completely mask the coconut. In fact, the first time my family tried this recipe, they didn’t even know it included coconut. The only role it plays in this fudge is giving it an appropriate texture. We all know peanut butter and chocolate were made for each other, so go ahead and dive in!
MAKES TWELVE 2½-INCH (6.4 CM) PIECES
One 3.5 ounce (100 g) dark chocolate bar, roughly chopped, or 1 cup (160 g) dark chocolate chips
1 cup (250 g) Classic Peanut Butter
½ cup (100 g) coconut butter (see shredded coconut)
¾ cup (180 ml) almond milk (see Basic Nut Milk)
¼ cup pure maple syrup
1. Mix all the ingredients in a medium saucepan. Stir over medium heat until they are well combined, about 2 minutes.
2. Spoon the mixture into 12 lined or greased muffin cups. I use standard size-muffin pans with silicone liners, although paper liners will also work. If you want to make 24 smaller pieces, use a mini-muffin pan instead. If you don’t have muffin pans, make this fudge in an 8 x 8-inch (20 cm x 20 cm) glass baking dish lined with parchment paper.
3. Stick the fudge into the fridge to set. It should take about 30 minutes to 1 hour.
4. Store the fudge in the refrigerator for up to 3 weeks, or in the freezer for up to 3 months. If you keep it in the freezer, you’ll need to let it thaw slightly, about 5 minutes, before eating.
PREP AND CHILL TIME: 30 minutes to 1 hour
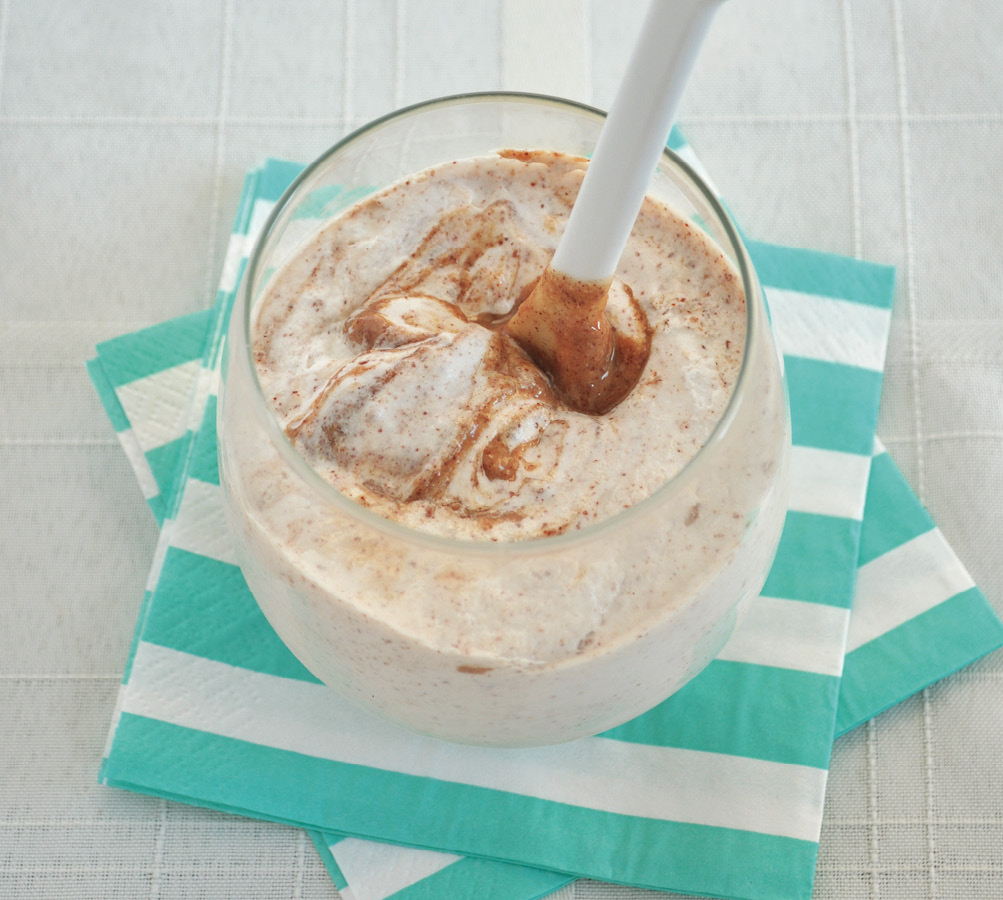
Almond Butter Mousse
MY HUSBAND AND I were on vacation in Austin, Texas, one summer, sampling the local fare and talking about recipes to make for the blog. We had the good fortune of eating a vegan mousse on that trip, and from that delightful treat this recipe was born. It’s a fancy dessert that takes very little effort to make, so you can wow your guests with a rich mousse in minutes.
MAKES FOUR ½-CUP (120 G) SERVINGS
One 14-ounce (400 ml) can full-fat coconut milk, refrigerated overnight
½ cup (120 g) almond butter (see Basic Nut Butter)
¼ cup (60ml) almond milk (see Basic Nut Milk)
2 tablespoons pure maple syrup
1 teaspoon vanilla extract
1. Stick an unopened can of coconut milk into the fridge the night before you plan to make this recipe. When you open it the next morning, the fatty part of the coconut milk will have separated from the water.
2. Spoon out the fatty part of the coconut milk into a large mixing bowl. Freeze the leftover coconut water in ice cube trays to add to smoothies in the future.
3. Mix the almond butter, almond milk, maple syrup, and vanilla in a small saucepan. Stir over medium heat until the ingredients are just combined, about 2 minutes. Remove it from the heat.
4. Using the whipping attachment on your mixer, whip the coconut fat into a cream. This will take 2 to 3 minutes on high speed. It should resemble a whipped cream made from heavy dairy cream.
5. Slowly and gently fold the almond butter mixture into the whipped cream.
6. Scoop the mousse into individual serving bowls and refrigerate until you’re ready to serve it. The mousse should keep for about a week in the fridge.
VARIATIONS
· For an extra boost of almond flavor, add ½ teaspoon of almond extract.
· Chocolate lovers can use Chocolate Hazelnut Spread in place of almond butter.
· For a great Thanksgiving treat, substitute pumpkin puree for the almond butter, and add 1 teaspoon of cinnamon, ¼ teaspoon of nutmeg, and ¼ teaspoon of ginger.
PREP AND CHILL TIME: About 30 minutes (not including the overnight refrigeration of the coconut milk)
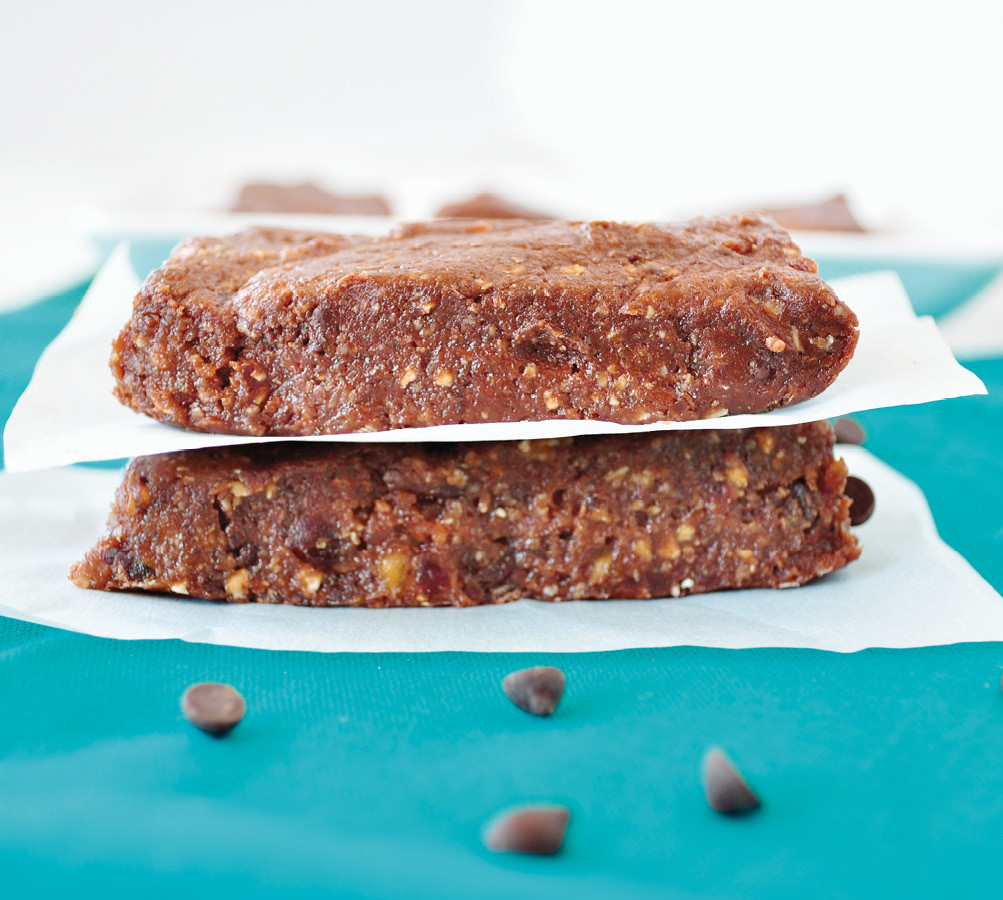
Brownie Bars
IF YOU’RE A serious chocolate lover, look no further. The creamy taste of the macadamia nut butter in this recipe pairs so well with the richness of the chocolate chips, it’s a match made in heaven, recreated in your kitchen. Beware—you might want to eat all of the brownies in one sitting, so it’s best to have a buddy with you! If there are any left after twenty-four hours, you’re better at self-control than I am.
MAKES NINE 2-INCH ( 5 CM) SQUARES
1 cup (100 g) gluten-free rolled oats
1 cup (240 g) macadamia nut butter (see Basic Nut Butter)
12 Medjool dates, pits removed
¾ cup (120 g) dark chocolate chips
2 tablespoons unsweetened cocoa powder
½ teaspoon sea salt
3 to 4 tablespoons water
1. Combine the oats and the macadamia nut butter in a food processor. Pulse until the mixture has a coarse consistency, about 2 minutes.
2. Add the rest of the ingredients except the water.
3. Grind for a minute, then slowly add the water 1 tablespoon at a time. You’ll see the mixture begin to come together to form a thick batter.
4. Line an 8 x 8-inch (20 cm x 20 cm) glass dish with parchment paper. Make sure there is enough paper hanging off the sides so that you can easily pull the brownies out once they’re firm.
5. Spoon the batter into the dish evenly. The batter will be extremely sticky, so it helps to wet the spatula first. After the batter is spread in the dish, place it in the fridge to set, about 1 hour.
6. When the brownies are firm, grab the sides of the parchment paper and pull the brownies out. Cut them into nine even squares using a pizza cutter or a sharp knife.
7. These bars must be stored in the refrigerator, where they will last for up to 2 weeks, or in the freezer for up to 6 months.
PREP AND CHILL TIME: About 65 minutes
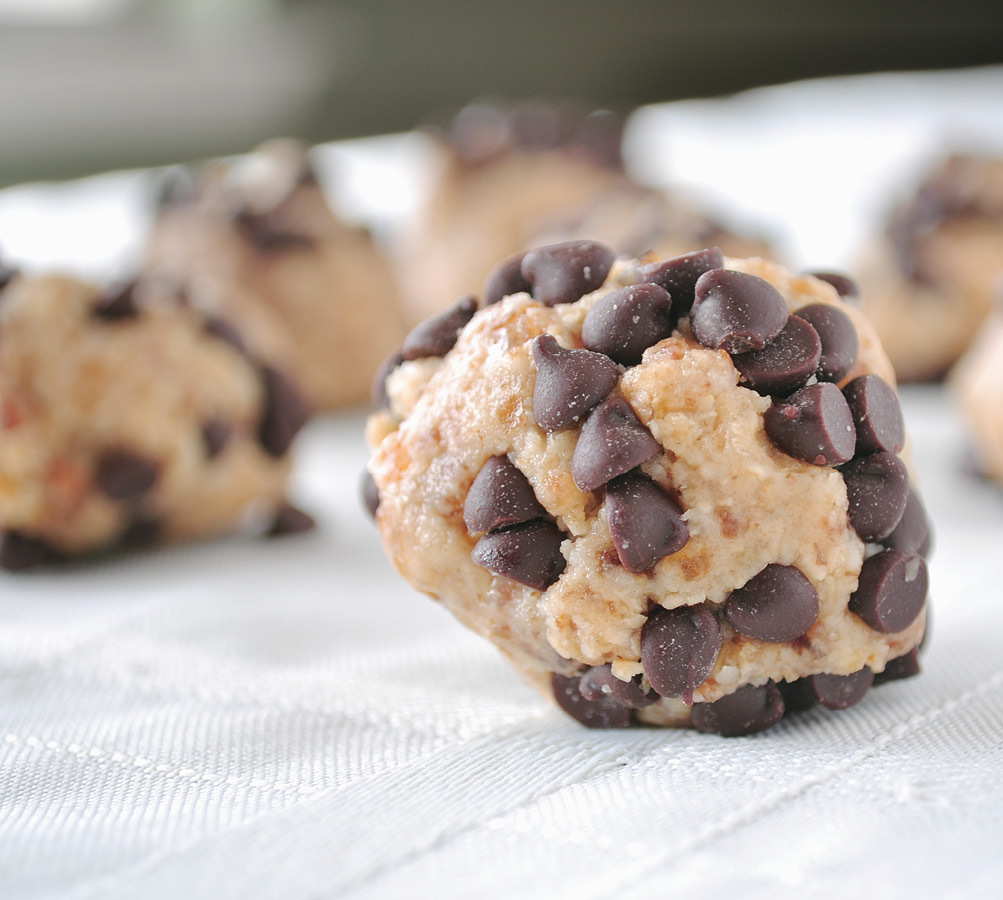
Cookie Dough Balls
ONE MAJOR RITE of passage in childhood is eating raw cookie dough straight out of the mixing bowl. It’s become so ingrained in American culture that you can even buy cookie dough candy and ice cream now. There’s a catch to eating the homemade stuff, of course: as almost everyone knows, eating raw egg can be harmful. That’s what makes this recipe so great—there’s no egg in it! Eat these treats to your heart’s content. The only thing that’s ever unsatisfying about this dish is that it runs out so quickly!
MAKES FIFTEEN 1-INCH (2.5 CM) BALLS
1 cup (100 g) gluten-free oats
10 Medjool dates, pits removed
1 cup (240 g) macadamia nut butter (see Basic Nut Butter)
1 teaspoon ground vanilla beans
2 tablespoons water
½ cup (80 g) dark chocolate chips
1. Blend the oats in a food processor until they are coarsely ground. This takes about 2 minutes.
2. Add the dates, macadamia nut butter, vanilla, and water. Pulse until a dough starts to form, 2 to 3 minutes.
3. Fold the chocolate chips into the dough, or use them in the next step to coat the outside of the balls.
4. Roll the dough into bite-size balls. If you’re covering them with chocolate chips, roll the balls around on a plate of chocolate chips and then gently press the chips in.
5. Place the balls on a parchment-lined baking sheet. Stick the baking sheet into the fridge so that the balls can firm up, about 30 minutes.
6. Store the cookie dough balls in the refrigerator for up to 2 weeks, or in the freezer for up to 6 months.
NOTE
If you want to bump up the protein in this recipe, add 2 tablespoons of chia seeds, hemp seeds, or leftover nut milk pulp (see How to Use Nut Pulp).
PREP AND CHILL TIME: About 40 minutes
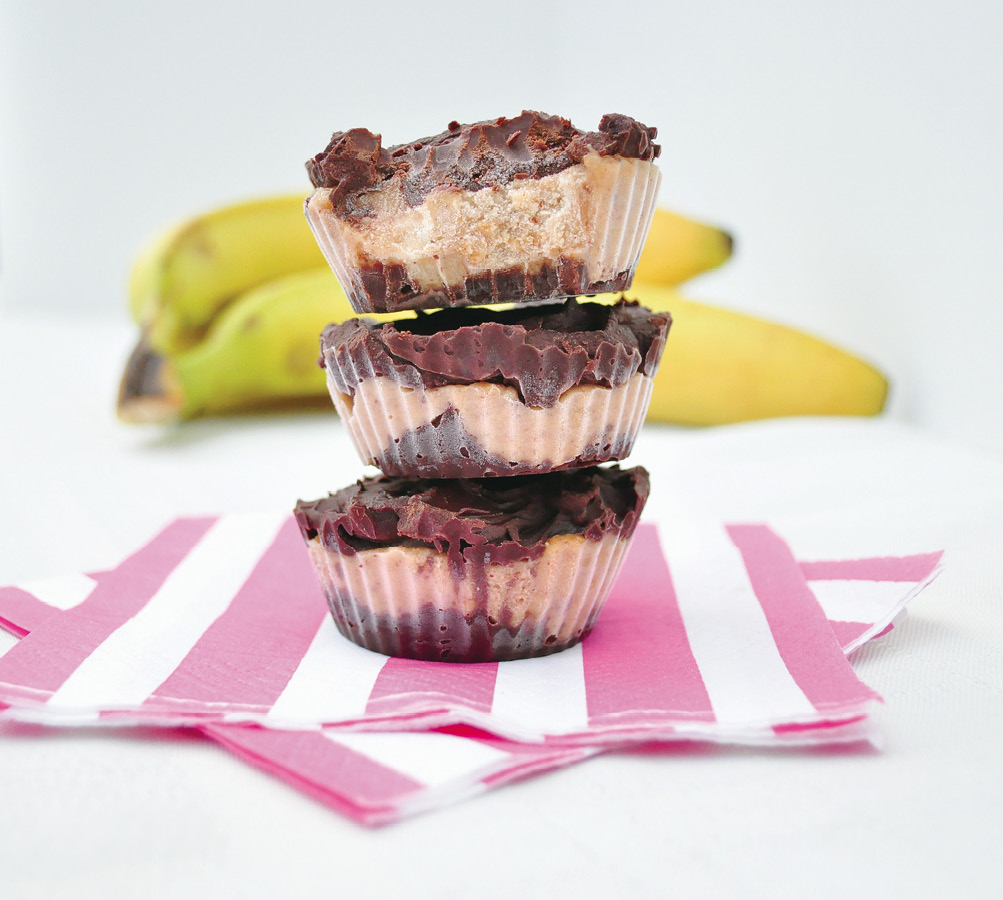
Chocolate Almond Banana Cups
THE TODAY SHOW on NBC featured this recipe as a “Too Good to Be Healthy” contest winner in February 2014. Once you make it, you’ll see why. It’s perfect for when you want a little bite of something sweet but don’t want to indulge to the point of guilt. These cups are so delicious that one of the Today show’s hosts even served them at her Super Bowl party—and from what I was told, they were quite the hit. With accolades like that, you can be sure you won’t be disappointed.
MAKES TWELVE 2½-INCH (6.4 CM) PIECES
1 very ripe banana, mashed
⅓ cup (80 g) almond butter (see Basic Nut Butter)
½ teaspoon ground vanilla beans or vanilla extract
4.5-ounces (125 g) dark chocolate or ½ cup (80 g) chocolate chips
¼ cup (60ml) almond milk (see Basic Nut Milk)
1. Mix together the banana, almond butter, and vanilla in a small bowl.
2. Mix the chocolate and the milk in a double boiler (see Notes below). Heat and keep stirring until the chocolate is melted and very smooth, about 5 minutes.
3. Pour a small amount of chocolate into the bottom of a lined muffin cup. Once you have a little chocolate in the bottom of each cup, place the muffin pan in the freezer to set, 5 to 10 minutes.
4. When the chocolate is firm, spoon a little dollop of the banana mixture into each cup, on top of the chocolate. Once all the cups have an even amount of banana mixture, fill them with the remaining chocolate and place them in the freezer to set. This should take a few hours.
5. Serve immediately after removing them from the freezer (see Notes below). These will last for up to 6 months frozen.
NOTES
· To create a double boiler, fill a medium saucepan with water. Bring the water to a boil, then place a heatproof glass bowl on top of the pot. Add the chocolate chips and nut milk to the glass bowl. This will allow you to gently melt the chocolate without burning it.
· There are two things to note about storing these cups: First, they must be kept in the freezer, or else the banana gets too mushy. Second, they melt very quickly once out of the freezer, so only pull them out right before you intend to eat them.
VARIATION
You can go the simple route with this recipe and fill the cups with the banana, almond butter, and vanilla mixture only. It makes a delightfully healthy snack that is lower in calories and fat.
PREP AND CHILL TIME: About 3 hours