DIY Nut Milks, Nut Butters, and More (2014)

If you asked me what my favorite meal of the day is, I would instantly tell you, breakfast. After fasting all night while I sleep, I appreciate nothing more than a bowl of oats with my morning coffee. But why stop at oatmeal? There are so many ways to incorporate nut milks and butters into your morning routine, and these breakfasts will keep you satisfied and satiated until lunchtime.
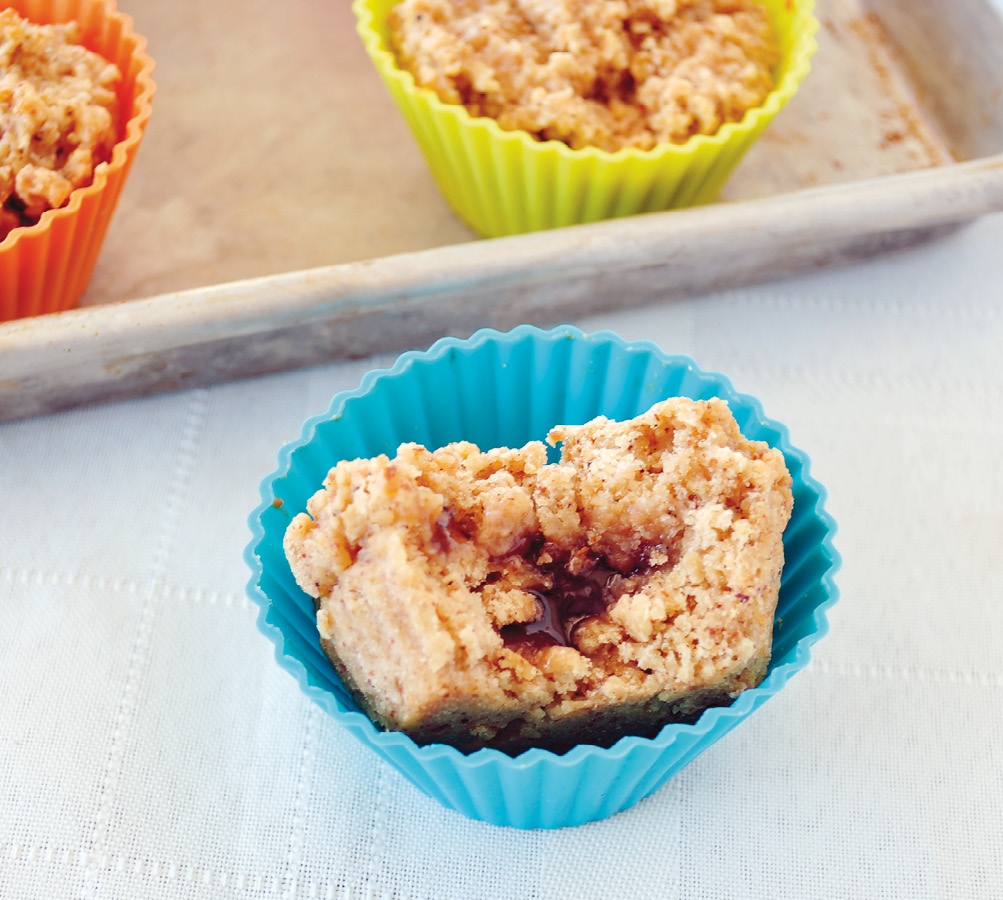
Almond Butter and Jelly Muffins
WE MAKE FILLED muffins quite often in our house—they’re such a treat for the children (and adults!). My four-year-old daughter refers to them as “muffins with little surprises.” Biting into these almond butter muffins to find some jelly waiting inside will make you feel like a kid again. They’re perfect to bring to a party or to your office, where they’ll quickly disappear after people get a taste.
MAKES 12 MUFFINS
2 tablespoons flax meal
¼ cup plus 2 tablespoons water
2 cups (180 g) gluten-free oat flour
1 teaspoon baking powder
1 teaspoon baking soda
½ teaspoon sea salt
½ cup (120 g) almond butter (see Basic Nut Butter)
⅓ cup (80ml) pure maple syrup
¼ cup (60ml) almond milk (see Basic Nut Milk)
1 teaspoon vanilla extract
½ cup (170 g) your favorite jam (see Bonus Recipe below)
1. Preheat the oven to 350°F (175°C).
2. Whisk together the flax meal and water in a small bowl. Place it in the refrigerator for a minute to set. It will become gummy, like an egg.
3. Mix the oat flour, baking powder, baking soda, and sea salt in a large bowl. Set it aside.
4. Mix the almond butter, maple syrup, almond milk, and vanilla in a sauce-pan over medium heat. Using a silicone spatula, stir until smooth, about 2 minutes.
5. Add the almond butter mixture and the flax/water mixture to the dry ingredients and mix well, about 1 minute, using either a handheld or stand mixer (both work well).
6. Spoon a little dollop of batter into each cup of a lined or greased muffin pan, filling them about ¼-inch (.6 cm) high. The batter will be very thick because of the almond butter, so I recommend wetting a spoon or spatula to help keep it from sticking. Once a little batter is in the bottom of each cup, use your finger to create a small depression in the middle. This is where the jam will sit. Be careful not to make the hole too deep, or the jam will ooze out the bottom.
7. Spoon a dollop of jam into the indentation.
8. Spoon some more batter into each muffin cup, until they’re about three-quarters full.
9. Bake the muffins for 10 to 12 minutes, until a toothpick inserted into the middle comes out clean. Wait for them to cool completely before removing them from the pans.
10. Store the muffins in an airtight container in the refrigerator for up to 2 weeks or in the freezer for up to 6 months.
NOTE
If you’re not eating gluten-free, feel free to use whole wheat pastry flour or spelt flour.
PREP AND BAKE TIME: 20 to 25 minutes
 Homemade Jam
I like to make my own jam using 1 cup (150 g) of berries, 1 tablespoon of chia seeds, and 1 teaspoon of pure maple syrup. Mix the ingredients in a food processor for 30 seconds, then place the jam in the fridge for 30 minutes.
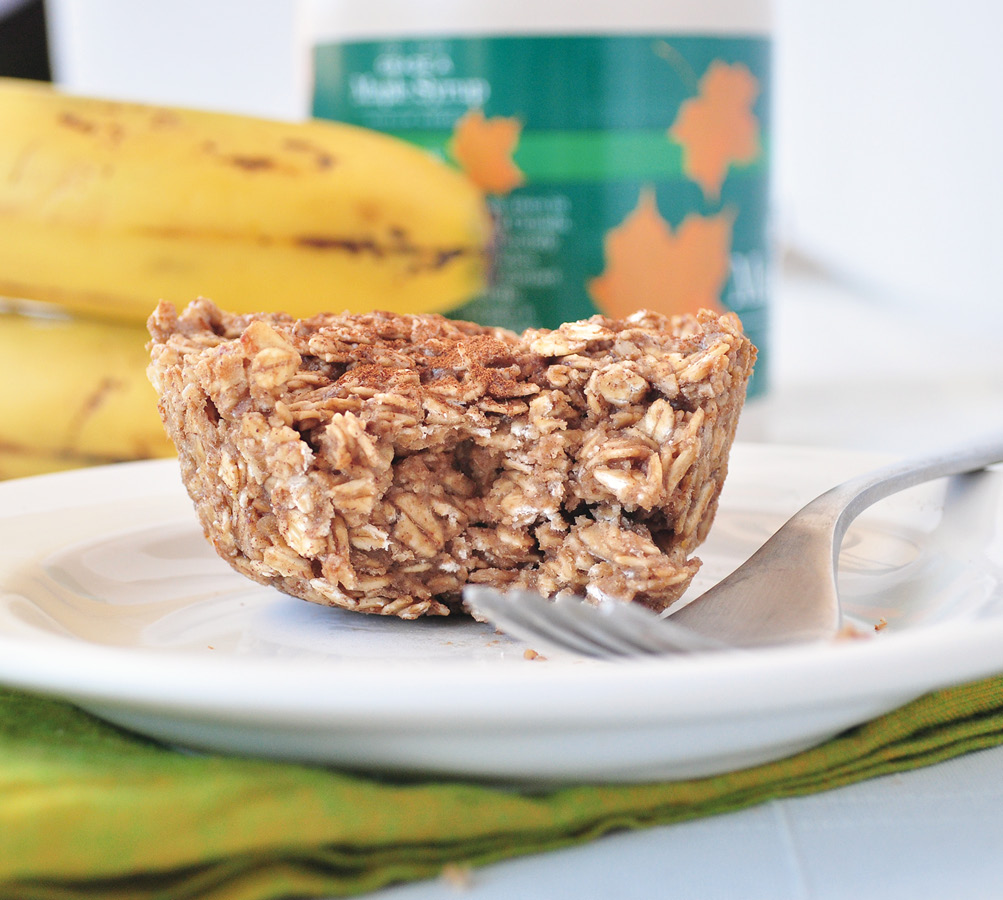
Banana Walnut Oatmeal Muffins
IN MY HOUSE breakfast has to be kid-friendly or else I wind up making two meals. These muffins are always greeted with smiling faces by my whole family and never last very long. You can make them ahead of time and freeze them for an easy breakfast on busy days. I pull mine out the night before I want to serve them so that by morning they’re perfectly thawed and ready to eat. This recipe yields a small batch, so you might want to double or triple it if you intend to feed more than a few people.
MAKES 3 JUMBO OR 6 STANDARD MUFFINS
3 cups (300 g) gluten-free rolled oats
1 teaspoon cinnamon
½ teaspoon sea salt
2 ripe bananas, mashed
⅓ cup (85 g) walnut butter (see Basic Nut Butter)
3 tablespoons pure maple syrup
2 to 3 tablespoons almond milk (see Basic Nut Milk)
1 teaspoon vanilla extract
1. Preheat the oven to 350°F (175°C).
2. Mix the oats, cinnamon, and sea salt together in a large bowl. Set it aside.
3. Mix the banana, walnut butter, maple syrup, almond milk, and vanilla in a small saucepan. Stir over medium heat with a silicone spatula until the ingredients are well combined, about 2 to 3 minutes.
4. Add the banana mixture to the bowl with the oats. Stir until the ingredients are completely mixed, about 1 minute, using either a handheld or stand mixer (both work well).
5. Spoon the mixture into the cups of a lined or greased muffin pan. Bake for 15 to 18 minutes, until slightly golden. Wait until they’re completely cooled before removing them from the muffin pan.
6. Store the muffins in the refrigerator for up to 1 week or in the freezer for up to 3 months. I like to keep mine in a ziplock bag.
VARIATIONS
· If you want to give these an extra boost, try sprinkling a cinnamon- coconut sugar blend on top of each muffin. Use 1 tablespoon of coconut sugar and ¼ teaspoon of cinnamon.
· This recipe is also delicious when you use almond butter instead of walnut butter, omit the cinnamon, and add ¼ cup (40 g) of chocolate chips.
· Other potential add-ins include 2 tablespoons of shredded coconut, raisins, chia seeds, or hemp seeds.
PREP AND BAKE TIME: About 25 minutes
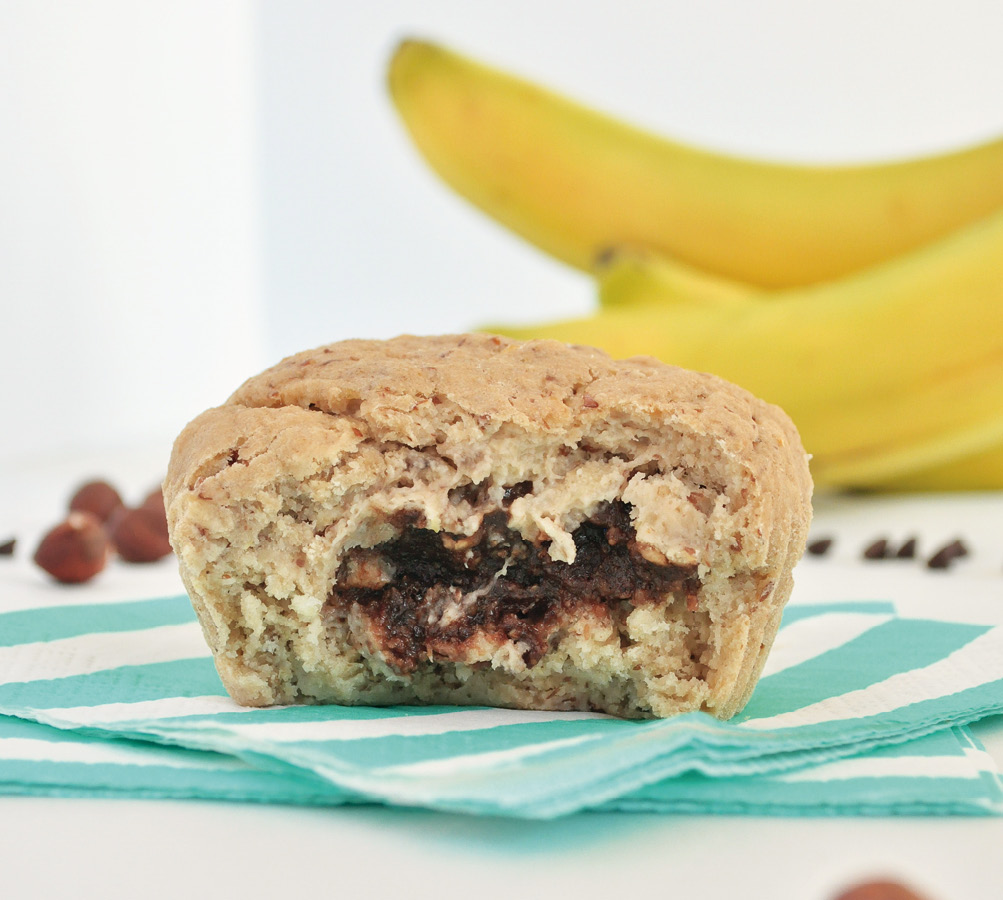
Banana Muffins with Chocolate Hazelnut Filling
IF YOU’RE A seasoned baker, you probably know that banana breads are a great way to use up bananas that are beginning to brown. These wonderfully moist muffins have been supercharged with a luscious chocolate hazelnut filling. I really don’t see how they could get any better than this.
MAKES 12 MUFFINS
1 tablespoon flax meal
3 tablespoons warm water
1¾ cup (160 g) gluten-free oat flour
1 teaspoon baking powder
½ teaspoon sea salt
2 ripe bananas, mashed
⅓ cup (80 ml) unsweetened applesauce
¼ cup (60 ml) pure maple syrup
5 tablespoons almond milk (see Basic Nut Milk)
1 tablespoon coconut oil
1 teaspoon vanilla extract
1 cup (240 g) Chocolate Hazelnut Spread or your favorite nut butter for filling (see Nut Butters)
1. Preheat the oven to 350°F (175°C).
2. Whisk together the flax meal and water in a small bowl. Place it in the refrigerator for a minute to set. It will become gummy, like an egg.
3. Mix the oat flour, baking powder, and sea salt in a large bowl.
4. Mix the bananas, applesauce, maple syrup, almond milk, coconut oil, and vanilla in a small saucepan. Stir over medium heat with a silicone spatula until all the ingredients are well combined, 2 to 3 minutes.
5. Add the banana mixture to the bowl with the oats. Stir until the ingredients are completely mixed, 1 to 2 minutes.
6. Add the flax/water mixture and mix well, using either a handheld or stand mixer (both work well).
7. Spoon a small amount of batter into the bottom of each cup in a lined or greased muffin pan. Add a dollop of the Chocolate Hazelnut Spread on top, then fill each cup with more muffin batter until they’re about three-quarters full.
8. Bake the muffins for 12 to 15 minutes, until golden. Wait until the muffins have completely cooled before removing them from the pans.
9. Store the muffins in an airtight container at room temperature for up to 4 days, for up to 2 weeks in the refrigerator, or for up to 6 months in the freezer.
VARIATION
Try making these with almond butter or cashew butter, which are equally delicious.
PREP AND BAKE TIME: 20 to 25 minutes
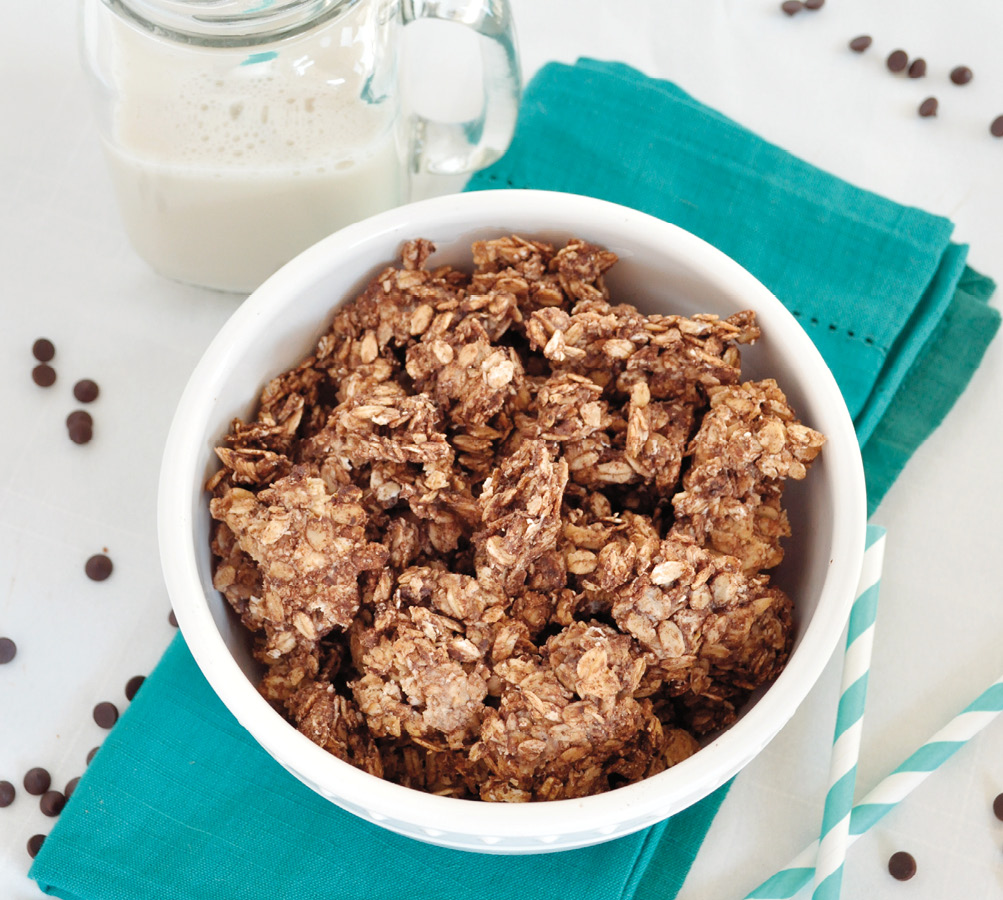
Peanut Butter Cup Granola
BEFORE I STARTED down my whole-food journey, I adored peanut butter cups. I remember going to chocolatiers when I lived in Las Vegas, looking for the perfect peanut butter cup to devour. Although I’m no longer on a search for the perfect peanut butter cup, I made this recipe to incorporate my love of everything peanut butter cup into my morning meal. It might be a breakfast food, but I promise it tastes like you’re eating dessert. And who doesn’t like a little something sweet to start the day? This dish will give you something to look forward to when you go to bed at night.
MAKES 4 CUPS (480 G)
3 cups (300 g) gluten-free rolled oats
3 tablespoons unsweetened cocoa powder or cacao powder
1 teaspoon sea salt
½ cup (125 g) Classic Peanut Butter
⅓ cup (80ml) pure maple syrup
¼ cup (60ml) unsweetened applesauce
2 tablespoons almond milk (see Basic Nut Milk)
1 teaspoon ground vanilla beans or vanilla extract
1. Preheat the oven to 350°F (175°C).
2. Mix together the oats, cocoa powder, and sea salt in a large bowl.
3. Mix the peanut butter, maple syrup, applesauce, almond milk, and vanilla in a small saucepan. Stir over medium heat using a silicone spatula until the ingredients are well combined, about 2 minutes.
4. Add the peanut butter mixture to the bowl with the oats and stir with the spatula until everything is well coated.
5. Spread the mixture out evenly onto a parchment-lined baking sheet and bake for about 25 minutes, stopping halfway through to shake the granola around a bit. You can tell it’s ready when the granola has a golden color to it.
6. Wait until the granola is completely cooled before removing it from the baking sheet.
7. Store the granola in an airtight container at room temperature for up to 7 days, in the refrigerator for up to 2 weeks, or in the freezer for up to 6 months.
PREP AND BAKE TIME: About 35 minutes
Peanut Butter Cup Granola Cookies
You can easily turn this recipe into cookies. All you need to do is add another ¼ cup (60 g) of peanut butter. After mixing, drop scoops of the batter onto a parchment-lined baking sheet and bake for 15 minutes. It’s hard to visually tell when these are done, so I lightly press my finger into a cookie to feel if it’s firm enough. Use a cookie scoop or two spoons to drop the cookies onto the baking sheet; either method works fine.
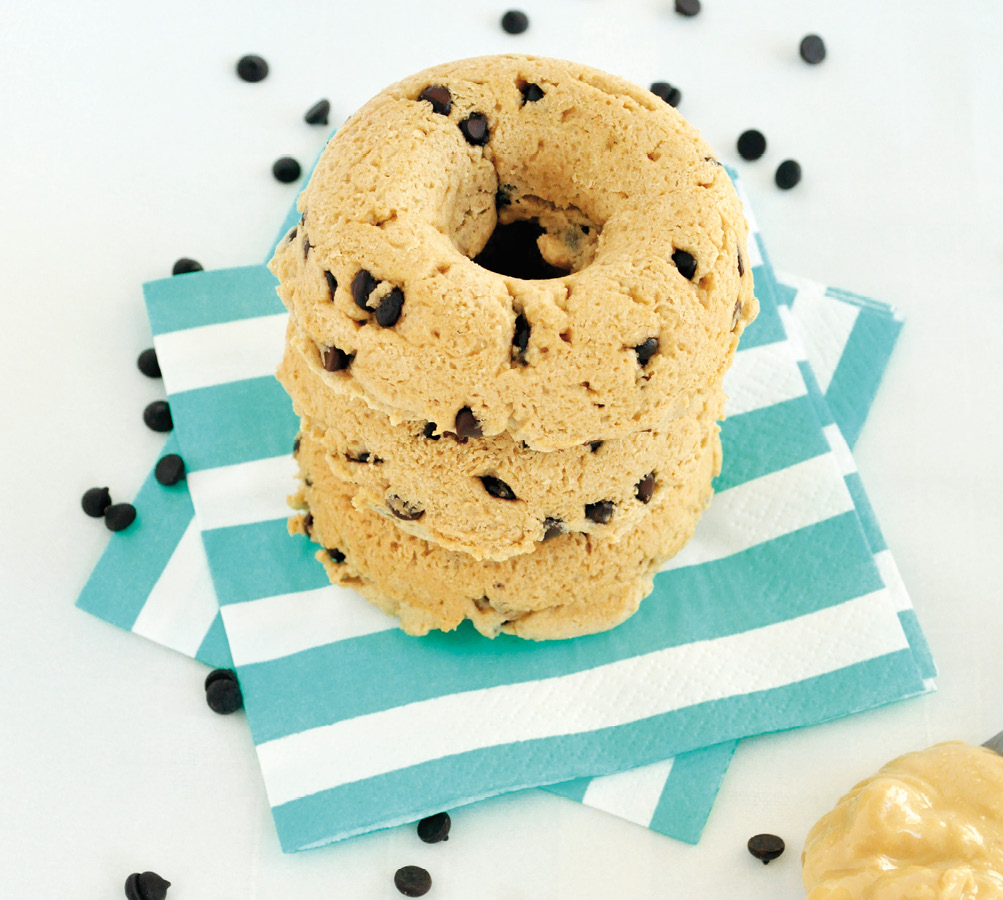
Peanut Butter Chocolate Chip Donuts
DID SOMEONE SAY donuts? Yes, please! These iconic American breakfast (well, possibly dessert) treats bring a smile to everyone’s face. My husband loves donuts so much that he takes off for the closest donut shop whenever I turn my back. Okay, maybe that’s an exaggeration, but I promise, it would be impossible for him to live without the occasional donut. So I created these peanut butter chocolate chip versions for him to have at home. Donuts are traditionally deep fried in peanut or vegetable oil, but to make mine a bit healthier than their store-bought counterparts, I bake them to avoid the grease overload. I’ll bet you’ll get hooked on these the first time you try them, just like my family did.
MAKES 12 DONUTS
½ cup (120 ml) unsweetened applesauce
⅓ cup (80 ml) pure maple syrup
½ cup (125 g) Classic Peanut Butter
3 tablespoons almond milk (see Basic Nut Milk)
1 teaspoon vanilla extract
2 cups (180 g) gluten-free oat flour
1 teaspoon baking powder
½ teaspoon sea salt
⅓ cup (50 g) dark chocolate chips
1. Preheat the oven to 350°F (175°C).
2. Mix the applesauce, maple syrup, peanut butter, almond milk, and vanilla in a small saucepan. Stir over medium heat until the ingredients are well combined, 2 to 3 minutes. Remove the mixture from the heat and let it cool for 5 minutes.
3. While the applesauce mixture cools, mix together the oat flour, baking powder, and sea salt in a large bowl.
4. When the applesauce mixture has cooled, add it to the dry ingredients and mix well, using either a handheld or stand mixer (both work well).
5. Fold in the chocolate chips with a spoon or spatula.
6. Spoon the batter into greased donut pans and bake for 10 minutes, until golden. Let the donuts cool completely before removing them from the pans.
7. Store the donuts in the refrigerator for at least a week, if not a few days more, or in the freezer for up to 3 months. To defrost, pull them out the night before and let them thaw at room temperature overnight.
NOTE
If you don’t have donut pans, you can make this recipe in a standard muffin pan. Simply cook them a few extra minutes to allow the centers to cook through. They turn out just as tasty.
PREP AND BAKE TIME: 20 to 25 minutes

Four-Ingredient Almond Butter Breakfast Cookies
IF BAKING ISN’T your thing, whether it intimidates you or you’re new to it, this is one of the easiest recipes you could ever make. If you’re a seasoned professional, these cookies will remind you that simple food can be exquisite. One of the best things about this recipe is that you probably already have all the ingredients you need on hand! So step into the kitchen and get busy—you’ll be finished in no time.
MAKES SIXTEEN 2-INCH (5 CM) COOKIES
2 cups (200 g) gluten-free rolled oats
½ teaspoon sea salt
2 bananas, mashed
1 cup (240 g) almond butter (see Basic Nut Butter)
2 tablespoons pure maple syrup, optional
1. Preheat the oven to 350°F (175°C).
2. Mix the oats and sea salt in a large bowl.
3. Mix the bananas with the almond butter and maple syrup (if you choose to use it) in a small saucepan. Cook over medium heat, stirring constantly, until the ingredients are mixed well, about 2 minutes.
4. Add the banana mixture to the oats and mix until the ingredients are well combined, using either a handheld or stand mixer (both work well), or mix it by hand with a silicone spatula.
5. Using a cookie scoop or two spoons, drop dollops of the dough onto a parchment-lined baking sheet, about 1 inch apart.
6. Bake the cookies for 10 minutes, until lightly golden. Let them completely cool before removing them from the baking sheet.
7. Store the cookies in an airtight container in the refrigerator for up to 2 weeks, or in the freezer for up to 6 months.
NOTE
For an added boost of protein, add 2 tablespoons of chia seeds or hemp hearts (shelled hemp seeds).
PREP AND BAKE TIME: About 15 minutes
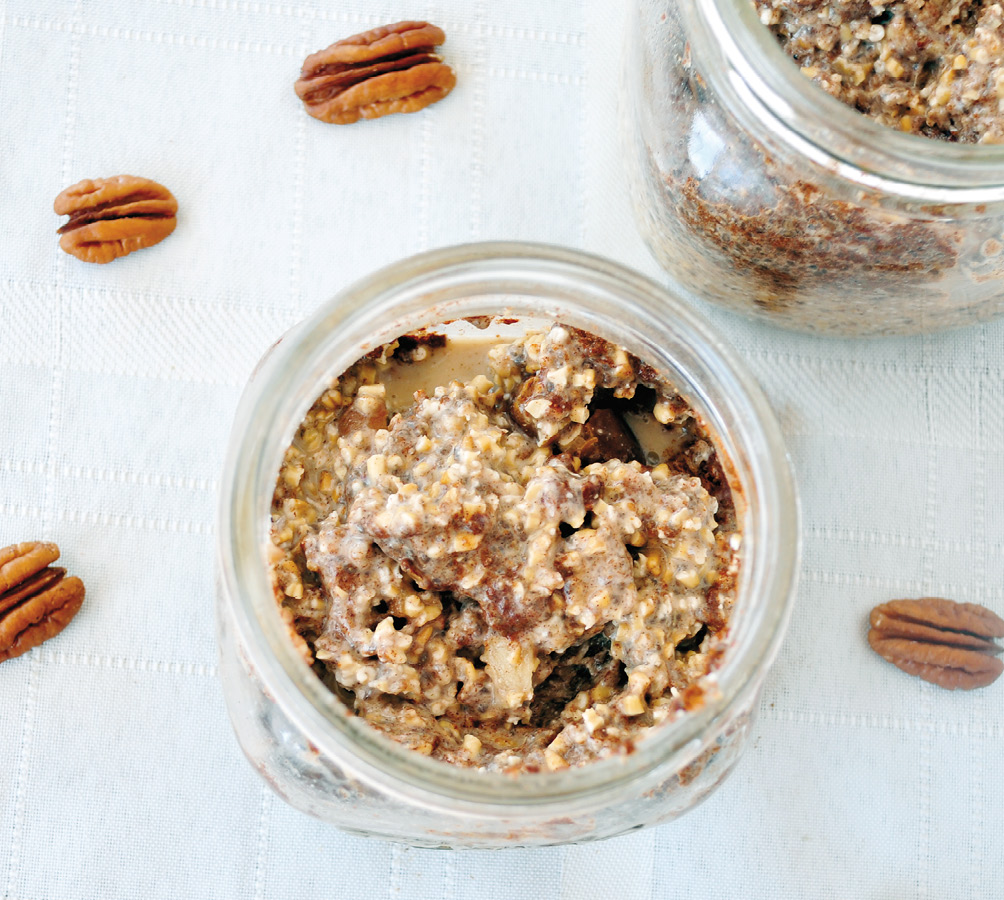
Pecan “Caramel” Overnight Oats
IMAGINE A BREAKFAST that takes only minutes to make, requires no cooking, and will leave you satisfied for hours. It exists! Overnight oats are my favorite breakfast, partly because of the endless number of flavor combinations you can enjoy. I make five jars’ worth at a time for easy breakfast options all week. It makes having a healthy meal and still getting out the door on time on weekday mornings easy.
MAKES ONE 12-OUNCE (340 G) SERVING
½ cup (150 g) gluten-free rolled oats or gluten-free steel-cut oats
2 teaspoons chia seeds
1 teaspoon cinnamon
½ to ¾ cup (125 to 180 ml) almond milk (amount depends on how thick you like your oatmeal; see Basic Nut Milk)
1 tablespoon pecan butter (see Basic Nut Butter)
1 Medjool date, pit removed and finely chopped
1. Mix the oats, chia seeds, and cinnamon together in a glass jar that holds at least 12 ounces (340 ml). I prefer mason jars, but you can use any kind you like; recycled jam jars work well, too.
2. Add the almond milk, peanut butter, and chopped date, and stir until the ingredients are well combined. Make sure to blend the pecan butter evenly inside the jar. I use the back of my spoon to break up any chunks while I’m stirring.
3. Store the oats covered overnight in the refrigerator. Make sure to mix them well in the morning just before eating.
NOTES
· Steel-cuts oats will still retain a crunch in the morning, which I enjoy. You can use rolled oats if you prefer a smoother oatmeal. Don’t use quick oats; they get too soggy.
· If you’re sensitive to oats, you can use millet instead.
· Instead of the date, you can use 2 teaspoons of pure maple syrup, although it won’t have as much of a caramel-like texture and taste.
· This oatmeal also works well warmed up. Heat it in the microwave for no more than 30 seconds, or place the jar in a pot of water and heat it gently on the stove.
VARIATIONS
· A great alteration to this recipe is to substitute almond butter (see Basic Nut Butter) for the pecan butter, omit the cinnamon, and add 2 teaspoons of unsweetened cocoa powder or cacao powder.
· I also like to add 1 to 2 teaspoons of maca powder to this recipe for a natural energy boost!
PREP TIME: About 5 minutes (not including the overnight soak)
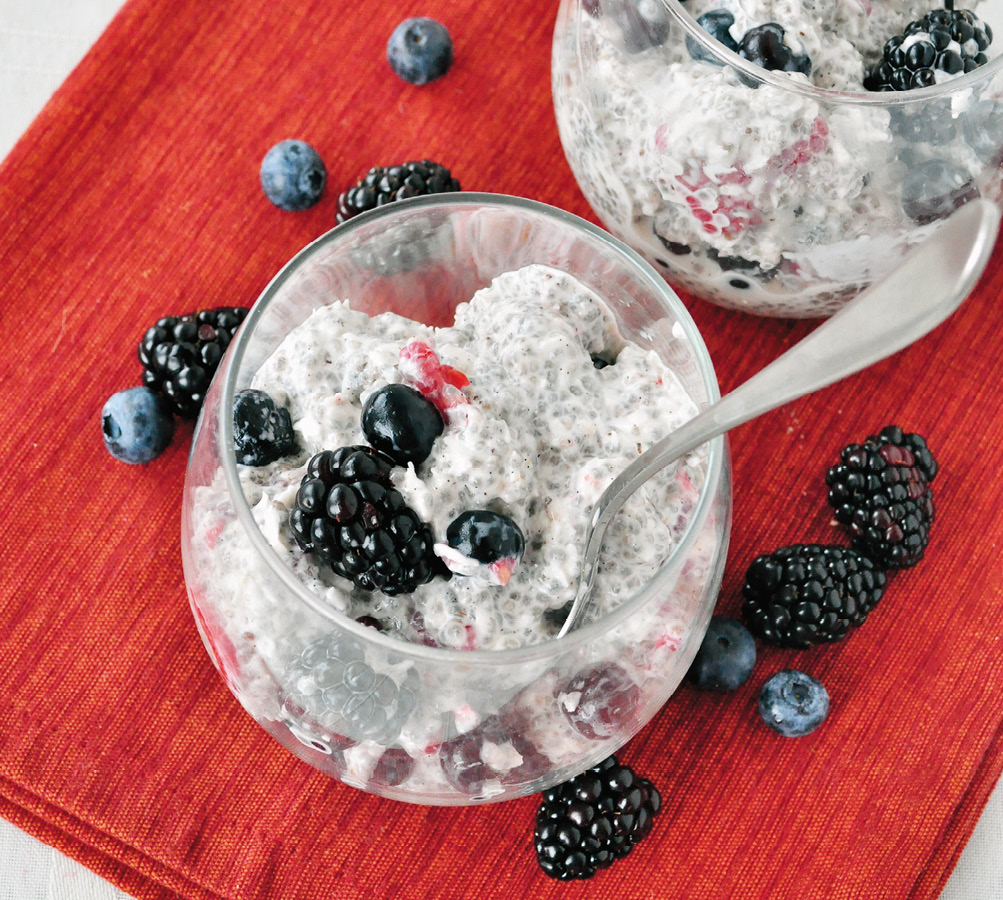
Triple Berry Chia Seed Pudding
IN THE 1980S chia seeds were something you spread over a ceramic animal to watch them sprout. Today they’re recognized as an ancient Aztec superfood. Did you know that one serving of chia seeds contains 11 grams of fiber? That’s 42 percent of the daily recommendation! They’re also a great source of protein and healthy fats. With their high fiber content, they’ll keep you satiated for a long time. Since they expand in liquid, a little goes a long way, and they fill you up more than you might think. There are so many ways to eat chia seeds, but my favorite is in pudding, like in this simple recipe. You can even easily take it on the go!
MAKES FOUR ½-CUP (250 G) SERVINGS
2 cups (480 ml) Brazil nut milk (see Basic Nut Milk)
½ cup (80 g) chia seeds
½ cup (47 g) shredded unsweetened coconut
1 cup (125 g) sliced strawberries (see Notes below)
1 cup (150 g) blueberries (see Notes below)
½ cup (70 g) blackberries (see Notes below)
1 teaspoon ground vanilla beans
3 tablespoons pure maple syrup
1. Place all the ingredients in a large bowl and mix them very well. The chia seeds have a tendency to clump together at the bottom of the bowl, so make sure to stir completely for several minutes. Using a silicone spatula helps blend those stubborn chia seeds at the bottom.
2. Place the bowl, covered, in the refrigerator for 4 hours to firm up. The pudding should last in the refrigerator for 4 to 5 days.
NOTES
· Chia seeds have a texture similar to tapioca, although the seeds are much smaller. If you’re not a fan of the texture, after the seeds have expanded, throw the whole mixture into a blender and mix it to a smoother texture.
· You can use fresh or frozen berries for this recipe. If you use frozen ones, make sure they’re completely thawed before mixing.
PREP AND CHILL TIME: About 5 minutes, plus 4 hours to set in the fridge