How to Bake Everything: Simple Recipes for the Best Baking - Mark Bittman (2016)
Frozens, Puddings, and Candies
Few of the recipes in this chapter are baked, but who’s going to argue with including puddings, ice creams, soufflés, mousses, candies, and their relatives? These desserts are among the easiest ways to indulge a sweet tooth, supremely adaptable—if you can make one granita, you can make any—and once you discover how superior these kinds of desserts are to their commercial cousins, you’ll have trouble going back. These have another benefit besides flavor and ease: They’re gluten free. So this is a key chapter for dessert lovers who avoid wheat.
The Basics of Frozen Desserts
There’s nothing like fresh ice cream, straight from the machine—it’s soft-serve at its best, with ideal texture and the freshest flavors. Ice cream keeps for a while, but once you’ve stored it in the freezer, it will never be the same, though it’ll still be delicious. Let it soften slightly before serving, about 30 minutes in the refrigerator or 15 minutes on the counter.
Of course, there are also easier, lower-tech frozen desserts than ice cream, all of which are equally refreshing and adaptable. Granitas are like uber-slushies, and nothing beats them for icy summertime fixes. (Note that they are naturally vegan too.) Semifreddo, rich and creamy, will satisfy even the strongest ice cream craving, but it’s made of whipped cream, egg whites, and a quick custard, then frozen in a loaf pan rather than churned in a machine. And don’t forget ice pops, totally kid-friendly but, as you’ll see, sophisticated enough for adults.
ICE CREAM
Ice cream may be made with milk, half-and-half, or cream, typically a combination; it has to have at least 10 percent milk fat. Custard-based—that is, egg-thickened—ice cream is usually called French ice cream. Eggless varieties are made with cornstarch; these were once called “Philadelphia” ice cream. Many people prefer it because its flavors may seem purer than those made with eggs. It’s easiest to make ice cream with a machine, but you can do without; see page 309.
GELATO
This Italian counterpart to ice cream is typically made with more milk than cream, and denser. Specialized gelato machines add less air than most ice cream makers, but it’s easy to make your own homemade version by slightly under-churning. Adding a bit of corn syrup (not to be confused with the high-fructose stuff) does a good job of replicating the almost fudgy consistency.
ICE MILK
Ice milk can be thought of as crude ice cream or extra-creamy sorbet. You make it in an ice cream machine, but it freezes harder and forms larger ice crystals; what you lose in texture and richness you also lose in fat and calories, which makes it a great option for some. You can make ice milk from any kind of milk as long as you adjust your expectations and realize that it is more akin to sorbet than ice cream; treat it that way and you won’t be disappointed. You can also make ice milk from nondairy milks, like coconut or nut milk.
FROZEN YOGURT
The frozen yogurt served at most shops is soft ice cream by another name, but the best frozen yogurt sticks to its origins and is slightly sour. The only real difference between the two is that yogurt takes the place of ice cream’s custard or cornstarch base.
SORBET
Sorbet is typically—but not always—fruit based and dairy and egg free. At its core, it’s about simplicity and intensity of flavor; at a minimum, it can be made with just two or three ingredients, like fruit purée (the base), sugar, and sometimes a bit of water. Sherbet is the dairy version, with a milk fat content of 1 to 2 percent. Any fruit or vegetable can serve as a base for either, as well as chocolate, coffee, tea, and more (see More Flavors for Sorbet, Granita, and Ice Pops).
You can make sorbet in a food processor, but if you do, it’s best to serve it ASAP; it gets quite hard in the freezer. Otherwise, let it soften in the fridge for 15 to 20 minutes before serving, and blitz it once or twice in the food processor if it still won’t soften.
GRANITA
Granitas are among the easier and readily customizable frozen desserts—you don’t need a machine or any special equipment to make them, you can use literally any flavored liquid you like, and no special technique is involved. Intensely flavored, with a crunchy, slushy, largely unrefined texture, they’re never more appealing than in the dead of summer. Making them is a largely lazy affair: You freeze a liquid and return to stir and scrape it periodically as it freezes until the whole thing resembles a snow cone.
ICE POPS
Or Popsicles, freezer pops, paletas—these are made by freezing any liquid in a mold with a stick. They’re great made with just juice, or use any of the sorbet or granita variations. Refreshing, fun to make and eat with kids, and very low effort. You don’t even need molds: Paper cups or large ice cube molds will do the job.
EQUIPMENT
I’m not an appliance geek, but I do recommend that you buy an ice cream machine if you ever want to make ice cream or its relatives. The most economical are those with insulated bowls that you freeze ahead of time, or those that just sit in the freezer. When the time comes, you fill the container with your custard mixture, then crank by motor or even hand. Most will make a quart or so, and even motorized ones cost as little as $25. On the other hand, if you’re really serious about your frozen desserts, the top-of-the-line machines have built-in refrigeration units and timers, weigh up to 50 pounds, cost a few hundred dollars when new, and do almost all the work. Fanatics will want one of these.
Recipes
Simplest Vanilla Ice Cream
Vanilla Custard Ice Cream
Chocolate Gelato
Frozen Yogurt
Fresh Fruit Sorbet
Food Processor Fruit Sorbet
Orange Sherbet
Fruit Granita
Coffee Granita
Strawberry Semifreddo
Fruit Ice Pops
Orange Cream Pops
Simplest Vanilla Ice Cream
Makes: About 1 quart
Time: About 30 minutes, plus time to chill and churn
Classic vanilla ice cream usually calls for a custard base. I like this version better. Not only does cornstarch achieve the same velvety texture that you get from a custard, but the vanilla (or other flavors; see page 314) shines through even more without the egg.
- 2 tablespoons cornstarch
- 2 cups half-and-half
- 1 cup cream
- ½ cup sugar
- ¼ teaspoon salt
- 2 teaspoons vanilla extract
1. Whisk the cornstarch with 2 tablespoons of the half-and-half to make a smooth slurry.
2. Put the remaining half-and-half, the cream, sugar, and salt in a medium saucepan and whisk to combine. Cook over medium-low heat, stirring occasionally, until the mixture nearly comes to a simmer. Whisk in the slurry and vanilla and continue to cook, whisking frequently until the mixture thickens a bit, 2 or 3 minutes.
3. Strain the mixture into a bowl. Cover and refrigerate until it is completely cool, at least 2 hours and preferably overnight. Transfer to an ice cream maker and churn according to the manufacturer’s directions.
How to Make Ice Cream Without a Machine
Jerry-rigged ice cream is not quite as good as that made in a machine, but it’s worth the effort. Having said that, it’s real effort, which is why I encourage enthusiasts to buy a machine. But if you need convincing…
Find the largest and second-largest mixing bowls that you have; ideally, when you put the smaller one in the larger one, there will be about an inch of space around the perimeter. After nesting the smaller bowl inside the larger, weight the smaller bowl down with something heavy, like a brick, a rock, or a bag of rice. Pour water into the space between the two bowls until it reaches just below the rim of the smaller bowl. Freeze until the water turns to solid ice.
Pour the chilled ice cream base into the smaller bowl and beat with a hand mixer on high speed until the mixture is very cold and has some air beaten into it, 10 minutes or so. At this point it will still be very runny; don’t worry. Cover with plastic wrap and freeze for 1 hour, or until the mixture is pudding-like. Remove the bowls from the freezer and beat again for 5 minutes. Cover again, pressing the plastic wrap directly onto the surface of the ice cream, and freeze until the ice cream is firm all the way through (the very middle will be the last to harden), anywhere from 4 hours to overnight.
Vanilla Custard Ice Cream
Makes: About 1 quart
Time: About 30 minutes, plus time to chill and churn
Eggs add luxurious thickness and a mellow, round flavor, making for a rich ice cream that’s fabulous on its own and also serves as a base for any flavor you can dream up (see page 314 for a slew of ideas). Experiment at will: As long as you have 3 cups of liquid, you can play around with the fat content, but know that higher fat makes for better texture. You can use as few as three yolks and still produce very good ice cream.
- 6 egg yolks
- ½ cup sugar
- 2 cups half-and-half
- 1 cup cream
- ¼ teaspoon salt
- 2 teaspoons vanilla extract
1. Combine the egg yolks and sugar in a large saucepan and use a whisk or electric mixer to beat them until thick and pale yellow, about 5 minutes.
2. Whisk the half-and-half, cream, and salt into the yolk mixture until thoroughly combined. Put the saucepan over medium-low heat and cook, stirring constantly, until thick; if the custard ever starts to simmer, turn down the heat. It’s ready when it coats the back of a spoon and a line drawn with your finger remains intact (see the illustration on page 324); this should take 5 minutes or so.
3. Strain the custard into a bowl and stir in the vanilla. Cover and refrigerate until it is completely cool, at least 2 hours and preferably overnight. Transfer to an ice cream maker and churn according to the manufacturer’s directions.
VANILLA BEAN ICE CREAM Real vanilla beans add an unbeatable warmth and depth of flavor: Split a vanilla bean down the middle and scrape out the seeds (see page 29 for more detail). In a large saucepan, combine the seeds and pod with the half-and-half and cream; heat the mixture over medium-low heat, stirring occasionally, until steam rises from the mixture, about 5 minutes. Remove from the heat and let cool completely for the vanilla to steep; remove the pod. Beat the egg yolks and sugar as directed, whisk them into the cooled half-and-half mixture, and proceed with the recipe.
12 Toppings for Any Ice Cream
- Whipped Cream
- Hot Fudge or Rich Chocolate Sauce
- Any Caramel Sauce
- Butterscotch Sauce
- Marshmallow Sauce
- Dulce de Leche
- Fruit Sauce, Two Ways
- Macerated Fruit
- Any crumbled cookies, brownies, or cake
- Chopped toasted nuts (see page 57)
- Crushed Toffee or Peanut Brittle, or Peppermint Bark
- Toasted coconut (see page 57)
Chocolate Gelato
Makes: About 3 cups
Time: About 30 minutes, plus time to chill and churn
Gelato is made with mostly milk rather than cream. It’s also churned at a lower speed than other ice creams, so despite its lower fat content, it is denser and richer with less air beaten into it. Most home ice cream makers don’t have slower settings, but churning for less time and adding a bit of corn syrup help emulate the thick consistency.
- 3 tablespoons cornstarch
- 2½ cups whole milk
- 1 cup half-and-half
- ½ cup sugar, or more if you like it a little sweeter
- 2 tablespoons light corn syrup
- ¼ teaspoon salt
- 1 cup cocoa powder
- 3 ounces dark chocolate, finely chopped
1. Mix the cornstarch with about 3 tablespoons of the milk to make a slurry.
2. Heat the remaining milk, the half-and-half, sugar, corn syrup, and salt in a saucepan over medium-low heat until the sugar dissolves. Whisk in the cornstarch slurry along with the cocoa powder and chopped chocolate. Stir until the chocolate has melted and a line drawn on the spoon with your finger remains intact for a second or 2 (see the illustration on page 324); this should take 6 to 8 minutes.
3. Strain the custard into a bowl, cover, and refrigerate until it is completely cool, at least 2 hours and preferably overnight. To make the gelato, reserve ¾ cup of the custard and keep it refrigerated. Pour the rest into the ice cream maker and churn until thick; this will take a little less time than it would for ice cream. Pour in the reserved custard and churn for another 2 or 3 minutes or until it reaches the desired consistency. Freeze to harden the gelato as much or as little as you like, softening if necessary before serving.
PISTACHIO GELATO The natural color of pistachio gelato is yellowish brown, so if you want it to be green you’ll have to add a few drops of food coloring while it churns: Use a food processor to coarsely grind 2 cups unsalted pistachios. Add the ground pistachios to the saucepan with the milk and proceed with the recipe, omitting the cocoa powder and chocolate. Stir frequently to avoid burning. Strain just before churning, pressing the nuts to extract their flavor.
HAZELNUT GELATO Toast 2 cups hazelnuts in a 350°F oven until fragrant, 8 to 10 minutes, shaking the pan occasionally. Rub the nuts in a towel to remove the skins and follow the preceding variation.
CHOCOLATE-HAZELNUT GELATO When you’re making the hazelnut gelato above, stir in 4 ounces chopped dark chocolate with the cornstarch slurry and proceed with the recipe. Or, instead of hazelnuts and chocolate, stir in ⅔ cup Chocolate-Hazelnut Spread after straining the gelato into the bowl.
The Three Stages of Ice Cream Flavoring
Since ice cream is just a liquid that you chill and churn, it’s easy to add flavors and textures. (Go to an ice cream shop and it can seem like there are more flavors than days in the year.) There are three different ways to add flavor, depending on what you’re adding:
1. Infuse the milk or cream
Helpful because it doesn’t change the body of the ice cream; best with a spice (think vanilla!), herb, tea, or other highly aromatic ingredient. Heat the cream to simmering; add the flavoring ingredient loose, in a tea ball, or wrapped in cheesecloth; let it sit off the heat for 5 to 20 minutes, depending on the ingredient and how strong you want the flavor to be; then strain.
▪ Whole spices, like cinnamon stick, cardamom, ginger, lemongrass, or vanilla bean
▪ Culinary lavender buds, lemon verbena, mint, thyme, basil, or other herbs
▪ Dried tea like Earl Grey, rooibos, or chai
▪ Ground coffee
2. Add to the base
Do this with liquids like melted chocolate, fruit purées, and booze or other ingredients that add flavor but don’t need to be strained, like ground spices. Stir into the finished base before you chill it.
▪ Cinnamon, ginger, nutmeg, or cardamom
▪ Almond extract, peppermint oil, or orange oil
▪ A shot of espresso
▪ Bourbon, rum, Kahlúa, Grand Marnier, or other booze
3. Swirl into the ice cream
Use with ingredients that you want to remain somewhat distinct rather than completely incorporated. When the ice cream is the consistency you want, slowly add these ingredients with the machine running; churn for just a couple of seconds, stopping before they’re fully incorporated. This is great when you want each bite to be slightly different, with a patch of chocolate chips or a ribbon of caramel or fruit, or if you want the ingredient to stay somewhat crunchy, like nuts or crumbled cookies.
▪ Lukewarm Rich Chocolate Sauce, any Caramel Sauce, Butterscotch Sauce, Dulce de Leche, any fruit purée, Fruit Sauce, Two Ways, or Balsamic Syrup
▪ Any nut butter or Chocolate-Hazelnut Spread
▪ Up to ¾ cup chopped toasted nuts, like almonds, walnuts, hazelnuts, pecans, peanuts, and/or macadamias (see page 57)
▪ Chopped, minced, or crushed candy—chocolate-covered espresso beans, Peanut Brittle, Caramels (page 324), Peppermint Bark, Candied Ginger, Candied Orange Peel, or your favorite store-bought candy, for example
▪ Crushed Chocolate Wafer Cookies, Gingersnaps, Sugar Cookies, Brownies, or other cookies or bars
▪ Pieces of Chocolate Chunk Cookie dough (if raw eggs are a concern, leave them out of the dough)
▪ Up to ¾ cup macerated or cooked fruit—anything from raspberries, strawberries, peaches, or cherries to sautéed apples or poached pears
Frozen Yogurt
Makes: About 1 quart
Time: 5 minutes, plus time to chill and churn
With just two ingredients and hardly any real prep work, this is one of the easiest desserts there is. Whole-milk yogurt produces the creamiest results; Greek yogurt, which is much thicker, often becomes too hard in the freezer but is an excellent complement to fruit purées, as in the variation.
- 3½ cups yogurt
- ¾ cup granulated or superfine sugar
Whisk together the yogurt and sugar until combined. Chill for 30 minutes, then churn in an ice cream maker according to the manufacturer’s instructions.
HONEY FROZEN YOGURT Yes, this can pass as breakfast: Reduce the sugar to 3 tablespoons and add ⅔ cup honey.
FRUITY FROZEN YOGURT Any fruit is wonderful here, as is a combination: Replace the yogurt with 2 cups Greek yogurt and add 1½ cups fruit purée.
COCONUT FROZEN YOGURT Replace 1 cup of the yogurt with 1 cup full-fat coconut milk. Add 1 cup shredded unsweetened coconut just before churning.
7 Mix-Ins for Frozen Yogurt
Add these to the yogurt before chilling and use as many as you like:
- Fresh or dried fruit, chopped, 1 cup
- Citrus zest, grated, 1 tablespoon
- Vanilla extract, 2 teaspoons
- Dark chocolate, chopped, 4 ounces
- Balsamic vinegar or Balsamic Syrup, ¼ cup
- Freshly grated ginger, 1 tablespoon
- Cardamom or cinnamon, 1 teaspoon
6 Treats to Make with Ice Cream, Sorbet, or Frozen Yogurt
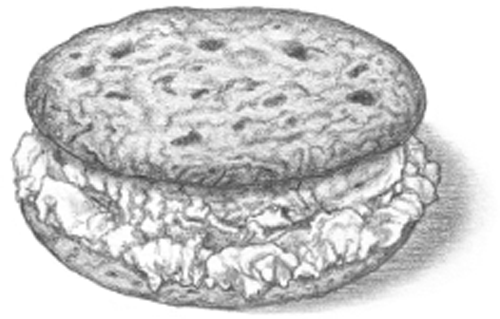
ICE CREAM SANDWICHES
Sandwich a scoop of your favorite ice cream between a pair of homemade cookies, like vanilla ice cream between Chocolate Chunk Cookies or Ginger Ice Cream between Molasses-Spice Cookies.
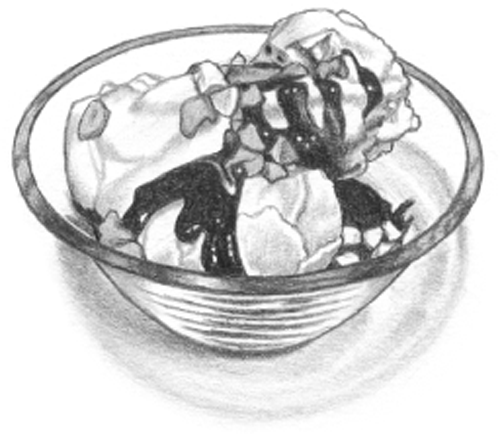
SUNDAES
Top a few scoops of your ice cream of choice with any of the following: Chocolate, Caramel, or Butterscotch Sauce, Whipped Cream, sprinkles, chopped toasted nuts, or leftover crumbled cookies. With sundaes, anything goes.

LAYERED ICE CREAM CAKE
Prepare a layer cake of your choice (see pages 196-218). Soften your batch of ice cream by microwaving it for a few seconds and then stirring with a rubber spatula (see Ice Cream Genoise). Spread the softened ice cream between the layers, then stick the cake in the freezer until firm. Meanwhile, prepare your frosting. Working quickly, frost the frozen cake, sticking the cake back in the freezer if the ice cream starts to melt. Store the cake in the freezer; thaw for 15 minutes before serving, just until it’s soft enough to slice easily.
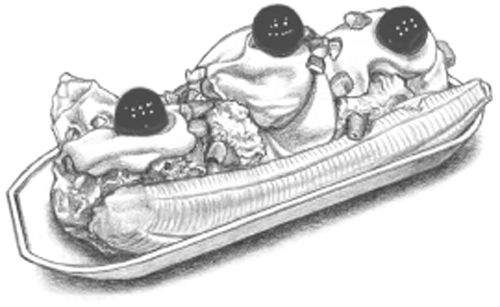
BANANA SPLITS
Cut a banana in half lengthwise and lay it in a dish. Add a scoop each of chocolate, vanilla, and strawberry ice cream (page 314 and 310) in a line down the center of the two banana pieces and garnish with chopped nuts, Whipped Cream, and maraschino cherries. If you like, a drizzle of Hot Fudge or Rich Chocolate Sauce never hurts.
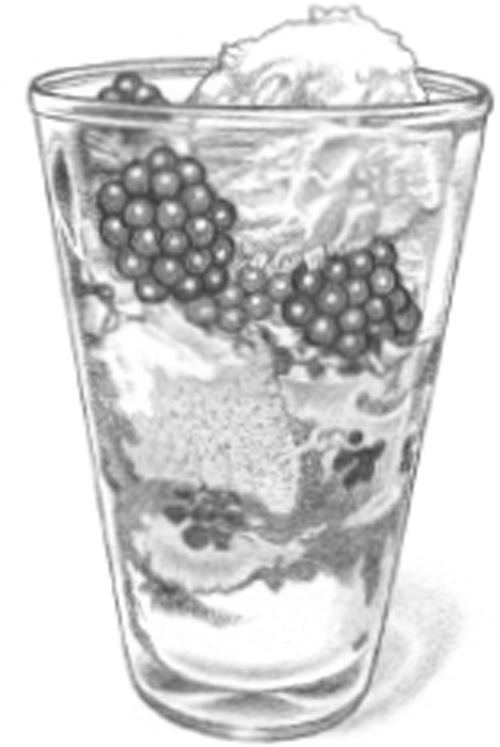
PARFAITS
Layer one or a combination of ice creams and sorbets with Fruit Sauce, Macerated Fruit, Fruit Purée, Fruit Jam, or Marmalade and crushed graham crackers or cookie crumbs.
TARTUFO
Line a 9 × 5-inch metal loaf pan with plastic wrap, leaving a 3-inch overhang on all sides. Spread 1 quart softened ice cream evenly into the pan and freeze until firm, about 30 minutes. Sprinkle the ice cream with a handful of chopped nuts, maraschino cherries, chocolate chips, or any topping to your liking. Spread more softened ice cream (the same or a different flavor) on top to fill the pan (about 3 cups). Freeze the pan until the ice cream is firm, 1 hour. Meanwhile, make Chocolate Ganache. Spread two-thirds of the ganache over the ice cream and freeze until the chocolate is very hard, about 2 hours. Rewarm the remaining ganache over low heat, then cool to room temperature. Run a knife around the outside of the pan to loosen the ice cream and invert the loaf onto a wax-paper-lined baking sheet. Peel off the plastic wrap and quickly spread chocolate ganache over the bare top and sides of the ice cream loaf. Sprinkle more toppings like nuts or fruit over the loaf, then freeze until the chocolate is firm, another hour. Cut the tartufo into slices and serve with more warm ganache if you like.
More Ice Cream Flavors
The base ratio always remains the same: 6 yolks—or 2 tablespoons cornstarch—with 3 cups total liquid; only the type of liquid, the flavorings (substituted for the vanilla), and the sweetener change.
VARIATION: Chocolate Ice Cream
FLAVORINGS: 5 ounces dark chocolate, chopped
HOW TO ADD: Add to the ice cream base with the half-and-half and cream.
VARIATION: Strawberry (or Any Berry) Ice Cream
FLAVORINGS: 1 cup berry purée, strained (see page 572)
HOW TO ADD: Stir into the ice cream base before chilling.
VARIATION: Coffee Ice Cream
FLAVORINGS: 2 to 3 shots freshly brewed espresso or ½ cup ground coffee
HOW TO ADD: Swap liquid coffee for ½ cup of the half-and-half or steep ground coffee in the hot base (see The Three Stages of Ice Cream Flavoring)
VARIATION: Coconut Ice Cream
FLAVORINGS: 1 cup coconut milk; ½ cup shredded unsweetened coconut, toasted in a dry skillet until lightly browned if you like (see page 57)
HOW TO ADD: Replace the cream with the coconut milk and fold the coconut into the ice cream base before chilling.
VARIATION: Spice Ice Cream
FLAVORINGS: ½ teaspoon each cinnamon, mace, nutmeg, black pepper, and coriander, plus 2 vanilla beans; or use 1 tablespoon single spice, like cinnamon or cardamom
HOW TO ADD: Split open the vanilla beans and steep in the hot ice cream base (see page 310); stir ground spices directly into the base before chilling.
VARIATION: Pumpkin Ice Cream
FLAVORINGS: 1 cup canned pumpkin purée; ½ teaspoon each cinnamon and ginger
HOW TO ADD: Whisk 1 cup of the hot ice cream base with the pumpkin to thin it, then add it to the base with the spices before chilling.
VARIATION: Rum-Raisin Ice Cream
FLAVORINGS: ½ to ¾ cup raisins; ¼ cup dark rum; ½ cup packed light brown sugar
HOW TO ADD: Soak the raisins in the rum at room temperature for an hour or so, or bring to a boil and set aside to cool. Use the brown sugar in place of granulated. Add the rum-raisin mixture to the ice cream base for the last minute or 2 of cooking, before chilling.
VARIATION: Maple-Nut Ice Cream
FLAVORINGS: ¾ cup maple syrup; 1 cup chopped lightly toasted nuts (see page 57), like pecans or walnuts
HOW TO ADD: Swap the sugar for the maple syrup and add the nuts to the base before chilling.
VARIATION: Buttermilk Ice Cream
FLAVORINGS: 1 cup buttermilk
HOW TO ADD: Use the buttermilk instead of cream.
VARIATION: Mascarpone Ice Cream
FLAVORINGS: 1 cup mascarpone cheese
HOW TO ADD: Use mascarpone instead of cream.
VARIATION: Banana Ice Cream
FLAVORINGS: 2 ripe bananas
HOW TO ADD: Peel and steep the bananas in the hot ice cream base (see page 311), then strain them out before chilling the base.
VARIATION: Ginger Ice Cream
FLAVORINGS: 2 tablespoons chopped fresh ginger; ½ cup minced candied ginger
HOW TO ADD: Steep the fresh ginger in the hot ice cream base (see page 311), then strain it out and stir in the candied ginger before chilling.
VARIATION: Green Tea Ice Cream
FLAVORINGS: 1 tablespoon matcha green tea or 2 tablespoons leaf green tea
HOW TO ADD: Stir the matcha into the base before chilling or infuse the hot ice cream base with leaf green tea (see page 311).
VARIATION: Corn-Maple Ice Cream
FLAVORINGS: ½ cup maple syrup; 2 ears corn, plus more if you like
HOW TO ADD: Use the maple syrup in place of sugar. Cut the kernels from the corn, purée, and strain, then add the liquid with the cobs to the ice cream base with the half-and-half and cream. Strain and discard the cobs from the finished ice cream base; if you like, stir in more whole corn kernels before chilling.
VARIATION: Avocado Ice Cream
FLAVORINGS: 1 large avocado puréed with the juice of a lime
HOW TO ADD: Whisk the avocado with a bit of the hot ice cream base until smooth, then stir it into the bowl before chilling.
VARIATION: Miso-Peach Ice Cream
FLAVORINGS: ½ cup packed light brown sugar; 2 peaches (or nectarines), peeled and puréed to make about 1 cup, whisked with 1 tablespoon white miso
HOW TO ADD: Use brown sugar instead of white. Add the peach mixture to the ice cream base before chilling.
VARIATION: Bacon-Bourbon-Maple-Pecan Ice Cream
FLAVORINGS: ¾ cup maple syrup; 2 tablespoons bourbon; 4 strips chopped cooked bacon, the rendered bacon fat, and ¾ cup chopped toasted pecans
HOW TO ADD: Use the maple syrup instead of sugar. Whisk the bourbon into the ice cream base in the last minute or 2 of cooking, then fold in the bacon, fat, and pecans before chilling.
VARIATION: Olive Oil Ice Cream
FLAVORINGS: ⅓ cup olive oil
HOW TO ADD: Whisk the olive oil into the base before chilling.
VARIATION: Salted Caramel Ice Cream
FLAVORINGS: 2 cups Caramel Sauce and 1½ teaspoons coarse salt
HOW TO ADD: Stir the caramel and salt into the base before chilling.
Fresh Fruit Sorbet
Makes: About 3 cups
Time: About 10 minutes, plus time to chill and churn
Sorbets are simple and light, with little to distract you from the main ingredient’s flavor, so they’re an excellent use for good fresh fruit. If, at the peak of the season, you find yourself with an overabundance of overripe fruit, it’s perfect here—though not all sorbets are fruit-based; see this chart for more flavor variations.
- 4 cups ripe soft fruit, peeled, pitted, and chopped as necessary
- ¾ cup granulated sugar, superfine sugar, or Simple Syrup
- 1 tablespoon fresh lemon juice, or more to taste
1. Purée the fruit in a blender with the sugar and lemon juice. Taste and add more of either if necessary; err on the sweeter side, as the sorbet will taste less sweet than the purée. If necessary, add water 2 tablespoons at a time to help the fruit mix. If you’re using mango or seedy berries, strain the purée, stirring and pressing the mixture through a sieve with a rubber spatula to leave any fibers or seeds behind; be sure to scrape all the purée from the underside of the strainer.
2. Cover and refrigerate until completely cool, then churn in an ice cream maker according to the manufacturer’s directions.
FRESH FRUIT SORBET WITH JAM Substitute ¾ cup fruit preserves for the sugar.
FRESH FRUIT ICE MILK In terms of richness, somewhere in between sorbet and ice cream: Substitute 1 cup milk (or cream if you want it really rich) for a cup of the fruit and omit the lemon juice.
Food Processor Fruit Sorbet
Makes: About 1 quart
Time: 10 minutes
You don’t need an ice cream maker, or even fresh fruit, to make this sorbet—it comes together in a matter of minutes in a food processor and goes straight to the table. Yogurt adds a silky tang, but you can substitute dairy or nondairy milk. You can also use juice or water, adding just enough to break down the fruit. Feel free to double the recipe, for entertaining or stashing away, and serve with Whipped Cream or Lemon Curd to give it some richness.
- 1 pound frozen fruit
- ½ cup yogurt or silken tofu
- ¼ cup sugar
1. In a food processor, combine the fruit, yogurt, and sugar with 2 tablespoons water. Process until just puréed and creamy, scraping the sides of the bowl as needed. If the fruit isn’t breaking apart, add more water 1 or 2 tablespoons at a time. Be careful not to overprocess.
2. Serve immediately or freeze in a sealed container for later. It gets very hard in the freezer, so thaw at room temperature for 15 minutes or in the refrigerator for about 1 hour before serving.
CREAMY ALL-FRUIT SORBET Frozen bananas break down to a soft-serve-like creaminess; add a bit more frozen fruit to minimize the banana flavor if you like: Replace the yogurt or tofu with 1 peeled, chopped, frozen banana. Process it on its own until creamy before adding the fruit and sugar; use fruit juice or water as needed to keep the machine working.
MANGO-COCONUT SORBET Use frozen mangoes for the fruit and coconut milk instead of the yogurt or tofu.
CHERRY-CHOCOLATE SORBET Use frozen pitted cherries for the fruit. In Step 1, add 4 ounces chopped chocolate to the food processor along with the rest of the ingredients.
PEACH-GINGER SORBET Use frozen peaches for the fruit. In Step 1, add 1 teaspoon minced fresh ginger to the food processor along with the rest of the ingredients.
Orange Sherbet
Makes: About 1 quart
Time: About 10 minutes, plus time to chill and churn
Sherbet is a midpoint between sorbet and ice cream, with a dominant fruit flavor that’s offset by the richness of milk. It makes a fun, refreshing dessert, especially for kids.
- 2 cups fresh orange juice
- ¾ cup sugar
- 1 tablespoon grated orange zest
- 2 teaspoons vanilla extract
- ¼ teaspoon salt
- 1½ cups milk
1. Use an electric mixer to combine the orange juice, sugar, orange zest, vanilla, and salt. Whisk in the milk.
2. Cover the bowl and refrigerate until cold. Churn in an ice cream maker according to the manufacturer’s instructions, then freeze in a container to firm up the sherbet.
LEMON-LIME SHERBET Use ½ cup fresh lime juice and ¼ cup fresh lemon juice in place of the orange juice and 2 teaspoons each grated lemon zest and grated lime zest instead of the orange zest. Omit the vanilla; if you like, add another ¼ cup sugar. Increase the milk to 2½ cups. Chill and churn as directed.
RASPBERRY SHERBET Omit the orange juice, zest, and vanilla. Blend 4 cups fresh or thawed frozen raspberries with the sugar and milk and strain, pressing down on the seeds to extract all the juice. Combine with 1 tablespoon grated lemon zest, 1 tablespoon fresh lemon juice, and the salt. Chill and churn as directed.
RAINBOW SHERBET Halve the orange, lemon-lime, and raspberry sorbet recipes and make them all separately, keeping frozen in between batches. When all three flavors are finished, let them soften in the refrigerator for 20 to 30 minutes. Transfer the orange sherbet to a 1½-quart container, pressing it into one side so that the container is one-third full. Repeat with the raspberry sherbet in the middle and the lemon-lime sherbet on the other side.
Fruit Granita
Makes: About 3 cups
Time: About 2 hours
This is a no-special-equipment-needed, minimal-effort dessert that can be made with almost any fruit imaginable. The crunchy, icy texture is similar to a snow cone but with a much better, lighter flavor. Perfectly ripe fruit stands on its own; herbs and spices add sophistication. The best part: You can make it with any liquid—juice, coconut milk, coffee (page 308), or any sorbet recipe or variation; use about 2 cups total.
- 2 cups chopped ripe fruit
- ¼ cup Simple Syrup
- Fresh lemon juice (optional)
1. Purée the fruit in a blender or food processor with the syrup (or if you’re not using it, add some water if necessary to get the machine going). Strain it if there are lots of seeds or fibers. (You should end up with a little less than 2 cups purée, but don’t stress about the exact quantity.) Add the lemon juice if you’re using it or some more simple syrup to taste.
2. Pour into a large shallow pan or baking dish and freeze until completely frozen, about 2 hours, using a fork to break up the ice every 30 minutes (see illustrations). It should be slushy and crunchy with ice crystals. Serve right away or pack loosely in an airtight container. If at any point it becomes too hard, pulse it just once or twice in a food processor.
SWEET CITRUS GRANITA Substitute 2 cups juice from any sweet citrus, such as orange, tangerine, or grapefruit, and 1 tablespoon grated zest for the fruit.
LEMON OR LIME GRANITA Substitute 2 cups fresh lemon or lime juice (or a combination) and 1 tablespoon grated zest for the fruit; start with ½ cup syrup and add more to taste if you like.
GREEN APPLE GRANITA Wonderfully tart: Peel, core, and chop 3 large Granny Smith apples. Purée in a blender with the sugar syrup, lemon juice, and a little more water to get the machine going. Strain; if you like, add ½ teaspoon cinnamon or a splash of bourbon.
WATERMELON-MINT GRANITA This couldn’t be more refreshing: Purée 2 cups chopped seeded watermelon with ¼ cup loosely packed fresh mint leaves; strain.
TROPICAL GRANITA Use any combination of chopped pineapple, peach, mango, papaya, or any other tropical fruit to make 2 cups total. Purée and strain; if you like, stir in ¼ cup coconut milk or a splash of rum.
Coffee Granita
Makes: About 3 cups
Time: About 2½ hours
The simplest granita ever: Just stir and freeze. Do as the Italians do and add a dollop of Whipped Cream if you want to dress it up.
- 2 cups freshly brewed coffee
- ½ cup sugar, or more to taste
1. When the coffee is still hot, stir in the sugar until lightly sweet. Let cool at room temperature or in the refrigerator.
2. Pour into a shallow pan or baking dish and freeze until completely frozen, about 2 hours, using a fork to break up the ice every 30 minutes. The granita should be slushy and crunchy with ice crystals. Serve right away or pack loosely in an airtight container. If at any point it becomes too hard, pulse it just once or twice in a food processor.
MOCHA GRANITA Richer and sweeter: Finely chop 2 ounces dark chocolate and stir it into the hot coffee along with the sugar.
GREEN TEA GRANITA Refreshing and invigorating: Bring 2 cups water almost to a boil. Remove from the heat and add 2 green tea bags or 2 tablespoons loose green tea; cover and steep for 10 minutes, then strain if necessary. Stir in ¼ cup honey, or more to taste, and 2 tablespoons fresh lemon juice. Let cool before freezing.
RED WINE GRANITA A fruity red is intense and ideal: Combine ½ cup water and the sugar in a saucepan and heat until the sugar dissolves. Cool and combine with 1½ cups Pinot Noir, Beaujolais, or any other fruity red wine.
MULLED CIDER GRANITA A good palate cleanser for the holidays: Combine 2 cups apple cider, 1 cinnamon stick, and 1 tablespoon whole cloves in a saucepan over medium heat. Omit the sugar. Bring to a simmer, then remove from the heat and let cool at room temperature before removing the spices.
Making Granita
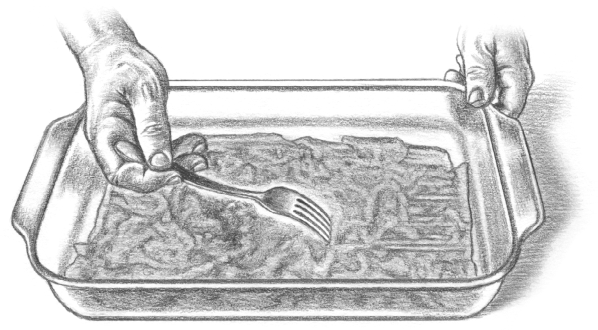
STEP 1
Use a fork to scrape the granita every 30 minutes as it freezes.
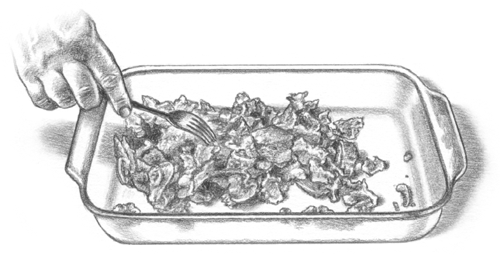
STEP 2
After about 2 hours, the finished granita should be slushy with crunchy ice crystals.
10 Simple Ideas and Add-Ins for Any Fruit Sorbet or Granita
- Add 1 teaspoon or more grated citrus zest.
- Combine fruits.
- Add up to ¾ cup chopped or whole fresh fruit.
- Add 1 tablespoon or more minced candied fruit or candied ginger.
- Add 1 to 2 tablespoons or flavored liqueur like amaretto, Triple Sec, and so on.
- Add ⅛ teaspoon, or to taste, freshly ground black or pink pepper or chili powder.
- Add 1 tablespoon or so fresh herb leaves, like mint, spearmint, basil, rosemary, thyme, verbena (steeped in the Simple Syrup, or minced and added to the sorbet).
- Use honey to sweeten instead of sugar or Simple Syrup.
- Add 1 teaspoon or more grated fresh ginger.
- Add 1 teaspoon rose or orange blossom water.
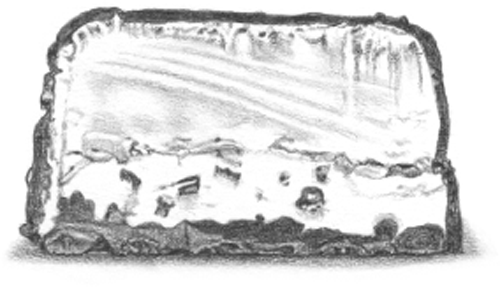
Strawberry Semifreddo
Makes: 8 servings
Time: About 30 minutes, plus time to freeze
Semifreddo (“half frozen” in Italian) is basically whipped cream mixed with beaten egg yolks and beaten egg whites and then frozen in a loaf pan—what you get is akin to ice cream, rich and velvety, with no need for an ice cream machine. The surface of the semifreddo will get a little wrinkled because of the plastic wrap; to smooth it out (if you care), dip an offset spatula or spoon in warm water and run it across the top.
- 2 cups cream, chilled
- 4 eggs, separated
- ¾ cup sugar
- ¼ teaspoon salt
- 1½ cups strawberries, hulled
1. Line a loaf pan with plastic wrap or parchment paper, leaving 3 inches of overhang on each side. Use an electric mixer to beat the cream in a large bowl until it holds soft peaks. Refrigerate.
2. Fill a saucepan with 2 inches of water and bring it to a simmer over medium heat, adjusting the heat if necessary to keep the water from boiling. Meanwhile, whisk together the egg yolks and ½ cup of the sugar in a large heatproof bowl until smooth. Set the bowl over the simmering water and use an electric mixer to beat the mixture until it is thick and fluffy, 4 to 5 minutes. Remove from the heat and keep beating until it’s pale yellow and has roughly doubled in volume. Set aside; wash the beaters.
3. In a separate heatproof bowl set over the simmering water, beat together the egg whites and remaining ¼ cup sugar until fluffy, then remove the bowl from the heat and continue beating until the whites hold stiff peaks.
4. Purée the strawberries in a blender or food processor (with a little water if necessary to get the machine going) until smooth; strain. Gently fold the egg whites into the yolk mixture until just combined, then fold in the whipped cream followed by the strawberry purée. Transfer the mixture to the prepared loaf pan and press the overhanging plastic wrap over the surface. Freeze until firm, at least 8 hours and up to 3 days. To serve, use the plastic wrap to lift the semifreddo and transfer it to a plate. Discard the plastic wrap and cut into slices.
PEACH-VANILLA SEMIFREDDO Peel, pit, and chop 2 large ripe peaches; substitute these for the strawberries. Add 1 tablespoon vanilla extract to the cream before whipping.
PISTACHIO-CARDAMOM SEMIFREDDO Pulse 1 cup unsalted pistachios in a food processor until coarsely chopped. Cook the egg yolk mixture with ½ teaspoon cardamom; beat the cream with ½ teaspoon almond extract. Fold in the nuts just before freezing.
CHOCOLATE SEMIFREDDO Melt 4 ounces of dark chocolate in the microwave or in a separate bowl over the simmering water and whisk it into the cooked egg yolk mixture. Fold 2 ounces chopped chocolate into the mixture before freezing.
ESPRESSO-WHITE CHOCOLATE SEMIFREDDO Cook ½ cup freshly brewed espresso with the egg yolks and sugar. Melt 4 ounces white chocolate in the microwave or in a separate bowl over the simmering water and fold it into the cooked egg yolk mixture before freezing.
PEANUT BUTTER SEMIFREDDO Of course you can use any nut butter here, or even Chocolate-Hazelnut Spread or Speculaas Spread: If you’re using a sweetened spread, decrease the sugar to ⅔ cup (use ¼ cup for the egg whites and the rest for the yolks). Warm ¾ cup peanut butter in the microwave or in a small saucepan, then whisk it into the whipped egg yolk mixture.
LEMON SEMIFREDDO Fold ¾ cup lemon curd, store-bought or homemade (recipe) into the whipped cream before chilling. Add ½ cup fresh lemon juice and 2 tablespoons grated lemon zest to the egg yolks and sugar before cooking and beating.
TWO-TONE SEMIFREDDO Make any two of the preceding variations by dividing the egg yolk mixture equally between two bowls, halving the additions in the variations, and folding half of the beaten egg whites and whipped cream into each bowl. Pour one into the loaf pan, smooth it out, and pour the other on top. Freeze as directed.
SEMIFREDDO PIE An excellent pie for the summer: Pulse graham crackers, Gingersnaps, Sugar Cookies, Chocolate Wafers, or any crisp cookie in a food processor to make 1 cup fine crumbs. Add 1 tablespoon melted butter and press into the bottom of the loaf pan before topping with semifreddo. Or double the crust and use a springform pan.
More Flavors for Sorbet, Granita, and Ice Pops
Use the Fresh Fruit Sorbet recipe and its ice milk variation as a jumping-off point for these variations. Churn in an ice cream maker for sorbet or ice milk, follow the directions for granita and think of it as a no-tech sorbet, or freeze solid as ice pops.
SORBET: Lemon-Lime or Yuzu Sorbet
FLAVORING(S): 1½ teaspoons each grated lemon and lime zest
LIQUID (TO REPLACE THE PURÉED FRUIT): 1 cup each fresh lemon and lime juice, or combine with yuzu juice to yield 2 cups total liquid
SWEETENER: 2 cups Simple Syrup
SORBET: Blood Orange or Grapefruit Sorbet
FLAVORING(S): ½ teaspoon grated blood (or regular) orange zest; ½ teaspoon grated peeled fresh ginger (optional)
LIQUID (TO REPLACE THE PURÉED FRUIT): 2 cups fresh blood (or regular) orange juice or grapefruit juice
SWEETENER: 1 cup superfine sugar or Simple Syrup
SORBET: Raspberry-Red Wine Sorbet
FLAVORING(S): 1 cup raspberries
LIQUID (TO REPLACE THE PURÉED FRUIT): 1 cup red wine (cook all ingredients for 10 minutes and strain)
SWEETENER: 1 cup Simple Syrup
SORBET: Espresso Sorbet or Ice Milk
FLAVORING(S): 3 to 4 shots freshly brewed espresso; ¼ cup crushed chocolate-covered espresso beans for garnish (optional)
LIQUID (TO REPLACE THE PURÉED FRUIT): 2 cups water or nondairy or dairy milk or cream
SWEETENER: 1 cup superfine sugar or Simple Syrup
SORBET: Spicy Melon Sorbet
FLAVORING(S): 1 tablespoon minced jalapeño
LIQUID (TO REPLACE THE PURÉED FRUIT): 2 cups any melon purée
SWEETENER: ¾ cup superfine sugar or Simple Syrup
SORBET: Blueberry-Basil Sorbet
FLAVORING(S): 1 teaspoon grated lemon zest
LIQUID (TO REPLACE THE PURÉED FRUIT): 2 cups blueberries and ¼ cup fresh basil, purÉed and strained
SWEETENER: ½ cup Simple Syrup
SORBET: Goat Ice Milk
FLAVORING(S): 1½ teaspoons grated lemon zest; up to 1 cup Strawberry Compote, churned into the finished ice cream, is nice here
LIQUID (TO REPLACE THE PURÉED FRUIT): 2 cups goat milk
SWEETENER: ½ cup superfine sugar or Simple Syrup
SORBET: Papaya-Lime Sorbet
FLAVORING(S): 1½ teaspoons grated lime zest; 3 tablespoons fresh lime juice, or to taste
LIQUID (TO REPLACE THE PURÉED FRUIT): 2 cups papaya purée
SWEETENER: ½ cup superfine sugar or Simple Syrup
SORBET: Pear-Rosemary Sorbet
FLAVORING(S): 1 sprig fresh rosemary (steeped for 15 minutes in Simple Syrup)
LIQUID (TO REPLACE THE PURÉED FRUIT): 2 cups peeled and chopped pear, puréed with ¼ cup fresh lemon juice
SWEETENER: ¾ cup Simple Syrup
SORBET: Orange-Thyme Sorbet
FLAVORING(S): 3 sprigs fresh thyme (steeped in the Simple Syrup); ½ teaspoon finely chopped fresh thyme leaves
LIQUID (TO REPLACE THE PURÉED FRUIT): 2 cups fresh orange juice
SWEETENER: ¾ cup Simple Syrup
SORBET: Pineapple-Lavender Sorbet
FLAVORING(S): 1 teaspoon culinary lavender buds; ½ cup finely chopped pineapple
LIQUID (TO REPLACE THE PURÉED FRUIT): 2 cups pineapple juice
SWEETENER: ¾ cup superfine sugar or Simple Syrup
SORBET: Chamomile-Tangerine Sorbet
FLAVORING(S): 2 tablespoons chamomile buds or tea (steeped in the Simple Syrup)
LIQUID (TO REPLACE THE PURÉED FRUIT): 2 cups fresh tangerine juice
SWEETENER: 1 cup Simple Syrup
SORBET: Cherry Chocolate Sorbet
FLAVORING(S): ¾ cup cocoa powder; 1 cup pitted and halved cherries stirred in at the end
LIQUID (TO REPLACE THE PURÉED FRUIT): 2 cups fresh orange juice
SWEETENER: 1 cup Simple Syrup
SORBET: Persimmon Sorbet or Ice Milk
FLAVORING(S): ½ teaspoon ground allspice or cinnamon (optional)
LIQUID (TO REPLACE THE PURÉED FRUIT): 2 cups persimmon purée or 1 cup persimmon purée and 1 cup nondairy or dairy milk or cream
SWEETENER: ½ cup honey or Simple Syrup
SORBET: Horchata Sorbet
FLAVORING(S): 1 teaspoon cinnamon, 1 teaspoon grated lime zest, and 1 tablespoon fresh lime juice or to taste
LIQUID (TO REPLACE THE PURÉED FRUIT): 2 cups rice milk
SWEETENER: 1 cup superfine sugar or Simple Syrup
SORBET: Strawberry-Pink Peppercorn Sorbet or Ice Milk
FLAVORING(S): 1 tablespoon crushed pink peppercorns
LIQUID (TO REPLACE THE PURÉED FRUIT): 2 cups strawberry purée or 1 cup strawberry purée and 1 cup nondairy or dairy milk or cream
SWEETENER: ½ cup superfine sugar or Simple Syrup
SORBET: Cucumber-Honey Sorbet
FLAVORING(S):
LIQUID (TO REPLACE THE PURÉED FRUIT): 3 cups cucumber purée, strained (you should have about 2 cups)
SWEETENER: ½ cup honey
SORBET: Coconut-Lime Sorbet
FLAVORING(S): 1½ teaspoons grated lime zest; 3 tablespoons fresh lime juice, or to taste
LIQUID (TO REPLACE THE PURÉED FRUIT): 2 cups coconut milk
SWEETENER: 1 cup superfine sugar or Simple Syrup
SORBET: Apricot-Orange Blossom Sorbet
FLAVORING(S): 1 teaspoon orange blossom water
LIQUID (TO REPLACE THE PURÉED FRUIT): 2 cups pitted and chopped apricots, puréed
SWEETENER: ½ cup Simple Syrup
SORBET: Pomegranate Sorbet
FLAVORING(S): 1 teaspoon grated lemon zest and ½ cup pomegranate seeds, stirred into the finished sorbet
LIQUID (TO REPLACE THE PURÉED FRUIT): 2 cups pomegranate juice
SWEETENER: 1 cup Simple Syrup
Fruit Ice Pops
Makes: 4 to 8 pops, depending on size
Time: 5 minutes, plus time to freeze
This is an easy, refreshing summer dessert that requires no churning, scraping, or multitasking. You don’t even need a mold—paper cups will do the job. Think of this recipe as a template for nearly any fruit or vegetable combination you can think of and see the variations for some jumping-off points or try it with any of the sorbet and granita recipes and variations.
- 2 cups chopped ripe fruit
- 3 tablespoons sugar or honey
- 2 teaspoons fresh lemon juice (optional)
1. Use a blender or food processor to purée the fruit, sugar, and lemon juice; add 1 tablespoon water at a time as needed to get the machine going.
2. Divide the liquid evenly among plastic molds or small paper cups. Freeze for about 45 minutes, then insert a wooden stick into each; the pops will have frozen enough that the stick stays upright. Freeze for another 2 hours or until solid. These can stay in the freezer for up to 2 weeks; any longer and they may get freezer burn. Run the molds or cups under cool running water for a few seconds to loosen the pops.
WATERMELON-BASIL POPS Purée 2 cups chopped seeded watermelon and ¼ cup loosely packed fresh basil leaves with the sugar and lemon juice.
MANGO-COCONUT POPS Purée 1½ cups chopped mango and ½ cup coconut milk with the sugar and lemon juice.
BANANA-PEANUT BUTTER POPS Purée 2 medium bananas, 1 cup milk, ¼ cup peanut butter, 2 tablespoons sugar, and ½ teaspoon vanilla. Sprinkle 1 tablespoon chopped roasted peanuts into each mold or cup before adding the banana mixture.
AVOCADO-LIME POPS Purée 2 large ripe avocados, ¼ cup fresh lime juice, and 1½ cups water . Add the sugar for sweet ice pops or a bit of salt and pepper to taste for something more savory.
CUCUMBER-MELON POPS Purée 1 peeled small cucumber and 1 cup chopped honeydew melon with the sugar and lemon juice.
CAMPARI POPS Booze is great in ice pops, but don’t use too much or the liquid won’t freeze: Combine 1½ cups grapefruit juice with ½ cup Campari and ¼ cup Simple Syrup.
MOJITO POPS Combine ½ cup loosely packed fresh mint leaves, ⅓ cup white rum, ⅓ cup fresh lime juice, ¼ cup Simple Syrup, and 1 cup water.
10 Ice Pop Combinations
Use strained purée or 100% juice for the fruit.
- Peach and 1 tablespoon grated fresh ginger
- Cherry and 1 teaspoon vanilla extract
- Apple and 1 teaspoon cinnamon
- Pineapple and ¼ cup loosely packed fresh mint
- Strawberry and 2 tablespoons balsamic vinegar
- Raspberry and 2 tablespoons rose water
- Blueberry and ½ cup almond milk
- Grape and ¼ cup peanut butter, layered into the pop molds
- Lime and ¼ cup loosely packed fresh cilantro
- Cooked sweet corn and 1 teaspoon vanilla extract
Orange Cream Pops
Makes: 4 to 8 pops, depending on size
Time: 5 minutes, plus time to freeze
No need to purée whole fruits—you can make ice pops with juice, milk, coffee, or yogurt too.
- 1⅓ cups fresh orange juice
- ⅔ cup milk
- 3 tablespoons sugar
- 1 teaspoon vanilla extract
1. Whisk all the ingredients together until the sugar dissolves.
2. Divide the liquid evenly among plastic molds or small paper cups. Freeze for about 45 minutes, then insert a wooden stick into each; the pops will have frozen enough that the stick stays upright. Freeze for another 2 hours, or until solid. These can stay in the freezer for up to 2 weeks; any longer and they may get freezer burn.
FUDGE POPS The ultimate Fudgesicle: Combine 2 cups milk with 6 ounces chopped dark chocolate, 3 tablespoons sugar, and 1 tablespoon cocoa powder in a saucepan over medium-low heat, stirring occasionally until the mixture is smooth. Remove from the heat, add 1 teaspoon vanilla extract, and let cool before freezing.
CREAMY COFFEE POPS These, of course, have a caffeine kick: Stir ¼ cup sugar into 1½ cups strong brewed coffee until the sugar dissolves. Let the coffee cool, then add ½ cup milk and freeze. Or use ½ cup sweetened condensed milk in place of the milk and sugar for something creamier and richer.
YOGURT-BERRY POPS Creamy: Lightly crush ¾ cup berries in a bowl, just enough to release some juices (if you’re using strawberries, quarter them first). Stir in 1¼ cups yogurt and, if you like, 1 teaspoon vanilla extract.
COCONUT-KEY LIME PIE POPS Finely crush 4 graham crackers by hand or in a food processor. Combine with 1 tablespoon melted butter and divide the mixture evenly among the molds or cups, pressing it into the bottom. Combine ⅔ cup fresh lime juice (about 5 limes) with ¾ cup sweetened condensed milk, ¾ cup coconut milk, and 1 tablespoon grated lime zest. Pour over the graham crackers and freeze as directed.
The Basics of Stovetop Puddings, Custards, and Mousses
Few things are more comforting than pudding: sweet and velvet-smooth but still humble and homely. Pudding can be used to refer to a lot of things—in England, for instance, you can find sticky toffee pudding (a cake) and black pudding (a type of blood sausage)—but think of it here as an umbrella term for those thick, custardy desserts you eat with a spoon. There are many ways to give that signature thickness, including eggs, cornstarch and other starches, grains, bread, or a combination—and they’re all laid out in this section.
Related to puddings and also included here are mousses and soufflés. Mousses are both rich and cloudlike, not cooked, and usually get their volume from whipped egg whites or whipped cream. Soufflés, which appear later in this chapter and are like a cross between custard and mousse, are almost always baked and have rich, velvet centers and impressive, billowing tops.
EGG-THICKENED
A pudding with a cooked egg-and-cream base is called a custard (custards can also be sauces, like Crème Anglaise, or Zabaglione). Gently cooked eggs lend a silken texture and rich, gentle flavor unmatched by anything else. There’s no real trick to cooking eggs for these recipes other than to tell you what you don’t want: overcooked eggs, which are essentially scrambled. To avoid turning your dessert into breakfast, you must cook eggs at a relatively low heat just until they thicken, to make them smooth and uniform.
If you’re cooking on the stovetop, as you will with most soft custards, this isn’t a big hurdle; in some recipes, you’ll also temper raw eggs by very gradually adding warm liquid to them, whisking vigorously and constantly, until they’ve reached a stable temperature.
Note that this chapter contains several recipes that call for raw or undercooked eggs. If you are cooking for someone very old, very young, pregnant, or whose immune system is otherwise compromised, you should avoid those recipes unless you can find pasteurized eggs in the shell (see page 21 for more information).
STARCH-THICKENED
You might skip the eggs in your pudding to let the other flavors shine through, to make a vegan dessert, or just to simplify your recipe. Cornstarch is usually your best bet—simple, reliable, and (as long as you cook it for a few minutes) neutrally flavored. The only recipe I don’t use it for is tapioca pudding, because tapioca itself is a thickener.
The best way to avoid clumps when using powdered starch thickeners is to make a slurry: Combine them with water or a few spoonfuls of the cooking liquid. Use just enough liquid to dissolve the thickener and smooth out the lumps with a spoon so that the consistency is like a thin paste. (Again, the exception is tapioca pudding, which uses tapioca pearls rather than powder.) If you’re using cornstarch, you’ll want to cook the pudding a bit after adding the thickener to eliminate its raw flavor and activate the thickening process.
GEL-THICKENED
Gelled desserts have a distinct texture that we all remember from childhood (hello, Jell-O). Gelatin works best to create gelées or panna cottas because it gels clear, but you can also use granulated agar (a form of dehydrated seaweed) or arrowroot. You can find gelatin in powder, sheets, or bars; powder is by far the easiest and most straightforward to use. You must first let it “bloom” by sprinkling it over cold liquid in an even layer and leaving it alone for a few minutes, then dissolve it with warm liquid.
Coating the Back of a Spoon
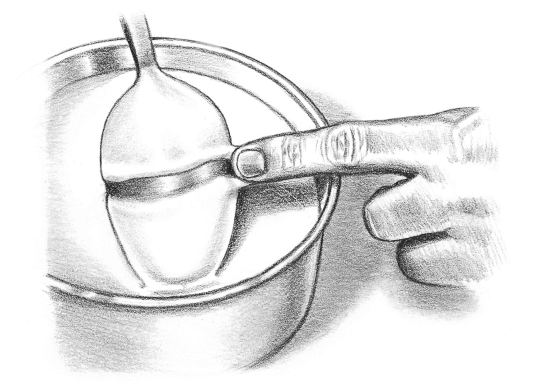
If you’re cooking a pudding or custard on the stove, the best way to know when it’s done is to dip a spoon into the liquid and drag the tip of your finger across the back. If the liquid is opaque and coats and clings to the back of the spoon, forming a distinct trail from where your fingertip was, it’s properly thickened. If the liquid just slides right off the spoon, or your finger trail is covered quickly by runny liquid, keep cooking.
Recipes
Simplest Vanilla Pudding
Traditional Vanilla Pudding
Chocolate Pudding
Rice Pudding
Butterscotch Rice Pudding
Tapioca Pudding
Mexican Chocolate Tofu Pudding
Zabaglione
Raspberry Fool
Chocolate Mousse
Lemon Mousse
Frozen Maple Mousse
Strawberry Trifle
Tiramisu
Zuppa Inglese
Summer Pudding
Panna Cotta
Gelée, Many Ways
Simplest Vanilla Pudding
Makes: 4 to 6 servings
Time: About 20 minutes, plus time to chill
Nearly as easy as instant pudding, but with infinitely more flavor.
- 2½ cups whole milk or half-and-half
- ⅔ cup sugar
- ¼ teaspoon salt
- 3 tablespoons cornstarch
- 2 tablespoons butter, softened (optional)
- 1 teaspoon vanilla extract
1. Combine 2 cups of the milk with the sugar and salt in a medium saucepan and cook over medium-low heat, stirring occasionally until the mixture just begins to steam, 2 or 3 minutes.
2. Whisk the cornstarch with the remaining ½ cup milk in a bowl until completely smooth. Add this to the saucepan and cook, stirring occasionally until the mixture thickens and just starts to simmer, 3 to 5 minutes. Reduce the heat to very low and continue to cook, stirring constantly, until the pudding thickens noticeably and starts to stick to the pan, another 3 to 5 minutes. Stir in the butter and vanilla until the butter melts completely.
3. Pour the mixture into a large heatproof bowl or into 4 to 6 small ramekins or glasses. Put plastic wrap directly on top of the pudding to prevent the formation of a “skin,” or leave it uncovered if you like skin. Refrigerate until chilled, at least an hour, and serve within a day.
BUTTERSCOTCH PUDDING Substitute brown sugar for the granulated sugar and increase the salt to ¾ teaspoon.
BANANA PUDDING Infused with rich, real banana flavor: Use whole milk and reduce the sugar to ¼ cup. Peel 3 very ripe bananas, cut them into 1-inch chunks, and add them to the warm milk mixture in Step 1. Steep for 20 minutes, then strain them out and return the milk mixture to the pot. Proceed with the recipe.
LEMON PUDDING Add 2 tablespoons grated lemon zest to the saucepan with the milk, sugar, and salt; for a very smooth pudding, strain out the zest, but there’s no need. Substitute ¼ cup fresh lemon juice for the vanilla.
GREEN TEA PUDDING Try this with your favorite tea: Steep 2 green tea bags or 2 tablespoons loose green tea in the warmed milk mixture in Step 1 for 5 minutes. Squeeze out the bags or strain out the loose tea and proceed with the recipe.
SUPER-RICH PUDDING Substitute cream for the half-and-half in the main recipe or any of the variations.
Traditional Vanilla Pudding
Makes: 4 to 6 servings
Time: About 20 minutes, plus time to chill
Eggs give this pudding a rich, smooth texture and a delicate flavor. Use any of the variations for Simplest Vanilla Pudding (this page) or Chocolate Pudding.
- 2½ cups half-and-half or whole milk
- ⅔ cup sugar
- 4 egg yolks
- 2 eggs
- ¼ teaspoon salt
- 2 tablespoons butter, softened (optional)
- 1 teaspoon vanilla extract
1. Put the half-and-half in a medium saucepan over medium-low heat. Stir occasionally just until it begins to steam, 2 or 3 minutes.
2. Beat the sugar, yolks, eggs, and salt in a large bowl until combined. Gradually whisk in one-third of the heated half-and-half, then whisk the egg mixture into the remaining half-and-half. Cook, whisking constantly, until it is thick and coats the back of a spoon, about 10 minutes. Remove from the heat and stir in the butter and vanilla until the butter melts completely.
3. Pour the mixture into a large heatproof bowl or into 4 to 6 small ramekins or glasses. Put plastic wrap directly on top of the pudding to prevent the formation of a “skin,” or leave it uncovered if you like skin. Refrigerate until chilled, at least an hour, and serve within a day.
Chocolate Pudding
Makes: 4 to 6 servings
Time: About 20 minutes, plus time to chill
This is as easy as Simplest Vanilla Pudding but with a deep chocolate flavor. Replace the dark chocolate with any kind you like here, as long as it’s good quality.
- 2½ cups whole milk or half-and-half
- ½ cup sugar
- ¼ teaspoon salt
- 3 tablespoons cornstarch
- 4 ounces dark chocolate, finely chopped
- 2 tablespoons butter, softened
- 1 teaspoon vanilla extract
1. Combine 2 cups of the milk with the sugar and salt in a medium saucepan and cook over medium heat, stirring occasionally, until the mixture just begins to steam, 3 or 4 minutes.
2. Whisk the cornstarch with the remaining ½ cup milk in a bowl until completely smooth. Add this to the saucepan and cook, stirring occasionally, until the mixture thickens and just starts to boil, 3 to 5 minutes. Reduce the heat to low and continue to cook, stirring constantly, until the pudding thickens noticeably and starts to stick to the pan, another 3 to 5 minutes. Stir in the chopped chocolate, butter, and vanilla until fully incorporated.
3. Pour the mixture into a large heatproof bowl or into 4 to 6 small ramekins or glasses. Put plastic wrap directly on top of the pudding to prevent the formation of a “skin,” or leave it uncovered if you like skin. Refrigerate until chilled, at least an hour, and serve within a day.
CHOCOLATE MOCHA PUDDING Steep 2 tablespoons instant coffee or instant espresso powder in the warmed milk mixture for 10 minutes, off the heat. Strain out the coffee, put the milk back over the heat, and proceed with the recipe.
CHOCOLATE-PEANUT BUTTER PUDDING Use any nut butter you like here: Add ½ cup creamy peanut butter with the chocolate, butter, and vanilla.
CHOCOLATE COCONUT PUDDING You can easily make this vegan by using vegan chocolate and omitting the butter: Substitute coconut milk for the whole milk. If you like, garnish with toasted shredded unsweetened coconut flakes (see page 57).
CARAMEL PUDDING Let the milk sit at room temperature for 20 minutes or so to take the chill off. Add the sugar to the saucepan and cook over medium-high heat until it is a deep copper color. Resist the urge to stir, which can cause the sugar to crystallize; you can shake the saucepan to move the sugar around if it’s cooking unevenly. Remove from the heat to whisk in the milk and salt; proceed with the recipe. Add the chocolate if you like.
Rice Pudding
Makes: About 4 servings
Time: About 2 hours, mostly unattended
Like many comfort foods, rice pudding is simple to make and adaptable to your whims. This version is cooked entirely in the oven, so all you need to do is stir it occasionally. (For a more traditional stovetop version, see page 328.) Long-grain rice like basmati or jasmine will deliver the most delicate texture and fragrance, while short- or medium-grain rice like Arborio will be more thick and chewy, like risotto. Substitute any nondairy milk if you prefer or replace some or all of the milk with half-and-half or cream for a richer pudding.
- 4 cups whole milk
- ½ cup sugar
- ⅓ cup white rice (see headnote)
- 1 teaspoon cinnamon (optional)
- ¼ teaspoon salt
1. Heat the oven to 300°F. Stir all the ingredients together in a 3- or 4-quart baking dish or ovenproof saucepan. Bake for 30 minutes, then stir. Bake for 30 minutes longer; at this point the rice may have started to swell and the milk should be developing a bubbly skin. Stir again to incorporate.
2. Bake for 30 more minutes. The pudding is almost done when the rice predominates the mixture and the skin becomes more visible and darker. Stir the skin back into the rice, return the mixture to the oven, and check every 10 minutes, stirring gently each time.
3. The pudding will be done before you think it’s done. The rice should be really swollen and the milk thickened considerably but still pretty fluid; the milk will thicken while it cools. Stir it once more, which helps release the rice’s starch and thicken the milk. Serve warm or at room temperature or cover with plastic wrap (press it directly on the pudding’s surface if you want to prevent a skin from forming) and serve it cold.
SAFFRON RICE PUDDING Stir a pinch of saffron threads into the rest of the ingredients before baking. If you like, add a teaspoon of rose water after cooking.
KHEER This Indian dessert is sometimes made with vermicelli noodles instead of rice: Melt 1 tablespoon butter or ghee in a large saucepan over medium-high heat. Add ½ cup broken-up vermicelli noodles and toast until golden (don’t walk away; it goes quickly). Decrease the milk to 3 cups and add it along with ½ teaspoon ground cardamom and a pinch of saffron if you like. Bring to a boil, stir in the sugar, and reduce the heat to medium-low. Let the mixture simmer, stirring occasionally, until the milk has thickened but is still fluid, 35 to 45 minutes. Stir in ½ cup chopped toasted pistachios (see page 57).
MANGO RICE PUDDING Very Thai; I love this: Replace the milk with coconut milk; stir 1 cup of chopped fresh mango into the mix after about 1 hour of cooking.
RICOTTA-HONEY RICE PUDDING Decrease the milk to 2½ cups and add 2 cups of fresh ricotta (no need to drain it first). Substitute honey for the sugar. Proceed with the recipe.
RUM RAISIN RICE PUDDING Combine the ingredients with ¼ cup rum before baking. Cook as directed. Stir ½ cup of raisins into the pudding as soon as you remove it from the oven.
CHOCOLATE RICE PUDDING Finely chop 2 ounces dark chocolate and stir it into the cooked pudding until it melts. Add a teaspoon of vanilla extract.
RICE PUDDING BRûlée When you’re ready to serve the pudding, heat the broiler, placing the rack so the pudding dish will be 2 or 3 inches from the heat. Sprinkle 2 tablespoons sugar in a thin layer over the pudding, then broil it until the sugar melts and blackens a bit, about 5 minutes. Serve within an hour.
7 Simple Add-ins for Any Rice Pudding
- Add ¼ cup or more raisins or snipped dates, figs, or other dried fruit about halfway through the cooking.
- Stir 1 cup chopped fresh mango, papaya, or pineapple into the mix about halfway through the cooking.
- Add 1 teaspoon vanilla extract or orange blossom or rose water at the end of cooking.
- Add 1 teaspoon grated lemon or orange zest in place of spices.
- Garnish with up to ½ cup toasted sliced almonds or other nuts.
- Substitute coconut, soy, rice, or any nut milk for the milk.
- Stir in a piece or two of whole spice (cinnamon sticks, cloves, or nutmeg) at the beginning of cooking; remove before serving.
Butterscotch Rice Pudding
Makes: 4 servings
Time: About 1½ hours, largely unattended
There’s not much to making this beyond letting the rice cook long and slow on the stovetop to absorb the milk. Brown rice is chewier, and has a nuttiness that makes a hearty, not-too-sweet dessert and goes beautifully with the butterscotch flavor; white rice, of course, is more familiar, and softer, if you prefer. Try any of the flavor variations for Rice Pudding too.
- 4 cups whole milk or half-and-half
- ½ cup brown or white rice
- ½ teaspoon salt
- ½ cup packed brown sugar
- 4 tablespoons (½ stick) butter, melted
- ½ teaspoon vanilla extract
1. Combine the milk, rice, and salt in a medium saucepan over medium-high heat. Bring to a boil, then reduce the heat to low. Partially cover and let simmer, checking on it occasionally to make sure the milk isn’t bubbling over, until the rice is tender and has absorbed most of the liquid, about an hour.
2. Beat together the brown sugar, butter, and vanilla until smooth. Stir the sugar mixture into the saucepan and let the mixture cook, uncovered, until it has thickened, another 5 minutes or so. If it gets thicker than you’d like, just stir in a splash of milk. Serve warm or at room temperature or press a layer of plastic wrap over the pudding’s surface, refrigerate, and serve it cold.
MAPLE BROWN RICE PUDDING Replace the brown sugar with ½ cup maple syrup; omit the butter and vanilla. If you like, stir in 1 teaspoon cinnamon and ½ teaspoon ginger when you add the syrup.
BROWN RICE PUDDING WITH NUTS AND DRIED FRUITS Replace half of the milk with any nut milk. Omit the butter; add ⅔ cup each of chopped toasted nuts and raisins or other dried fruit along with the brown sugar and vanilla.
COCONUT BROWN RICE PUDDING Garnish this with toasted coconut flakes: Substitute coconut milk for half of the regular milk and granulated sugar for the brown sugar. Omit the butter and vanilla.
COOKED-RICE PUDDING An excellent shortcut and one of the best uses for leftover rice: Decrease the milk to 3 cups and combine it with 3 cups cooked rice. Proceed with the recipe or any of the variations, cooking for just 15 minutes or so.
Tapioca Pudding
Makes: 4 servings
Time: About 20 minutes, plus time to chill
Tapioca acts as a neutral-flavored thickener, like cornstarch, but gives the pudding a distinctive texture, like rice. Some people don’t like the mildly chewy texture, but others find it heavenly. It’s especially fantastic topped with Whipped Cream.
- 2 cups milk
- ⅓ cup quick-cooking tapioca
- ½ cup sugar
- ¼ teaspoon salt
- 2 eggs, separated
- 1½ teaspoons vanilla extract
1. Combine the milk, tapioca, sugar, and salt in a small saucepan over medium heat. Stir until the tapioca becomes transparent, about 5 minutes. Remove from the heat, cool for a minute or 2, then beat in the egg yolks. Cool the mixture for a few more minutes.
2. Beat the egg whites until they hold soft peaks; fold them gently into the tapioca mixture along with the vanilla. Serve warm or transfer to a bowl, cover with plastic wrap, and chill for at least 2 hours, then serve cold.
COCONUT-LIME TAPIOCA PUDDING Substitute coconut milk for all or part of the milk. Add 1 tablespoon grated lime zest to the milk mixture in Step 1 and cook as directed.
FRUIT TAPIOCA PUDDING Use any fruit you like; peach is excellent with the pudding’s mild sweetness: Add 1 cup puréed, mashed, or chopped fruit along with the egg whites.
Mexican Chocolate Tofu Pudding
Makes: 4 to 6 servings
Time: 10 minutes, plus time to chill
This is an incredibly simple pudding, requiring only a blender, and no one will know it’s vegan; I swear. The tofu acts like eggs—you don’t even have to cook it. And by far the strongest flavor is chocolate (unless you use a lot of spice), so use the best chocolate you can.
- ¾ cup Simple Syrup or sugar
- 1 pound silken tofu
- 8 ounces dark chocolate, melted
- 1 teaspoon vanilla extract
- 1½ teaspoons cinnamon
- ½ teaspoon chili powder, or more to taste
- Chocolate for garnish (optional)
1. If you’re using sugar, combine it with ¾ cup water in a small saucepan and heat until the sugar dissolves. Set aside to cool.
2. Combine all the ingredients in a blender and purée until completely smooth, stopping to scrape down the sides if necessary. Divide the pudding among 4 to 6 ramekins and chill for at least 30 minutes before serving. If you like, use a vegetable peeler to make shavings of chocolate to top the pudding.
CHOCOLATE-ORANGE TOFU PUDDING Citrus adds a bright, tart flavor: Substitute 1 tablespoon grated orange zest for the vanilla, cinnamon, and chili powder.
CHOCOLATE-RASPBERRY TOFU PUDDING Decrease the simple syrup to ½ cup or dissolve ½ cup sugar in ½ cup water. If you don’t mind seeds, blend ½ cup fresh or thawed frozen raspberries with the other ingredients; otherwise, purée and strain 1 cup raspberries to make about ½ cup purée and add that to the blender. Omit the vanilla, cinnamon, and chili powder.
PEANUT BUTTER-BANANA TOFU PUDDING These three main ingredients make this over-the-top silky: Use ¼ cup simple syrup. Blend it with the tofu, vanilla, 2 ripe bananas, and ½ cup creamy peanut butter. Omit the cinnamon and chili powder.
Zabaglione
Makes: 4 servings
Time: About 20 minutes
You’re likely to have all four ingredients on hand (sweet vermouth or any sweet wine will work in place of Marsala) for this light, airy pudding so you can make it at the last minute, without worry. Plus, it’s served warm. Serve it on its own or with fresh berries or Biscotti or use it like a sauce over cakes, pies, or tortes.
- 6 egg yolks
- ⅓ cup sugar
- ½ cup Marsala
- ¼ teaspoon salt
1. Fill a small saucepan with 2 inches of water and bring it to a simmer over medium heat. Meanwhile, in a heatproof bowl large enough to rest in the top of the saucepan, use a whisk or electric mixer (much easier) to beat the yolks with the sugar until thick and pale, about 5 minutes. Slowly beat in the Marsala and salt.
2. Set the bowl over the saucepan and beat the mixture vigorously until it is thick and frothy, about 10 minutes. At this point, you can use it as an airy pudding or a sauce; cook it a couple minutes longer to thicken it a bit more. Divide it among ramekins or custard cups and serve warm.
ORANGE-RUM ZABAGLIONE Wonderfully tart and warm, perfect served over broiled orange slices: Replace the Marsala with ⅓ cup rum and add 1 tablespoon grated orange zest along with it.
RED WINE ZABAGLIONE For a more pronounced, dramatic flavor: Replace the Marsala with a fruity red wine like Pinot Noir or Beaujolais.
Raspberry Fool
Makes: 4 to 6 servings
Time: 20 minutes
The easiest mousse you can make and a perfect use for any soft, ripe fruit, although you can also use thawed frozen fruit year-round or even switch to chocolate for a quickly made chocolate mousse.
- 2-3 cups raspberries
- ½ cup confectioners’ sugar, plus more if needed
- 1 tablespoon granulated sugar
- 1 cup cream, very cold
1. Purée about one-third of the raspberries in a blender with ¼ cup of the confectioners’ sugar. Force the purée through a sieve to remove the seeds. Taste; the purée should be quite sweet. If not, add a little more sugar.
2. Roughly mash the remaining berries (saving a few for garnish) just until they’re broken up and toss with the remaining ¼ cup confectioners’ sugar. Beat the cream with the granulated sugar until it holds soft peaks. Beat in the raspberry purée, then fold in the sugared berries. Taste and add more confectioner’s sugar if necessary. Garnish and serve immediately or refrigerate for 1 or 2 hours.
CHOCOLATE FOOL An impromptu chocolate mousse: Omit the berries and the confectioner’s sugar. Finely chop 6 ounces dark chocolate. Melt 4 ounces of it and let cool completely; beat it into the whipped cream, then fold in the remaining chocolate. If you prefer a completely smooth version, melt all of the chocolate.
YOGURT FOOL A lighter, tangier flavor to use with any fruit: Decrease the cream to ½ cup; whip it with the sugar, then fold in 1 cup yogurt.
MANGO-LIME FOOL Substitute 2 cups chopped mango for the raspberries and purée all of it with ¼ cup of the confectioners’ sugar (omit the remaining ¼ cup). Beat the cream with 1 teaspoon grated lime zest.
STRAWBERRY-BALSAMIC FOOL Substitute hulled strawberries for the raspberries. Beat the cream with 1 tablespoon balsamic vinegar, adding a little more granulated sugar to make it sweeter if you like.
Chocolate Mousse
Makes: 4 to 6 servings
Time: 20 minutes, plus time to chill
There’s a reason this is a staple of good French bistro: It sounds (and tastes) fancy, but this ultra-rich chocolate pudding is blazing quick to make and surprisingly easy to adapt to different diets—see the variations for a vegan version. Play around with the flavor: Add espresso for a rich mocha mousse or spike it with a liqueur. Top with Whipped Cream and shaved chocolate if you like.
- 4 ounces dark chocolate, chopped
- 2 tablespoons butter
- 2 tablespoons rum, bourbon, Grand Marnier, or other liqueur (optional)
- 3 eggs, separated
- ½ teaspoon vanilla extract
- 2 tablespoons sugar
- ½ cup cream, very cold
1. Use a microwave or double boiler to melt the chocolate, butter, and liqueur if you’re using it; check and stir it frequently, then remove from the heat and stir until smooth. Set aside until the bowl is cool enough to hold, then whisk in the egg yolks and vanilla.
2. In a medium bowl, beat the egg whites with 1 tablespoon of the sugar until they hold stiff peaks. In a separate bowl using clean beaters, beat the cream with the remaining 1 tablespoon sugar until it holds soft peaks.
3. Stir a couple of spoonfuls of the egg whites into the chocolate mixture to lighten it, then fold in the remaining whites, using thorough but gentle strokes (see illustrations, page 56). Fold in the cream until just combined, so that there are no streaks of white, then refrigerate until chilled. If you’re in a hurry, divide the mousse among 4 to 6 cups; it will chill much faster. Serve within a day.
MOCHA MOUSSE Add 2 tablespoons very strong brewed coffee (espresso is best) to the chocolate mixture in Step 1 and reduce the cream in Step 3 to 6 tablespoons. Or add 2 teaspoons instant espresso powder to the chocolate mixture in Step 1 and use the full amount of cream.
WHITE CHOCOLATE MOUSSE Use white chocolate instead of dark. Garnish with fresh berries and white chocolate shavings. If you like, swap the vanilla for 1 teaspoon almond extract.
EGGLESS CHOCOLATE MOUSSE Increase the chocolate to 6 ounces and the cream to 1 cup. Melt the chocolate and butter together with 3 tablespoons water, then remove from the heat and add the vanilla. Let cool completely before gradually folding in the whipped cream.
Or: Increase the chocolate to 6 ounces and the cream to ¾ cup. Bring ¼ cup of the cream to room temperature and keep the rest chilled. Sprinkle 1 teaspoon powdered gelatin over the room-temperature cream and let sit for 10 minutes, then combine it with the chocolate and butter; cook until the chocolate melts and the gelatin is completely dissolved. Remove from the heat and add the vanilla. Whip the remaining ½ cup cream with the sugar and fold it into the cooled chocolate mixture.
VEGAN CHOCOLATE MOUSSE Avocado adds silkiness, while doubling the amount of chocolate ensures that the flavor isn’t compromised: Use 8 ounces chocolate. Substitute 2 tablespoons coconut oil for the butter. Omit the eggs and cream. In a food processor, combine the cooled chocolate mixture with 2 ripe avocados, ¼ cup nondairy milk, 3 tablespoons sugar, and the vanilla; process, scraping down the sides of the bowl as necessary, until completely smooth.
Lemon Mousse
Makes: About 6 servings
Time: About 30 minutes, plus time to chill
This refreshing mousse is foolproof, and it works with any citrus; just adjust the amount of sugar accordingly. Top with Whipped Cream, fresh berries, chopped fresh mint, or toasted almonds or serve with Pavlova or in a Cookie Crumb Crust made with graham crackers.
- 1 ¼-ounce envelope (2½ teaspoons) unflavored gelatin
- ½ cup fresh lemon juice
- 4 eggs
- 1 tablespoon grated lemon zest
- ½ cup sugar
- 1 cup cream
1. In a small saucepan, sprinkle the gelatin over the lemon juice. Let sit for about 10 minutes while you beat the eggs, lemon zest, and sugar until lemon colored and slightly thickened.
2. Warm the gelatin mixture over low heat, stirring occasionally, until the gelatin dissolves, just a minute or 2. Cool for 1 minute, then stir it into the egg mixture.
3. Working quickly (you don’t want the gelatin to set prematurely) and using clean beaters, whip the cream until it holds soft peaks, then stir thoroughly into the egg mixture. Refrigerate, stirring occasionally for the first hour or 2, until well chilled. Serve the same day.
COCONUT-LIME MOUSSE Refrigerate a can of full-fat coconut milk until well chilled, at least 2 hours and preferably overnight. Scoop out 1 cup of the solid coconut cream that has risen to the top; save the water at the bottom for something else. Whip the coconut cream and use it instead of the whipped cream. Substitute lime juice and zest for the lemon.
ORANGE MOUSSE Replace the lemon with orange juice and orange zest. Decrease the sugar to ⅓ cup.
MANGO-GINGER MOUSSE Tangy, tropical, and a little hot: Instead of lemon juice, use mango juice; if you can’t find store-bought, purée a ripe mango and strain it. Substitute ginger for the lemon zest.
POMEGRANATE MOUSSE Substitute 1 cup pomegranate juice for the lemon juice. Omit the zest. Use only 2 eggs and add an extra egg white. Garnish with pomegranate seeds.
Frozen Maple Mousse
Makes: About 6 servings
Time: About 20 minutes, plus time to chill
Mousse is one of those desserts that always impresses people, which I find a bit strange because it’s so easy to make. This one has a texture somewhere between regular mousse and semifreddo. You can serve it unfrozen if you like, but it must be served within an hour or two of making it (otherwise it will start leaching water).
- 4 egg whites
- ½ cup maple syrup
- 4 tablespoons confectioners’ sugar
- 1½ cups cream
1. Beat the egg whites to soft peaks. Add the syrup and 2 tablespoons of the sugar and continue beating until the mixture holds stiff peaks (the syrup will keep the meringue on the softer side of stiff peaks). Set aside. In a separate bowl with clean beaters, beat the cream with the remaining 2 tablespoons sugar until it holds soft peaks.
2. Thoroughly but gently fold the cream into the whites. Gently transfer the mousse to individual ramekins or cups (it’s quicker to chill) or into one dish, cover with plastic, and freeze until firm, 2 to 3 hours. Serve within 1 day.
FROZEN HONEY-ORANGE MOUSSE Swap ⅓ cup honey for the syrup. Beat 1 tablespoon grated orange zest into the whipped cream before folding it into the egg white mixture.
FROZEN AVOCADO MOUSSE Buttery and mild, with a bit of lime to keep it fresh and green: Use a food processor or blender to blend 2 ripe avocados with 2 tablespoons fresh lime juice and ½ cup sweetened condensed milk or honey until very smooth. Omit the maple syrup; add all the sugar to the cream before beating it. Fold the avocado purée into the egg white and cream mixture before pouring into ramekins.
Strawberry Trifle
Makes: About 8 servings
Time: About 15 minutes, plus time to chill
An easy, impressive dessert, great for making in advance. There’s lots of wiggle room here: Add fruit or don’t, use any pound cake variation or a different liqueur or cream filling; adjust the quantities of each component until the texture is how you like it. You’ll need to make the components separately, but that process can be staggered so that assembly is a snap.
- 2½ pounds fresh strawberries
- ⅓ cup sugar, or to taste
- 2 tablespoons sherry
- 2½ cups Whipped Cream
- 1 recipe Vanilla Pastry Cream
- 1 recipe Classic Pound Cake
1. Hull and slice the strawberries; reserve a few slices for topping the trifle if you like. Combine the sliced strawberries in a saucepan with the sugar and ¼ cup water and cook over medium heat, stirring occasionally, just until the berries soften slightly and the sugar is dissolved, 3 to 5 minutes. Remove from the heat and add the sherry. While the berries cool, fold together the whipped cream and pastry cream in a separate bowl until just combined. Cut the cake into ½-inch-thick slices.
2. Arrange 3 or 4 cake slices in a single layer in the bottom of a trifle dish or large deep bowl, breaking them so that the entire bottom is covered. Spoon about one-third of the berry mixture (including the juices) over the cake, then spread about one-third of the whipped cream mixture over the berry mixture. Repeat for all layers. Cover with plastic wrap and refrigerate for a few hours before serving, preferably overnight. Top with sliced strawberries if you like and serve.
PEACH MELBA TRIFLE Use 4 cups chopped peaches instead of the strawberries and swap the sherry for Chambord. Use Yellow Cake, baked in any pan and cut into 1-inch slices.
LEMON-BERRY TRIFLE Creamy, tart, and good with any berry: Use Lemon Curd in place of the pastry cream and Lemon-Poppy Bread instead of pound cake.
MINT CHOCOLATE TRIFLE Strictly for the grown-ups: Omit the berries, sugar, and sherry. Use Chocolate Pastry Cream and Chocolate Cake; drizzle ¼ cup crème de menthe over each layer of cake. Garnish with chocolate shavings.
MOCHA TRIFLE Follow the preceding variation, switching freshly brewed coffee for the crème de menthe.
GINGERBREAD TRIFLE A spicy spin for colder months: Follow the preceding variation, using Caramel Sauce in place of the pastry cream and Gingerbread in place of the cake. Drizzle 2 tablespoons whiskey over each layer.
Tiramisu
Makes: About 6 servings
Time: About 30 minutes, plus time to chill
Creamy and rich, with coffee-soaked sponge cookies and cocoa powder dusted on top, this impressive, easy dessert is excellent for entertaining. Add 1 teaspoon vanilla extract to the beaten egg yolks for an extra layer of flavor.
- 2 eggs, separated
- ¼ cup sugar
- ½ cup heavy cream
- 1¼ cups mascarpone
- 1½ cups freshly brewed coffee or espresso
- 24 ladyfingers, store-bought or homemade (page 175)
- ¼ cup cocoa powder
1. In a large bowl, beat the egg yolks and sugar with an electric mixer until thick, pale, and doubled in volume. Clean and dry the beaters, then beat the egg whites in a separate bowl until they hold stiff peaks. In a third bowl, beat the cream until it holds stiff peaks. Stir the mascarpone into the egg yolk mixture, then gradually fold in the egg whites and whipped cream.
2. Put the coffee in a shallow bowl. One by one, dip half of the ladyfingers in the coffee, turning to soak each side for a few seconds before layering them in a square baking dish. Spread half of the mascarpone mixture over this layer, then repeat with the rest of the ladyfingers and the filling. Sift the cocoa powder over the top. Cover and refrigerate for at least 4 hours or overnight. Serve within 2 days.
EGGLESS TIRAMISU An airy, creamy, albeit not quite as custardy alternative that works with any of the variations: Omit the eggs and increase the cream to 1 cup.
CHOCOLATE TIRAMISU Melt 4 ounces dark chocolate, let it cool a bit, then stir it into the egg yolk mixture along with the mascarpone and 1 teaspoon vanilla.
BANANA TIRAMISU Stir 3 mashed very ripe bananas into the egg yolk mixture along with the mascarpone and 1 teaspoon vanilla.
ORANGE TIRAMISU Add ¼ cup fresh orange juice and 2 tablespoons grated orange zest to the egg yolks and sugar before beating. Combine the coffee with 3 tablespoons orange liqueur.
ALMOND TIRAMISU For a more intense almond flavor, swap the ladyfingers for Italian Almond Cookies: Beat 1 teaspoon almond extract into the egg yolk mixture. Add ⅓ cup amaretto to the coffee. Garnish with sliced toasted almonds.
Zuppa Inglese
Makes: About 8 servings
Time: About 15 minutes, plus time to chill
This Italian dessert (which translates as “English Soup”) gets its name from its similarity to a classic English trifle (page 332) and the fact that the ladyfingers layered throughout are dunked in liquid (that’s the “zuppa” part). Each layer gets a different topping (vanilla pastry cream, chocolate pastry cream, and whipped cream), so there’s a nice variety. But feel free to play around with the flavors of each, adding lemon zest to the vanilla cream, almond extract to the whipped cream, and so forth.
- 1 cup Simple Syrup
- ¼ cup dark rum
- 36 ladyfingers, store-bought or homemade (page 175)
- 1 recipe Vanilla Pastry Cream
- 1 recipe Chocolate Pastry Cream
- 2 cups Whipped Cream
- Toasted slivered almonds for garnish (optional)
1. Combine the simple syrup and rum in a bowl. One by one, dip 12 ladyfingers (both sides) in the mixture and lay them in the bottom of a trifle dish, large deep bowl, or baking dish, breaking them to fit if necessary.
2. Spread the vanilla pastry cream over the top, then top with a second layer of ladyfingers dipped in the syrup-rum mixture. Top that layer with the chocolate pastry cream and the final layer of rum-dipped ladyfingers with the whipped cream. Cover and refrigerate for a few hours before serving, preferably overnight. Sprinkle with the almonds if you’re using them and serve.
Summer Pudding
Makes: 4 to 6 servings
Time: 20 minutes, plus time to chill
A much lighter, simpler version of a trifle, and among the best ways to showcase berries. Cooking them into a quick compote brings out their sweetness and natural juices, which soak every bite of the cake. Use any kind of berries or a mixture, either left whole or cut into bite-sized pieces; fresh summer fruit is best, of course, but frozen berries work decently. The cake is easy to vary too: Pound cake is dense enough to hold its own, and any of its variations work equally well here, but you can substitute any plain cake or even thick slices of bread with crusts removed. Serve with lightly sweetened Whipped Cream, sour cream, or crème fraîche.
- 3 pounds fresh or frozen raspberries
- ½ cup sugar, or to taste
- 1 recipe Classic Pound Cake
1. Rinse the berries, then combine in a saucepan with the sugar and ¼ cup water. Cook gently, stirring occasionally, just until the berries soften and yield their liquid, 10 to 15 minutes. Cool.
2. Meanwhile, cut the pound cake into roughly ½-inch-thick slices. Line a medium bowl with just over half the slices of pound cake so they come about 4 inches up the sides of the bowl; pack the slices so they leave no (significant) gaps. When the berries are cool, drain them, reserving the liquid. Spoon the berries on top of the pound cake and drizzle with about half of the liquid.
3. Cover with the remaining slices of pound cake, again packing them close together. Drizzle with all of the remaining juice from the berries.
4. Find a plate that will just fit into the bowl and press it down on top of the pudding. Weight it with a few cans (or whatever you can find that will do the trick) and refrigerate overnight.
5. To serve, run a knife around the edge of the pudding and invert onto a plate and cut slices or just scoop servings right from the bowl.
WINTER PUDDING Substitute 6 very soft Hachiya persimmons for the berries. In Step 1, slice off the tops of the persimmons, scoop the insides into the saucepan, add 1 teaspoon cinnamon and a pinch ground cloves, and cook with the sugar and water as directed.
Panna Cotta
Makes: 4 to 6 servings
Time: About 20 minutes, plus time to chill
The silken Italian favorite, a custard is thickened with gelatin and flavored with vanilla. Elegant on its own and lovely with Fruit Sauce, Two Ways or macerated berries (see page 575). See the variations for other flavors; I like the buttermilk variation best.
- Neutral oil (like grapeseed or corn) for greasing
- 3 cups cream or 1½ cups cream and 1½ cups half-and-half
- One ¼-ounce envelope (2½ teaspoons) unflavored gelatin
- 1 vanilla bean or 1 teaspoon vanilla extract
- ½ cup sugar
1. Use a paper towel and a bit of oil to very lightly grease the insides of 4 large or 6 small custard cups.
2. Put 1 cup of the cream in a medium saucepan and sprinkle the gelatin evenly over it; let sit for 5 minutes. Put the saucepan over low heat and whisk until the gelatin dissolves completely, 3 to 5 minutes.
3. Cut the vanilla bean in half lengthwise. Scrape out the seeds with a sharp knife; add both seeds and pod to the pot along with the sugar and the remaining cream. Increase the heat to medium and stir the mixture until the sugar has completely dissolved and steam rises from the pot, another 3 to 5 minutes. (If you’re using vanilla extract, heat the cream and sugar with the gelatin mixture until the sugar dissolves, then add the vanilla.) Let the mixture cool for a few minutes.
4. Remove the vanilla pod and pour the mixture into the custard cups. Chill until set, about 4 hours. Serve in the cups or run a thin knife along the sides to loosen the panna cotta, dip the cups in hot water for about 10 seconds each, and invert onto plates. Serve within 24 hours.
BUTTERMILK PANNA COTTA Subtly tangy and especially wonderful with Balsamic Glaze and fruit: Use 1½ cups cream and 1½ cups buttermilk. Dissolve the gelatin in the buttermilk and proceed with the recipe.
CITRUS PANNA COTTA Decrease the cream to 2¾ cups and omit the vanilla. Peel a few strips of zest from one piece of citrus (any kind you like) and squeeze ¼ cup of juice. Add the citrus peel as soon as you turn on the heat, then remove it at the beginning of step 4 and whisk in the juice right before pouring it into the custard cups.
TEMBLEQUE A Caribbean coconut dessert: Substitute coconut milk for the cream. Dissolve the gelatin in ½ cup of the coconut milk for 3 to 5 minutes, then combine it with the remaining coconut milk and the sugar. Cook over medium heat, stirring constantly, just until the sugar dissolves. Omit the vanilla. Dust the unmolded custards with cinnamon just before serving. Replace the gelatin with agar to make this one vegan; as with the gelatin, you’ll need to let it bloom in the coconut milk and heat it to dissolve before proceeding.
GREEN TEA PANNA COTTA Omit the vanilla. Combine 2 cups of the cream with 2 green tea bags over medium heat. As soon as the mixture boils, remove it from the heat, transfer to a bowl (so you can use the saucepan for the remaining cream and the gelatin), and let steep for 20 minutes, then discard the tea bags. Proceed with the recipe, adding the green-tea-infused cream along with the sugar in Step 3.
Gelled Desserts for Vegetarians
Gelatin is easy to shop for and easy to use, but because it’s made from animal collagen, it’s not for everyone. The easiest and most versatile substitution is agar powder; substitute it in a one-to-one ratio for recipes that call for powdered gelatin. To use it, let it first bloom in the cold liquid for a minute or two, then heat the mixture, stirring regularly, until the powder is completely dissolved. One teaspoon of agar will firm one cup of liquid and takes about an hour to set. It does end up with a looser hold than regular gelatin does, so if you want a firmer set, use slightly more agar than the gelatin called for. Note that if you are cooking with highly acidic ingredients like citrus fruits, you may also need more agar than the recipe calls for, and some tropical fruits like pineapples and papayas will not work with agar at all.
Gelée, Many Ways
Makes: 4 to 6 servings
Time: 25 minutes, plus time to chill
A light, sweet, and refreshing dessert that is the original Jell-O, infinitely better and almost as easy to make. It’s also incredibly adaptable: As long as you’re starting with roughly 4 cups of liquid, you can use just about any kind you like—juices, purées, teas, or alcohol—and adjust the sweetness to taste. For something stiffer that can be cut into shapes, add 1 or 2 more teaspoons gelatin.
- 4 teaspoons (about 1½ envelopes) unflavored gelatin
- 1½ cups Simple Syrup
- ¼ cup fresh lemon juice
- ¼ cup fresh lime juice
1. Put 2 cups water in a saucepan, sprinkle the gelatin evenly over the water, and let sit for 10 minutes or so. Bring to a simmer, stirring occasionally until the gelatin is completely dissolved. Remove from the heat and whisk in the rest of the ingredients.
2. Strain the liquid into small cups or a single larger dish so that the gelée is at least 1 inch thick. Let the gelée cool to room temperature, then refrigerate until firm, about 4 hours.
CHOCOLATE GELÉE Divinely rich, somewhere between ganache and gelée: Increase the gelatin to 5 teaspoons. Omit the citrus juices and use only 1 cup water; combine it with the simple syrup and 1 cup cocoa powder. Bring the mixture to a simmer, then remove from heat and whisk in 8 ounces melted dark chocolate.
MOCHA GELÉE Decrease the water to 1 cup and combine with the gelatin, simple syrup, and 1 cup cocoa powder; whisk in 1½ cups freshly brewed coffee once the mixture is simmering.
CHAMPAGNE GELÉE WITH BERRIES Omit the juices and water altogether; decrease the simple syrup to 1 cup and bloom the gelatin in the syrup. Bring to a simmer, cool for 5 minutes, then stir in 3 cups chilled Champagne. Transfer to the cups or serving dish and refrigerate until the gelée is just starting to set, about 5 minutes; drop in about ½ cup berries (they should suspend in the gelée) and return to the fridge until firm.
BERRY GELÉE A great way to highlight one berry or your favorite combination; especially good topped with Whipped Cream: Use only 1 cup of water. Replace the juices with 1½ cups strained berry purée.
HONEY GELÉE Use the best-quality honey you can find since the bolder flavor is front and center: Omit the simple syrup and juices. As soon as the gelatin and water are simmering, remove from the heat and stir in 1½ cups honey until completely dissolved.
FRUIT JUICE GELÉE Use any juice here to change the flavor at will: Decrease the simple syrup to ½ cup and omit the water. Use this to bloom the gelatin, then bring to a simmer and whisk until it is completely dissolved. Remove from the heat and add 3½ cups fruit juice.
VEGAN GELÉE A vegan alternative to gelatin; this method works with the main recipe or any of the variations: Replace the gelatin with powdered agar, following the same directions for blooming it in the liquid. FYI, using agar produces gelée that’s a little less firm, so add an extra teaspoon or so if you like.
BOOZY GELÉE Also known as Jell-O shots. Substitute gin or vodka for up to half of the total amount of liquid (no more than 2 cups, which is super-boozy). Don’t heat the alcohol; just simmer the juice and gelatin until it’s dissolved, then stir in the alcohol off the heat before pouring the mixture into cups.
The Basics of Baked Custards
Baked custards have a slightly firmer and (usually) smoother consistency than puddings. You can serve them warm from the oven or bake ahead, chill, and serve cold or at room temperature. Other baked puddings, like Bread Pudding and clafoutis, have more substance and can handle more add-ins than their cream-based counterparts, which makes them among the most satisfying and versatile desserts you can find.
Perfecting these desserts comes down to the timing; it can be tricky to know when they’re done: By the time a custard appears to be set, it’s almost always overcooked. You must take a leap of faith and remove it from the oven when it’s still a bit wobbly in the center. It’ll firm up as it cools.
Although it’s not essential, it also helps to cook your custards in a water bath (also called a bain-marie), which moderates the temperature to ensure your delicate egg custards bake evenly and don’t break or curdle. To make a water bath, just put the baking dish or individual custard cups in a larger baking pan (a roasting pan works especially well since it’s deeper) and pour hot water into the pan at least halfway up the height of the dish. If you’re worried about carrying a heavy pan full of hot water across your kitchen, pour the water around the custard dishes after putting the pan in the oven.
Recipes
Baked Custard (Pots de Crème)
Flan (Crème \Caramel)
Cherry Clafoutis
Bread Pudding, Many Ways
Noodle Kugel
Apple Charlotte
Cornmeal Pudding
Baked Custard (Pots de Crème)
Makes: About 6 servings
Time: About 45 minutes
A more elegant version of vanilla pudding, this can be made ahead and served cold or at room temperature or eaten warm from the oven. Try using your favorite spice instead of the vanilla, and top with Whipped Cream.
- 2 cups cream, milk, or a mixture
- 2 eggs plus 2 yolks
- ¼ teaspoon salt
- ½ cup sugar, or more to taste
- 1 teaspoon vanilla extract
1. Heat the oven to 325°F and put a kettle of water on to boil. In a small saucepan over medium heat, cook the cream just until it begins to steam, 3 to 5 minutes. In a separate bowl, beat the eggs and yolks with the salt, sugar, and vanilla until pale yellow and fairly thick.
2. Gradually whisk one-third of the hot cream into the egg mixture, stirring constantly, then whisk this mixture into the remaining cream. Strain through a fine-mesh sieve if there are any lumps. Pour the mixture into six 4- to 6-ounce custard cups or an ovenproof dish, then put the cups or dish in a baking pan. Pour the boiling water into the pan so that it comes about halfway up the sides of the dish. Bake for 30 to 40 minutes for individual cups and a little longer if you’re using one large dish, until the custard is not quite set—it should wobble just a little in the middle. Remove the pan from the oven and carefully take the cups or dish out of the water. Serve warm, at room temperature, or cold (they’ll firm up more as they cool), within a day.
CRÉME BRÛLÈE Add ½ cup more cream, omit the whole eggs, and use 6 egg yolks. Bake as directed, let cool, cover with plastic wrap, and chill for up to a day or 2. Put an oven rack as close to the broiler as the height of the baking dish or cups will allow. Sprinkle ½ cup sugar in a thin, even layer over the custards, then place in the cold oven. Turn on the broiler and cook for 5 to 10 minutes, watching carefully and rotating the dishes if necessary. When the sugar bubbles and browns, it’s ready. Let sit for a few minutes before serving. Or, if you want to serve it cold (which is traditional), chill in the fridge for about 30 minutes; much longer than that and the brûléed sugar will get soggy. (You can also do the brûlée with a propane torch. Same concept: Heat the sugar with the flame until it bubbles and browns.)
LEMON CUSTARD Use 3 eggs and 4 yolks; increase the sugar to ¾ cup and omit the vanilla. Beat ½ cup fresh lemon juice and 1 tablespoon grated lemon zest into the egg mixture before adding the cream.
CHOCOLATE CUSTARD A little richer and more elegant than Chocolate Pudding: Decrease the sugar to ¼ cup. Melt 4 ounces chopped dark chocolate and cool slightly; stir into the egg mixture before adding the cream. Top with Whipped Cream if you like.
PUMPKIN CUSTARD A great gluten-free Thanksgiving dessert and simpler than a pie: Increase the sugar to ¾ cup. Instead of vanilla, add 1 teaspoon cinnamon, ½ teaspoon ginger, and ½ teaspoon nutmeg. Stir 1 cup pumpkin purée into the heated cream until smooth. Increase the eggs to 3 and the yolks to 3 and proceed with the recipe.
CAPPUCCINO CUSTARD Stir 2 tablespoons instant espresso powder into the cream just after removing it from the heat. Proceed with the recipe.
CHAI-SPICED CUSTARD Add 2 chai tea bags to the cream before cooking, then let steep for 15 minutes after removing from the heat. Remove the tea bags and proceed with the recipe.
Baking in a Water Bath

Set the custard cups or baking dish in a large baking pan. Pour hot water into the pan so that it comes about halfway up the sides of the cups.
Flan (Crème Caramel)
Makes: About 6 servings
Time: About 1 hour
This silky custard is baked over a layer of caramel, so when you flip it and remove the baking dish, you get a syrupy sauce and topping. It’s a bit of work, but impressive.
- 1½ cups sugar
- 2 cups cream, milk, or a mixture
- 2 eggs plus 2 yolks
- ¼ teaspoon salt
- 1 teaspoon vanilla extract
1. Stir together 1 cup of the sugar with ½ cup water in a small saucepan over medium heat. Cook, swirling the pan occasionally (instead of stirring), until the mixture turns golden brown, about 15 minutes; keep an eye on it, especially near the end, since it can burn easily. Immediately pour into a large ovenproof dish or six 4- to 6-ounce custard cups. Set aside.
2. Heat the oven to 325°F and put a kettle of water on to boil. In a clean saucepan, cook the cream over medium heat just until it starts to steam, 3 to 5 minutes. Beat the eggs and yolks with the remaining ½ cup sugar, the salt, and the vanilla in a large bowl until the mixture is pale yellow and thick.
3. Slowly add the cream to the egg mixture, stirring constantly. Strain through a fine-mesh sieve if there are any lumps. Pour this over the caramel and set the dish or cups in a baking pan. Pour the boiling water into the pan so that it comes about halfway up the sides of the dishes. Bake for 30 to 40 minutes, until the custard is not quite set—it should wobble just a little in the middle. Remove the pan from the oven and carefully take the dishes out of the water. Cool on a rack, then chill or serve. To unmold, dip the dish or cups in boiling water for about 15 seconds, then invert onto a plate or plates.
ORANGE FLAN Carefully stir ½ cup fresh orange juice into the finished caramel sauce. Add 2 tablespoons grated orange zest to the cream and cook as directed; strain the mixture right before adding to the eggs.
BUTTERSCOTCH FLAN Swap light brown sugar for all of the granulated sugar.
SALTED CARAMEL FLAN Cook the caramel as specified in the main recipe, but allow it to cook longer, until it is a deep amber color. Remove from the heat and stir in ¾ teaspoon salt. Garnish the unmolded custards with a pinch of flaky salt.
Cherry Clafoutis
Makes: 4 to 6 servings
Time: About 45 minutes
This rustic dessert—essentially a large, sweet, eggy pancake baked over fruit—is incredibly simple and one of the fastest ways to a fancy dessert. Use pretty much any fruit you like. Serve with a dollop of crème fraîche or Whipped Cream, dress it up with Balsamic Syrup, or add a drizzle of Rich Chocolate Sauce.
- Butter for greasing
- ½ cup granulated sugar, plus 1 tablespoon for greasing
- 1 pound cherries, pitted and halved
- 3 eggs
- 1½ cups cream, milk, or a mixture
- 1 teaspoon vanilla extract
- ¼ teaspoon salt
- ¾ cup flour
- Confectioners’ sugar for garnish
1. Heat the oven to 375°F. Butter a baking dish that’s big enough to hold the fruit in one layer and sprinkle it evenly with the tablespoon of sugar. Lay the cherries in the dish.
2. Beat the eggs, then add the remaining ½ cup sugar and continue to beat until foamy and fairly thick. Stir in the cream, vanilla, and salt, then beat in the flour until just combined. (If you like, you can make this in a blender instead.)
3. Pour the batter over the fruit and bake for about 30 minutes or until the clafoutis is nicely browned on top and a knife inserted into the center comes out clean. Sift some confectioners’ sugar over it and serve warm or at room temperature.
BLUEBERRY CLAFOUTIS Wonderful with any berry: Substitute 2 cups blueberries for the cherries. For a firmer filling that’s not quite so juicy, toss the berries with 1 tablespoon cornstarch first.
BRANDY APPLE CLAFOUTIS Peel and core 1 pound apples (about 2 small or 1 large). Cut them into thin slices and combine in a bowl with ¼ cup brandy. Let sit for at least 30 minutes, then add the apple slices to the dish. Decrease the cream to 1¼ cups and add the brandy with it. Garnish with a bit of cinnamon.
BOURBON-GINGER-PEAR CLAFOUTIS A flavorful wintertime dessert: Follow the preceding variation, substituting bourbon for the brandy and pears for the apples. Add 2 teaspoons minced fresh ginger to the bourbon before soaking the pears.
DRIED FRUIT CLAFOUTIS Use any dried fruit or a combination: Put 1½ cups dried fruit in a bowl; if the pieces are large, chop them first. Cover with warm water, rum, or bourbon and let sit for about 30 minutes. Drain and squeeze dry.
BANANA-CHOCOLATE CHIP CLAFOUTIS A dessert spin on the beloved pancakes: Use brown sugar instead of granulated sugar to coat the bottom of the dish. Cut 2 ripe bananas into ¼- to ½-inch-thick slices. Cover with batter, then sprinkle 1 cup chopped chocolate over the top.
7 More Ideas for Baked Custards
Unless otherwise specified, stir these add-ins into the custard before you pour it into the dish or dishes, just before baking.
- Add 1 or 2 tablespoons minced candied ginger or 2 teaspoons grated fresh ginger.
- Add ¼ cup or more shredded unsweetened coconut.
- Add about 1 teaspoon grated orange zest.
- Sprinkle raspberries or other fruit on the bottom of the dish before pouring in the custard and baking; use 1 or 2 tablespoons per serving.
- Substitute ½ teaspoon cinnamon and ½ teaspoon nutmeg for the vanilla.
- Infuse warm cream or milk with ½ cup coarsely ground coffee, 1 tablespoon matcha green tea, a vanilla bean, or whole spices or other ingredients (see page 311); let stand for 10 minutes and strain before proceeding.
- Add a pinch of flaky sea salt to each dish just before serving, especially for chocolate or caramel flavors.
Bread Pudding, Many Ways
Makes: About 6 servings
Time: About 1 hour
When you make bread pudding, you transform stale bread into an unbeatable dessert that lends itself to infinite adaptations. All sorts of bread will work, as will day-old pastries like Danish or cinnamon rolls; best is one that’s neither too crusty nor too soft. Serve with Hard Sauce or the sauce for Sticky Toffee Pudding.
- 3 cups cream, milk, or a combination
- ½ cup plus 1 tablespoon sugar
- ¾ cup raisins
- 4 tablespoons (½ stick) butter, plus more for greasing
- 1½ teaspoons cinnamon
- ¼ teaspoon salt
- 8 thick slices bread, preferably stale
- 4 eggs
1. Heat the oven to 350°F. Combine the milk, ½ cup of the sugar, the raisins, butter, 1 teaspoon of the cinnamon, and the salt in a medium saucepan over medium-low heat, stirring occasionally, just until the butter melts. Meanwhile, fill a kettle with water and put it on to boil. Butter a loaf pan or square baking dish and cut or tear the bread into bite-sized pieces—not too small.
2. Put the bread in a large bowl, then pour the milk mixture over it and stir to submerge completely; let sit for a few minutes. Beat the eggs briefly and stir them into the bowl. Pour the mixture into the baking dish, then mix together the remaining 1 tablespoon sugar and ½ teaspoon cinnamon and sprinkle over the top. Let sit for a few minutes to absorb the custard. Set the baking dish in a larger baking pan and pour in enough hot water from the kettle so that it comes about halfway up the sides of the dish.
3. Bake for 45 to 60 minutes, until a knife inserted in the center comes out clean or nearly so; the center should be just a little wobbly. If you want to brown the top, turn on the broiler, remove the dish from the water, and broil for about 30 seconds. Serve warm or cold. This keeps well for 2 days or more, covered and refrigerated.
RUM RAISIN BREAD PUDDING Add ¼ cup dark rum to the saucepan once you take it off the stove.
VANILLA BREAD PUDDING Doubly comforting with a scoop of vanilla ice cream : Omit the raisins and cinnamon. Add 1 tablespoon vanilla extract to the milk mixture when you take it off the heat.
CHOCOLATE BREAD PUDDING Leave out the cinnamon and add 3 ounces chopped chocolate in place of the raisins; cook until completely melted. For double chocolate, stir in 3 more ounces of chopped chocolate after you add the bread.
BANANA BREAD PUDDING Stale banana bread is imperative here; otherwise it won’t soak up the custard: Substitute Banana Bread for half of the bread. Add 1 teaspoon vanilla extract just before the bread, then mash 1 ripe banana and beat it with the eggs. If you like, substitute chocolate chips for the raisins and stir them in along with the eggs. Top with Boozy Caramel Sauce or Butterscotch Sauce.
VEGAN BANANA-CHOCOLATE BREAD PUDDING The banana not only adds flavor but also serves as an egg replacement, along with the cornstarch: Substitute nondairy milk for the dairy milk and 2 ripe bananas for the eggs. Add 1 cup vegan dark chocolate chunks. Mash one of the bananas and chop or slice the other one. Stir the bananas and chocolate into the bread in Step 2 in place of the eggs.
EGGNOG BREAD PUDDING Use the Italian holiday bread panettone, store-bought or homemade (page 433) for something especially festive: Omit the raisins and cinnamon. Use 2 cups eggnog and 1 cup milk; decrease the sugar to ⅓ cup. Remove from the heat and stir in 3 tablespoons bourbon. If you don’t have eggnog, use the original quantities of milk and sugar and add ½ teaspoon nutmeg before cooking.
BERRY BREAD PUDDING Depending on your mood, you can top this with Whipped Cream, Crème Anglaise, Fruit Compote, or just powdered sugar: Skip the raisins and cinnamon; when you take the saucepan off the heat, stir in 1 teaspoon each vanilla extract and grated lemon zest. Fold in 2 cups mixed berries—like blueberries, raspberries, blackberries, or hulled chopped strawberries—with the bread.
APPLE-CINNAMON BREAD PUDDING Increase the sugar to ¾ cup. Peel, core, and chop 2 apples and omit the raisins. Increase the butter to 5 tablespoons; melt 1 tablespoon butter in a skillet over medium heat, then sauté the apples in the pan until they’ve softened, 5 to 10 minutes. Proceed with the recipe, adding the apples along with the bread.
Noodle Kugel
Makes: 8 servings
Time: About 1 hour
A baked casserole with sweet eggy custard and crispy brown top, Kugel is a sublime comfort food, as good for dessert as it is for breakfast the next day. Leave it as is or stir in up to 1 cup chopped dried fruit, like raisins or cranberries, or toasted nuts.
- 1 stick butter, melted, plus softened butter for greasing
- 1 pound wide egg noodles
- 6 eggs
- 1 cup sugar, or more to taste
- 2 cups cottage cheese
- 2 cups yogurt or sour cream
- 1 tablespoon vanilla extract
- 1 teaspoon cinnamon
- ¼ teaspoon salt
1. Heat the oven to 350°F and put a pot of water on to boil. Butter a 13 × 9-inch baking dish. When the water is at a rolling boil, cook the noodles for 5 to 7 minutes, until al dente. Drain well, shaking to get rid of excess water.
2. In a large bowl, combine the eggs and sugar and beat until foamy. Add the cottage cheese, yogurt, melted butter, vanilla, cinnamon, and salt; beat until thoroughly combined. Fold in the noodles.
3. Pour the mixture into the prepared dish and bake for 45 minutes to 1 hour, until set and golden brown on top. Check occasionally; if the noodles start to get too dark, cover the dish with foil and finish cooking. Serve hot, warm, or at room temperature.
EXTRA-CREAMY NOODLE KUGEL Beat 1 pound cream cheese with 2 cups ricotta cheese until smooth and use in place of the cottage cheese and yogurt.
CHOCOLATE CHIP NOODLE KUGEL Chop 4 ounces chocolate and fold into the noodle mixture before transferring to the baking dish.
Apple Charlotte
Makes: 6 servings
Time: About 1 hour
Tender apples baked in a crust of buttered bread—it may not sound like much, but this French dessert, like a crisp apple pie but easier to make, is greater than the sum of its parts. You can make the apple mixture and assemble the bread “crusts” in advance, so it’s a good one if you’re short on time or space. Served warm on its own, it’s hard to beat, but a spoonful of Caramel Sauce, Crème Anglaise, or Zabaglione is good for gilding the lily. And save the bread scraps for breadcrumbs.
- 4 large apples
- 6 tablespoons (¾ stick) unsalted butter, plus more for greasing
- ⅓ cup packed brown sugar
- 1 tablespoon fresh lemon juice
- 1 teaspoon vanilla extract
- 18 slices white bread
- 2 tablespoons granulated sugar
1. Peel, core, and grate or finely chop the apples. Melt 2 tablespoons of the butter in a large saucepan over medium heat, then add the apples, brown sugar, lemon juice, vanilla, and ¼ cup water. Cook, stirring occasionally, until the apples are caramelized and soft, 15 to 20 minutes. Remove from the heat and let cool.
2. Heat the oven to 350°F and generously butter 6 ramekins or straight-sided baking cups. Remove the crusts from the bread slices; cut 12 circles with the same diameter as the ramekins, then cut 12 rectangles that are about as wide as the ramekins’ height (they needn’t be perfect). Spread the remaining 4 tablespoons butter over one side of the cut bread.
3. Place one round piece of bread, butter side down, in the bottom of each ramekin. Line the walls of the ramekin with 2 rectangular pieces of bread, butter side against the ramekin, filling in any gaps with scraps as necessary. Fill each bread cup with some of the apple mixture, then top with another round piece of bread, butter side up, pressing down gently to “seal” the lid. Sprinkle 1 teaspoon of sugar over each ramekin.
4. Put the ramekins on a baking sheet and bake for about 30 minutes, until the bread is golden brown and crisp all around; cover the baking sheet with foil if the lid starts to get too brown before the sides (you can peek with the tip of a paring knife). To serve, run a knife around the insides of the ramekins and invert onto a plate. Or you can just eat right out of the ramekins. Serve right away.
MIXED BERRY CHARLOTTE Like a way richer version of buttered toast with jam: Replace the cooked apples with 2 cups Fruit Compote made with any type of berry or a combination.
PEACH-CHERRY CHARLOTTE Peel, pit, and chop 4 large ripe peaches in place of the apples. Add the peaches and 1 cup pitted cherries to the melted butter along with the sugar, lemon juice, vanilla, and 1 teaspoon grated lemon zest.
SKILLET CHARLOTTE A faster version that uses a skillet instead of individual ramekins; the result is similar to Tarte Tatin: Butter a medium ovenproof skillet and line the bottom and walls with pieces of buttered bread, cutting them to fit as necessary. Spoon in the apple mixture, top with more buttered bread, and sprinkle the top with sugar. Bake as directed; to serve, either invert the whole thing onto a large plate or platter or cut slices right from the skillet.
Cornmeal Pudding
Makes: 4 to 6 servings
Time: About 3 hours
It’s not much to look at, but this pudding has the deep flavor of molasses and the creaminess of polenta—comforting and a little different. It’s also one of the first American desserts, probably dating from pre-Mayflower days. Top with Maple Whipped Cream.
- 3 tablespoons butter, plus more for greasing
- 4 cups whole milk
- ¾ cup sugar
- ½ cup molasses
- ½ cup cornmeal
- 1 teaspoon cinnamon
- ½ teaspoon ginger
- ¼ teaspoon nutmeg
- ½ teaspoon salt
1. Heat the oven to 300°F and butter a 2-quart casserole or square baking dish.
2. Combine 3½ cups of the milk in a medium saucepan with the sugar and molasses. Cook over medium heat, stirring occasionally until smooth, then decrease the heat to low. Whisk in the cornmeal, taking care to break up any lumps, and let cook for another 10 minutes or so, whisking frequently until the mixture is thick enough to coat the back of a spoon. Stir in the butter, cinnamon, ginger, nutmeg, and salt until the butter melts. Remove from the heat.
3. Pour the pudding into the prepared dish and top with the remaining ½ cup milk; do not stir. Bake for 2½ to 3 hours or until the pudding is just set in the center. Serve warm, at room temperature, or cold; wrapped well and refrigerated, this will keep for several days.
MAPLE CORNMEAL PUDDING Use ½ cup pure maple syrup in place of the molasses; decrease the sugar to ¼ cup and add ¼ cup packed light brown sugar.
CORNMEAL PUDDING WITH CORN KERNELS A good way to highlight the corn’s flavor and add some textural contrast: Fold ¾ cup fresh or thawed frozen corn kernels into the pudding just before pouring it into the dish.
The Basics of Dessert Soufflés
Dessert soufflés—like their savory counterparts—get their lofty height and airy texture (the word soufflé has the same root as the word for “breath”) from beaten egg whites and their creamy, puddinglike centers from the yolks. Baked soufflés make stunning presentations, but they can also be frozen. Some versions are rich and velvety while others are light and even refreshing.
Soufflés have a reputation for being fussy and difficult; try, and you’ll quickly realize how straightforward they are. There are just a couple of rules: It’s essential to use clean metal or glass utensils for beating the egg whites; traces of fats, which keep the egg whites from foaming, can cling to plastic materials even after they are cleaned. For the same reason, make sure there is no trace of yolk in the whites; their fat will also render the whites flat. Use room-temperature eggs, so the whites hold more air. Whip until they are shiny and can hold stiff peaks with tips that fold over just a bit. If the whites are too stiff, clumpy, and watery, they’re overwhipped—you must start over with new whites. It’s a mistake you won’t make twice.
Be gentle when you fold the egg whites into the soufflé base so that you maintain their airiness. Start by folding about one-third of the egg whites into the base to lighten it. Use your hand or a rubber spatula—the spoon-shaped ones are especially nice—to scoop the mixture from the bottom in one clean motion and fold it over the top until it’s just barely incorporated. Gradually fold in the rest of the egg whites, a little more gently, just until you no longer see streaks of white. It may feel like you’re undermixing, but you’re not. If the mixture goes flat, it’s overmixed and it won’t rise much in the oven.
Don’t skip over anything in the prep: Butter, sugar, and straight-sided dishes all promote maximum rise. Resist the urge to keep opening the oven door to check on the soufflé as it bakes; gusts of cool air may cause the rising egg whites to fall, so start checking only about three-quarters of the way through baking. The soufflé is done when the top is golden and airy but the center still wobbles a bit.
Finally, serve immediately; soufflé waits for no one. It will start to deflate at room temperature, so everyone should be ready with spoons in hand for that dramatic moment when you bring the billowing soufflé to the table. For maximum effect, use a serving spoon to break into the center and let steam escape. Serve as is, with a dusting of confectioners’ sugar or cocoa powder, or with sauce, ice cream, or fresh fruit.
Recipes
Chocolate Soufflé
Orange Soufflé
Frozen Berry Soufflé
Chocolate Soufflé
Makes: 4 to 6 servings
Time: About 45 minutes
No matter what you’ve heard, this soufflé is foolproof, and can even be prepared ahead, so long as you bake it just before you eat it; it starts to deflate shortly after it comes out of the oven. Serve with a spoonful of Crème Anglaise for a restaurant-quality dessert.
- Butter for greasing
- ⅔ cup sugar, plus some for greasing
- 6 ounces dark chocolate
- 6 eggs, separated
- ¼ teaspoon salt
- ¼ teaspoon cream of tartar
- Confectioners’ sugar for dusting (optional)
1. Heat the oven to 350°F. Butter a deep 2-quart baking dish or several smaller individual ramekins. Sprinkle sugar over the butter, invert the dish, and tap to remove excess sugar.
2. Chop and melt the chocolate, then set it aside to cool. Using an electric mixer, beat the egg yolks with all but 2 tablespoons of the sugar until very light and thick; the mixture will fall in a ribbon from the beaters or whisk when it is ready (see illustration). Mix in the melted chocolate until well combined and set aside.
3. Wash the beaters well, then beat the egg whites in a clean bowl with the salt and cream of tartar until they hold soft peaks; continue to beat, gradually adding the remaining 2 tablespoons sugar, until they are very stiff and glossy. Stir a spoonful of the whites thoroughly into the egg yolk mixture to lighten it, then gently fold in the remaining whites (see illustrations, page 56). Transfer to the prepared dish(es) and use a spatula or butter knife to gently smooth the tops; at this point you can cover and refrigerate for up to 2 days before baking.
4. Bake for 15 to 20 minutes for ramekins and 25 to 35 minutes for a single large soufflé, until the center is nearly set. Dust with confectioners’ sugar if you like and serve immediately.
VANILLA SOUFFLÉ This version uses a classic white sauce for the base; it’s one small extra step that adds richness and depth of flavor: Omit the chocolate. Melt 3 tablespoons butter in a saucepan over medium heat. Whisk in 3 tablespoons flour and stir for 2 or 3 minutes. Add 1 cup whole milk and bring to a simmer, stirring occasionally. Remove from the heat and stir in the seeds from 1 vanilla bean (see page 29) or 1 tablespoon vanilla extract. Let cool while you beat the egg yolks and sugar; temper the eggs by beating in a bit of the milk mixture, then gradually adding the rest. Proceed with the recipe.
MOCHA SOUFFLÉ Dissolve 2 tablespoons instant espresso powder in 2 tablespoons boiling water, then add it when you add the chocolate.
PUMPKIN SOUFFLÉ An American twist: Omit the chocolate. Put ½ cup milk, 1 teaspoon cinnamon, ½ teaspoon ginger, and ¼ teaspoon nutmeg in a small saucepan over medium heat and bring to a simmer. Combine 1 tablespoon cornstarch with 1 tablespoon milk; whisk into the saucepan, remove from the heat, and whisk in ¾ cup pumpkin purée. Add to the egg yolks in place of the chocolate.
Orange Soufflé
Makes: 4 to 6 servings
Time: About 45 minutes
A lighter, brighter soufflé that’s just as simple and impressive as the preceding chocolate version.
- Butter for greasing
- 1 cup sugar, plus more for sprinkling
- 6 eggs, separated
- 2 tablespoons fresh orange juice
- 2 tablespoons Grand Marnier or other orange-flavored liqueur
- 1 tablespoon grated orange zest
- ¼ teaspoon salt
- ¼ teaspoon cream of tartar
1. Heat the oven to 350°F. Butter a deep 2-quart baking dish or several smaller individual dishes. Sprinkle sugar over the butter, invert the dish, and tap to remove excess sugar.
2. Using an electric mixer, beat the egg yolks with ¾ cup of the sugar until pale yellow and thick enough that, when you lift the beaters, the mixture falls in a ribbon (see illustration below). Beat in the juice, liqueur, and zest and set aside.
3. Wash the beaters well, then beat the egg whites with the salt and cream of tartar in a clean bowl until they hold soft peaks; continue to beat, gradually adding the remaining ¼ cup sugar, until they are very stiff and glossy. Stir a spoonful of whites into the egg yolk mixture, then gently fold in the rest (see illustrations, page 56). Transfer to the prepared dish(es) and gently smooth the tops with a butter knife or spatula; at this point you can cover and refrigerate for up to 2 days before baking.
4. Bake for 15 to 20 minutes for ramekins or 25 to 35 minutes for a single large soufflé, until the center is nearly set. Serve immediately.
LEMON SOUFFLÉ Good with a spoonful of warm Fruit Compote: Replace the liqueur and orange juice with ¼ cup fresh lemon juice; use lemon for the zest.
LIME SOUFFLÉ The combination of lime and rum gives this soufflé a tropical zing: Substitute lime juice and zest for the orange juice and zest and rum for the Grand Marnier. If you like, garnish with toasted shredded unsweetened coconut before serving.
Beating Egg Yolks
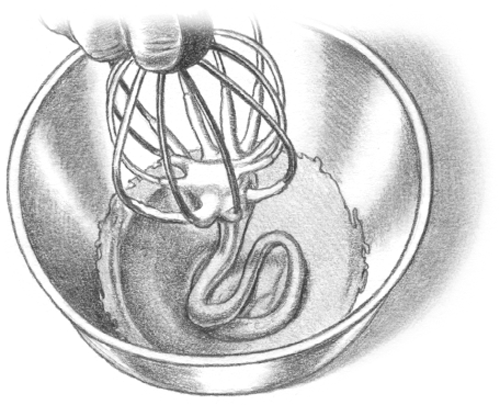
For soufflés and some other custard-based desserts, you want to beat the egg yolks until very light and thick; the mixture will fall in a ribbon from the beaters.
Frozen Berry Soufflé
Makes: 4 to 6 servings
Time: About 30 minutes, plus time to freeze
Somewhere between a soufflé and a semifreddo, this gets its airiness from whipped cream and whipped egg whites, and sets up in the freezer. This makes it a good summer dessert that works with fresh or thawed frozen fruit; feel free to swap the berries for any chopped soft fruit, like mango or peach.
- 3 cups mixed berries
- 1 tablespoon fresh lemon juice
- 3 eggs, separated
- 1 cup sugar
- ¼ teaspoon salt
- 2 cups cream
1. Purée the berries with the lemon juice and pass through a strainer to remove any seeds, pressing the pulp with a spoon to extract as much juice as possible; the yield will vary depending on the berries you use, but you want about 2 cups.
2. In a large bowl, use an electric mixer to whisk the egg yolks with ¾ cup of the sugar until light and very thick; the mixture will fall in a ribbon from the ends of the beaters when ready (see illustration, page 345). Stir in the berry purée.
3. Thoroughly wash the beaters, then beat the egg whites and salt in a clean bowl until they hold soft peaks; continue to beat, gradually adding the remaining ¼ cup sugar, until they are very stiff but still glossy. Stir a good spoonful of the whites thoroughly into the berry mixture to lighten it, then fold in the remaining whites (see illustrations, page 56).
4. Whip the cream until it holds soft peaks. Fold it very gently into the egg mixture. Turn into a 1½- to 2-quart serving dish or smaller individual dishes, smoothing the tops with a spatula or butter knife, and freeze for several hours before serving.
FROZEN CHERRY-CHOCOLATE SOUFFLÉ Melt 4 ounces chopped dark chocolate and set aside to cool. Purée 2 cups chopped pitted cherries and strain; stir the juice into the chocolate mixture and proceed with the recipe. Dust with cocoa powder and confectioners’ sugar before serving.
The Basics of Candies
The idea of making your own cakes, puddings, and even ice creams is commonly accepted—no one will dispute that the homemade, from-scratch versions are generally better and always more special than their store-bought alternatives. But for some reason, few people make candy.
Perhaps the prospect seems daunting, but there are plenty of simple candy recipes that are both delicious and rewarding. Chief among these is fudge, which was once the first recipe people taught their children. But there are so many others, from truffles to chocolate bark to marshmallows, that are easy and fun to make. Best of all, you get all the irresistible results of boutique-style confections—customized any way you like them—without a trip to a fancy candy shop, and with none of the unpronounceable ingredients found in candy from the supermarket.
EQUIPMENT
It’s worth buying a candy thermometer to get a precise read in the range between 230°F and 300°F (for some recipes, every degree counts)—that’s where sugar works its crystalline magic. It doesn’t need to be a huge investment—good-quality thermometers should set you back only $10 or $20; just avoid any that seem too cheap or flimsy—and they’re easy to use. If you don’t have one, you can determine the temperature of cooked sugar by dropping a bit into a glass of cold water and seeing what shape it makes:
- Thread stage (230-235°F): The melted sugar is a viscous syrup and forms a long, fluid thread.
- Soft-ball stage (235-240°F) (Chocolate Fudge; Marshmallows): The melted sugar forms a soft, pliable ball that feels soft between your fingers.
- Firm-ball stage (245-250°F) (Caramels): The melted sugar forms a hard ball in the water but is still somewhat pliable if you pinch it out of the water.
- Hard-ball stage (250-265°F) (Divinity Candy; Vanilla Taffy): The melted sugar forms a hard ball that holds its shape if you pinch it out of the water.
- Soft-crack stage (270-290°F): The melted sugar forms flexible, solid threads.
- Hard-crack stage (300-310°F) (Toffee): The melted sugar makes hard, brittle threads that snap when you try to hold or bend them.
Recipes
Chocolate Fudge
Chocolate Truffles
Cherry-Almond “Truffles”
Caramels
Peanut Brittle
Maple Candy
Peppermint Bark
Toffee
Chocolate-Dipped Anything
Vanilla Taffy
Divinity Candy
Marshmallows
Candied Orange Peels
Berry Pâte de Fruit
Marzipan (Almond Paste)
Peanut Butter Buckeyes
Halvah
Green Tea Mochi
Chocolate Fudge
Makes: About 1½ pounds
Time: About 45 minutes, plus time to set
Homemade fudge is smooth, chewy, and intensely flavored, worlds away from the cloying and grainy kind you find at souvenir shops. Corn syrup helps minimize the formation of sugar crystals, which makes for an even smoother consistency, but you can leave it out if you want. The better the chocolate you start with, the better the fudge you make. See the list on page 348 for ways to customize it.
- 2 tablespoons butter, plus more for greasing
- 2½ cups sugar
- 4 ounces unsweetened chocolate, chopped
- 1¼ cups heavy cream
- 2 tablespoons light corn syrup (optional)
- ½ teaspoon salt
- 1 teaspoon vanilla extract
- 1 cup chopped walnuts or pecans (optional)
1. Line an 8- or 9-inch square baking pan with parchment or foil (make sure there’s lots of overhang on the sides) and grease with butter. Let the 2 tablespoons butter come to room temperature while you work.
2. Combine the sugar, chocolate, cream, corn syrup if you’re using it, and salt in a heavy saucepan over medium heat. Cook, stirring frequently until the mixture comes to a boil. Cover the pan and cook for 2 minutes; this creates steam and washes the sugar crystals off the side of the pot.
3. Uncover the pot, reduce the heat to medium-low, and put a candy thermometer inside the pan, making sure the bottom of the thermometer isn’t touching the bottom of the pan. Let the mixture cook, without stirring, until it reaches 236°F (soft-ball stage; see page 346).
4. Immediately remove from the heat. Add the softened butter, but do not stir yet. Let the mixture cool (don’t disturb the pan) to 130°F, about 30 minutes. Once it’s cooled, add the vanilla and beat with an electric mixer on medium speed just until the butter and vanilla are incorporated and the mixture is smooth, less than a minute. Mix in the nuts if you’re using them.
5. Scrape into the prepared pan, smooth out the top with a rubber spatula, and let set at room temperature, at least 2 hours or overnight. When the mixture has hardened, lift the foil out of the pan, peel it off, and cut the fudge into squares. Wrap well and refrigerate; fudge keeps for weeks but is best eaten fresh.
PEANUT BUTTER FUDGE Substitute 1 cup peanut butter for the chocolate. Stir in 1 cup chopped roasted peanuts before transferring to the pan.
MILK CARAMEL FUDGE The “milk” here is sweetened condensed milk; substitute an equal amount of Dulce de Leche for a stronger caramel flavor: Substitute one 14-ounce can (about 1⅓ cups) sweetened condensed milk for the cream and chocolate; decrease the sugar to 2 cups.
CANDY CANE FUDGE This makes a festive holiday gift: Substitute 1 teaspoon peppermint extract for the vanilla; instead of nuts, fold 1 cup crushed peppermints into the fudge before scraping into the pan.
CHOCOLATE CHERRY FUDGE You can use any dried fruit, but cherries’ tart sweetness is especially good in such a rich candy: Proceed with the recipe, adding 1 cup chopped dried cherries at the end in place of the nuts.
Chocolate Truffles
Makes: About 1½ dozen
Time: 15 minutes, plus time to chill and roll
You’d be hard-pressed to find a more simple, elegant dessert. As with all simple recipes, the quality of the ingredients is everything. Sixty percent dark chocolate is ideal here; don’t go darker than that. (If you prefer milk chocolate, see the variations.)
- 8 ounces dark chocolate
- ⅔ cup cream, or more as needed
- 1 tablespoon butter, softened
- ½ cup cocoa powder
1. Finely chop the chocolate and put in a large heatproof bowl. Warm the cream in a small saucepan over medium heat, stirring occasionally until it is just boiling. Pour ⅔ cup of the cream over the chocolate and add the butter; let sit for a minute, then stir until the mixture is smooth and glossy. If it won’t come together or looks a bit grainy, add a little more cream, 1 tablespoon at a time. Chill in the fridge until it’s solid all the way through, at least 2 hours.
2. Scoop the chocolate mixture into scant tablespoon-sized mounds and quickly roll each one into a ball, then place on a plate or baking sheet. It helps to do this in a cool place, and latex gloves help prevent melting; if the chocolate becomes too soft to handle, refrigerate for a few minutes. Roll the balls in the cocoa powder until fully coated. Serve immediately or store in a sealed container in the refrigerator for up to a week.
MILK CHOCOLATE TRUFFLES A milder, sweeter flavor: Substitute milk chocolate for dark and decrease the cream to ½ cup. For a less bitter coating, decrease the cocoa powder to ¼ cup and combine with ¼ cup confectioners’ sugar.
CHOCOLATE-DIPPED TRUFFLES These have a thin, glossy shell with just a bit of snap: Omit the cocoa powder. Temper chocolate (see page 353); place the formed, chilled balls on a fork and dip them into the chocolate, letting any excess drip off the fork before placing on a sheet of parchment paper to set.
VEGAN TRUFFLES Avocado adds creaminess without altering the flavor: Omit the cream and butter. Pit a small avocado and mash it well. Melt the chocolate (use vegan chocolate), then mix in the avocado until completely smooth. Roll in the cocoa powder.
9 Additions to Chocolate Fudge or Chocolate Truffles
Stir these into the finished mixture, before it sets:
- Chopped nuts, any kind, up to 1 cup
- Sea salt or kosher salt, 1 teaspoon
- Vanilla extract, 1 teaspoon
- Grated citrus zest, 1 tablespoon
- Chopped candied ginger, ¼ cup
- Instant espresso powder, a teaspoon or 2
- Warm spices, such as cinnamon, cayenne pepper, and/or cardamom, 1 teaspoon
- Dried fruit, whole and enclosed in the truffle or minced and folded in, up to 1 cup
- Any liqueur, like Grand Marnier or Frangelico, 1 tablespoon
Cherry-Almond “Truffles”
Makes: About 2 dozen
Time: About 30 minutes
“Truffle” is in quotation marks because, instead of chocolate and cream, the filling here is mostly made up of dried fruit, which takes on a gooey, melty quality when steeped in booze. Nuts add a little crunch, and a dusting of cocoa makes the truffles read much more chocolaty than they are.
- 1 cup bourbon, brandy, cherry liqueur, or water
- 2 cups dried cherries
- 1 cup almonds
- 1 tablespoon honey
- ½ teaspoon almond extract (optional)
- ¼ cup cocoa powder
1. Bring the liquor or water to a simmer in a medium saucepan over high heat. Stir in 1½ cups of the cherries, remove from the heat, and cover. Let sit until soft, 10 to 15 minutes. Drain the cherries well, reserving the liquid.
2. Combine the soaked cherries in a food processor with the remaining ½ cup cherries, the almonds, the honey, and the almond extract if you’re using it. Pulse until the mixture is puréed and sticks together, scraping down the sides and adding 1 tablespoon at a time of the reserved liquid if necessary to keep the machine running. At this point, you can refrigerate for up to a day before proceeding.
3. Put the cocoa powder in a shallow bowl. Scoop scant-tablespoon-sized mounds of the mixture and use your hands to roll them into balls, then roll each one in the cocoa until fully coated and arrange on a plate or baking sheet. Covered, these will keep at room temperature for about a week or in the fridge for a little longer.
CRANBERRY-WALNUT TRUFFLES Omit the almond extract; use dried cranberries and walnuts for the fruit and nuts. Stir 1 teaspoon cinnamon into the cocoa powder.
FIG AND PINE NUT TRUFFLES Substitute chopped dried figs for the cherries and 1 teaspoon vanilla extract for the almond extract; soak only 1¼ cups figs. Purée the figs, honey, and vanilla. Add 1 cup pine nuts and pulse a couple times, until the nuts are just incorporated.
PB&J TRUFFLES An old-school flavor combination in a new recipe: Swap the cherries for raisins, the almonds for peanuts, and the almond extract for vanilla extract. Add ½ teaspoon cinnamon to the cocoa powder before rolling the truffles.
Caramels
Makes: 4 to 5 dozen
Time: About 45 minutes, plus time to cool
Getting these right is just a matter of reading a thermometer. The result is a soft, creamy candy that’s miles better than anything bought at a store.
- 4 tablespoons (½ stick) butter, plus some for greasing
- 1½ cups cream
- 2 cups sugar
- ½ cup light corn syrup
- ¼ teaspoon salt
- 1½ teaspoons vanilla extract
1. Line an 8- or 9-inch square baking pan with enough parchment or wax paper to hang over the sides, then lightly grease it with butter.
2. Clip a candy thermometer to the side of a medium saucepan, making sure it doesn’t touch the bottom of the pan. Add the cream, warm it over medium-low heat, and cook until it just starts to steam, then add the sugar, corn syrup, butter, and salt all at once. Continue to cook, stirring frequently, until the sugar dissolves and the mixture reaches 245°F (the firm-ball stage; see page 346).
3. Remove from the heat, stir in the vanilla, and pour the mixture into the prepared pan. Let cool to room temperature. Use the parchment to lift the caramel out of the pan and use a sharp knife to cut it into small squares. Wrap each square in parchment or wax paper (this is a good project to do with kids). These keep for weeks but are best eaten fresh.
CHOCOLATE CARAMELS A match made in heaven: Decrease the butter to 2 tablespoons; add 4 ounces chopped dark chocolate to the hot cream.
SALTED CARAMELS A fancy finishing salt with big crystals adds a wonderful crunch: Increase the salt in the caramel to 1 teaspoon, then sprinkle a teaspoon of flaky salt over the caramel once you’ve poured it into the pan.
CHEWY CARAMELS A little baking soda adds tiny air bubbles that lighten the candies: Decrease the cream to 1¾ cups. Add 1 teaspoon baking soda with the vanilla and mix until thoroughly incorporated.
COFFEE CARAMELS Stir in 1 tablespoon instant espresso powder along with the vanilla.
GINGERBREAD CARAMELS A perfect holiday treat: Decrease the corn syrup to ¼ cup and add ¼ cup molasses. Add ½ teaspoon ginger, ½ teaspoon cinnamon, ¼ teaspoon nutmeg, and ¼ teaspoon allspice along with the vanilla.
LIME CARAMELS Try this with any citrus; the tartness cuts the rich caramels perfectly: Add 1 tablespoon grated lime zest to the saucepan with the cream; when the mixture starts to steam, remove from the heat, cover, and let sit for 10 or 15 minutes. Strain the mixture, discarding the zest, and return the cream to the stove.
CARDAMOM CARAMELS Cardamom has a wonderfully complex flavor—somehow both warm and cool—that accentuates caramel’s salty sweetness: Follow the preceding variation, using 4 crushed whole cardamom pods instead of zest.
PISTACHIO CARAMELS Addictively crunchy and chewy; of course, you can do this with any nut, for equally great results: Stir 1 cup chopped toasted pistachios into the caramel just before pouring it into the pan. Substitute ½ teaspoon almond extract for the vanilla for a more intense nutty flavor.
Peanut Brittle
Makes: About 1 pound
Time: About 20 minutes, plus time to cool
You won’t believe how easy brittles are; you can whip one up in no time, and there’s no need for a thermometer. Vary as you like with different nuts; mix in seeds and/or spices; or make it over-the-top by dipping it in chocolate.
- Butter for greasing
- 2 cups sugar
- 2 cups roasted peanuts
- ½ teaspoon salt if the peanuts are unsalted
1. Use the butter to grease a baking sheet, preferably one with a low rim.
2. Put the sugar and ⅓ cup water in a small saucepan over low heat. Cook until the sugar dissolves and becomes a nutty caramel color but is not yet dark brown, anywhere from 5 to 10 minutes. Resist the urge to stir, which can cause the sugar to crystallize and create lumps, but you can swirl the pan if the sugar is cooking unevenly. If there’s a lot of sugar clinging to the sides of the pot, use a brush dipped in water to wash it back down. Watch carefully, as sugar has a tendency to burn the second you turn your back on it.
3. Stir in the peanuts and the salt if you’re using it; stir until combined, then remove from the heat and immediately pour the mixture onto the prepared baking sheet. Let cool completely at room temperature, then break into pieces. (To make even squares, score the brittle with a sharp knife once it’s solidified slightly but before it has hardened.) Store in a covered container indefinitely.
POPCORN BRITTLE Even crunchier—and more addictive—than caramel corn: Pop about ¼ cup popcorn kernels; you should have about 4 cups popcorn. Put the popcorn in a large heatproof bowl and pour the caramel over it. Toss to coat, working quickly so the sugar doesn’t harden, and immediately spread the mixture on the prepared baking sheet, using a greased piece of parchment to press it into a thin and even layer if necessary.
MAPLE-WALNUT BRITTLE Tastes like autumn: Decrease the sugar to 1½ cups and the water to ¼ cup; substitute 2 cups chopped toasted walnuts (see page 57) for the peanuts. Add ½ cup pure maple syrup just before adding the nuts and salt.
ROSEMARY-PINE NUT BRITTLE An elegant, unusual treat, perfect for grown-ups: Swap the peanuts for pine nuts and add ¼ teaspoon salt along with 1 tablespoon minced rosemary leaves.
8 Things to Add to Brittle
Stir these into the hot caramel in addition to or in lieu of the peanuts, and mix and match as you like—sesame seeds with five-spice powder and macadamia with coconut are both good, for example—but keep it simple so the flavors don’t muddy, with no more than 2 to 2½ cups of mix-ins.
- Any other nuts (I like salted nuts in brittle, but you can go either way): almonds, pecans, hazelnuts, walnuts, macadamia, cashews, or pistachios
- Any seeds: white and/or black sesame seeds, pumpkin seeds, sunflower seeds, or poppy seeds, up to 1 cup
- Shredded unsweetened coconut, up to 2 cups
- Chopped dried fruit: raisins, dates, cherries, blueberries, pineapple, and/or apricots, up to 2 cups
- Ground or crushed spices: cinnamon, ginger, five-spice, allspice, nutmeg, cardamom, cayenne, coriander, or black or pink peppercorns, 1 teaspoon
- Crushed espresso beans, up to ½ cup
- Minced fresh herbs, like thyme, rosemary, or sage leaves, 1 tablespoon
- Grated citrus zest (lime and peanut is a wonderful combination, underrated in the world of sweets), 2 teaspoons
Maple Candy
Makes: About ¾ pound
Time: About 20 minutes, plus time to cool
This candy has that wonderful sugary crunch, and (aside from a few drops of oil) requires only one ingredient, so make sure you’re using good syrup. To make more candy, simply increase the amount of syrup; the only difference is that it will take a little longer to heat and cool.
- Neutral oil (like grapeseed or corn)
- 2 cups maple syrup
1. Line a 9 × 5-inch loaf pan with aluminum foil and grease it. (Or if you have silicone candy molds, use those.)
2. Put the syrup in a small, heavy saucepan with high sides over medium-high heat and clip a candy thermometer to the side, making sure the bottom of the thermometer isn’t touching the bottom of the pan. Cook without stirring; when the syrup starts to bubble up (as if it’s going to overflow), add a few drops of oil and the foam will subside. As soon as the temperature reaches 236°F, take the pot off the heat.
3. Let the syrup cool to 180°F, 8 to 10 minutes, then stir vigorously with a wooden spoon until the syrup lightens in color and becomes thick, creamy, and opaque, about 3 minutes. Pour the syrup into the prepared pan (or molds) and let cool at room temperature until set. Unmold and break into pieces; in an airtight container at room temperature, these will keep for about a month.
Peppermint Bark
Makes: About 1 pound
Time: 15 minutes, plus time to cool
During the holidays you can find this festive candy for upward of $20 a pound. Making it at home means you can have it year-round, for a fraction of the cost—the hardest part is waiting for the individual layers to set. See the variations for other easy gift ideas.
- 8 ounces dark chocolate, chopped
- 8 ounces white chocolate, chopped
- 1 teaspoon peppermint extract
- 3 candy canes or 12 peppermint candies
1. Line a baking sheet with parchment paper or foil (or use a silicone mat). Melt the dark chocolate over a double boiler or in the microwave, checking and stirring frequently until it’s completely smooth. Pour onto the prepared sheet and spread into an even layer about ⅛ inch thick (it won’t fill the whole baking sheet). Refrigerate until set, at least 15 minutes.
2. Melt the white chocolate until completely smooth; add the peppermint extract and let cool until lukewarm, another 10 or 15 minutes. Meanwhile, put the candy canes or peppermints in a plastic bag and use a mallet, rolling pin, or heavy utensil to crush them into very small pieces.
3. Spread the white chocolate over the dark chocolate, working quickly so that the dark chocolate doesn’t start to melt and streak. Sprinkle the peppermints evenly over the top and refrigerate until the bark is hard. Cut into pieces or break by hand. Refrigerate in an airtight container for no more than 2 weeks. Serve cold or at room temperature.
GANACHE BARK Add a middle layer of velvety chocolate cream: After Step 1, chop another 8 ounces of any kind of chocolate and melt with ¼ cup cream, stirring until smooth; if you’re using dark chocolate, add another tablespoon or 2 of cream. Let cool to lukewarm, then spread over the bottom layer and chill before adding the top layer.
CHOCOLATE PRETZEL BARK The perfect salty-sweet snack: Substitute milk or dark chocolate for the white chocolate and vanilla extract for the peppermint; instead of candy canes, use 1 cup lightly crushed salted pretzels.
CHOCOLATE CASHEW BARK Use your favorite nut or a combination: Omit the peppermint extract or substitute 1 teaspoon vanilla extract. Chop 1 cup toasted cashews (see page 57) and scatter them over the top layer; if the nuts are unsalted, add 1 teaspoon coarse salt.
CHOCOLATE-CHERRY ALMOND BARK Chewy, crunchy, and smooth: Swap ¾ teaspoon almond extract for the peppermint extract or leave out extract entirely. Chop ½ cup each dried cherries and toasted almonds (see page 57); mix them together before you melt the chocolate and sprinkle over the top layer as soon as it’s poured.
CHOCOLATE COCONUT BARK Skip the peppermint extract. Toss 1 cup shredded unsweetened coconut with 1 tablespoon grated lime zest and sprinkle it over the top. If you like, toast the coconut first (see page 57).
Toffee
Makes: About 1 pound
Time: About 30 minutes, plus time to cool
Buttery, crunchy, with a complex nutty sweetness, this—like Peppermint Bark and Peanut Brittle—is deceptively simple and makes an excellent gift. Almonds are the classic addition, but pecans, pistachios, hazelnuts, even walnuts or macadamias are divine too.
- 2 sticks butter, plus more for greasing
- 1½ cups sugar
- 1 teaspoon salt
- 1 teaspoon vanilla extract
- 8 ounces dark chocolate
- ½ cup chopped toasted almonds (see page 57)
1. Line a baking sheet with parchment paper or foil and grease it with a little butter (or use a silicone mat if you have one). Put the sugar, butter, salt, and ⅓ cup water in a medium saucepan over medium heat. Cook, stirring frequently, until the mixture begins to boil. Put a candy thermometer in the pan, making sure the bottom of the thermometer isn’t touching the bottom of the pan, and continue cooking, without stirring, until the mixture reaches 300°F (hard-crack stage). (You can use a brush dipped in water to wash stray sugar crystals off the sides of the pot and keep them from burning.)
2. Immediately remove from the heat. Working quickly, stir in the vanilla, then pour onto the prepared sheet and spread in a thin, even layer with a heatproof rubber spatula. Let harden completely at room temperature.
3. Follow the directions for Chocolate-Dipped Anything to temper the chocolate and spread it over the cooled toffee, then top with the almonds. Once the chocolate sets, break the toffee into pieces by hand and store in an airtight container at room temperature or in the fridge for up to 2 weeks.
SHORTCUT TOFFEE Cutting out the tempering step makes toffee dangerously easy to make. Nontempered chocolate stays soft at room temperature, so keep this version in the fridge: Before you start cooking, finely chop the chocolate. Spread the toffee over the sheet and let sit for 2 minutes, then sprinkle the chocolate over it and leave to melt for another 2 minutes. Use a spatula to spread the chocolate in an even layer.
SALTED TOFFEE Like crunchy salted caramel: Instead of (or in addition to) almonds, sprinkle 1½ teaspoons coarse sea salt over the just-poured chocolate.
COFFEE TOFFEE Add 1 tablespoon instant espresso powder along with the vanilla.
Chocolate-Dipped Anything
Makes: 3 to 4 dozen
Time: 45 minutes
More technique than recipe, tempering chocolate is not difficult, but it does require patience. In return, you get a chocolate that stays firm at room temperature, with a glossy snap like that of professionally made candies. Coat just about anything with it or use it for a more shelf-stable Peppermint Bark.
- 2 pounds dark chocolate
- 3-4 dozen things for dipping (see the list below)
1. Line a baking sheet with parchment paper or foil. Finely chop the chocolate and reserve ½ pound. Put the remaining 1½ pounds in a double boiler or a clean heatproof bowl set over simmering water and set a candy thermometer inside, making sure the thermometer isn’t touching the bottom of the bowl. Melt the chocolate, stirring frequently, until it reaches 115°F.
2. Remove from the heat, add the reserved chocolate, and stir constantly with a rubber spatula until the thermometer registers 82-84°F. Put the chocolate back over the hot water and bring the temperature up to 91°F. (Don’t let it get any warmer than 91°F or you’ll have to start over.) Remove the chocolate from the heat (leave the thermometer in the chocolate) and start dipping like mad, letting the excess drip off and placing the dipped items on the prepared sheet to set. Monitor the temperature all the while; between 88°F and 91°F is your window for tempered dark chocolate, so once it cools to 88°F, put the chocolate back over the hot water and gently bring it back up to 91°F before continuing. Anything you dip in chocolate should be stored as you would store it without the chocolate: Berries and other fruit should be kept in the fridge, while cookies, pretzels, and candies will keep at room temperature for at least a week.
MILK CHOCOLATE-DIPPED ANYTHING In Step 1, remove the chocolate from the heat when it measures 112°F; bring the melted chocolate to 88°F before dipping in Step 2 and gently reheat when the temperature gets lower than 86°F.
WHITE CHOCOLATE-DIPPED ANYTHING In Step 1, remove the chocolate from the heat when it hits 110°F. In Step 2, bring the melted chocolate down to 80°F, then back up to 83°F before dipping, and gently reheat when the temperature gets lower than 80°F.
22 Things to Dip in Tempered Chocolate
- Dried fruit like apricots, figs, mango, pineapple, or apple
- Fresh strawberries or bananas
- Pretzels, potato chips, or popcorn
- Graham crackers or Whole Wheat Digestive Biscuits
- Biscotti
- Classic Shortbread
- Coconut Macaroons
- Meringues
- Tuiles
- Florentines
- Faux-reos
- Brownies
- Rice Cereal Bars or Caramel Popcorn Bars
- Liège Waffles
- Chocolate Truffles
- Caramels
- Peanut Brittle
- Maple Candy
- Marshmallows
- Candied Orange Peels
- Marzipan
- Peanut Butter Buckeyes
Vanilla Taffy
Makes: About 5 dozen pieces
Time: About 1 hour
This old-school favorite gets its distinctive texture from lots of pulling and stretching by hand. It’s a good workout, and a fun project to do with kids or friends.
- 1½ tablespoons butter, plus more for greasing
- 2 cups sugar
- 2 tablespoons cornstarch
- ½ teaspoon salt
- 1 cup light corn syrup
- 1 tablespoon vanilla extract
- ¼ teaspoon baking soda
1. Generously grease a rimmed baking sheet or baking dish. Put the sugar, cornstarch, and salt in a large saucepan and stir until combined, then add the corn syrup and ¼ cup water and clip a candy thermometer to the inside, making sure it’s not touching the bottom of the pan. Cook over high heat, stirring occasionally until the mixture comes to a boil; then reduce the heat to medium and cook without stirring until it reaches 260°F (hard-ball stage; see page 346). Remove from the heat and thoroughly mix in the butter, vanilla, and baking soda with a wooden spoon, then pour into the prepared dish.
2. When the taffy is cool enough to handle but still warm, butter your hands and gather it into a ball. (If you’ve got helpers, give each person a piece.) Pull the taffy, stretching it out and folding it back onto itself until it has become opaque and significantly lighter in color, 10 to 15 minutes. Butter your hands as necessary to keep it from sticking.
3. Butter a sharp knife or kitchen scissors and re-grease the baking sheet if necessary. Stretch the taffy into a long rope about ¾ inch in diameter and cut it into bite-sized pieces. Keep the pieces separate on the prepared baking sheet or a greased plate or else they’ll stick together. Wrap each in wax paper and store at room temperature for no more than a week.
Divinity Candy
Makes: About 2 dozen pieces
Time: About 20 minutes, plus time to set
The light sweetness of Vanilla Meringues meets the fudgy chewiness of nougat. Use a different nut or add dried fruit or chopped chocolate as you like; this recipe can handle up to 1 cup of add-ins.
- 2 egg whites, at room temperature
- ⅛ teaspoon cream of tartar
- 2 cups sugar
- ½ cup light corn syrup
- ¼ teaspoon salt
- 1 teaspoon vanilla extract
- ¾ cup chopped pecans
- Butter for greasing
1. Line 2 baking sheets with parchment paper or foil. In a large, heatproof bowl, beat the egg whites with the cream of tartar until they hold stiff peaks. Set aside.
2. Combine the sugar, corn syrup, salt, and ½ cup water in a medium saucepan over medium-high heat and bring to a boil. Put a candy thermometer inside the pan, making sure it’s not touching the bottom of the pan, and continue to cook without stirring until the mixture reaches 260°F (hard-ball stage; see page 346). Remove from heat.
3. With the mixer running, slowly pour the sugar mixture into the egg whites, and continue to beat for 5 minutes or so, until the mixture thickens considerably and starts losing its sheen. Mix in the pecans; then, using a buttered spoon, drop tablespoon-sized mounds of the mixture onto the prepared sheets. (If the mixture flattens and spreads when you spoon it onto the baking sheets, beat it for another minute to thicken and try again.) Let set at room temperature and store in an airtight container. Eat within 2 or 3 days.
Marshmallows
Makes: About ninety-six 1-inch marshmallows
Time: 30 minutes, plus time to set
Biting into a fluffy, tender homemade marshmallow is such a simple joy; you’ll never go back to store-bought. For thicker marshmallows, use an 8- or 9-inch square baking dish.
- Neutral oil (like grapeseed or corn) for greasing
- 1 cup confectioners’ sugar, sifted, plus more for dusting
- 1 tablespoon vanilla extract
- 2 tablespoons (a little less than three ¼-ounce envelopes) unflavored gelatin
- 1¾ cups granulated sugar
- ¾ cup light corn syrup
- ½ teaspoon salt
- 2 egg whites
- ¼ cup cornstarch
1. Grease the inside of a 13 × 9-inch baking dish; dust the bottom and sides with some confectioners’ sugar, tapping out any excess. Put ½ cup cold water and the vanilla in a large heatproof bowl (use the bowl of a stand mixer if you have one) and sprinkle the gelatin evenly over it; let soften while you make the sugar syrup.
2. Put ½ cup water into a medium saucepan along with the granulated sugar, corn syrup, and salt. Cook over medium heat, stirring occasionally, until the sugar dissolves, then set a candy thermometer in the pan, making sure it’s not touching the bottom of the pan, and increase the heat to medium-high. Cook without stirring until the mixture hits 240°F (soft-ball stage). Remove from the heat and carefully pour over the gelatin; beat with an electric mixer until the mixture is thick and glossy and has nearly tripled in volume, about 10 minutes if you’re using an electric mixer or a few minutes less with a stand mixer.
3. Clean the beaters well and, in a separate bowl, beat the egg whites until they hold stiff peaks. Fold them into the sugar-gelatin mixture until just combined, then use an oiled spatula to scrape it into the prepared dish; smooth out the top. Let set for at least 6 hours, preferably overnight.
4. Combine the confectioners’ sugar and cornstarch in a bowl. Dust a thin layer of the mixture over the top of the marshmallow, then run an oiled knife along the edges of the dish to loosen it. Invert onto a cutting board and cut into cubes, oiling the knife as needed to keep it from sticking. Toss each marshmallow in the cornstarch mixture to coat. Store at room temperature in a sealed container for no more than 1 week.
CHOCOLATE MARSHMALLOWS Combine ¼ cup cocoa powder and ¼ cup hot water in a small bowl and whisk until smooth, then stir it into the gelatin mixture just before pouring in the sugar syrup in Step 2. Substitute cocoa powder for up to half of the confectioners’ sugar in the coating; if you like, add 1 tablespoon cinnamon to the coating.
LEMON MARSHMALLOWS These are like a mini lemon meringue pie; you can swap the lemon for any other citrus if you prefer: Beat 1½ tablespoons grated lemon zest into the gelatin mixture just before adding the hot sugar syrup.
PEPPERMINT MARSHMALLOWS Perfect with a big mug of hot chocolate: Substitute 1 teaspoon peppermint extract for the vanilla extract. Crush about 15 peppermint candies into a very fine powder and combine with the confectioners’ sugar and cornstarch.
Candied Orange Peels
Makes: About 2 cups
Time: About 1½ hours, largely unattended, plus time to dry
This bittersweet candy has an incredibly simple ingredient list, and it turns what you’d probably throw away into an elegant dessert. If you like, coat the dried peels in tempered chocolate.
The process of boiling and reboiling the rinds is tedious, but it’s necessary to make them tender and sweet enough to eat, and you can multitask while you do it. I love the texture and flavor of the whole rind, but if that’s too bitter for you, use a vegetable peeler to leave behind the white pith.
- 4 oranges
- 3 cups sugar
1. Fill a pot with several inches of water and put it over high heat. Meanwhile, use a sharp knife to cut the tops and bottoms off the oranges and make 4 scores down the length of each one, cutting through the whole rind; peel off the rind and cut it into ¼-inch-wide pieces.
2. When the water is boiling, add the peels and cook for about 10 minutes. Drain and rinse the peels, then repeat.
3. In a medium saucepan, combine 2 cups of the sugar with 2 cups water. Bring to a simmer over medium heat and add the peels. Reduce the heat to medium-low and let simmer until the peels are translucent and tender, 45 minutes to 1 hour; no need to stir. Drain and toss with the remaining cup of sugar, then spread out on a rack to dry completely, at least 4 hours. Store in an airtight container at room temperature for up to 2 weeks. These freeze nicely; thaw completely before serving.
CANDIED GINGER Peel 1 pound fresh ginger and cut it into very thin slices—no thicker than ⅛ inch. Increase the total sugar to 3½ cups, using 2½ cups to simmer the ginger with the 2 cups water and using the remaining cup to coat the ginger after it cooks.
Berry Pâte de Fruit
Makes: About 5 dozen, depending on size
Time: About 30 minutes, plus time to set
These little fruit jellies have an intense fruit flavor and smooth texture that contrasts nicely with the ethereally crunchy sugar coating.
- Neutral oil (like grapeseed or corn) for greasing
- 2 tablespoons (a little less than three ¼-ounce envelopes) gelatin
- 4 cups berries, fresh or frozen and thawed
- 1 cup strawberry (or any berry) jam, store-bought or homemade (page 575)
- 1½ cups sugar
- 1 teaspoon grated lemon zest
1. Wipe a bit of oil over the inside of an 8- or 9-inch square baking dish and line it with wax paper (make sure it overhangs the edges of the dish). Fill a wide bowl with ¾ cup cold water and sprinkle the gelatin over it; set aside to soften while you prepare the fruit.
2. Purée the berries, jam, and 1 cup of the sugar (adding a splash of water to get the machine going if necessary) and strain the mixture into a saucepan. Cook over medium-high heat, stirring regularly, until the mixture has reduced into a thick syrup (there should be about 2 cups), 10 to 12 minutes. Stir in the gelatin mixture and cook for another minute or so, until the gelatin has completely dissolved. Remove from the heat and stir in the zest. Pour the fruit mixture into the prepared dish and let cool to room temperature. Cover with plastic wrap and refrigerate for at least 6 hours or overnight.
3. Unmold the pâte de fruit onto a cutting board, peel off the wax paper, and cut the pâte de fruit into bite-sized squares. Fill a bowl with the remaining ½ cup sugar, toss the squares in the sugar until evenly coated, and serve. Or store the uncut and uncoated pâte de fruit in an airtight container in the fridge for up to 2 weeks, then slice and coat the jellies in the sugar right before serving.
MANGO-LIME PÂTE DE FRUIT Substitute 5 cups chopped fresh mango for the berries and lime zest for lemon. Omit the jam.
Marzipan (Almond Paste)
Makes: About 1 pound
Time: About 15 minutes
With a deep almond flavor and soft, almost cookie-dough-like texture, this is leagues ahead of commercial, brightly colored marzipan, and it comes together in no time. Eat it as is or dip it in chocolate. If you miss the fun shapes of store-bought marzipan, you can roll the dough into a sheet, ¼ to ½ inch thick, and use cookie cutters or a paring knife to cut out shapes, then arrange the pieces on a baking sheet, cover with plastic wrap, and refrigerate until set.
- 2 cups almond flour (see page 15 to make your own)
- 1½ cups confectioners’ sugar
- ⅓ cup light corn syrup
- 1 tablespoon almond extract
- Neutral oil (like grapeseed or corn) for greasing
1. Put the almond flour in a food processor with the confectioners’ sugar and process until the mixture is combined and smooth. Add the corn syrup and almond extract and continue to process until the mixture starts to stick together, about a minute (it will look a little crumbly, but if you press it together with your fingers it should stick). If it doesn’t quite come together, add water, a few drops at a time, until it does.
2. Scrape the dough onto a lightly oiled surface and knead it a few times until it comes together into a smooth dough. Shape it into a log about 2 inches in diameter, wrap tightly in plastic wrap, and chill in the fridge to firm up a bit; keep refrigerated for no more than a month. Cut into slices and serve at room temperature.
COCONUT MARZIPAN Chewy and excellent with dark chocolate: Replace the almond flour with 2 cups shredded unsweetened coconut. Omit the almond extract if you like. No need to oil the counter; the coconut will release its own oil.
Peanut Butter Buckeyes
Makes: About 3 dozen
Time: About 30 minutes, plus time to set
So called because of their resemblance to the nut of the buckeye, Ohio’s state tree, these are especially popular in that state but rightfully beloved and enjoyed elsewhere. Peanut butter and chocolate are the classic combination, but these are great with any nut butter.
- 1½ cups smooth peanut butter
- 1 stick butter, softened
- 1 tablespoon vanilla extract
- 1 teaspoon salt (optional)
- 3 cups confectioners’ sugar
- 12 ounces dark chocolate, finely chopped
1. Line a baking sheet with parchment or wax paper. In a large bowl, beat together the peanut butter, butter, vanilla, and salt if you’re using it. Once the mixture is smooth, gradually add the sugar and beat until combined. When the mixture becomes too thick to beat, start mixing with your hands, kneading in the sugar as you would with a dough. Break off scant tablespoon-sized pieces of the dough, roll them into balls, and put them on the prepared sheet, then chill until firm, about 20 minutes in the freezer or a couple hours in the fridge.
2. Melt the chocolate (to temper it so it stays firm at room temperature, see page 353). Stick a toothpick, skewer, or fork into each peanut butter ball, dip in the chocolate until it’s covered at least halfway, and let any extra chocolate drip off. Put the buckeyes back on the sheet and refrigerate until the chocolate hardens or leave to set at room temperature if the chocolate is tempered. Store in an airtight container in the fridge (or at room temperature if you tempered the chocolate) for up to 1 week.
CRISPY BUCKEYES These have a great salty snap: Omit the salt. Crush enough pretzels to make ¾ cup fine crumbs; add to the mixture before adding the sugar.
Halvah
Makes: About 2 pounds
Time: About 30 minutes, plus time to cool
At once flaky and dense, halvah has many variations the world over. This one has a sweet, nutty depth and is a little chewier than most. Pistachios and cardamom add color and a delicate flavor, but use any nuts or spices you like—walnuts and cinnamon are nice, as are almonds and vanilla.
- Neutral oil (like grapeseed or corn) for greasing
- 2 cups honey
- 2 cups tahini
- 2 cups chopped toasted pistachios (see page 57)
- ½ teaspoon cardamom (optional)
1. Lightly oil the insides of a loaf pan or an 8- or 9-inch square baking dish.
2. Clip a candy thermometer inside a medium saucepan, making sure it’s not touching the bottom of the pan. Add the honey and cook over medium heat until it reaches 240°F (soft-ball stage; see page 346). Remove it from the heat. Put the tahini in a separate saucepan over medium heat and cook until it’s about 120°F. With a wooden spoon, stir it into the honey along with the nuts and the cardamom if you’re using it. Continue to stir until the mixture is stiff but still pourable, about 5 minutes.
3. Pour the mixture into the prepared dish and let cool at room temperature; cover with plastic wrap and refrigerate for 24 to 36 hours (so the sugar crystals have time to form). Run an oiled knife around the edges to loosen the halvah from the pan, then invert it onto a cutting board and cut it into slices or chunks. Bring to room temperature before serving. Wrapped well, this will keep in the refrigerator for several weeks.
DOUBLE-SESAME HALVAH Instead of nuts, use 2 cups toasted sesame seeds (white, black, or a combination). If you like, substitute 1 teaspoon rose water for the cardamom.
Green Tea Mochi
Makes: 1 to 2 dozen pieces, depending on size
Time: About 20 minutes
Lightly sweet with a soft, chewy, doughlike texture, mochi (a popular treat in Japan) is unlike anything else. The hardest part is finding the glutinous flour (which, despite the name, contains no gluten at all); find it online or at an Asian grocery.
- 1½ cups glutinous rice flour
- ¾ cup sugar
- 1 tablespoon green tea powder
- Cornstarch for dusting
1. In a large heatproof bowl, whisk together the rice flour, sugar, and green tea powder with 1½ cups water until completely combined. Cover loosely with plastic wrap and microwave on high for 2 minutes; the mixture should have thickened into a sticky dough. Continue to microwave in 1-minute intervals until the mixture is semitranslucent and no longer grainy (carefully taste a small piece to make sure it doesn’t taste like raw flour). Cooking time usually ranges from 5 to 7 minutes. Let cool for a minute or 2.
2. Generously sprinkle a clean surface with cornstarch and turn the mochi out onto it while it’s still hot. As soon as it’s cool enough, dust your hands with cornstarch and pat the dough into an even layer about ½ inch thick, sprinkling it with cornstarch as needed to keep it from sticking. Use a sharp knife to cut into bite-sized pieces and dust with more cornstarch. Serve or store in an airtight container at room temperature for up to 3 days.
RED BEAN-FILLED MOCHI Red bean—also called adzuki bean, not to be confused with the red kidney beans that are popular in New Orleans—is a common flavor in many Asian desserts, adding a subtle, earthy sweetness. If you can find canned sweetened red bean paste, feel free to use it, but it’s pretty simple to make your own, and kidney beans have a similar flavor: Before making the mochi, drain and rinse 1 cup canned red adzuki or kidney beans; pulse in a food processor with ¼ cup brown sugar until smooth. Scoop scant tablespoon-size mounds onto a baking sheet or plate lined with parchment; freeze until firm, about 15 minutes. Cut the mochi into 12 pieces and pat them out until they’re thin enough to wrap completely around the filling. Put the paste in the middle, pinch the ends closed, and roll the balls in your hands until smooth. To store, wrap individually in plastic wrap and store in the fridge for up to 2 days.
MOCHI ICE CREAM A fun way to eat ice cream, so much the better if you use a homemade version (pages 309-315): Scoop scant tablespoon-sized mounds of ice cream onto a baking sheet or plate lined with parchment; freeze until firm, about 15 minutes. Cut the mochi into 12 pieces and pat them out until they’re thin enough to wrap completely around the filling. Put the ice cream in the middle, pinch the ends closed, and roll the balls in your hands until smooth. Freeze in an airtight container for no more than a week or 2.