How to Bake Everything: Simple Recipes for the Best Baking - Mark Bittman (2016)
Pancakes, Waffles, and Doughnuts
Here’s a celebration of what many of us consider to be the most fun and even luxurious breakfast foods: pancakes, waffles, doughnuts, and other stovetop treats. These foods scream weekend. Though most are simple enough to make on a weekday, they are best enjoyed on a leisurely morning when time is not an issue and when a syrupy indulgence seems well earned. French toast is hardly more difficult to make than normal toast, yet the rich egg bath and sweet topping make it feel special. Pancakes and waffles can be made in a flash and are endlessly versatile. And once you try crêpes, they’ll never seem daunting again.
Doughnuts take a bit of doing, but they are a fun project, with such tender, sublime results they’ll ruin you for anything but homemade. You’ll also find make-your-own cereals here, which are a revelation. They have nothing in common with their commercial counterparts. Most of these recipes aren’t actually baked, but they are made with batters and doughs and custards (call it stovetop baking), which earns them a place here, and certainly in your kitchen.
The kinds of techniques you’ll find in this chapter lend themselves to fun tinkering. Quick bread and muffin recipes can easily be adapted to become waffles, doughnuts, or pancakes, giving you almost endless choice for flavors. And lest you think these foods can only be sweet, many recipes and variations dial back on the sugar, and some others are strictly savory.
The Basics of Pancakes
Pancakes are made from a simple, forgiving batter with lots of room for improvising: Beat the egg whites and/or use cottage cheese for light and airy pancakes; add ricotta for something more dense; switch up the flours (see the full flour rundown on page 12) for new flavors and textures; add fruit, chocolate, spices, nuts and nut butters, or almost anything you like (check out this list of variations). Many of these batters whip up in no time. You can even combine all the dry ingredients in advance (this, essentially, is Bisquick) and add eggs, milk, and flavoring when you’re ready. Follow these tips for making perfect pancakes:.
- Don’t overmix the batter. Stir just until all ingredients are incorporated; a few lumps are normal and will ensure the cakes aren’t tough or rubbery.
- Use a nonstick griddle or skillet, an electric griddle heated to 350°F, or a well-seasoned cast-iron skillet to minimize the amount of butter or oil you use.
- Heat the pan until a few drops of water skid across the surface before evaporating. You want it to be hot before the batter hits, but not so hot that the water evaporates right away.
- If you’re using only butter in the pan, take care that it doesn’t burn. Wipe off the griddle after every batch or two or, better still, add a bit of oil.
- Ladle the pancakes onto the griddle with enough room in between for flipping. The first couple of cakes might be sloppy; they’ll still taste great.
- The edges of the pancake will set first; when tiny bubbles form and pop in the center, it’s ready to flip. Resist the urge to flip beforehand—that keeps the pancakes from developing a golden brown crust and a light, tender center.
- Pancakes are best eaten immediately. If you have to wait, you can keep them warm on an ovenproof plate in a 200°F oven.
- Melt the butter and gently heat the maple syrup before serving; the microwave does a good job here.
Recipes
Simplest Pancakes
Light and Fluffy Pancakes
Vegan Pancakes
Mother Hubbard Pancakes
Lemon Ricotta Pancakes
Pumpkin Spice Pancakes
Pancake Tatin
Cornmeal Pancakes
Buckwheat Pancakes
Oatmeal and Dried Fruit Griddle Cakes
Berber Pancakes
Gluten-Free Pancakes
Brioche Pancakes
Dutch Baby
Mashed Potato Pancakes
Simplest Pancakes
Makes: 4 to 6 servings
Time: 20 to 30 minutes
This batter is quick to whip up, and you can refrigerate it, covered, for up to 2 days, making it ideal for weekday breakfasts and weekend brunches alike. It’s also very easy to customize: See page 100 for all the ways you can vary the flavor and texture.
- 2 cups flour
- 2 teaspoons baking powder
- ½ teaspoon salt
- 1 tablespoon sugar (optional)
- 2 eggs
- 1½-2 cups milk
- 2 tablespoons butter, melted and cooled
- Butter and/or neutral oil (like grapeseed or corn) for cooking
1. Heat a griddle or large skillet over medium-low heat while you make the batter.
2. Combine the flour, baking powder, salt, and sugar if you’re using it in a large bowl and stir to mix well. In a smaller bowl, beat the eggs with 1½ cups of the milk, then stir in the melted butter.
3. Add the egg mixture to the dry ingredients, stirring only enough to moisten the flour and distribute the liquid evenly; don’t worry about a few lumps. If the batter seems thick, add a little more milk—the thinner the batter, the thinner the pancakes and the more they’ll spread out in the pan.
4. When a couple drops of water skid across the surface of the pan before evaporating, it’s hot enough. Put a pat of butter and/or a drizzle of oil in the skillet. When the butter stops foaming or the oil shimmers, ladle batter into the skillet, making any size pancakes you like. Cook, undisturbed, until the edges are set and bubbles appear in the center of the pancakes, 2 to 4 minutes. If the pancakes are cooking too fast or too slowly, adjust the heat.
5. Carefully slip a spatula under a pancake to peek and see if it’s brown on the bottom. If so, flip it. Cook the second side until it’s lightly browned, another 2 or 3 minutes. Serve right away or keep warm on an ovenproof plate in a 200°F oven for about 15 minutes while you cook the rest.
SLIGHTLY RICHER PANCAKES Just a little sweeter and more tender, with the same classic flavor: Add 1 tablespoon sugar to the dry ingredients and an extra yolk to the batter after adding the milk.
YOGURT PANCAKES Pleasantly tangy; you can also use buttermilk here: Substitute yogurt for the milk and ½ teaspoon baking soda for the baking powder. If necessary, thin the batter with a little milk before you cook it.
WHOLE GRAIN PANCAKES A bit denser in texture and with a hearty grain flavor: Substitute your favorite flour (whole wheat, quinoa, amaranth, teff, kamut, rice, oat, and cornmeal will all work) for 1 cup of the all-purpose flour, or use all whole grain flour and add 2 extra tablespoons of melted butter.
SOURDOUGH PANCAKES A tangy delight: When you feed your sourdough starter (page 408), use the portion of the starter you might throw away here: Substitute 1 cup sourdough starter for half the flour; reduce the milk and salt by half, the baking powder to ½ teaspoon and the egg to 1. Mix the starter, flour, and ½ cup of the milk to make a medium-thin batter; let sit for an hour. Just before cooking, stir in the salt, sugar, and baking powder; then beat in the egg.
Light and Fluffy Pancakes
Makes: 4 to 6 servings
Time: 20 to 30 minutes
Beating the egg whites and folding them into the batter at the last minute creates something between your typical pancake and a soufflé.
- 1 cup milk
- 4 eggs, separated
- 1 cup flour
- ⅛ teaspoon salt
- 1 tablespoon sugar
- 1½ teaspoons baking powder
- Butter and neutral oil (like grapeseed or corn) for cooking
1. Heat a griddle or large skillet over medium-low heat while you make the batter.
2. Beat the milk and egg yolks together. In a separate bowl, beat the egg whites with a whisk or an electric mixer until fairly stiff.
3. Add the dry ingredients to the milk-yolk mixture, stirring to blend. Gently fold in the beaten egg whites; they should be evenly dispersed but remain somewhat distinct in the batter.
4. When a couple drops of water skid across the surface of the pan before evaporating, it’s hot enough. Add about 1 teaspoon each of the butter and oil. When the butter is melted and the oil is hot, add the batter by the heaping tablespoon. Cook until lightly browned on the bottom, 3 to 5 minutes, then turn and cook until the second side is brown, another 2 or 3 minutes. Serve immediately or keep warm on an ovenproof plate in a 200°F oven for up to 15 minutes.
LIGHT AND FLUFFY COCONUT MILK PANCAKES Call it a breakfast macaroon: Use coconut milk. Fold up to ½ cup shredded unsweetened coconut into the batter along with the egg whites.
JAMMY LIGHT AND FLUFFY PANCAKES A bit of fruit in every bite: Reserve 2 tablespoons or so of the milk and use it to thin out ½ cup of your favorite jam (to make your own). Swirl this into the batter after folding in the egg whites, lightly enough that it doesn’t fully incorporate. Top with more jam to make it even jammier, or with syrup or butter to balance out the jam flavor.
Pancakes Your Way
These variations will work with virtually any basic pancake recipe, and pancakes are so forgiving that you can mix and match any of them.
BUTTERMILK, YOGURT, OR SOUR CREAM PANCAKES Substitute one of these for the milk in any pancake recipe (to make your own “buttermilk,”); use ½ teaspoon baking soda in place of the baking powder and proceed with the recipe. If necessary, thin the batter with a little more milk or buttermilk.
FRUIT PANCAKES Use any kind of fresh or frozen (not defrosted) berries or peeled, grated, or finely chopped apples, peaches, or pears; sliced overripe bananas are my favorite: Cook these on slightly lower heat than you would with other pancakes as they tend to burn more easily. Pour the batter, then top with the fruit.
BANANA BREAD PANCAKES Banana bread flavor in less than half the time: Add 1½ cups mashed banana with the wet ingredients; reduce the flour by ½ cup and add another egg. Swirl in 1 teaspoon cinnamon and 1 teaspoon vanilla extract. Serve topped with chopped walnuts.
COCOA PANCAKES Add chocolate chunks too, if you like: Substitute ¼ cup cocoa powder for ¼ cup of the flour and add ¼ cup sugar to the dry ingredients.
GINGERBREAD PANCAKES Perfect served with a dollop of Whipped Cream: Substitute ½ cup molasses for the sugar and add it with the milk. Add 2 teaspoons ground ginger, 1 teaspoon cinnamon, and a pinch of ground cloves.
BUCKWHEAT PANCAKES Substitute buckwheat flour for the white flour, up to the full amount, although the more you use, the flatter the cakes will be. Double the amount of sugar if you like and increase the amount of milk (or other liquid) by ¼ cup if necessary (buckwheat is “thirstier” than all-purpose flour). For a hauntingly good flavor, stir in a teaspoon or so of ground coriander.
LEMON-POPPY SEED PANCAKES An especially good variation of the Light and Fluffy Pancakes: Substitute ½ teaspoon baking soda for the baking powder. Add 2 tablespoons fresh lemon juice and 2 teaspoons grated lemon zest with the wet ingredients, then fold in ¼ cup poppy seeds.
KEY LIME PANCAKES Swap buttermilk or sour cream for the milk and add 2 tablespoons fresh lime juice and 2 teaspoons grated lime zest along with 2 tablespoons sugar. Sprinkle crushed graham crackers directly over the poured batter. Cook at a slightly lower temperature than the other variations so they don’t burn.
NUTTY PANCAKES Cook these more slowly than other pancakes, over slightly lower heat, as they burn easily. Substitute nut flour for half the all-purpose. If you like, use unflavored, unsweetened nut milk instead of dairy. Beat up to ¼ cup nut butter or tahini into the batter with the milk and eggs; fold up to 1 cup chopped nuts (ideally the same kind as the nut butter) into the finished batter.
7 Ideas for Pancake Add-Ins
- Sprinkle chopped chocolate or chocolate chips over the poured batter. As always, chopping your own gives you the most control over quality, but use whichever you prefer.
- Stir up to 1 cup cooked grains, like rice, millet, wheat or rye berries, couscous, barley, quinoa, wild rice, kamut, or oats into the batter.
- Substitute fresh orange juice for the milk and add 1 tablespoon grated orange zest with the other wet ingredients.
- Substitute coconut milk for the milk and fold in ½ cup shredded unsweetened coconut.
- Add 1 teaspoon ginger or cinnamon, ½ teaspoon cardamom or nutmeg, or any combination.
- Swirl ½ cup jam into the finished batter; don’t fully incorporate it so the batter is marbled.
- Spoon the batter directly over pieces of cooked bacon.
How Do I Make My Pancake …?
|
THICKER |
Increase the flour 1 tablespoon at a time. |
|
THINNER |
Add more liquid, 1 tablespoon at a time. |
|
FLUFFIER |
Separate the eggs; whip the whites to stiff peaks before folding them into the finished batter. |
|
RICHER |
Add 1 tablespoon sugar to the dry ingredients and an extra yolk after adding the milk. |
|
HEARTIER |
Substitute your favorite whole grain flour—like whole wheat, buckwheat, oat, or cornmeal—for some or all of the flour; add up to 2 additional tablespoons melted butter to keep them tender. |
Vegan Pancakes
Makes: 4 to 6 servings
Time: 20 to 30 minutes
Pancakes are among the easiest things to veganize, so no one will go hungry or unsatisfied at breakfast.
- 2 tablespoons ground flaxseed (you can grind your own in a spice grinder)
- 2 cups flour
- 2 teaspoons baking powder
- ½ teaspoon salt
- 2 teaspoons sugar
- 1½-2 cups nondairy milk
- 2 teaspoons cider vinegar
- 1 tablespoon neutral oil (like grapeseed or corn), plus more for cooking
1. Put the ground flaxseed in a medium bowl, whisk in 5 tablespoons water, and set aside. Heat a griddle or large skillet, preferably nonstick, over medium-low heat while you make the batter.
2. Combine the flour, baking powder, salt, and sugar in a large bowl and stir to mix well. Stir the milk, vinegar, and oil into the bowl with the flaxseed, then stir the wet ingredients into the dry; it’s fine if there are a few lumps. If you like, add a bit more milk until the batter is the consistency you want.
3. When a couple drops of water skid across the surface of the pan before evaporating, it’s hot enough. Drizzle about 1 teaspoon oil into the skillet, let it heat for about 30 seconds, then ladle small amounts of batter onto the skillet. Cook, undisturbed, until the edges are set and bubbles appear in the center of the pancakes, 2 to 4 minutes. If the pancakes are cooking too fast or too slowly, adjust the heat.
4. Carefully slip a spatula under a pancake to peek and see if it’s brown on the bottom. If so, lift it from the pan and turn it over. Cook the second side until it’s lightly browned, another 2 or 3 minutes, and serve right away or keep warm on an ovenproof plate in a 200°F oven for about 15 minutes.
WHOLE GRAIN VEGAN PANCAKES Replace 1 cup of the all-purpose flour with 1 cup of any whole grain flour or fine cornmeal.
NUTTY VEGAN PANCAKES Substitute 1 cup ground nuts for 1 cup of the flour; if you like, substitute 2 tablespoons nut butter for the oil in the batter. As soon as you pour the batter into the skillet, sprinkle each pancake with chopped toasted nuts.
Adapting Recipes
How to Veganize Breakfast Baked Goods
It’s easy to make vegan substitutions in pancakes, French toast, and waffles. Use your favorite nondairy milk—unflavored is best—cup for cup; if you like, add 1 or 2 teaspoons cider vinegar, which acts like buttermilk to make especially tender cakes. Use oil in place of butter, melting it if necessary so it’s liquid when you add it. For each egg, substitute ¼ cup mashed banana, 3 tablespoons applesauce, or 1 tablespoon ground flaxseeds or chia seeds whisked with 2½ tablespoons water. See page 40 for more information on making your favorite recipes appropriate for vegans.
Mother Hubbard Pancakes
Makes: 4 to 6 servings
Time: 20 to 30 minutes
Eggless pancakes for when your refrigerator is bare. Baking soda keeps these thin pancakes light, while soured milk or, ideally, buttermilk makes them tangy and flavorful. The centers are almost creamy when you take them out of the skillet (which I like), but if you let them sit for a few minutes before eating, they’ll firm up a bit. A good one to make if you’re out of eggs or just want something a little different.
- 3 cups minus 3 tablespoons milk (or 3 cups buttermilk if you have it)
- 3 tablespoons vinegar if using milk
- 2 cups flour
- 2 tablespoons sugar
- 1 teaspoon baking soda
- ½ teaspoon salt
- 4 tablespoons (½ stick) butter, melted and cooled Butter and neutral oil (like grapeseed or corn) for cooking
1. To sour the milk, stir it with the vinegar and set aside so the mixture can clot.
2. Heat a griddle or large skillet, preferably nonstick, over medium-low heat. Meanwhile, combine the flour, sugar, baking soda, and salt in a large bowl and stir to mix well. Stir in 2½ cups of the soured milk or buttermilk and the melted butter, mixing just until the flour is moistened; a few lumps are fine. If the batter is too thick, add a little more milk until it reaches the desired consistency.
3. When a couple drops of water skid across the surface of the pan before evaporating, it’s hot enough. Add a pat of butter and a drizzle of oil; when the butter stops foaming, ladle in the batter. Cook, undisturbed, until the edges are set and bubbles appear in the center of the pancakes, 2 to 4 minutes. If the pancakes are cooking too fast or too slowly, adjust the heat a little bit at a time.
4. Carefully slip a spatula under a pancake to peek and see if it’s brown on the bottom. If so, lift it from the pan and turn it over. Cook the second side until it’s lightly browned, another 2 or 3 minutes. Serve right away or keep warm on an ovenproof plate in a 200°F oven for about 15 minutes.
Lemon Ricotta Pancakes
Makes: 4 to 6 servings
Time: About 30 minutes
These are more involved than other pancakes—you’ll need three bowls, and to whip the egg whites separately—but for that extra effort you get pancakes that are lightly rich with almost custardy centers. They’re great with Macerated Fruit, but, really, don’t need help. A good recipe for Mother’s Day or breakfast in bed.
- 3 eggs, separated
- 1 cup ricotta cheese
- ½ cup milk
- 1 tablespoon fresh lemon juice
- 1 cup flour
- 2 tablespoons grated lemon zest
- 1 tablespoon sugar
- ½ teaspoon baking soda
- ⅛ teaspoon salt
- Butter and/or neutral oil (like grapeseed or corn) for cooking
1. Heat a griddle or large skillet over low heat while you make the batter.
2. Beat the egg whites until fairly stiff but not dry. In a separate bowl, beat the ricotta, egg yolks, milk, and lemon juice together.
3. Stir the flour, zest, sugar, baking soda, and salt into the ricotta mixture, blending well but not beating. Gently fold in the beaten egg whites; they should remain somewhat distinct in the batter but still be evenly combined.
4. Raise the heat to medium-low. When a couple drops of water skid across the surface of the pan before evaporating, it’s hot enough. Add a pat of butter and/or a drizzle of oil to the griddle or skillet. When the butter foam subsides or the oil shimmers, add the batter and spread it around gently (it won’t spread much on its own) to make whatever size pancakes you like, being careful not to deflate the batter. Cook until lightly browned on the bottom, 3 to 5 minutes, then turn and cook until the second side is brown, another 2 or 3 minutes. Serve each batch right away as you cook the next one; the longer these pancakes sit, the more they deflate.
COTTAGE CHEESE AND SOUR CREAM PANCAKES Similarly fluffy, but with the tang of buttermilk pancakes: Substitute ½ cup each of cottage cheese and sour cream for the ricotta; reduce the milk to ⅓ cup. Omit the lemon zest and lemon juice if you like.
RICOTTA AND YOGURT PANCAKES WITH ORANGE Yogurt makes these richer, almost like cheesecake, while orange is slightly more assertive: Substitute ½ cup yogurt for ½ cup of the ricotta and reduce the milk to ⅓ cup. Use orange zest and ¼cup fresh orange juice instead of lemon zest and juice. If you like, add ½ teaspoon cinnamon along with the rest of the dry ingredients.
Pumpkin Spice Pancakes
Makes: 4 servings
Time: 20 to 30 minutes
These pancakes make an excellent fall breakfast. The pumpkin makes them especially tender and moist. Use this as a template for any fruit or vegetable purée; see page 572 for how to purée fruits and page 39 for puréeing winter vegetables. Top with Ginger or Maple Whipped Cream, Salted Caramel Sauce, or Roasted Walnut Butter.
- 1½ cups flour
- 2 tablespoons brown sugar
- 2 teaspoons baking powder
- 1 teaspoon cinnamon
- ¼ teaspoon nutmeg
- ¼ teaspoon ginger
- ¼ teaspoon ground cloves
- ½ teaspoon salt
- ½ cup canned pumpkin
- 1 cup milk, plus a little more if needed
- 1 egg
- 2 tablespoons melted butter
- Butter and neutral oil (like grapeseed or corn)
- for cooking
1. Heat a griddle or large skillet, preferably nonstick, over medium-low heat while you make the batter.
2. Combine the flour, brown sugar, baking powder, spices, and salt in a large bowl. In a smaller bowl, beat together the pumpkin, milk, egg, and melted butter.
3. Add the pumpkin mixture to the dry ingredients, stirring until just combined; some remaining lumps of flour are fine. If the batter seems thick, add a little more milk—the thinner the batter, the thinner the pancakes will be, so adjust to your preferences.
4. When a couple drops of water skid across the surface of the pan before evaporating, it’s hot enough. Add about 1 teaspoon each of butter and oil. When the butter has melted, ladle in batter, making whatever size pancakes you like. Cook, undisturbed, until the edges are set and bubbles appear in the center of the pancakes, 2 to 4 minutes. If the pancakes are cooking too fast or too slowly, adjust the heat a little at a time.
5. Carefully slip a spatula under a pancake to peek and see if it’s brown on the bottom. If so, lift it from the pan and turn it over. Cook the second side until it’s lightly browned, another 2 or 3 minutes. Serve right away or keep warm on an ovenproof plate in a 200°F oven for about 15 minutes while you cook the rest.
APPLE-CINNAMON PANCAKES Spread these with Apple Butter or Caramel Sauce when they’re still hot: Replace the pumpkin purée with unsweetened applesauce and use ¾ cup milk, adding more if needed (you won’t get quite as many pancakes as in the main recipe). Omit the nutmeg, ginger, and cloves and increase the cinnamon to 2 teaspoons.
PEAR-GINGER PANCAKES Try these after Thanksgiving topped with leftover cranberry sauce: Use pear purée instead of pumpkin and use ¾ cup milk, adding more if needed. Increase the ground ginger to 1 teaspoon; replace the cinnamon and nutmeg with 1 teaspoon or so of grated fresh ginger.
APRICOT-CARDAMOM PANCAKES Delicate and unusual in the best way: Use apricot purée instead of the pumpkin and use ¾ cup milk, adding more if needed. Replace the spices with 1 teaspoon vanilla extract and ½ teaspoon cardamom. Even better with some chopped pistachios sprinkled over the batter.
TROPICAL FRUIT PANCAKES More creamy than fluffy, but packed with flavor. Feel free to alter the fruits in the purée as you like or just use one of the three instead of a combination: Make a purée by blending (or puréeing in the food processor) a generous ½ cup each chopped peach, pineapple, and mango; use that instead of the pumpkin. Use ¾ cup coconut milk instead of the regular milk and white sugar instead of brown, and omit the spices. These are good with a bit of shredded unsweetened coconut sprinkled onto the pancakes before they’re flipped.
9 Toppings for Pancakes, French Toast, and Waffles
Aside from or in addition to the obvious butter and maple syrup:
- Whipped Cream
- Yogurt or créme fraîche, lightly sweetened with honey
- Fruit Compote or Fruit Sauce, Two Ways
- Fruit Jam or Orange Marmalade
- Orange Butter Sauce
- Applesauce or any other fruit purée
- Maple Buttercream
- Apple or Gingery Pear Butter
- Lemon Curd
Pancake Tatin
Makes: 6 to 8 servings
Time: About 30 minutes
Tarte Tatin is one of the most distinctive French desserts, with a bed of soft, deeply caramelized apples inverted over a pastry crust. Here the pastry is swapped out for a simple, eggy batter; the result is a giant apple-laced pancake that you cut into slices; it’s equally good as breakfast or dessert (and the pineapple and banana variations are arguably even better). The key to success is to not crowd the apples. The batter must be able to seep around the slices and meet the bottom of the pan. It shouldn’t sit separately atop a layer of fruit.
- 3 medium apples (preferably a tart and crisp variety like Granny Smith)
- Juice of ½ lemon
- 1 stick butter, cut into pieces
- ¾ cup sugar
- 2 cups flour
- 2 teaspoons baking powder
- 1 teaspoon salt
- 3 eggs
- 1½ cups milk
- 1 teaspoon vanilla extract
1. Heat the oven to 400°F.
2. Peel, core, and quarter the apples; toss with the lemon juice. Press the butter into the bottom and sides of a heavy ovenproof (cast iron is good) 10-inch skillet. Sprinkle the butter with the sugar. Press the apple quarters into the sugar; you should have enough room for a large circle of apples around the outside, with 1 or 2 pieces in the center. There should be some gaps between the apples so that you can see the sugar beneath; if there isn’t, remove a few pieces of apple.
3. Put the pan over medium-high heat. Cook until the butter-sugar mixture has turned a very deep, dark brown, 10 to 12 minutes. While it’s cooking, make the batter. Combine the flour, baking powder, and salt in a large bowl. In a separate bowl, beat the eggs, milk, and vanilla. Add this mixture to the flour mixture and stir until just combined.
4. When the apple mixture is ready, turn off the heat. Pour the batter into the skillet, spreading it evenly over the apples with a rubber spatula and making sure it seeps into the spaces between the apples. Bake until the pancake is just cooked through (a toothpick inserted into the middle should come out mostly clean), about 15 minutes. To know for sure, you can always dig into the pancake a bit with a paring knife or fork and take a taste; this side will ultimately be the bottom, so nobody will see.
5. Let the pancake sit for 5 minutes. Using pot holders, shake the hot pan to loosen the apples stuck to the bottom of the skillet. Invert the whole thing onto a large cutting board or serving dish, taking care not to burn yourself. Cut into slices and serve hot or warm.
PINEAPPLE UPSIDE-DOWN PANCAKE Instead of the apples, use 1 medium pineapple, peeled, cored, and cut into thick slices about 4 inches long (see illustrations, page 37). Omit the lemon juice. Arrange the slices in a circle around the skillet (like the spokes of a wheel) and proceed with the recipe.
CARAMELIZED BANANA PANCAKE Instead of the apples, slice 4 large or 5 small bananas in half crosswise. Since the bananas don’t release much liquid, it will take less time for the butter and sugar to turn dark brown. Stir ¾ cup chopped walnuts or pecans into the batter before pouring it into the skillet.
Cornmeal Pancakes
Makes: 4 servings
Time: 20 to 30 minutes
Cornmeal is often used alongside all-purpose flour, but use it alone for a heartier and more flavorful pancake. To sweeten these, add a bit of sugar or molasses to the batter or top with honey or compote. To make them savory, swirl in chopped herbs or cheese. These are naturally gluten-free and easily become vegan if you replace the milk with unflavored soy or nut milk or even fruit juice.
- 2 cups fine or medium cornmeal
- 1 teaspoon salt
- 2 tablespoons neutral oil (like grapeseed or corn), plus more for cooking
- ¼-½ cup milk
1. Combine the cornmeal, salt, and 1½ cups boiling water in a bowl, stir, and let it sit until the cornmeal absorbs the water and softens, 5 to 15 minutes, depending on what grind you use.
2. Place a large skillet or griddle (preferably nonstick) over medium heat. While it warms up, stir the oil into the cornmeal mixture, then add the milk, a little at a time (don’t start with more than ¼ cup), until the batter is spreadable but still thick.
3. When the pan is hot, coat it with a teaspoon or so of oil and let the oil heat up. Spoon out the batter and cook until bubbles form on the top and burst, 3 to 5 minutes (they may stick to the pan slightly if you’re not using a nonstick skillet), then flip and cook until the other side is golden. Serve immediately or keep warm on an ovenproof plate in a 200°F oven while you cook the rest.
OLIVE OIL-CORNMEAL PANCAKES A bit more assertive, whether you prefer them sweet or savory: Use olive oil in the batter as well as for frying. Add a tablespoon of grated citrus zest to the batter and replace half of the milk with fresh orange juice or add ¼ cup grated Parmesan cheese and a teaspoon each of fresh thyme and cracked black pepper.
CORNY CORNMEAL PANCAKES Best at the height of summer, when nothing beats fresh corn: Use a sharp knife to cut the kernels off 1 ear of corn; this should make about ¾ cup. Gently fold the kernels into the batter before adding it to the pan.
CORNMEAL PANCAKES WITH VANILLA AND NUTS Good with honey or completely on its own: Add ¾ cup of your favorite nuts and 1 teaspoon vanilla extract to the batter.
CORNMEAL PANCAKES WITH BACON AND BANANAS A powerhouse breakfast: Fry 6 strips of bacon in a skillet; chop the bacon and reserve the fat. Add ½ cup mashed overripe banana (about ½ medium banana) and fold it into the batter in Step 2. Fry the pancakes in the bacon grease and sprinkle each pancake with a tablespoon or so of chopped bacon before flipping.
BLUE CORN PANCAKES This is a tiny bit sweeter, but mostly a fun visual switch: Use blue cornmeal instead of yellow (making sure it’s still fine or medium ground). If you like, dot the pancakes with fresh blueberries after adding them to the griddle.
PEACH AND CORNMEAL PANCAKES These have a mild sweetness: Pit and roughly dice 2 ripe peaches or about 1½ cups’ worth; you can remove the skin if you’d like, but it isn’t necessary. (You can also use thawed frozen peaches.) Gently stir the peaches into the batter. Sprinkle a teaspoon or so of brown sugar onto each pancake before flipping.
Maple Syrup
The difference between real maple syrup and artificially flavored syrup is equivalent to the difference between butter and margarine: One is a natural, wholesome, downright delicious product, and the other is a nutritionally useless, not-very-good-tasting, unnatural substitute.
The label will tell you all you need to know; the only ingredient should be pure maple syrup. It takes about 40 gallons of sap to make just 1 gallon of syrup, so it’s not inexpensive, but you’ll taste the difference and never go back. Syrup is graded based on flavor and color, not quality; the darker it is, the stronger the flavor and, in general, the cheaper. As luck would have it, my favorite is Dark Amber (formerly called Grade B), which is darkest and cheapest with an unmistakable maple flavor. See page 19 for more on maple syrup.
You can easily infuse maple syrup with other flavors by slowly warming them together in a saucepan over low heat. Try cooked bacon, citrus rinds, a shot of liquor, herbs like rosemary or thyme, or whole spices like cinnamon stick or vanilla bean. Or melt the butter directly into the syrup—convenient and delicious.
Buckwheat Pancakes
Makes: 4 to 6 servings
Time: 30 minutes
Nutty, ever so slightly tangy buckwheat makes flavorful pancakes that take just as well to savory additions—like an egg, shredded cheese, or thinly sliced ham—as to Macerated Fruit or maple syrup. Cutting it with some regular flour produces a more tender texture, but for an all-buckwheat (also gluten-free) version, see the variation.
- 1 cup buckwheat flour
- 1 cup all-purpose flour
- 2 teaspoons baking powder
- ½ teaspoon salt
- 2 eggs
- 1½ cups milk, plus more if necessary
- 2 tablespoons honey
- 2 tablespoons butter, melted and cooled
- Butter and neutral oil (like grapeseed or corn) for cooking
1. Heat a large skillet, preferably nonstick, over medium-low heat while you make the batter.
2. Combine the flours, baking powder, and salt in a large bowl. In a separate bowl, beat the eggs, then add the milk, honey, and melted butter. Stir the egg mixture into the dry ingredients until just combined; a few lumps are fine. Add more milk if needed to thin the batter to your desired consistency.
3. When a couple drops of water skid across the surface of the pan before evaporating, it’s hot enough. Add a bit of butter and oil. As soon as the butter melts, ladle in the batter and cook, undisturbed, for 2 to 4 minutes, until bubbles appear in the centers of the cakes. Use a spatula to peek at the bottoms and flip when they’re browned. Repeat on the other side. Serve immediately or keep warm in a 200°F oven for 15 minutes or so.
100% BUCKWHEAT PANCAKES Use 2 cups buckwheat flour and omit the all-purpose flour. You may need to increase the milk to 1¾ cups.
YEASTED BUCKWHEAT PANCAKES Yeast gives these hearty pancakes some extra lift and ratchets up the nutty, tangy flavor of the buckwheat: Combine the flours and salt with 1 teaspoon instant yeast; omit the baking powder. Add the milk (heat it until lukewarm), honey, and melted butter, then cover with plastic wrap and set aside at room temperature for at least 1 hour or overnight. The batter is ready when it smells distinctly yeasty and has a few bubbles on the surface. Beat the eggs in a separate bowl, then stir them into the batter. Cook for an extra minute or two on each side.
BLINI These small Russian pancakes make great appetizers: Omit the honey. Proceed with the recipe or either variation; drop the batter into a skillet by the tablespoon. These can be eaten at room temperature topped with crème fraîche, caviar or smoked salmon, and a bit of fresh dill.
Oatmeal and Dried Fruit Griddle Cakes
Makes: 4 servings
Time: 30 minutes with cooked oatmeal
Leftover oatmeal gives these pancakes body and plenty of moisture. Anything that you would add to oatmeal, feel free to add here: ½ cup or so of chopped nuts, a bit of warm spices, dried or fresh fruit. You get a filling—and far from boring—pancake.
- ¼ cup whole wheat flour
- ¼ cup all-purpose flour
- ¼ cup rolled oats
- 1 teaspoon baking powder
- 2 teaspoons sugar
- ¾ teaspoon salt
- 1 egg
- ¾ cup milk, plus more if necessary
- 2 cups cooked oatmeal, cooled
- ½ cup chopped dried fruit
- Butter and oil for cooking
1. Combine the flours, oats, baking powder, sugar, and salt in a large bowl. In a separate bowl, whisk together the egg and milk; stir in the cooked oatmeal and the fruit until just incorporated. Add the oatmeal mixture to the dry ingredients and stir until just combined. The batter should be thick but still spreadable; add a little more milk as needed.
2. Heat a large skillet or griddle over medium heat. When a couple drops of water skid across the surface of the pan before evaporating, it’s hot enough. Add a bit of butter and oil and let it heat up. Add scoops of batter and spread them into small, not-too-thick cakes with the back of a spoon. Cook until the tops of the cakes dry out a bit and the bottoms are brown and crisp, 3 to 4 minutes. Carefully flip the pancakes and repeat on the other side. Serve immediately or keep warm on an ovenproof plate in a 200°F oven for 15 minutes.
CINNAMON-RAISIN OATMEAL PANCAKES Like a breakfast-friendly oatmeal cookie: Add 2 tablespoons brown sugar and 1 teaspoon cinnamon with the rest of the dry ingredients. Use raisins for the fruit.
PEANUT BUTTER OATMEAL GRIDDLE CAKES Any nut butter works here; you can also sprinkle chopped toasted nuts on the pancakes as they cook: Whisk ⅓ cup peanut butter into the beaten eggs and milk.
RICE PANCAKES Creamy and lightly sweet, these might remind you of rice pudding: Omit the rolled oats and whole wheat flour and increase the all-purpose flour to ⅔ cup; start with ½ cup milk. Instead of oatmeal, use overcooked rice; you want it to be porridgelike. If you like, add 1 teaspoon vanilla to the batter.
Berber Pancakes
Makes: 6 servings
Time: 45 minutes, plus time to rise
Yeast gives these thin Moroccan pancakes a tinge of sourness that’s balanced by a topping of honey and butter, while semolina makes them extra-crisp on the bottom.
- 1½ cups milk
- 2 teaspoons instant yeast
- 1 teaspoon sugar
- 1 cup all-purpose flour
- 1 cup semolina flour
- 2 teaspoons baking powder
- 1 teaspoon salt
- Neutral oil (like grapeseed or corn) for cooking
- Butter and honey for serving
1. Pour 1½ cups water and the milk into a bowl and bring it to a lukewarm temperature.
2. In a separate bowl, combine the yeast, sugar, flours, baking powder, and salt. Add the milk and water to the yeast mixture, then add the dry ingredients, stirring or blending until smooth. Cover and let rest until the batter is bubbly and has doubled in size, about 1½ hours.
3. Put a large skillet (or 2) or a griddle, preferably nonstick, over medium heat. When a couple drops of water skid across the surface of the pan before evaporating, it’s hot enough. Add a teaspoon of oil and swirl it around. Stir or blend the batter again to remix it, then pour about ¼ cup of batter into the skillet for each cake (you may have room for only 1 or 2 at a time). Cook until the top has dried and small bubbles have popped all over the surface. Do not flip; just adjust the heat as needed so that the cakes do not burn while they finish cooking. Total cooking time is 4 to 6 minutes; add more oil as needed.
4. Serve the pancakes immediately or keep warm in a 200°F oven, crisp side up so they don’t get soggy. Top with softened butter and honey.
SEMOLINA PANCAKES WITH PISTACHIOS AND LIME As soon as you pour the batter into the skillet, sprinkle the top of each pancake with some chopped pistachios and grated lime zest.
Gluten-Free Pancakes
Makes: 4 to 6 servings
Time: About 30 minutes
As fluffy and tender as the best pancakes and just as versatile. See page 101 for things to stir into pancake batter. You can easily prepare a big batch of the dry ingredients so you have pancake mix standing by for easy breakfasts.
- 1¼ cups rice flour (brown, white, or a combination)
- ½ cup gluten-free oat flour
- ¼ cup cornstarch
- 2 teaspoons baking powder
- ½ teaspoon salt
- 3 eggs
- 1-1½ cups milk
- 2 tablespoons butter, melted and cooled
- Butter and neutral oil (like grapeseed or corn) for cooking
1. Set a griddle or large skillet over medium-low heat. While it heats, whisk together the flours, cornstarch, baking powder, and salt in a large bowl. In a smaller bowl, beat the eggs with 1 cup milk, then stir in the melted butter.
2. Fold the egg mixture into the dry ingredients, stirring until just combined. Add milk as needed to get the batter to your desired consistency.
3. When a couple drops of water skid across the surface of the pan before evaporating, it’s hot enough. Add a pat of butter and a teaspoon of oil. When the butter stops foaming, ladle in the pancakes. They’re ready to flip when the tops of the cakes are moist but no longer liquid, about 3 minutes; don’t bother them before that. Flip and cook on the other side for another couple of minutes. Serve immediately or keep warm in a 200°F oven until you’re ready to eat.
Brioche Pancakes
Makes: 4 to 6 servings
Time: 30 minutes, plus time to rise
Brioche is a French pastry that’s leavened and doughy like bread but rich with egg yolks and butter. Here you get a similar buttery tenderness and rich eggy flavor for a lot less effort. These are excellent as is, but for a little extra, try adding raisins or chocolate chips, as the French do when they want to gild the lily.
- 2 cups flour
- 2 tablespoons sugar
- 1 teaspoon instant yeast
- ½ teaspoon salt
- 1½ cups milk, lukewarm
- 6 tablespoons (¾ stick) unsalted butter, melted
- 2 eggs
- 3 egg yolks
- Butter for cooking
1. Combine the flour, sugar, yeast, and salt in a large bowl. Add the milk and melted butter. Cover with plastic wrap and set aside at room temperature for at least 1½ hours and up to 4.
2. The batter is ready when it has little bubbles on the surface. Heat a griddle or large skillet over medium-low heat. Beat the eggs and egg yolks, then stir them into the batter.
3. When a couple drops of water skid across the surface of the pan before evaporating, it’s hot enough. Add some butter to the hot pan. Once the butter melts, ladle in the batter and cook for 2 to 4 minutes, until bubbles appear in the middle. Flip the pancakes when they’re golden; resist the urge to move them around before that. Repeat on the other side. Serve immediately, with extra butter or some jam, or keep warm in a 200°F oven for 15 minutes or so.
HONEY BRIOCHE PANCAKES Replace the sugar with honey, adding it along with the milk and butter.
Adapting Recipes
Waffles into Pancakes/Pancakes into Waffles
Waffles and pancakes are similar but not so much that their batters are interchangeable without some adjustments. If you want to take a pancake recipe and turn it into a waffle, or vice versa, keep these tips in mind.
- Waffles contain more sugar.
- Waffles need more fat.
- Waffles should be airier.
So to use a pancake batter for waffles, increase the sugar by 1 tablespoon. Add at least 1 tablespoon neutral oil or melted butter per cup of flour or add more—up to 4 tablespoons—for a richer flavor and crisper edges. And separate the eggs, combining the yolks with the base of the batter and whipping the whites to soft peaks separately before folding them into the batter at the end.
To use a waffle recipe for pancakes, reduce the sugar called for by 1 tablespoon. Reduce any oil or butter to not more than 1 or 2 tablespoons per cup of flour. Don’t bother separating the eggs (although if you like extra-airy pancakes, you are welcome to do so).
Dutch Baby
Makes: 4 servings
Time: 20 to 30 minutes
Technically, this giant pancake is German; it’s called a Dutch baby because somebody couldn’t pronounce Deutsch. History aside, it’s a showstopper—billowy like a soufflé, with crackly golden edges and an eggy, custardlike center—but it’s actually incredibly simple to make. You’re almost guaranteed to have the ingredients on hand, and because it’s baked, you don’t even have to flip it. In other words, it’s perfect for entertaining.
- 4 eggs
- 1 cup milk
- ¾ cup flour
- ½ teaspoon salt
- 4 tablespoons (½ stick) butter
- Confectioners’ sugar for garnish
- Fresh lemon juice for garnish
1. Heat the oven to 425°F. Lightly beat the eggs in a bowl, then stir in the milk, flour, and salt and mix until fully incorporated (or mix the ingredients in a blender).
2. Melt the butter in a large ovenproof skillet, swirling it around so it coats the sides too. (To make smaller pancakes, melt the butter and use it to coat two 9-inch cake pans.) As soon as the butter stops foaming, pour in the batter and immediately transfer to the oven.
3. Bake until the pancake is puffed up and browned, 15 to 20 minutes. As soon as you take it out of the oven, dust it with confectioners’ sugar, sprinkle it with lemon juice, and slice into wedges (or just tear into it). It will deflate but will taste just as good.
MIXED BERRY DUTCH BABY Clafouti meets Dutch Baby: Use your favorite berries or use a combination; chop strawberries before measuring. Toss 2 cups berries with 1 tablespoon granulated sugar. Make the pancake as directed, folding the berries into the batter just before you pour it.
CHOCOLATE CHIP DUTCH BABY Roughly chop 3 ounces dark chocolate and stir the chunks into the batter along with 1 teaspoon vanilla extract at the end of Step 1. Omit the lemon juice at the end.
DUTCH BACON BABY The holy trinity of breakfast—savory, sweet, and eggy: Fry 4 strips of bacon in the skillet; reserve the grease. Chop the bacon, add it to the batter, and bake the pancake in the bacon grease rather than butter. Omit the salt. Serve with good maple syrup.
BABY DUTCH BABIES Thoroughly grease 12 muffin cups with butter or a paper towel dipped in oil. Divide the batter among the cups, filling them only halfway or so. Check for doneness after 12 minutes.
Mashed Potato Pancakes
Makes: 4 servings
Time: About 30 minutes
These have the starchy, savory comfort of latkes (complete with the golden crusts) but with the light, creamy center of classic pancakes. It’s a great way to put leftover mashed potatoes to use, but if you don’t have any on hand, make them as you usually do, keeping them on the dry and bland side. Serve with applesauce or sour cream.
- 2 eggs
- ¼ cup milk
- ½ cup flour
- ½ teaspoon salt
- 2 teaspoons baking powder
- 2 cups leftover mashed potatoes
- Vegetable oil for cooking
1. Heat a skillet over medium heat while you make the batter.
2. Lightly beat the eggs and milk in a large bowl. In a separate bowl, combine the flour, salt, and baking powder. Stir the potatoes into the eggs and mix well, then add the flour mixture and stir until just combined. The batter should be thick but spreadable; add more flour or some milk as needed to get it to the right consistency.
3. Coat the bottom of the skillet with oil. When it’s hot, spoon the batter into the skillet and spread it around into small cakes. Cook until the bottom is browned, 2 or 3 minutes; flip and brown on the second side, another 2 minutes or so. Serve immediately or keep warm in a 200°F oven.
CHEESY POTATO PANCAKES Like a twice-baked potato in pancake form; feel free to use your favorite hard cheese. Parmesan and sharp cheddar are especially nice: In Step 2, add ¼ cup each of grated onion and shredded cheese and ½ teaspoon cracked black pepper.
SWEET POTATO PANCAKES Use 2 cups leftover mashed sweet potatoes. Add 2 tablespoons light brown sugar to the flour mixture; you may need an extra tablespoon of milk, depending on how wet or dry your potatoes are. These are good with ½ cup chopped toasted nuts folded into the batter.
The Basics of Waffles
Waffles are one of the most fun things you can serve at breakfast—their texture alone is festive and unexpected. Though they’re most commonly served with pools of syrup or piles of fruit, they’re just as good (if not better) made with savory batter and eaten at lunch or dinner with chicken, vegetables, chili, or other stews. Topped with ice cream or sweet sauces, they’re great for dessert too.
The best waffles are super-crisp outside and creamy inside, so it’s crucial to get them out of the iron and onto the table quickly. You can keep them warm in the oven for a little while if necessary or even wrap tightly, freeze, and reheat. But nothing is like a really fresh waffle.
Yeast-raised waffles are absolutely unbeatable, and as long as you remember to start a batch the night before, they’re as easy as any other kind. Buttermilk waffles are almost as good, with a similar delicious tang, and they’re more spontaneous. And, as with pancakes, adapting the batter to make something more unusual couldn’t be easier. Follow these guidelines for the absolute best waffles:
- The iron must be hot. Almost all models have lights that let you know when they’re ready for you to add batter.
- The iron should be clean and lightly oiled, even if it’s nonstick. Before turning it on, brush or spray it lightly with a neutral oil, like grapeseed or corn; you can also wipe it with an oil-soaked paper towel. When it’s good and hot, open it for a minute to let any smoke escape; close it until it reheats a bit, then start cooking.
- If you have an extra 5 minutes, separate the eggs and beat the whites by themselves until stiff, then fold them into the batter just before cooking. You’ll be amazed at how much fluffier the results are.
- As with pancakes, don’t overmix the batter.
- Don’t add too much batter to the iron since it will spread. Start on the smaller side, and if it doesn’t spread to the edges, add more batter to the next waffle. Better to have too little than too much, which results in a mess.
- Be patient and don’t underbake. After pouring the batter, close the top and leave it alone for at least 2 minutes, then check on it by gently pulling up on the top of the iron. If the lid resists, give it another minute—don’t put all your faith in the indicator light or in the myth about waffles being ready when there’s no more steam wafting out of the iron.
- The time that the waffle spends baking is just right for melting the butter and warming the syrup. I use the microwave set on low.
- If you can’t serve waffles right away, or if you’re making multiple waffles and want everyone to eat at once, hold them for a few minutes on a rack in a 200°F oven.
Recipes
Buttermilk Waffles
Overnight Waffles
Liège Waffles
Rice Flour Waffles
Corn Waffles
Anadama Waffles
Gingery Sweet Potato Waffles
Buttermilk Waffles
Makes: 4 to 6 servings
Time: 10 minutes, plus time to bake
Buttermilk makes the most tender, spontaneous waffles; if you don’t have it, use 1½ cups of sour cream or yogurt thinned with ¼ cup milk, or make your own (see recipe). Or just use regular milk as in the variation. Vanilla makes these good enough that you can skip the toppings; omit it if you plan to serve with maple syrup.
- 2 cups flour
- 2 tablespoons sugar
- 1½ teaspoons baking soda
- ½ teaspoon salt
- 1¾ cups buttermilk
- 2 eggs, separated
- 4 tablespoons (½ stick) butter, melted and cooled
- 1 teaspoon vanilla extract (optional)
- Neutral oil (like grapeseed or corn) for cooking
1. Combine the flour, sugar, baking soda, and salt in a large bowl. In another bowl, whisk together the buttermilk and egg yolks. Stir in the melted butter and the vanilla if you’re using it.
2. Brush the waffle iron lightly with oil and heat it. Stir the wet ingredients into the dry and let them rest; meanwhile, beat the egg whites with a clean whisk or electric mixer until they hold soft peaks. Fold them gently into the batter.
3. Spread a ladleful or so of batter onto the waffle iron and bake until the waffle is done, usually 3 to 5 minutes, depending on your iron. Serve immediately or keep warm for no more than a few minutes in a 200°F oven.
THE FASTEST, EASIEST WAFFLES Not quite as airy and tender, but still good and quick: Instead of the baking soda, use 2 teaspoons baking powder. Use 1½ cups milk instead of the buttermilk. Don’t bother to separate the eggs; just whisk them in whole with the buttermilk in Step 1.
CRISP WAFFLES These waffles have a soft, light interior and an ethereally crispy crust: Decrease the flour to 1½ cups and add ½ cup cornstarch.
WHOLE GRAIN WAFFLES Heartier and a bit denser: Substitute any whole grain flour (such as whole wheat flour, cornmeal, oat flour, or a combination) for the all-purpose. Increase the butter to 6 tablespoons (¾ stick). Depending on what kind of flour you use, you may need to add an extra splash of regular milk to thin out the batter a bit.
BACON-BROWN SUGAR WAFFLES Salty, sweet, and ideal for Sunday brunch: Cook 6 strips of bacon; when it’s crispy, chop and let it cool. Substitute brown sugar for the granulated sugar in the recipe and fold the bacon into the batter before you add the egg whites.
Overnight Waffles
Makes: 4 to 6 servings
Time: 8 hours or more, largely unattended
Yeast-raised waffles require planning ahead, but they’re absolutely as easy to make as their last-minute counterparts. The time spent resting enhances the irresistible flavor and makes the texture fluffy but chewy. Serve with butter and syrup for a traditional breakfast or use them as a “bread” to serve with virtually any meal—they’re that good.
- 2 cups flour
- 1 tablespoon sugar
- 2 teaspoons instant yeast
- ½ teaspoon salt
- 1½ cups milk, lukewarm
- 1 stick butter, melted and cooled
- ½ teaspoon vanilla extract (optional)
- Neutral oil (like grapeseed or corn) for cooking
- 2 eggs, separated
1. The night before you want to serve the waffles, combine the flour, sugar, yeast, and salt in a large bowl. Stir in the milk, then the melted butter and the vanilla if you’re using it, until just combined. Cover with plastic wrap and set aside overnight at room temperature. (Of course you can do this in the morning if you want waffles for supper.)
2. When you’re ready to bake, brush the waffle iron lightly with oil and heat it. Stir the egg yolks into the batter. Beat the whites until they hold soft peaks, then fold them gently into the batter until it’s relatively smooth.
3. Spread a ladleful or so of batter onto the waffle iron and bake until the waffle is done, usually 3 to 5 minutes, depending on your iron. Serve immediately or keep warm for a few minutes in a 200°F oven. If you’re making them ahead, store at room temperature in an airtight container and warm them in a 300°F oven for about 5 minutes just before serving; or freeze them in single layers, separated by sheets of parchment, and reheat in a 350°F oven for 8 to 10 minutes.
WHOLE GRAIN OVERNIGHT WAFFLES Replace some or all of the all-purpose flour with any whole grain flour (whole wheat, oat, quinoa, kamut, or fine cornmeal, for instance) or combination of flours.
Liège Waffles
Makes: 6 servings
Time: About 1 hour
This crisp, Belgian-style waffle is traditionally made with pearl sugar, which has gigantic crystals that caramelize on the crust and make each bite slightly crunchy and sweet. Turbinado sugar (or any other kind with large crystals) has a similar effect and is much easier to find. Bread flour gives the waffles their characteristic chewiness, but you can use all-purpose without sacrificing much in the way of texture. Don’t be deterred by the wait time; you can prep this ahead through Step 2. You can also customize the batter with any of the add-ins from the list on page 101. Serve with Speculaas Spread.
- 2 cups bread flour
- 2 teaspoons instant yeast
- ½ teaspoon granulated sugar
- ⅛ teaspoon salt
- ⅓ cup milk, lukewarm
- 2 eggs
- 2 sticks butter, melted and cooled
- 2 teaspoons vanilla extract
- ½ cup turbinado sugar or ¾ cup pearl sugar (see headnote)
- Butter or neutral oil (like grapeseed or corn) for cooking
1. In a large bowl, whisk together the flour, yeast, granulated sugar, and salt. Stir in the milk, then mix in the eggs, one at a time, followed by the melted butter and vanilla. Stir well to combine; the dough should be wet (it will firm up as it rests) and will look a bit like a sponge. Cover the bowl and let the dough rest for at least 30 minutes; you can also refrigerate it overnight.
2. Use a spoon or your hands to gently work the turbinado or pearl sugar into the dough, being sure not to overhandle it. Cover the bowl once more and let it rest for 15 minutes or so. Meanwhile, brush the waffle iron with butter or oil and let it heat up; you want it to be quite warm but not so hot that the sugar will burn. Add a ball or scoop of dough (about ⅓ cup) to the iron; don’t worry about the shape; these waffles won’t be perfect squares. Cook until it’s crisp and deeply browned, 3 to 4 minutes. Unlike regular waffles, these will actually crisp up a bit more as they cool, so feel free to serve them warm (or even at room temperature) rather than piping hot. And if you have any left over, they will keep in an airtight container for up to a few days.
15 Variations on Any Waffles
Buttermilk Waffles or Overnight Waffles are good starting points for these tweaks.
SPICE WAFFLES Add up to 2 teaspoons ground cinnamon or ginger or ½ teaspoon ground cardamom for sweet waffles.
SAVORY WAFFLES Omit the sugar. Add up to 2 teaspoons curry powder or minced fresh herbs.
GRANOLA WAFFLES Add up to 1 cup chopped nuts or Granola.
Fruit Stand Waffles Gently fold up to 1 cup fresh fruit, like blueberries, raspberries, peaches, or apples, into the batter; cut into ¼- to ½-inch dice beforehand if necessary.
Tropical Waffles Add up to ¾ cup shredded unsweetened coconut or coarsely chopped dried fruit, like apricots, cherries, cranberries, or raisins, to the batter.
Orange-Almond Waffles Add ½ teaspoon almond extract and/or orange extract instead of or in addition to the vanilla.
Speculaas Waffles Top the warm waffles with Speculaas Spread.
Chocolate Waffles Decrease the flour to 1¾ cups; add ¼ cup cocoa powder.
Cheese Waffles Add up to 1 cup grated cheese, like Gruyère, Emmental, cheddar, or Jack, or ½ cup grated Parmesan, to the batter.
Molasses Waffles Substitute molasses for ½ cup milk. Especially excellent with Corn Waffles.
Bacon-Covered Waffles Lay 2 or 3 strips of raw bacon over the batter as soon as you pour it into the iron; it will infuse the waffles and cook along with them. Cooking time may be a minute or two longer.
Pumpkin or Winter Squash Waffles Mix in up to 1 tablespoon grated lemon or orange zest when you add the sugar. Substitute 1 cup puréed cooked pumpkin (canned is fine) or winter squash for ¾ cup milk and 1 egg.
Loaded Waffles Top with anything from the list (9 Toppings for Pancakes, French Toast, and Waffles).
Citrusy Waffles Fold 1 tablespoon grated lemon zest into the batter. Serve with Lemon Curd.
Bananas Foster Waffles Slice 1 ripe banana and fold into the batter along with 2 tablespoons rum and ½ teaspoon cinnamon.
Rice Flour Waffles
Makes: 4 to 6 servings
Time: 10 minutes, plus time to bake
This is an excellent gluten-free waffle. It’s not fluffy, but rather airy and wonderfully crisp, and it has a mild, slightly sweet flavor that goes with all the usual toppings, especially fruity ones. To play up the rice’s flavor, mix in leftover cooked rice as in the first variation or add ½ cup puffed rice cereal for a bit of crunch.
- 1¾ cups rice flour
- ½ cup cornstarch
- 2 tablespoons sugar
- 2 teaspoons baking powder
- ½ teaspoon salt
- 1¾ cups milk
- 2 eggs, separated
- 4 tablespoons (½ stick) butter, melted and cooled
- 1 teaspoon vanilla extract (optional)
- Neutral oil (like grapeseed or corn) for cooking
1. Combine the flour, cornstarch, sugar, baking powder, and salt in a large bowl. In another bowl, whisk the milk and egg yolks together. Stir in the melted butter and the vanilla if you’re using it.
2. Brush the waffle iron lightly with oil and heat it. Stir the wet ingredients into the dry and let them rest; meanwhile, beat the egg whites with a clean whisk or electric mixer until they hold soft peaks. Fold them gently into the batter.
3. Spread a ladleful or so of batter onto the waffle iron and bake until the waffle is done, 2 to 5 minutes, depending on your iron. Serve immediately or keep warm for no more than a few minutes in a 200°F oven.
DOUBLE-RICE WAFFLES Wonderfully chewy and an excellent way to put leftover rice to use: Decrease the rice flour to 1¼ cups and the cornstarch to ¼ cup. Fold 1 cup leftover cooked rice into the batter before adding the egg whites.
COCONUT-LIME RICE WAFFLES Replace 1 cup of the regular milk with coconut milk; add ½ cup shredded unsweetened coconut and 2 teaspoons grated lime zest to the batter before adding the egg whites.
Corn Waffles
Makes: 4 to 6 servings
Time: 10 minutes, plus time to bake
This waffle has the slight crunch of corn bread, raised to the power of waffles. It’s excellent topped with a little honey butter (which you make by mashing one part honey with three parts softened butter) and just as good with chili or eggs. Be sure to use fine ground cornmeal so they don’t turn out gritty.
- 1 cup flour
- 1 cup fine cornmeal
- 1½ teaspoons baking soda
- ½ teaspoon salt
- 1¾ cups buttermilk
- 2 eggs, separated
- 4 tablespoons (½ stick) butter, melted and cooled
- ¾ cup fresh corn kernels (from about 1 ear)
- Neutral oil (like grapeseed or corn) for cooking
1. Combine the flour, cornmeal, baking soda, and salt in a large bowl. In another bowl, whisk together the buttermilk and egg yolks. Stir in the melted butter..
2. Brush the waffle iron lightly with oil and heat it. Stir the wet ingredients into the dry, stir in the corn kernels, and let the batter rest; meanwhile, beat the egg whites with a clean whisk or electric mixer until they hold soft peaks. Fold them gently into the batter.
3. Spread a ladleful or so of batter onto the waffle iron and bake until the waffle is done, 3 to 5 minutes, depending on your iron. Serve immediately or keep warm for no more than a few minutes in a 200°F oven.
JALAPEÑO CORN WAFFLES A great base for a fried egg, black beans, and salsa: Remove the seeds and membranes from 1 jalapeño (or 2, if you like it hot). Mince it and fold it into the batter when you add the fresh corn.
CHEDDAR CORN WAFFLES As it cooks, some of the cheese melts and gets crispy: Stir ¾ cup grated sharp cheddar cheese or pepper Jack into the batter along with the corn.
CORN AND BACON WAFFLES Possibly the ultimate crowd pleaser: Cook 6 to 8 slices of bacon until crisp. Chop it and add it to the batter before the egg whites; omit the corn kernels. Use the bacon fat to grease the waffle iron if necessary.
CORN AND BLUEBERRY WAFFLES Berries are a great way to bring out corn’s sweeter side: Whisk 2 tablespoons brown sugar into the batter along with the buttermilk and butter. Substitute 1 cup fresh blueberries for the corn kernels.
Anadama Waffles
Makes: 4 to 6 servings
Time: 10 minutes, plus time to bake
These substantial but fluffy waffles capture the essence of anadama bread, a traditional New England loaf made with cornmeal and molasses. Applesauce gives the batter a little extra sweetness and moisture without extra fat, and its flavor disappears in the cooked waffles. If you want to highlight the applesauce, top the waffles with Apple Butter or—surprise—more applesauce.
- 1⅓ cups whole wheat flour
- ⅓ cup fine or medium cornmeal
- 1½ teaspoons baking soda
- ¾ teaspoon salt
- 2 eggs, separated
- ¾ cup applesauce
- ½ cup milk
- 3 tablespoons vegetable oil, plus more for the waffle iron
- 2 tablespoons molasses
1. Combine the flour, cornmeal, baking soda, and salt in a large bowl. In another bowl, beat the egg yolks, applesauce, milk, oil, and molasses until foamy, about 2 minutes.
2. Brush the waffle iron lightly with oil and heat it up. While it heats, beat the egg whites with a clean whisk or electric mixer until stiff peaks form. Add the applesauce mixture to the dry ingredients and stir until just combined. Fold in the egg whites until the batter is relatively smooth.
3. Spread a ladleful or so of batter onto the waffle iron and bake until the waffle is done, 3 to 5 minutes, depending on your iron. Serve immediately or keep warm for a few minutes in a 200°F oven.
BANANADAMA WAFFLES Stir ¾ cup chopped toasted walnuts into the batter before the egg whites. Substitute ¾ cup mashed overripe bananas (2 should be enough, or 1 if it’s very large) for the applesauce.
Adapting Recipes
Waffle Iron Quick Breads
The waffle iron has three big advantages: direct and even heat, plenty of nooks and crannies, and gentle pressure. These things give great texture—think crisp edges and still-tender centers—to other batters besides traditional waffles. My favorite: quick breads. Heat the waffle iron to medium-high if it has multiple settings. Grease it well and working in batches, fill three-fourths of the way with any quick bread batter you like. Cook for 5 or 6 minutes, until golden brown. The quickest quick bread you’ll ever make.
Gingery Sweet Potato Waffles
Makes: 6 to 8 servings
Time: 10 minutes, plus time to bake
Leftover sweet potatoes never looked so good. These waffles are crispy outside, creamy inside, and kicking with ginger. You need to cook them a bit longer than most waffles to get them truly crunchy.
- 1¾ cups flour
- ¼ cup cornstarch
- 2 tablespoons brown sugar
- 1½ teaspoons baking soda
- ½ teaspoon salt
- 1½ cups milk, plus more if necessary
- 3 eggs, separated
- 1 cup mashed sweet potatoes
- 4 tablespoons (½ stick) butter, melted and cooled
- 1 tablespoon minced fresh ginger
- Neutral oil (like grapeseed or corn) for cooking
1. Combine the flour, cornstarch, brown sugar, baking soda, and salt in a large bowl. In another bowl, whisk the milk and egg yolks together. Stir in the sweet potatoes, melted butter, and ginger.
2. Brush a waffle iron lightly with oil and heat it. Meanwhile, beat the egg whites with a clean whisk or an electric mixer until they hold soft peaks. Stir the wet ingredients into the dry, then fold the egg whites gently into the batter. If necessary, thin the batter with milk, 1 tablespoon at a time.
3. Spread a ladleful or so of batter onto the waffle iron and bake until the waffle is done, 3 to 5 minutes, depending on your iron. Serve immediately or keep warm for a few minutes in a 200°F oven.
GINGERY SPICED PUMPKIN WAFFLES Pumpkin spice for breakfast: Proceed with the recipe, replacing the sweet potatoes with 1 cup canned pumpkin. Add 1 teaspoon cinnamon and ⅛ teaspoon nutmeg.
GINGERY CARROT CAKE WAFFLES Tangy, lightly sweet, chewy, and crunchy: Increase the brown sugar to 3 tablespoons. Instead of the milk, use buttermilk or 1 cup sour cream thinned with ½ cup milk. Substitute 1 cup grated carrots for the sweet potatoes; add ¾ cup each of chopped toasted walnuts and raisins before adding the egg whites.
The Basics of French Toast
French toast should be crisp on the outside and custardy on the inside. Two of its most common pitfalls are sogginess and dryness; the best versions fall somewhere in between. You can broil slices of French toast, bake it as a casserole (think of it as a breakfast bread pudding), or stuff it.
The bread you use makes the dish. Squishy supermarket loaves are bland, and their thin slices may disintegrate. Look for breads with a dense crumb—challah, brioche, cinnamon-raisin, and good-quality Pullman loaves are favorites—that won’t fall apart in the pan. Ideally, each slice is ¾ to 1 inch thick, thin enough to cook evenly but thick enough for textural contrast, and a bit stale, which lets it soak up the custard. Think outside the loaf too: croissants, corn bread, quick breads, and panettone are all excellent. Whatever you use, pay attention to how much you let it soak in the custard—some breads need only a quick dip, while baguettes and hearty loaves need more time to break down their craggy crusts.
Recipes
French Toast
Overnight French Toast
Chocolate-Peanut Butter Stuffed French Toast
French Toast
Makes: 4 servings
Time: About 20 minutes
The best French toast has a crisp, golden crust with a custardy center, but beyond that, it’s very easy to adapt. Buttery, eggy breads like brioche or challah are traditional, but whole grain breads are wonderful too and more substantial. See the ideas below for many more ways to make them your own.
Stale bread really is best because it soaks up the egg mixture like a sponge. If you are working with fresh bread, dry it in a 200°F oven for 10 minutes or so.
- 3 eggs
- 1 cup milk
- ⅛ teaspoon salt
- 2 tablespoons sugar (optional)
- 1 teaspoon vanilla extract (optional)
- Butter or neutral oil (like grapeseed or corn) for cooking
- 8 slices (½ loaf) good-quality bread, about
- 1 inch thick
1. Heat the oven to 200°F. Put a large griddle or skillet over medium-low heat while you prepare the egg mixture.
2. Beat the eggs lightly in a broad bowl and stir in the milk, the salt, and the sugar and vanilla if you’re using them.
3. Add about 1 teaspoon of butter or oil to the griddle or skillet. When the butter is melted or the oil is shimmering, dip each slice of bread in turn in the batter and put it on the griddle. Cook until nicely browned on each side, turning as necessary, for no more than about 10 minutes total; you may find that you can raise the heat a bit. Serve immediately or keep warm in a 200°F oven for up to 30 minutes.
CARAMELIZED FRENCH TOAST Messy, but worth it. The sugary crust melts into a crunchy coating similar to crème brûlée: After dipping each piece of bread in the batter, dredge both sides in sugar. Cook, peeking occasionally and adjusting the heat to make sure the sugar doesn’t burn, until both sides are deeply browned.
EXTRA-RICH FRENCH TOAST A desserty breakfast, or a breakfasty dessert: Use half-and-half—or, if you’re really feeling flush, heavy cream—and add 1 egg yolk to the custard. Use the sugar and vanilla.
NUT-CRUSTED FRENCH TOAST Add ¼ teaspoon nutmeg to the custard. Add another egg and decrease the milk to ¾ cup. Spread about 1 cup sliced almonds or other finely chopped nuts (you may need more, but start with that) on a plate; after dipping the bread in the egg mixture, put the slice on the nuts and press gently to make the nuts stick; flip it over to coat the other side. Proceed with the recipe; be careful not to burn the nut coating.
NUT-CRUSTED FRENCH TOAST Add ¼ teaspoon nutmeg to the custard. Add another egg and decrease the milk to ¾ cup. Spread about 1 cup sliced almonds or other finely chopped nuts (you may need more, but start with that) on a plate; after dipping the bread in the egg mixture, put the slice on the nuts and press gently to make the nuts stick; flip it over to coat the other side. Proceed with the recipe; be careful not to burn the nut coating.
COCONUT FRENCH TOAST Coconut makes a wonderfully crisp yet chewy crust: Use coconut milk in place of regular milk. Follow the preceding variation, using shredded unsweetened coconut instead of nuts. The shredded coconut can burn easily, so keep an eye on it.
CRISPY FRENCH TOAST Stale bread is essential here: Heat the oven to 375°F and prepare the bread as directed. Increase the oil in the pan to 1 tablespoon; after both sides are cooked, transfer the slices to the oven and bake for 5 minutes.
SAVORY FRENCH TOAST Served on its own, this is good at dinnertime too: Decrease the milk to ½ cup. Omit the sugar and vanilla; increase the salt to 1 teaspoon and add 1 teaspoon freshly ground black pepper. If you like, add ½ teaspoon chopped fresh thyme.
VEGAN FRENCH TOAST Use your favorite nondairy milk and increase it to 1½ cups. Use ½ cup applesauce instead of the eggs. Cook in oil instead of butter and make sure the pieces develop a nice crust before flipping them.
9 Ways to Flavor French Toast Custard
Depending on whether you want savory or sweet, add any of these instead of or in addition to the sugar and vanilla to any French toast recipe:
- Almond extract, ½ teaspoon
- Cinnamon or ginger, 1 teaspoon
- Cardamom or nutmeg, ½ teaspoon
- Finely grated orange, lime, or lemon zest, 3 tablespoons
- Brown sugar or molasses, ¼ cup
- Bourbon, rum, or other liqueur, 1 shot
- Grated Parmesan, ½ cup
- Mustard, 1 tablespoon Dijon or 1 teaspoon dry
- Minced fresh herbs, like rosemary, thyme, or sage, up to 2 teaspoons
Overnight French Toast
Makes: 4 to 8 servings
Time: About 8 hours, largely unattended
Extravagant and creamy with crisped-up, chewy bits on the top. It’s a great one to make ahead for the holidays or any other time you have houseguests. Use any bread you’d use for ordinary French toast. Challah and brioche are my favorites.
- 6 tablespoons (¾ stick) butter, melted and cooled, plus some softened butter for greasing
- 8-10 slices bread
- 2 eggs
- 1⅔ cups milk
- 1 teaspoon vanilla extract
- ⅛ teaspoon salt
- 2 tablespoons sugar
1. Generously butter the bottom and sides of a 13 × 9-inch baking dish and pack in the bread slices, squeezing them together if necessary. Beat the eggs in a large bowl, then add the milk, vanilla, salt, and melted butter. Pour the custard over the bread, pressing down on the bread to submerge it in the custard as much as possible. Cover and refrigerate for at least 1 hour and up to overnight.
2. To bake, heat the oven to 425°F. While it heats, let the French toast come to room temperature. Sprinkle the bread with the sugar, then bake until the center is barely set and the top is golden and caramelized, 20 to 30 minutes.
STICKY BUN FRENCH TOAST Add 1½ teaspoons cinnamon to the custard before adding the bread. Bake as directed. In a skillet, melt 1½ cups brown sugar and 1 stick of butter over medium heat, stirring constantly until the mixture is smooth but not boiling. Stir in 1½ cups chopped pecans. Spread the caramel evenly over the cooked French toast. (No need for the extra sugar sprinkled on top.)
BANANAS FOSTER FRENCH TOAST Follow the preceding variation, swapping 3 thinly sliced bananas for the pecans. Cook the bananas for a minute or two, until they’ve softened slightly, then remove the caramel from the heat and add 3 tablespoons dark rum.
SPIKED FRENCH TOAST The alcohol gets cooked out, leaving behind a warm, complex flavor: Stir in 3 tablespoons of your favorite spirit or liqueur—such as bourbon, rum, or Grand Marnier—with the milk.
10 Things to Add to Overnight French Toast
Gently stir these add-ins into the custard before pouring it over the bread:
- Cream cheese, ½ cup, cubed
- Fresh orange juice, up to ½ cup, and grated orange zest, 1 tablespoon
- Berries, fresh or thawed frozen, 1 cup
- Chopped fruit, like apples, pears, bananas, or peaches, 1 cup, sautéed in a bit of butter
- Cinnamon, 1 teaspoon, or ¼ teaspoon cardamom or nutmeg
- Chopped chocolate or chocolate chips, 4 ounces
- Chopped toasted nuts or seeds, 1 cup
- Chopped cooked bacon, up to 8 strips, or cooked sausage, up to 1 cup
- Cooked, drained greens (leave out the sugar and vanilla), 1 cup, especially good with ¼ teaspoon nutmeg
- Cheese, like Gruyère, cheddar, feta, Gouda, or goat, grated or crumbled, 4 ounces (about 1 cup; leave out the sugar and vanilla)
Chocolate-Peanut Butter Stuffed French Toast
Makes: 6 to 8 servings
Time: About 30 minutes
This emphasizes the good qualities of French toast—gooey center, crisp edges—in something that’s even richer than the original. As the toast cooks it melts the filling; no syrup needed.
- 8 slices (½ loaf) good-quality bread, about 1½ inches thick
- ½ cup chunky peanut butter
- 4 ounces dark chocolate, chopped
- 3 eggs
- 1 cup milk
- ⅛ teaspoon salt
- 2 tablespoons sugar
- 1 teaspoon vanilla extract
- Butter and neutral oil (like grapeseed or corn) for cooking
1. Cut horizontally about three-quarters of the way into each slice of bread to create a pocket. Spread a thin layer of peanut butter (about 1 tablespoon) inside the pocket and sprinkle some of the chocolate over the peanut butter; gently press down on the bread to enclose the filling.
2. Set a large skillet, preferably nonstick, over medium-low heat. In a wide, shallow bowl, beat the eggs and milk until the mixture is smooth. Add the salt, sugar, and vanilla.
3. Transfer slices of the stuffed bread to the bowl. Flip them carefully to keep the chocolate from spilling out and press gently on the bread to help it soak up the custard.
4. When the pan is hot enough that water skids across its surface before evaporating, add a pat of butter and a teaspoon of oil. When the butter stops foaming, add the bread to the pan, letting any excess custard drip off first. Don’t overcrowd the pan. Cook each piece until it’s browned on the bottom, about 3 minutes, then flip and repeat, adjusting the heat if necessary to prevent burning. You might need to move the slices around in the pan to help them cook evenly. Serve immediately or keep warm in a 200°F oven for up to 20 minutes.
PEANUT BUTTER, BANANA, AND BACON FRENCH TOAST Crunchy, melty, salty, and sweet: Cook 8 slices of bacon and cut 2 bananas into ¼-inch slices. In Step 1, replace the chocolate with 1 slice of bacon (cut in half crosswise if necessary to fit inside the pocket) and several slices of banana in each piece of bread. Cook the French toast in the rendered bacon fat if you like.
ALMOND-DATE STUFFED FRENCH TOAST A lighter morning boost: Omit the sugar from the egg mixture or replace it with honey. Use almond butter in the French toast and top it with pitted halved dates.
CHOCOLATE-HAZELNUT AND BANANA STUFFED FRENCH TOAST Cut 2 bananas into ¼-inch slices. Use chocolate hazelnut spread (to make your own) in place of the peanut butter and the banana slices instead of the chopped chocolate.
STRAWBERRY AND CREAM CHEESE STUFFED FRENCH TOAST Wonderfully tangy and good with any berry or even sliced peaches: Substitute ½ cup softened cream cheese for the peanut butter. Hull and thinly slice 1 cup strawberries and stuff them into the bread instead of the chocolate.
LEMON-RICOTTA STUFFED FRENCH TOAST Add ¾ cup ricotta cheese to a small bowl; if necessary, drain it beforehand. Combine it with 1 tablespoon grated lemon zest. Fill each slice of bread with about 1½ tablespoons of the ricotta mixture in place of the chocolate and peanut butter.
MONTE CRISTO FRENCH TOAST Savory, sweet, creamy, and crisp: Increase the salt to 1 teaspoon and add 1 teaspoon freshly ground black pepper; leave out the sugar and vanilla. Instead of chocolate, grate 4 ounces (about 1 cup) Swiss or Gruyère cheese; fill each slice of bread with 2 tablespoons cheese and 1 slice of ham (this is easiest if you chop the ham and toss it with the cheese). If the cheese doesn’t completely melt before the bread browns, just transfer the slices to the warm oven until it does. Dust with confectioners’ sugar and serve with Fruit Jam.
EGG-IN-A-HOLE FRENCH TOAST Two breakfast comfort foods combined: Instead of cutting pockets in the bread, cut a hole 2½ or 3 inches in diameter (or as large as the bread will allow) from the center of the bread; you can do this with a cookie cutter, biscuit cutter, or the rim of a glass. Omit the sugar and vanilla. Cook the first side as directed; when you flip it, crack an egg into the hole and sprinkle it with a little salt and pepper. When the bottom finishes cooking, carefully flip the toast once more and cook for another minute or two, until the egg is set. Don’t forget to cook the round cutout too.
French Toast Sandwiches
Put pretty much anything between two slices of bread and you can call it a sandwich, and chances are it’ll be tasty. Apply the same principle to thickly sliced French toast: Cut a pocket into the bread, fill, and adjust the custard depending on whether your fillings are savory or sweet. Try PB&J, scrambled eggs and American cheese, sliced turkey with Brie and Granny Smith apples, caramelized onions and Gruyère—even chopped liver!
The Basics of Crêpes and Blintzes
Crêpes and blintzes are thin pancakes that can be filled with either sweet or savory fillings (these lists contain some of my favorite options). Crêpes are French and traditionally hold much less filling, whereas blintzes, sort of like little burritos, are Eastern European. In either case, making them sweet or savory is as simple as switching the filling or the flour and adding sugar (or not). Savory crêpes are usually made with buckwheat flour and are folded, whereas sweet crêpes are made with white flour and rolled, but really, it’s your call. Crêpes can even be made into a simple but elegant cake, the Mille Crêpe Cake.
One batch yields many pancakes, which makes them somewhat time consuming to cook but not difficult. Use a nonstick or well-seasoned pan; flip by lifting the edges with a spatula and using your fingers to pull it up off the pan, then turn it over to the other side. The first crêpes almost never work—even for professionals—but you’ll get the hang of it quickly, and there’s plenty of batter to make up for the loss.
When filling, remember that crêpes are more delicate and are meant to have just enough filling that you can still taste the crêpe itself. Blintzes can withstand more filling, but they need space to fold nicely and make sealed packages for sautéing or baking.
Recipes
Crêpes
Crêpes Suzette
Egg Crêpes
Cheese Blintzes
Crêpes
Makes: 8 to 12 crêpes, depending on the size
Time: 40 minutes
Crêpes are great at any time of day and as good savory as they are sweet. The batter can be made a day ahead, as can the unfilled crêpes—refrigerate them, then wrap them in foil and reheat in a 325°F oven. If you want to freeze them, cool them entirely, stack them with wax paper between crêpes, and wrap the whole thing tightly in plastic wrap. Defrost in the fridge.
With such a thin batter, you may have to make one or two crêpes before they’re perfectly thin and perfectly round; this is normal, and there’s plenty to allow for some error. But even a misshapen crêpe is a tasty one.
- 1¼ cups milk, plus more if needed
- 1 cup all-purpose flour
- 2 eggs
- 2 tablespoons butter, melted and cooled
- 1 tablespoon sugar (optional)
- ⅛ teaspoon salt
- Butter for cooking
1. Whisk the milk, flour, eggs, melted butter, the sugar if you’re using it, and the salt until smooth; you can do this in a blender. If the mixture isn’t quite pourable, add a little more milk. If time allows, let the batter rest in the refrigerator for an hour or up to 24 hours.
2. Put an 8- or 10-inch nonstick skillet over medium heat and when it’s hot, add a small pat of butter. Stir the batter and pour a scant ladleful into the skillet. Swirl it around so that it forms a thin layer on the bottom of the pan.
3. When the top of the crêpe is dry, after about a minute, carefully flip it and cook the other side for 15 to 30 seconds. (The crêpe should become only slightly brown and not at all crisp.) Bear in mind that the first crêpe almost never works, so discard it if necessary; there is plenty of batter.
4. Stack the crêpes on a plate as you make them and keep them warm in a 200°F oven until ready to serve. Even better, fill each crêpe while it’s still in the pan, putting the filling in the center of the bottom third of the crêpe. Either roll the crêpe starting at the end with the filling or fold it in half, then into thirds. If you want your filling warmed, keep the filled crêpe over low heat for a few minutes. Repeat this process, adding butter to the skillet and adjusting the heat as needed, until all the batter is used up.
CHOCOLATE CRÊPES Chocolaty but still light: Add ¼ cup cocoa powder and use the sugar. Serve with Chocolate Ganache or, lighter, with Whipped Cream and Macerated Berries.
BUCKWHEAT CRÊPES Fill with shredded cheese, scrambled egg, sautéed mushrooms, or ham: Use buckwheat flour instead of all-purpose and increase the milk to 1½ cups. These are best if the batter rests for at least an hour.
Crêpes Suzette
Makes: 3 to 6 servings
Time: About 1 hour
This French dessert is famous for its finale: Just before serving, orange liqueur is poured into the skillet and set aflame. It’s a showstopping presentation, but you can get the same deep citrusy caramel flavor at home without setting off any fire alarms by making a quick sauce on the stove and finishing under the broiler.
- 6 crêpes
- 4 tablespoons sugar
- 1 cup fresh orange juice
- 2 teaspoons grated orange zest
- 6 tablespoons (¾ stick) butter
- 2 tablespoons Grand Marnier
1. Heat the broiler. In a medium ovenproof skillet, melt 2 tablespoons of the sugar over medium heat until it starts to brown. Carefully stir in the orange juice and zest (it might bubble up a bit) and bring the mixture to a simmer; cook until the liquid has reduced by about half, 3 to 5 minutes. Add the butter and stir until combined. Remove from the heat and stir in the Grand Marnier.
2. Fold 6 crêpes in half twice, forming a triangle. Arrange them in the skillet so they overlap slightly. Sprinkle the remaining 2 tablespoons sugar over the crêpes and transfer to the oven. Broil until the sugar caramelizes, 2 minutes or more, depending on the heat of your broiler. Serve immediately with the orange caramel sauce spooned over the top.
TROPICAL CRÊPES SUZETTE Extra-tangy: Use lime juice and zest in place of the orange. Instead of Grand Marnier, use dark rum.
Filling and Rolling a Crêpe

STEP 1 Spoon some filling across the lower third of the crêpe.
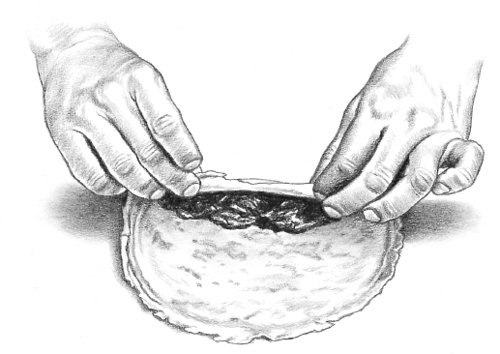
STEP 2 Lift the bottom edge and roll it up.
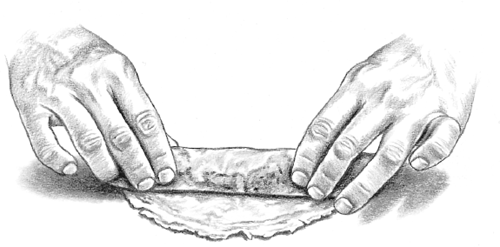
STEP 3 A filled crêpe.
Egg Crêpes
Makes: About 6 crêpes
Time: 15 minutes
All the versatility (and ease) of eggs in the shape of a pancake. They’re very lightly sweetened here, like a flourless crêpe, but they easily become savory if you remove the sugar and add soy sauce, as in the variation that follows, or minced herbs. Treat them like pancakes and eat them alone or treat them like any other crêpe and fill them.
- 4 eggs
- 1 tablespoon milk
- 1 teaspoon sugar
- ⅛ teaspoon salt
- Neutral oil (like grapeseed or corn) for cooking
1. Vigorously whisk the eggs, milk, sugar, and salt in a bowl until the sugar and salt are dissolved.
2. Put a small or medium nonstick pan over medium heat and add 1 teaspoon oil. Use a brush or paper towel to spread the oil evenly over the pan. When the oil is hot, pour in just enough egg mixture to cover the pan in a very thin layer, tilting the pan to help it spread. Cook until the top is dry, 15 to 30 seconds; carefully flip it and cook another 15 seconds or so. To flip, slide a spatula underneath the crêpe and flip it quickly with a flick of the wrist. Or grab the edges of the crêpe with your fingers, carefully pick it up, and turn it over. Expect to fail on the first crêpe (consider it an experiment); it takes a little bit of practice to get the hang of it. As you cook the rest, lower the heat if necessary to prevent the crêpes from browning very much.
3. Stack the finished crêpes and serve immediately or let cool to room temperature; eat them on their own or fill them like crêpes.
JAPANESE EGG CRÊPES As a thin omelet, this is simple and delicious; alternatively, stack the finished crêpes, roll them all together into a cylinder, cut them crosswise into thin strips, and use as a garnish for stir-fries, noodles, or rice. Substitute 1 tablespoon soy sauce for the milk and skip the salt and sugar.
10 Sweet Fillings for Crêpes
These range from classic to unusual. Combine them as you like—PB&J or Chocolate-Hazelnut with raspberry, for instance—but remember not to overfill.
- Fresh lemon juice and a sprinkling of sugar
- Any peeled, seeded (or pitted and cored) fruit (like bananas, apples, strawberries, peaches, or berries), raw or cooked briefly with a bit of sugar, butter, and rum or cinnamon if you like
- Fruit Jam, Orange Marmalade, jelly, or Fruit Compote
- Lemon Curd
- Chocolate Ganache or chopped chocolate
- Chocolate-Hazelnut Spread
- Caramel Sauce or Butterscotch Sauce
- Roasted Nut Butter
- Crème fraîche or yogurt, sweetened to taste
- Brown butter sprinkled with cinnamon, cardamom, and/or cloves
8 Savory Fillings for Crêpes
Savory crêpes make an excellent meal, especially Buckwheat Crêpes. As with the sweet fillings, mix and match these, but don’t use too much filling. If you are adding cheese, you may need to pop the filled crêpe back into a warm pan to melt the cheese before serving.
- Thinly sliced ham, turkey, or roast beef
- Cooked shrimp, crabmeat, or flaked fish
- Scrambled or fried egg
- Grated or thinly sliced cheese, like Gruyère, Brie, goat, mozzarella, or cheddar
- Caramelized onions, shallots, or leeks
- Cooked, drained, and chopped vegetables, like mushrooms, asparagus, spinach, zucchini, eggplant, tomatoes, or garlic
- Cooked beans or lentils
- Any thick stew of vegetables, meat, poultry, or seafood
Cheese Blintzes
Makes: 4 to 6 servings
Time: About 1 hour
Eggier and sturdier than crêpes, blintzes are filled, then sautéed or baked with butter, which gives them a slightly browned, crisp crust. Because they are folded into little packages, they can handle substantial fillings whether you’re having them for breakfast, snacks, or dessert. Traditional fillings include cottage cheese, mashed potatoes, and fruit.
- 1 cup milk
- ¾ cup all-purpose flour
- ¼ teaspoon salt
- 3 eggs
- 2 tablespoons butter, melted and cooled
- Butter and neutral oil (like grapeseed or corn) for cooking and greasing
- 1½ cups cottage cheese, drained if very moist
- ½ cup sour cream or yogurt
- 1 tablespoon sugar, or to taste, plus more for dusting
- 1 teaspoon cinnamon, or to taste, plus more for dusting
1. Whisk together the milk, flour, and ⅛ teaspoon of the salt until smooth; you can do this in a blender. Beat in the eggs and stir in the melted butter. If time allows, let rest in the refrigerator for at least an hour and up to 24 hours.
2. Put an 8- or 10-inch nonstick skillet over medium heat and when it’s hot, add a small pat of butter and 1 teaspoon oil. Stir the batter and use a large spoon or ladle to pour a couple of tablespoons of it into the skillet. Swirl it around so that it forms a thin layer on the bottom of the pan.
3. When the top of the blintz is dry, after about a minute, flip it and cook the other side for 15 to 30 seconds. The blintz should become only slightly brown and not at all crisp. Bear in mind that the first blintz almost never works, so discard it if necessary; there is plenty of batter. Stack the finished blintzes on a plate.
4. Combine the cottage cheese, sour cream, sugar, cinnamon, and the remaining ⅛ teaspoon salt. Put about 2 tablespoons of the filling in the center of each blintz about a third of the way from the bottom. Fold the bottom third over the filling, then fold in the sides, then roll from the bottom up to create a package (see illustrations, page 125). To heat, arrange them on a greased ovenproof platter. Dot with butter and dust with sugar and cinnamon; bake in a 400°F oven for 10 minutes. Alternatively, sauté several at a time in 2 tablespoons butter until they’re lightly brown and just a little crisp on both sides, about 5 minutes total.
BERRY BLINTZES In a saucepan over medium heat, combine 2 cups berries or pitted cherries with 1 tablespoon sugar, 1 teaspoon cinnamon, and a pat of butter. Cook until the fruit pops and thickens slightly. Use this instead of the cheese filling or prepare the cheese blintzes as directed and spoon this over the tops.
MASHED POTATO BLINTZES Savory and comforting: Substitute well-seasoned mashed potatoes (or any other mashed vegetable) for the cheese filling.
PUMPKIN BLINTZES Just like pumpkin pie: Decrease the cottage cheese to 1 cup and beat it with 1 cup unsweetened pumpkin purée (canned is fine). Increase the sugar to 2 tablespoons and add ½ teaspoon ginger and ¼ teaspoon nutmeg along with the cinnamon.
BANANA BLINTZES An excellent way to use up very ripe bananas: Decrease the cottage cheese to 1 cup. Add to it 1 cup mashed banana (2 or 3 overripe bananas); proceed with the recipe. If you like, add a splash of rum to the filling before baking.
APPLESAUCE BLINTZES These are simply sweet as is, but they’re fabulous and more dessertlike with a drizzle of Caramel Sauce: Follow the preceding variation using unsweetened applesauce instead of bananas.
Filling and Folding Blintzes
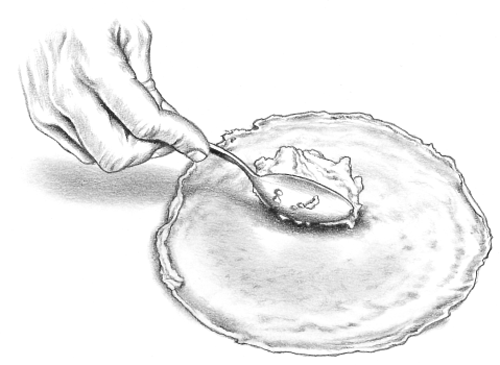
STEP 1
Spoon some filling about a third of the way from the bottom of the blintz.
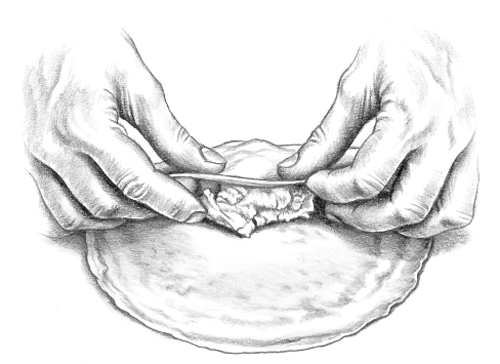
STEP 2
Fold the bottom third over the filling.
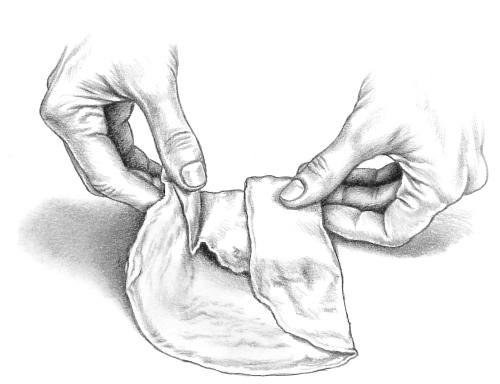
STEP 3
Fold in the sides.

STEP 4
Roll from the bottom up.
Recipes
Glazed Doughnuts
Cake Doughnuts
Sour Cream Old-Fashioned Doughnuts
Carrot Cake Baked Doughnuts
Beignets
Zeppole
Fried Dough
Funnel Cake
Apple Fritters
Corn Fritters
Ricotta Fritters
The Basics of Doughnuts
If you want a truly great, crisp, hot doughnut, you have to make it yourself; everything else pales in comparison. When done properly, they’re not at all greasy, but light as cotton candy and just a bit sweet, made a little sweeter with a dusting of sugar or a brush of glaze. They can be stuffed with filling or formed into any shape you like. Fritters, zeppole, funnel cake, beignets: any dough you fry is essentially a doughnut.
Doughnuts fall into one of two camps: raised or cake. The former are made with yeast and have downy centers; the latter use baking powder as leavening, which gives them a tighter crumb.
Frying gives doughnuts an unmatchable golden crust, but baking is an option too. Either way, you’ll need some special equipment—a heavy pot and candy thermometer if you fry or (in most cases) a special doughnut pan if you bake. If this is your first time deep-frying, Fats for Frying will tell you all you need to know; the learning curve isn’t steep.
Doughnuts firm up quickly as they age, but you can revive them even a day or two later with a quick run through the microwave just before serving.
Glazed Doughnuts
Makes: About 1 dozen
Time: About 3 hours, mostly unattended
Crispy, with a pillowy interior and thin sugar glaze, homemade doughnuts are leagues ahead of the best store-bought versions. The dough needs to rest twice—that’s what makes it so light—but you can prepare it the night before. The bit of extra work is well worth it, and once you’ve made the dough, preparing any yeast-raised doughnut is just a matter of switching the filling and frosting. See the variations for ideas or use the lists on pages 129 and 132 as jumping-off points.
- 1½ cups milk, lukewarm
- 2¼ teaspoons (1 package) instant yeast
- 2 eggs
- 1 stick butter, melted and cooled
- ¼ cup granulated sugar
- 1 teaspoon salt
- 4¼ cups flour, plus more for rolling out the dough
- About 8 cups neutral oil (like canola or vegetable) for frying, plus more for greasing
- 2 cups confectioners’ sugar
- 1 teaspoon vanilla extract
1. Using an electric mixer or a stand mixer fitted with the dough hook, beat 1¼ cups of the milk, the yeast, eggs, butter, granulated sugar, and salt. Add half the flour and mix until combined, then mix in the rest of the flour until the dough pulls away from the sides of the bowl. Add more flour, about 2 tablespoons at a time, if the dough is too wet. If you’re using an electric mixer, the dough will probably become too thick to beat; when it does, transfer it to a floured surface and gently knead it until it is smooth.
2. Grease a large bowl with oil. Transfer the dough to the bowl and cover with plastic wrap or a kitchen towel. Let rise at room temperature until it doubles in size, about 1 hour; if you prefer, you can let the dough rise in the refrigerator overnight.
3. Turn the dough out onto a well-floured surface and roll it to ½-inch thickness. Cut out the doughnuts with a doughnut cutter, concentric cookie cutters, or a sturdy drinking glass and a shot glass (the larger one should be about 3 inches in diameter), flouring the cutters as you go. If you like, reserve the doughnut holes (highly recommended). Knead any scraps together, being careful not to overwork, and let rest for a few minutes before repeating the process.
4. Arrange the doughnuts on 2 floured baking sheets so there is plenty of room between them. Cover with a kitchen towel and let rise in a warm place for another 45 minutes or so, until they are slightly puffed up and delicate. If your kitchen is not warm, heat the oven to 200°F at the beginning of this step, then turn off the heat and leave the door slightly ajar before letting the dough rise in the oven.
5. About 15 minutes before the doughnuts are done rising, place a candy thermometer in a large heavy-bottomed pot or Dutch oven, add the oil, and heat over medium heat. Heat to 375°F, watching it carefully to make sure it doesn’t get too hot. Meanwhile, line racks, baking sheets, or plates with paper towels.
6. Carefully add the doughnuts to the oil, a few at a time. If they’re too delicate to pick up with your fingers (they may be this way only if you let them rise in the oven), use a metal spatula to pick them up and slide them into the oil. It’s okay if they deflate a bit; they’ll puff back up as they fry. After about 45 seconds to 1 minute, when the bottoms are deep golden, use a slotted spoon to flip and cook for another minute or so on the other side. Doughnut holes cook faster, less than 30 seconds per side. Transfer the doughnuts to the prepared racks or plates and repeat with the rest of the dough, adjusting the heat as needed to keep the oil at 375°F.
7. To make the glaze, whisk the confectioners’ sugar with the remaining ¼ cup milk and the vanilla until smooth. When the doughnuts are cool enough to handle, dip the tops into the glaze; if you like, flip them so they’re completely covered. Transfer to racks to let the glaze set and serve as soon as possible. If you can’t serve them right away, keep them warm in a 200°F oven or store for one day in an airtight container at room temperature.
BAKED DOUGHNUTS Not as tender or puffy, but a decent alternative that spares you the hassle of deep-frying: Proceed with the recipe through Step 5. Bake the doughnuts on a greased or parchment-lined baking sheet in a 375°F oven until they’re fluffy and golden, about 8 minutes.
CHOCOLATE-GLAZED DOUGHNUTS This glaze is thin and sweet; for a richer, thicker topping, use still-warm Chocolate Ganache: For the glaze, decrease the confectioners’ sugar to 1¾ cups and add ¼ cup cocoa powder. Dip only the tops of the doughnuts.
JELLY DOUGHNUTS Use a cookie cutter or the rim of a sturdy glass to punch out the doughnut but do not punch out a doughnut hole. When the cooked doughnuts are hot but cool enough to handle, dip both sides in granulated sugar. Poke a chopstick or skewer through one side of the doughnut and hollow out the center of the doughnut. Fit a pastry bag or zipper bag with a round tip and fill it with your favorite jelly or jam (see my recipe to make your own)- you’ll need about ½ cup per batch. (See the following illustrations and No Pastry Tip? No Problem.) Insert the pastry tip into the center of the doughnut and fill it with 1 to 2 tablespoons jam; as you pipe, slowly pull the bag toward you to keep the doughnut from exploding.
CUSTARD-FILLED DOUGHNUTS Like an American éclair: Follow the directions above for making filled doughnuts, using 2 cups of your favorite flavor Pastry Cream as the filling. Dust the doughnuts with confectioners’ sugar.
BOSTON CREAM DOUGHNUTS Follow the preceding variation, omitting the confectioners’ sugar. Make the glaze in the Chocolate-Glazed Doughnuts variation and dip the tops of the filled doughnuts into it.
CREAM-FILLED DOUGHNUTS An airier but equally rich version of custard doughnuts: Whip ½ cup heavy cream until it holds stiff peaks. Fold in 1 cup Pastry Cream until incorporated and fill the doughnuts as directed.
LOUKOUMADES Honey and cinnamon give these Greek doughnut holes a warm sweetness: Proceed with the recipe through Step 3. Instead of rolling and cutting the dough, shape it into balls, about 2 tablespoons each. Rest and fry as directed. For the glaze, combine ½ cup each of honey and water in a saucepan over medium heat and bring to a boil. Let cool slightly before adding 2 teaspoons cinnamon and drizzling the syrup over the loukoumades.
No Pastry Tip? No Problem
Pastry tips are cheap and easy to find, but if you don’t have them, you can use a funnel to fill soft pastries like doughnuts and cream puffs. Since funnels are rigid like pastry tips, they give you good control. For filled doughnuts, spoon the filling directly into the funnel or put it in a zipper bag, snip the corner, and put the bag in the funnel. Make a hole in the side of a doughnut and insert the funnel; squeeze the bag or use a spoon to push it through. If the filling is concentrated in the center, gently squeeze the top of the doughnut to distribute it into the gaps.
Filling Doughnuts

Use a pastry bag fitted with a round tip to pipe filling into the doughnut.

Alternatively, press or squeeze the filling through a funnel and into the doughnut.
Cake Doughnuts
Makes: About 1 dozen
Time: About 1 hour
These old-fashioned doughnuts are leavened with baking powder rather than yeast, which gives them a denser, more cakelike crumb and a satisfyingly crisp crust. This dough doesn’t need to rest, making it a good choice for spontaneous breakfasts. Coat it with Vanilla Glaze, Lemon Glaze, or Jam Glaze, or eat it as is.
- 3½ cups flour, plus more for rolling out the dough
- 1 tablespoon baking powder
- 1 teaspoon salt
- ¾ teaspoon nutmeg (optional)
- 2 eggs
- 1⅓ cups sugar
- ¾ cup milk
- 4 tablespoons (½ stick) butter, melted and cooled
- About 8 cups neutral oil (like canola or vegetable) for frying, plus more for greasing
- 1 teaspoon cinnamon
1. Combine the flour, baking powder, salt, and the nutmeg if you’re using it. In a separate bowl, beat the eggs and ⅔ cup of the sugar until thick, then add the milk and melted butter. Add the flour mixture a little at a time, mixing first with a whisk and then switching to your hands once it gets too thick. The dough should be sticky but hold together; if it’s too wet, add flour a tablespoon at a time until it comes together.
2. Transfer the dough to a well-floured surface and knead a few times. Roll it out to ½-inch thickness; if it contracts as you roll, let it rest for a few minutes, then try again. Dip a doughnut cutter, a 3-inch cookie cutter, or the rim of a sturdy glass in flour to cut out the doughnuts; cut out the holes with a smaller cookie cutter or shot glass (save them and fry along with the doughnuts). Knead any scraps together, being careful not to overwork, and repeat. Arrange the doughnuts on a floured or parchment-lined baking sheet and cover with a kitchen towel while you heat the oil.
3. Place a candy thermometer inside a large heavy pot or Dutch oven and heat the oil to 375°F. Watch very carefully; too-hot oil is a fire hazard, and oil takes a while to cool down. Line racks or plates with paper towels.
4. Gently add the doughnuts to the oil, a few at a time. After 45 seconds to 1 minute, when the bottoms are deep golden, flip them with a slotted spoon and cook on the other side for another minute. Doughnut holes cook faster, less than 30 seconds per side. Transfer the doughnuts to the prepared racks and repeat with the rest of the dough, adjusting the heat as needed to keep the oil at 375°F.
5. Combine the cinnamon and remaining ⅔ cup sugar in a bowl. When the doughnuts are still hot but have cooled enough to handle, roll them in the cinnamon sugar. Eat them while they’re still warm.
CHOCOLATE DOUGHNUTS Great for dipping in coffee, and classic with Vanilla Glaze: Decrease the flour to 2½ cups and add 1 cup cocoa powder; omit the nutmeg. Use 3 eggs, decrease the sugar to 1¼ cups, and replace ¼ cup of the milk with buttermilk. If the dough is too dry, add more buttermilk, a tablespoon at a time, until it comes together. Fry for 1 minute 15 seconds per side.
APPLE CIDER DOUGHNUTS Dipped in cinnamon sugar and served hot, these are hard to beat: Boil 1 cup apple cider over high heat until it reduces to ⅓ cup; let it cool. Decrease the milk to ¼ cup and add the cooled cider along with it in Step 1. Omit the nutmeg.
CRULLERS This twisted doughnut holds on to glazes well and is fun to eat: On a well-floured surface, roll out the dough into a ½-inch-thick rectangle. Cut the dough into strips about 10 inches long and ¾ inch wide. Make the crullers by folding each strip in half, twisting a few times, then pinching the ends to seal them. Fry for a minute or so per side.
Sour Cream Old-Fashioned Doughnuts
Makes: About 10 doughnuts
Time: 1½ hours
Crunchy on the outside and tender inside, these are where doughnuts meet biscuits. They’re fried at a lower temperature and flipped twice, giving them their characteristic ridges, which are perfect for clinging to glaze. Coat with any of the glazes you’d use for Glazed Doughnuts.
- 3 cups flour, plus more for rolling out the dough
- 2 teaspoons baking powder
- 1 teaspoon salt
- ⅔ cup sugar
- 4 tablespoons (½ stick) butter, softened
- 3 egg yolks
- ¾ cup sour cream
- About 8 cups neutral oil (like canola or vegetable) for frying, plus more for greasing
1. Combine the flour, baking powder, and salt in a medium bowl. In a separate bowl, beat the sugar and butter until the mixture is like wet sand, then mix in the egg yolks and sour cream. Add the flour mixture a little at a time, mixing first with a whisk and then switching to your hands once it gets too thick. The dough should be slightly sticky but hold together; if necessary, add more flour or sour cream a tablespoon at a time until it comes together. Cover and chill for at least 1 hour or overnight.
2. Place a candy thermometer inside a large heavy-bottomed pot or Dutch oven and heat the oil to 325°F, watching carefully to make sure it doesn’t get any hotter. Line racks or plates with paper towels.
3. Transfer the dough to a well-floured surface and knead it a few times, then roll it to ½-inch thickness. Dip a doughnut cutter, 3-inch cookie cutter, or the rim of a sturdy glass in flour and cut out the doughnuts; cut out the holes with a smaller cookie cutter or shot glass. Knead any scraps together, being careful not to overwork, and repeat.
4. Gently add the doughnuts to the oil, one at a time. Don’t crowd them. They will sink at first; when they float to the top, fry for another 15 seconds and then flip. Cook until the underside cracks and turns golden, 1½ to 2 minutes, then flip and repeat on the other side. Doughnut holes cook faster. Transfer the doughnuts to the prepared racks and repeat with the rest of the dough, adjusting the heat as needed to keep the oil at 325°F. Eat them while they’re still warm, or store for one day in an airtight container at room temperature.
LEMON OLD-FASHIONED DOUGHNUTS Lemon adds to the tangy lightness: If you can find crème fraîche, use it in place of the sour cream; otherwise, decrease the sour cream to ½ cup and add ½ cup cream. Add 1 tablespoon grated lemon zest and coat with Lemon Glaze.
16 Doughnut Toppings
A simple glaze is the favorite topping, but with or without it, you can roll doughnuts in any number of other toppings. Make sure they’re still moist from the fryer so the toppings stick and put the toppings in a shallow bowl for easiest coverage:
- Vanilla Glaze, Lemon Glaze, or Jam Glaze
- Confectioners’ sugar, sifted beforehand
- Sugar mixed with 1 tablespoon cinnamon or ½ teaspoon cardamom
- Drizzled honey or maple syrup
- Rich Chocolate Sauce
- Sprinkles
- Finely grated citrus zest
- Chopped toasted nuts
- Shredded unsweetened coconut
- Chopped cooked bacon (this is great mixed with pecans)
- Finely chopped dried fruit
- Crushed graham crackers or Chocolate Wafer Cookies
- Caramel Sauce or Butterscotch Sauce
- Marshmallow Sauce
- Peanut Butter Sauce
- Crushed or finely chopped cereal or Granola
Carrot Cake Baked Doughnuts
Makes: About 1 dozen
Time: About 40 minutes
A baked doughnut is essentially a quick bread with a different shape. And so it follows that every quick bread and many cakes can be adapted for doughnuts (see 10 Quick Breads That Can Double as Doughnuts). If you decide to glaze this carrot-cake-inspired doughnut (nice but not necessary) use Cream Cheese Frosting.
This recipe and all its variations can be fried instead of baked if you prefer. To do so, you need to turn the batters into doughs: Once the batter is all mixed, stir in flour a heaping spoonful or so at a time until the batter holds together in a dough. Once it does, follow the rolling, cutting, and frying directions for Cake Doughnuts.
- 2 cups flour
- 1 cup sugar
- 2 teaspoons baking powder
- 1 teaspoon cinnamon
- 1 teaspoon salt
- 2 eggs
- ¾ cup milk
- 4 tablespoons (½ stick) butter, melted and cooled, plus more for greasing
- 1 cup grated carrots
- ½ cup chopped walnuts (optional)
1. Heat the oven to 350°F and grease a doughnut pan.
2. Stir together the flour, sugar, baking powder, cinnamon, and salt. In a separate bowl, beat the eggs, then add the milk and melted butter. Stir the egg mixture into the dry ingredients, just enough to moisten; do not overmix. Fold in the carrots and the nuts if you’re using them.
3. Spoon the batter into the doughnut pan so that the cups are nearly full. Bake until the doughnuts are golden brown, about 15 minutes. Remove from the pans immediately and cool on racks.
WHOLE GRAIN DOUGHNUTS This works well with the main recipe or any of the following variations: Replace half the all-purpose flour with 1 cup of any whole grain flour.
BANANA BREAD DOUGHNUTS Swap 1 teaspoon vanilla extract for the cinnamon (add it to the wet ingredients) and 2 mashed overripe bananas, about 1 cup, for the carrots. Decrease the milk to ½ cup.
PUMPKIN BREAD DOUGHNUTS Use 1 cup pumpkin purée (canned is fine) in place of the carrots and decrease the milk to ¼ cup. Add 1 teaspoon vanilla extract and ¼ teaspoon nutmeg.
GINGERBREAD DOUGHNUTS Not as dense as a gingerbread loaf but with the same warm spices and molasses flavor: Instead of the granulated sugar, use ½ cup packed brown sugar and 2 tablespoons unsulfured molasses (add it to the wet ingredients). Add 1 tablespoon ginger, ¼ teaspoon ground cloves, and ¼ teaspoon nutmeg along with the cinnamon.
Beignets
Makes: About 3 dozen
Time: 1½ hours
This New Orleans icon is as pillowy as a yeast-raised doughnut but doesn’t have as long a rest time as the ones on page 126 and is simpler to cut. Serve with café au lait and piles of confectioners’ sugar.
- 2¼ cups buttermilk
- 2¼ teaspoons (1 package) instant yeast
- 2 tablespoons granulated sugar
- 2 tablespoons butter, softened
- 4 cups bread flour, plus more for rolling out the dough
- ½ teaspoon salt
- About 8 cups neutral oil (like canola or vegetable) for frying, plus more for the bowl
- Confectioners’ sugar for topping
1. Heat the buttermilk until it is warm but not hot, about 90°F (it’s okay if it curdles a bit).
2. Using an electric mixer or a stand mixer fitted with the dough hook, mix the yeast, granulated sugar, butter, and buttermilk. Add the flour and salt and mix until the dough pulls away from the sides of the bowl; it will be wet and sticky. If you’re using an electric mixer, the dough will become too thick to beat; when it does, transfer it to a floured surface and gently knead it until it is smooth and elastic.
3. Wipe with 1 teaspoon oil to coat the inside of a large bowl. Transfer the dough to the bowl and cover with plastic wrap or a kitchen towel. Let rise at room temperature for 1 hour.
4. Place a candy thermometer inside a large heavy-bottomed pot or Dutch oven and heat the oil to 375°F while you cut the beignets. Watch very carefully; too-hot oil is a fire hazard and takes a long time to cool down.
5. Roll the dough to ½-inch thickness on a well-floured surface and cut it into 2-inch squares. Gently add them to the oil, one at a time; don’t overcrowd the pot. Flip them constantly while they cook. When they are golden brown, transfer them to a paper-towel-lined plate or rack to cool. Top with confectioners’ sugar to taste; to really make these New Orleans style, top each beignet with about 2 tablespoons of it.
LEMON BEIGNETS Add 1 tablespoon grated lemon zest with the flour and salt. When the beignets are still hot but cool enough to handle, dip them in Lemon Glaze.
ESPRESSO BEIGNETS Beat 2 teaspoons instant espresso powder into Whipped Cream. When the beignets are cool, poke a chopstick or skewer through one side and use it to hollow out the middle. Use a pastry bag or zipper bag with a rounded pastry tip or a small funnel (see page 127) to pipe 1 to 2 tablespoons of the whipped cream into each beignet.
BOMBOLONI An Italian version to fill with your favorite sauce: Cut the dough into 2-inch circles before frying; gently knead the scraps together, roll back out, and repeat. Fill as in the preceding variation, using any of the sauces below.
Adapting Recipes
10 Quick Breads That Can Double as Doughnuts
The only difference between most quick breads and baked doughnuts is the shape. With a doughnut pan, you can turn any batter that you’d bake as a loaf or a muffin into a crazy-simple, tender, and somewhat wholesome breakfast. No substitutions needed, but if the original recipe calls for juice, replace it, cup for cup, with milk. Eat these plain or give them the full doughnut treatment with any of the toppings from the list on page 129.
- Banana Bread
- Fresh Fruit and Nut Bread
- Lemon-Poppy Bread
- Zucchini Bread
- Gingerbread
- Pain d’Épices
- Blueberry Muffins
- Double Chocolate Muffins
- Applesauce Muffins
- Oatmeal Muffins
Zeppole
Makes: 1 to 1½ dozen, depending on the size
Time: 30 minutes
These Italian fried dough balls are made with ricotta, which somehow makes them both rich and light. The dough comes together quickly on the stovetop, where some of the extra water is cooked out, making for doughnuts with incredibly rich, eggy centers.
- 1 cup ricotta
- 2 eggs
- 2 teaspoons vanilla extract
- 1 cup all-purpose flour
- 2 tablespoons granulated sugar
- 2 teaspoons baking powder
- ½ teaspoon salt
- About 8 cups neutral oil (like canola or vegetable) for frying
- Confectioners’ sugar
1. In a saucepan, whisk together the ricotta, eggs, 2 tablespoons very cold water, and the vanilla until smooth. Whisk in the flour, sugar, baking powder, and salt and put the saucepan over low heat. Cook the mixture, stirring constantly, until some of the moisture cooks out and a thin film forms on the bottom of the pan, about 5 minutes. Transfer the dough to a clean bowl and refrigerate it while the oil heats..
2. Place a candy thermometer in a large heavy-bottomed pot or Dutch oven, add the oil, and heat to 350°F. Line a baking sheet, plate, or rack with paper towels.
3. Scoop the dough into balls, about 1½ tablespoons each, and carefully drop them into the oil; don’t overcrowd the pot. Cook until the bottom is deep golden, 1 to 2 minutes, then flip and cook for another minute, until deeply golden all over. Adjust the heat as needed to keep the temperature at 350°F. Transfer the zeppole to the prepared racks and coat them with confectioners’ sugar while they’re still hot. Repeat with the rest of the dough. Serve right away; these don’t last.
CINNAMON SUGAR ZEPPOLE WITH CHOCOLATE SAUCE Combine 1 cup granulated sugar with 1½ teaspoons cinnamon. Omit the confectioners’ sugar. When the zeppole are still hot but just cool enough to handle, roll them in the cinnamon sugar. Drizzle with or dip in Rich Chocolate Sauce.
8 Sauces for Filling Doughnuts
Sweet, pillowy fried dough makes a perfect pocket for your favorite sweet sauce:
- Whipped Cream
- Pastry Cream
- Chocolate Ganache or Chocolate-Hazelnut Spread
- Caramel Sauce, Butterscotch Sauce, or Dulce de Leche
- Fruit Sauce, Two Ways or Fruit Compote
- Lemon Curd
- Zabaglione
- Fruit Jam or Orange Marmalade
Fried Dough
Makes: 8 pieces
Time: 30 minutes
Fried dough is just about universal around the globe, whether you call it frybread, bannock, sopaipillas, chiacchiere, or merveilles. This carnival classic gets a little extra crispiness from seltzer; if you prefer, you can use still water and replace the baking soda with baking powder.
- 2 cups flour, plus more for rolling
- 1½ teaspoons baking soda
- 1 teaspoon salt
- 2 tablespoons butter, cold and cubed
- ¾ cup seltzer, lukewarm
- Neutral oil (like vegetable or canola) for frying
- Confectioners’ or granulated sugar (optional)
1. Combine the flour, baking soda, and salt in a large bowl. Work in the butter using a fork or your hands or pulse the mixture in a food processor until it is barely incorporated and the mixture resembles wet sand. Add the seltzer and stir until combined. Shape the dough into a ball, cover, and let rest for 15 minutes.
2. Fill a Dutch oven or large frying pan with ½ inch of oil and place it over medium heat. Heat the oil to 375°F, watching carefully to make sure it doesn’t get any hotter. Line a plate or rack with paper towels.
3. Divide the dough into 8 pieces and roll each one on a floured surface to ⅛-inch thickness, about 6 inches in diameter. Drop one piece of dough into the oil and cook until the bottom is golden, 30 to 45 seconds; flip and cook on the other side. Transfer to the prepared plate and serve immediately or keep warm in a 200°F oven. Repeat with the rest of the dough. If you like, dust with confectioners’ or granulated sugar while they are still warm.
MERVEILLES A lightly sweetened French version: Replace the baking soda with 1 teaspoon baking powder. To the dry ingredients, add ⅓ cup granulated sugar and 1 tablespoon grated lemon or orange zest. Use softened rather than cubed butter, omit the seltzer, and add 3 beaten eggs along with it. Cover and let rest for 15 minutes. Roll the dough out to an ⅛-inch thickness and cut it into long, narrow triangles. Fry as directed; these take a little longer to become golden. Dust with confectioners’ sugar.
CHIACCHIERE An Italian favorite during carnival season: Follow the preceding variation, adding 2 tablespoons brandy or grappa when you add the eggs. Roll the dough out to ⅛-inch thickness, cut it into rectangles, and fry.
PURI This puffy Indian bread is the perfect thing to serve alongside a curry: Heat the oil first. Omit the baking soda, substitute 2 tablespoons neutral oil for the butter, and use water rather than seltzer, starting with ⅔ cup and adding just enough to form a stiff dough. Don’t chill the dough; knead it, divide the dough into 8 balls, and roll them out to a little more than ⅛ inch thick, using oil to help you roll if necessary, not flour. Fry as directed.
Fried Dough, Sweet and Savory
Since it’s flat and thin when it’s fried, you can pile things on top of fried dough as you would with crackers, bread, or toast—it’s a good party trick whether you’re serving it as breakfast, lunch, dinner, or dessert. Anything from the list of 16 Doughnut Toppings works beautifully here, but here are some savory options:
- Ricotta with finely chopped fresh herbs, salt, and freshly ground black pepper
- Good extra virgin olive oil and balsamic vinegar
- Scrambled eggs and bacon or sausage
- Beans, salsa, and cheese
- Roasted vegetables, like tomatoes or eggplant, and Parmesan cheese
- Cooked ground meat or seafood with cumin
- Tomato sauce, mozzarella cheese, and your favorite pizza toppings
Funnel Cake
Makes: About 8 servings
Time: 20 minutes
This state fair favorite gets its name and its distinctive swirled shape because it’s poured into the oil through a funnel (although the job can be done with a pastry bag, zipper bag, or squeeze bottle). It’s fun to eat and could hardly be simpler to make.
- Neutral oil (like canola or vegetable) for frying
- 2 eggs
- 2¼ cups milk
- 1 teaspoon vanilla extract
- 3 cups flour
- ¼ cup granulated sugar
- 2 teaspoons baking powder
- 1 teaspoon salt
- Confectioners’ sugar for dusting
1. Place a candy thermometer in a heavy-bottomed pot or Dutch oven, add 2 inches of oil, and heat it to 375°F over medium heat while you make the batter. Line a plate or rack with paper towels.
2. In a large bowl, lightly beat the eggs, then add the milk and vanilla. Whisk in the flour, granulated sugar, baking powder, and salt until combined.
3. To pour the batter into the oil, you can use a pastry bag with a round tip, a zipper bag with the corner cut off, a squeeze bottle with a wide opening, or a large funnel. For each cake, squeeze out the batter in overlapping circles (or whatever crazy shape you like). Fry until golden, 45 seconds to 1 minute; flip and cook for another minute or so. Transfer to the prepared plate, dust with confectioners’ sugar, and serve immediately.
JALEBI These extra-crisp Indian cakes are sensational on their own or soaked in saffron syrup: Omit the eggs and use 4 cups buttermilk in place of the milk; add 2 tablespoons melted butter or ghee (Indian clarified butter). Replace the vanilla with ½ teaspoon cardamom and omit the baking powder. To make the syrup, bring ½ cup water and ½ cup sugar to a boil. Stir in ⅛ teaspoon saffron threads and turn off the heat. Cook the cakes until they are deep golden and very crisp. Dip the cooked cakes in the syrup or just drizzle some over the top; serve immediately.
Fats for Frying
For deep-frying, there are two main factors: smoke point and cost. You don’t want the oil to burn before it reaches frying temperature (about 350°F), and since you need several inches of it in the pot, you can’t use liquid gold. Peanut, vegetable, and corn oils are all great standbys; it’s worth keeping a big bottle of one in your pantry. Even olive oil is good, and since it smokes at 375°F, it’s perfectly appropriate for frying.
If you can get your hands on it, lard satisfies these criteria and crisps food up beautifully; clarified butter, or ghee, doesn’t have the milk solids that cause butter to burn, so it’s far more heat resistant, and grapeseed is wonderfully neutral. All three are sufficiently expensive that you’re not likely to fill a pot with them and make doughnuts.
What to do with a pot full of hot, used oil? Don’t throw it down the drain (dangerous) or in the trash (expensive and messy). Let it cool to room temperature, strain out the solids, and store it in the fridge or a cool, dark place. Do this and you can reuse it several times; as soon as it starts to smell a little funky, throw it away: Let it cool, refrigerate in a disposable container, then throw it in the trash.
Apple Fritters
Makes: 6 to 8 servings
Time: 20 minutes
The batter here is very similar to that of a cake doughnut, but where a doughnut is characterized by dough, fritters are all about the filling; the batter is just there to hold it all together. These fluffy fritters need no resting time and have a sweet apple flavor that stands on its own, although a dip in Vanilla Glaze or a dusting of confectioners’ or granulated sugar certainly doesn’t hurt. To make this with other fruits, see Endlessly Adaptable Fritters.
- Neutral oil (like canola or vegetable) for frying, plus more for the bowl
- 2½ cups flour
- 2 teaspoons baking powder
- 2 teaspoons cinnamon
- 1 teaspoon salt
- 2 eggs
- ½ cup sugar
- 1 cup milk
- 2 tablespoons butter, melted and cooled
- 2 teaspoons vanilla extract
- 2 large apples, peeled and chopped into roughly ¼-inch pieces (about 2 cups)
1. Place a candy thermometer in a heavy-bottomed pot or Dutch oven, add 2 inches of oil, and heat to 350°F while you make the batter.
2. Combine the flour, baking powder, cinnamon, and salt in a bowl. In a large bowl, lightly beat the eggs with the sugar, then whisk in the milk, melted butter, and vanilla. Stir in the flour mixture until just combined, then add the apples. Stir to combine; the mixture should be a very thick batter with apples suspended within.
3. Add the batter to the oil 1 heaping spoonful at a time; don’t overcrowd the pot. Cook until golden, 1½ to 2 minutes per side, adjusting the heat if necessary to keep it at a steady 350°F. Transfer to a paper-towel-lined plate or rack and serve right away.
BANANA FRITTERS Popular in Indonesia: Slice 6 ripe bananas in half lengthwise, then cut them in half crosswise. Omit the cinnamon, salt, and baking powder. Decrease the sugar to ¼ cup; omit one of the eggs. Gently fold the bananas into the batter, taking care not to break them, so that each piece is coated all over in batter. Fry a few pieces at a time, until golden and crisp all over.
WHOLE WHEAT APPLE FRITTERS These are no lighter, but the flavors are nuttier and more intense. If you have it, use whole wheat pastry flour, which makes the fritters extra-tender: Use ½ cup applesauce and ½ cup apple juice in place of the milk. Omit the butter. Substitute whole wheat flour for the all-purpose.
Corn Fritters
Makes: 6 to 8 servings
Time: 20 minutes
Corn’s mild flavor makes these fritters incredibly versatile. Boost the sugar to ¼ cup for something sweeter and top with maple syrup, honey, and cinnamon, or Strawberry Jam. There are plenty of savory variations, and ever more variations when you switch out the corn for other vegetables; see this chart.
Fresh corn will give the best flavor, but you can use frozen corn when it’s not in season.
- Neutral oil (like canola or vegetable) for frying, plus more for the bowl
- 2 cups flour
- 1 tablespoon sugar
- 2 teaspoons baking powder
- 1 teaspoon salt
- 2 eggs
- 1 cup milk
- 2 tablespoons butter, melted and cooled
- 3 cups corn kernels
1. Place a candy thermometer in a heavy-bottomed pot or Dutch oven, add 2 inches of oil, and heat to 355°F while you make the batter.
2. Combine the flour, sugar, baking powder, and salt in a medium bowl. In a large bowl, lightly beat the eggs, then stir in the milk and melted butter. Stir in the flour mixture until just combined, then fold in the corn.
3. Add the batter to the oil 1 heaping tablespoon at a time; don’t overcrowd the pot. Cook until deep golden all over, about 2 minutes per side, adjusting the heat if necessary to keep it at a steady 355°F. Transfer to a paper-towel-lined plate or rack and serve right away.
CORN AND SCALLION FRITTERS Add 1 teaspoon of paprika to the flour mixture. Thinly slice 6 scallions, discarding the dark green portions, and add them with the corn.
SPICY CORN FRITTERS Add ¾ teaspoon cayenne to the flour mixture. Mince 1 jalapeño, removing the seeds and membranes, and add it along with the corn.
CHEESY CORN FRITTERS Just about any cheese will work here, but cheddar is particularly nice: Replace the baking powder with 1½ teaspoons baking soda, omit 1 egg, and use buttermilk instead of milk. Fold ¾ cup grated cheese in with the corn.
HUSH PUPPIES A classic side dish for seafood: Add 1½ cups cornmeal and decrease the flour to ½ cup. Replace the baking powder with 1½ teaspoons baking soda and use buttermilk. Mince 1 medium onion and fold it into the batter; omit the corn kernels or decrease them to 1 cup. Serve with hot sauce.
Ricotta Fritters
Makes: 6 to 8 servings
Time: 20 minutes
With their mild, creamy flavor and fluffy texture, these fritters are wonderful at breakfast, brunch, or dessert. As is, they pair nicely with Lemon Curd or Fruit Sauce, Two Ways, but look to the variations for simple ways to make them more substantial and savory.
- Neutral oil (like canola or vegetable) for frying
- 1 cup flour
- 2 teaspoons baking powder
- ½ teaspoon salt
- 2 eggs
- ¼ cup sugar
- 1 cup ricotta cheese
1. Place a candy thermometer in a heavy-bottomed pot or Dutch oven, add 2 inches of oil, and heat to 375°F while you make the fritters. Line a rack or plate with paper towels.
2. Combine the flour, baking powder, and salt in a bowl. In a large bowl, lightly beat the eggs and sugar until frothy and then whisk in the ricotta. Stir in the flour mixture until just combined.
3. Drop the batter by the heaping spoonful into the oil, taking care not to overcrowd the pot. Fry until the bottoms are deep golden, 1½ to 2 minutes, then flip and cook for another 1½ to 2 minutes. Transfer to the prepared rack, let them rest for a minute or two to crisp up a bit more, then serve.
PEAR AND RICOTTA FRITTERS These are mildly sweet; try them as a light winter dessert: Decrease the flour to ½ cup and add 1 teaspoon cinnamon to the dry ingredients. Peel and core 1 large ripe pear and roughly chop it; you should have about ¾ cup. Fold the pear and 1 teaspoon vanilla extract into the batter after adding the flour mixture.
PEACH AND RICOTTA FRITTERS Pleasantly tart and perfect for summer: Follow the preceding variation, substituting 1 large peach for the pear and 1 tablespoon grated lemon zest for the vanilla. Omit the cinnamon.
RICOTTA AND MOZZARELLA FRITTERS Dipped in marinara sauce, these are like pizza in fritter form: Omit the sugar and increase the salt to 1 teaspoon. Decrease the ricotta to ¾ cup and add 3 ounces shredded fresh mozzarella. If you like, add ½ teaspoon each of cracked black pepper and minced fresh oregano to the batter.
DRIED TOMATO AND GOAT CHEESE FRITTERS These savory fritters make an excellent snack for entertaining: Omit the sugar and increase the salt to 1 teaspoon. Substitute 4 ounces crumbled goat cheese for ½ cup of the ricotta. Fold ¾ cup chopped sun-dried tomatoes into the batter after adding the ricotta.
BEAN AND RICOTTA FRITTERS Any beans are good here, whether they’re cooked or canned and drained; try adding ½ teaspoon of any complementary herb or spice with it: Omit 1 egg and the sugar; decrease the ricotta to ¾ cup. Roughly mash ¾ cup beans, then fold them into the batter after the flour along with ½ teaspoon cracked black pepper.
Endlessly Adaptable Fritters
You can overhaul fritters, where the fruit and vegetable are the focus and the batter’s there to bind and add flavor, by switching up the main ingredient. Sub any of the below, cup for cup, for the apples in Apple Fritters or the corn in Corn Fritters, tweaking the batter itself to make it as savory or sweet as you like.
Pears
BATTER: Apple Fritters
ADDITIONAL SUBSTITUTIONS: Substitute 2 teaspoons ground ginger or 2 tablespoons minced fresh ginger for the cinnamon.
Peaches
BATTER: Apple Fritters
ADDITIONAL SUBSTITUTIONS: None.
Strawberries
BATTER: Apple Fritters
ADDITIONAL SUBSTITUTIONS: Omit the cinnamon.
Sweet potatoes, carrots, or winter squash
BATTER: Apple Fritters or Corn Fritters
ADDITIONAL SUBSTITUTIONS: For sweet, use the Apple Fritters recipe and add 1 teaspoon ginger and ¼ teaspoon nutmeg. For savory, use the Corn Fritters recipe; omit the sugar, up the salt to 2 teaspoons, and add 1 teaspoon minced fresh thyme, rosemary, or sage.
Fennel
BATTER: Corn Fritters
ADDITIONAL SUBSTITUTIONS: Grate or finely chop 1 fresh fennel bulb, leave out the sugar, and increase the salt to 2 teaspoons; add 2 teaspoons finely grated lemon zest and, if necessary, up to ½ cup coarse bread crumbs to the batter to help bind.
Zucchini or other summer squash
BATTER: Corn Fritters
ADDITIONAL SUBSTITUTIONS: Peel and grate the zucchini; combine with salt in a colander and let drain for at least 15 minutes. Add ¼ cup chopped fresh dill or mint.
Potato
BATTER: Corn Fritters
ADDITIONAL SUBSTITUTIONS: Peel and grate the potato; skip the sugar and up the salt to 2 teaspoons. Instead of milk, use ¾ cup sour cream, then thin as needed with milk.
Onion, shallot, or scallion
BATTER: Corn Fritters
ADDITIONAL SUBSTITUTIONS: Finely chop or grate the onion. Instead of sugar, add 1 tablespoon Dijon mustard or, for Indian onion fritters, 2 teaspoons turmeric and 1 teaspoon cumin. Increase the sugar to 2 teaspoons.
Sturdy greens like kale, spinach, or chard
BATTER: Corn Fritters
ADDITIONAL SUBSTITUTIONS: Cook the greens with a few cloves minced garlic and thoroughly squeeze out extra liquid before stirring into the batter. Omit the sugar and increase the salt to 2 teaspoons.
Cereal
As with most foods, making your own gives you control over both quality and flavor. Granola is so easy, so flexible, and so delicious that you’ll probably never fall for overpriced—and oversweetened—store-bought versions again. Some of the other recipes are a little more hands-on—fun projects for ardent breakfast lovers—and worth trying, even if they don’t make it into your daily routine.
Buy your grains in the bulk aisle, if possible, where they’re generally fresher and cheaper than the packaged stuff. And because all you’ll be adding to these is milk when it’s time to eat, take extra liberties to customize them—sweeten to taste and add only your favorite ingredients. It’s a great way to start the day.
Recipes
Granola
Grain Nuts
Bran Flakes
Oat Clusters
Chocolate Puffs
Granola
Makes: About 8 cups
Time: 45 minutes
Not only does homemade granola taste better, but you can also use the best-quality ingredients and adjust them exactly as you like. Add more nuts, leave out the fruit, or vary the spices—anything goes. This keeps well in the fridge and indefinitely in the freezer.
- 6 cups rolled oats
- 1 cup chopped nuts
- 1 cup hulled raw seeds, like sunflower, sesame, pumpkin, or flax
- 1 teaspoon cinnamon
- ½ teaspoon salt
- ½ cup honey or maple syrup or more to taste
- 2 tablespoons olive oil
- 1 cup raisins or chopped dried fruit
1. Heat the oven to 350°F. In a large bowl, combine the oats, nuts, seeds, cinnamon, and salt. Drizzle the mixture with the honey or syrup and the oil; toss to combine thoroughly. Taste and add more sweetener if you like.
2. Spread the mixture evenly on a rimmed baking sheet and bake for 30 to 35 minutes, stirring halfway through to make sure the granola is toasting evenly. The browner it gets without burning, the crunchier it will be.
3. Remove the pan from the oven and add the raisins. Cool on a rack. The pan will still be quite hot, so stir the granola once in a while until it cools to keep it from burning in spots. Transfer to a sealed container and store in the refrigerator; it will stay fresh for a couple months.
COCONUT GRANOLA Use melted coconut oil in place of the olive oil and 1½ cups shredded unsweetened coconut in place of the raisins.
CHOCOLATE HAZELNUT GRANOLA Dessertlike without being junky: Use 2 cups hazelnuts for the nuts and omit the cinnamon. Toss ½ cup cocoa powder with the oats and bake as directed. Roughly chop 4 ounces dark chocolate and add it in place of the raisins when the granola has cooled completely.
CRUNCHY GRANOLA The protein in egg whites forms crunchy clusters: Beat 2 egg whites until frothy and stir them into the granola mixture before baking.
CHERRY CASHEW GRANOLA Omit the seeds and use 2 cups coarsely chopped cashews. Add 1 teaspoon vanilla extract along with the honey and oil. Reduce the cinnamon to ½ teaspoon. Use dried cherries for the fruit.
BUCKWHEAT MOLASSES GRANOLA These two warmer, heartier flavors complement each other: Use buckwheat groats in place of the oats and use ½ cup molasses as the sweetener. Add 1 teaspoon ginger along with the cinnamon. Omit the raisins or replace them with chopped pitted Medjool dates.
QUINOA GRANOLA A little extra crunch: Rinse 1 cup uncooked quinoa and add it along with the oats; decrease the oats to 5 cups.
MUESLI This hearty cereal isn’t cooked; serve it cold or warm, with milk, juice, or yogurt, right away or soaked overnight: Use brown sugar as sweetener and omit the oil. Do not bake.
Grain Nuts
Makes: 8 servings
Time: About 20 minutes
Twice-cooked grains make a flavorful, crunchy breakfast cereal, with no need to add extra ingredients (unless you want to). This is a fantastic way to use up leftover grains and can easily be scaled up or down based on whatever you have; if there is too much to form a thin layer, use multiple baking sheets and rotate halfway through baking.
- 4 cups cooked grains, like quinoa, bulgur, or wheat berries
- ½ teaspoon salt
1. Heat the oven to 375°F. Spread the grains on a large rimmed baking sheet, using your hands to break up any clumps and making the layer as even as possible. Sprinkle with the salt.
2. Bake, tossing once or twice with a spatula, until the grains dry out and turn golden brown, 15 to 25 minutes, depending on the size of the kernels and how crunchy you want them. Set the pan on a rack to cool and serve like breakfast cereal, with fruit, toasted nuts or seeds, and milk. This can be stored in the refrigerator for a week.
SPICED GRAIN NUTS Sprinkle on 1 teaspoon cinnamon and ⅛ teaspoon nutmeg along with the salt; if you like, add ¼ cup packed brown sugar.
TOASTED COCONUT GRAIN NUTS Substitute 1 cup shredded unsweetened coconut for 1 cup of the grain. For a richer flavor, toss ¼ cup cocoa powder with the other ingredients.
Bran Flakes
Makes: About 3½ cups
Time: About 1 hour
Making your own cereal is certainly more work than grabbing a box off the supermarket shelf, but doing so lets you make sure the ingredients are simple and real. Try the main recipe with raisins, or any other dried fruit, and see the variations for more classic breakfasts.
- 1 cup wheat bran
- 1 cup whole wheat flour
- 2 tablespoons honey
- ½ teaspoon baking powder
- ½ teaspoon salt
1. Heat the oven to 350°F. Stir all the ingredients in a large mixing bowl with 1¼ cups water until well combined.
2. Cut parchment paper to fit 3 rimmed baking sheets. Lay one sheet of parchment out on the counter, scoop a third of the batter (about ½ cup) into the middle, and lay a large sheet of plastic wrap over the top. Using a rolling pin, roll the batter into as thin a sheet as you can (you should practically be able to see through it). Carefully peel off the plastic wrap and transfer the parchment to the baking sheet. Repeat with the remaining batter.
3. Bake (in batches if you don’t have 3 racks in your oven or 3 baking sheets), rotating the pans once halfway through, until the batter dries out a bit and begins to darken slightly around the edges, about 10 minutes. Let the sheets cool and lower the heat to 250°F. When the sheets have cooled, peel them off the parchment with your fingers; they’ll have a sort of rubbery texture. Tear the sheets into flakes. Spread them out on 2 baking sheets and bake, tossing occasionally, until completely dried out and brittle, 25 to 30 minutes. Cool before serving. These can be refrigerated in an airtight container for about 2 weeks.
NUTTY BRAN FLAKES Add ½ cup ground nuts and 2 tablespoons nut butter to the rest of the ingredients; increase the water to 1½ cups.
CORN FLAKES Substitute 1½ cups cornmeal and ½ cup all-purpose flour for the bran and whole wheat flour. Substitute 2 tablespoons sugar for the honey. Reduce the water to ¾ cup.
SWEET WHEAT FLAKES Replace the wheat bran with 1 cup all-purpose flour; substitute 2 tablespoons sugar for the honey. After the sheets of batter have baked for just a minute, sprinkle each one with another teaspoon of sugar. Return to the oven and proceed with the recipe.
Oat Clusters
Makes: About 5 cups
Time: About 1 hour, largely unattended
If your favorite part of boxed cereal is the crunchy little clusters, this is the breakfast for you. Think of it as part granola, part cereal, and feel free to fool around with the flavors—use a different spice, use nut butter in place of the oil, or add some seeds—until it’s just how you like it. Eat it on its own or stir into Bran Flakes.
- 6 cups rolled oats
- ¾ cup honey or maple syrup
- ¼ cup coconut or neutral oil (like grapeseed or corn)
- 1 teaspoon cinnamon (optional)
1. Heat the oven to 325°F and grease 2 baking sheets or line them with parchment paper.
2. Use a food processor to grind 1½ cups of the oats into a flour. In a large bowl, combine the ground oats with the honey, oil, the cinnamon if you’re using it, and ¼ cup water. Stir in the remaining 4½ cups oats until they’re coated and the mixture is sticky; if it looks too dry, stir in a bit more honey. Spread the mixture evenly over the prepared baking sheets.
3. Bake, stirring occasionally to break the clumps apart and cook them evenly, until the oat clusters are crisp and dry, 35 to 45 minutes. Let cool completely before serving or storing. These will keep in an airtight container for 2 weeks.
GRAIN CLUSTERS Another good way to use leftovers: Combine 1 cup wheat germ with the honey, oil, and cinnamon. Stir in 6 cups of any cooked grain, like bulgur or wheat berries; if necessary, add water 2 tablespoons at a time until the grains are coated in the honey mixture. Bake as directed.
Chocolate Puffs
Makes: About 3 cups
Time: About 1¼ hours
Some cereals are more like dessert than breakfast. This homemade version is rich and chocolaty but made with good ingredients that fill you up and won’t give you a sugar rush—or crash. Rolling out the puffs takes time, so if you have kids (or any kitchen helpers), have them lend a hand.
- ½ cup plus 2 tablespoons almond flour
- ½ cup plus 2 tablespoons all-purpose flour
- ¼ cup cocoa powder
- 1 egg white
- 3 tablespoons honey or maple syrup
- 2 tablespoons milk or almond milk
- 1½ teaspoons coconut or neutral oil (like grapeseed or corn)
- ½ teaspoon vanilla extract (optional)
- ⅛ teaspoon salt
1. Heat the oven to 300°F. Line a baking sheet with parchment. Combine all the ingredients in a food processor and pulse until the mixture comes together and forms a sticky dough (it won’t form one giant dough ball, so just gather it together with a rubber spatula or your hands).
2. Pinch off small pieces of dough and roll them into balls. Spread the puffs across the baking sheet and bake, shaking the pans often, until dry and crisp, 30 to 35 minutes. Let cool on the baking sheets. These can be refrigerated in an airtight container for up to 2 weeks.
ALMOND PUFFS Omit the cocoa powder. Increase the almond flour and all-purpose flour to ¾ cup each.