Great British Bake Off - Bake it Better: Sweet Bread & Buns - Linda Collister (2016)
Recipes
Up for a challenge
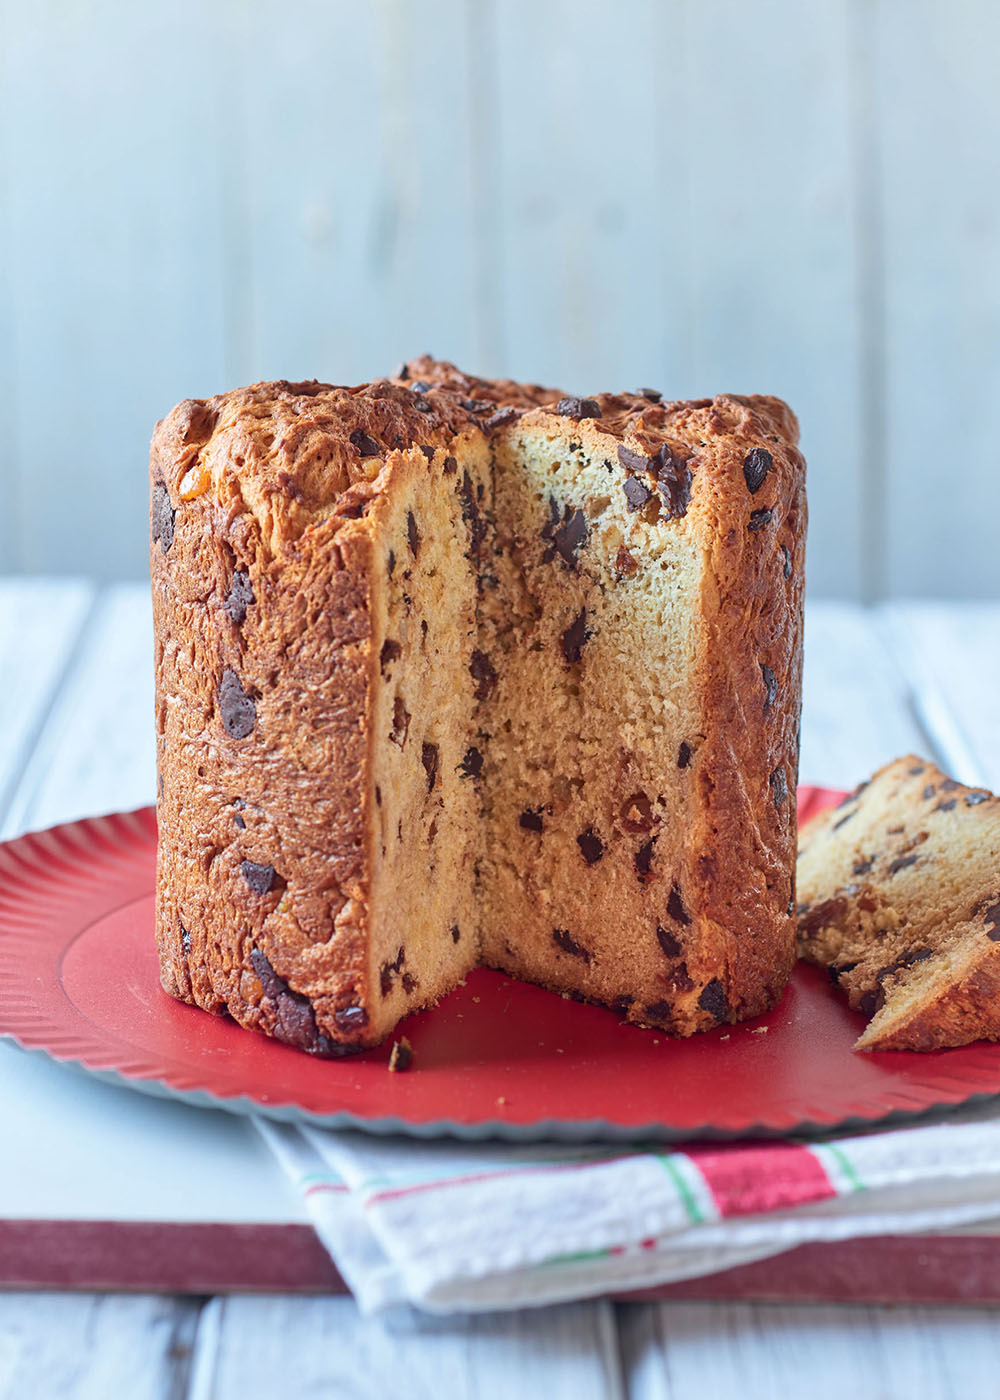
Panettone

Up for a challenge
HANDS-ON TIME:
1 hour 5 minutes
HANDS-OFF TIME:
6-7 hours
BAKING TIME:
1½ hours
MAKES:
1 large loaf
SPECIAL EQUIPMENT:
18cm (4.5 litre) loose-bottomed panettone tin or a very deep cake tin
STORAGE:
Leftover slices can be tightly wrapped in clingfilm and frozen for up to 1 month
Panettone gets its fine, cake-like crumb from multiple rises: there’s an initial batter-like ‘sponge’, followed by two rises before the dough is shaped, plus a final rise before baking, so set aside plenty of preparation time.
about 750g strong white bread flour, plus extra for dusting
2 × 7g sachets fast-action dried yeast
150g caster sugar
4 medium eggs, at room temperature
100ml lukewarm water
4 medium egg yolks, at room temperature
1 teaspoon vanilla extract
finely grated zest 1 large orange
finely grated zest 1 large unwaxed lemon
10g fine sea salt
350g unsalted butter, softened
100g large sultanas
70g candied orange and lemon peel, finely chopped
250g dark chocolate chunks or chips, preferably a minimum of 70 per cent cocoa solids
about 30g unsalted butter, to finish
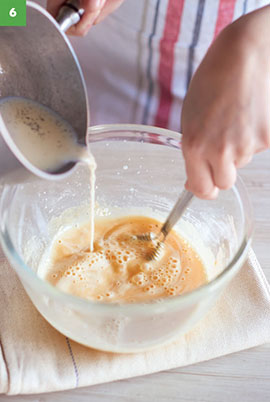
1. Mix 250g of the flour with the yeast and sugar in a large mixing bowl or the bowl of a free-standing mixer, using your hand or the dough hook attachment. Make a well in the centre. Beat the whole eggs with the lukewarm water in a jug and pour into the well. With your hand, or the dough hook on the slowest speed, work the liquid into the flour to make a thick, smooth batter. Sprinkle about a tablespoon of the remaining flour over the top of the batter to prevent a skin forming, then leave in a warm spot for about 1 hour, or until the batter (sponge) has expanded and is bubbly.
2. Stir the egg yolks, vanilla extract and orange and lemon zest into the batter using your hand, or the dough hook on the slowest speed, then gradually work in 350g of the remaining flour plus the salt to make a soft and very sticky dough.
3. Cut the butter into small pieces and work it in by squeezing the dough through your fingers, or using the dough hook on slow speed, until thoroughly incorporated and there are no streaks.
4. Scoop out the dough onto a floured work surface and knead thoroughly for 10 minutes, gradually working in enough of the remaining flour to make a dough that is satiny smooth, very pliable and holds its shape. It should still be soft and sticky (but not wet or sloppy). You may not need all the flour, or you may need a little more. If you are using the dough hook, knead for 3-4 minutes on the slowest speed. Return the dough to the bowl, if necessary, and cover with clingfilm or a snap-on lid. Leave to rise at normal, or slightly warm, room temperature for 2-2½ hours, or until doubled in size. Don’t leave in a very warm spot or the butter will begin to melt.
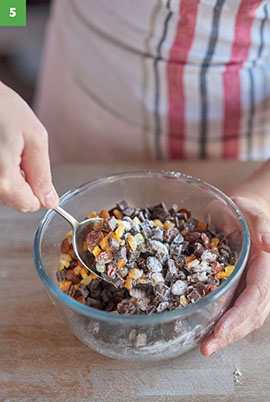
5. Uncover the bowl and punch down (knock back) the dough with your knuckles to deflate it, then cover the bowl and leave to rise as before until doubled in size - this time it’ll take about 1½ hours. Meanwhile, combine the 100g sultanas with the 70g chopped candied peel and 250g chocolate chips or chunks in another bowl and toss with a teaspoon of flour so they don’t clump together in the dough.
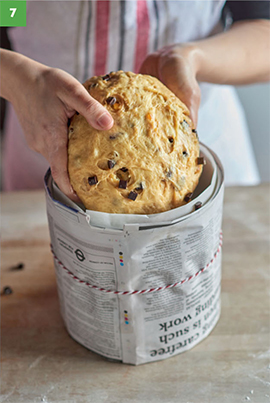
6. While you are waiting for the dough to rise, prepare the tin: grease the inside with a little melted butter and line the base and sides with a double layer of baking paper (or a single layer of parchment-lined foil). If you are using a deep cake tin rather than a special tall panettone tin, you will need to make sure that the paper around the inside of the tin extends 8cm above the height of the tin. Wrap a folded newspaper around the outside of the tin, again 8cm above the rim of the cake tin, and tie in place with string. The long baking time means the outside crust can become hard and dry before the heat reaches the centre if the tin isn’t well prepared, so don’t be tempted to skip this bit.
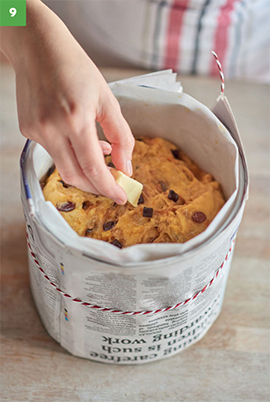
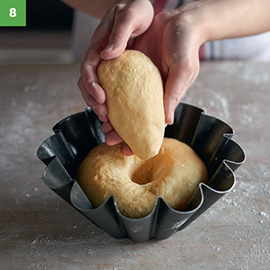
7. Punch down (knock back) the risen dough, then turn out onto a floured work surface. Sprinkle the fruit and chocolate mixture over the dough and work in very gently with floured hands until evenly distributed. The dough will look glossy but no longer sticky. Shape the dough into a ball and gently drop it into the prepared tin.
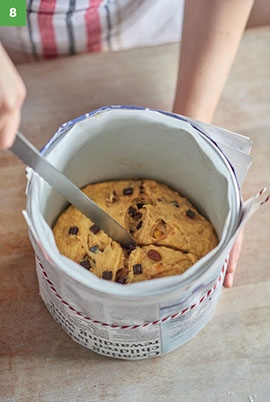
8. With the tip of a long, sharp knife cut a cross in the top of the dough. Lay a sheet of clingfilm lightly across the top of the lined tin, without stretching it, and leave to prove and rise as before for 1½-2 hours, or until doubled in size. Towards the end of the rising time preheat the oven to 200°C (180°C fan), 400°F, Gas 6.
9. When ready to bake, set aside one-third of the 30g unsalted butter and melt the rest. Uncover the tin and brush half the melted butter over the risen dough to glaze, then put the remaining knob of butter in the centre of the cross. Bake for 20 minutes until just starting to colour, then brush again with the remaining melted butter. Return the panettone to the oven, reduce the temperature to 180°C (160°C fan), 350°F, Gas 4 and bake for about a further 1-1¼ hours, or until it is a good golden brown and a skewer inserted into the centre comes out clean; start testing after 1 hour.
10. Remove the tin from the oven and stand it on a wire rack for 15 minutes to allow the crust of the panettone to firm up. Very gently unmould the loaf, peel off the lining paper, and set it on its side on the rack. Leave to cool completely before slicing. The loaf looks very grand served tied with a bright ribbon.
11. Serve panettone in thick slices with coffee or hot chocolate. It is best eaten within 3 days but is delicious toasted after that. Slightly stale panettone makes an excellent bread and butter pudding.
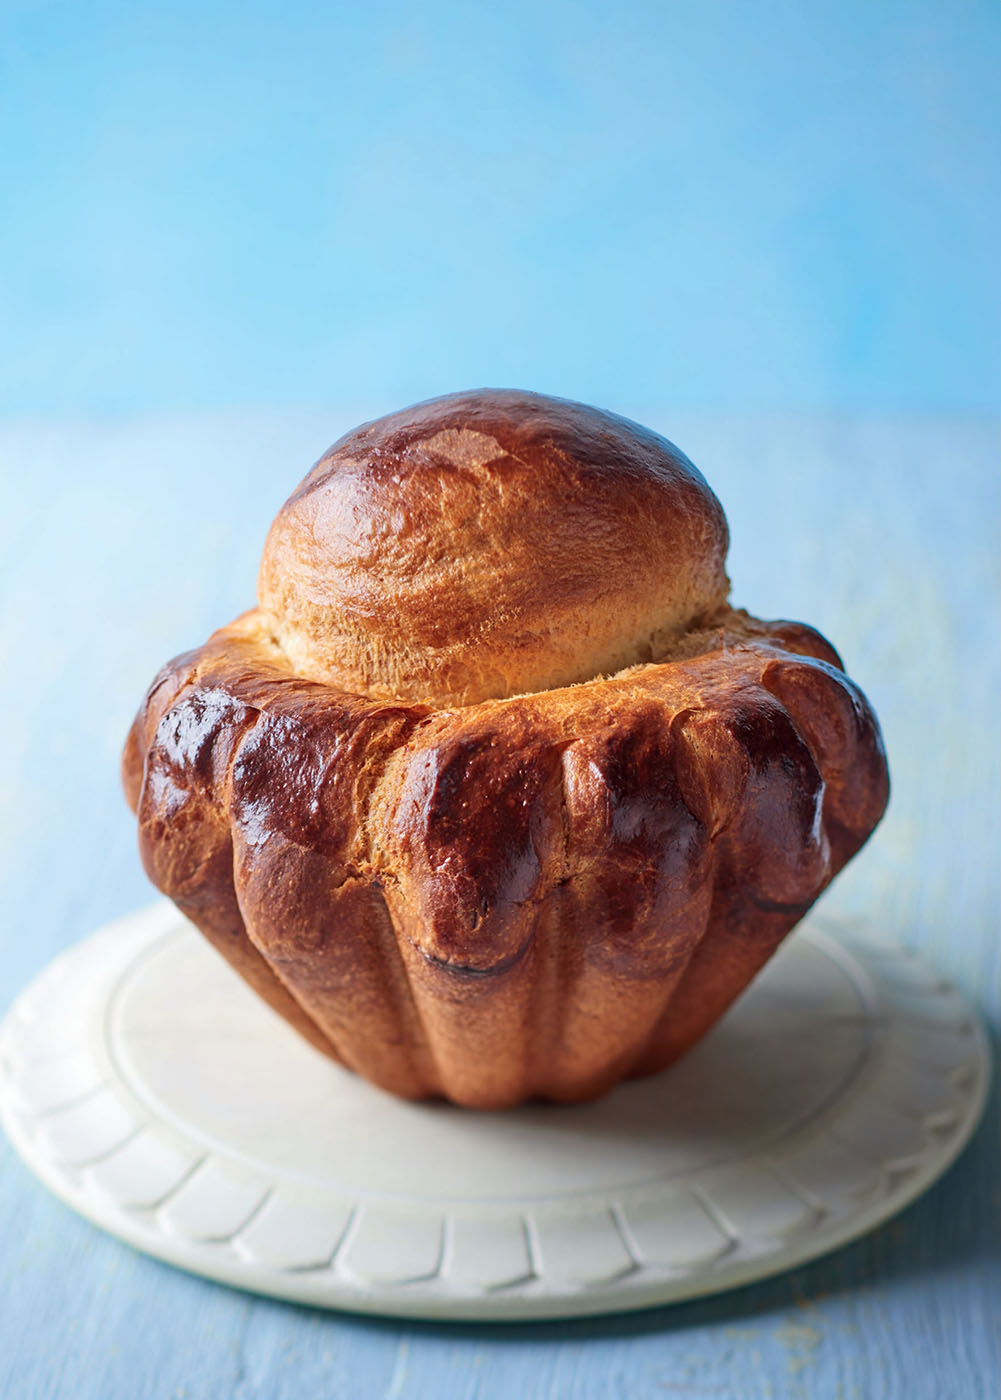
Brioche à Tête
Up for a challenge
HANDS-ON TIME:
45 minutes
HANDS-OFF TIME:
5-5½ hours
BAKING TIME:
40 minutes
MAKES:
1 large brioche
SPECIAL EQUIPMENT:
large brioche mould, about 22cm in diameter across the top and 11cm at the base
STORAGE:
Once cold, the brioche can be tightly wrapped in a freezer bag and frozen for up to 1 month
Brioche is the finest, richest, most buttery and golden of breads. The delicate, sponge-cake crumb of a brioche is the result of three risings, so plan ahead and follow the instructions carefully. The rich, soft dough also needs to be thoroughly chilled before it can be shaped.
450g strong white bread flour, plus extra for dusting
10g salt
25g caster sugar
7g sachet fast-action dried yeast
4 tablespoons milk, chilled
5 medium eggs, chilled
250g unsalted butter, at room temperature, diced
1 medium egg yolk plus 1 tablespoon milk, to glaze
1. Put the flour, salt and sugar into a mixing bowl or the bowl of a free-standing mixer and thoroughly combine with your hand. Sprinkle the dried yeast on top and mix in. Make a well in the centre.
2. Add the milk to the eggs in a measuring jug and beat with a fork, just to combine, then pour into the well in the flour mixture. Work the liquid into the flour, using your hand, or the dough hook attachment on slow speed, to make a very soft and very sticky, heavy dough.
3. Knead the dough in the bowl by slapping it up and down thoroughly for 10 minutes, or 6 minutes with the dough hook on slow speed, until it becomes glossy, firmer, smooth and very pliable.
4. Gradually work in the butter, a few pieces at a time, by squeezing it into the dough to make a silky smooth, soft and still sticky dough, with no visible streaks. If you are using a dough hook don’t forget to scrape down the sides of the bowl every minute or so. Now, repeat the slapping/kneading for another 10 minutes (or 5 minutes using the dough hook on slow speed) - the dough should feel silky smooth and very elastic. Cover the bowl with clingfilm or a snap-on lid. Leave to rise on the worktop, at normal rather than warm room temperature, for about 1½ hours, or until doubled in size.
5. Punch down (knock back) the dough to deflate it, then re-cover the bowl and chill the dough in the fridge for at least 2 hours but not more than 6 hours. The dough should feel cool and firm but not hard. Meanwhile, liberally grease the brioche mould with butter.
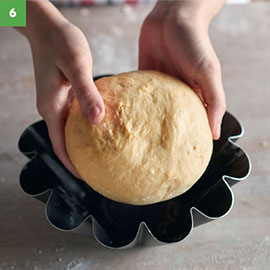
6. Turn the dough out onto a lightly floured worktop and shape into a ball. Cut off one quarter of the dough for the top and set it on one side. Reshape the remaining dough into a neat, smooth ball and set in the buttered mould.
7. Press your thumb and first two fingers together to make a pointed beak shape, then dip them in flour and press them into the centre of the ball of dough to make a deep hole (almost to the base).
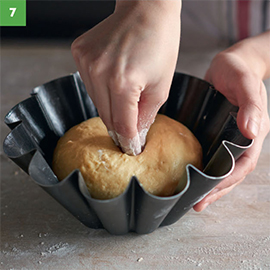
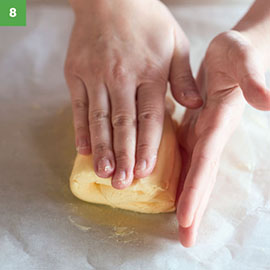
8. Roll the reserved piece of dough into an egg shape, then shape and elongate the pointed end of this ‘egg’ so it fits into the hole in the larger ball. Using your fingers, gently insert the narrow pointed end of the ‘egg’ into the larger ball of dough, so the smaller ball sits neatly on top, dead centre.
9. Lightly beat the 1 egg yolk and 1 tablespoon milk together with a fork. Glaze the dough very lightly with the egg mixture, taking care not to let the glaze drip down the sides of the dough, or to let the dough become ‘glued’ to the mould, as this will stop it expanding evenly as it rises.
10. Slip the mould into a large plastic bag, trapping in some air so the plastic doesn’t stick to the dough, and leave on the worktop to prove and rise at normal room temperature for 1½-2 hours, or until almost doubled in size, although this will depend on how long it was chilled for in Step 5. Towards the end of the rising time preheat the oven to 220°C (200°C fan), 425°F, Gas 7.
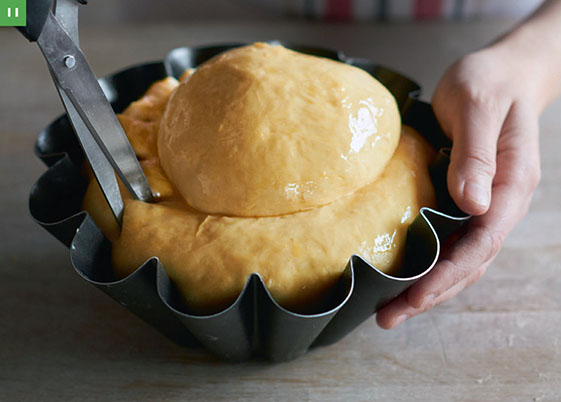
11. Uncover the risen dough and brush the brioche with glaze again. Dip a pair of kitchen scissors in cold water then snip all around the top of the dough between the rim of the tin and the centre ball of dough (you could make small slashes with a sharp knife instead).
12. Bake the brioche for 35-40 minutes, or until a rich golden brown. To test the brioche is properly cooked, carefully turn it out and tap it on the base - it should sound hollow. Check the brioche after 25 minutes and cover the top loosely with a sheet of baking paper if it seems to be browning too quickly. Set the unmoulded loaf gently on a wire rack and leave to cool completely before slicing.
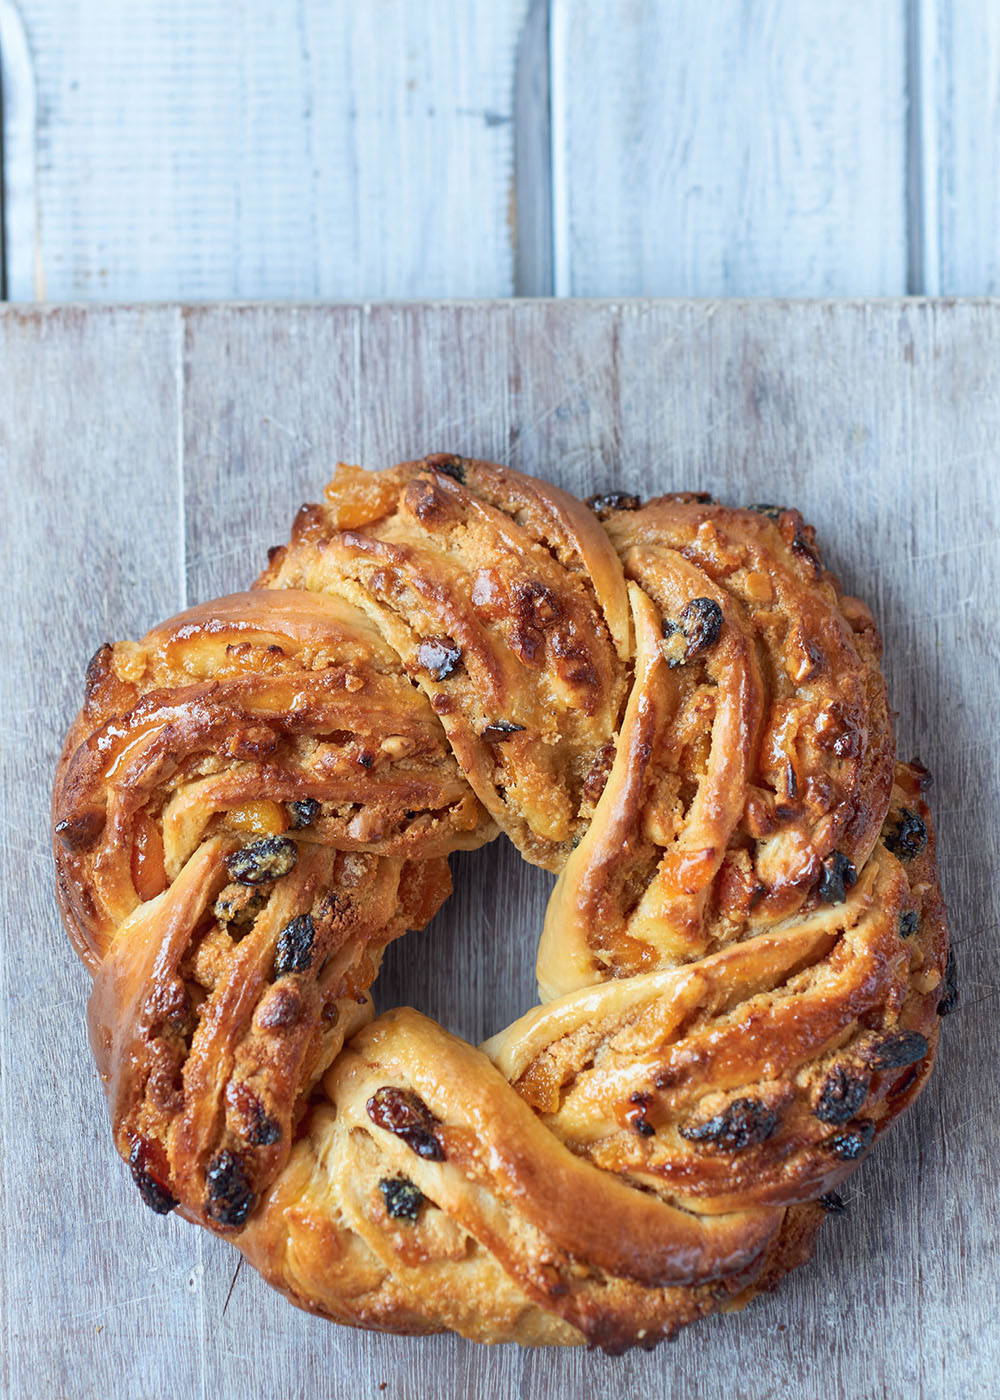
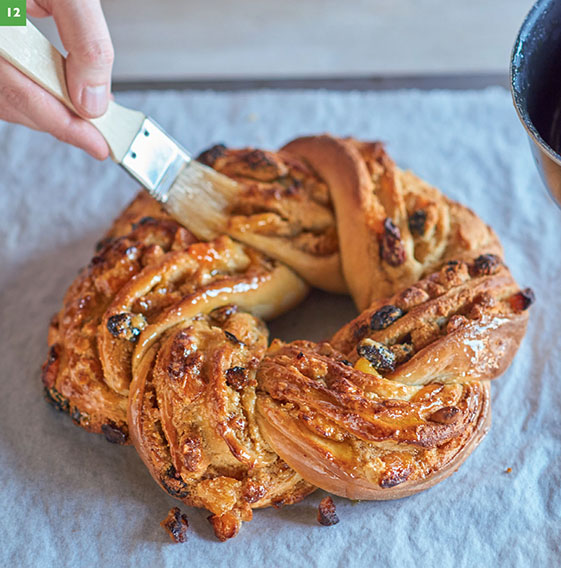
Twisted Apricot and Almond Couronne
Up for a challenge
HANDS-ON TIME:
55 minutes
HANDS-OFF TIME:
2½ hours
BAKING TIME:
30 minutes
MAKES:
1 large couronne, to serve 8-10
SPECIAL EQUIPMENT:
dough scraper, large baking sheet
STORAGE:
Wrap in clingfilm and keep in an airtight container overnight
A rich soft dough, flavoured with orange, is spread with dried apricots, raisins and chopped almonds in a frangipane cream, rolled up then cut lengthways and twisted to reveal the many layers of dough and filling.
For the dough
225g strong white bread flour, plus extra for dusting
2 teaspoons fast-action dried yeast (from a 7g sachet)
4g salt
20g light muscovado sugar
finely grated zest of 1 medium orange
40g unsalted butter, at room temperature, diced
1 medium egg, at room temperature
75ml lukewarm milk
For the filling
100g soft-dried apricots
juice of 1 medium orange
85g unsalted butter, at room temperature
50g light muscovado sugar
1 medium egg yolk, at room temperature
60g ground almonds
¼ teaspoon almond extract
75g jumbo raisins
75g blanched almonds, lightly toasted
For the glaze
1 tablespoon caster sugar
To make the dough
1. Put the flour and yeast into a mixing bowl, or the bowl of a free-standing mixer and mix well. Sprinkle the salt, sugar and orange zest into the bowl and mix in thoroughly with your hand. Add the pieces of butter to the bowl and rub in using just the tips of your fingers, until the mixture looks like fine crumbs. Make a well in the centre.
2. Put the egg and milk in a measuring jug and beat with a fork until just combined, then pour into the well in the flour. Gradually work the liquid into the flour using your hand, or the dough hook attachment on slow speed, to make a very soft and slightly sticky dough. If there are dry crumbs in the bottom of the bowl, or the dough feels hard or a bit dry, work in a little more lukewarm milk, a tablespoon at a time.
3. Turn out the dough onto a very lightly floured worktop (try to use as little extra flour as possible as it’s important to avoid the dough becoming tough or dry - a dough scraper will help you move the dough around) and knead it until the dough feels very pliable, firmer (though still soft) but no longer sticky - about 10 minutes, or 5 minutes using the dough hook on slow speed. Return the dough to the bowl, if necessary, and cover tightly with clingfilm or a snap-on lid. Leave to rise on the worktop for about 1½ hours, or until the dough has doubled in size. Line a large baking sheet with baking paper.
4. Meanwhile, roughly chop the 100g apricots for the filling, then soak them in the juice of 1 orange in a small bowl until needed.
5. Uncover the bowl and punch down (knock back) the risen dough to deflate it. Turn it out onto a worktop very lightly sprinkled with flour. Lightly flour a rolling pin and roll out the dough to a neat 30 × 22cm rectangle. Cover the dough lightly with a sheet of clingfilm and leave to relax while you make the filling.
To make the filling
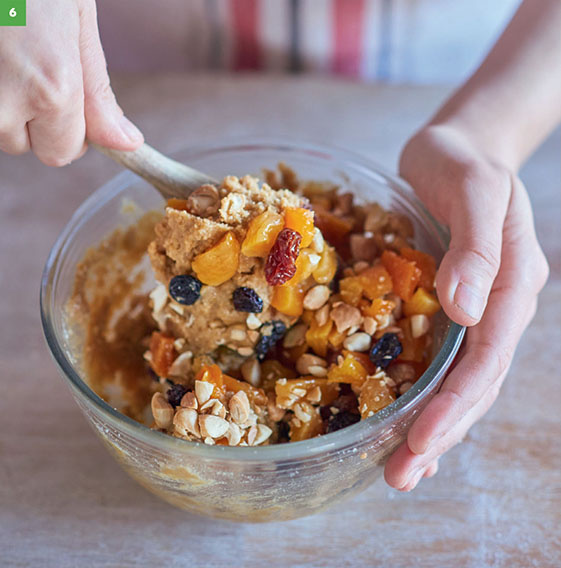
6. Set a sieve over a small pan, pour the apricot mixture into it and leave to drain. Beat the 85g soft butter and 50g light muscovado sugar together in a bowl with a wooden spoon until creamy, then beat in the 1 egg yolk followed by the 60g ground almonds and ¼ teaspoon almond extract. Mix in the 75g raisins and the well-drained apricots (save the strained juice for the glaze). Finally, roughly chop the 75g toasted almonds and mix in.
To shape the couronne
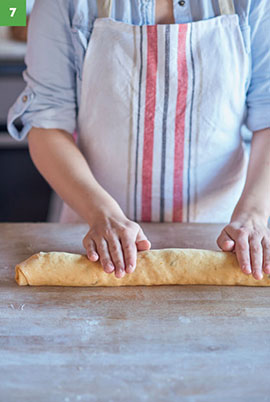
7. Spread the filling mix evenly over the dough - take care that the fruit is evenly distributed - then roll up fairly tightly from one long side, like a Swiss roll. Pinch the seam to seal the roll. Dust your hands lightly with flour and very gently use them to roll the cylinder of dough backwards and forwards on the worktop, until it is 55cm long.
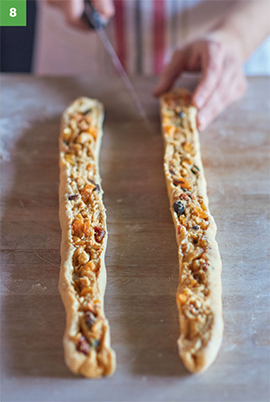
8. Flour a large, sharp knife and carefully cut the cylinder in half lengthways; try not to drag the knife as you want to keep the layers intact. Turn the two halves so the cut sides are facing up.
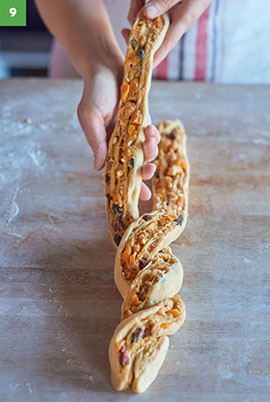
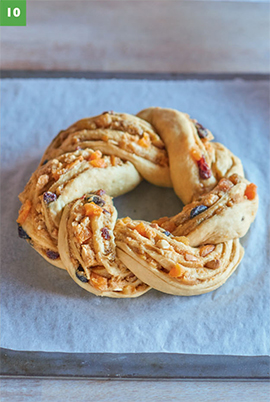
9. Gently twist both strands so the many layers are still visible, then shape the twisted dough into a ring. Pinch and twist together the ends neatly. Carefully transfer to the lined baking sheet.
10. Slip the tray into a large plastic bag, trapping in some air so the plastic doesn’t stick to the dough, then close the ends of the bag. Leave to prove and rise on the worktop for about 1 hour, or until doubled in size. Towards the end of the rising time preheat the oven to 200°C (180°C fan), 400°F, Gas 6.
11. Uncover the risen dough and bake for 20 minutes, then reduce the oven temperature to 180°C (160°C fan), 350°F, Gas 4, and bake for a further 10-13 minutes, or until the ring is a good golden brown and firm to the touch (take care as the dough will be very hot). This sweet dough can easily ‘catch’, so check when you reduce the temperature and rotate the baking sheet if necessary so the ring bakes evenly.
To make the glaze
12. Set the baking sheet on a wire rack while you make the glaze: add the 1 tablespoon caster sugar to the reserved orange juice in the pan and stir over low heat until dissolved. Turn up the heat and boil rapidly for a minute to make a syrup. Brush this hot glaze over the ring then carefully slide the couronne, still on its baking paper, off the sheet and onto the wire rack. Leave to cool completely before slicing.
Try Something Different
✵ The almonds can be replaced with pine nuts or walnut pieces, and dried cranberries can be used instead of some or all of the raisins; try soft-dried peaches instead of apricots.
✵ For an extra sweet finish, make a water icing by mixing a few tablespoons of icing sugar with a little cold water, until you have a smooth, runny icing. Drizzle the icing over the ring in a zigzag pattern.
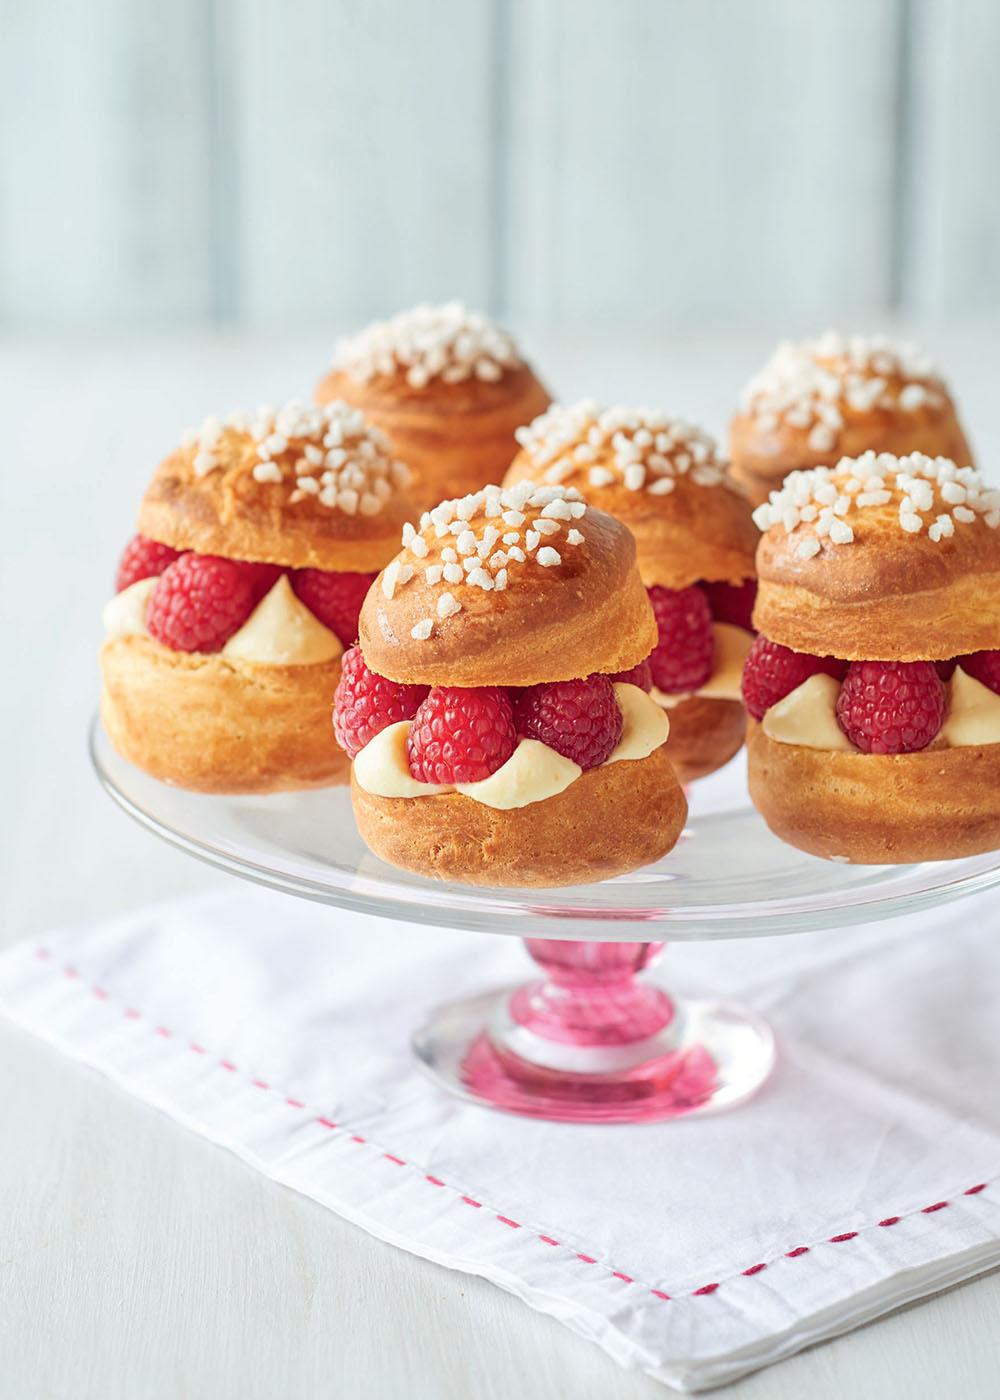
Mini Tropeziennes
Up for a challenge
HANDS-ON TIME:
1¾ hours
HANDS-OFF TIME:
2½-3 hours + 6-12 hours
BAKING TIME:
15 minutes
MAKES:
10 tropeziennes
SPECIAL EQUIPMENT:
dough scraper, 2 baking sheets, 6cm plain round cutter, 1cm plain round piping nozzle, piping bag
STORAGE:
Once cold, the unsplit and unfilled buns can be packed into a freezer container and frozen for up to 1 month
If you started off baking scones to go with clotted cream and jam (see here), then mastered Devonshire Splits (see here), this is the grand finale, the ultimate teatime bun. Here, an even more buttery, sweet and feather-light brioche dough is stamped out into thick discs, which bake into small crunchy-topped buns. These are filled with a piped crème mousseline and decorated with fresh berries for a touch of the south of France!
For the sweet brioche
225g strong white bread flour, plus extra for dusting
5g salt
1½ tablespoons caster sugar
finely grated zest of ½ large orange
1½ teaspoons fast-action dried yeast (from a 7g sachet)
3 tablespoons cold milk
2 medium eggs plus 1 medium egg yolk, chilled
150g unsalted butter, at room temperature, diced
1 medium egg yolk beaten with 1 tablespoon milk, to glaze
about 2 tablespoons pearl sugar nibs, for sprinkling
For the crème mousseline filling
130ml creamy milk, such as Jersey high-fat milk
2 medium egg yolks, at room temperature
30g caster sugar
finely grated zest of ½ medium orange
10g cornflour
20g unsalted butter, at room temperature
1 teaspoon Grand Marnier or orange blossom water 50ml double cream, chilled
To decorate
225g small raspberries or strawberries
1. Start by making the sweet brioche. Put the flour, salt, sugar and grated orange zest into a mixing bowl or the bowl of a free-standing mixer. Mix well then sprinkle the yeast over the top and mix in. Make a well in the centre.
2. Put the milk, whole eggs and the egg yolk in a small jug and beat with a fork, just until combined. Pour into the well. Using your hand, or the dough hook attachment on slow speed, work the flour into the eggs to make a very heavy and sticky dough (it will stick to the sides of the bowl and your fingers).
3. Knead the dough thoroughly in the bowl by slapping it up and down with your hand, or with the dough hook on slow speed, until it becomes very smooth, slightly paler and firmer, and very elastic - this will take 10-15 minutes by hand, or 6-8 minutes with the dough hook.
4. Gradually work in the diced butter, a few pieces at a time, squeezing it into the dough through your fingers (or using the dough hook) to make a smooth, streak-free dough that feels softer and stickier; use a dough scraper to scrape down the sides of the bowl regularly. Repeat the slapping/kneading for 10 minutes (or 5 minutes with the dough hook) so the dough feels silky and elastic. Cover the bowl with a snap-on lid or clingfilm and leave to rise on the worktop, at room temperature, for 1½ hours, or until doubled in size.
5. Punch down (knock back) the risen dough to deflate it, then re-cover the bowl and put it in the fridge for at least 6 hours, preferably overnight, to thoroughly chill.
To make the crème mousseline
6. Meanwhile, make a crème pâtissière (the base of the crème mousseline). Gently heat the 130ml milk. Set a heatproof bowl on a damp cloth to stop it wobbling then add the 2 medium egg yolks, 30g caster sugar, finely grated zest of ½ medium orange and 10g cornflour and whisk (use a small hand wire whisk) for a couple of minutes then whisk in the warm milk. Tip the mixture back into the pan and whisk continuously over a medium heat until it boils and thickens.
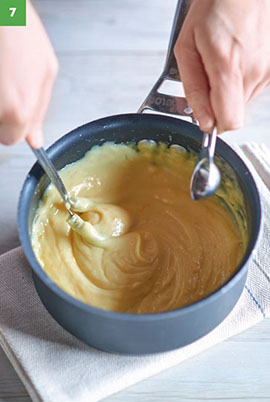
7. Remove the pan from the heat and whisk in the 20g unsalted butter. When completely amalgamated whisk for another minute, until very glossy and smooth, then whisk in the 1 teaspoon Grand Marnier or orange blossom water. Transfer the mixture to a clean heatproof bowl, press a piece of clingfilm or dampened baking paper onto the surface and leave to cool. Cover the bowl tightly with clingfilm and chill for at least 6 hours or overnight.
To bake the sweet brioche dough
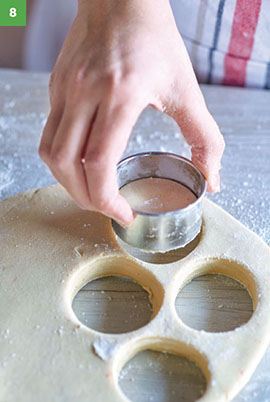
8. The next day, line two baking sheets with baking paper. Scoop the cold, firm brioche dough out onto a lightly floured worktop. Knead it once or twice - you don’t want the dough to soften - then roll or pat it out to a thickness of 1.25cm (it should feel like shortcrust pastry). Dip the 6cm round cutter in flour then stamp out 10 rounds. Arrange them spaced well apart on the lined baking sheets (to allow for expansion) then cover lightly with sheets of clingfilm. Leave on the worktop to prove and rise at normal room temperature for 1-1½ hours, or until just doubled in size. Towards the end of the rising time preheat the oven to 190°C (170°C fan), 375°F, Gas 5.
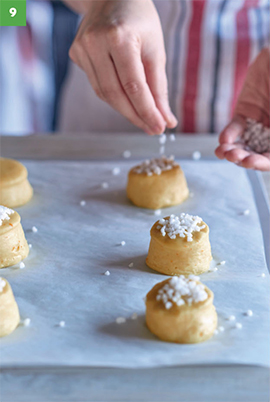
9. Uncover the risen buns and glaze them very lightly with the 1 egg yolk and 1 tablespoon milk glaze (take care not to let the glaze run down the sides of the buns as this will prevent any expansion), then brush again with a second layer of glaze. Finally sprinkle with the 2 tablespoons pearl sugar nibs.
10. Bake for 12-15 minutes, or until the buns are a rich golden brown. Check them after 9 minutes and rotate the baking sheets, if necessary, so they all bake evenly. Transfer to a wire rack and leave to cool completely.
To assemble the tropeziennes
11. When you are ready to assemble, whisk the chilled crème pâtissière for a few seconds, just until smooth. Put a 1cm plain round piping nozzle into a piping bag. Whip the 50ml chilled double cream until it stands in stiff peaks, gently fold into the crème pâtissière, then spoon into the piping bag. Chill until needed. (You can also spread the crème if you prefer, using a palette or round-bladed knife.)
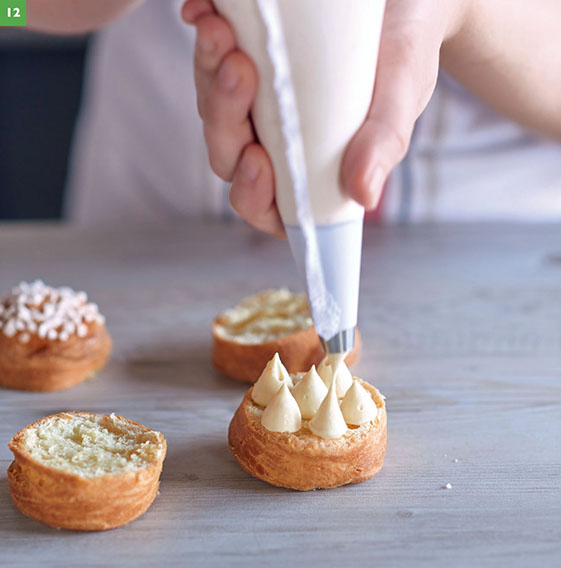
12. Split the buns in half horizontally. Holding the piping bag vertically pipe a small ‘kiss’ or button of the crème in the centre of each bun base. Pipe five more ‘kisses’ around this.
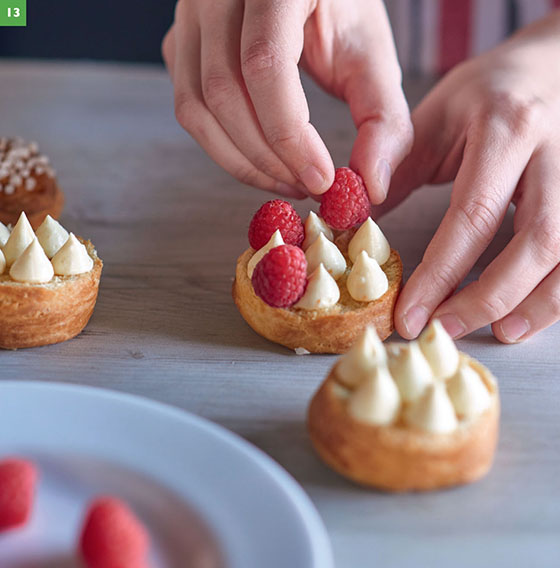
13. Take the 225g raspberries or strawberries and set a berry in the centre and between each ‘kiss’ (quarter or halve any large strawberries so they fit). Cover with the bun lids and serve as soon as possible.
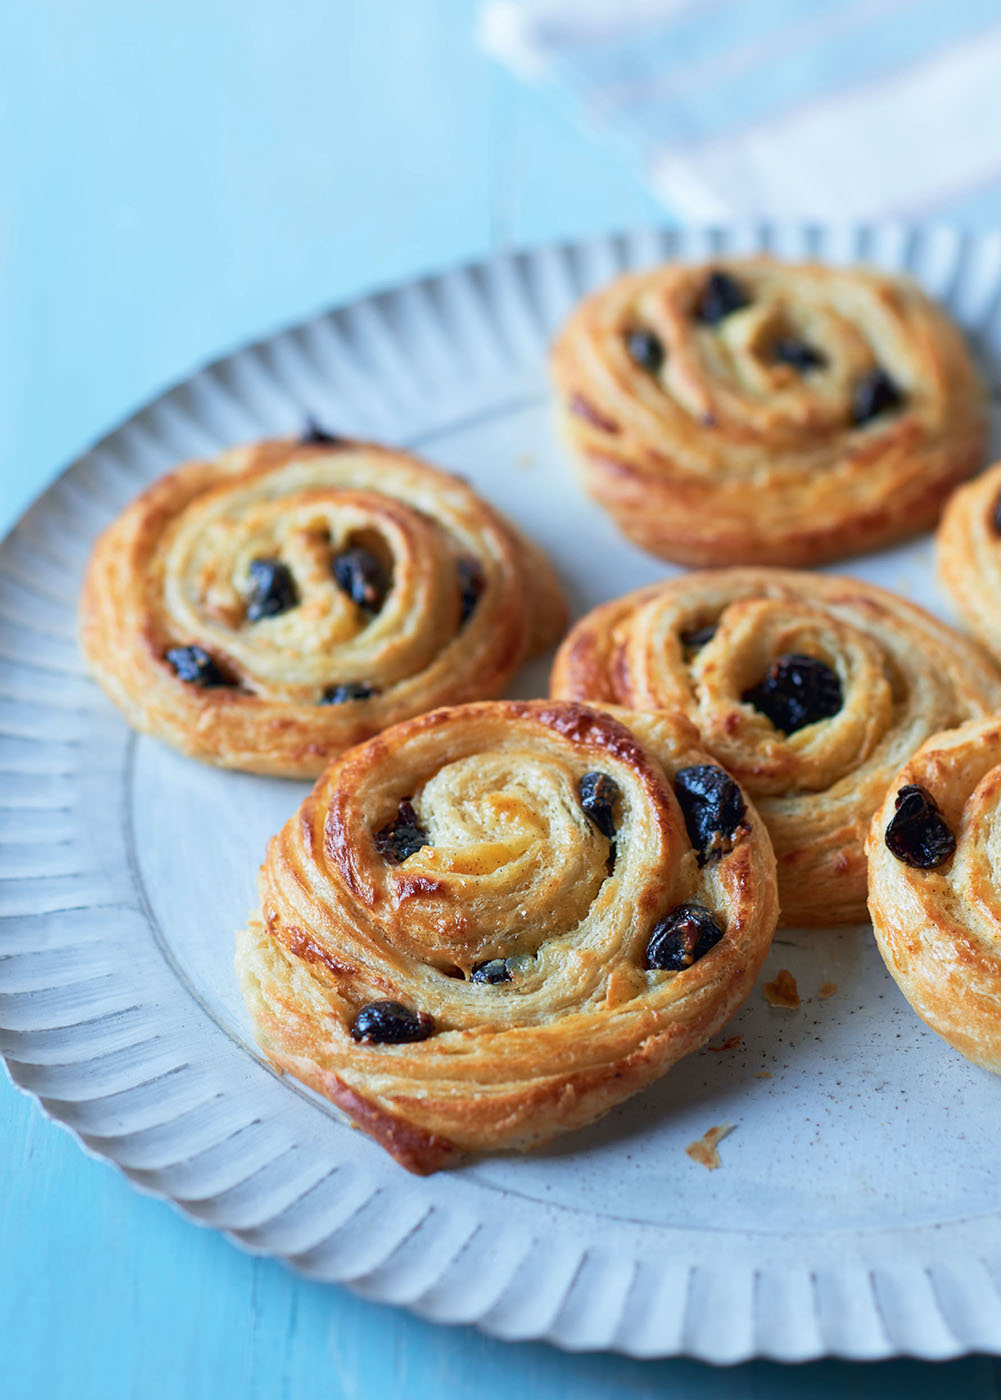
Pains aux Cerises
Up for a challenge
HANDS-ON TIME:
1¼ hours
HANDS-OFF TIME:
9-15 hours + 6-12 hours
BAKING TIME:
20 minutes
MAKES:
18 pains aux cerises
SPECIAL EQUIPMENT:
pizza wheel-cutter (optional), 2 baking sheets
STORAGE:
Once cold, open-freeze until firm, then pack into freezer bags and freeze for up to 1 month
These classic French buns are made from a yeast dough, laminated with butter in the same way as croissants (see here) to produce a luxurious combination of light, soft bread dough and crisp, flaky butter-rich puff pastry, plus dark, tangy cherries and sweet crème pâtissière. Take your time as this is quite an ambitious project, even for experienced bakers!
For the dough
35g caster sugar
10g salt
25g milk powder
325ml lukewarm water
500g unbleached white bread flour, plus extra for dusting
7g sachet fast-action dried yeast
250g unsalted butter, chilled
For the filling
200g soft-dried morello or sour cherries
3 tablespoons brandy or eau-de-vie (optional)
For the crème pâtissière
250ml creamy milk, such as Jersey high-fat milk
1 vanilla pod
3 medium egg yolks, at room temperature
50g caster sugar
20g cornflour
20g unsalted butter, at room temperature
To finish
1 medium egg yolk beaten with 1 tablespoon milk, to glaze
To make the dough
1. Add the sugar, salt and milk powder to the warm water in a measuring jug, stir well and leave for a couple of minutes until completely dissolved.
2. Put the flour into a mixing bowl or the bowl of a free-standing mixer. Add the dried yeast and mix it in using your hand or the dough hook attachment of the mixer. Add the milk mixture to the flour and beat with your hand, or the dough hook on the slowest speed, just until the ingredients are thoroughly combined to make a soft, slightly sticky and shaggy-looking dough that comes away from the sides of the bowl - about 1 minute. Do not knead or overwork the dough as you don’t want to develop the gluten (this would make the dough stretchy but also tougher).
3. Cover the bowl with clingfilm or a snap-on lid and leave to rise in a warm spot for 30-45 minutes, or until the dough has doubled in size. Gently punch down (knock back) the dough to deflate it, then re-cover and put into the fridge for at least 6 hours or overnight to firm up.
To make the filling
4. Put the cherries in a bowl with the alcohol, if using. Stir well, cover and leave to soak until needed.
To make the crème pâtissière
5. Put the 250ml creamy milk into a medium pan, split the 1 vanilla pod lengthways and scrape the seeds into the milk. Chop the pod in half and drop the pieces into the milk. Place over a low heat until it just starts to come to the boil, then remove the pan from the heat and leave to infuse for 10 minutes (discard the pod pieces).
6. Set a heatproof bowl on a damp cloth, to stop it wobbling, and add the 3 egg yolks, 50g caster sugar and 20g cornflour. Whisk (use a small hand wire whisk) for a couple of minutes until very smooth, then whisk in the infused milk. Tip the mixture back into the pan and whisk it continuously over a medium heat until it boils and thickens - take care that the rich mixture doesn’t catch on the base of the pan by adjusting the heat as you stir.
7. Remove the pan from the heat and whisk in the 20g unsalted butter. Transfer the mixture to a clean heatproof bowl and press a piece of clingfilm or dampened baking paper onto the surface to prevent a skin from forming. Cool, then cover the top of the bowl with clingfilm and chill for at least 6 hours or overnight.
To make the laminated dough
8. The next day take the 250g block of butter out of the fridge, place it between two sheets of baking paper and pound it with a rolling pin to flatten it. Re-shape into a brick and repeat the process a few times until the butter is cold and firm but pliable. Finally shape the butter into a square with sides about 12cm.
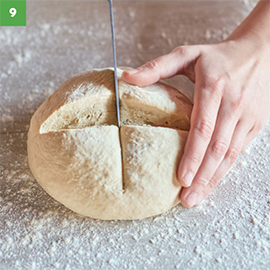
9. Turn the chilled dough out onto a lightly floured work surface. Punch down (knock back) the dough to deflate it, then shape the dough into a ball. Cut a deep cross in the top of the ball.
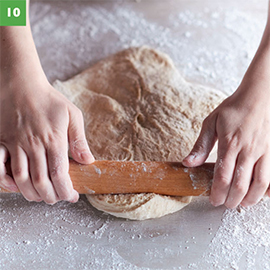
10. Roll out the dough using a floured rolling pin in four directions (making a quarter turn after each rolling) so the dough looks like a cross with a thick rough square of dough in the centre. Place the butter on top of the rough square of dough, then fold the flaps of dough over to enclose the butter, tucking in the edges so the butter doesn’t ooze out during the rolling and folding processes. Cover with the upturned bowl and leave on the worktop to rest for 5 minutes.
11. Lightly sprinkle the dough with flour then gently roll out the dough to a rectangle about 30 × 60cm. Turn the rectangle of dough on its side so one long side is facing you. Fold in three - fold over the right third of dough (so it covers the centre portion) then fold over the left third to make a three-layer sandwich of dough. Use the rolling pin to seal the edges. Set the dough on a baking sheet, cover tightly and chill for 40 minutes. This is your first ‘turn’. Repeat the rolling, folding and chilling process twice more, turning the dough a quarter turn to the left each time you start to roll. Remember, this is a yeasted dough and also a puff pastry dough, so it’s important to keep it cool enough for the butter to remain in layers within the dough and not start to soften and ooze out. Don’t cut corners with the chilling and resting times - if the dough begins to feel soft, cover and chill it until it is firm enough to start work again.
To make the pains aux cerises
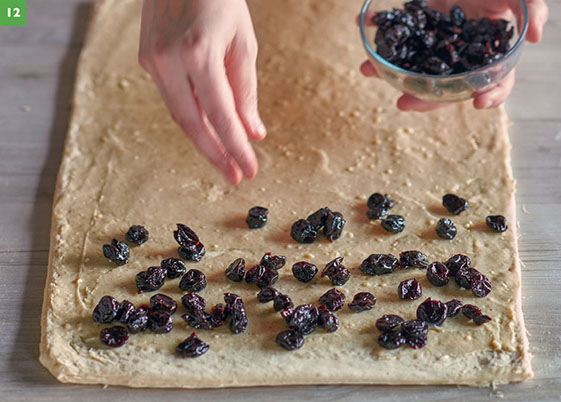
12. After the third chilling roll out the dough to a thin rectangle about 50 × 34cm. Using a large, sharp, floured knife (or a pizza wheel-cutter), trim the edges to make a neat 48 × 32cm rectangle. Spread with the crème pâtissière then scatter the well-drained cherries over the top.
13. Starting from one short end, roll up the dough fairly firmly, like a Swiss roll, to make a thick roll about 33-34cm long (the dough stretches slightly as it is rolled up). Roll the roll onto a sheet of baking paper, making sure the seam is underneath. Lift onto a baking sheet or a board, then cover lightly with clingfilm and chill until firm - about 1½ hours - this will make slicing easier. Meanwhile, line two baking sheets with baking paper.
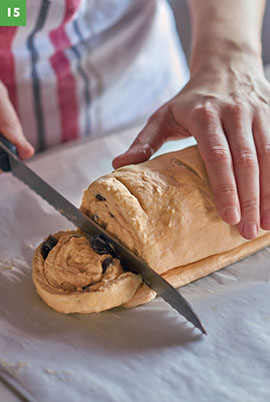
14. Uncover the roll and, using a large, sharp serrated bread knife, cut into 18 slices, using a slow, gentle sawing motion.
15. Transfer the slices to the lined sheets, spaced well apart to allow for expansion. Use the tip of a small knife to tuck the end of each spiral slice underneath, and replace any cherries that have popped out. Gently push back into shape if necessary (any reshaped spirals will look fine after baking so don’t worry). Lightly cover with clingfilm and leave on the worktop to prove and rise for 30 minutes, or until the spirals look slightly puffy. If your kitchen is very warm, or you are baking in batches, move the sheets to the fridge. Towards the end of the rising time preheat the oven to 190°C (170°C fan), 375°F, Gas 5. These pastries are baked in a hot oven to help the layers puff up and begin to set before the butter has time to melt; if the oven isn’t hot enough, the butter will escape.
16. Uncover the pains and gently brush with the beaten egg yolk and 1 tablespoon milk to glaze then bake for 18-20 minutes - they need to be a good golden brown for the best flakiness. Check after 15 minutes and rotate the sheets if necessary so they all bake evenly. Transfer the cooked pains to a wire rack. Best eaten the same or the next day - you can gently warm through at 180°C (160°C fan), 350°F, Gas 4 for 5-8 minutes.
